Care and maintenance
This section describes cleaning, charging, and storage for the camera.
Never disassemble the camera
Follow all cleaning agent manufacturer directions.
Clean the camera
Use a soft, damp cloth to clean the surface of the camera. Do not use harsh cleaners or solvents. Ideally, moisten the cloth with isopropyl alcohol.
Do not immerse the camera in water or cleaning solutions.
If the camera lens becomes dirty, use a lens blower brush to clean it and then wipe it with a soft cloth as needed.
If the camera display becomes dirty, clean with a damp cloth and dry with a soft cloth. Do not use ammonia-based or similar type window cleaners on the camera lens or display as these normally contain abrasives that can scratch.
Do not place the lens under running water or apply jets of water.
Do not use compressed air to clean the camera. Compressed air may damage the camera’s microphones.
Ensure the microphone openings are clear of debris.
Charge the battery
A fully charged camera battery should provide enough power for approximately 12 hours of normal operation. Recharging a battery after a 12-hour use can take up to nine hours if you are recharging on an Axon Dock. Recharging could take considerably longer if recharging from a computer.
Ensure the
The dock functions as an ethernet adapter, an unmanaged network switch, and charger. It charges and uploads video to Axon Evidence simultaneously.
When approximately 10% of the battery capacity remains, the camera emits four quick tones and four short vibrations. These alerts repeat at 5% capacity.
Recharge a depleted battery as soon as reasonably possible.
Instructions for replacing the camera battery are available from your Axon representative.
Charge without a dock
To charge the camera when no dock is available, use a
Charge your camera with
- Connect the camera to the
- Connect the cable to a power adapter or USB port. A power adapter generally provides more charging power than a device’s USB port.
- If the camera was off, it enters low-power mode and the current charge level appears on the camera display. When you remove the cable, the camera turns off. During charging, power the camera on normally at any time and it enters Ready mode (buffering).
- If the camera was on, it remains on with the charging icon beside the battery. When you remove the cable, the icon disappears and the camera remains on.
The color of the Battery status LED provides a visual indication of the charge level. The LED is red  when the charge level is 20% or less, yellow
  at 20–98%, and green
  at 98% or higher.
Replace the battery
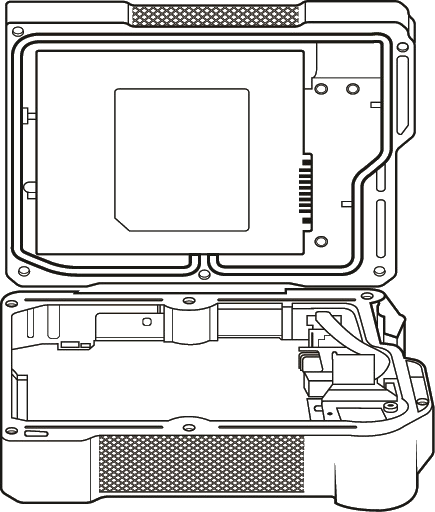
Replacement batteries are combined with the back portion of the camera. Replacing a battery involves removing the back of the camera and installing a new one.
- Turn the camera off.
- Use a Torx T6 screwdriver to remove the six screws from the back of the camera.
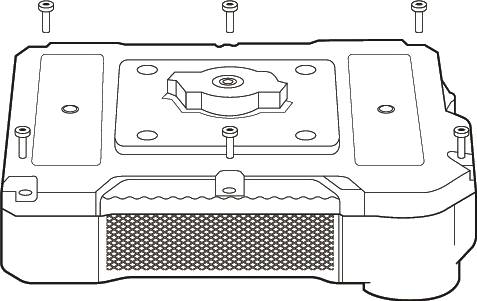
- Remove the back of the camera.
- Install the new camera back and reinstall the six screws. Do not overtighten.
Internal clock
Place your camera in an Axon Dock
Update firmware
Return your body camera to its networked charging dock on a regular basis, ideally at the end of every daily shift. This will recharge the battery, upload data to Axon Evidence, and download and apply any available firmware updates.  and yellow
  while downloading new firmware.
Moisture
Don’t charge your camera while the
If the
If a camera is charging when it gets wet, remove it from the charging source (dock or cable), use a paper towel or absorbent cloth to blot the
The
Camera storage
| -04–95 °F -20–35 °C |
Do not store Axon body-worn cameras in environments where the temperature is likely to be outside the maximum (such as under direct sunlight, near heaters, or in a vehicle in extremely hot weather) or minimum values. |
| 70–75 °F 21–24 °C |
before powering down. Every six months, run the camera until the battery is depleted, then recharge until Battery LED is yellow . |