Flex POV camera
Axon Body 4 accessories include a new Flex point-of-view (POV) camera that connects to the side USB-C connector. It offers high-quality video and low-light capture from an user’s point of view with the same IP67 waterproof rating and no separate charging requirement.
Watch this video for additional information about using the Flex POV with the Axon Body 4.
|
|
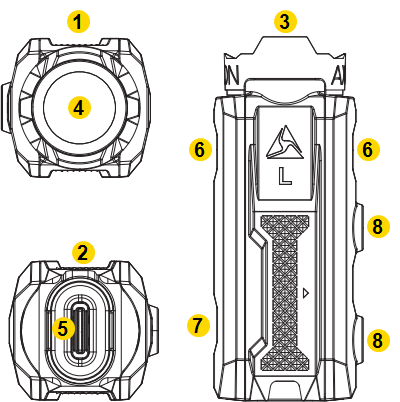
- Lens – Avoid touching the lens
- Vent – Avoid covering up the air vent with any stickers
- USB-C Connector – Connects to a cable leading to the Body 4 Camera
- Microphone – Records ambient sound
- Mount Magnet – Connects to the POV Mount
Avoid using the Flex POV camera at an indoor firing range as this may damage its microphones.
Flex POV cable connection
The Flex POV camera and the Axon Body 4 Camera work with a purpose-built cable with a smaller, straight connector at one end and a larger, right-angle connector at the other.
Unlock the POV latching mechanism and insert the camera's connector into the connector port with the cable pointing up as shown, then lock it in place by pushing up on the locking mechanism until it’s flush with the rest of the connector.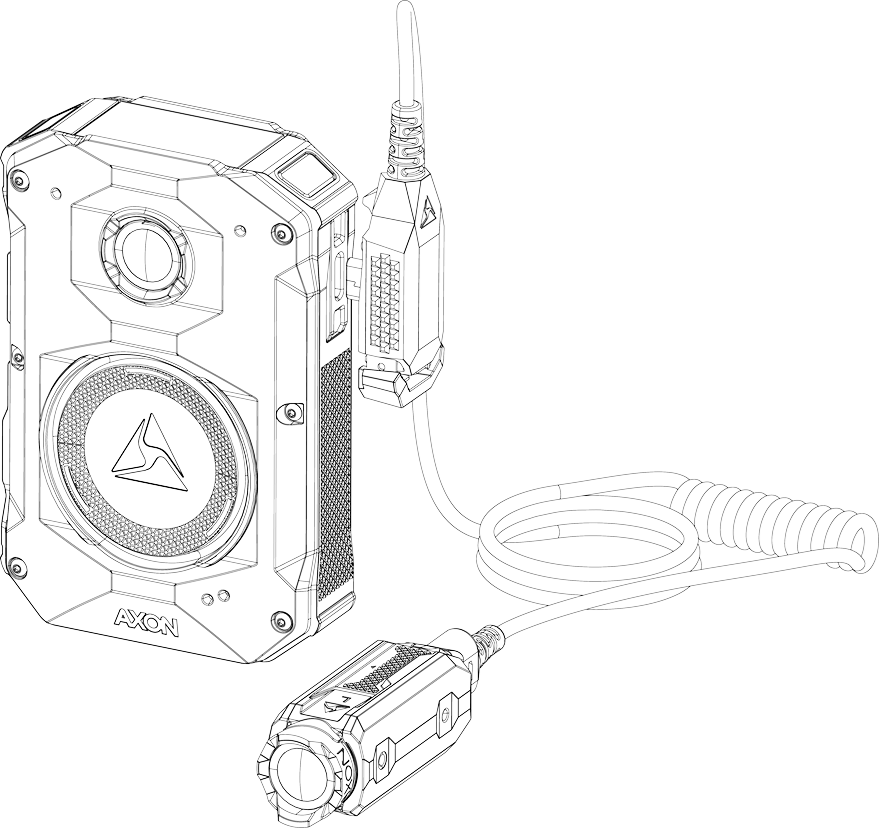

These cables are specifically calibrated to work with the Body 4 system. Use of unapproved cables will degrade system performance and may cause the system to malfunction.
Connect
In Axon Evidence, Admin > Axon Body 4 > your profile is a feature called POV Auto-Rotation. Leave this setting off for manual video orientation or toggle on for automatic.
Manual orientation
![]()
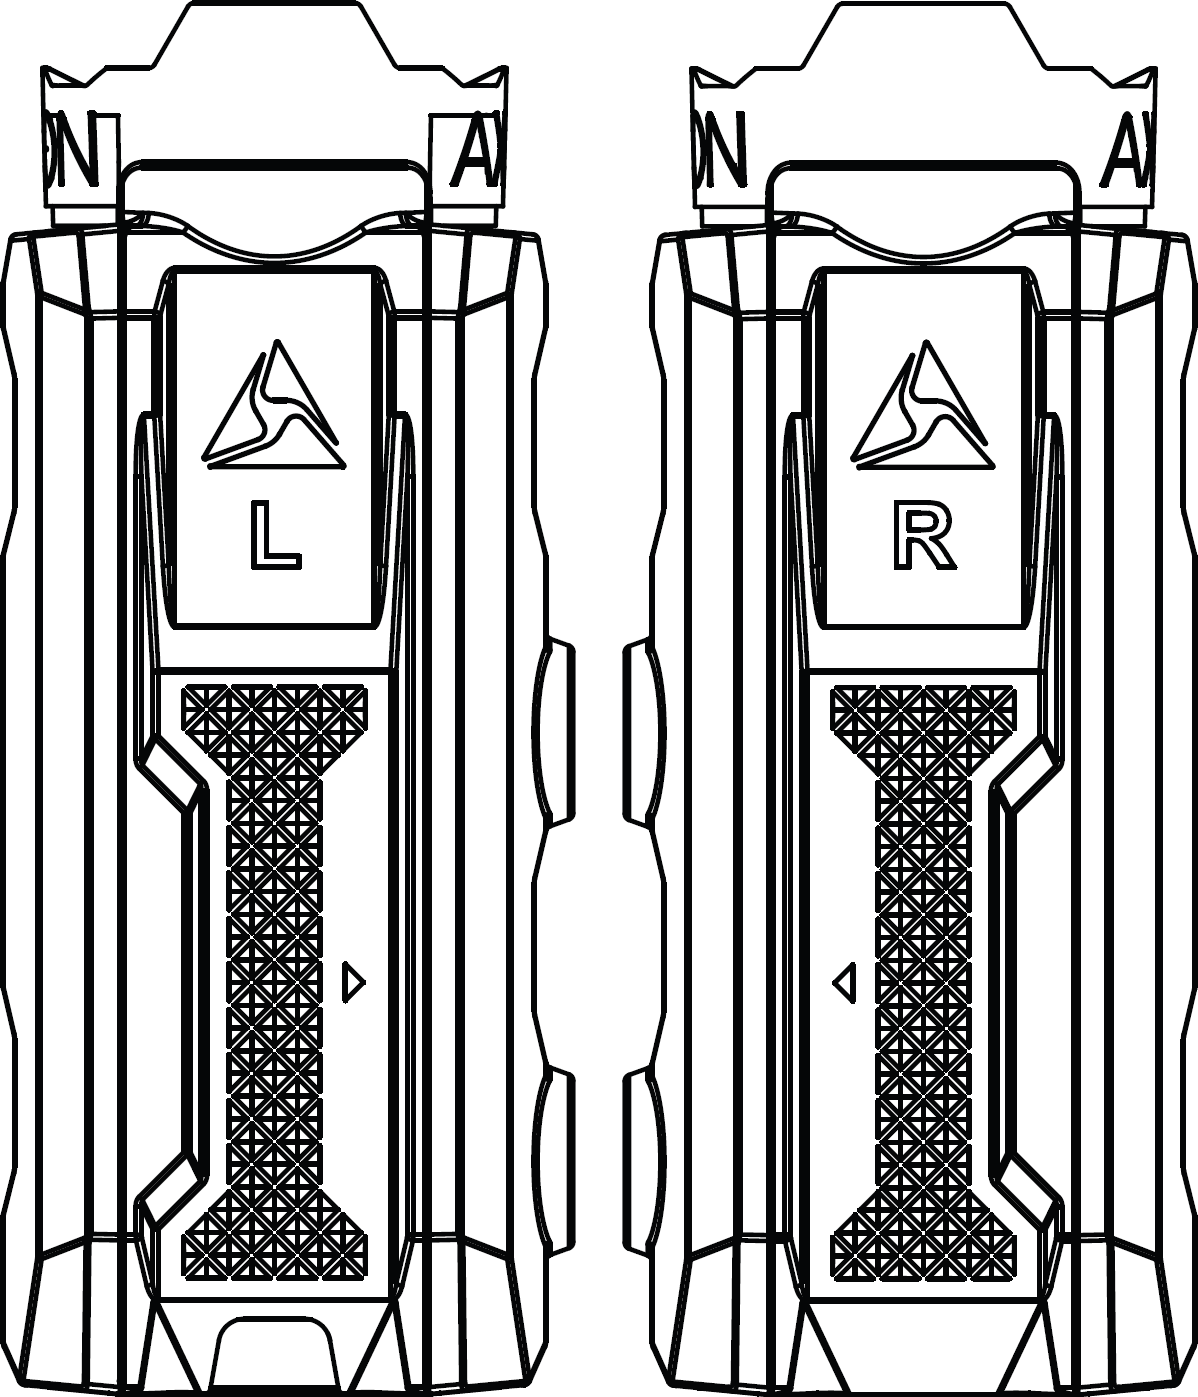 When you connect a Flex POV camera to a camera for the first time, it will prompt you to set the POV orientation to be either Left or Right.
Determine the orientation of the POV camera using the letter on the top of the POV camera when mounted.
Once set, update orientation using the camera menu: double-press Select and choose POV Orientation. You can also set orientation from the Axon View mobile app.
Automatic orientation
When you enable the POV Auto-Rotation feature in Axon Body 4 settings, the Flex POV camera will set the correct orientation based on the position of the camera.
When the Flex POV camera connects to the body camera, the system evaluates and sets the orientation, displaying a brief confirmation message on the screen, like POV CONNECTING RIGHT SIDE. Orientation is normally set within 10 seconds, but the camera will continue trying for up to five minutes.
- If it can't detect the orientation within five minutes, it displays an alert and uses the default (or previously set) orientation.
- If you use the menu (double-press Select) to manually set POV orientation to right or left, this becomes the new default.
After the orientation is set within the first five minutes of connection, the auto-orientation process will not run again until the Flex POV camera is disconnected and re-connected again. If the camera becomes inverted for any reason (such as during a scuffle), it will not re-orient the image, keeping the user's true perspective.
Use the camera
With the Flex POV camera connected, don't wear the body camera vertically on the belt line; hanging vests and gear can impinge on and damage the cable connection, which may disable the POV camera. Recurring messages like “POV Not Detected, Try Reconnecting” or “POV Error, Contact Admin” indicate the cable may be damaged.
When the Axon Flex POV Camera is attached to the body camera, Body 4 will use the POV video sensor instead of the body camera’s.
- If the POV camera is attached while buffering, the view will automatically switch from the body camera to the POV camera.
- If the POV camera is attached while recording, it will perform as follows:
- Notify with four short haptic notifications and the message “POV CONNECTED WHILE RECORDING”.
- Ask you to “PRESS SELECT TO SWITCH TO POV”.
- After you press Select, Body 4 will end the recording on the body camera and start recording from the POV camera.
NoteIf the camera is recording from the body camera while the POV camera is attached and no action is taken, it will continue to record from the body camera. This is intentional because since the system must stop recording on the body camera before starting on the POV, a moment of recording will not be captured. Leaving recording on the body camera ensures nothing crucial is lost in view transition.
Flex POV captures two audio tracks: a primary one from the Flex POV camera and a backup from the body camera.