Introduction
Connect an Axon Body camera to a laptop or computer with Axon View XL operating in Standalone mode to allow priority upload of videos from the camera to Axon Evidence. In Standalone mode, Axon View XL lets users view recorded videos, add metadata to videos, and upload camera videos to Axon Evidence.
Users with the appropriate permissions can also register, assign, and update the firmware on Axon Body Cameras.
Using Axon View XL in Standalone mode is separate from using Axon View XL with Axon Fleet products.
Connect the Axon Body Camera to a laptop or computer with a
System requirements
The requirements for using Axon View XL in Standalone mode are listed below.
Using Axon View XL Standalone mode does not require Axon Fleet. It can be used with Axon Fleet, but this
Laptop/computer
- Windows operating system: Windows
- Available disk space: 25 GB or greater
- RAM/memory: Recommended 8 GB or greater
- Available USB 2.0 or 3.0 port
- Administrative rights and privileges for software installation (only when installing the View XL application)
Other
- Internet access to the agency’s Axon Evidence account
-
- During installation, Axon View XL opens ports 5004-6004 UDP and 7234 TCP in the Windows Firewall and scopes the rule to axon-agent.exe. These ports are used by Axon View XL to connect to the Axon Body Camera with the USB cable.
Download and install View XL
If you already have a copy of the Axon View XL installation file, skip to step 4.
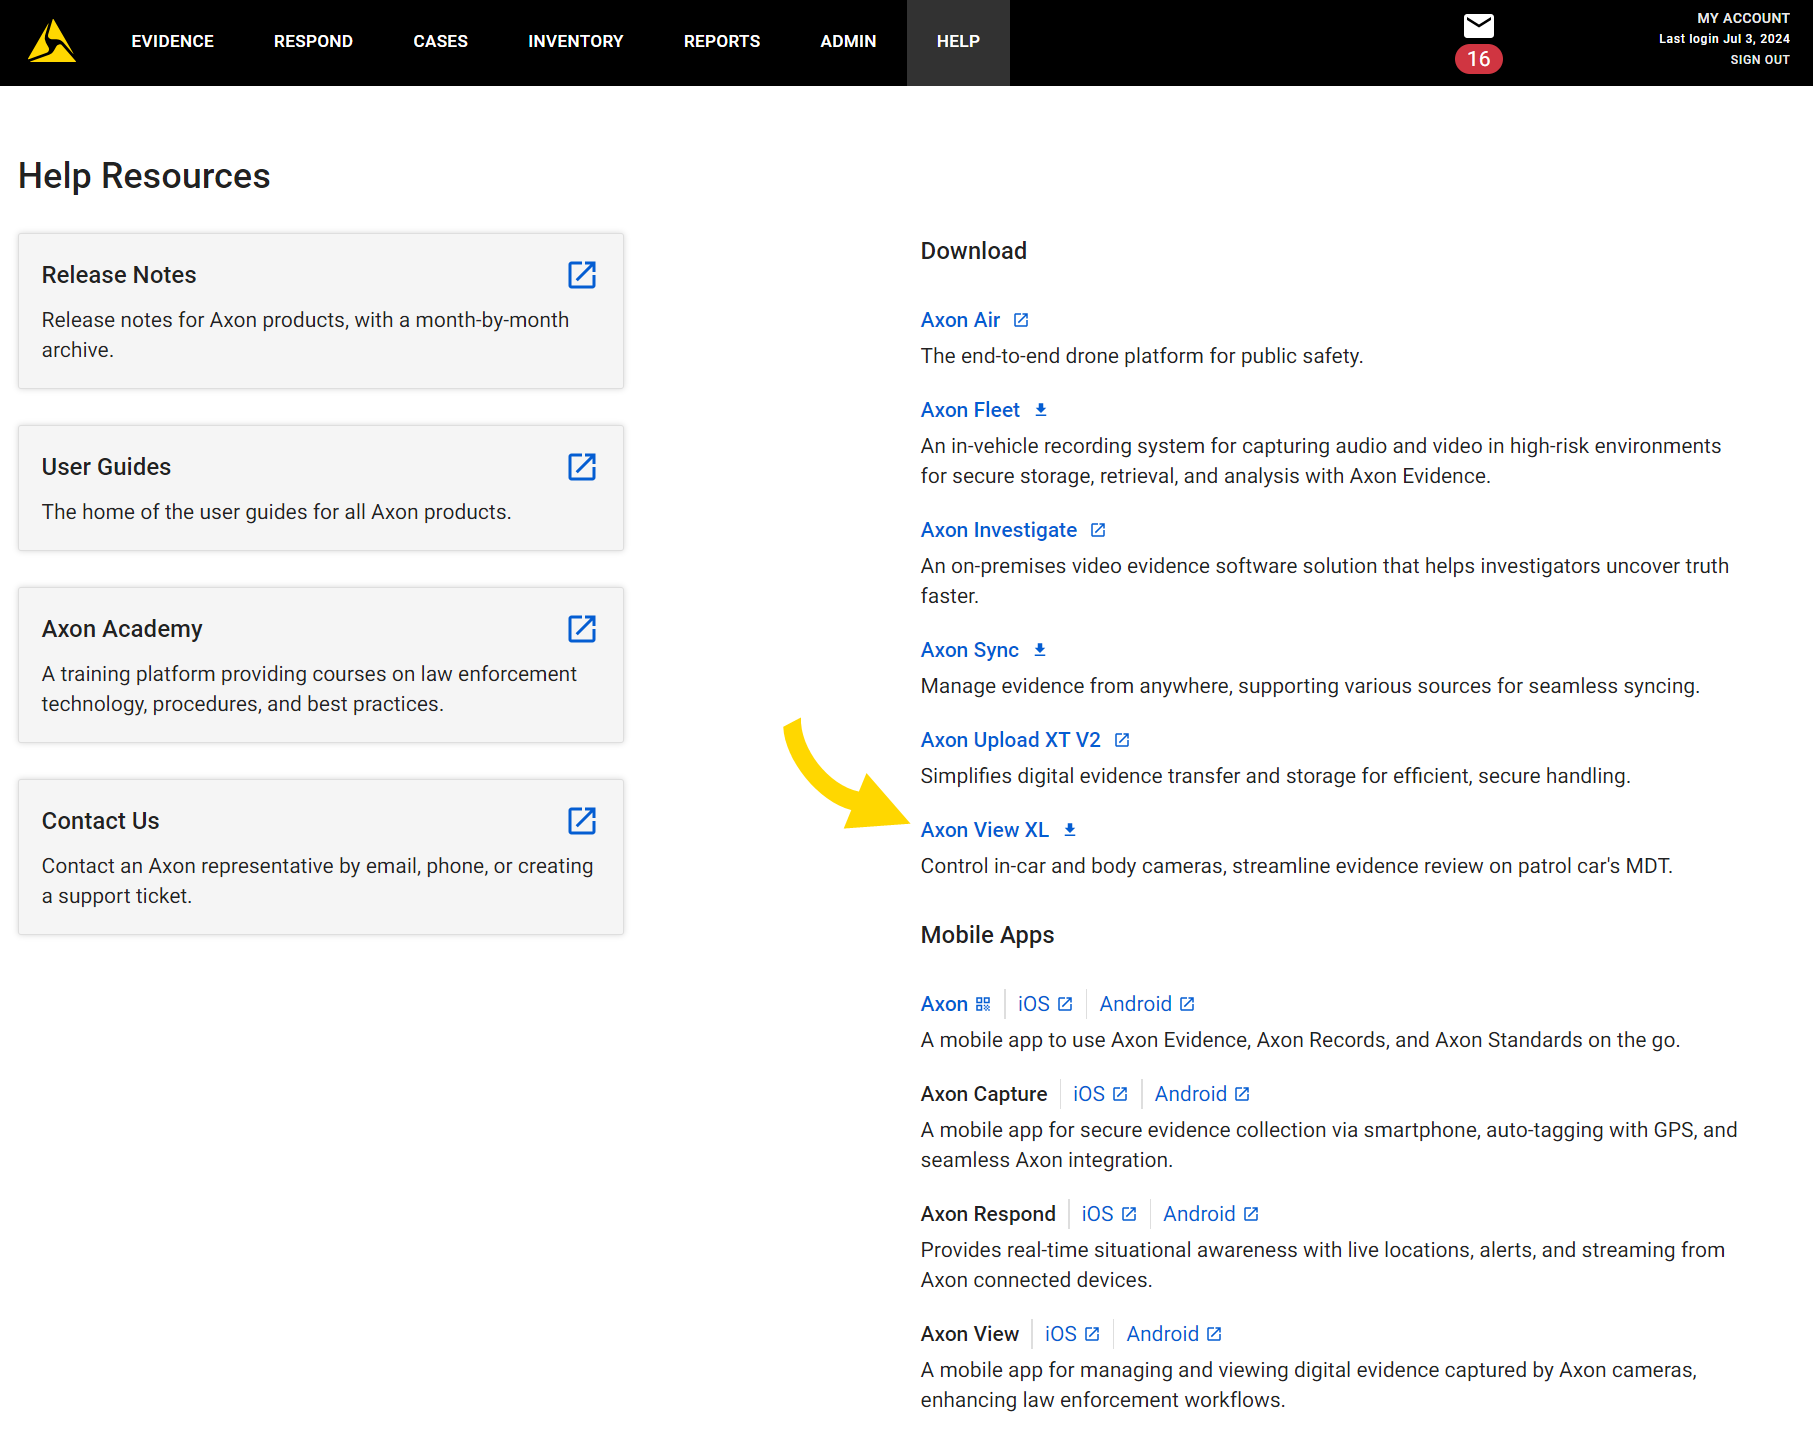
- Open a browser and sign into your Axon Evidence account.
- On the menu bar at the top of the page, select Help.
- Select Axon View XL. The installation file can be copied and saved to other laptops and computers.
- Locate the Axon View XL installation file, double-click the file, and follow the on-screen prompts to install the application and the Bluetooth driver.
Confirm connection to Axon Evidence
After the installation, confirm View XL can connect to Axon Evidence:
- Double-click the Axon View XL desktop icon to open Axon View XL.

- Use the Axon Evidence sub-domain as the agency name. When you go to Axon Evidence for your agency, you can see the sub-domain in your web browser’s address bar. If you do not normally sign into Axon Evidence, contact your agency's Axon administrator for the sub-domain information.
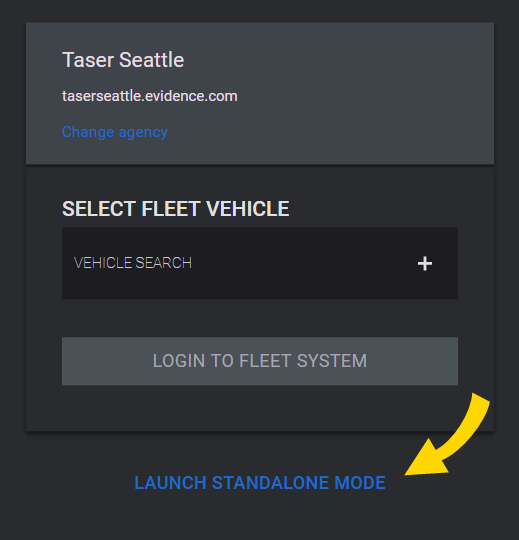
In the example below, the sub-domain is taserseattle.
Enter your agency's Axon Evidence URL (such as taserseattle) and select Continue.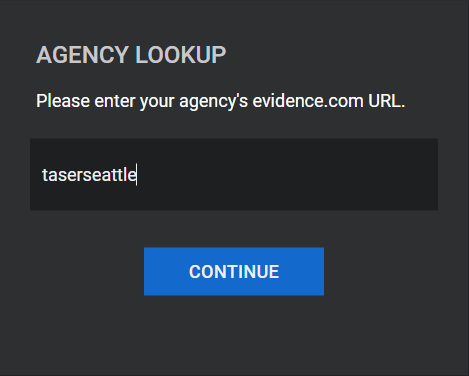
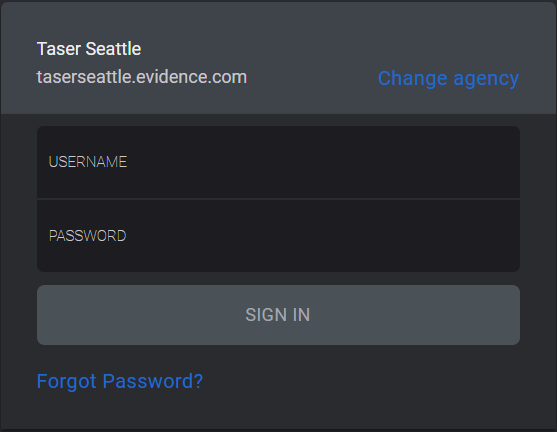
- Enter your Axon Evidence username and password, then select Sign in.
- Select Launch Standalone Mode.
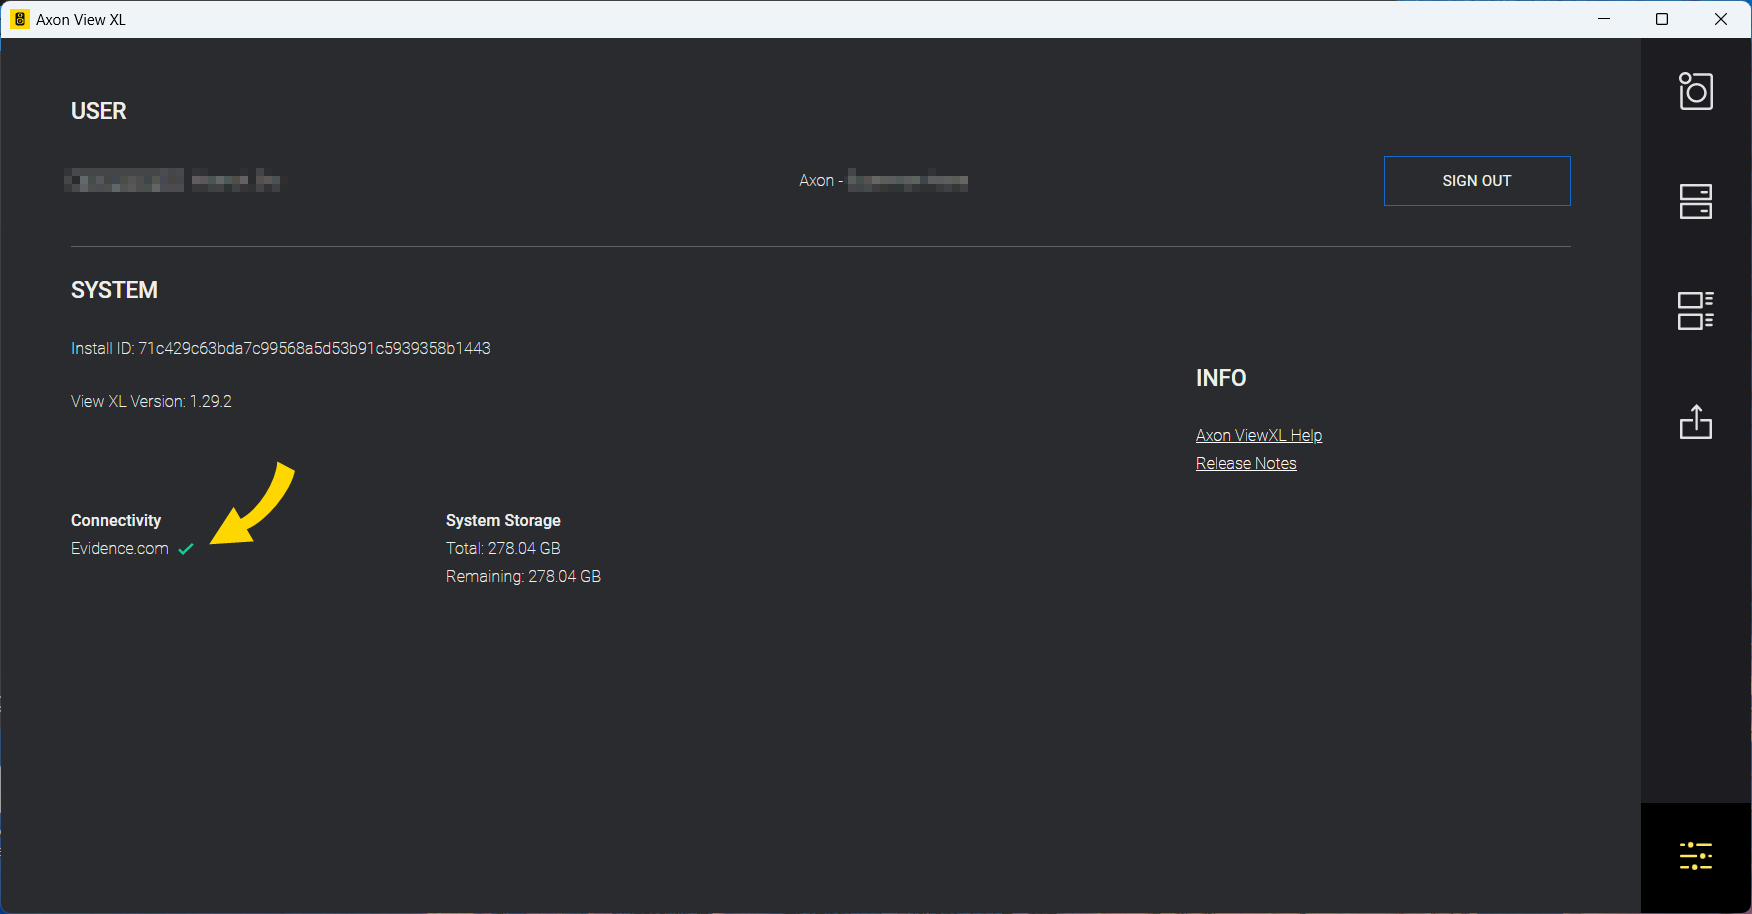
- Select Settings
 at the lower right of the screen. Under the Connectivity heading, there should be a green check mark beside Axon Evidence (Evidence.com). If you do not see a green check mark, ensure you are connected to the internet.