ODBC server
To connect to the Axon DataStore, you can create a Microsoft Open Database Connectivity (ODBC) server. ODBC is a C programming language interface that lets applications access data from a variety of database management systems (DBMSs). ODBC is a low-level, high-performance interface designed specifically for relational datastores.
After creating an ODBC server, you can link it to Microsoft Excel or Microsoft Access to view the data.
Before creating an ODBC server, contact your Axon representative to receive the following information:
- Server name
- Database name
- Login information (username and password)
Once you have the above information, take these steps:
- Create a data source
- Connect to SQL server
- Test the data source
- After creating and connecting to the server, you can link it to Microsoft Excel or Microsoft Access.
Create a data source
The first step in creating an ODBC server is to create a data source. To do this from a Windows machine, take these steps:
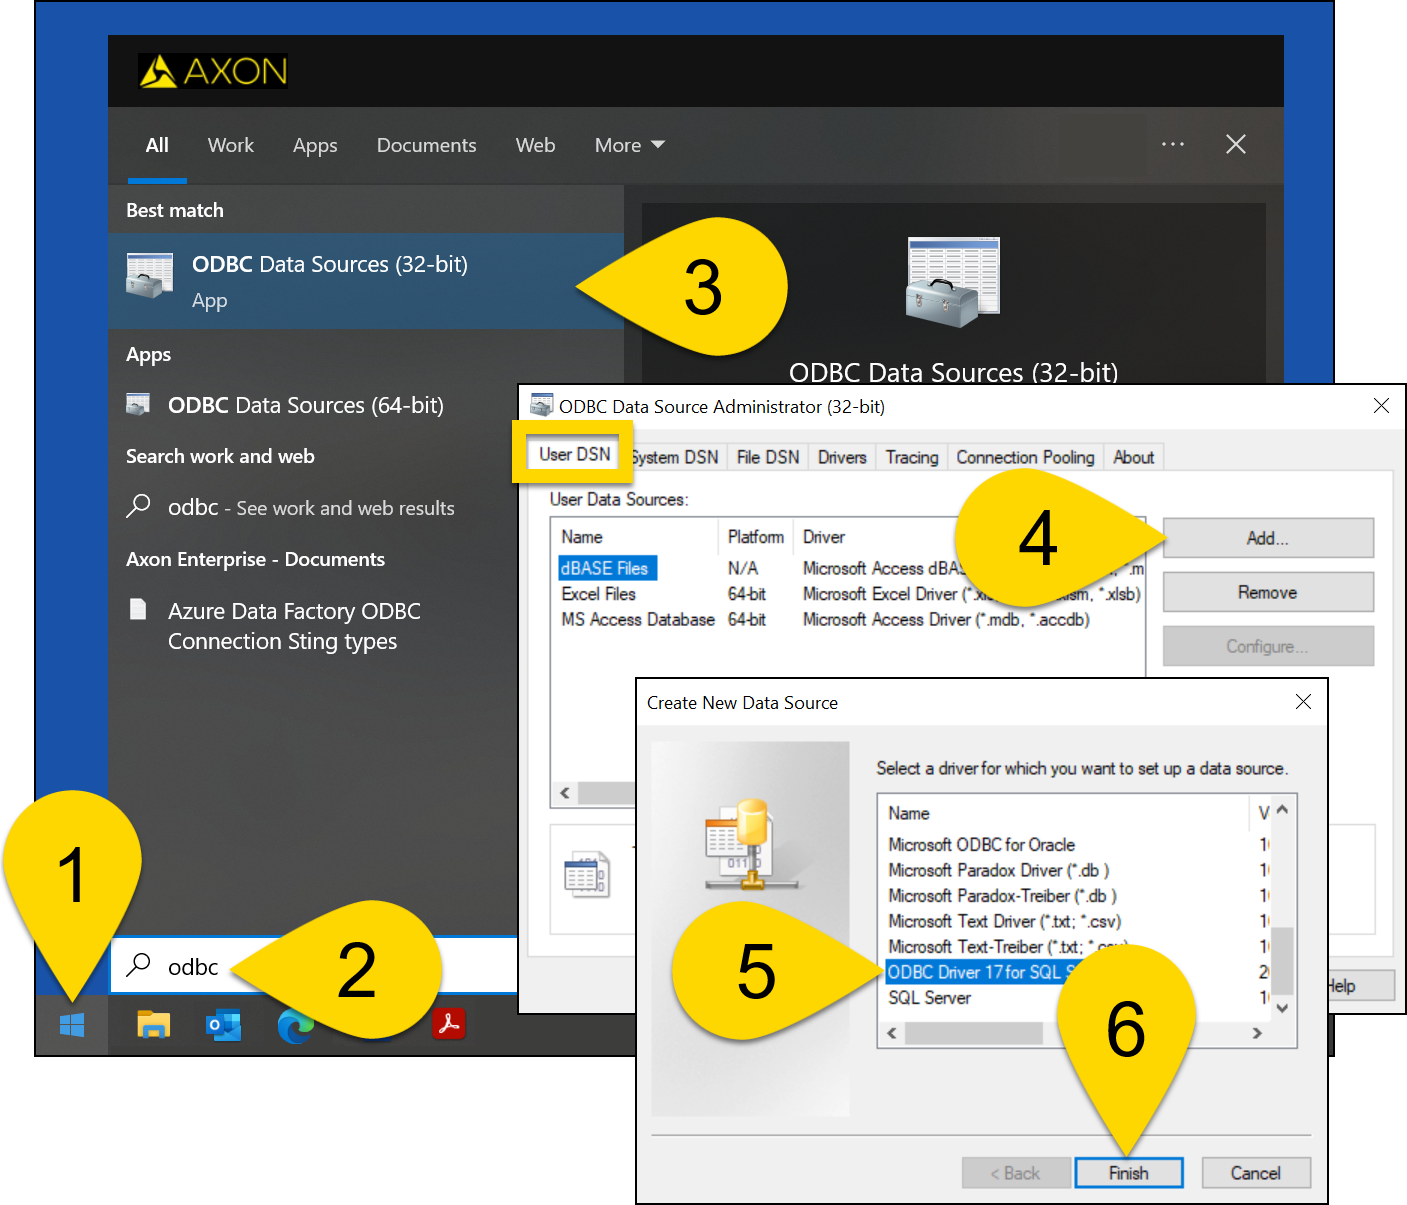
- Select the Windows icon in your start/task bar.
- Type "ODBC."
- After selecting the Windows icon, you will not see the search bar, but it will appear once you begin typing.
- Select ODBC Data source (32 bit).
- This program is part of the Windows operating system and does not need to be downloaded.
- On the User DSN tab, select Add.
- Select ODBC Driver 17 for SQL Server.
- Select Finish.
- You must use version 17 or greater. If you do not see this option, download and install the driver here.
Connect to the SQL server
Once you create a data source as explained above, you need to connect the data source to the SQL server.
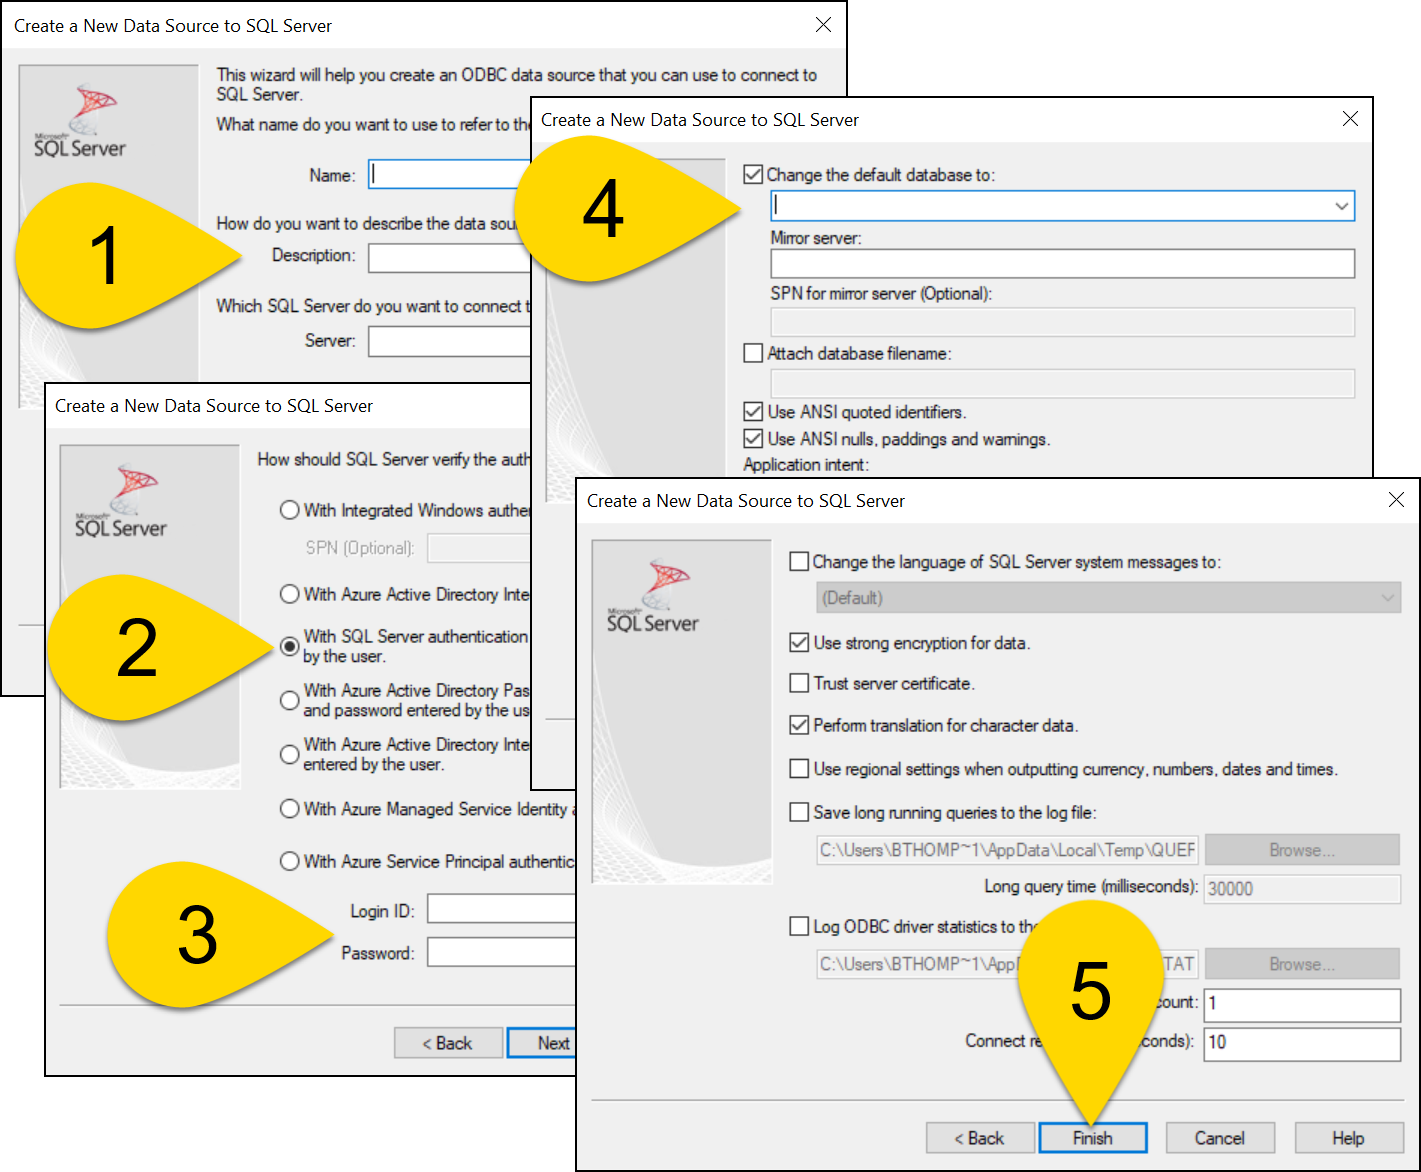
- When you select Finish after creating the data source, a new window will appear. Enter a name for the data source (free-form text), description (free-form text), and the server name. Select Next.
- Contact your Axon representative to receive the server name for your agency.
- Select the With SQL Server authentication using a login ID and password entered by the user
- Enter your username and password.
- Contact your Axon representative to receive this login information.
- Select the Change the default database to option, enter your database name, and select Next. The rest of the entries in this section do not need to be adjusted.
- Contact your Axon representative to receive the database name for your agency.
- Nothing on this screen should be adjusted. Select Finish.
Warning
Always use strong encryption.
Do NOT blindly trust the server certificate (this forces the client to verify the identity of the TLS certificate received from the server)
Test the data source
When you select Finish after setting up the SQL server connection, a new window will appear and display a configuration summary. Select Test Data Source.
Test completed successfully
If your test passes, select OK. The data source testing window will close, and you will again see the ODBC Data Administrator application. Your new data source will now display on the User DSN tab.
Test failed
If your test fails, select OK.
You will return to the final window in the SQL server connection workflow (step 5 in the previous section). Select Back three times until you reach the first window in this workflow (step 1 in the previous section).
Repeat steps 1-5 from the previous section and again test the data source until the test passes and your new data source appears in the ODBC Data Administrator application.
Link ODBC server to Microsoft Excel
Once you have created an ODBC server, you can link it to Microsoft Excel and access the Axon DataStore. To create this link, follow these steps:
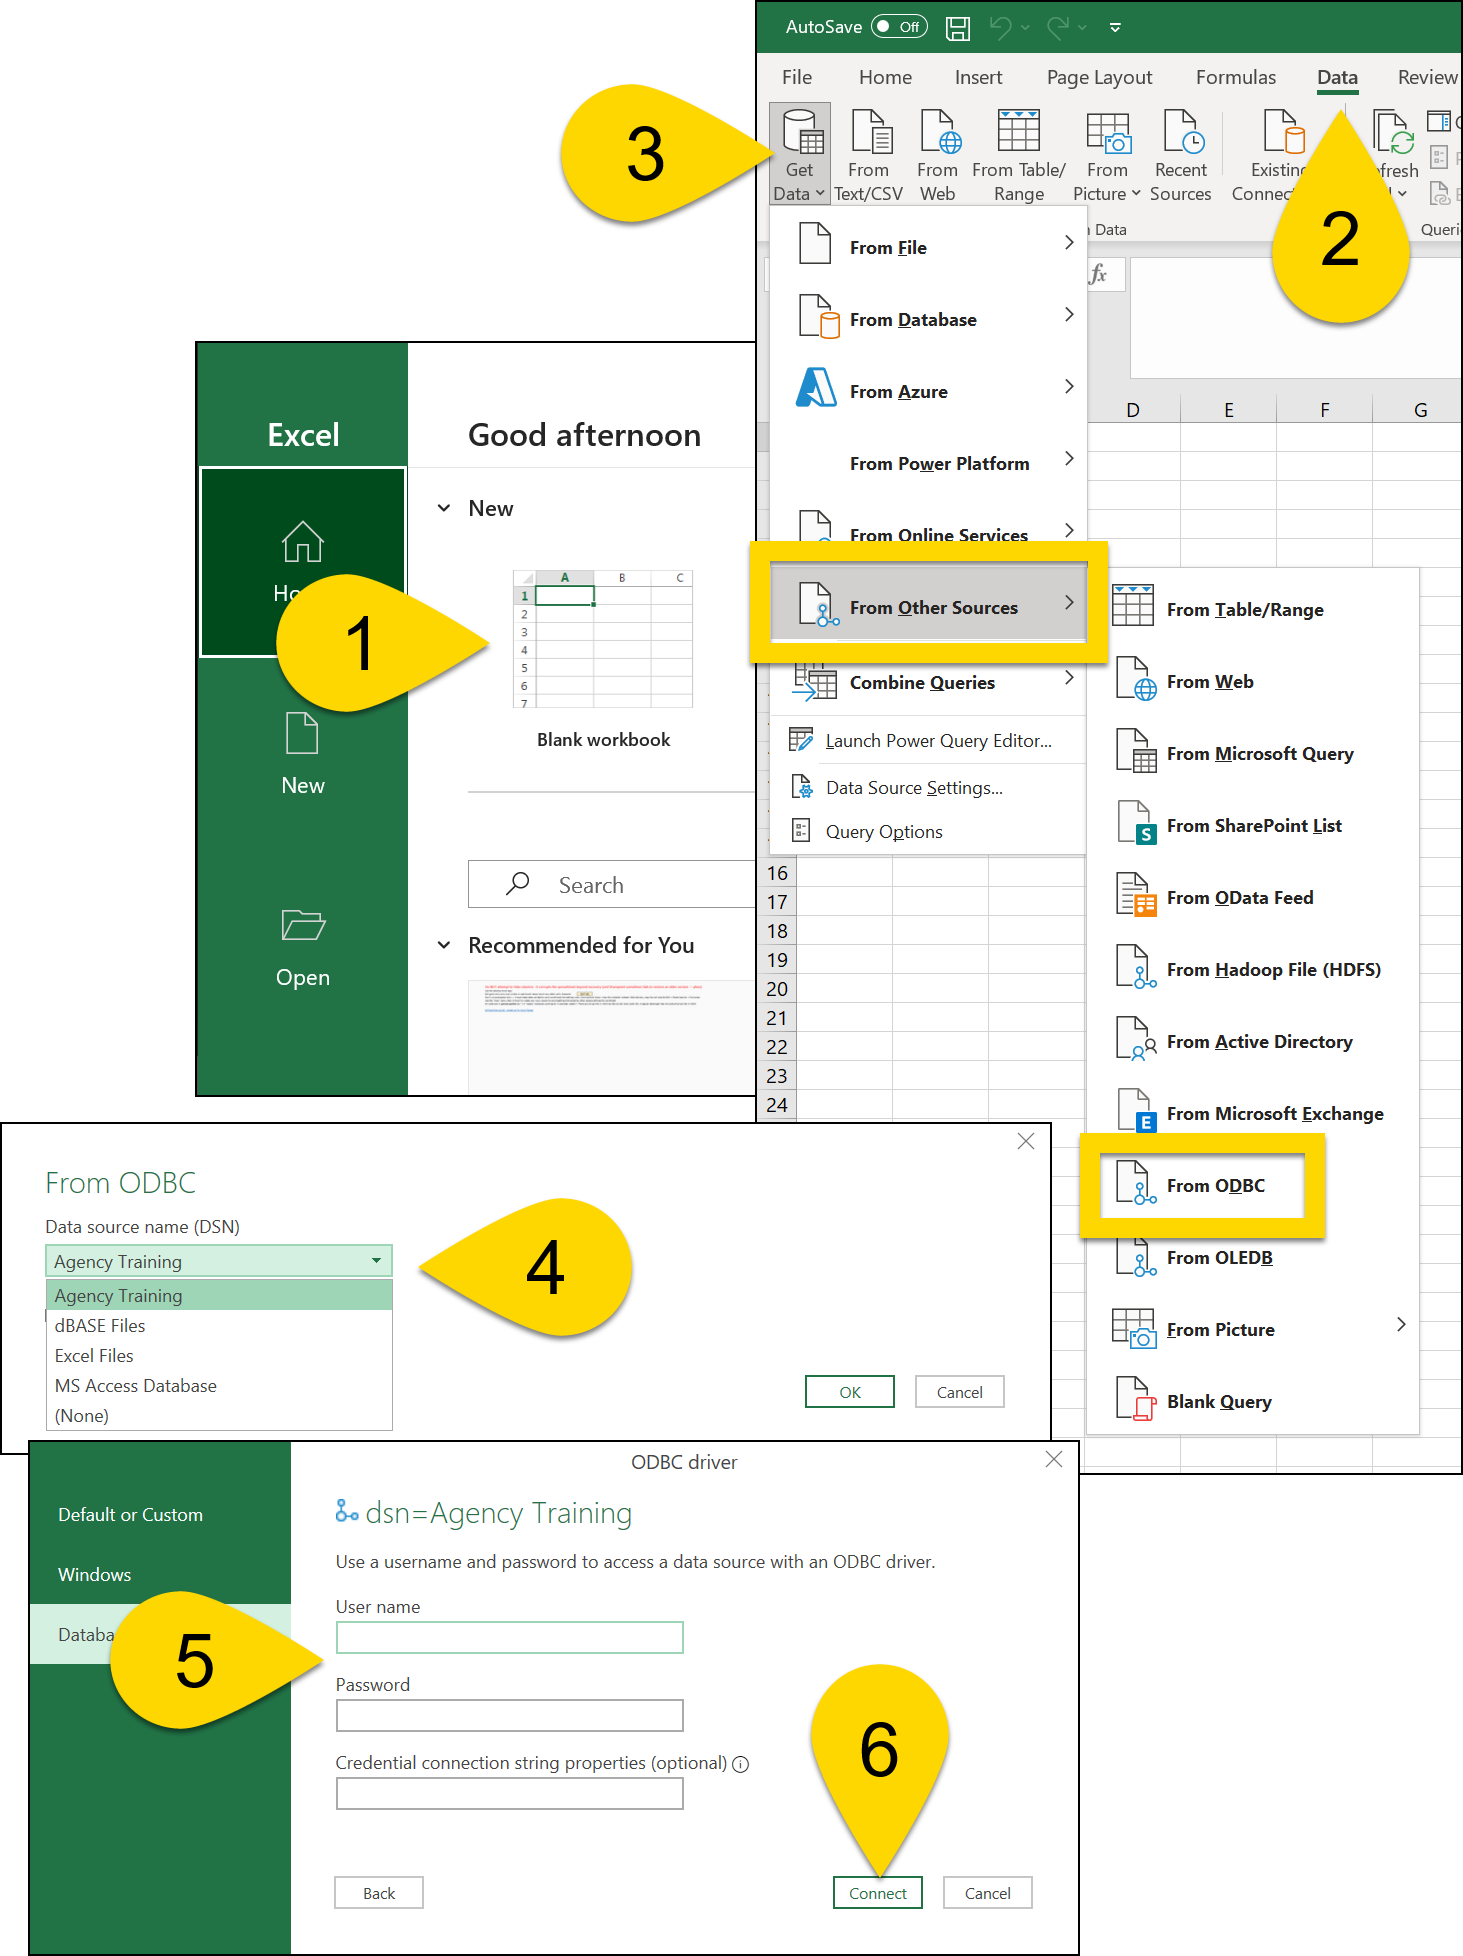
- Open a blank workbook in Microsoft Excel.
- Go to the Data tab.
- Select Get Data > From Other Sources > From ODBC.
- Reveal the list of data sources, choose your ODBC server, and select OK.
- Enter your username and password associated with that Axon DataStore. You can leave the Credential connection string properties (optional) field blank.
- Select Connect.
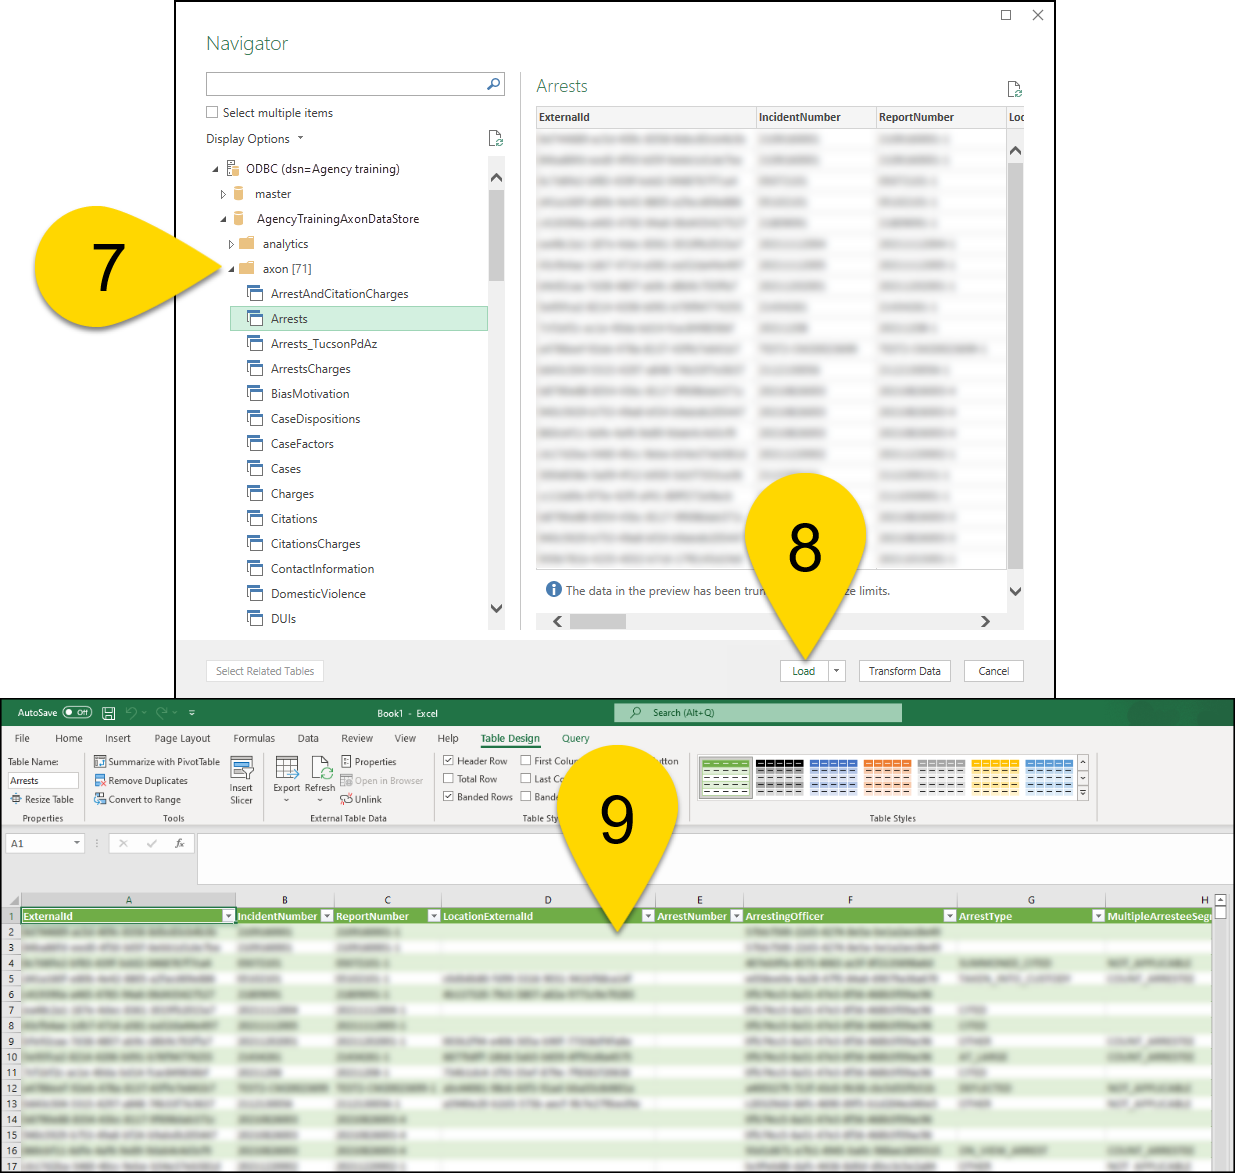
- The navigator will open where you can select the arrow beside axon, dw or raw, depending on which data you want to populate in Excel.
- After a data preview appears, select Load.
- The data will populate in Excel.
Link ODBC server to Microsoft Access
Once you have created an ODBC server, you can link it to Microsoft Access and access the Axon DataStore. To create this link, follow these steps:
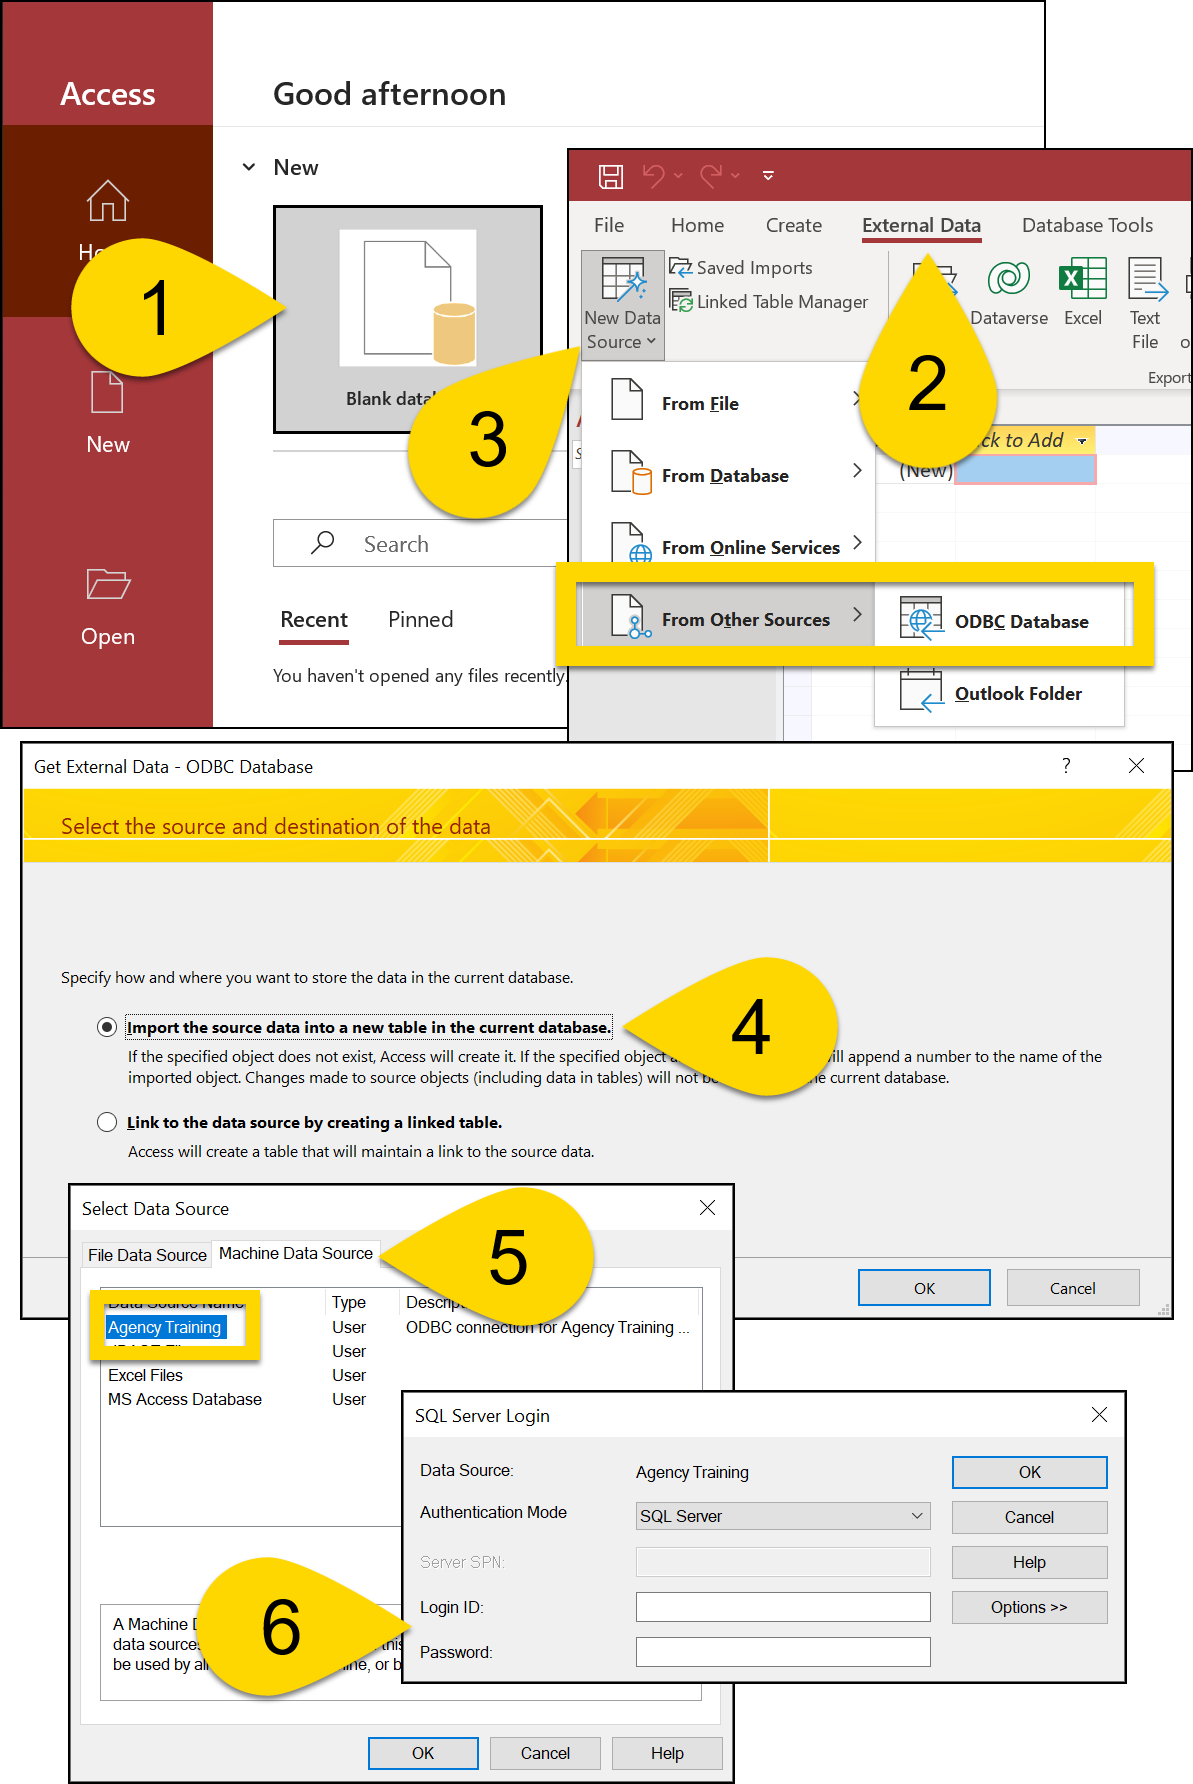
- Open a blank database in Microsoft Access.
- Go to the External Data tab.
- Select New Data Source > From Other Sources > From ODBC.
- Choose Import the source data into a new table in the current database and select OK.
- Select the Machine Data Source tab in the explorer window that appears and choose the ODBC server connection.
- Enter your username and password for with that Axon DataStore and select OK.
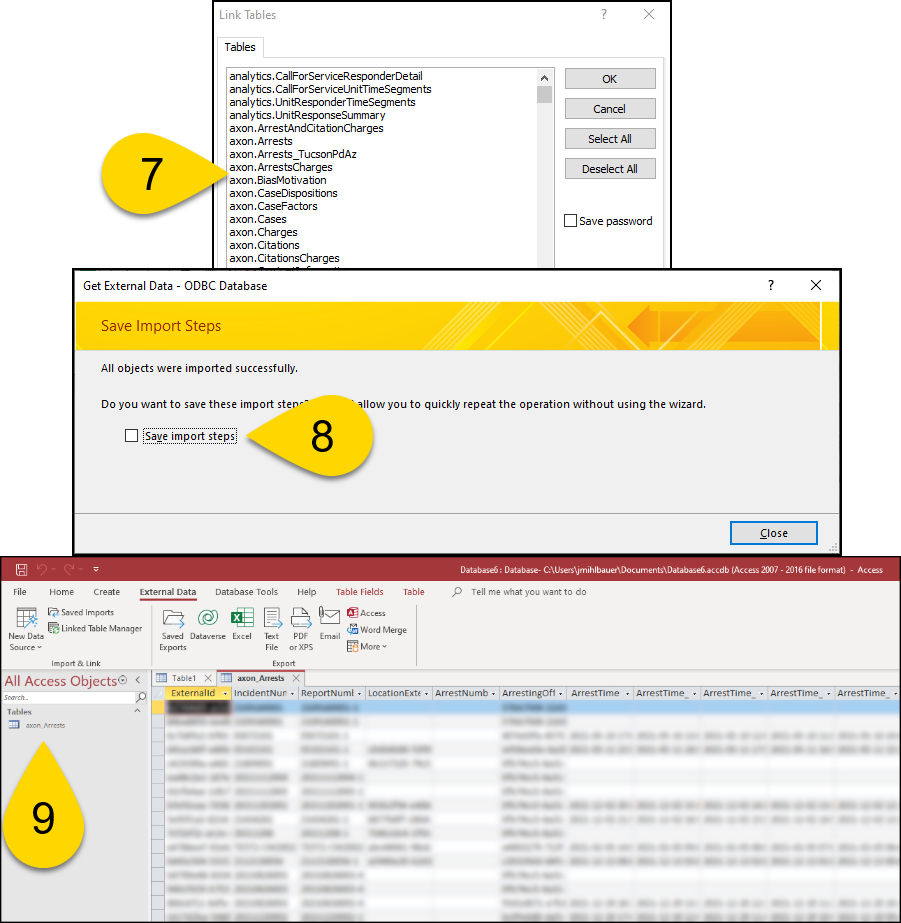
- Select which views to import into the Microsoft Access database.
- You can also save your password for future ease.
- Once you have selected all views you want to import, select OK.
- It may take some time for the views to import. Once the import is complete, you can save the import steps and close out of the import process.
- Double-click a view in the left panel to display the data for that view.