Settings in Axon Evidence
Enable Signal Vehicle
To enable the Axon Signal feature for your camera:
- Sign into your Axon Evidence account and select Admin on the menu bar.

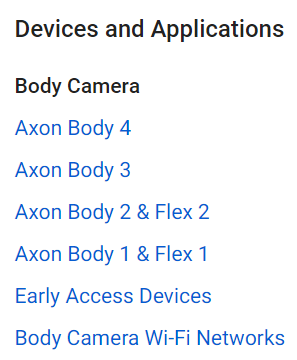
- In the Devices and Applications select the body camera used by your agency.
- Scroll down to the Signal section.
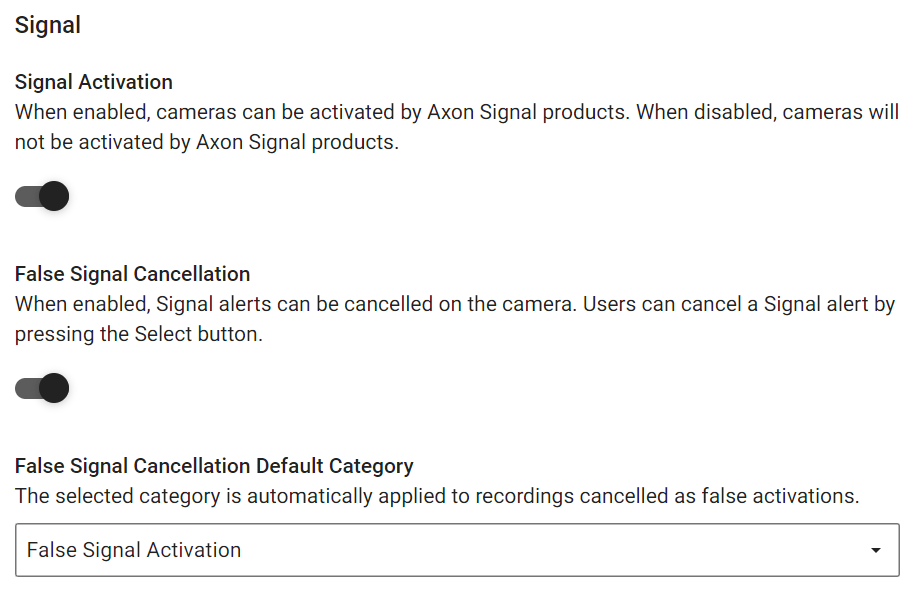
- Signal activation – Toggle on to enable cameras to be activated by Axon Signal products.
- False signal cancelation – Toggle on to allow alerts to be cancelled, and thereby stop recording, at the camera.
- False signal cancelation default category – If you enabled false signal cancelation, set a default category here.
- Scroll to the bottom and select Save settings.
You have now enabled cameras at your agency to detect a Bluetooth signal from Axon Signal Vehicle and SPPM. The next time the camera is connected to either an Axon Dock or Evidence Sync, it will update to this new setting.
Configure Signal Vehicle
If your camera still does not record even after activating the Signal Activation setting in step 3 above, check your Signal Vehicle Configuration.
If you already have a configuration setup in your Axon Evidence account, ensure the trigger you use to test the camera is enabled.
To check the signal configuration for your agency:
- Sign into your Axon Evidence account and select Admin on the menu bar.
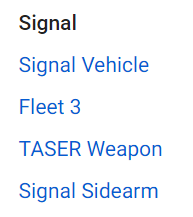
- Select Signal Vehicle.
- Ensure the trigger you're using to test the camera is listed as an event trigger.
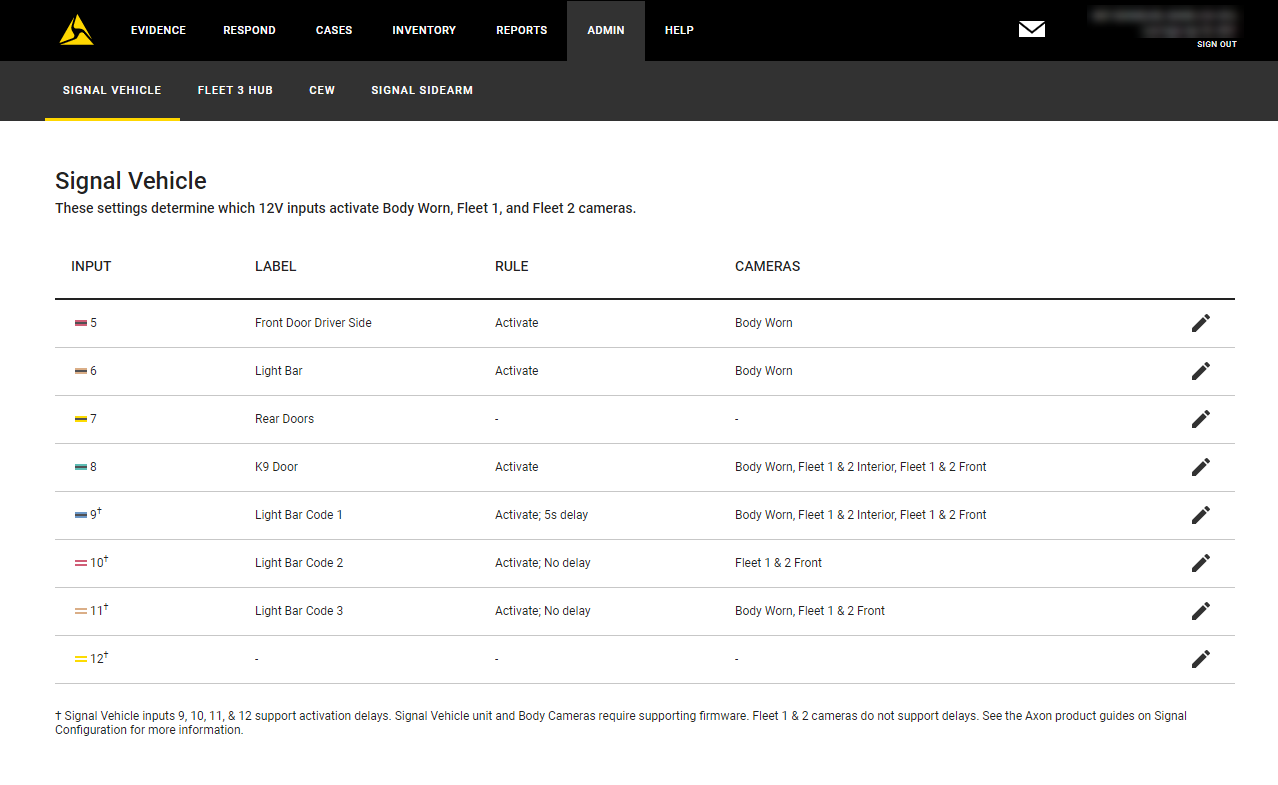
- If it isn't listed, select Edit
 on an unused row.
 - Select the appropriate trigger the Axon Signal Vehicle device is wired to in the installation, such as Front Door or Light Bar.
- Repeat steps 4–5 for other trigger inputs.
- Select Save.
Verify you enabled your cameras to detect selected event triggers from Axon Signal. The next time the camera is connected to either an Axon Dock or Evidence Sync, it will update to this new setting.
Signal reactivation and delay
Signal reactivation sensitivity determines if Signal will activate nearby cameras. The default behavior is less sensitive.
For example, a K9 unit responding to a call turns on the light bar, which activates the Fleet 3 and Body 3 cameras. They are 30 minutes from the location and do not want to record the entire time. The officer ends the recordings, but the light bar stays on. When they arrive at the call 30 minutes later, the situation escalates, and the officer uses the door popper to open the K9 door. The door popper is also configured to activate the Fleet 3 and Body 3 cameras. At less sensitive, since the light bar is still on, it is still the same Axon Signal session, so the Fleet 3 and Body 3 cameras do not activate.
With more sensitive selected, in the above scenario the Fleet 3 and Body 3 cameras will activate when the officer uses the door popper even though the light bar is already on.
Signal reactivation
To set signal reactivation:
- Sign into your Axon Evidence account and select Admin on the menu bar.
- Select Fleet 3 (to set body cameras, select Signal Vehicle).
- Select the desired sensitivity.

Signal delay
The delay feature, individually configurable for Fleet 3 and body cameras, allows 12V input signals to be active for a short period of time without activating camera recordings.
For example, you want officers to test the vehicle light bar prior to the start of each shift without creating unnecessary evidence recordings. To do so, add a five-second delay to Fleet cameras. At the beginning of a shift, if the officer tests the light bar for less than five seconds, body and Fleet cameras will not activate.
Delay is only available on pins 9–12 for Axon Signal Vehicle (BWC activations) and can be set for 5 or 10 seconds.
To set a delay:
- Sign into your Axon Evidence account and select Admin on the menu bar.
- Select Fleet 3 (to set body cameras, select Signal Vehicle).
- Select Edit on the row to change.
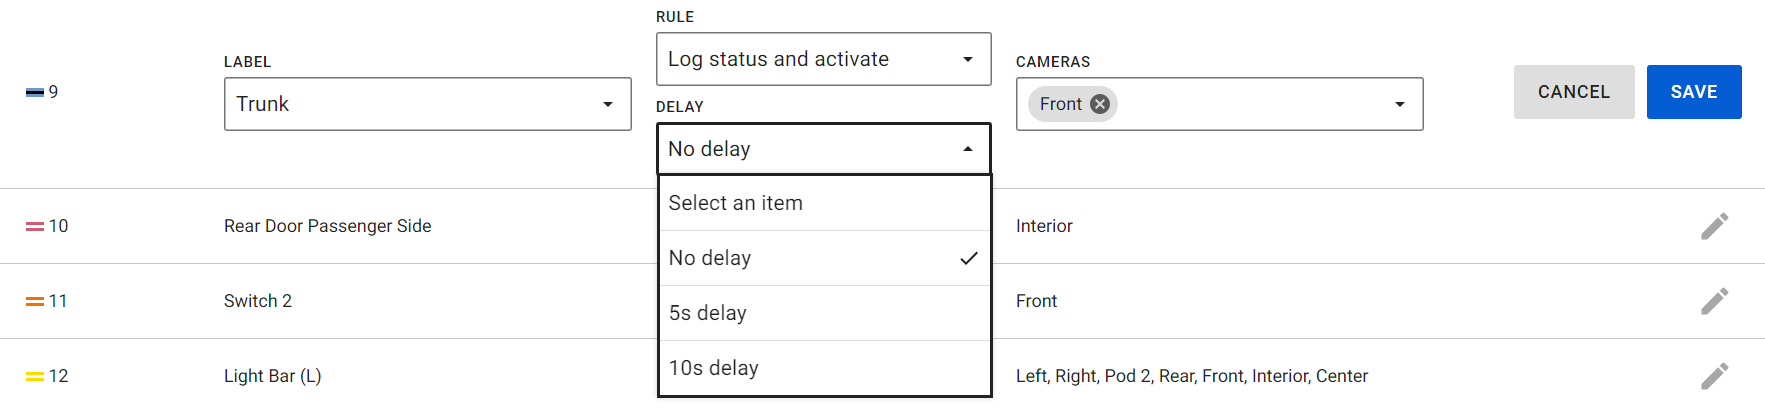
- Select the Rule and Delay time, and make other edits as needed.
- Select Save.
Last modified - 20 May 2026


