Manage personnel information
Use the Personnel module to manage detailed employee information beyond basic demographics, including service history, performance, education, and more. This guide explains how to add, edit, and remove personnel records, as well as how to work with related tools like feedback notes and audit logs.
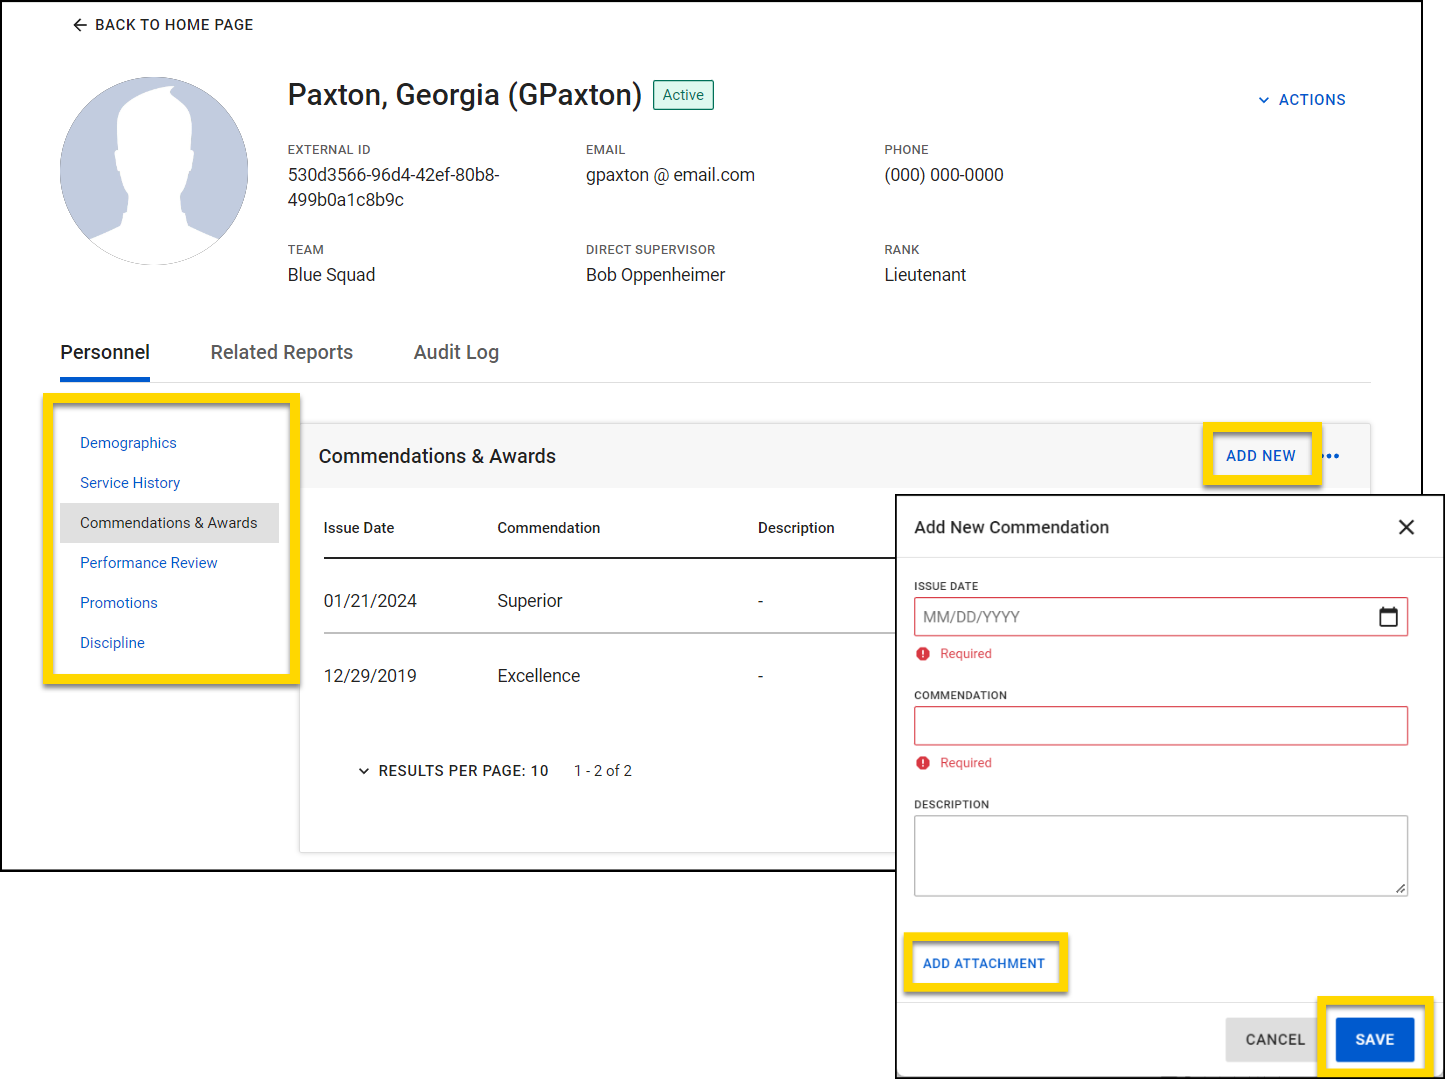
To add new information to a profile:
- Select the category you want to update from the menu on the left.
- Select Add New in the top right corner.
- Fill out the form, making sure all required information is included.
- Select Add Attachment if have any documents or files you need to include with the record.
- Select Save.
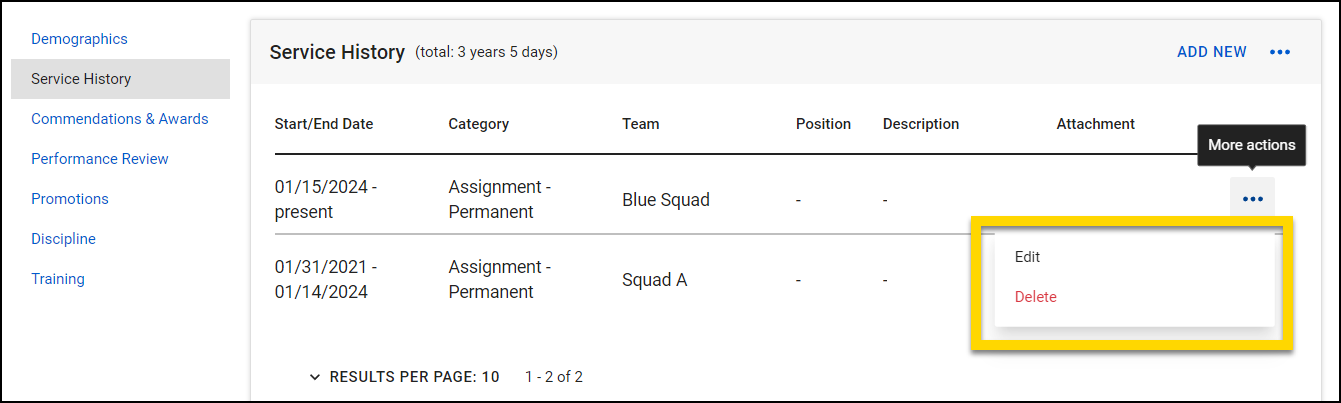
To edit or delete existing information:
- Select the More Actions [...] icon.
- Choose an action from the menu:
- Edit: This will allow you to update information or remove attachments. Within the edit mode, you can change any detail or click Remove next to an attachment to delete it.
- Delete: This allows you to completely remove a record. A confirmation prompt will appear to prevent accidental deletions.
Demographics
The user's name and basic information appears at the top of their profile; this information is always visible to other users.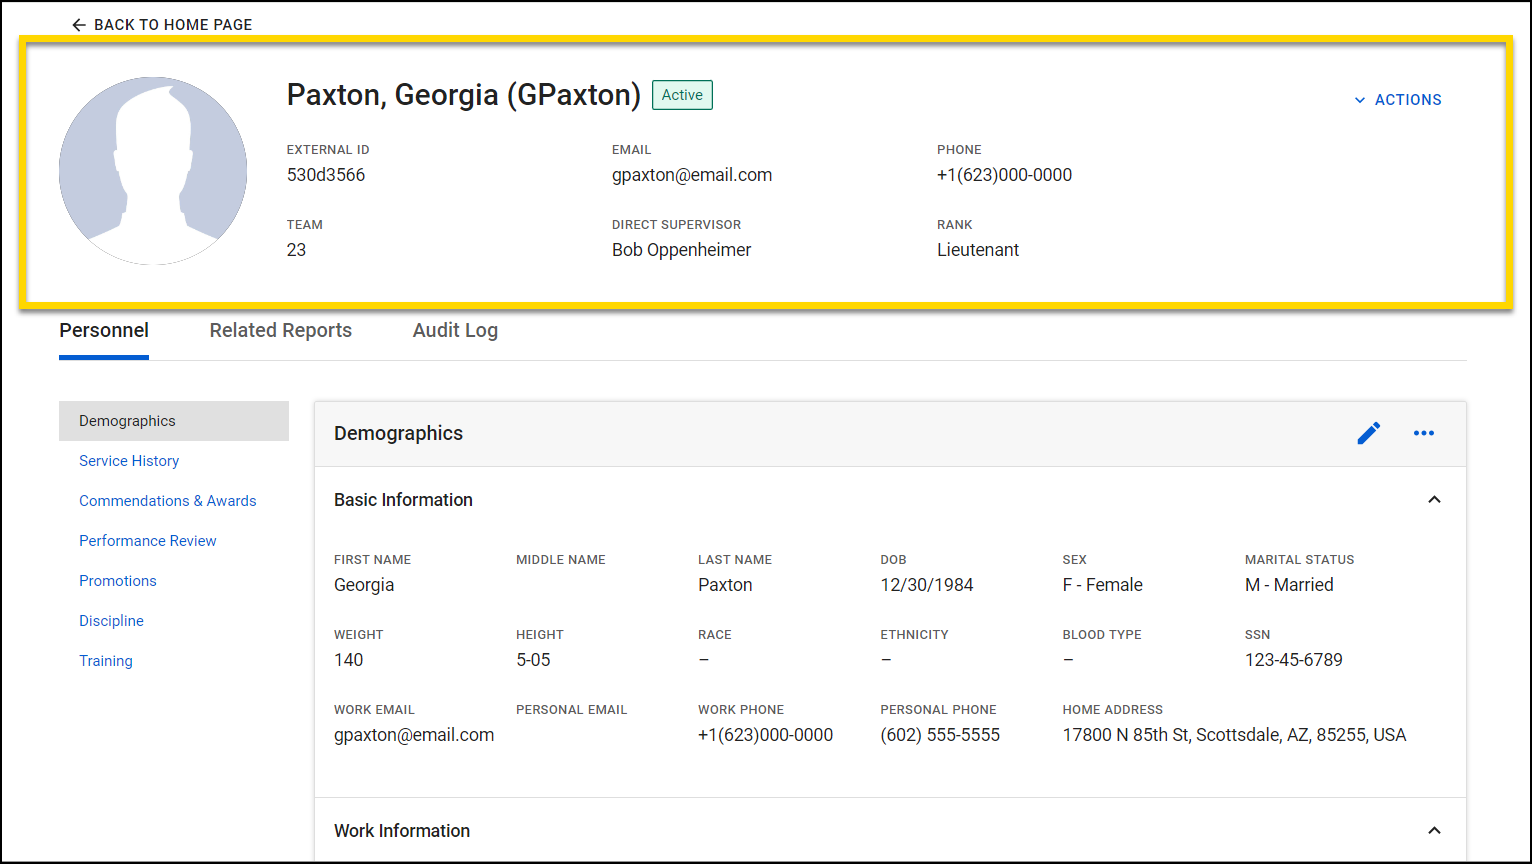
Below this, you'll find the Personnel, Related Reports, and Audit Log tabs. These sections have more information that can only be viewed or changed by users with the correct privilege level.
To edit multiple user profiles, use the Personnel Import Tool.
Edit demographics
Select the pencil icon located in the right corner of the Demographics section to modify demographic details.
With most of the demographic fields, you can add or edit information by selecting the field and typing. If the field is a dropdown menu, select from the available options. If you type information into a dropdown menu rather than selecting an option, your text won't be saved. 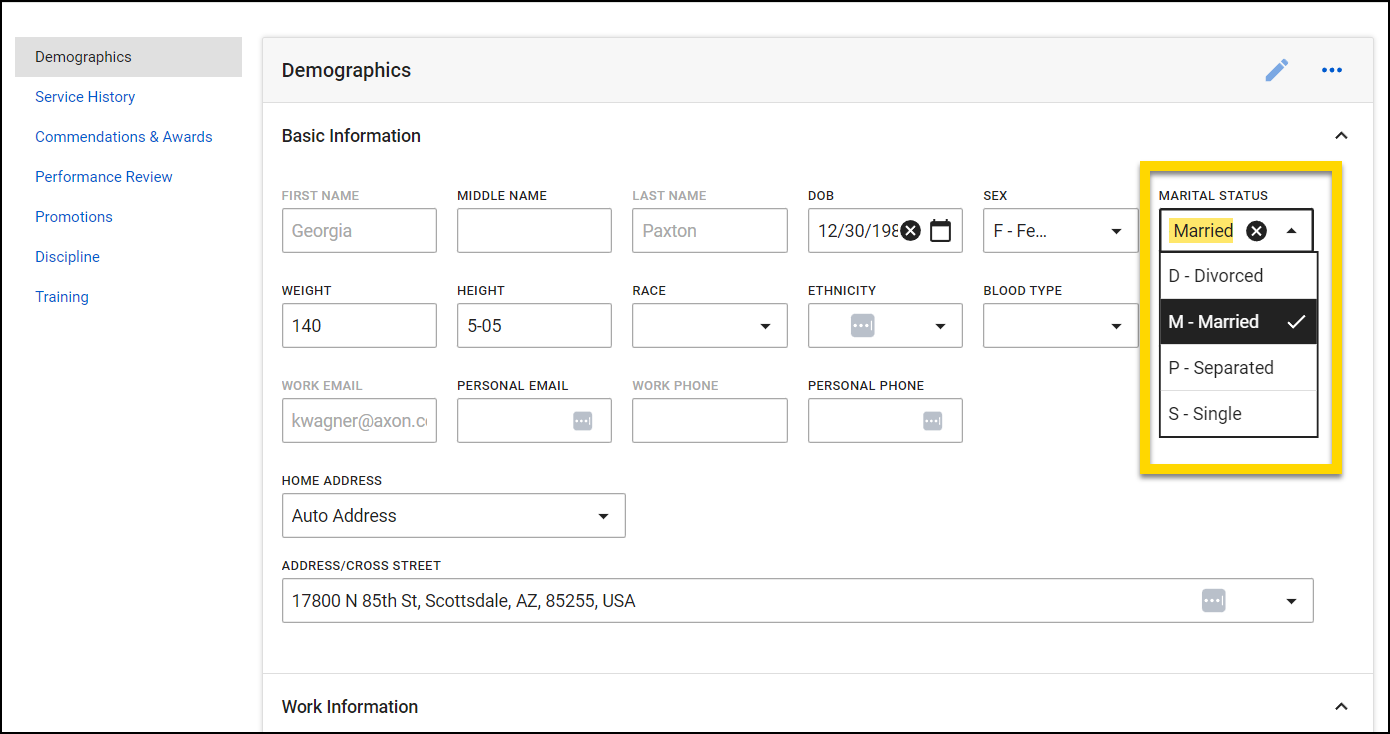
You can configure your reports to auto-fill with certain fields from the Personnel module (e.g., precinct, unit, race, Officer ID, etc.). Contact your Axon representative or Axon Support to set up this configuration.
Add an emergency contact
To add an emergency contact, select Add New Contact. A new set of fields will appear, allowing you to enter information for the new emergency contact.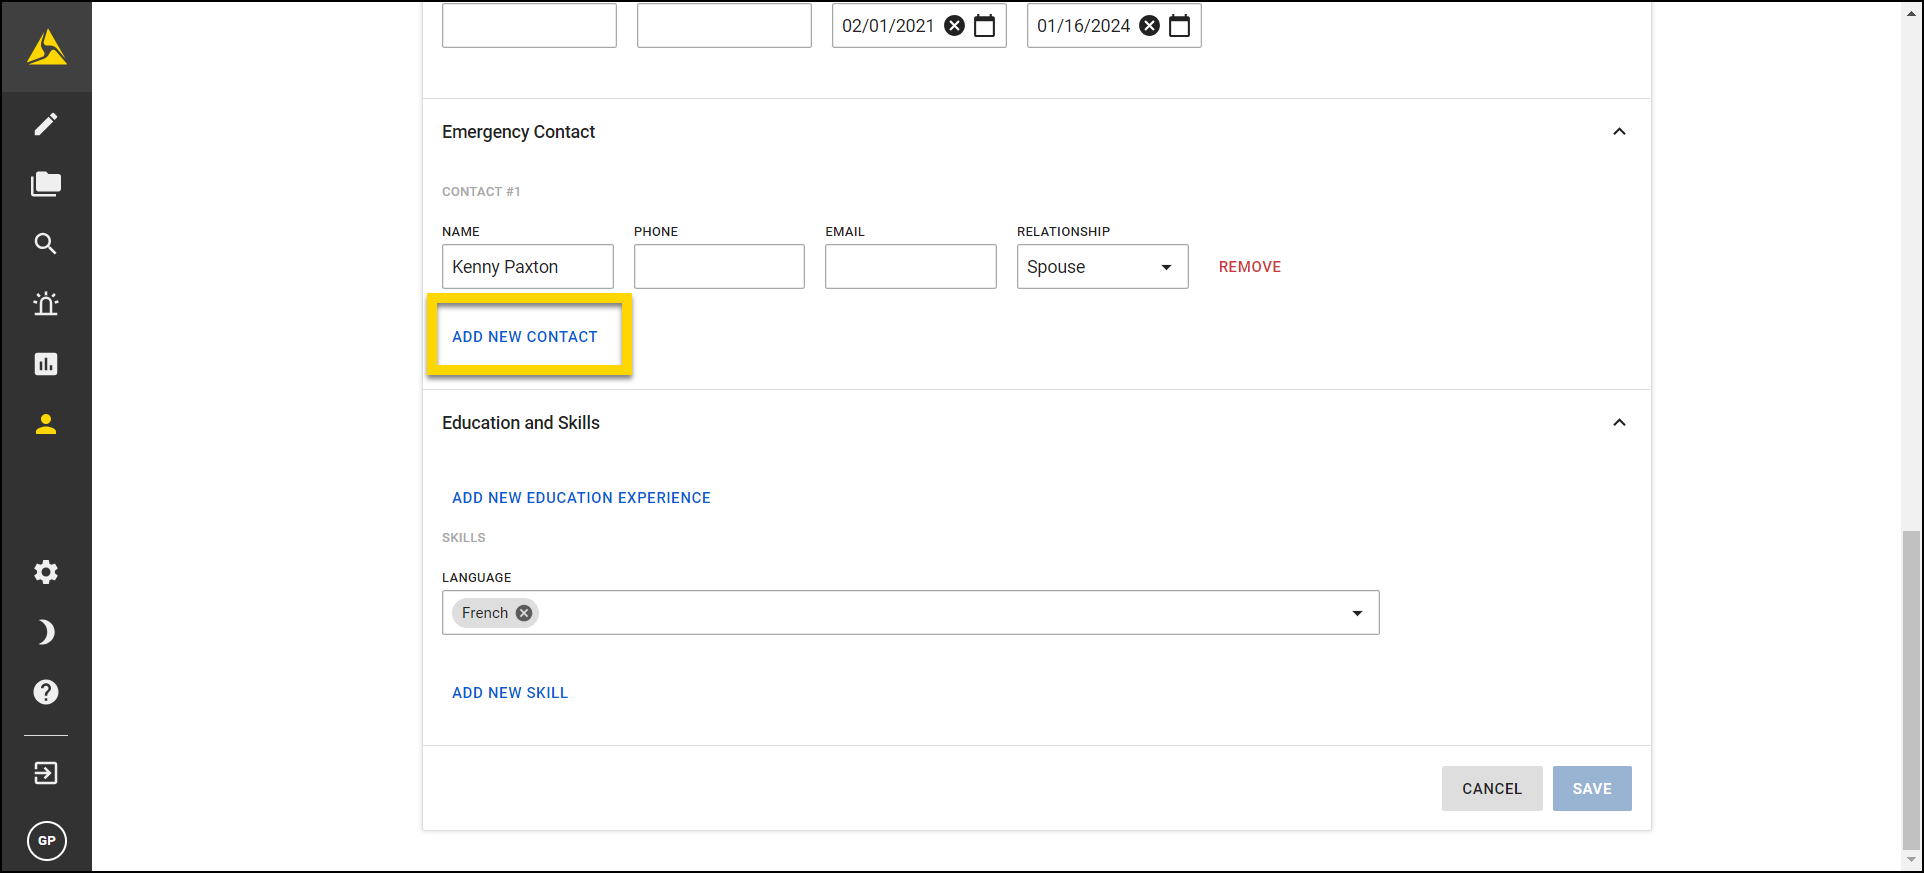
Add education and skills
To add educational achievements or skills, select Add New Education Experience or Add New Skill, respectively. Here, you can input the school, degree/certification type, or skill and the date obtained.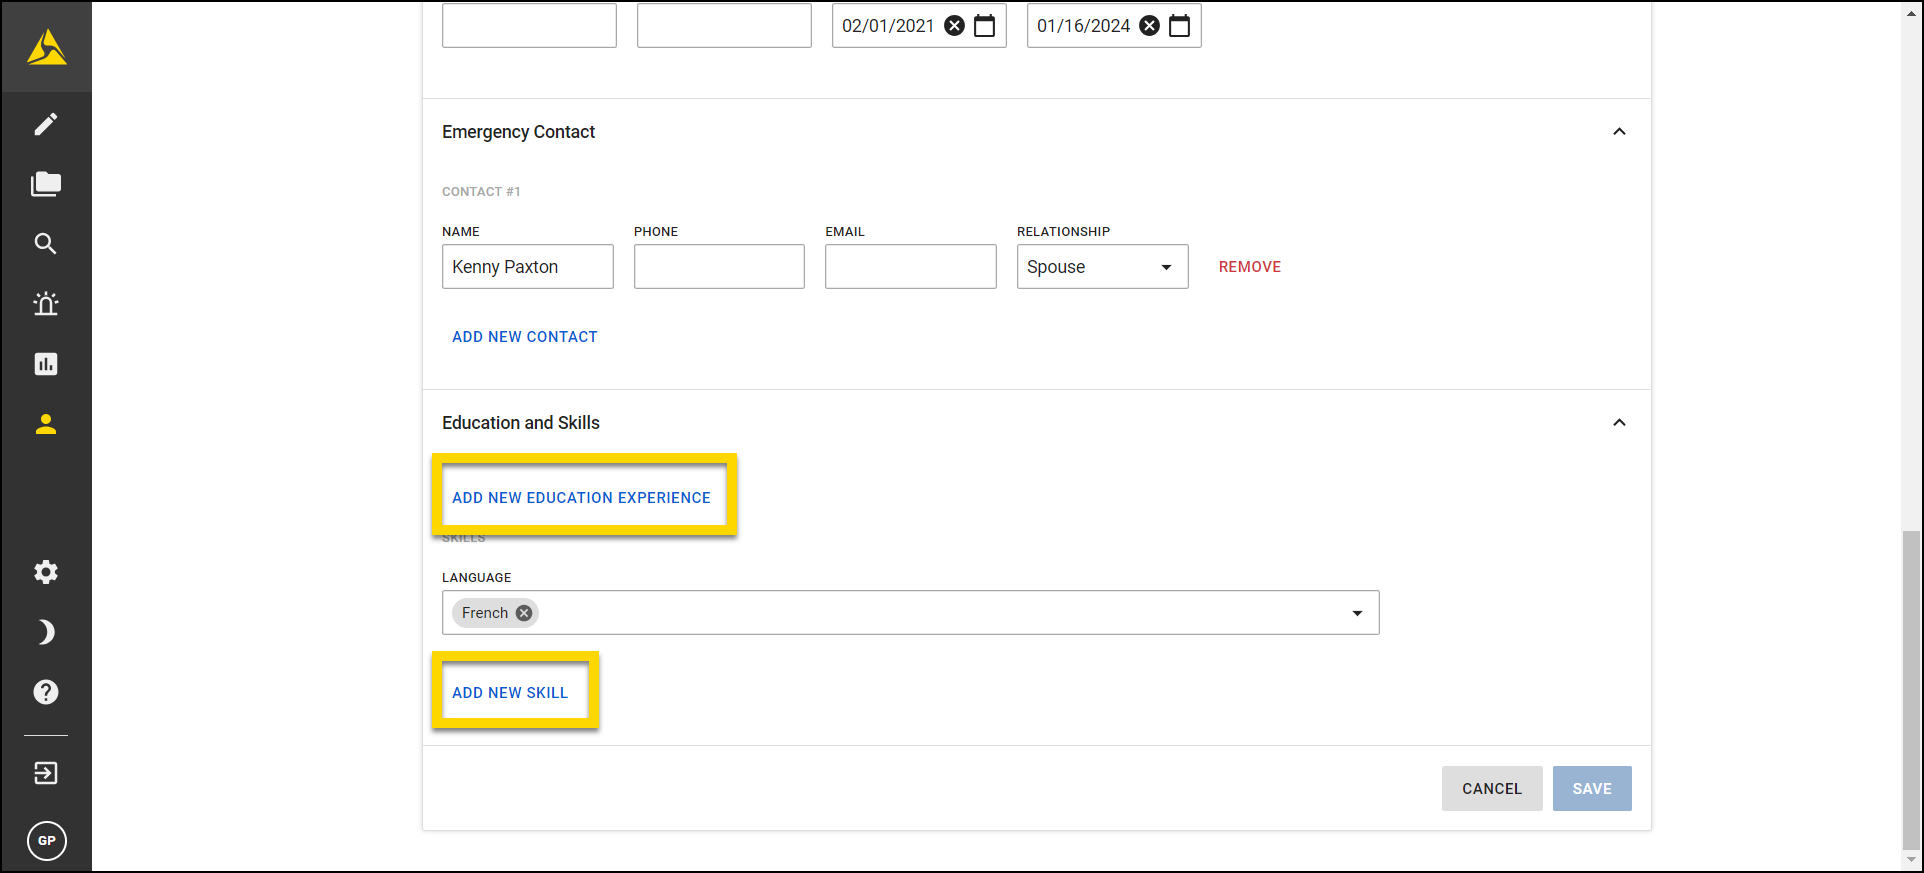
Remove information
To remove an existing emergency contact, educational history, or skill from the profile, select Remove next to the item you wish to delete. 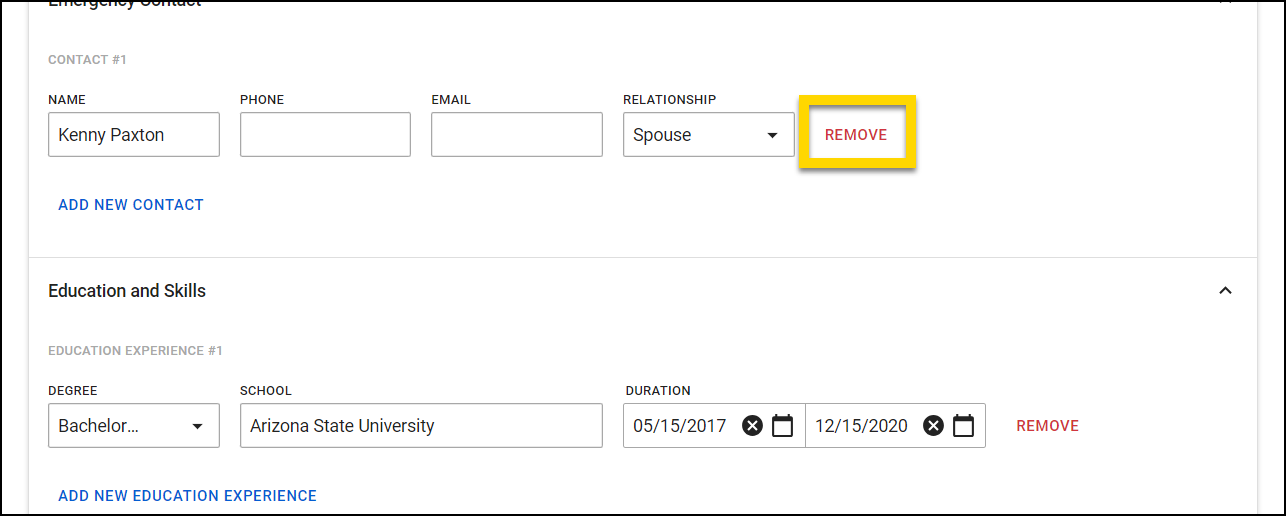
After completing all edits, scroll to the bottom of the page and select Save.
Related Reports
Select the Related Reports tab within a user’s profile to view a list of reports they have created or are mentioned in.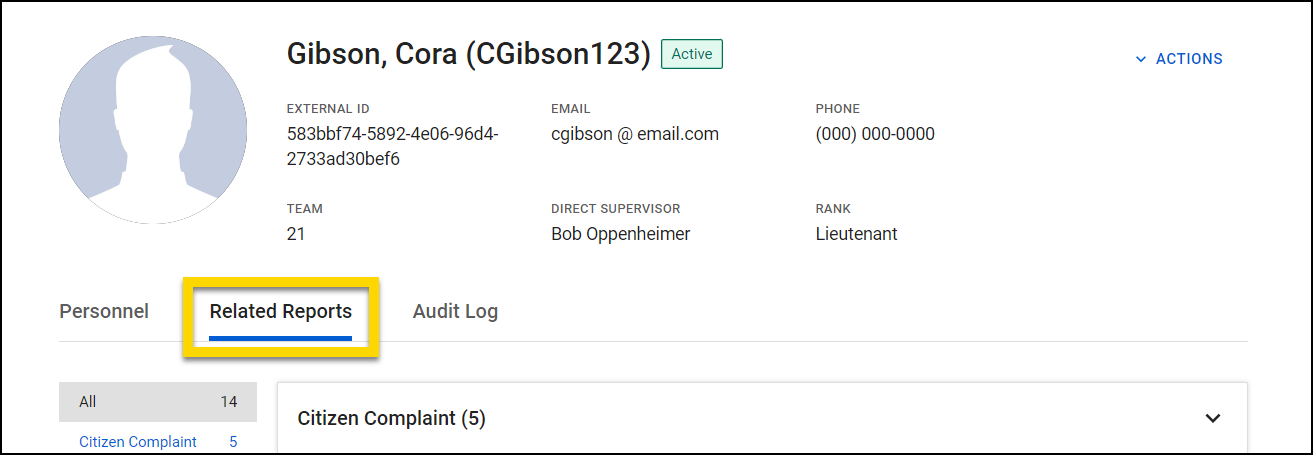
This tab is only available when you are logged into Axon Standards. If you are logged into Axon Records, you will not see this tab. To view the tab, switch to Axon Standards.
Reports are sorted with the most recent ones appearing at the top of the list. To filter to a specific type of report, select a category from the list on the left.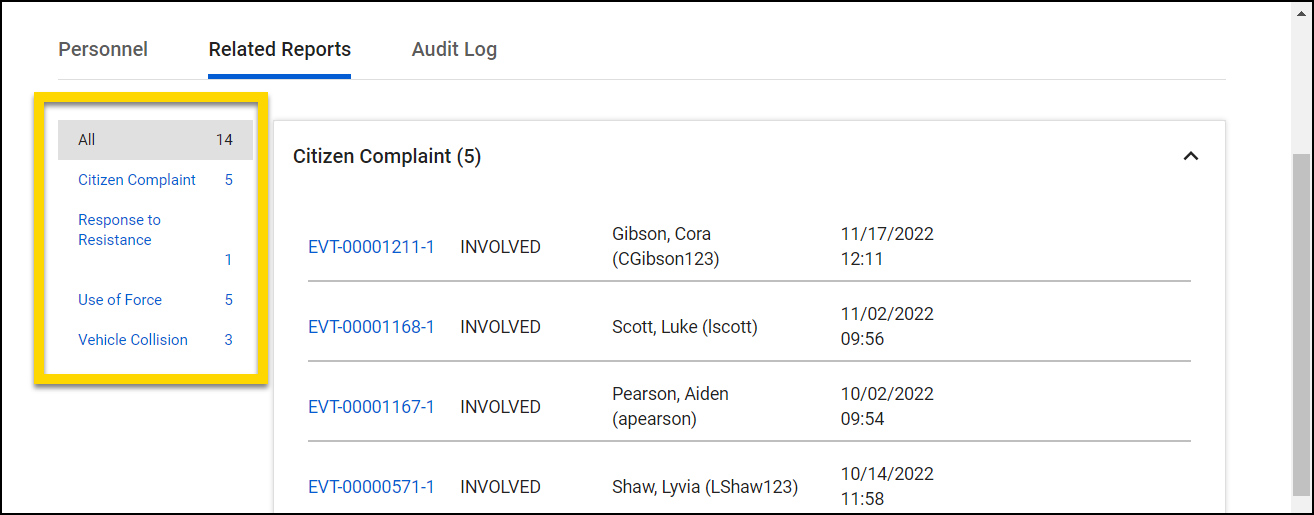
The Related Reports tab organizes report information across four columns. If there are empty spaces in a column, it means the report does not include that information.
- Report Number: Found in the first column. Select a report number from this column to open and view the report's details.
- Involvement Status: The second column indicates the user's role or involvement in the report.
- Report Author:The third column displays the name of the report author. If the profile you are viewing is mentions the user in a report they did not the author, their name will not appear in this column.
- Date and Time: The last column shows the date and time provided in the Event Overview section of the report.
Feedback notes
Feedback notes is a feature within the Personnel module that lets supervisors create and send feedback to their team, and allows users to view and acknowledge the feedback they’ve received.
When a supervisor sends a feedback note, the recipient will receive an email notification. They can then open the note directly by using the link in the email or by navigating to the Feedback notes tab on the Personnel page.
Some users, depending on their permissions, can create new feedback note types in the Administrator Console. These types determine the note label and optional expiration period. For more details, see Feedback notes.
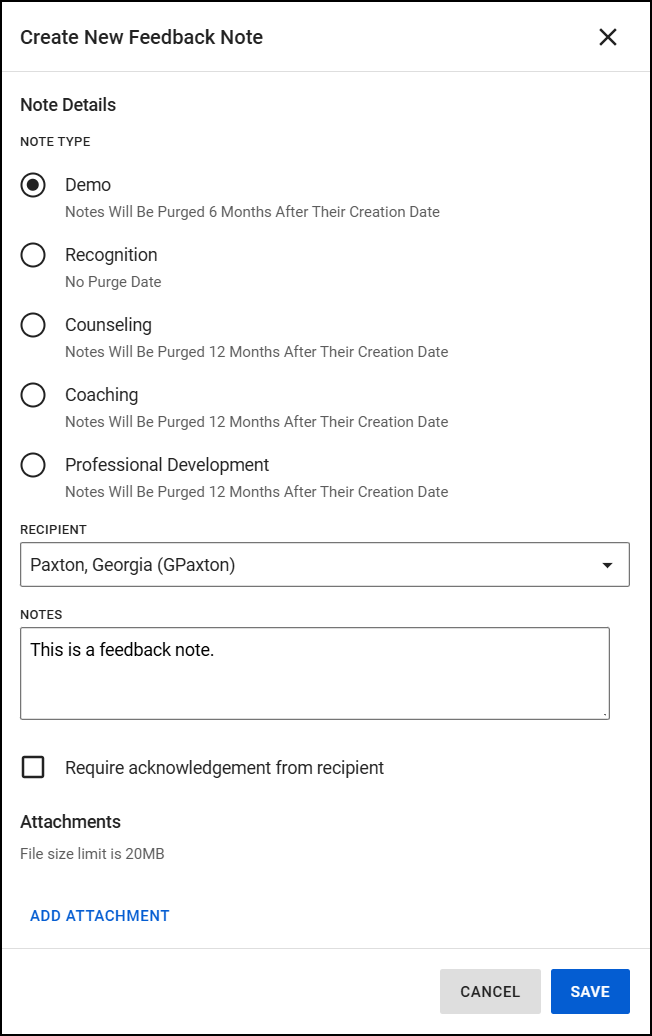
Create feedback notes
Follow these steps to create and send a feedback note:
- Open the Feedback notes tab in the Personnel module.
- Select Create Note.
- Choose the note type from the list, and enter the recipient's name.
- Write your message in the Note field.
- Select Require acknowledgment from recipient if you want them to confirm they've read the note.
- Add attachments, if needed.
- Select Save to send the note.
View feedback notes
To view feedback notes, open the Personnel module and select the Feedback notes tab. The information displayed depends on your role and permissions.
- All users can view feedback notes they've received
- Users with the ability to send notes can also view the notes they've sent.
- Users with the appropriate permission can view feedback notes on another user's profile.
When you open the feedback notes tab, the notes you've received will appear by default. To view the notes you have sent, select Notes sent from the side menu.
You can filter notes by Note type, Date range, and, for sent notes, by Recipient using the filters above the list. 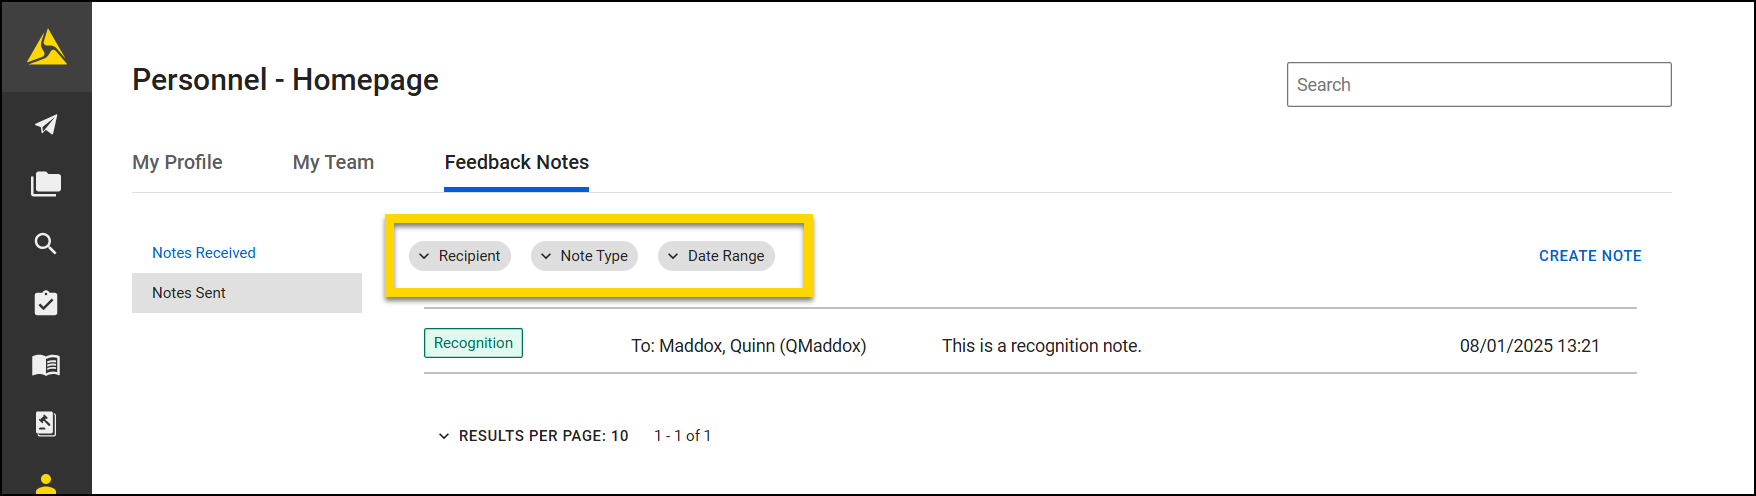
Select a note to open it and view the full details, which include:
- Date and time created
- Name of the creator
- Expiration date (if applicable)
- Acknowledgment status (if applicable)
- Note content
- Feedback type flag
To export a note, open it, select More Actions [...] > Export CSV. To return to the list of notes, select Back. 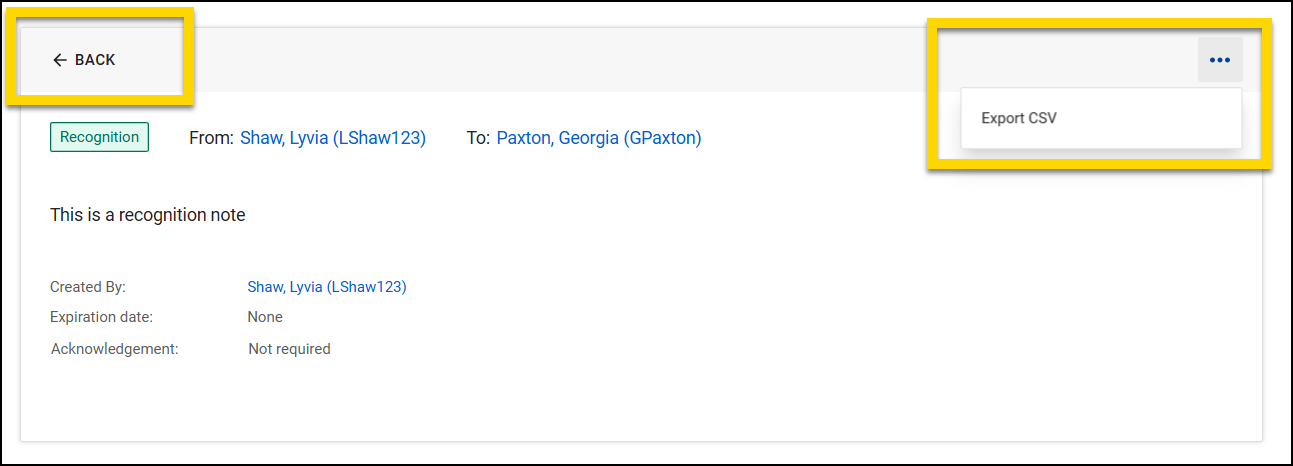
When the sender requires acknowledgment from the recipient, an Acknowledge button will appear in the note.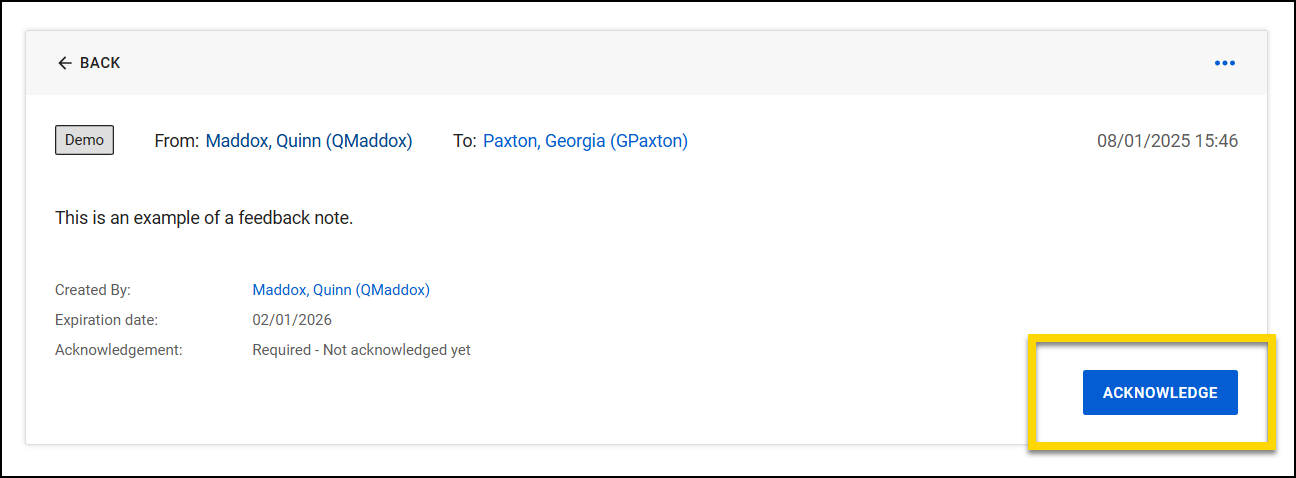
Selecting the Acknowledge button confirms you have seen the message, adds a timestamp, and notifies the sender.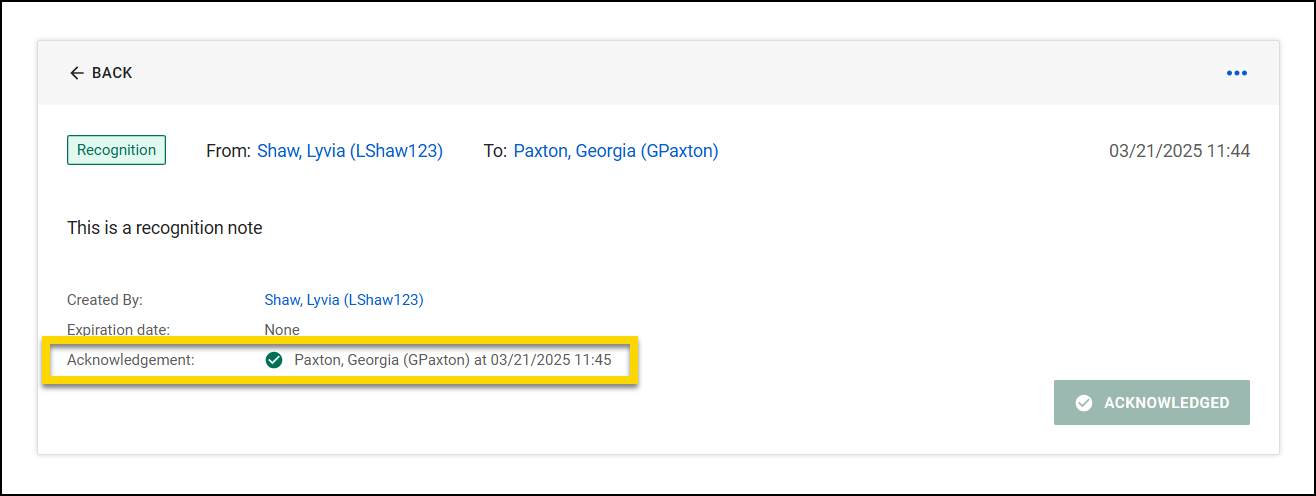
Users with the appropriate permissions can also view feedback notes on another user's profile. To do this, open that person’s profile in the Personnel module, then select the Feedback notes tab.
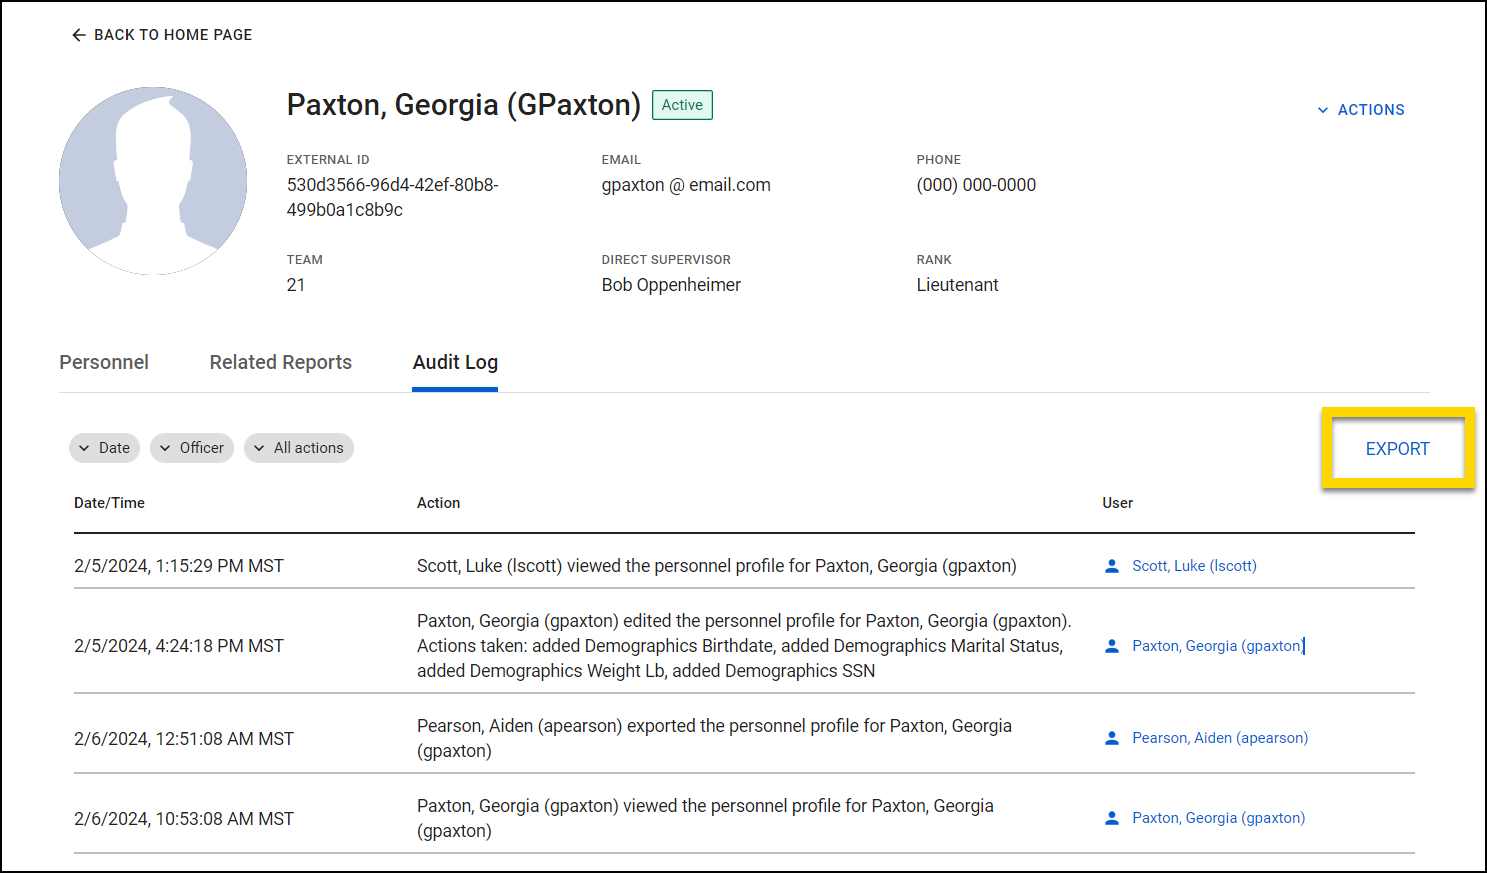
Audit log
An individual audit log is available in the Audit Log tab within each user's profile in the Personnel module. This tab contains a comprehensive record of all actions taken on that specific profile. Each entry includes the date and time of the action, the modification made, and the user made the change.
The audit log entries are listed from oldest to newest. These entries are automatically created and cannot be altered or added manually.
Use the filters at the top of the Audit Log to sort the information by date, name, badge number, or action type.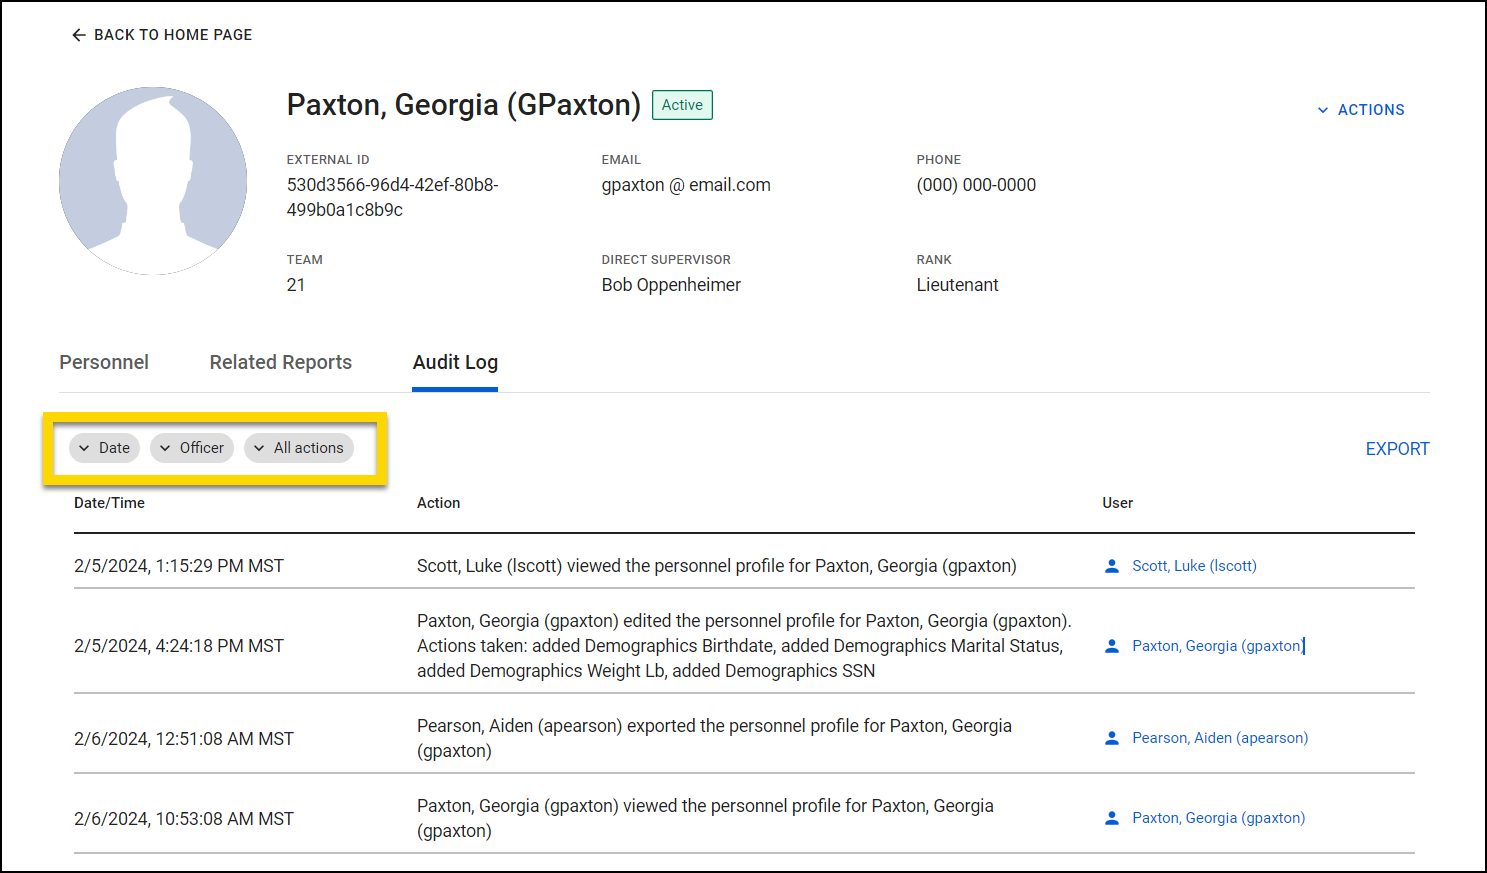
Select the Export button located on the right-hand side of the screen to download a CSV file that contains all information in the audit log.