Controller features
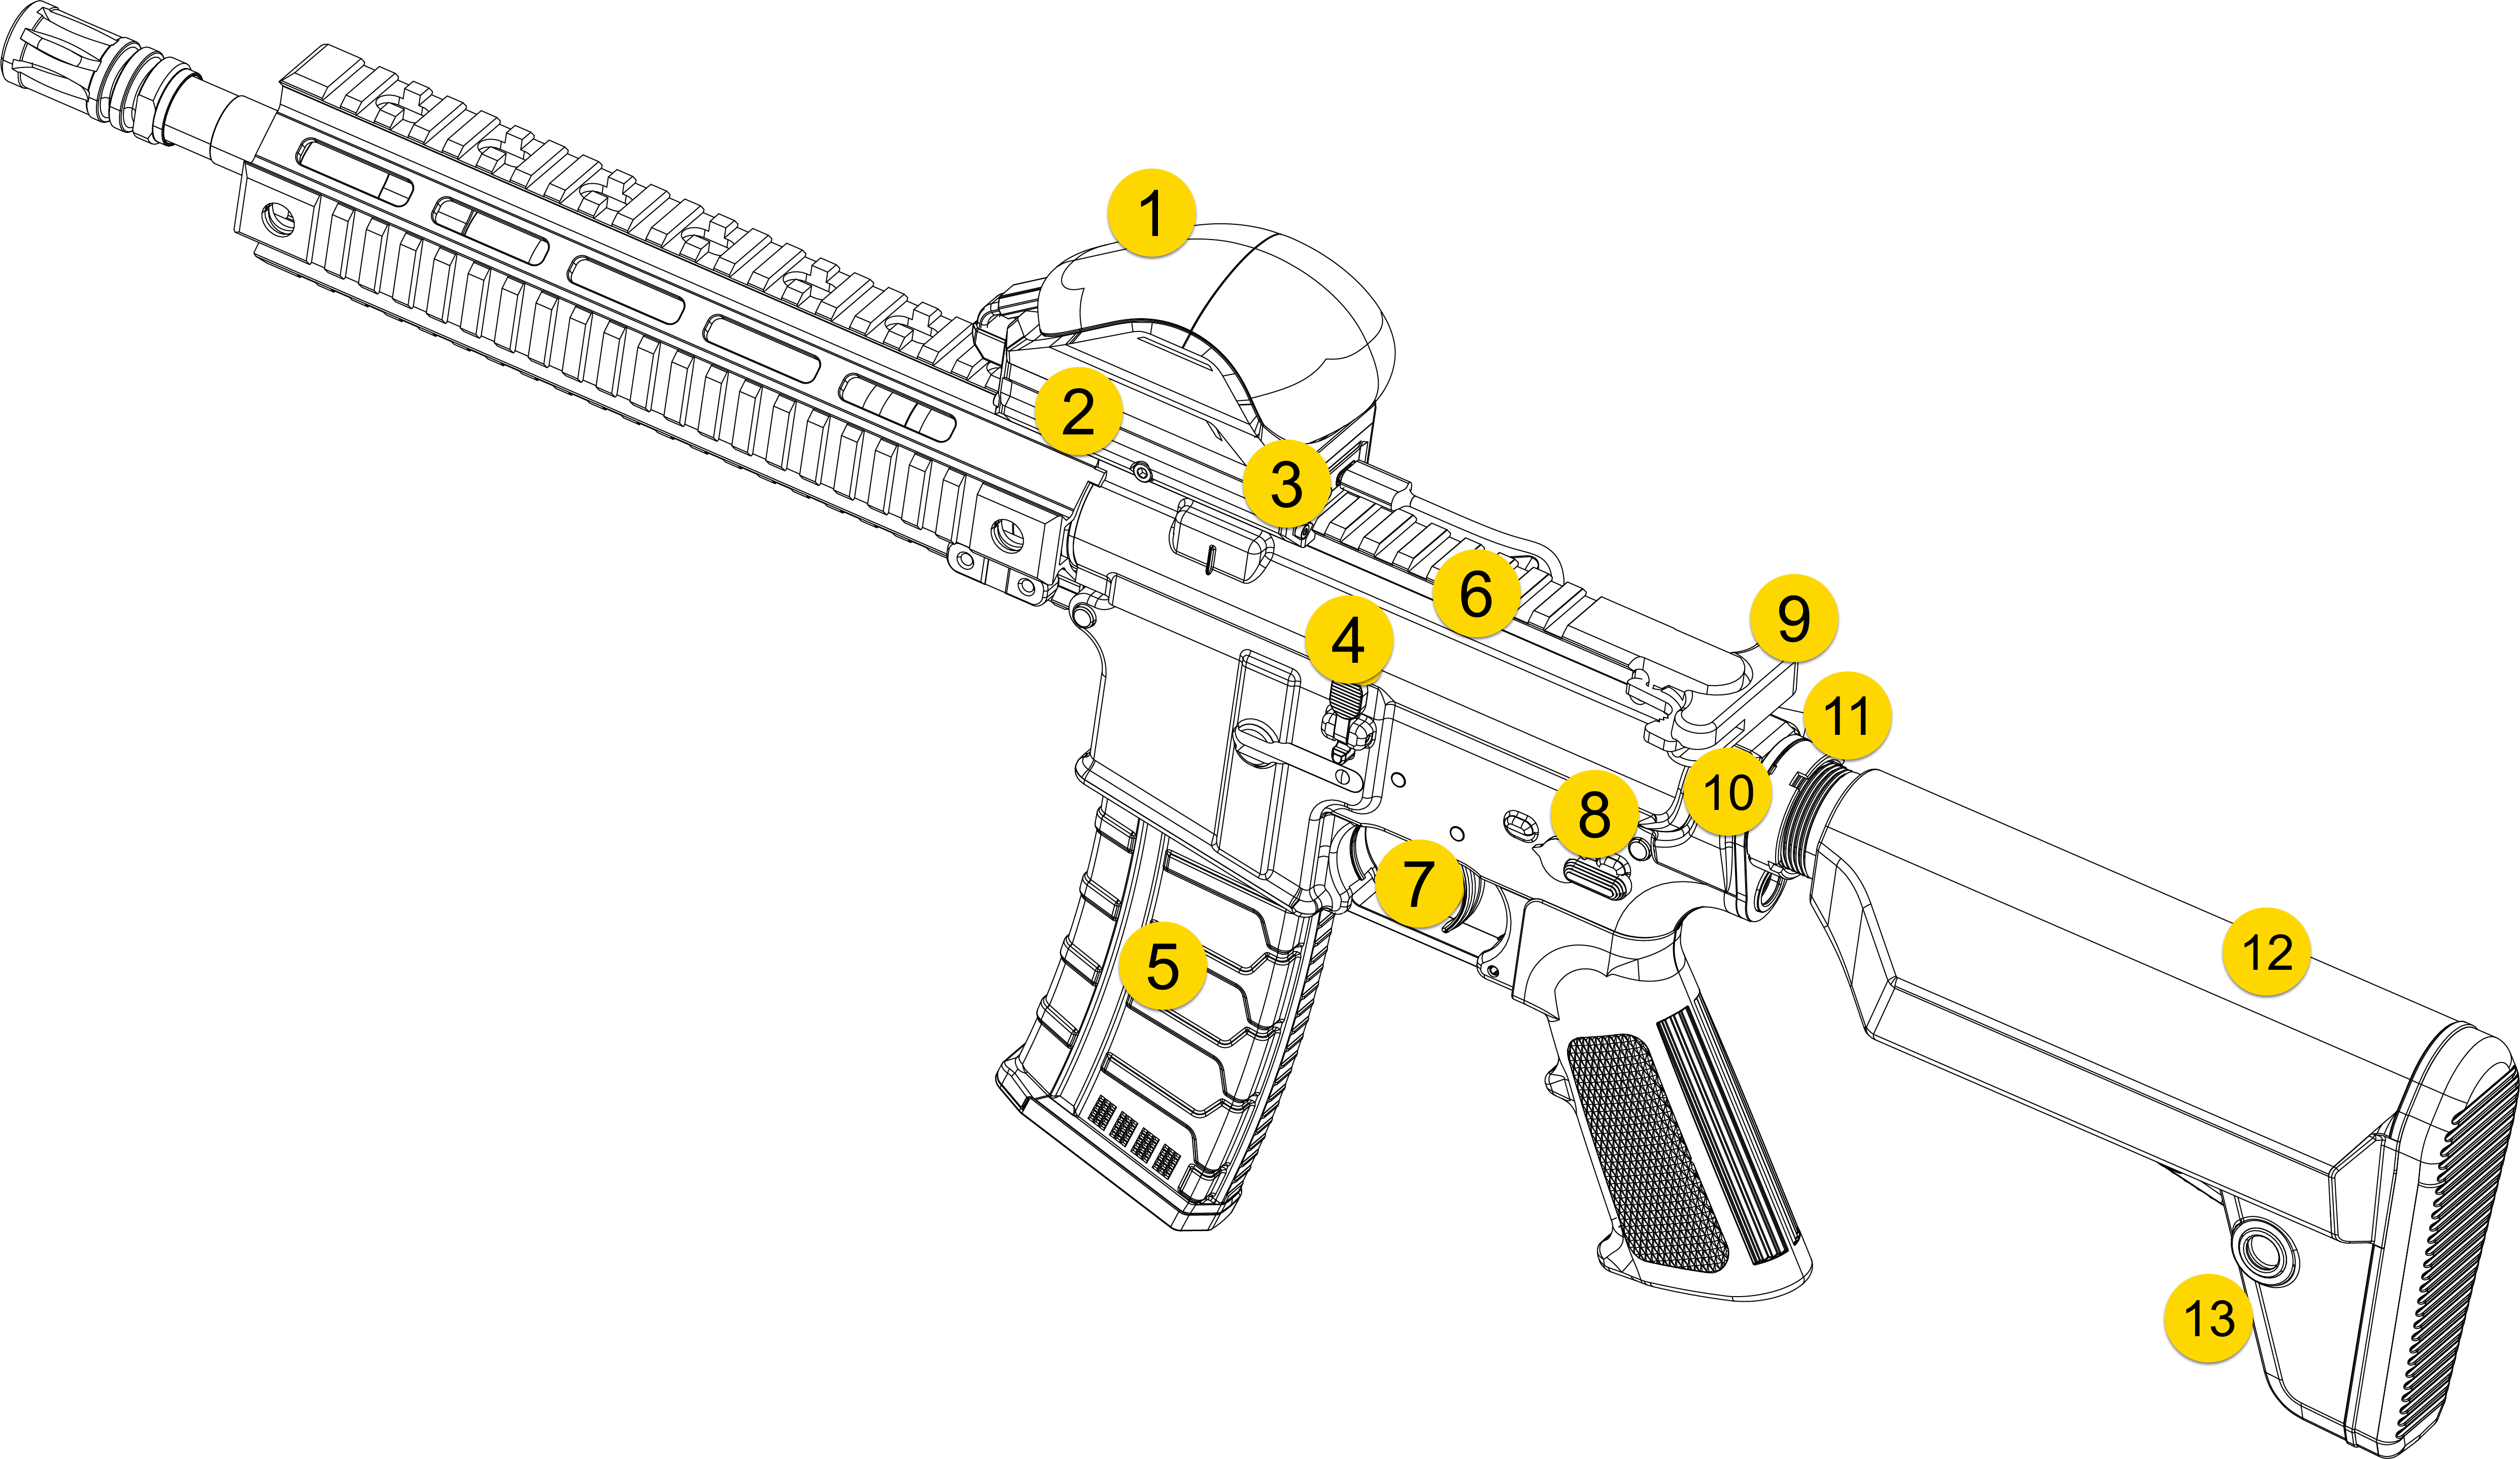
Overview
|
|
|
|
HTC tracker features
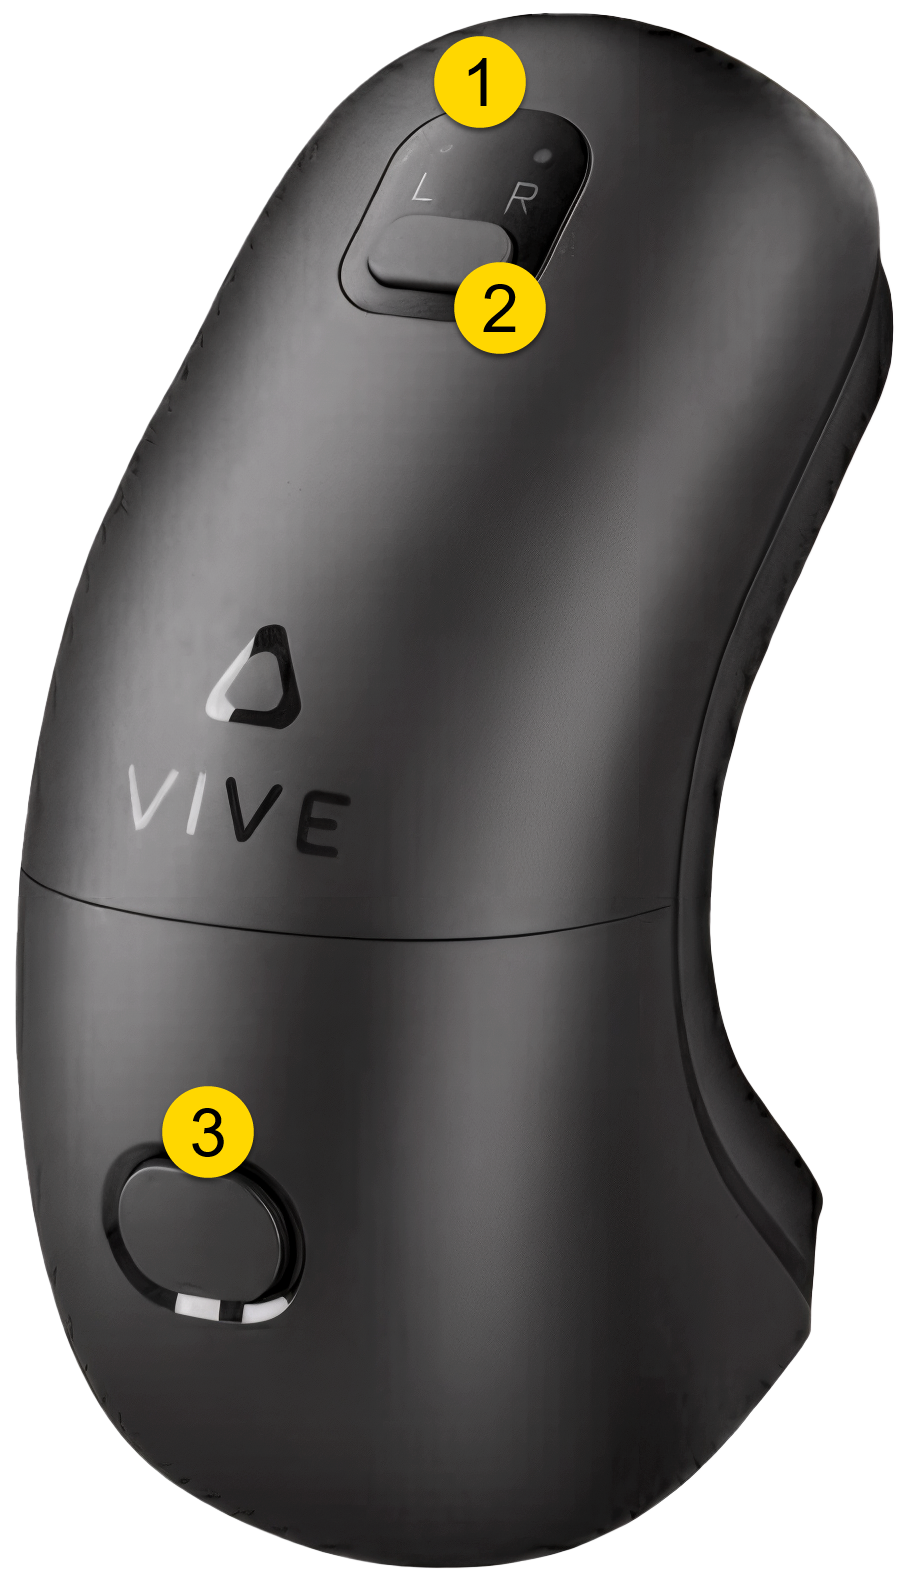
Safety features
The Rifle VR Controller (VRM4R) includes safety mechanisms that replicate those of a standard M4-style rifle. These features promote safe handling habits during training while maintaining realistic weapon behavior.
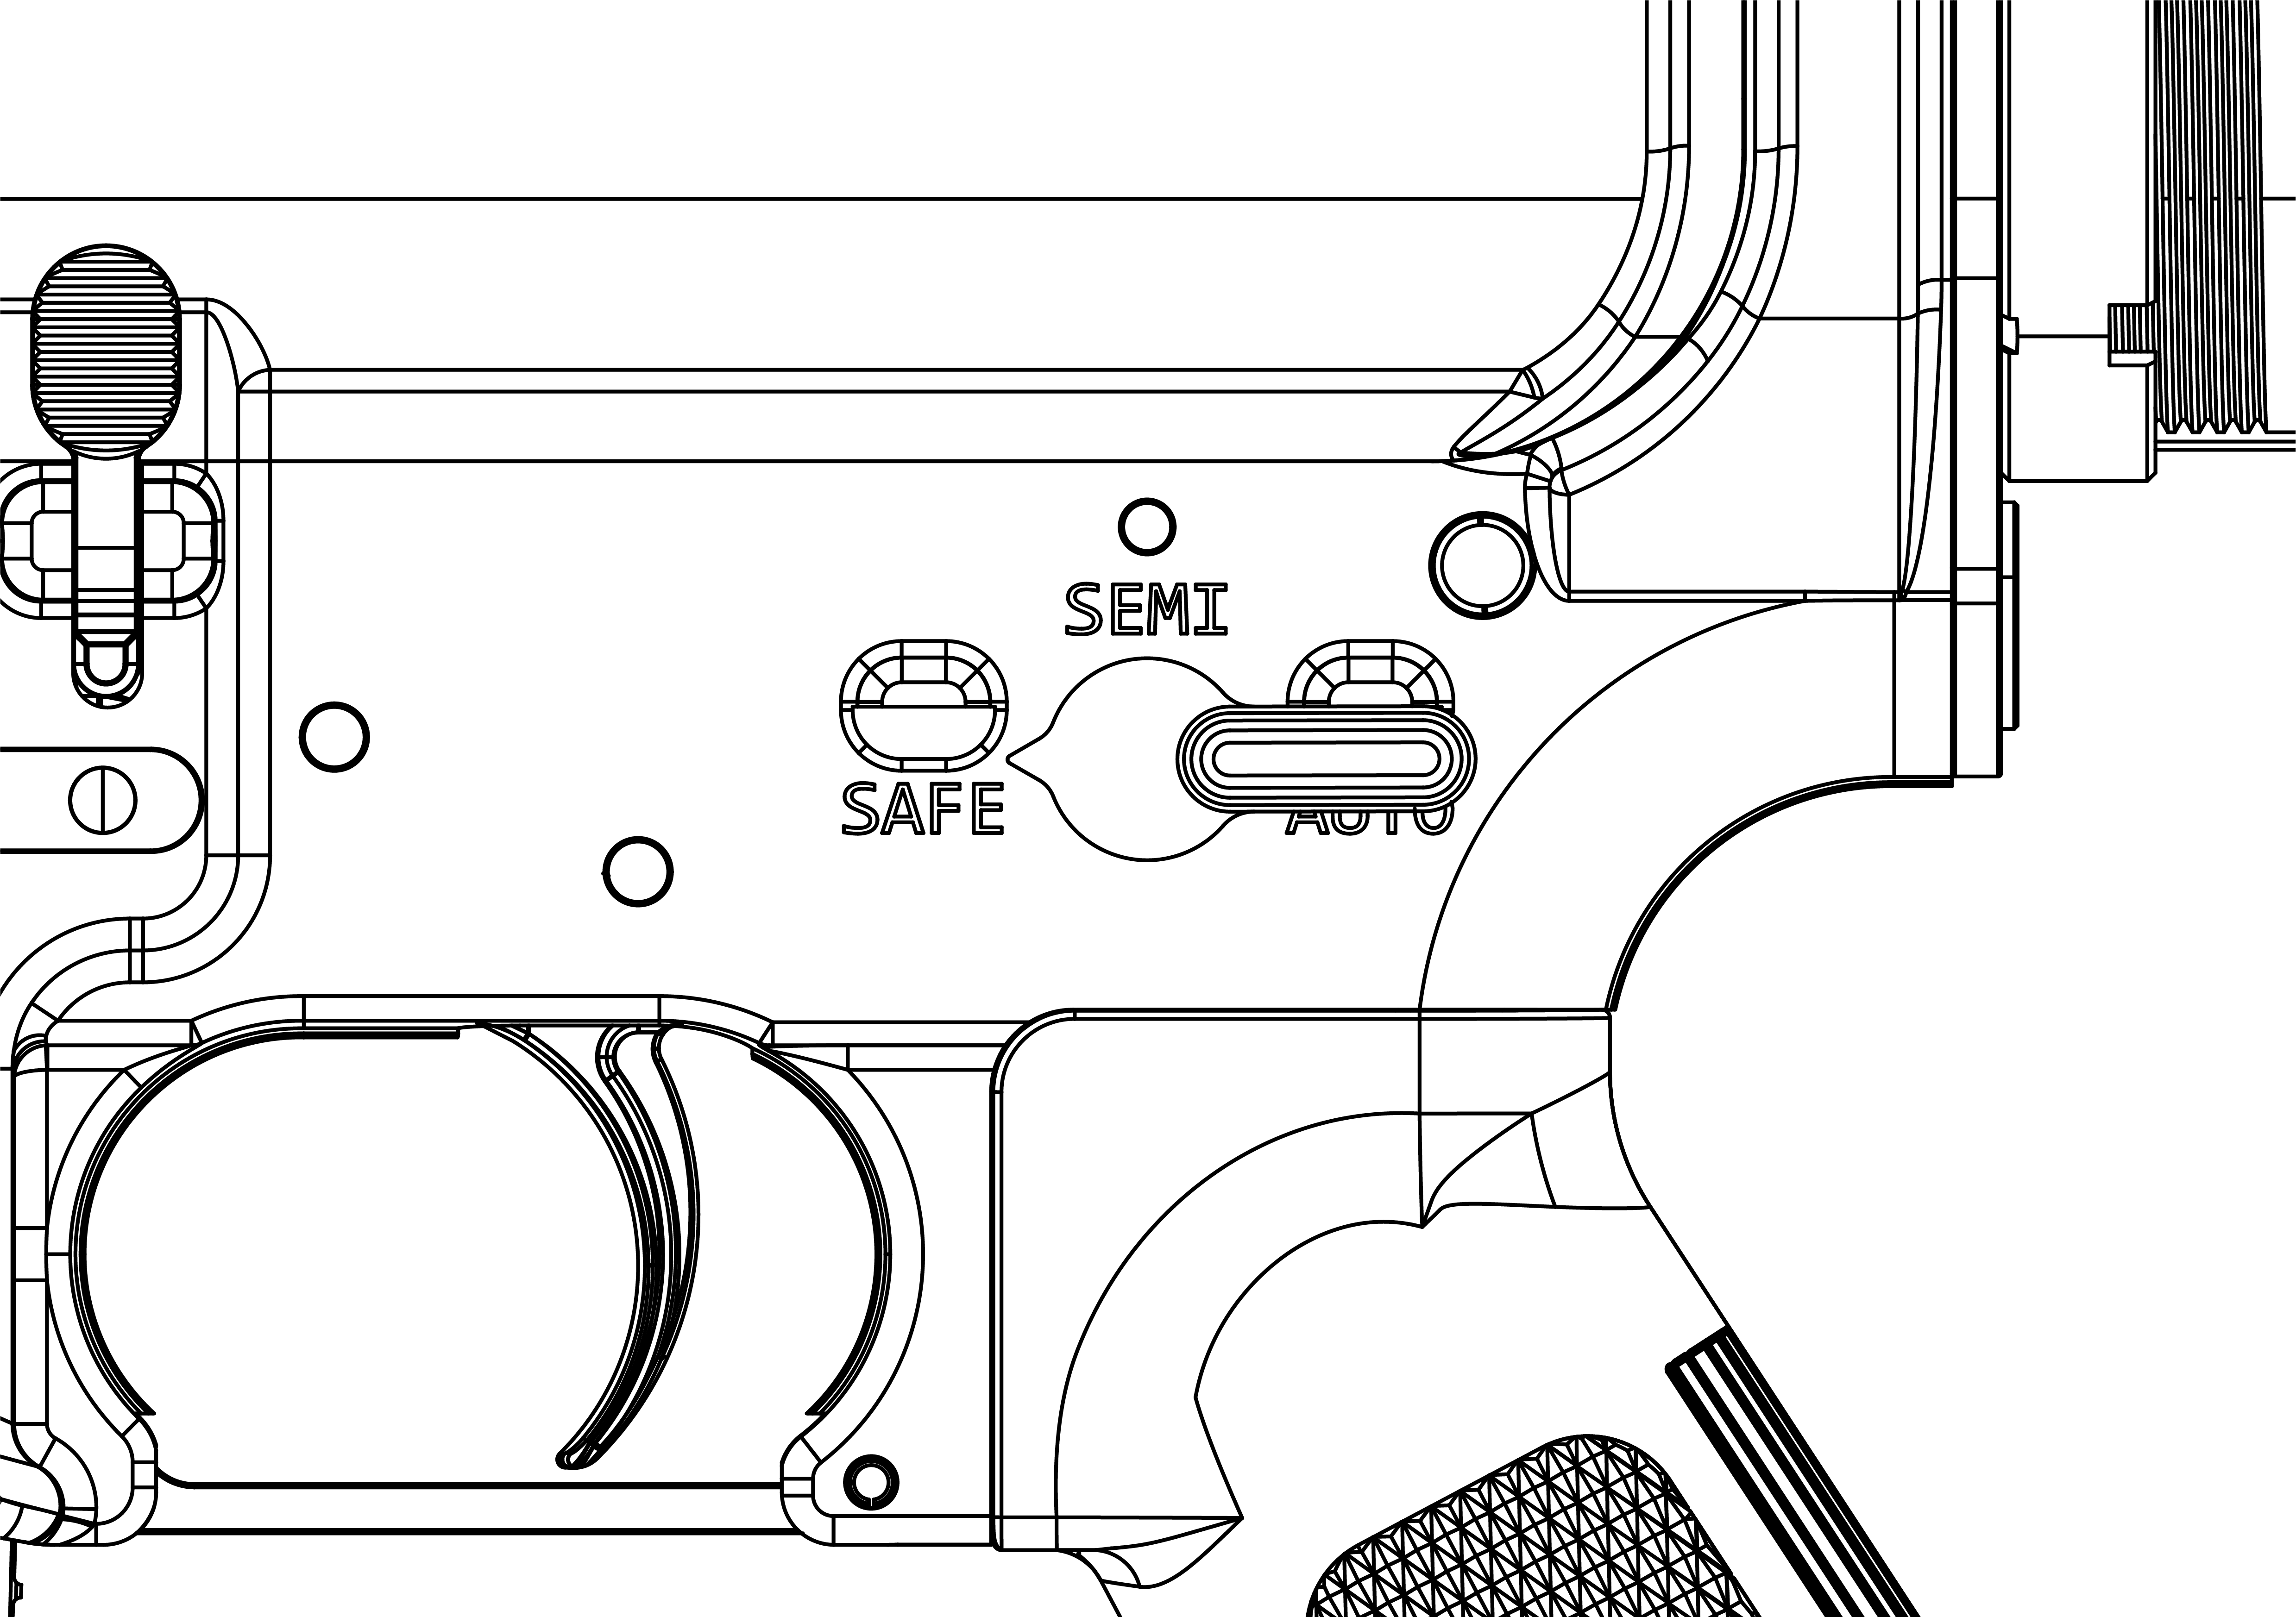
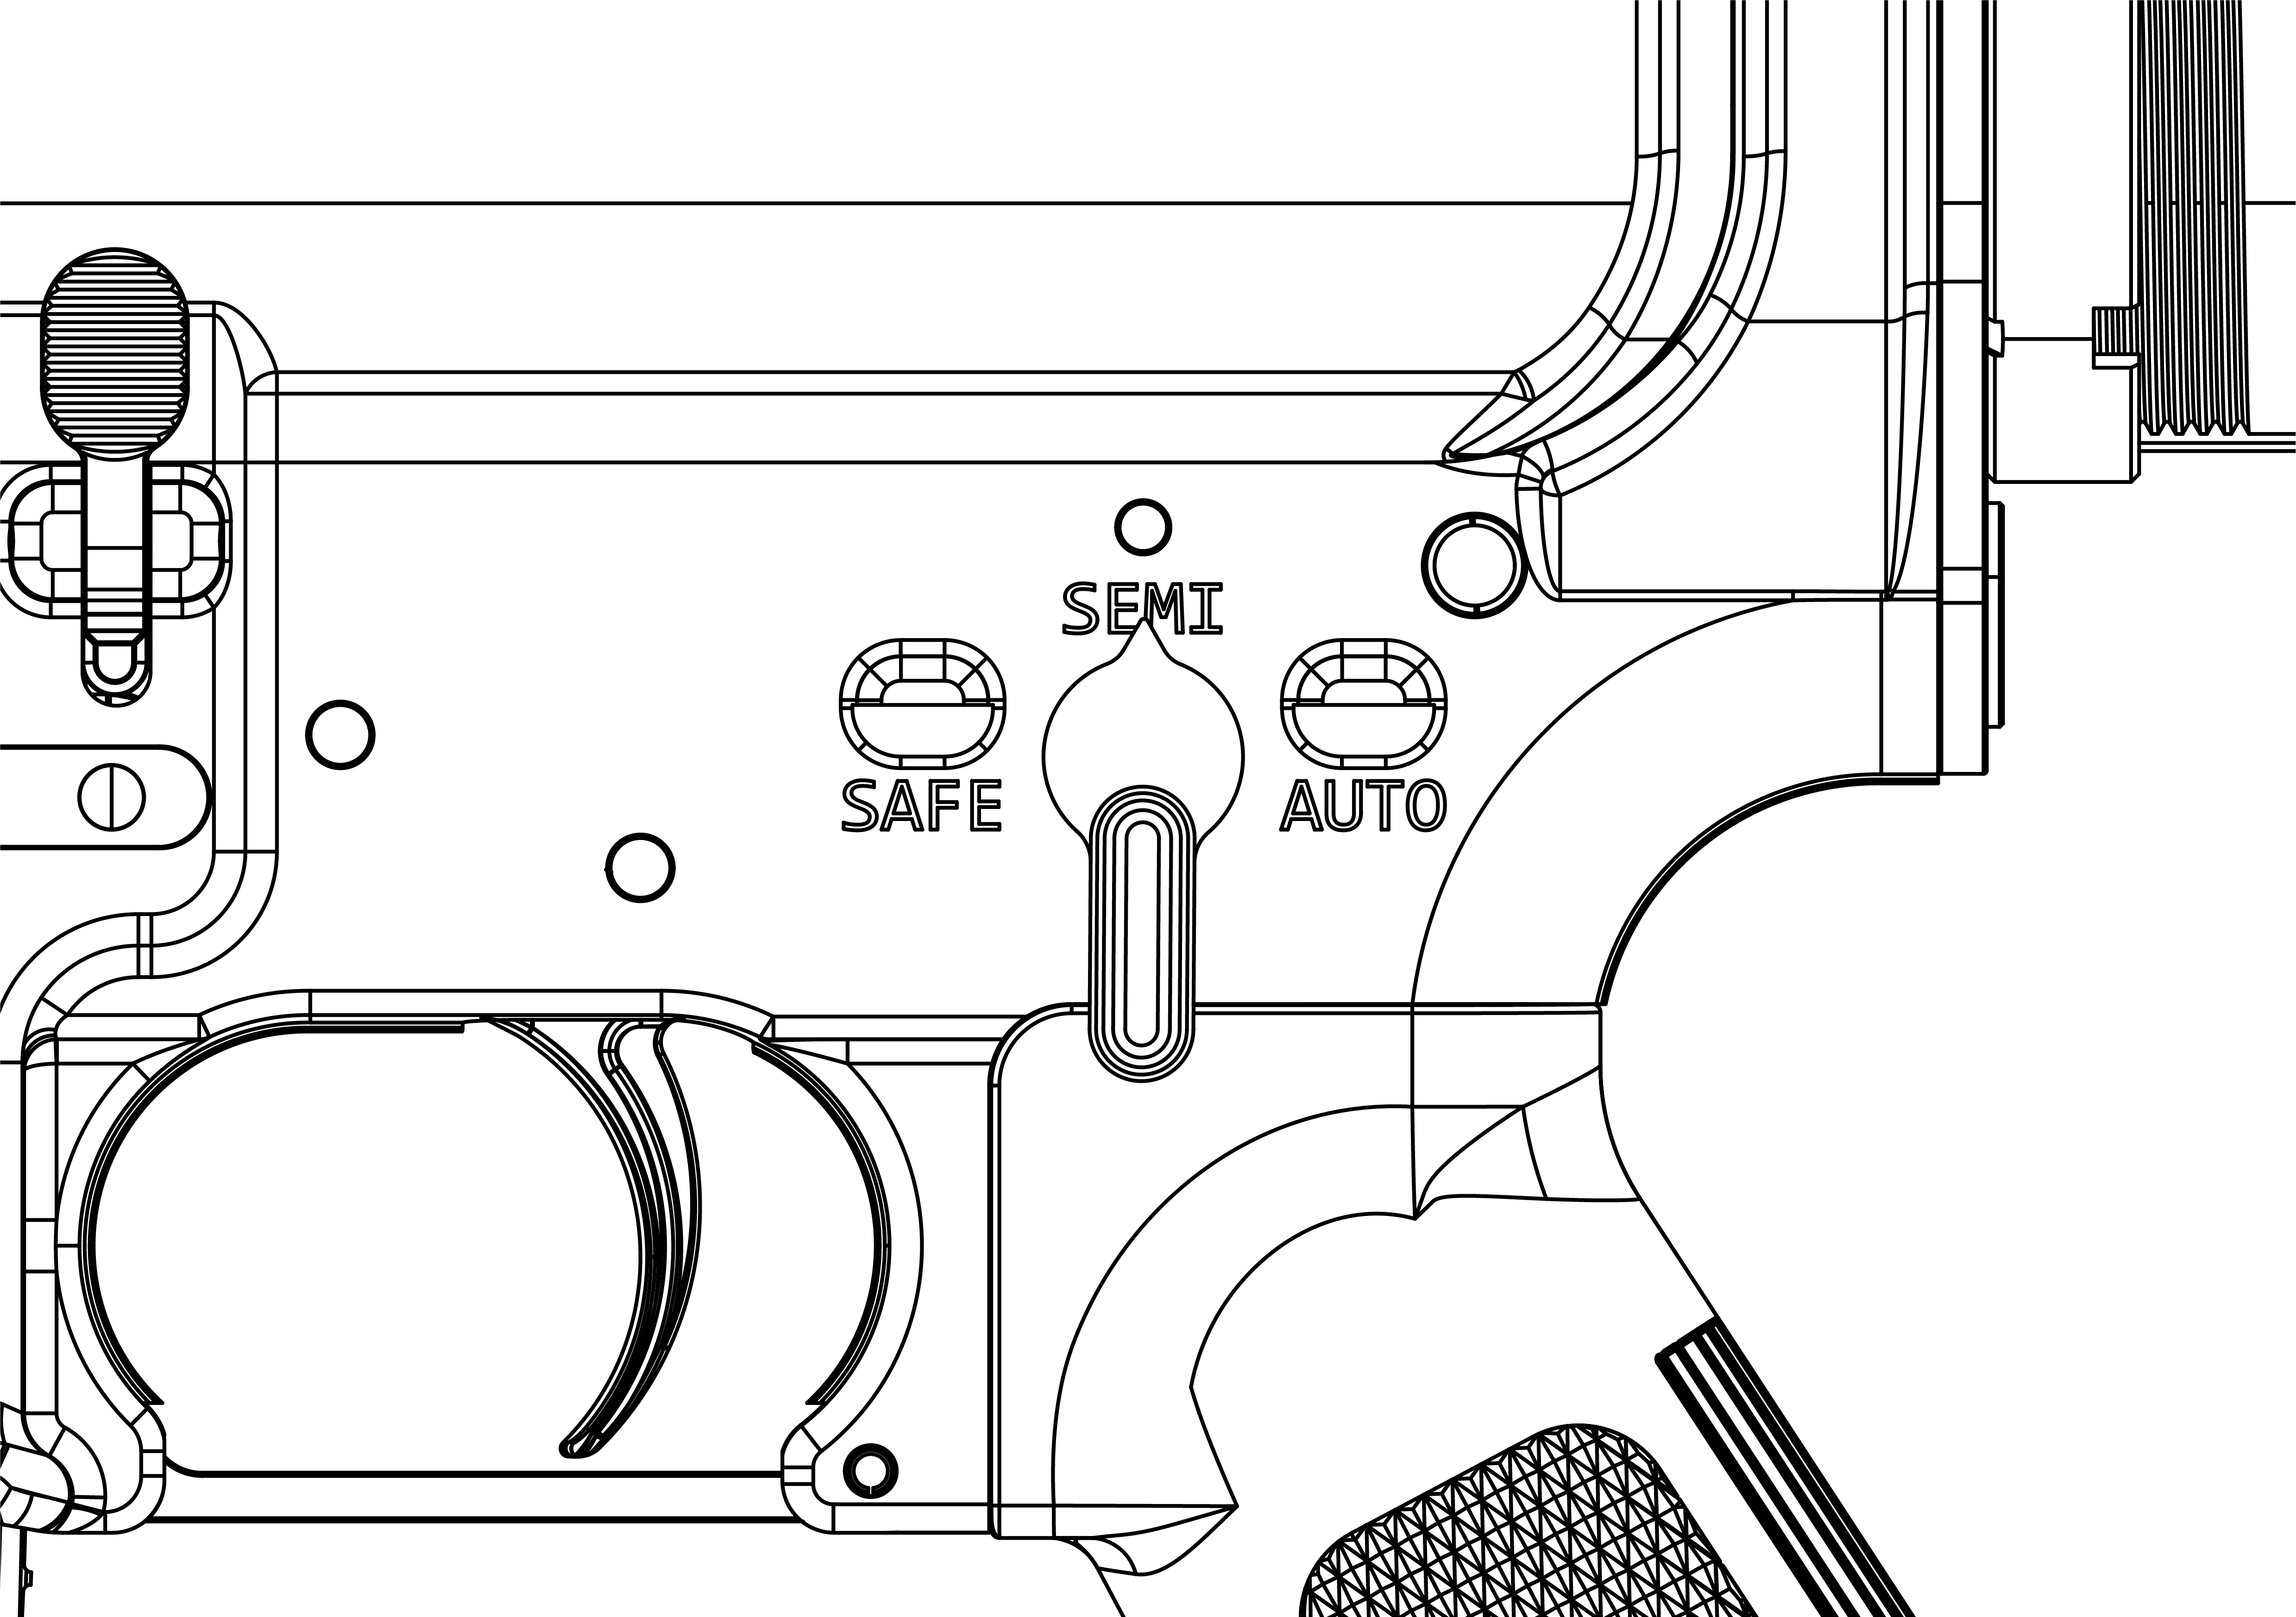
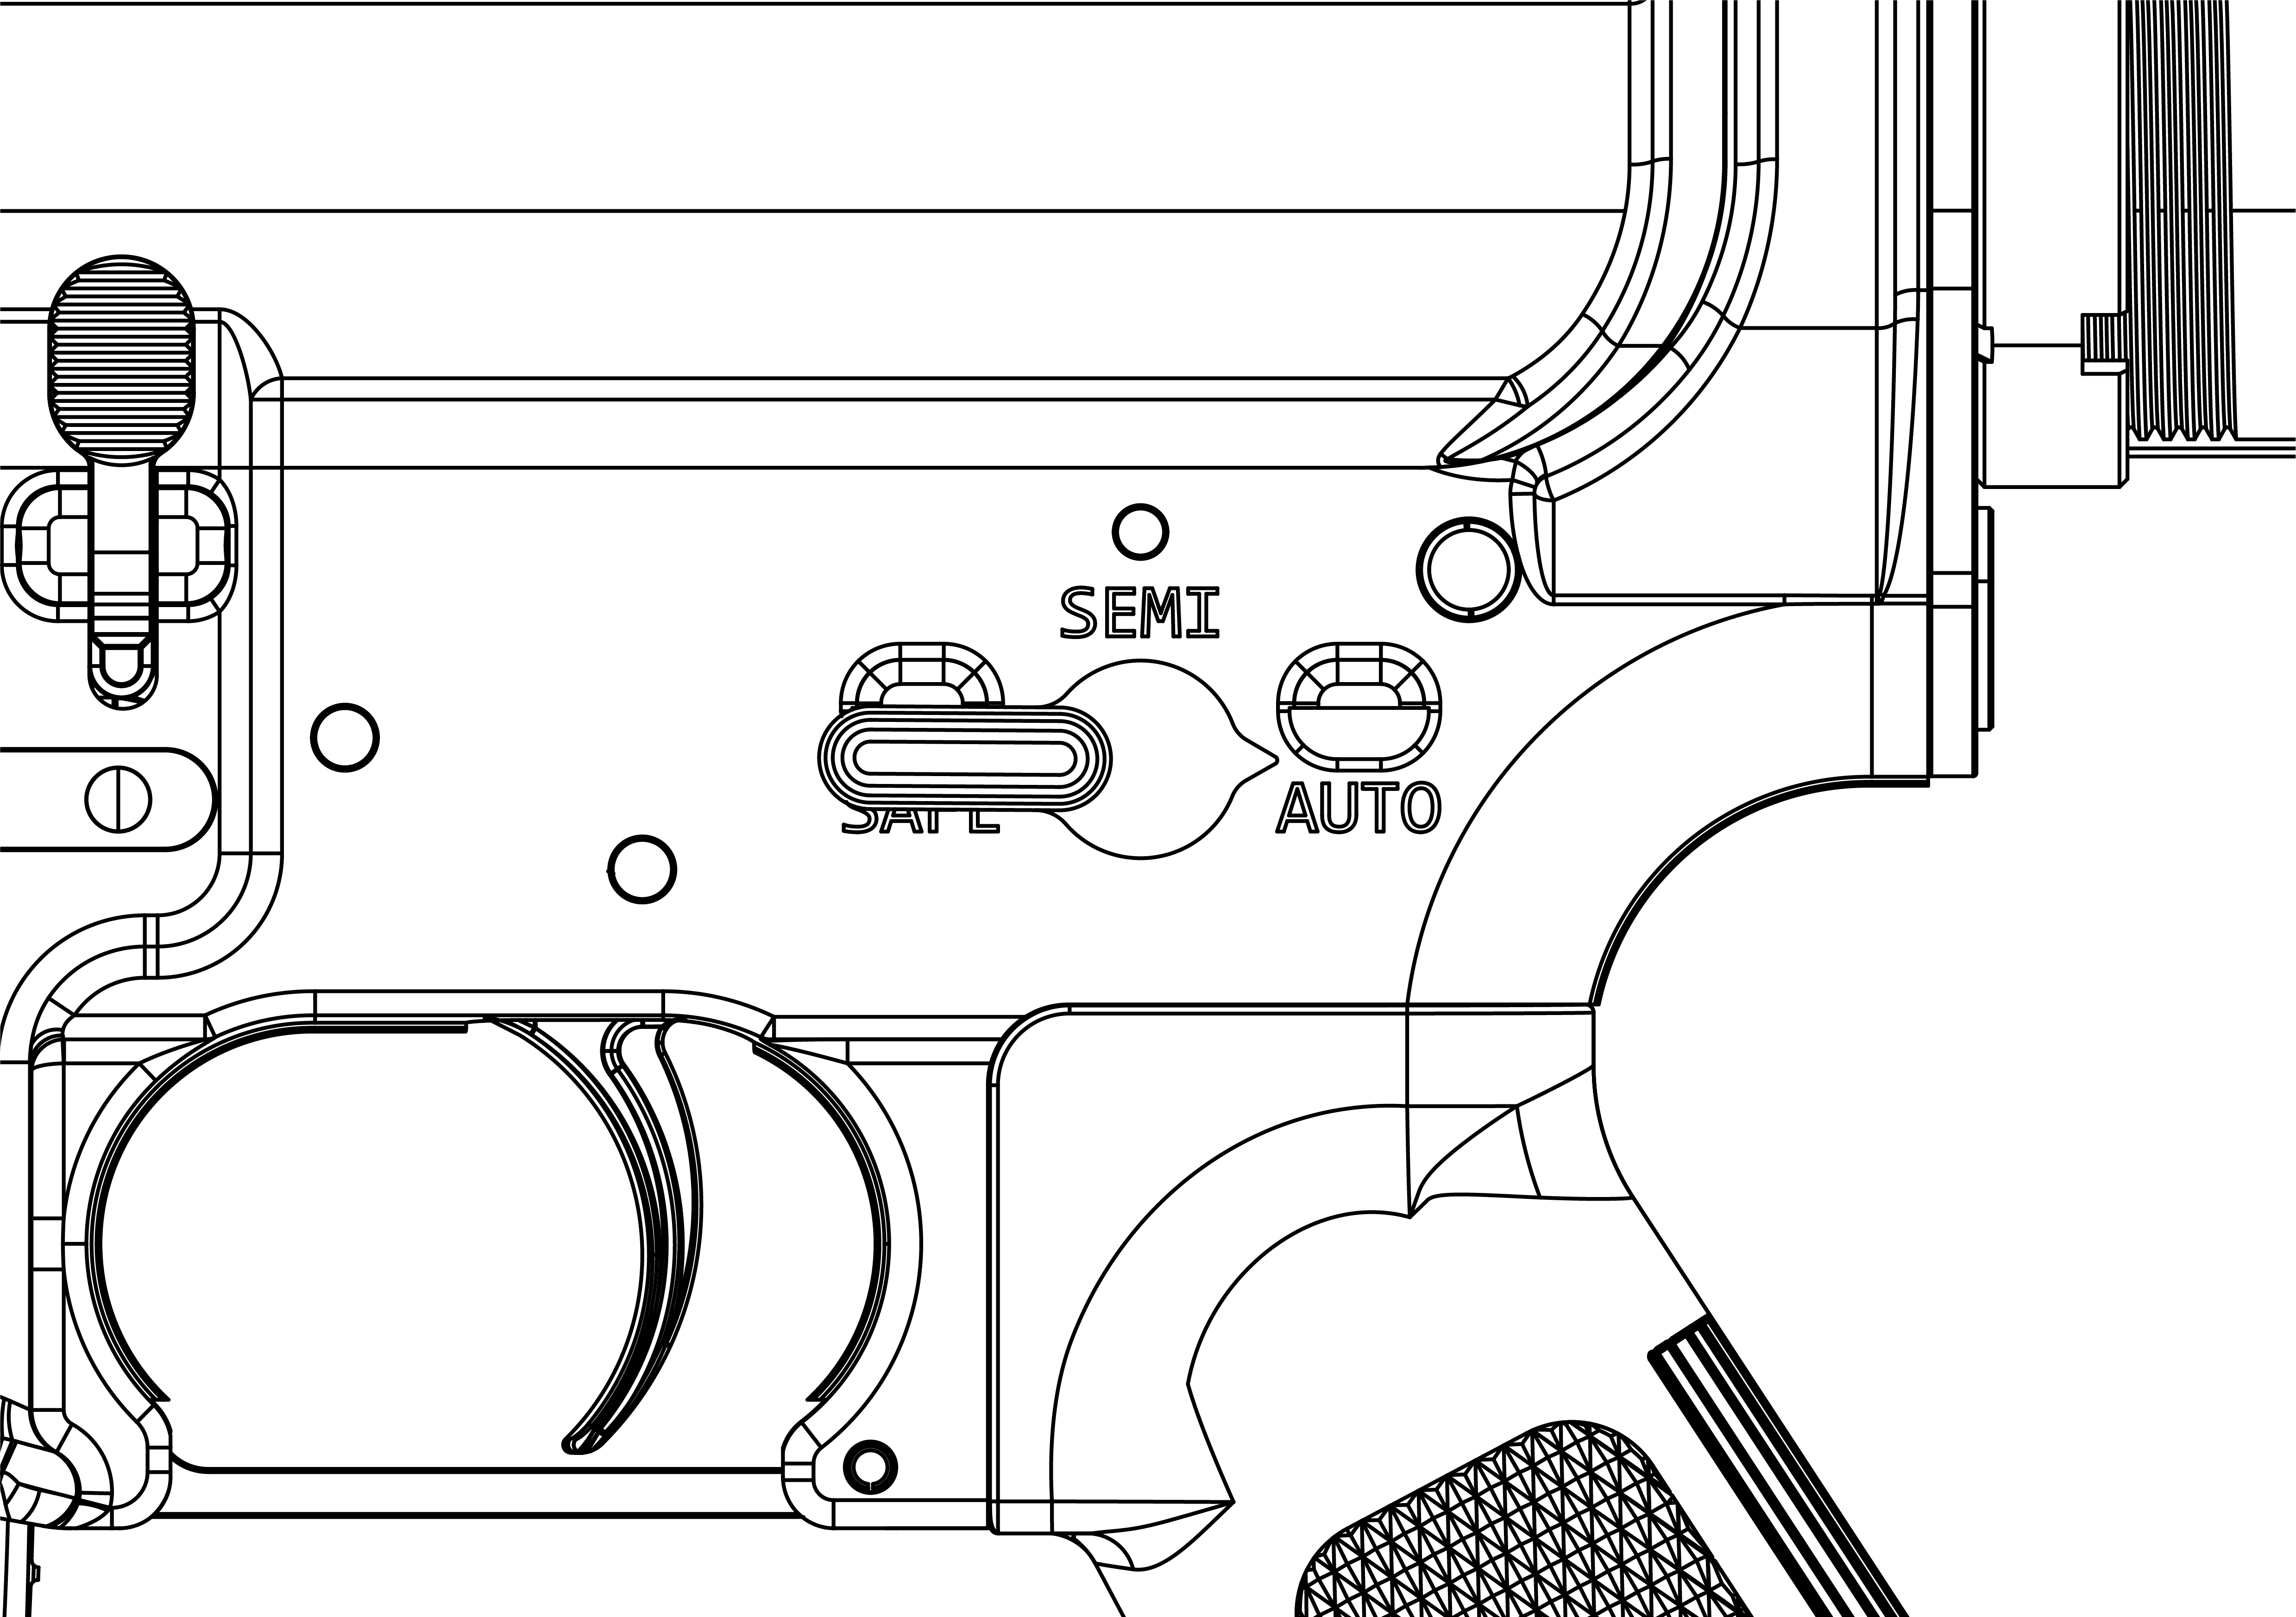
Safety selector lever
The safety selector lever is located on both sides of the lower receiver and has three positions:
| Safe | Semi | Auto |
| Blocks the trigger mechanism to prevent the hammer from releasing | Fires one shot each time the trigger is pulled. | Fires continuously until the trigger is released or the magazine is empty. |
|
|
|
Bolt-locking safety features
The Rifle VR Controller (VRM4R) can only fire when the bolt is fully secured in the barrel extension.
The bolt carrier and operating gear are designed to prevent the mechanism from cycling if the bolt is not locked into position. When the bolt moves forward and locks into the barrel extension, a gear inside the lower receiver engages to allow normal cycling of the bolt.
Do not operate the VR Controller if foreign objects are lodged inside the receiver or around the bolt. Debris or improper use can cause damage to internal components and reduce performance.
Operation
The VR Controller simulates standard rifle handling procedures, including loading and firing the Rifle VR Controller (VRM4R).
The following sections describe how to operate the VR Controller safely and effectively during VR training.
Power on/off VR Controller
The VR Controller is powered by a removable 3-cell lithium battery located in the buttstock. Make sure the battery is charged before powering on the controller.
- Charge the VR Controller's battery using the included USB-C cable that plugs into the port on the underside of the buttstock.
- Locate the power switch on the angled side of the buttstock.
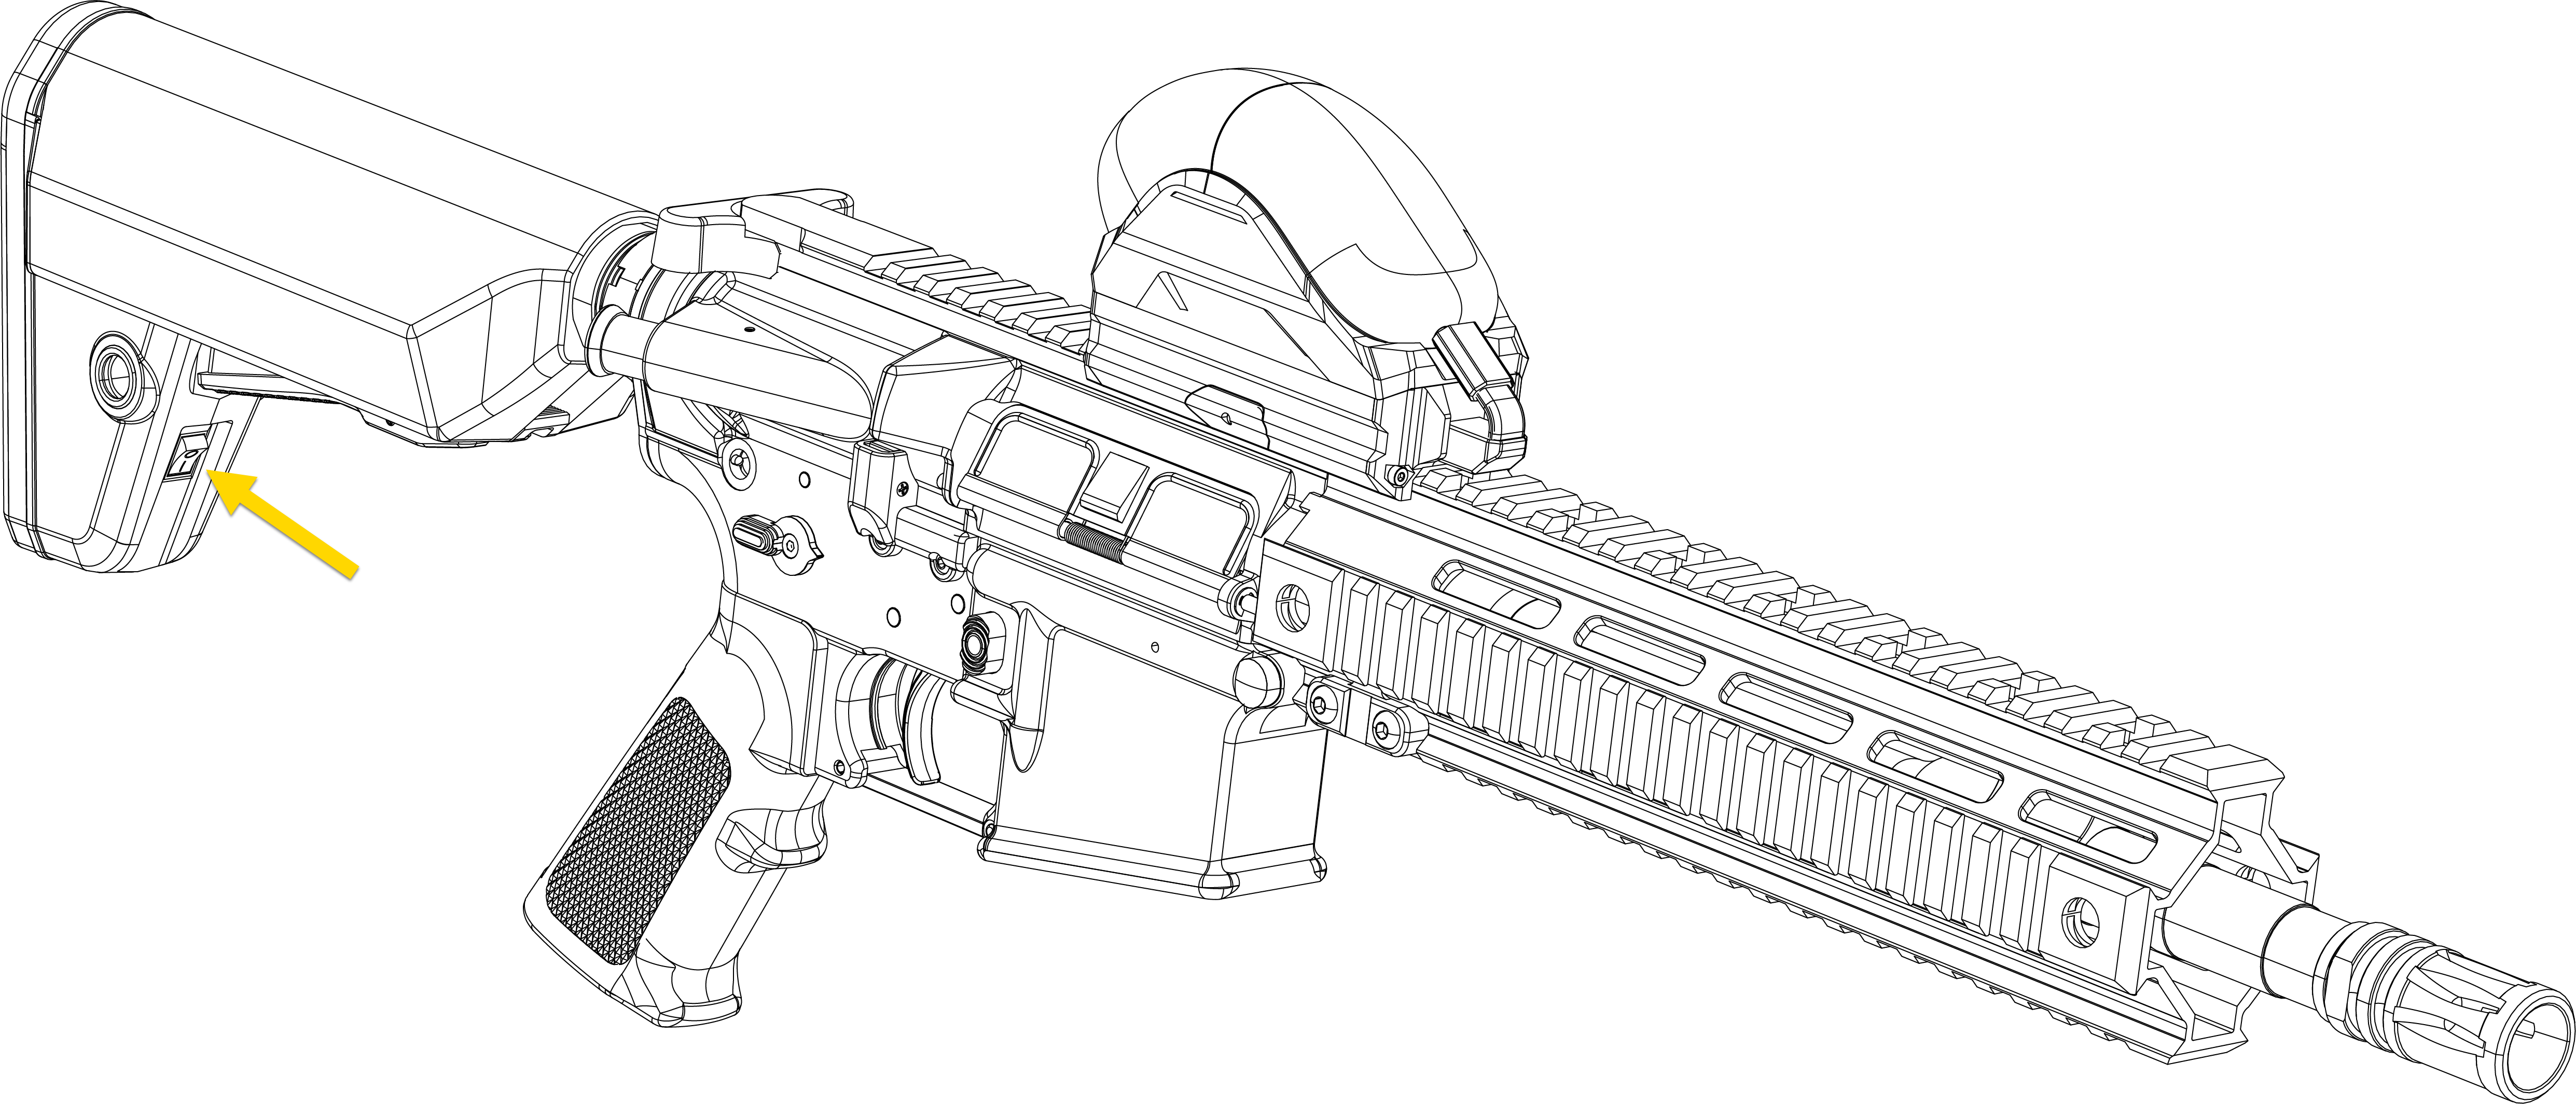
- Press the power switch to the On position. This automatically powers the Axon bridge and HTC tracker.
- To turn the VR Controller off, press the power switch to the Off position.
Use the smart magazine
The VR Controller comes with two smart magazines that have user-selectable round count.
Each smart magazine includes a rechargeable battery and can be charged using the included USB-C cable.
The VR Controller will fire unlimited rounds if the smart magazine is turned off or not inserted into the rifle.
- Slide the dust cover on the bottom of the smart magazine off and charge it using the included USB-C cable.
- Turn on the smart magazine by sliding the lower black switch to the right (when the white button is on top). The screen on the bottom of the magazine will illuminate when powered on.
- Set the round count by pressing the white button until your desired round count is shown on the screen. Available options include: 5, 10, 15, 20, 25, 28, 30, or Random.
- The middle switch on the bottom of the magazine toggles the memory function on or off. When enabled, the selected round count is retained upon removing the magazine from the rifle.
Load the VR Controller
- While pulling back on the charging handle, press the bottom part of the bolt catch to hold the bolt and carrier to the rear.

- Return the charging handle fully forward until it locks in place.
- Insert the magazine back into the well until it clicks into place.
- Pull lightly downward to make sure the magazine is secure.
- Keeping fingers away from the ejection port and muzzle pointed in a safe direction, press the top part of the bolt catch to release the bolt and allow it to move forward, simulating chambering.
The VR Controller simulates bolt movement and chambering for realism; it cannot discharge projectiles or accept live ammunition.
Fire VR Controller
Always keep the VR Controller pointed in a safe direction.
Keep the safety selector lever set to Safe until you are ready to fire the VR Controller.
If you notice a difference in sound or recoil while firing, stop use immediately. Dust or debris may cause operational issues. Pull the charging handle to the rear, remove the magazine, and inspect the bolt and chamber for obstructions. Remove foreign materials before resuming use.
Before firing, practice your stance, sight picture, and breathing for steady aim with the Rifle VR Controller (VRM4R)unloaded.
- Load the VR Controller as described in the section above.
- Place one hand on the handguard and the other on the grip, resting your index finger outside of the trigger guard.
- Raise the VR Controller and pull the buttstock firmly into your shoulder. Adjust the buttstock for proper shoulder placement.
- Aim by aligning the target with the front and rear sights.
- Set the safety selector lever to Semi.
- While maintaining a steady aim, place your index finger on the trigger and squeeze straight back until the trigger releases the hammer. Avoid jerking the trigger to maintain accuracy.
- To fire additional simulated rounds, release the trigger and squeeze it again for each shot until training is completed or the magazine is empty.
- After training:
- Remove your finger from the trigger.
- Set the safety selector lever to Safe.
If the magazine is empty, the bolt locks to the rear. The VR Controller can then be reloaded or inspected to verify that the chamber is clear.
The VR Controller automatically resets and is ready to fire after each simulated shot until the magazine is empty.
This VR Controller can also be fired without a magazine in place.
Charging information
Charge the battery only while it is installed in the VR Controller using the provided USB-C cable. Use a compatible power adapter that provides at least 7.5W of output. Using non-approved chargers or charging methods may damage the battery, cause overheating, or create a fire hazard.
Always inspect the battery and charging equipment before use. If any component appears damaged, stop use and contact your Axon Representative.
The VR Controller's charging port is located on the underside of the stock. Charge with any powered USB-c cable.

There is a button and four LEDs next to the USB-C port.
The first LED shows charging status:
- Red: Charging
- Green: Fully charged
- Flashing red and green: Charging error
Press the button to check the battery's state of charge:
- One white LED: Approximately 33% charged
- Two white LEDs: Approximately 66% charged
- Three white LEDs: Fully charged