Delete and restore evidence
Watch thisvideoto learn how to delete and restore evidence.
Delete evidence
When you need to delete evidence files, you can do this from the results of an evidence search. Evidence that you delete is added to a deletion queue based on the retention policy of your Recycle Bin. This prevents evidence from being unintentionally deleted. To delete evidence, complete the following:
- Sign-in to your Axon Evidence Local account.
- Select Evidencefrom the top menu and then search for the evidence you want to delete. For more information, seeHow to Search for Evidence.
- For each evidence file that you want to delete, select the check box to the left of the evidence.
- Select More actions (•••), and then select Delete.
- In the confirmation window, select Delete. The status of the evidence in the search results changes to Queued for Deletion. Files marked for deletion move to a holding queue based on the retention policy of the agency, where they remain recoverable by an administrator before being permanently deleted.
Restore evidence
You can restore evidence that has been queued for deletion from the results of an evidence search. Restoring evidence removes it from the deletion queue, unless assigned to a category with a retention period.
Important considerations for restored evidence and retention periods:
- Retention periods: Retention periods are defined at the folder or cabinet level where the evidence is stored.
- Custom metadata or categories: If evidence is assigned a custom metadata or category that is linked to a specific folder or cabinet, the deletion date is determined by the retention policy of that folder or cabinet.
To restore evidence, complete the following:
- Select Evidence from the top menu.
- Select Show Advanced Search, under Status, select Queued for Deletion.
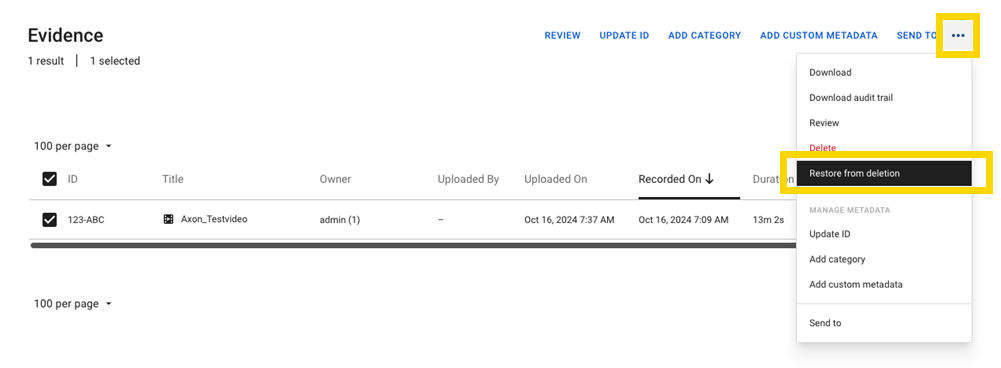
- For each evidence file that you want to restore, ensure the Status is Queued for Deletion, and then select the check box to the left of the evidence.
- Select More actions (•••), and then select Restore from deletion.
- In the confirmation window, select Confirm.
Recycle bin/queued for deletion
Digital evidence marked for deletion, either manually by a user or automatically when its retention period expires has the "Queued for Deletion" status. This status applies to evidence that is scheduled for permanent removal from the system.
The Recycle Bin cannot be used as a filter option or as a searchable folder. Instead, users can distinguish evidence that is queued for deletion using the status-based filtering system. The Advanced Search feature includes a "Queued for Deletion" option, allowing users to search for evidence pending deletion. Evidence that remains in the system and is not marked for deletion continues to have the "Active" status. Evidence with the status “Queued for Deletion” is no longer viewable nor is its metadata editable.
Asset status search
The search results include a Status column, displaying the status of each evidence file.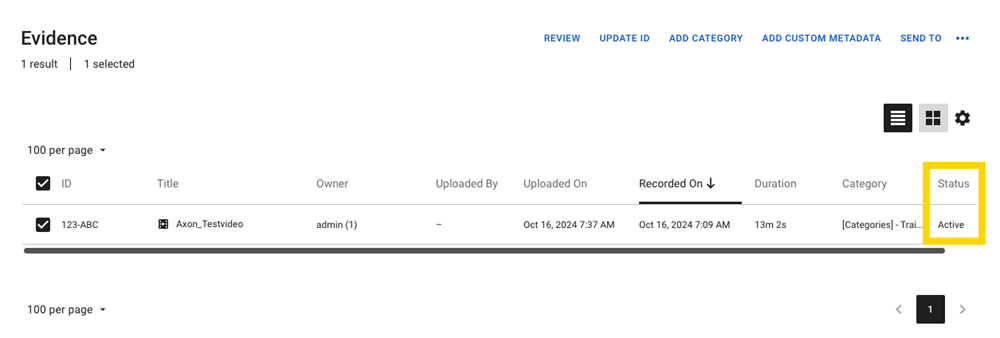
Evidence with the status “Queued for Deletion” will be permanently deleted unless restored by an administrator within the retention period specified for the Recycle Bin.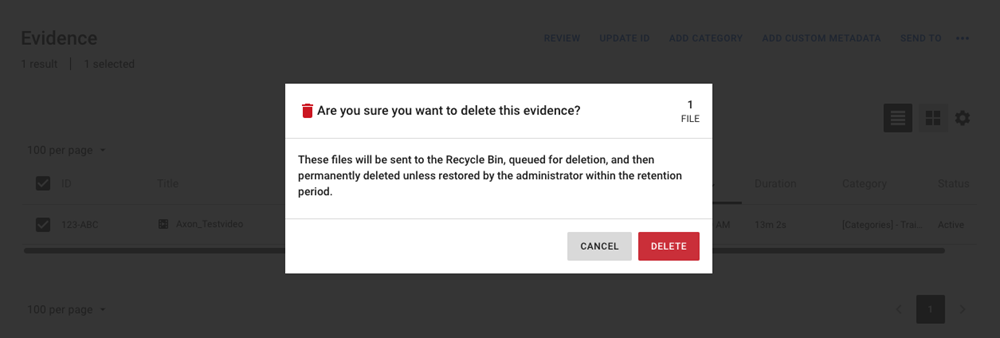
Queued for deletion filter
You can filter evidence that is queued for deletion. Evidence with the status “Queued for Deletion” can no longer be played back, edited, or have its metadata modified. The only exception is Managing User Access, which can still be adjusted. If any other changes are required, the evidence must first be restored.
Restoring evidence
You can restore evidence by doing the following:
- Select the desired evidence files.
- Select More actions (•••).
- Select Restore from Deletion.
Last modified - 01 April 2026