Installation
This section describes how to install a Fleet 3 wireless microphone in a vehicle. Ensure you have all the following parts: charging base, microphone, ethernet cable, lapel microphone, windshield antenna, microphone mount.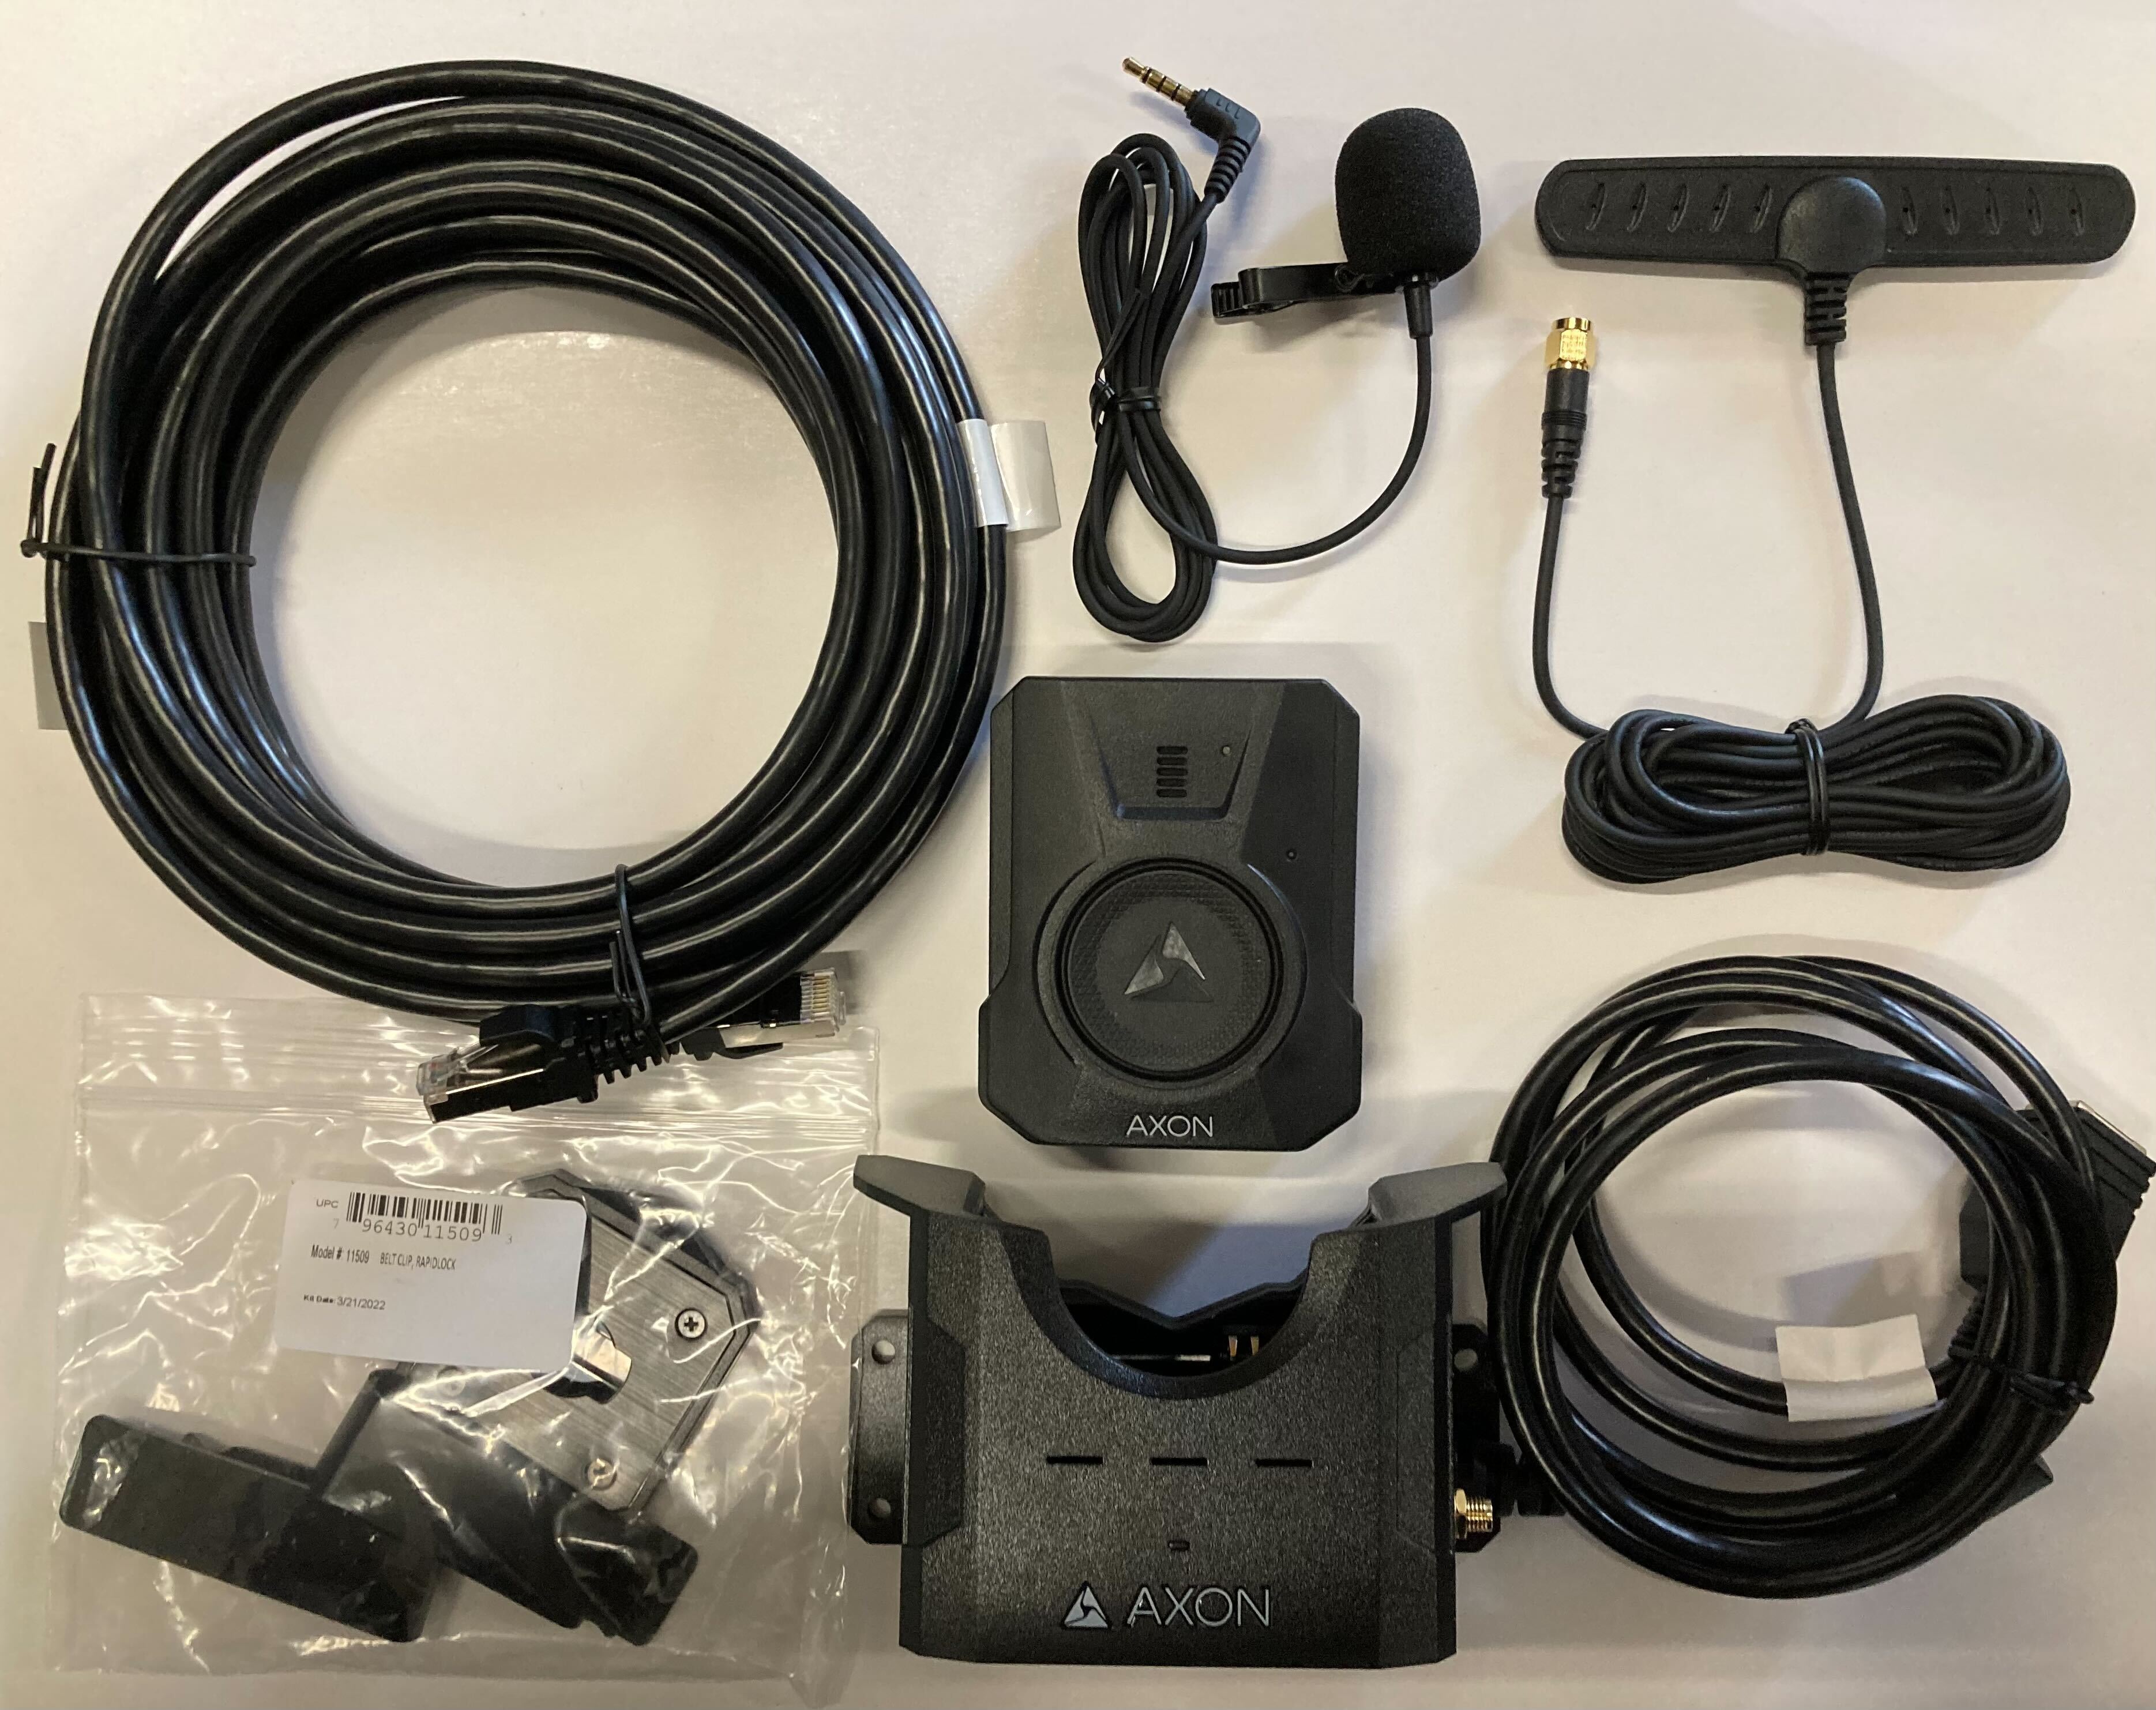
This includes mounting hardware for the charging base:
- (5) self-drilling #8 x ¾ screws
- (5) 8/32” 0.50 in, pan head Phillips screws
- (5) 8/32” hex nuts
- Alcohol prep wipe
Before you start
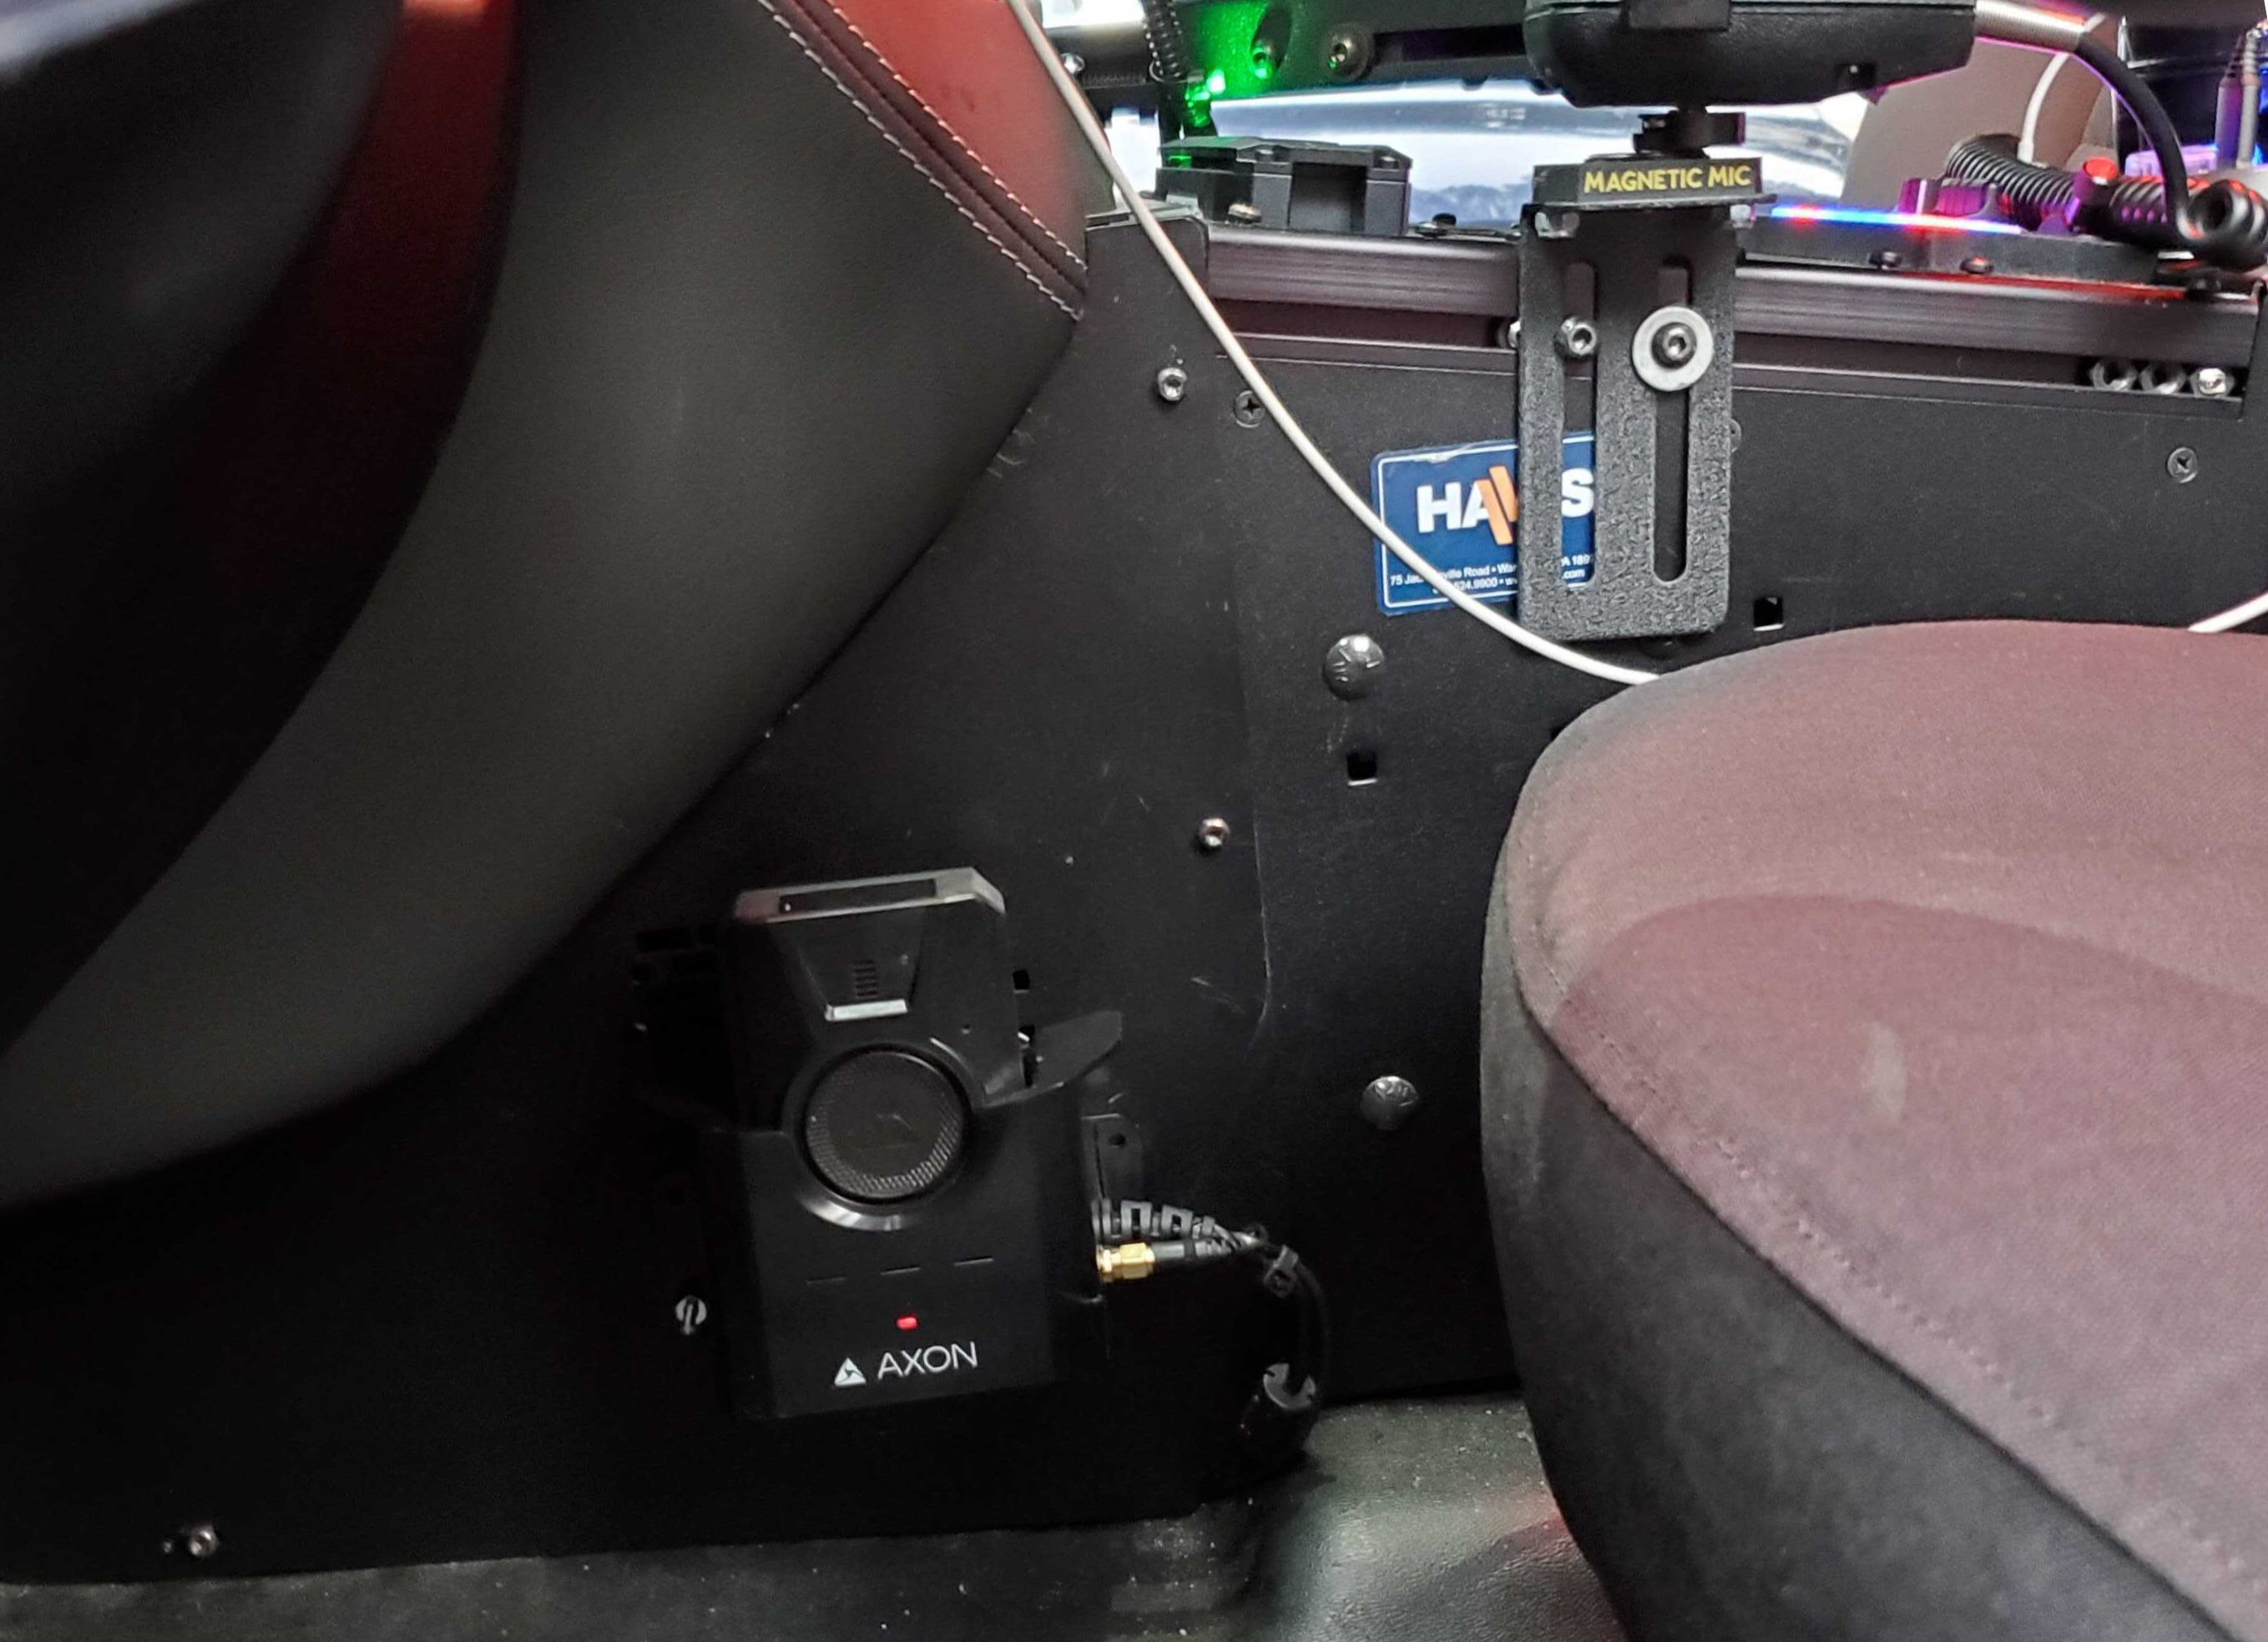
Identify a mounting location for the charging base. Ideal locations are on the front of the prisoner partition adjacent to the driver’s seat or on the side of the console. To reduce inadvertent bodily contact with the charging base, consider mounting in on the passenger side of the console.
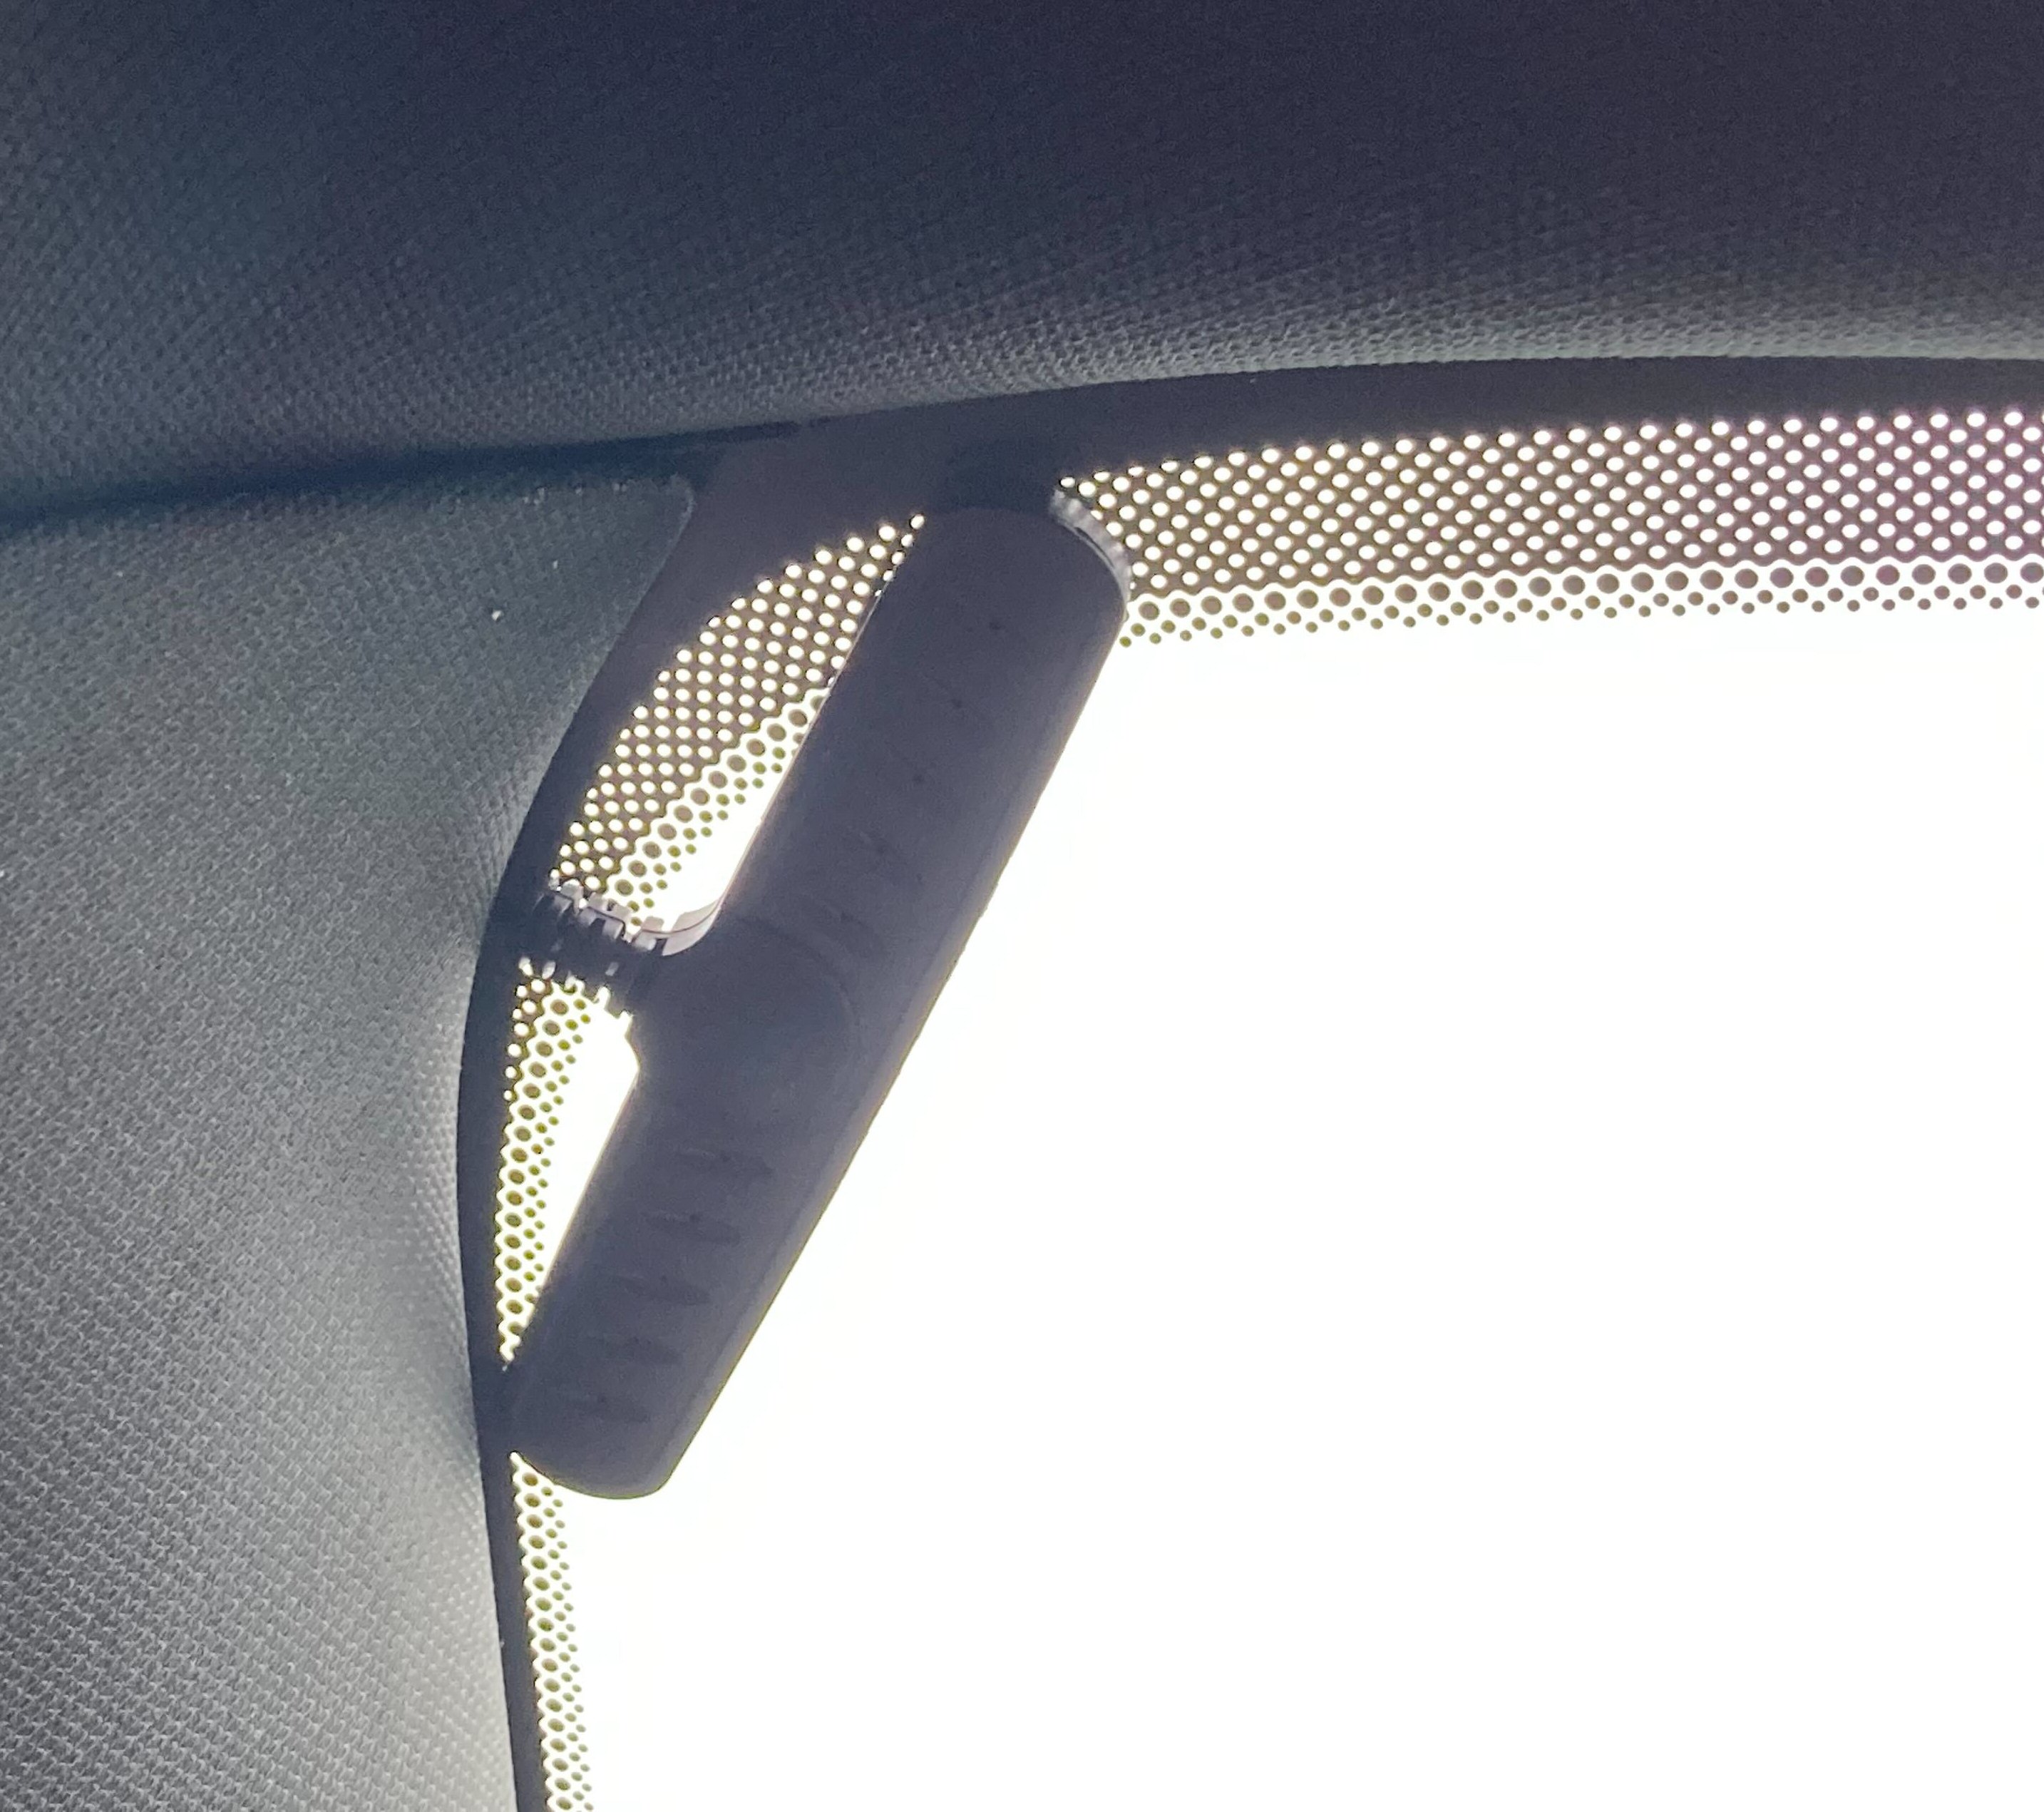
Identify a mounting location on the front windshield for the antenna. Test as needed to find a location that provides the best range and performance. Generally, a top corner works well.
Ensure the antenna cable can reach between the charging base and the antenna.
Install components
- Mount the base using either the nuts and bolts provided or the self-tapping screws. If using hardware, ensure you know what lies behind the mounting surface.
- Use the alcohol preparation wipe to clean the glass surface where the antenna will be mounted, then wipe with a clean, dry cloth.
- Remove the tape backing from the antenna and mount it to the windshield.
- Route the cable to the charging base mounting location.
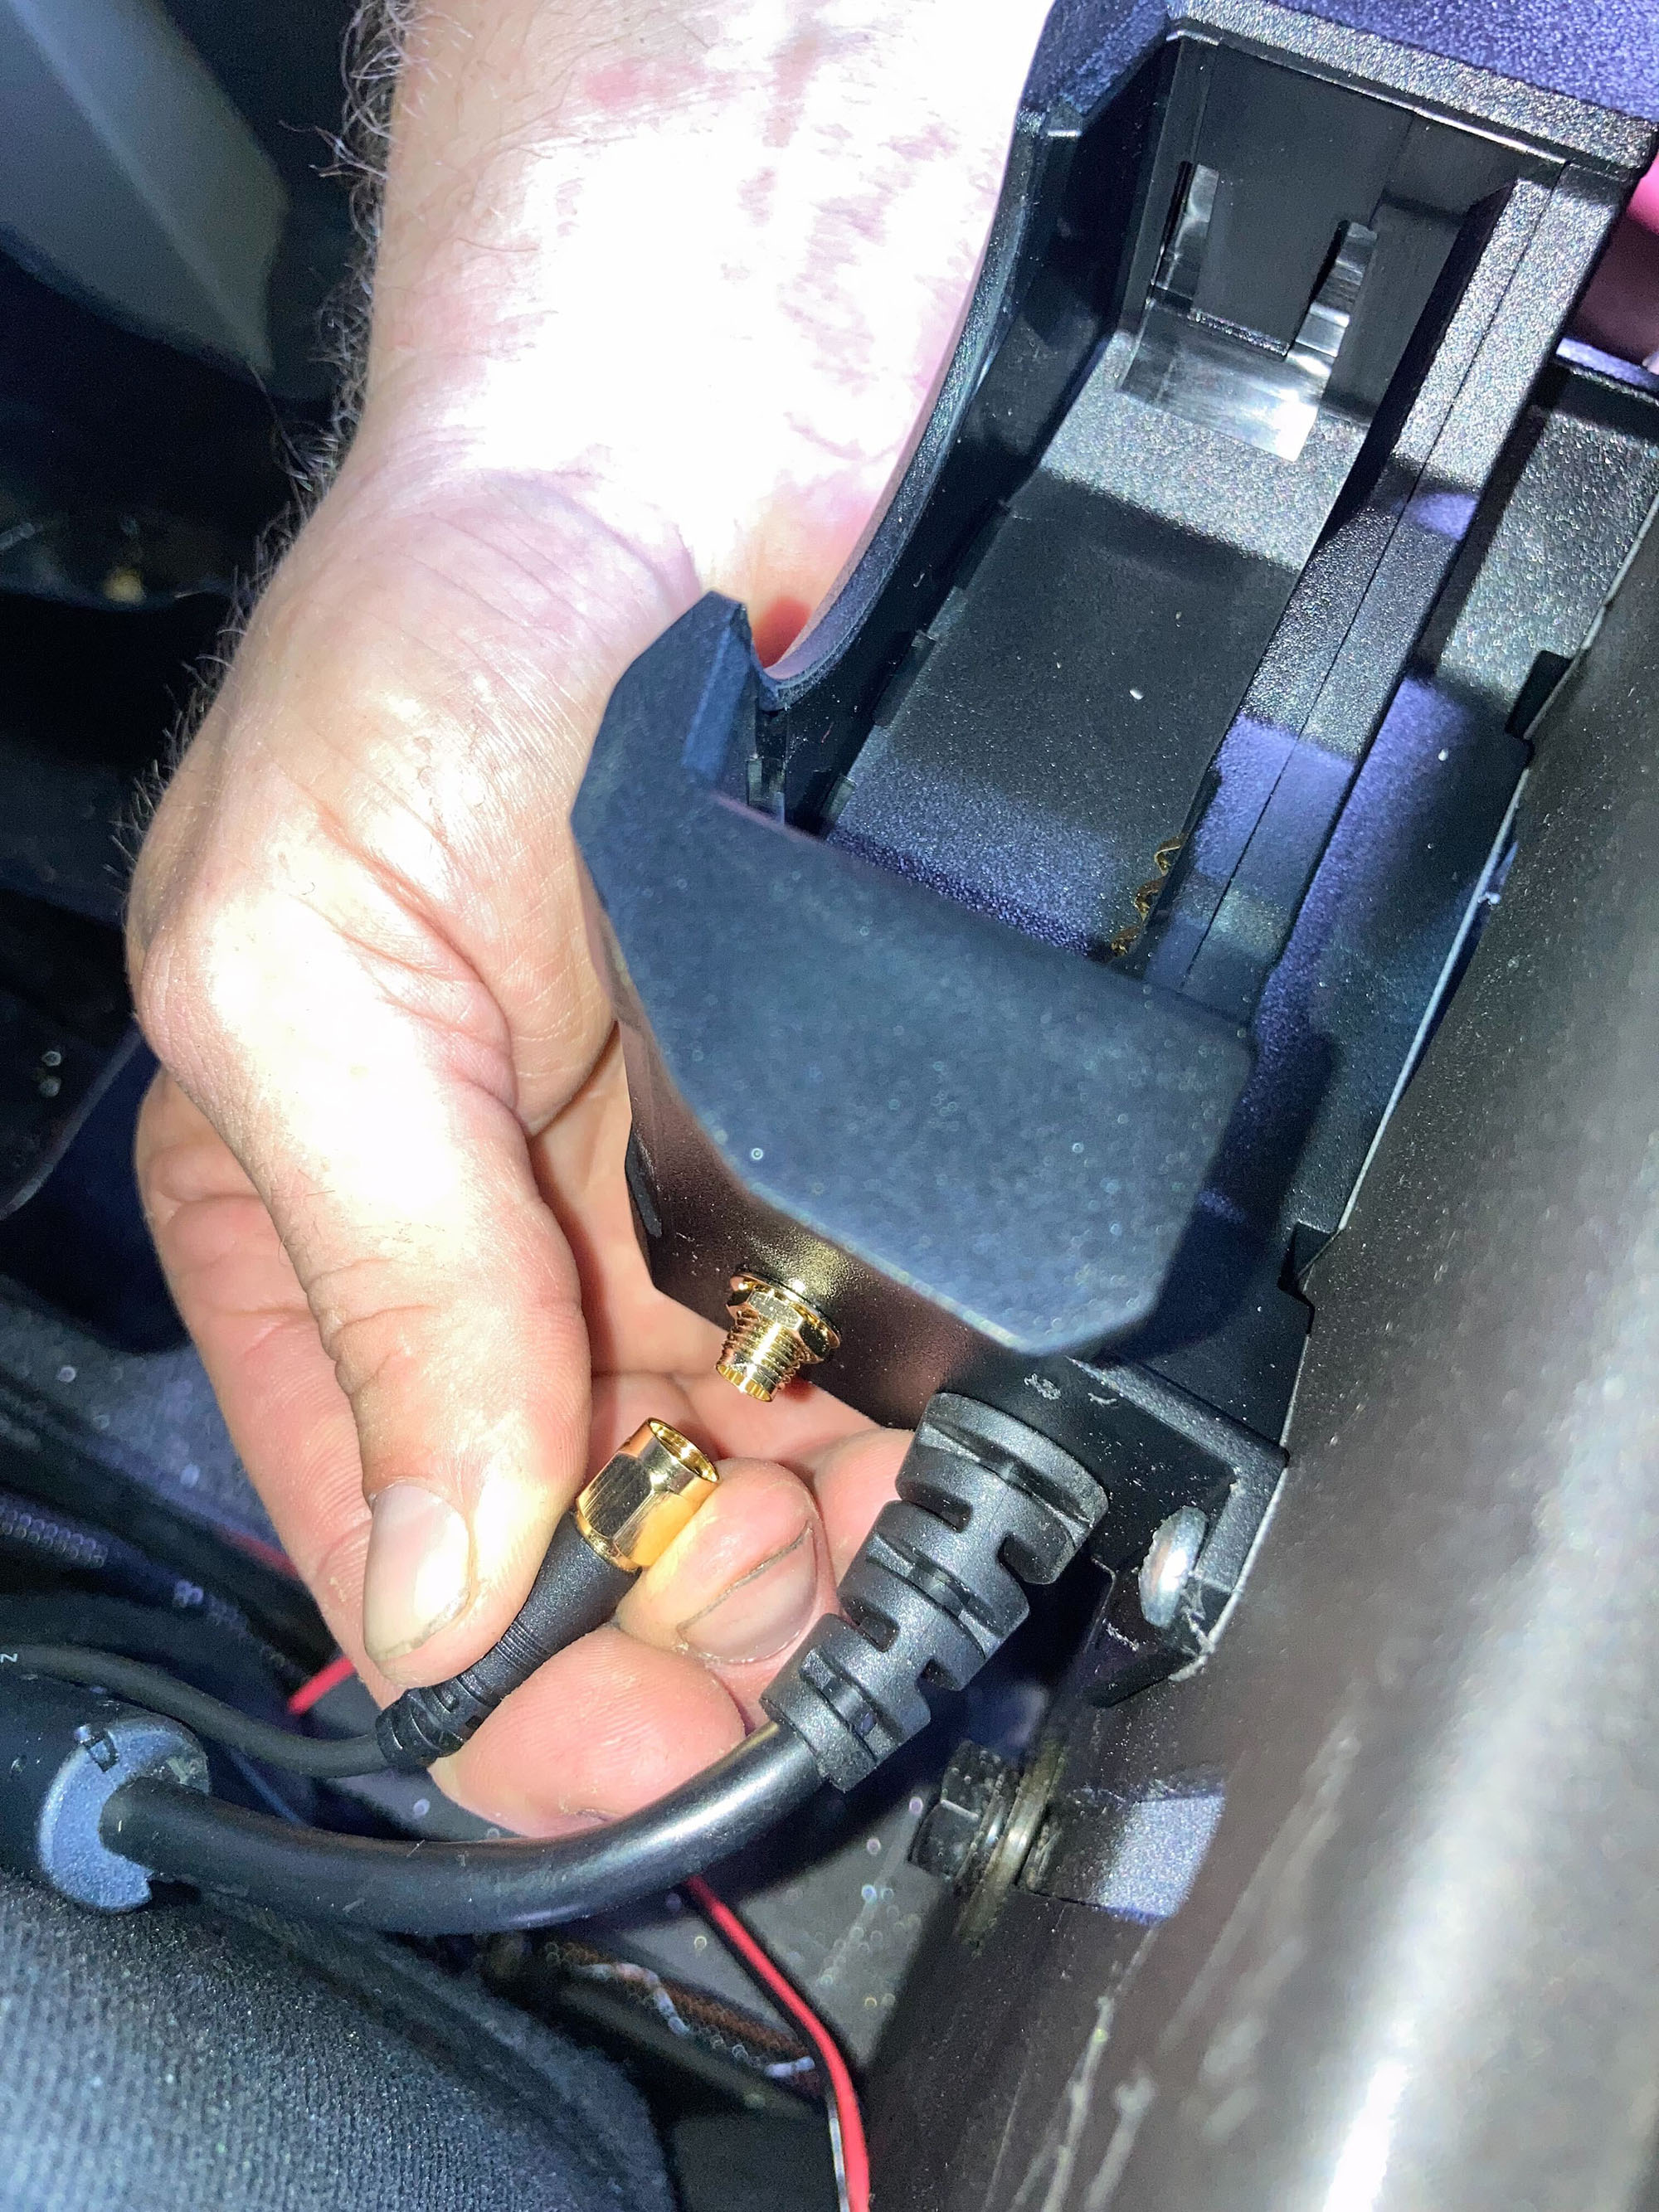
- Connect the windshield antenna SMA connector to the side of the charging base and torque to 4 in/lb. If the connector is over-tightened, it may begin to spin.
- Connect the charging base ethernet pigtail to the hub using the provided ethernet cable. Secure the pigtail and ethernet cable together using the provided ethernet pigtail splints. Refer to the Fleet 3 installation guide on my.Axon on proper splint installation procedures.
- Power on the Fleet 3 system with the wireless microphone docked. The microphone pairs and then enters READY status.
- Undock the microphone and double-press Event on the front. Ensure the Fleet 3 front camera begins recording. This confirms the installation is successful and the communication protocols are functional.
- Stop the recording in Fleet Dashboard. The wireless mic should return to Ready status.
Introduction ï this topic ð Get to know your wireless mic
Last modified - 28 April 2026