Cradlepoint router configuration - Fleet 3
Register and configure each Cradlepoint router from NetCloud Manager (NCM). Make changes in the NCM interface, not the local device UI. Use Groups to configure routers with a common configuration.
See Cradlepoint configuration on my.Axon for additional information on configuring a Cradlepoint router for Axon Fleet 3.
For more information about Cradlepoint devices or NetCloud Manager, see https://customer.cradlepoint.com/s/article/Getting-Started-with-NetCloud-Manager and https://docs.cradlepoint.com/r/IBR900-Getting-Started.
Configuration for Wi-Fi-connected dashboard
This instruction is for using the Cradlepoint user interface. This UI is not controlled by Axon and may have changed since this process was documented here. If you have questions about this process, contact Cradlepoint directly.
- Sign in at https://www.cradlepointecm.com.
- Select the first blue-colored Connect button under Netcloud (not the 2nd one under Cascade).
- If Switch to Classic UI displays at top of page, select it. If Try the New UI displays, proceed to next step.
- Prior to making config changes select Groups in the left-nav.
- Select Add and create a new group named <Agency Name> - Fleet 3 Wireless Dashboard.
- Locate the group the router(s) is/are currently in.
- Select the check box next to the group.
- In the Configuration dropdown, select Export and save the config file with a descriptive filename for use later, such as:
IBR900-<agency-name>-default-config-<date/time>.json. - In the Configuration dropdown, select Copy To and copy the config to the new group created above.
- Match the following settings and then Save:
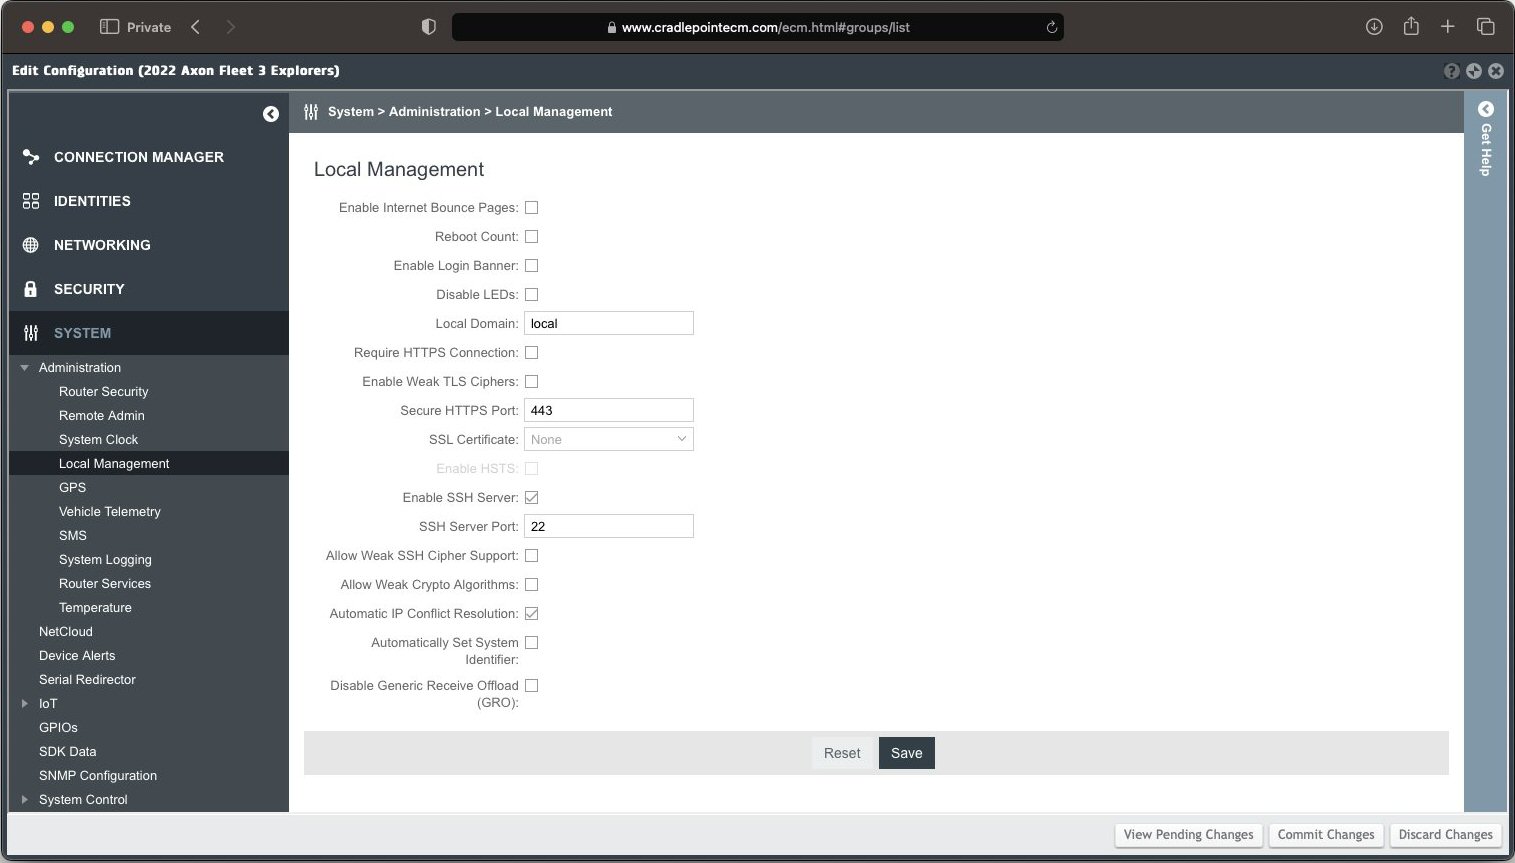
- In the left-nav, select System > GPIOs.
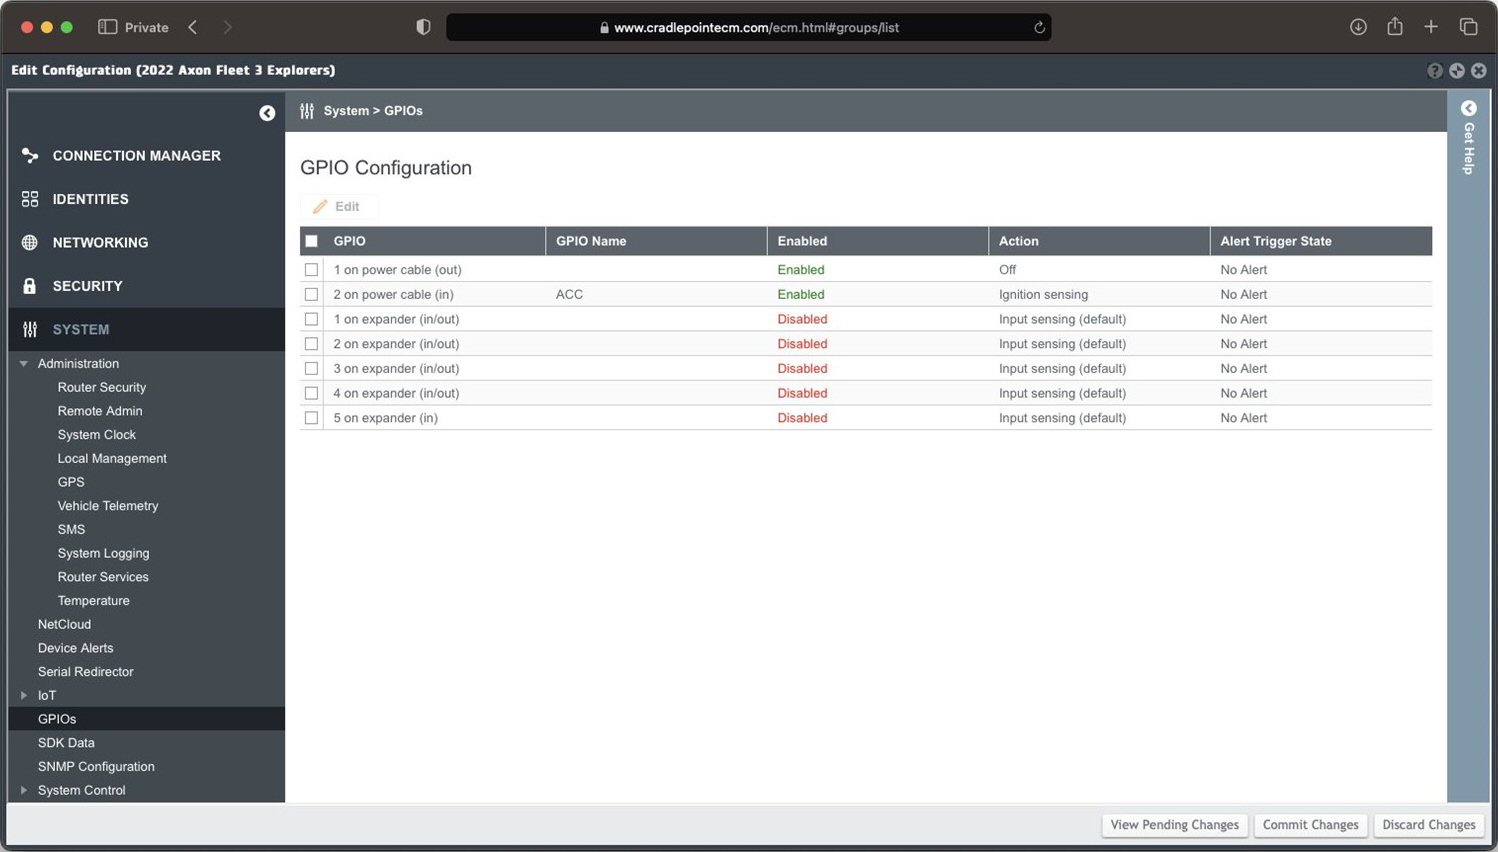
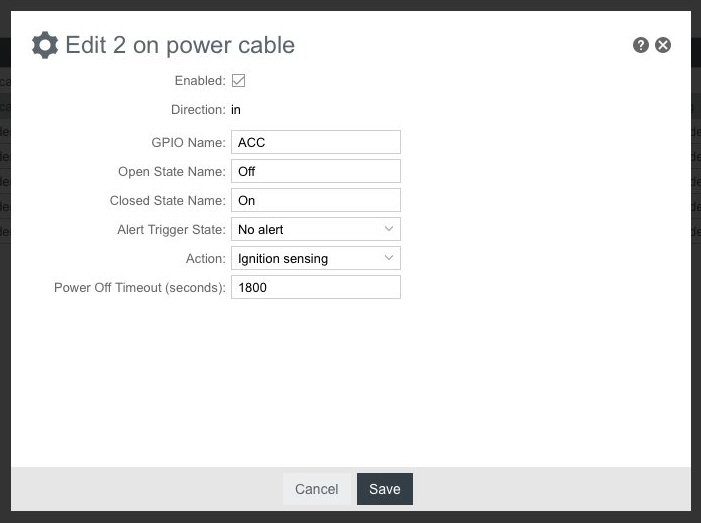
- Select the check box for GPIO #2.
- Select Edit.
- Select the Enabled check box, set the various fields as shown below, and then Save.
- In the left-nav, select Connection Manager > Devices.
- On the WAN Device Interface Profiles & Priority page, keep the entries shown in the image below, but delete other entries if the following conditions do not apply, then Save:
- 5G/LTE Multi-mode Modems – Keep if you use a 5G-capable Cradlepoint router+modem+SIM combo
- Ethernet – Keep if you connect Cradlepoints to WAN via ethernet (unlikely)
- 3G-only modems – Keep if you only uses 3G (unlikely)
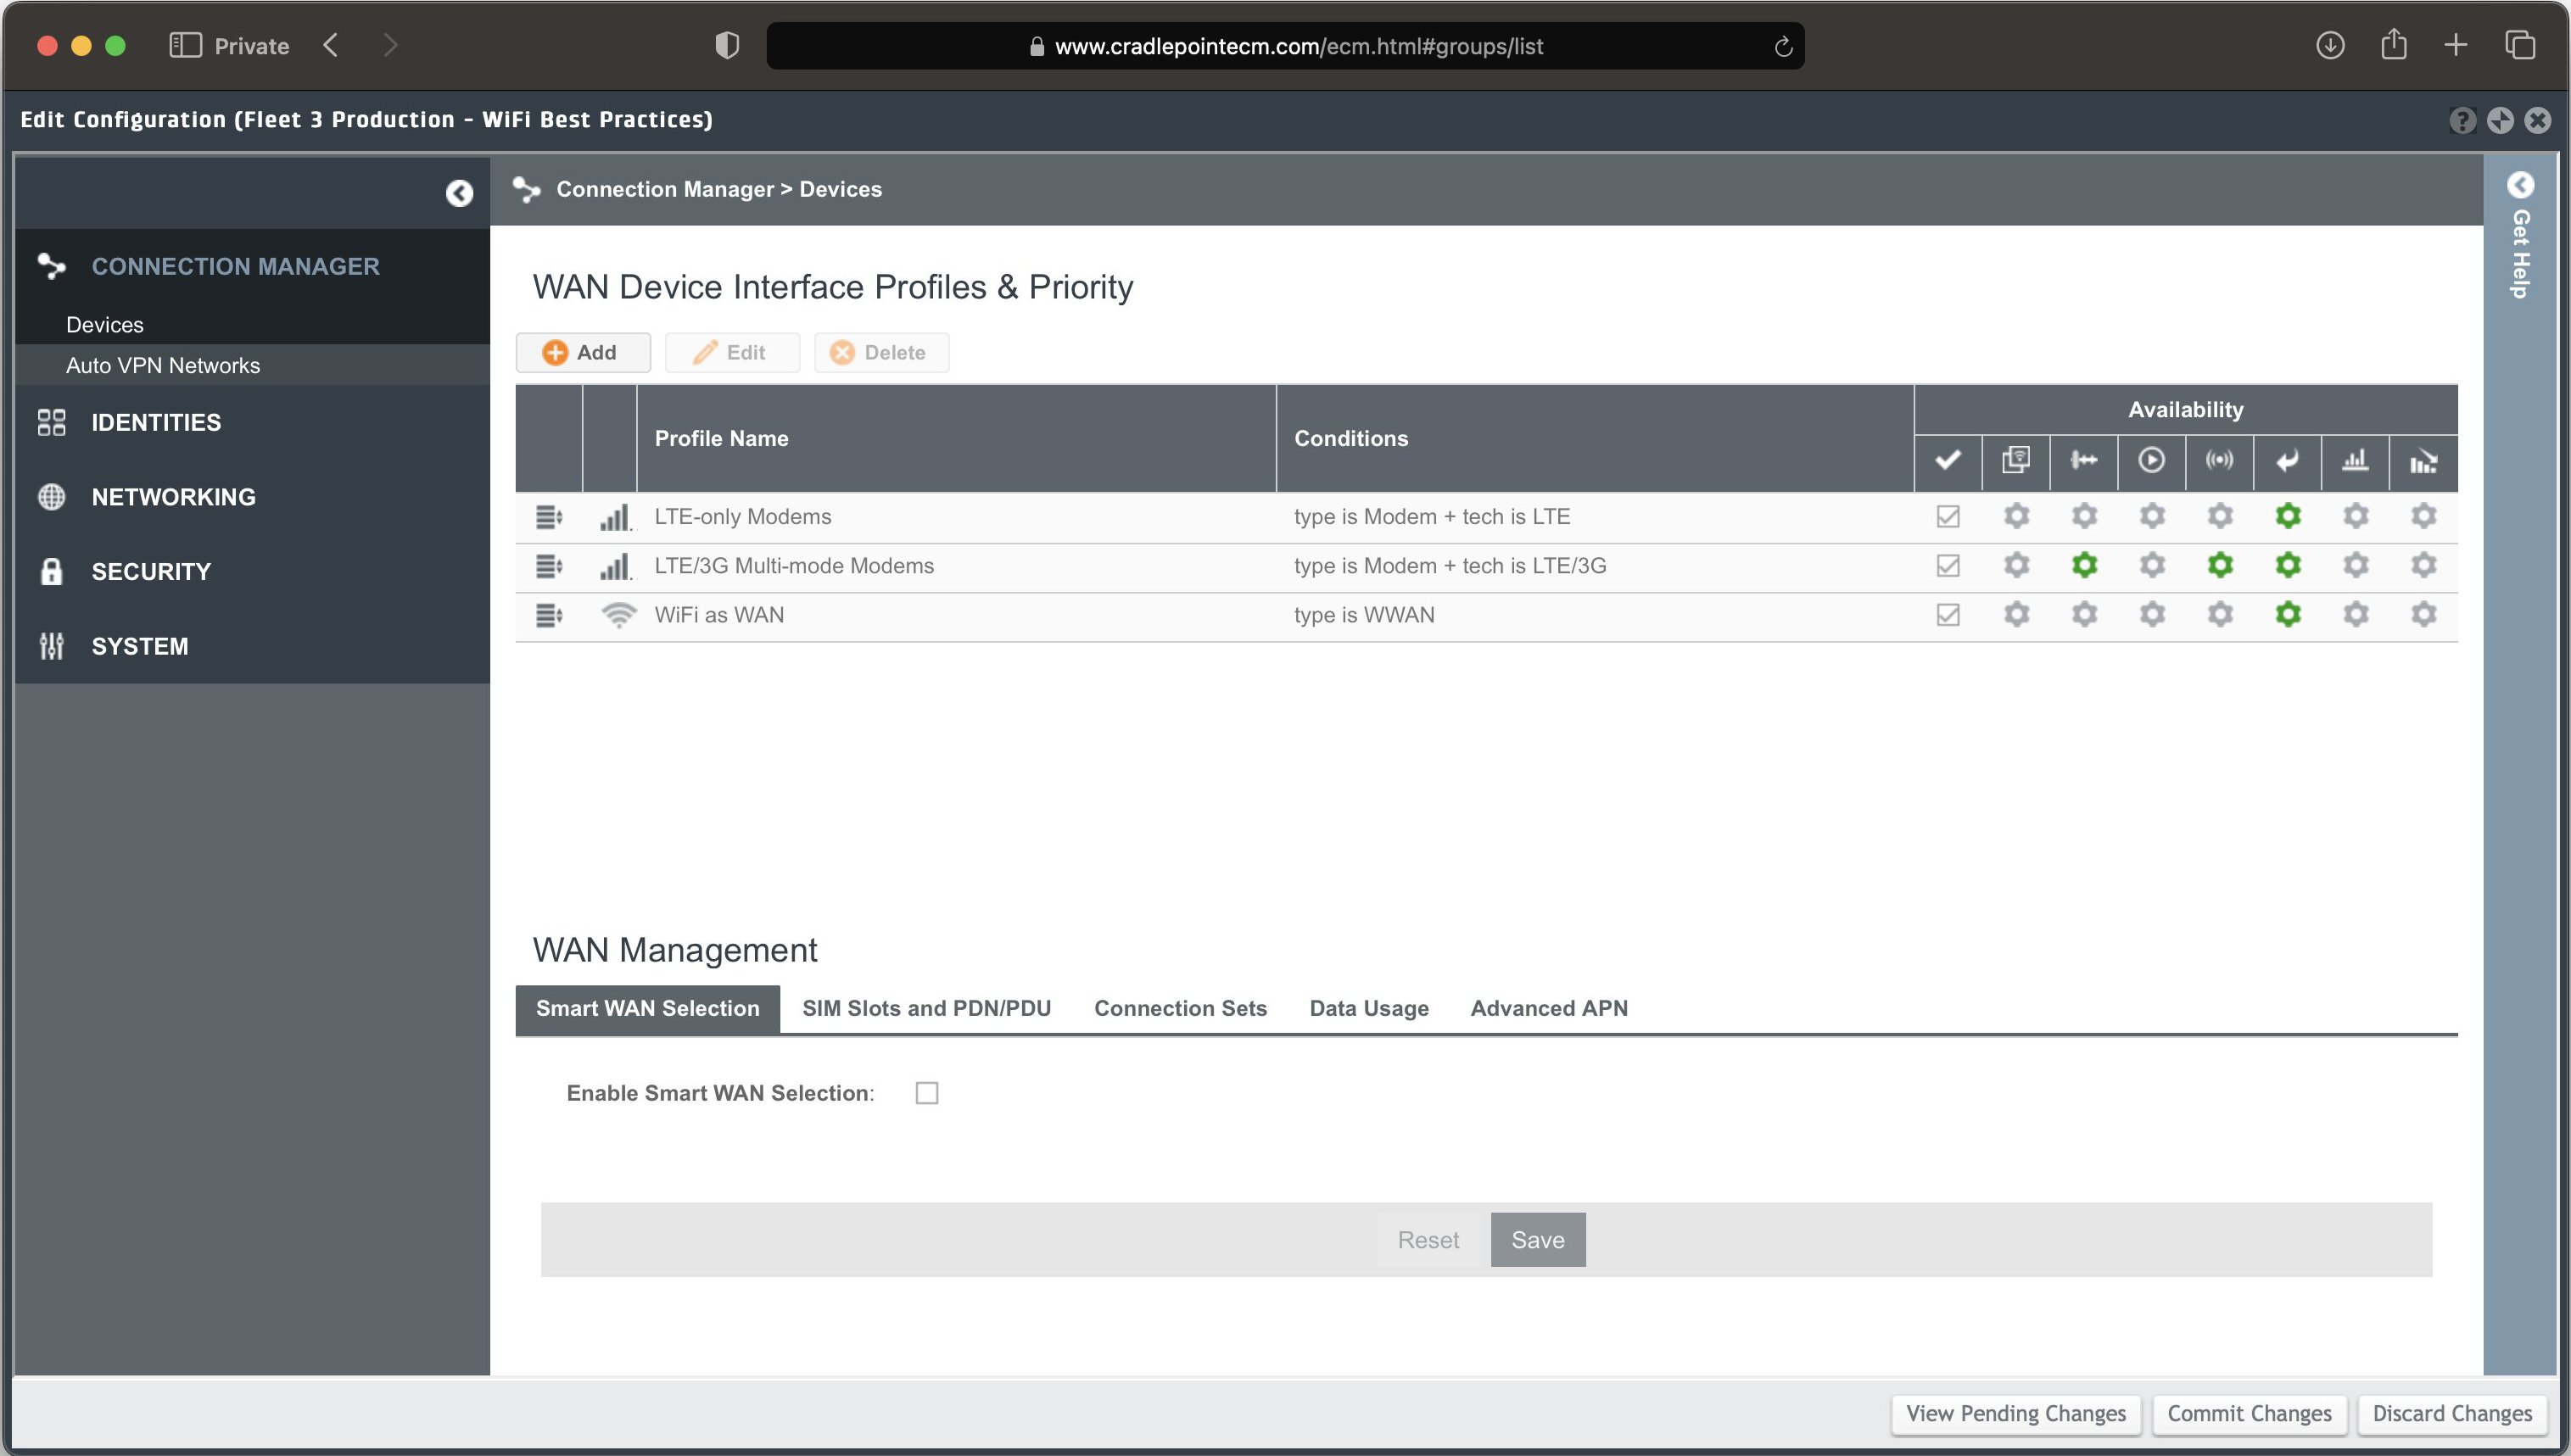
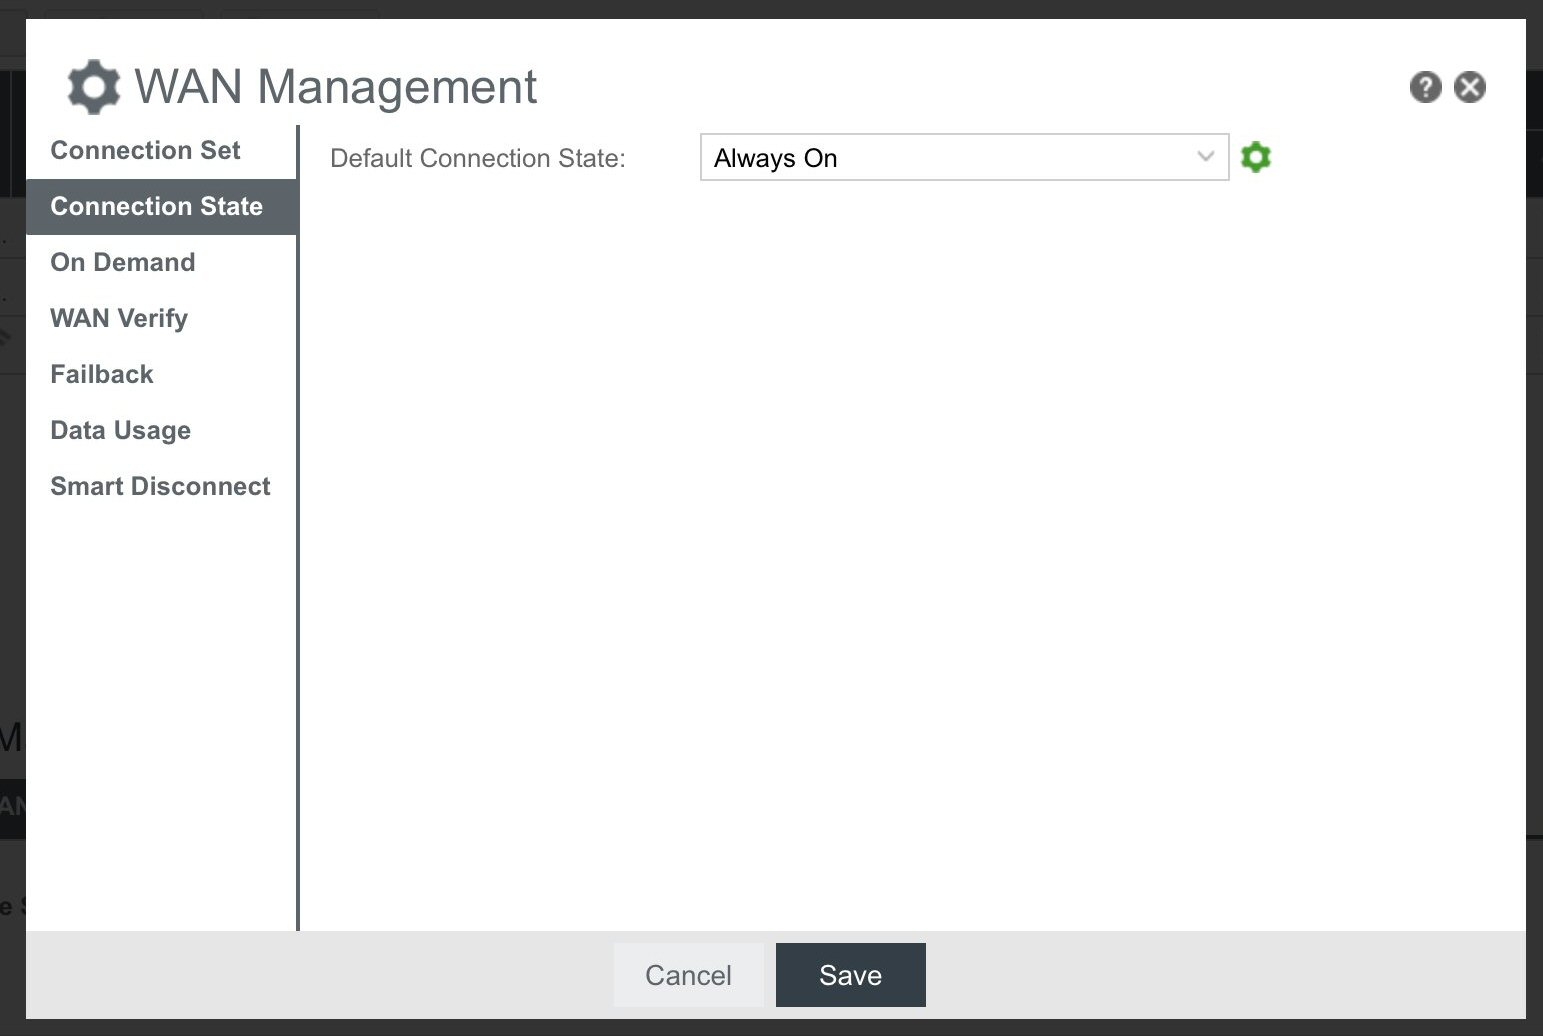
- For LTE/3G Multi-mode Modems, select the second gear from left to open WAN Management.
- Set Default Connection State to Always On and then Save.
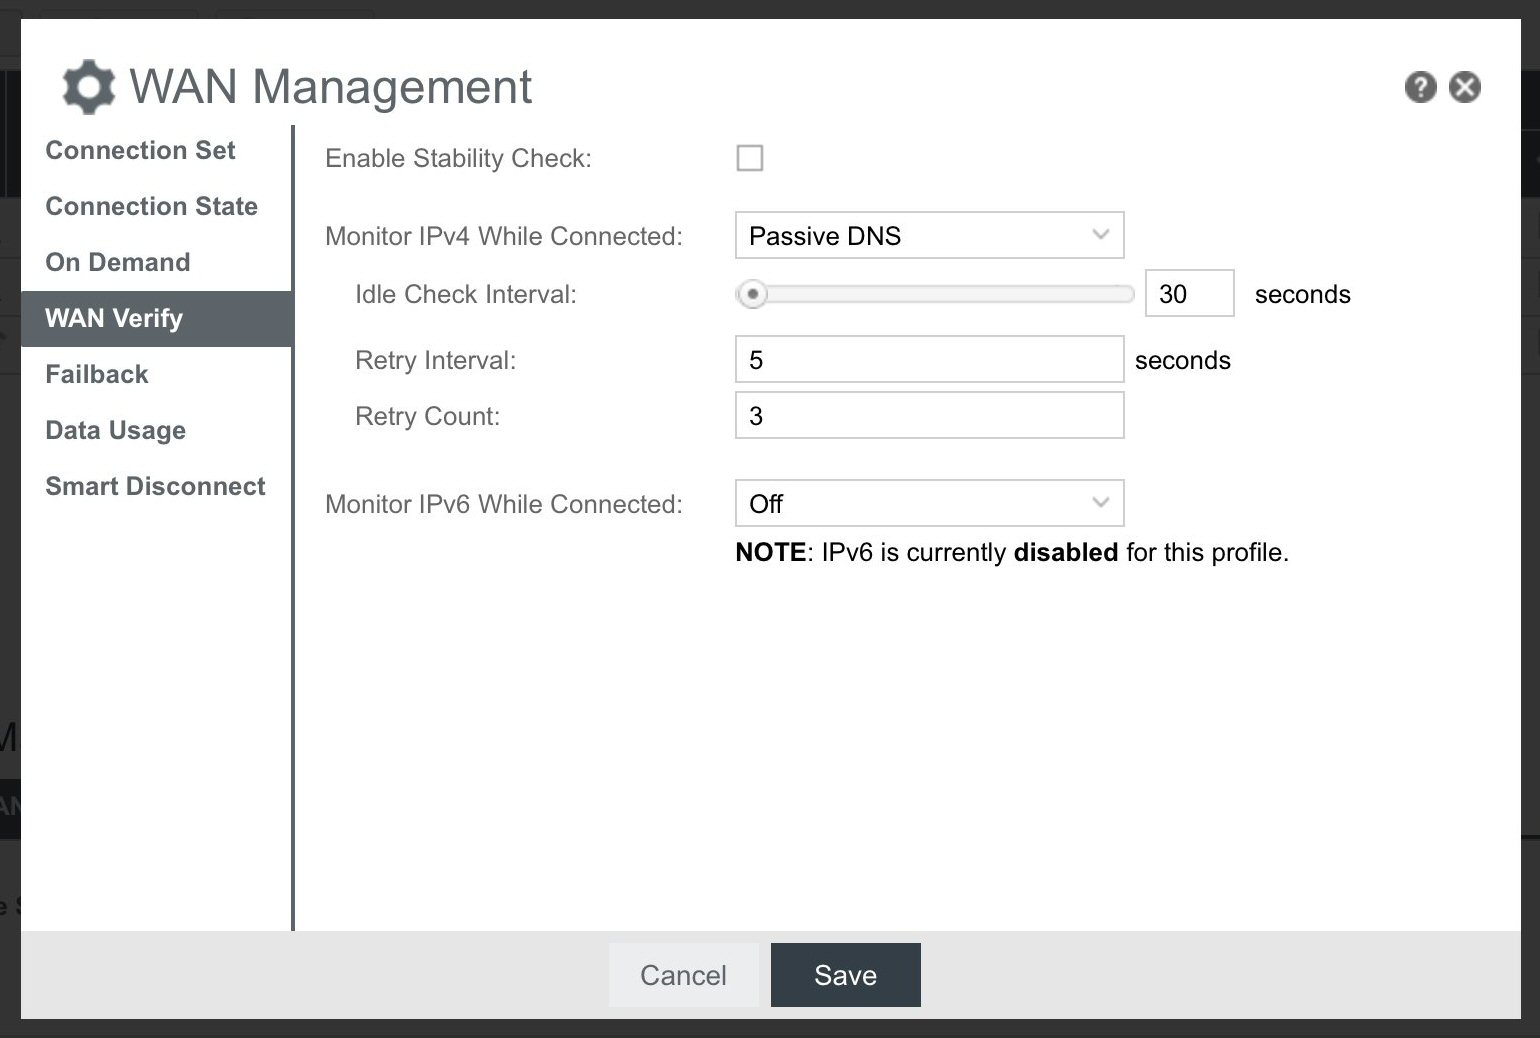
- Select WAN Verify and set the various fields as shown below and then Save:
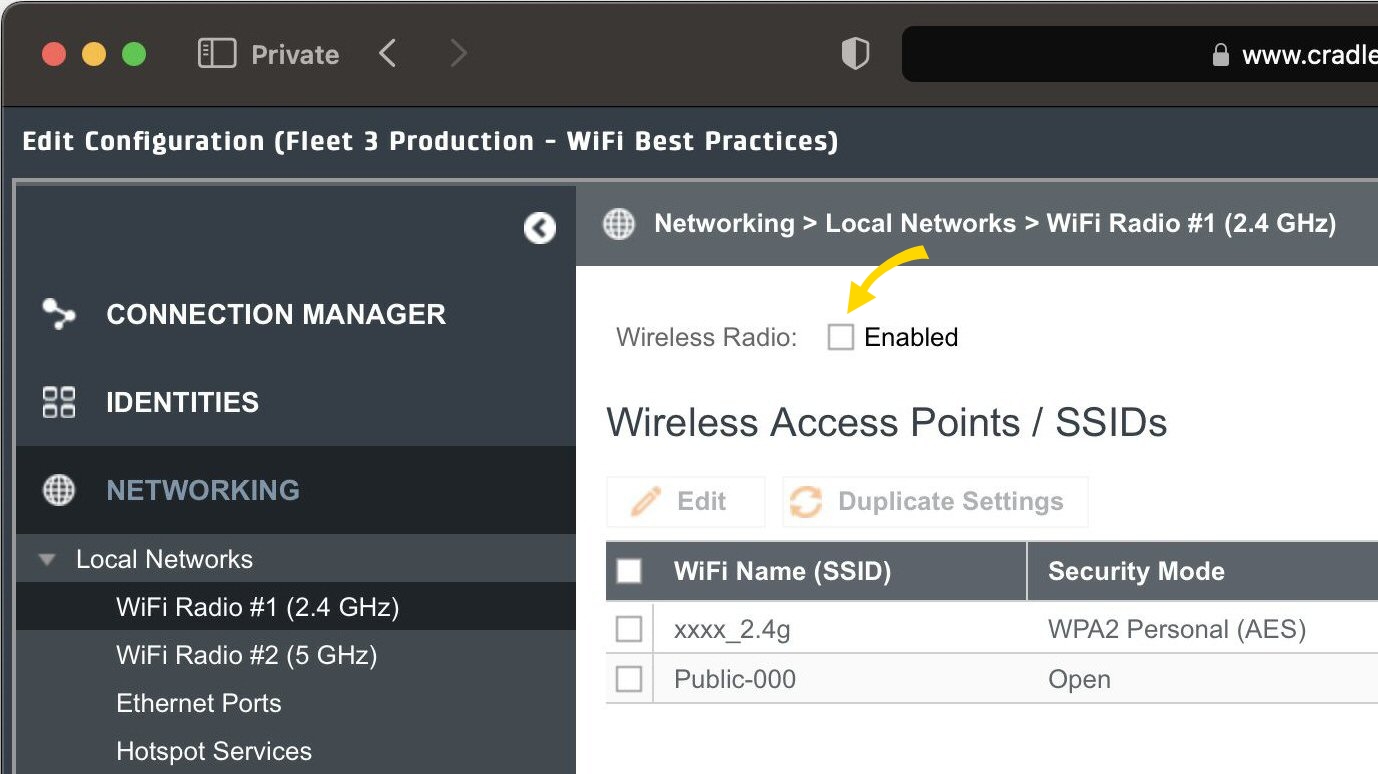
- In the left-nav, select Networking > Local Networks > Wi-Fi Radio #1 (2.4 GHz) and clear the check box at the top. Select Yes to ignore the inaccurate warning about "disable all wireless wireless access to the router“ and then Save.
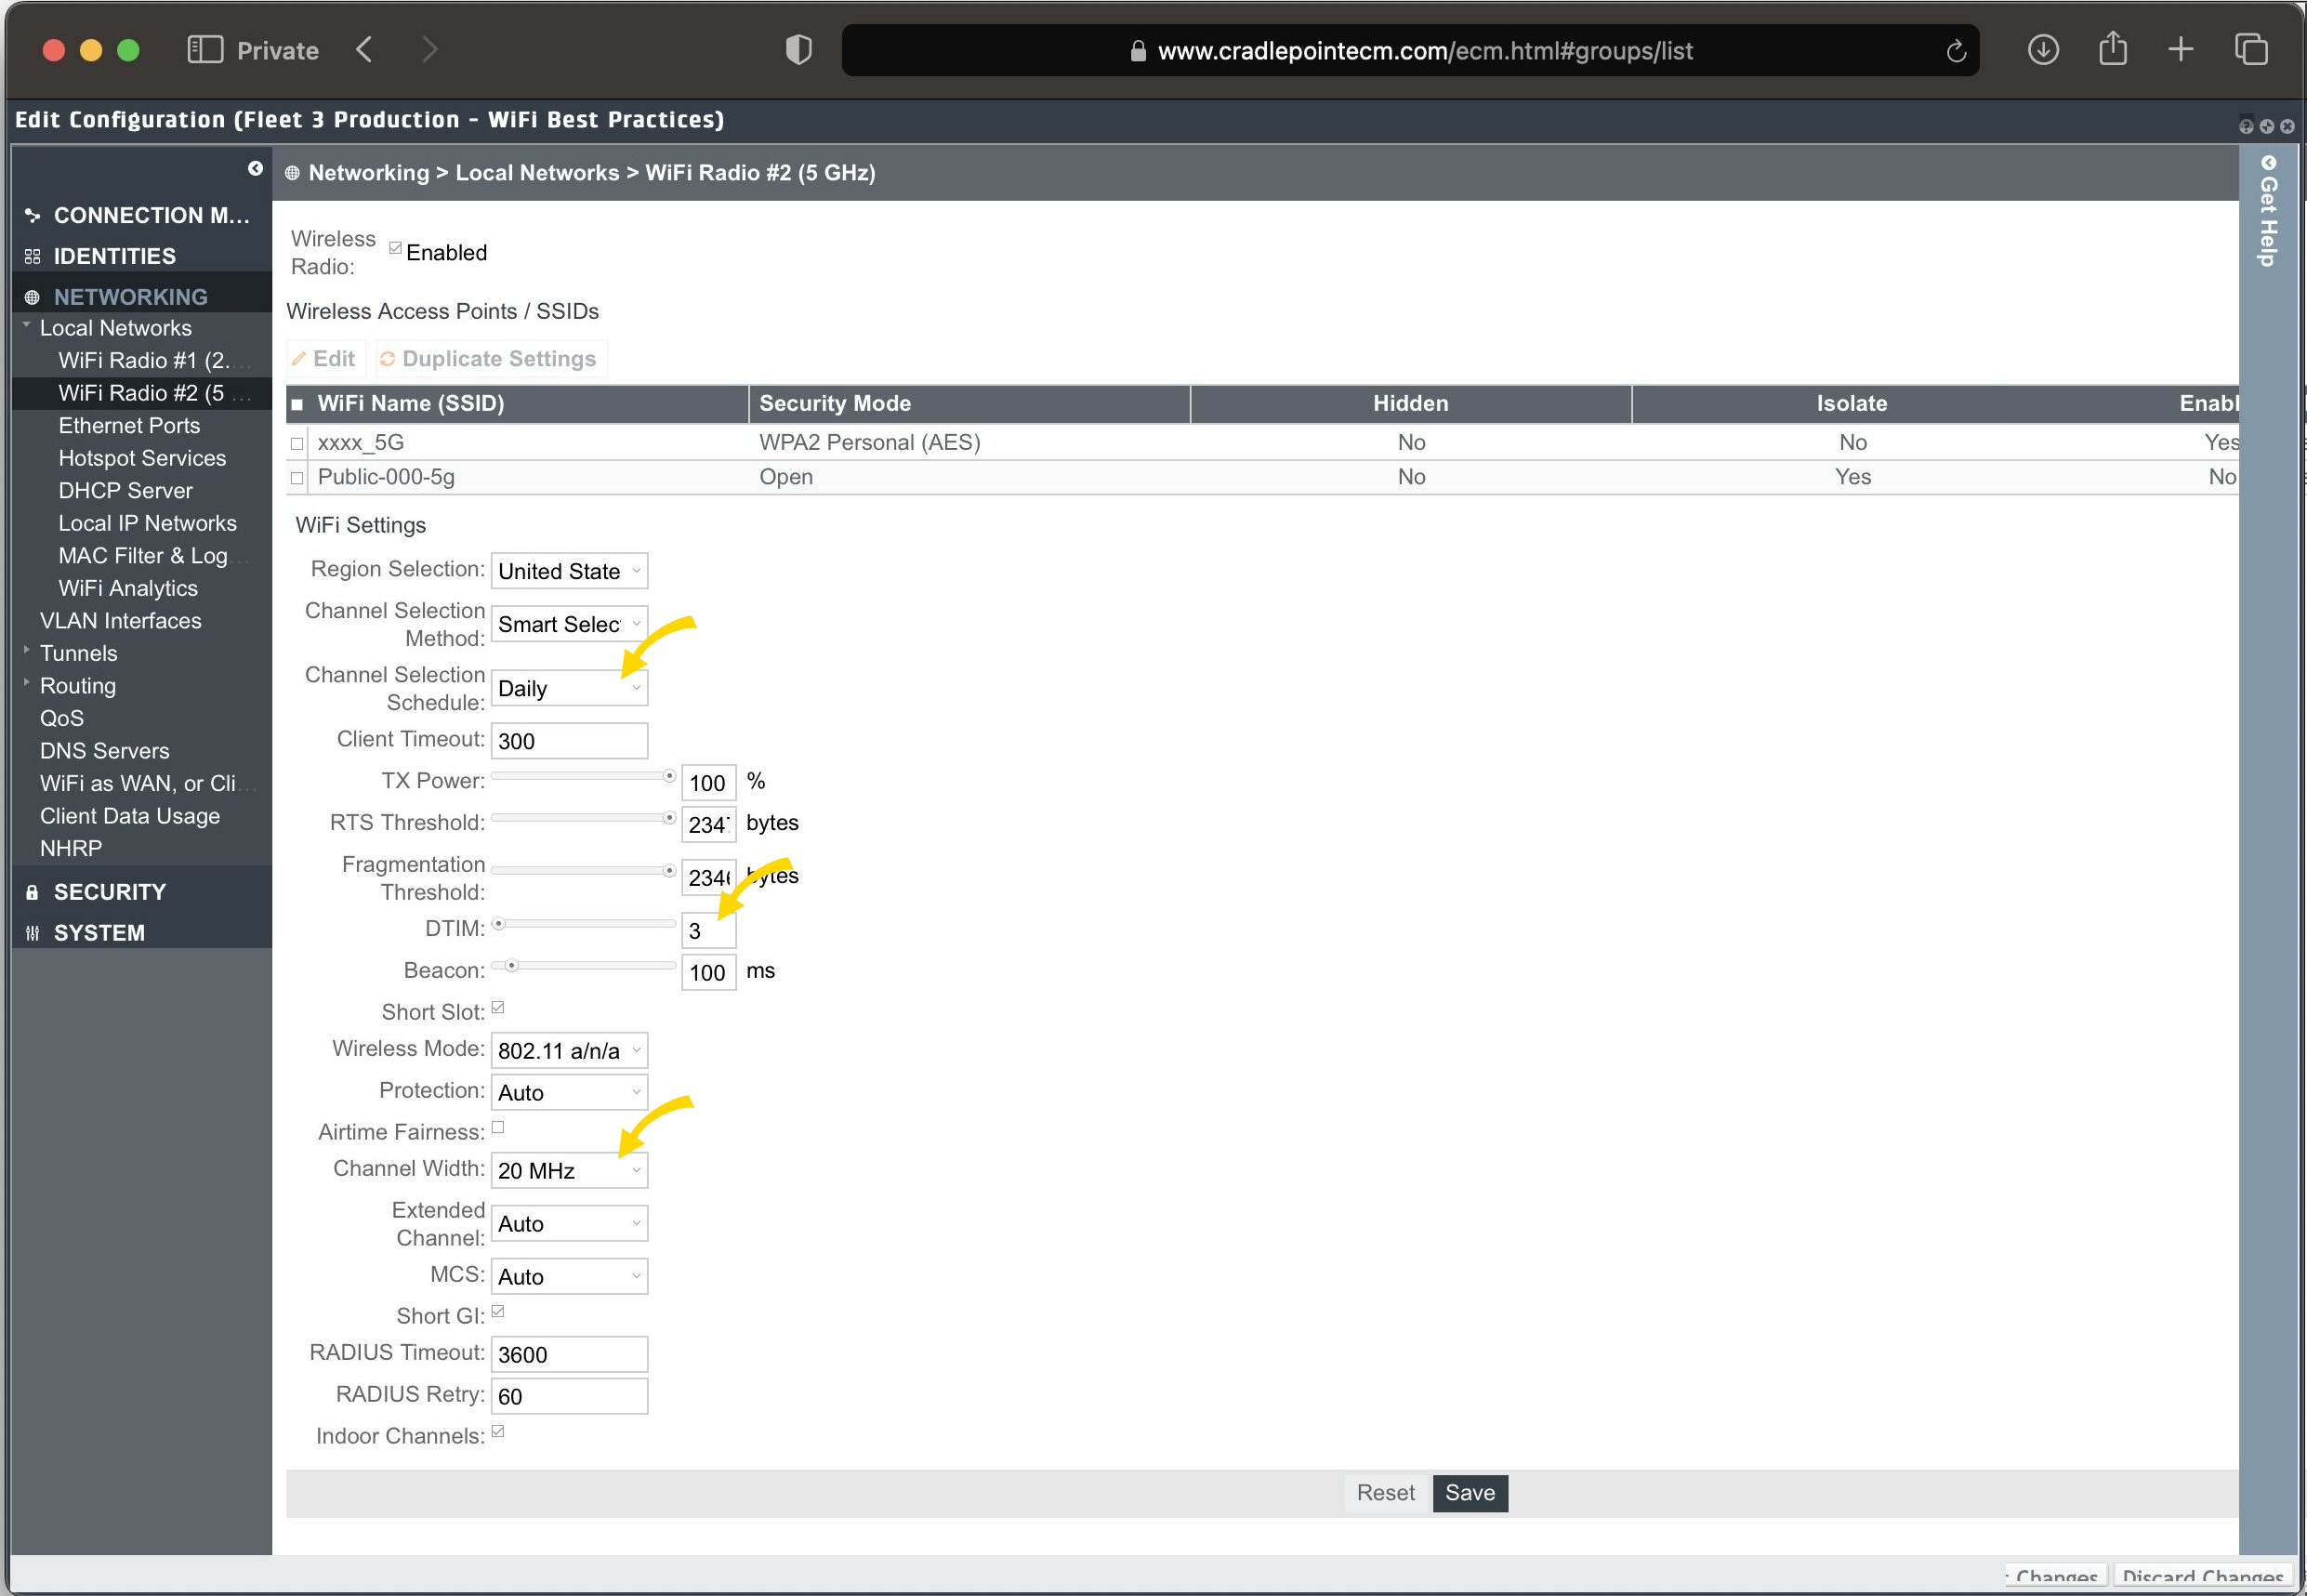
- In the left-nav, select Wi-Fi Radio #2 (5 GHz).
- Set Channel Selection to Daily.
- Set DTIM to 3.
- Set Channel width to 20 MHz and then Save.
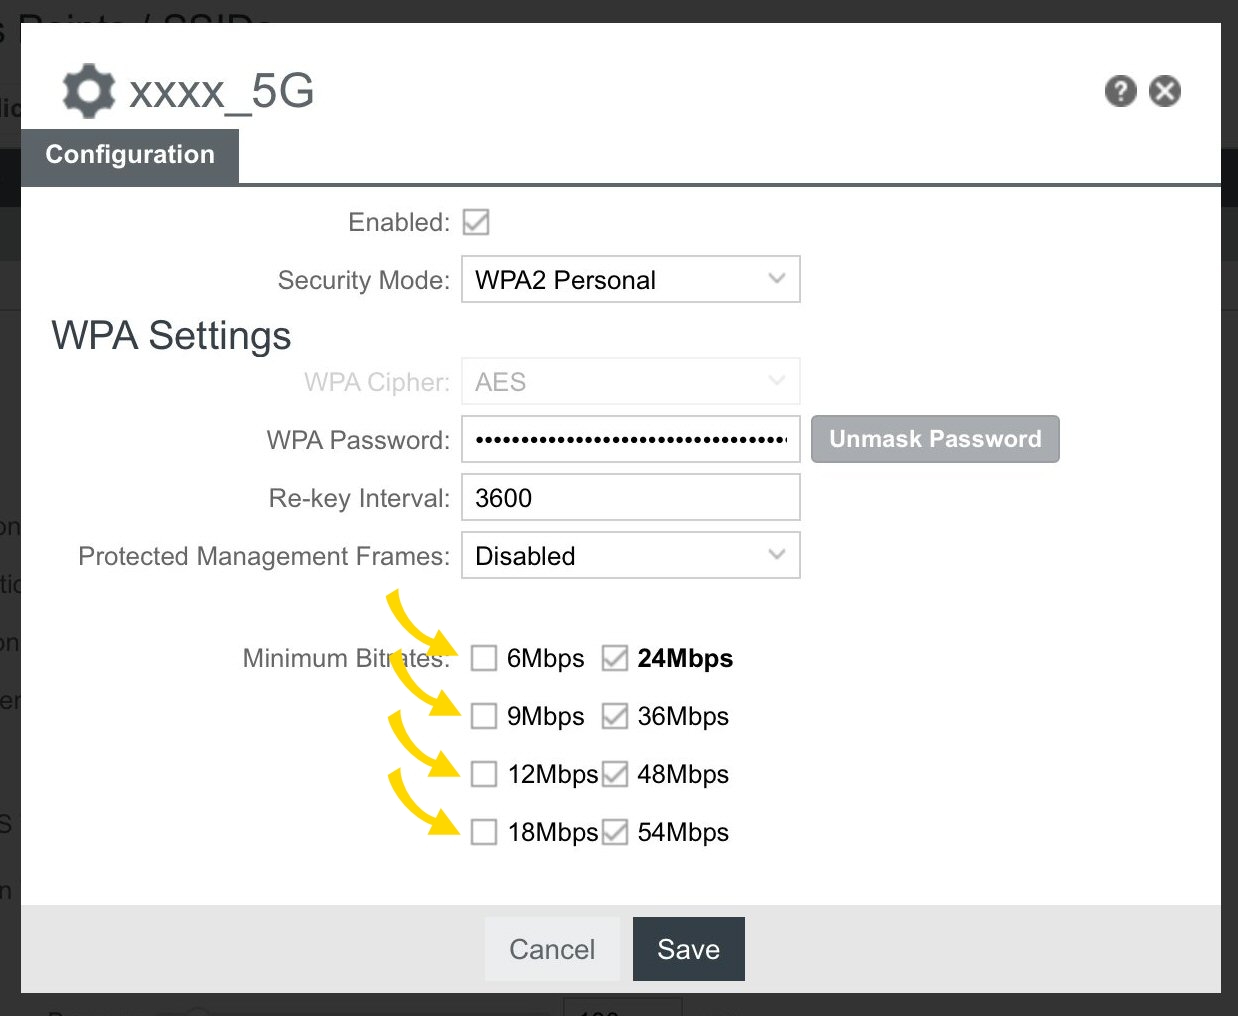
- Select the check box next to the non-public 5G Wi-Fi SSID (such as xxxx-5g), then Edit immediately above it.
- Disable bitrates less than 24 Mbps and then Save:
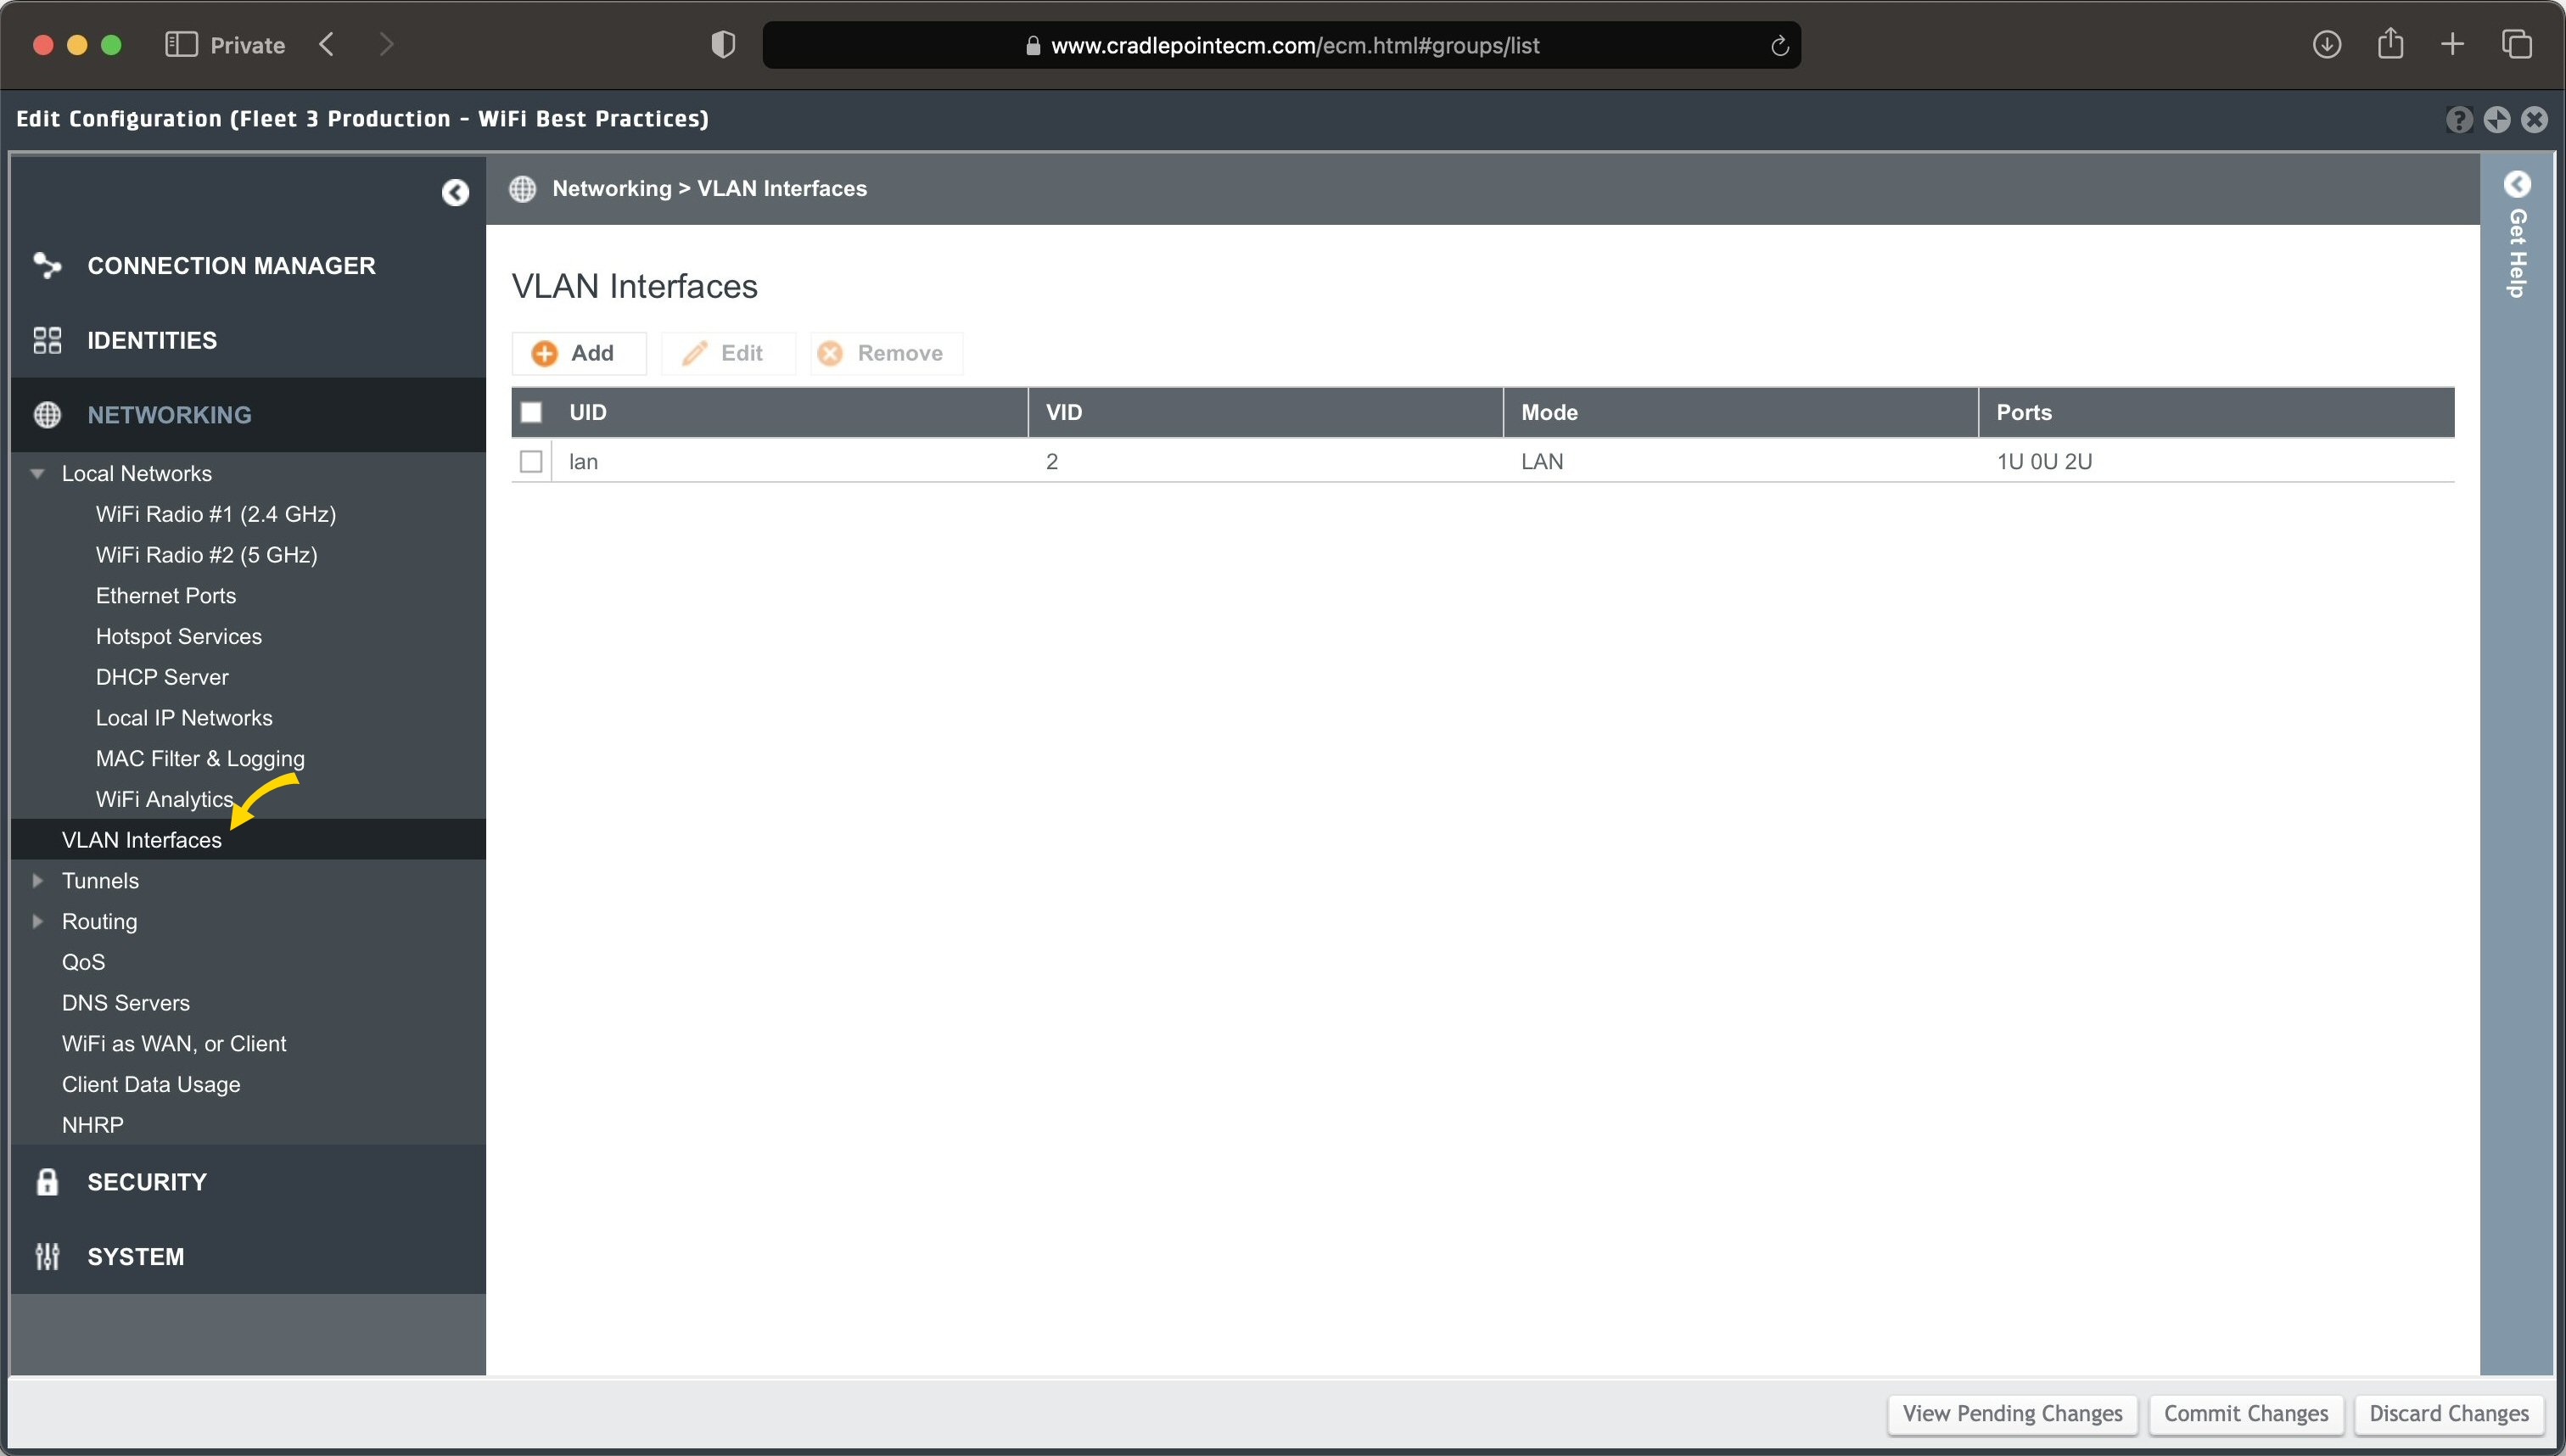
- In the left-nav, select Networking > VLAN Interfaces.
- To set both ethernet ports to LAN:
- Delete wan.
- Select the check box next to lan and select Edit immediately above it.
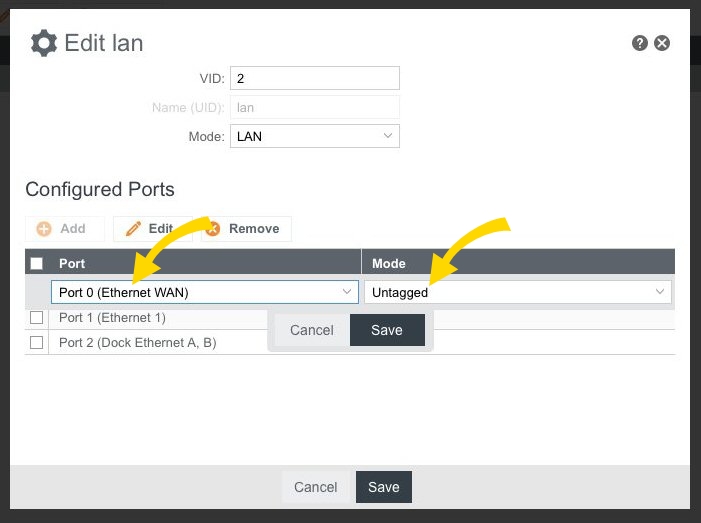
- Select Add and add Port 0 as Untagged and then Save.
- Select Commit Changes (see image in step 17).
- Add each vehicle to the newly created group.
- On each vehicle:
- In the left-nav, select Networking > Local Networks > Wi-Fi Radio #2 (5 GHz).
- Select the check box next to the non-public 5G Wi-Fi SSID (such as xxxx-5g), then Edit immediately above it.
- Set Wi-Fi Name (SSID) to vehicle number or identifier, such as 8554-5g or Axon12-5g and then Save.
- Select Commit Changes to finish.
You've reached the last topic in this series on Fleet 3 network configuration (yay you!).
To start with the first topic, see Router and VPN configuration.
Or, return to the Fleet 3 product page.
Last modified - 19 February 2026