May 2024
The schedule for the May 2024 release is as follows:
- Customers in the Enterprise region (.ent.evidence.com) receive on May 30, 2024.
- Customers in the European region (.eur.evidence.com) and European legacy region (.eu.evidence.com) receive on June 3, 2024.
- Customers in Canada (.ca.evidence.com) and New Zealand receive on June 4, 2024.
- Customers in the U.S. Federal (.us.evidence.com) and U.S. Law Enforcement region (.evidence.com) receive on June 5, 2024.
- Customers in Australia, the United Kingdom, and South America region (.la.evidence.com) receive on June 6, 2024.
For information on the update schedule times for your region, refer to the Axon Evidence Maintenance Schedule on the Axon website.
We don’t expect any downtime during this update.
Additional help documentation for the products included in these release notes is located at axon.com/help.
Download this month's release notesAxon Body 4
Firmware update version v1.2414
On April 29th Axon began a phased roll-out of firmware v1.2414 for Axon Body 4. The phased roll-out will span three weeks.
This update includes the following fixes and improvements:
-
Audio upload improvements to support Draft One
-
General bug fixes and improvements
With the May Evidence.com release, Axon Body 4 will also include support for:
- User Wi-Fi Networks: Allows users with the appropriate permissions to configure their own Wi-Fi networks in Evidence.com. Eliminating the need for users to send their personal Wi-Fi SSID and Password to agency admins for configuration. Only devices assigned to the user will pick up their networks
- Enterprise Wi-Fi Networks: Enables admins to configure WPA2 EAP-TLS Enterprise Networks in Evidence.com. Requires minimum firmware version 1.28. Learn more in the Body Camera Enterprise Wi-Fi Quick Start Guide.
Detailed articles are available for both administrators and users on setting up and managing Wi-Fi networks. Administrators can refer to the step-by-step guide in the updated Body Camera Wi-Fi Networks article and Assign Permissions - Manage User Wi-Fi Networks. For users looking to manage their personal Wi-Fi networks effectively, the User Guide for Personal Network Management provides all the information they’ll need.
Axon Body 3
Firmware update version 1.30
Axon began the phased rollout of the Axon Body 3 operating system v1.30 starting with early access devices on April 30. This phased rollout is expected to span three weeks, with general availability targeting May 20.
This update includes the following fixes and improvements:
- Audio upload improvements to support Draft One.
- General bug fixes and improvements.
With the May Evidence.com release, Axon Body 3 will also include support for:
- User Wi-Fi Networks: Allows users with the appropriate permissions to configure their own Wi-Fi networks in Evidence.com. Eliminating the need for users to send their personal Wi-Fi SSID and Password to agency admins for configuration. Only devices assigned to the user will pick up their networks.
- Enterprise Wi-Fi Networks: Enables admins to configure WPA2 EAP-TLS Enterprise Networks in Evidence.com. Requires minimum firmware version 1.28. Learn more in the Body Camera Enterprise Wi-Fi Quick Start Guide.
Detailed articles are available for both administrators and users on setting up and managing Wi-Fi networks. Administrators can refer to the step-by-step guide in the updated Body Camera Wi-Fi Networks article and Assign Permissions - Manage User Wi-Fi Networks. For users looking to manage their personal Wi-Fi networks effectively, the User Guide for Personal Network Management provides all the information they’ll need.
Axon Fleet
Firmware update v2.2415
Starting early May, Axon will begin a phased deployment of firmware update version v2.2415 for the Axon Fleet 3 system.
Fleet improvements:
- BWC connectivity improvements: Improved reliability of Axon Body 3 and Body 4 initial connection and subsequent re-connection to the Fleet 3 Hub for the duration of officer shift.
- Evidence.com Vehicle Assignment Available for All: Axon used to require requesting access to utilize the Vehicle Assignment page in Evidence.com. As of 3/6/2024 this restriction is no more. All customers have access to Vehicle Assignment and more details can be found here. This allows Officers and Fleet admins to self-assign pooled vehicles for easier convenience.
- Regular security and performance enhancements.
Fleet Dashboard for Android v1.2415 will be released to Google Play
- New Feature: Background ALPR Notifications (Android)
- Stay informed with ALPR hits even when the Dashboard app isn't in the foreground.
- Multitask seamlessly without missing critical alerts.
- Access ALPR hit details directly from your Notification Tray.
- Stability Improvements
- Implemented fixes for crashes and App Not Responding (ANR) errors.
- Enhanced 'Hub out of reach' behavior for better reliability.
- Resolved login issues and various bugs for a smoother experience.
Axon ALPR
UK Automatic Number Plate Recognition (ANPR)
Introduction
The Axon Automatic Number Plate Recognition (ANPR) system encompasses two complementary components: one in-vehicle and one in-office, providing a high quality, real-time ANPR solution. Axon Fleet 3 ANPR is a National ANPR Service (NAS) compliant ANPR solution for UK Law Enforcement, providing BOF2 and UTMC offload options to an ANPR Management Server. All plate data captured and distributed from Fleet 3 ANPR is compliant with the UK National ANPR Standards for Police and Law Enforcement (NASPLE).
Plate read data collected can optionally be retained and be queried through Axon Evidence in later investigations. Plate read data sent to Axon Evidence is in full resolution and not downsized.
This release enables Fleet 3 ANPR configuration for communication with your ANPR Management Server, ensuring NASPLE compliance. Future releases will include hotlist ingestion and In-Vehicle Alerting, such as PNC FastTrack alarms and VOI lists.
Configuring Axon Fleet 3 ANPR
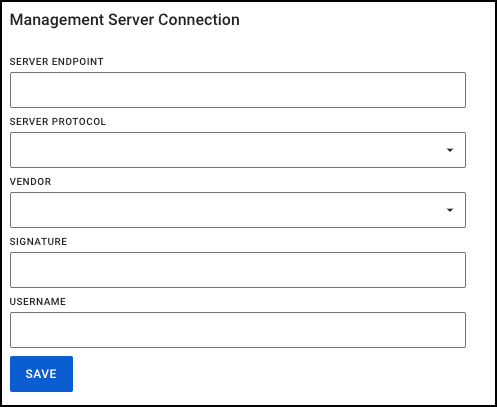
Establishing ANPR Management Server connection
- On the menu bar in Axon Evidence, select Admin, then ANPR Settings.
- For Server Endpoint, enter the URL or IP Address (and port number, if applicable) associated with your ANPR Management Server.
- You should confirm these details with your suppling vendor.
- For Server Protocol, select either BOF or UTMC, depending on your offload preference for ANPR records.
- For Vendor, select your ANPR Management Server vendor from the list.
- Optional: If specified by your ANPR Management Server vendor, enter a Signature value.
- Optional: If specified by your ANPR Management Server vendor, enter a Username value.
- Click Save
.
ANPR record offload configuration
The process for configuration of Fleet 3 ANPR differs slightly, depending on which ANPR offload protocol you will use.
BOF2
The BOF2 protocol for ANPR requires all camera devices to be uniquely identified using an FUC ID. There are two steps within Axon Evidence to configure your Fleet 3 ANPR vehicles to communicate in this way, detailed below. The FUC ID is defined as follows:
- F(orce) ID defines the Law Enforcement entity that device belongs to, and is otherwise known as the PNC ID.
- U(unit) ID defines the operating Unit or Vehicle that the camera device is associated with.
- C(amera) ID defines the camera device itself.
- Note: Camera ID does not need defining within Axon ANPR, given only one Dual-View Camera is supported. Therefore, this ID is defaulted to ‘1’ for each Unit.
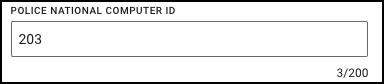
Add PNC ID to the agency profile
- On the menu bar in Axon Evidence, select Admin, then Force Profile.
- Click Edit Profile.
- Enter your Police National Computer ID, then click Save.
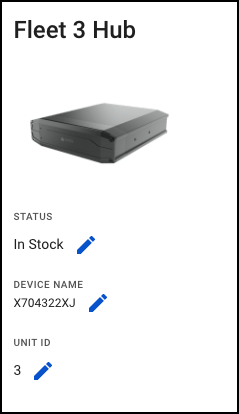
Add Unit ID
- On the menu bar in Axon Evidence, select Inventory, then Vehicles.
- From the list of Vehicles, click on each HubSN# you wish to add as an ANPR device.
- Click on the Edit icon to edit the device’s Unit ID.
- Enter a unique Unit ID for each device and click Save.
UTMC
The UTMC protocol for ANPR requires all camera devices to be uniquely identified using an Camera ID. There is a single step within Axon Evidence to configure your Fleet 3 ANPR vehicles to communicate in this way, detailed below.
Add Camera ID (Unit ID)
- On the menu bar in Axon Evidence, select Inventory, then Vehicles.
- From the list of Vehicles, click on each HubSN# you wish to add as an ANPR device.
- Click on the Edit icon to edit the device’s Unit ID.
- Enter a unique Unit ID for each device and click Save.

After you have finished your setup, you should ensure that all Fleet 3 systems are restarted, so they can receive the new ANPR configuration to communicate with your ANPR Management Server.
Verify connectivity to ANPR Management Server
You may verify the connection to your Management Server by visiting the Settings page on the Fleet 3 Dashboard application:
- From your Fleet 3 Dashboard, visit settings by clicking the gear icon.
- Under the System → General section, look for the green check mark next to the Management Server listing, indicating a connection has been made to the management server.

Opting to upload ANPR records to Evidence.com
While it is not necessary to upload records to Evidence.com, choosing to do so will retain high-resolution, un-cropped ANPR imagery from the Fleet 3 system, compared to the downsized ANPR data that flows to your ANPR Management Server and NAS.
You should consider both your data governance policy regarding ANPR data, and LTE/4G data allowances before enabling this feature.
- On the menu bar in Axon Evidence, select Admin, then ANPR Settings.
- If you wish to offload ANPR Data to Evidence.com, Enable the option, then click Save.
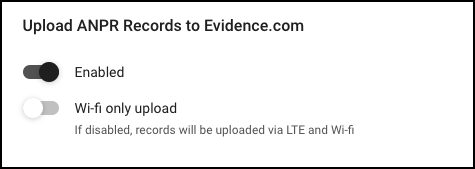
- Optional: If you wish to offload ANPR data, but only over Wi-Fi, to restrict LTE/4G data usage, Enable the option, then click Save.
Once configured, reboot your Fleet 3 Hub Devices
After you have successfully configured ANPR for your agency, you must restart all of your active Fleet 3 Hub devices in order for the configuration to take effect.
- From your Fleet 3 Dashboard, visit settings by clicking the gear icon.
- Click Restart to restart your Fleet 3 system.
Coming soon
Axon Body 3 and Axon Body 4
Role-based device settings
Historically, Axon device settings have been “one size fits all”, and any changes to device settings applied to all of those devices registered to the agency. In May, Axon will be releasing a new and improved method for managing role-based device settings. This new functionality will be available for all Axon Body 3 and Axon Body 4 users.
When this feature is available, administrators can create unique copies of the Axon Body 3 and Axon Body 4 Device Settings page, called Device Settings Profiles. These profiles can then be associated with a specific role. Any cameras of that type assigned to users in that associated role operate with the profile’s settings.
For example, the device settings page appears like this: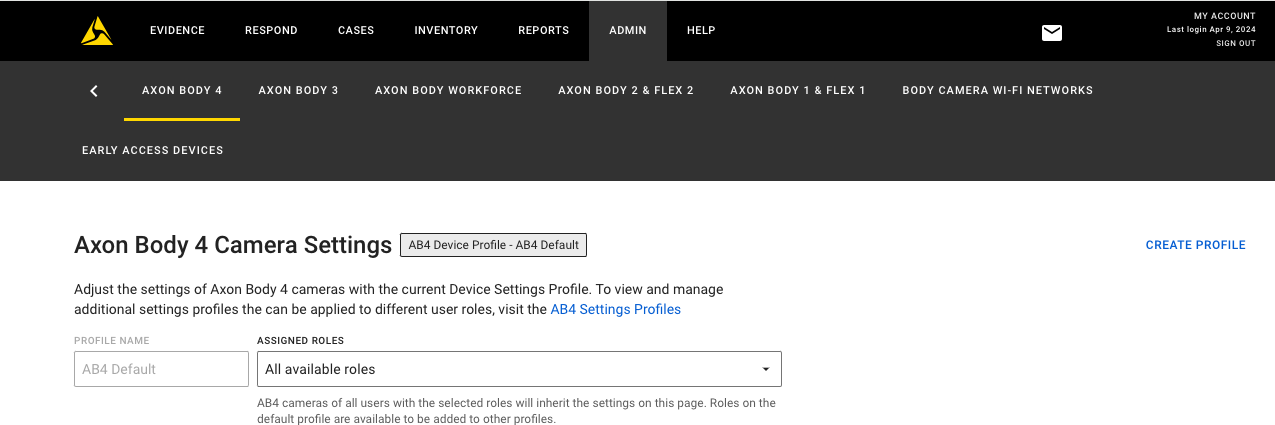
Every Axon Evidence account begins with a default profile, which contains the current settings your agency already has configured for the camera. The default profile is associated with “All available roles”, meaning that every role and therefore every assigned camera in your agency utilizes the settings configured in the default profile. By selecting Create Profile, you can create a copy of the default profile and modify settings as needed.
For example, a Test Profile has been created: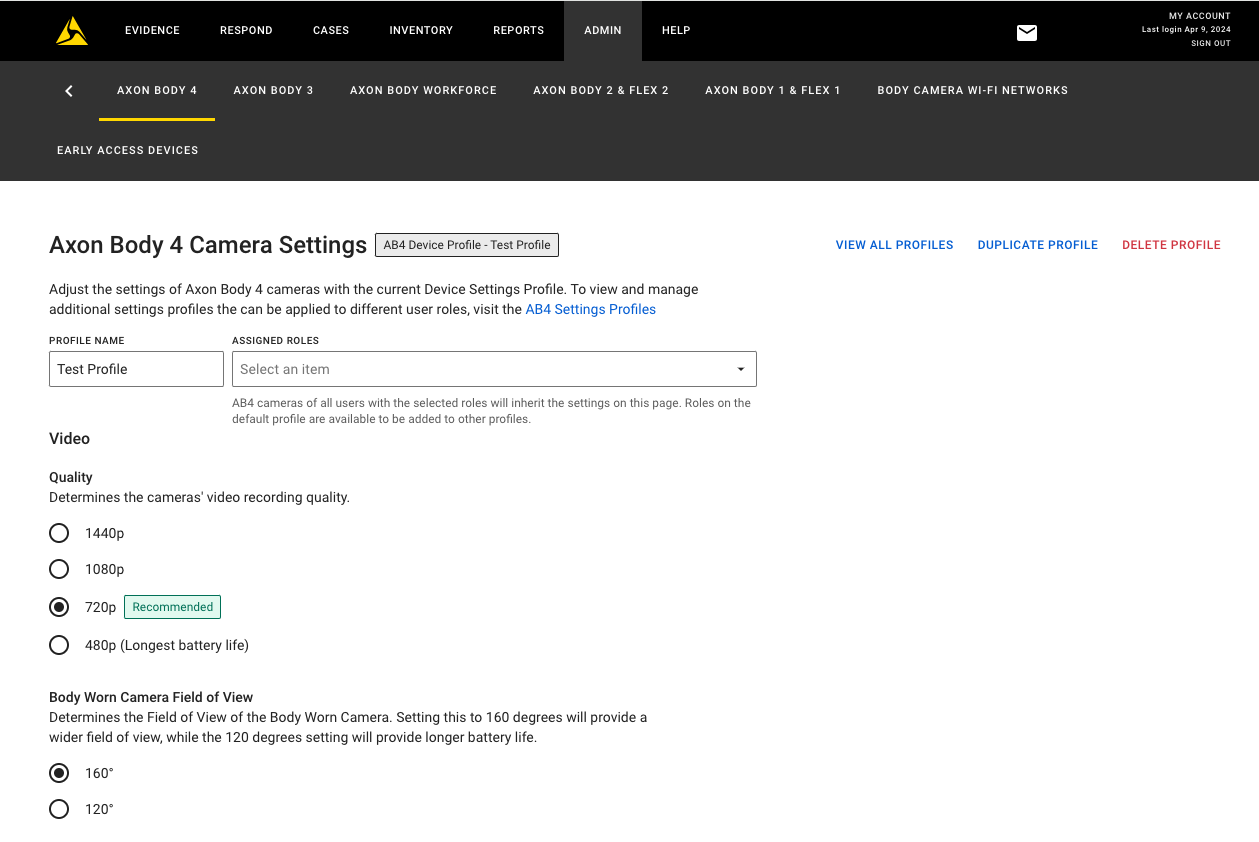
Within this test profile, any settings can be uniquely configured without impacting the default profile. As a final step, you can select which existing roles should be associated with this new test profile. In the following example, the test profile is now associated with the armorer role. As shown in the image, any roles that are currently associated with another non-default profile are unavailable for selection here. In this example the investigator and user roles are assigned to a different profile titled “No Location Reporting”. 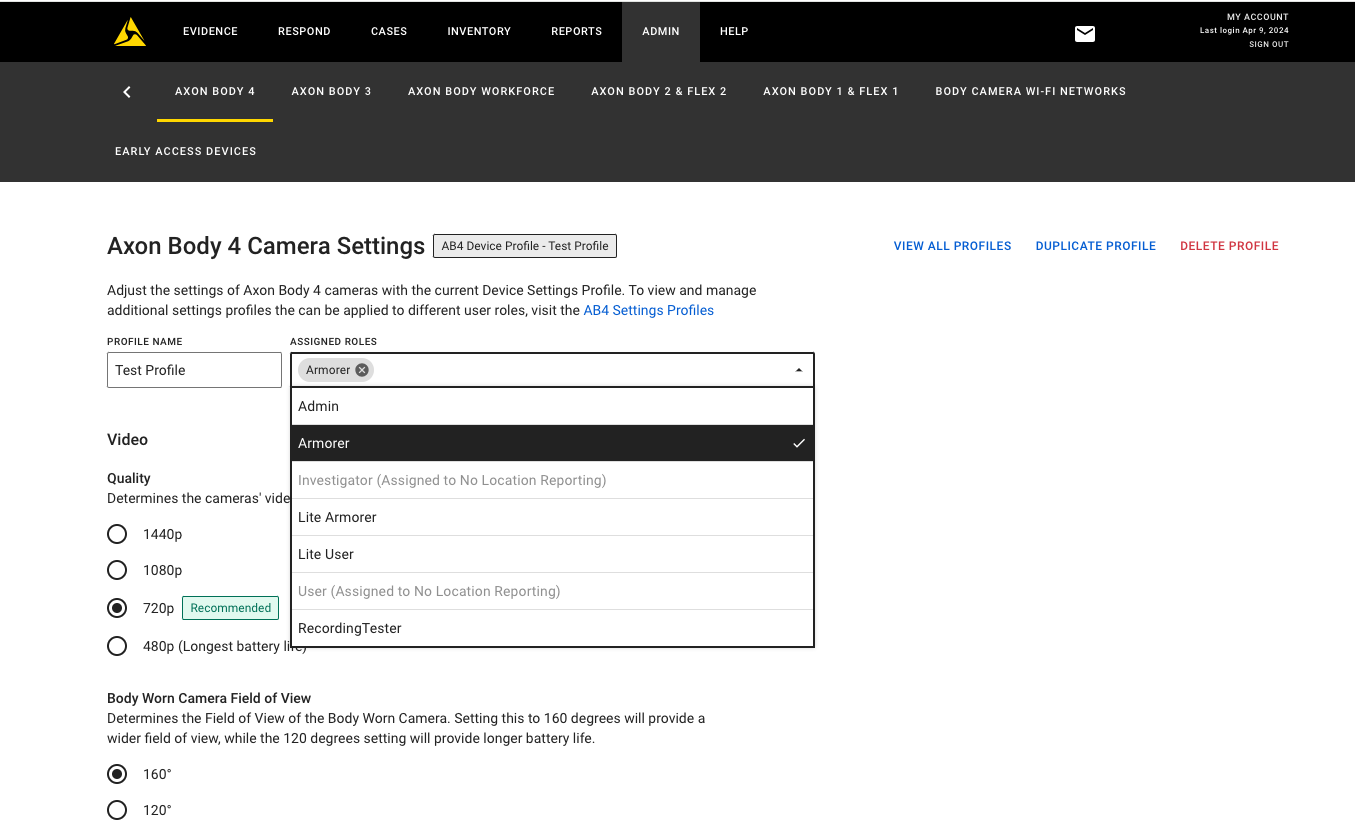
Selecting View All Profiles opens a list view of all profiles created and which roles are associated. From this view, you can select a specific profile to edit settings or role associations. This will be your new view every time you open the settings page going forward.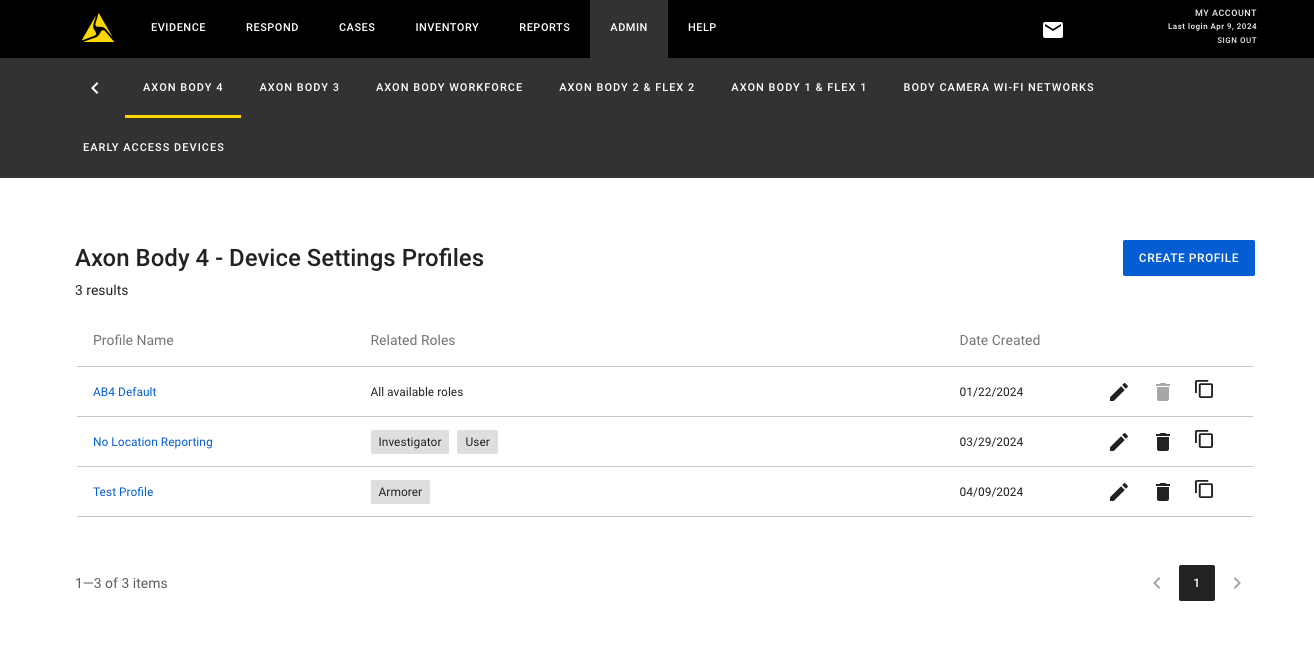
See Role-based device settings for a full step-by-step guide on how to configure this feature.
Axon Body 3
Firmware update version 1.30
Axon begins the phased rollout of the Axon Body 3 operating system v1.30 starting with early access devices. This phased rollout is expected to span three weeks, with general availability targeting May 20.
This update also includes general bug fixes and improvements.
Axon Body Camera Dock
We are rolling out universal sign-in 2.0 to all docks running firmware 3.17 beginning in May.
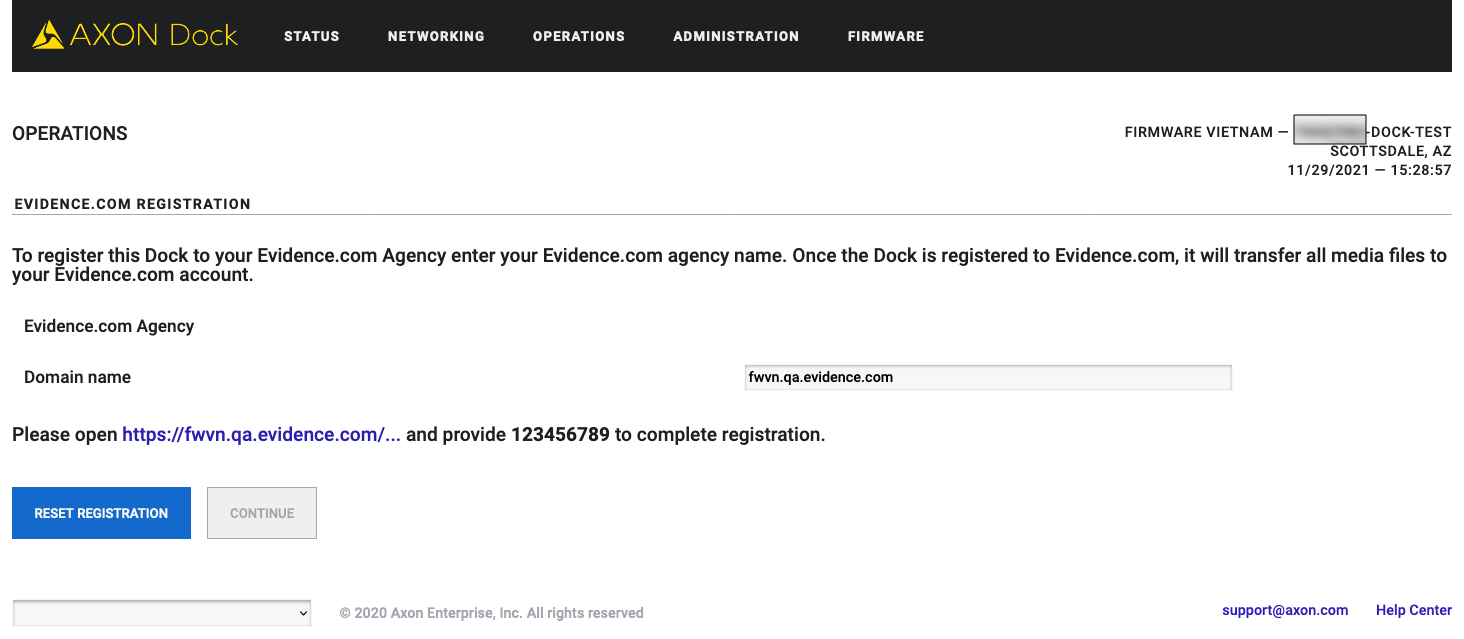
Universal sign-in experience
Universal sign-in 2.0 is a new Axon identity provider sign-in system that uses OAuth 2.0 for user authentication. It supports both first-party and third-party application authentication. Axon Dock firmware has been updated to use this updated system to align with other products in the Axon ecosystem and ensure future scalability of the product.
When enabled at the agency, the Axon Dock sign-in interface changes as shown below, but uses the same credentials as before.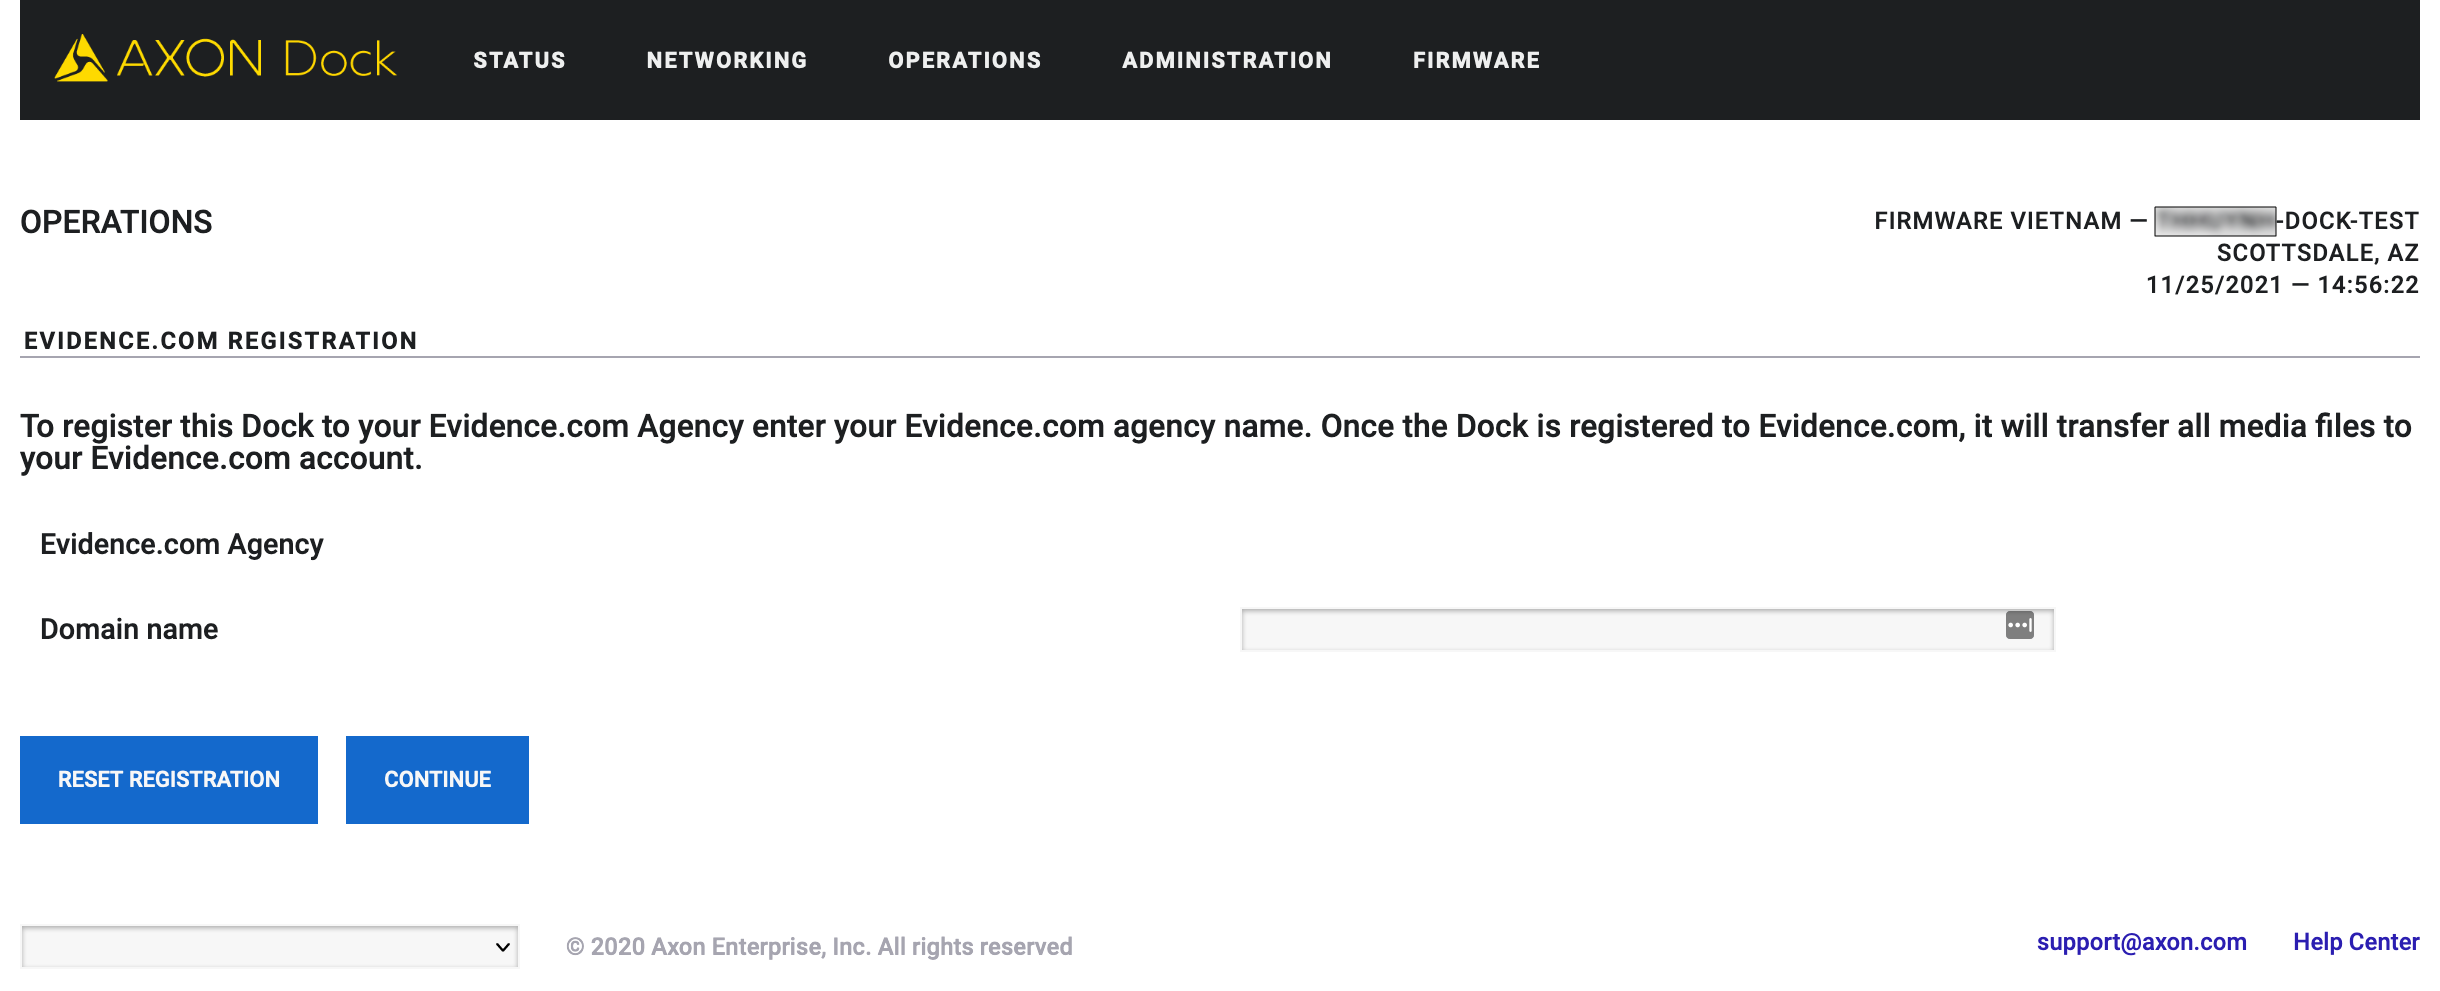
Axon Fleet 3
Firmware update v2.2415
Starting early May, Axon begins a phased deployment of firmware update version v2.2415 for the Axon Fleet 3 system.
Fleet improvements:
- BWC: Improved reliability of Axon Body 3 and Body 4 initial connection and subsequent re-connection to the Fleet 3 Hub for the duration of officer shift
- Evidence.com Vehicle Assignment Available for All: Previously, Axon required a request for access to utilize the Vehicle Assignment page in Evidence.com. Customers now have access to vehicle assignment. This allows officers and Fleet admins to self assign pooled vehicles for easier convenience.
- Regular security and performance enhancements
Fleet Dashboard mobile
Android v1.2414 to be released on the Google Play store
Background ALPR notifications (Android):
- Background Notifications: ALPR hit notifications appear, even when the dashboard app is running in the background.
- Multitasking: Allows officers to work seamlessly in other applications without missing out on important ALPR activity.
- Improved Quick Access: With one click, conveniently access ALPR hit details directly from your device's notification tray.