Community requests in the Axon app
Law enforcement frequently asks members of the public to submit evidence after an incident occurs. You can start a community request from the Axon app and ask individual community members to provide evidence.
When a community request is created from the Axon app, a request is sent to an individual recipient (via email and text), inviting them to submit evidence.
You can only create individual requests from the Axon app. To create a portal request, use the desktop application.
See this video for a quick explanation of Community Request in the Axon app.
There are two locations where you can create a new community request in the Axon app:
- Home screen
- Incident profile (only available to agencies who use Axon Records)
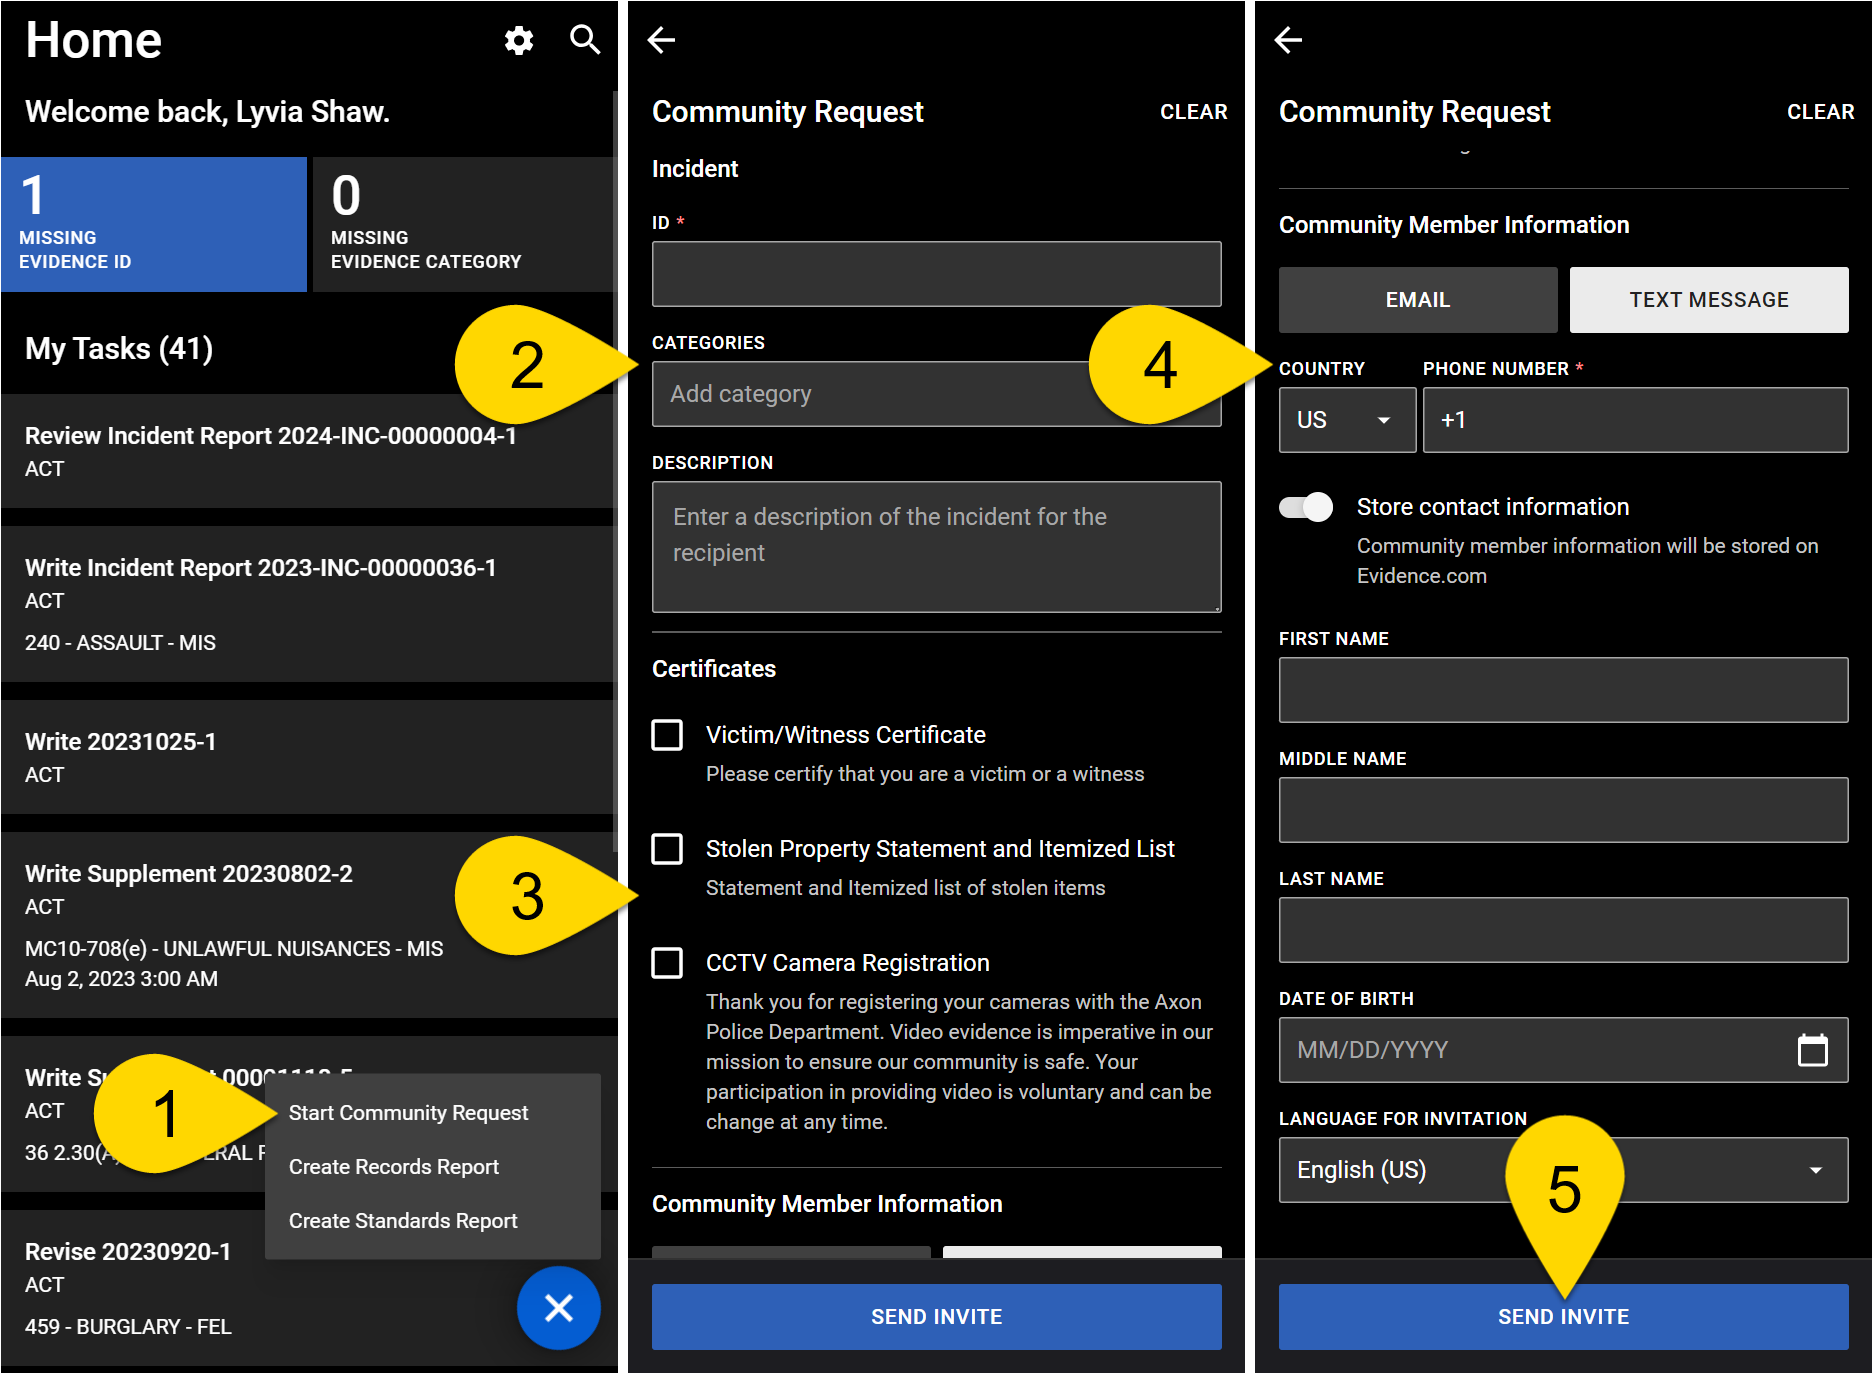
Start a new request from the Home screen
- Open the app, select the plus icon on the Home screen, and select Create Community Request.
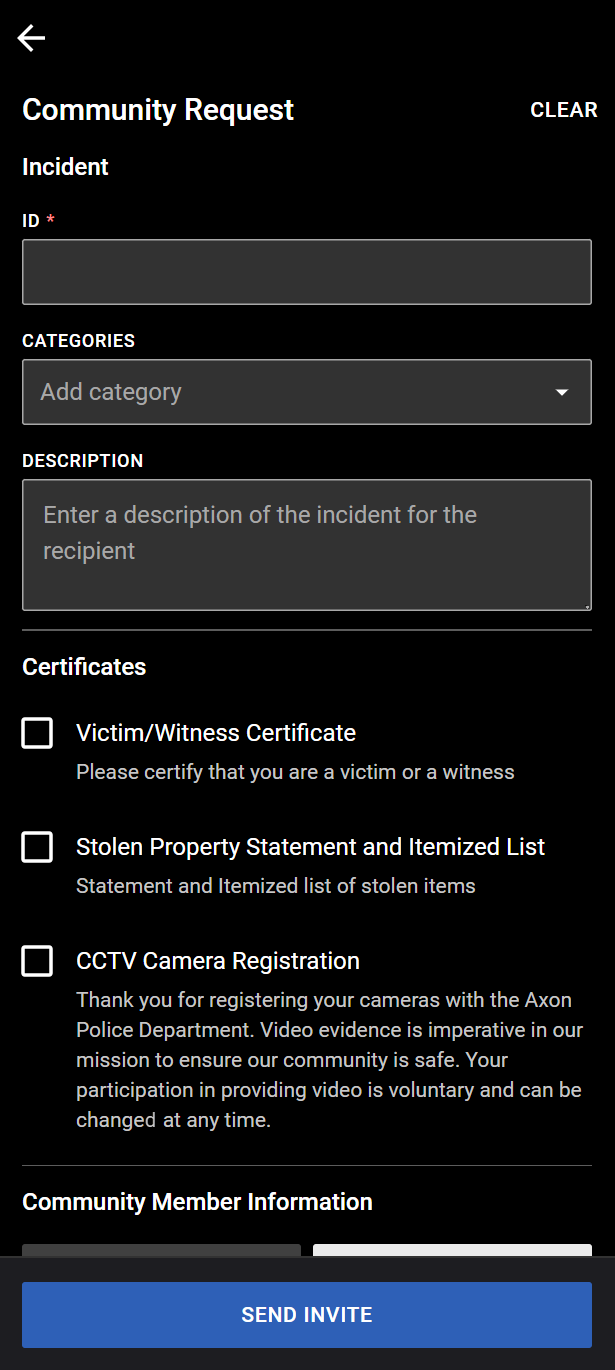
- In the Incident section, provide the following information:
- ID: Enter a request ID. This ID is included in the request so the recipient can reference it if they need to contact the agency with questions.
- Categories: Select an evidence retention category. For more information, see Categories and retention policies.
- Description: Enter a description of the incident so the recipient knows what evidence you are requesting.
- In the Certificates section, select one or more certificate as appropriate.
- Certificates are forms that are inserted in the evidence request that must be completed before the community member can submit evidence. These certificates can ask for additional information or statements from the recipient.
- In the Community Member Information section, provide the following information:
- Contact type: Email or Phone
- Turn the toggle on or off to indicate if the community member's contact information should be stored in Axon Evidence.
- If the toggle is turned off, the name and date of birth fields will disappear.
- Choose whether the invitation should be sent in English or Spanish.
- After all information is complete, select Send Invite.
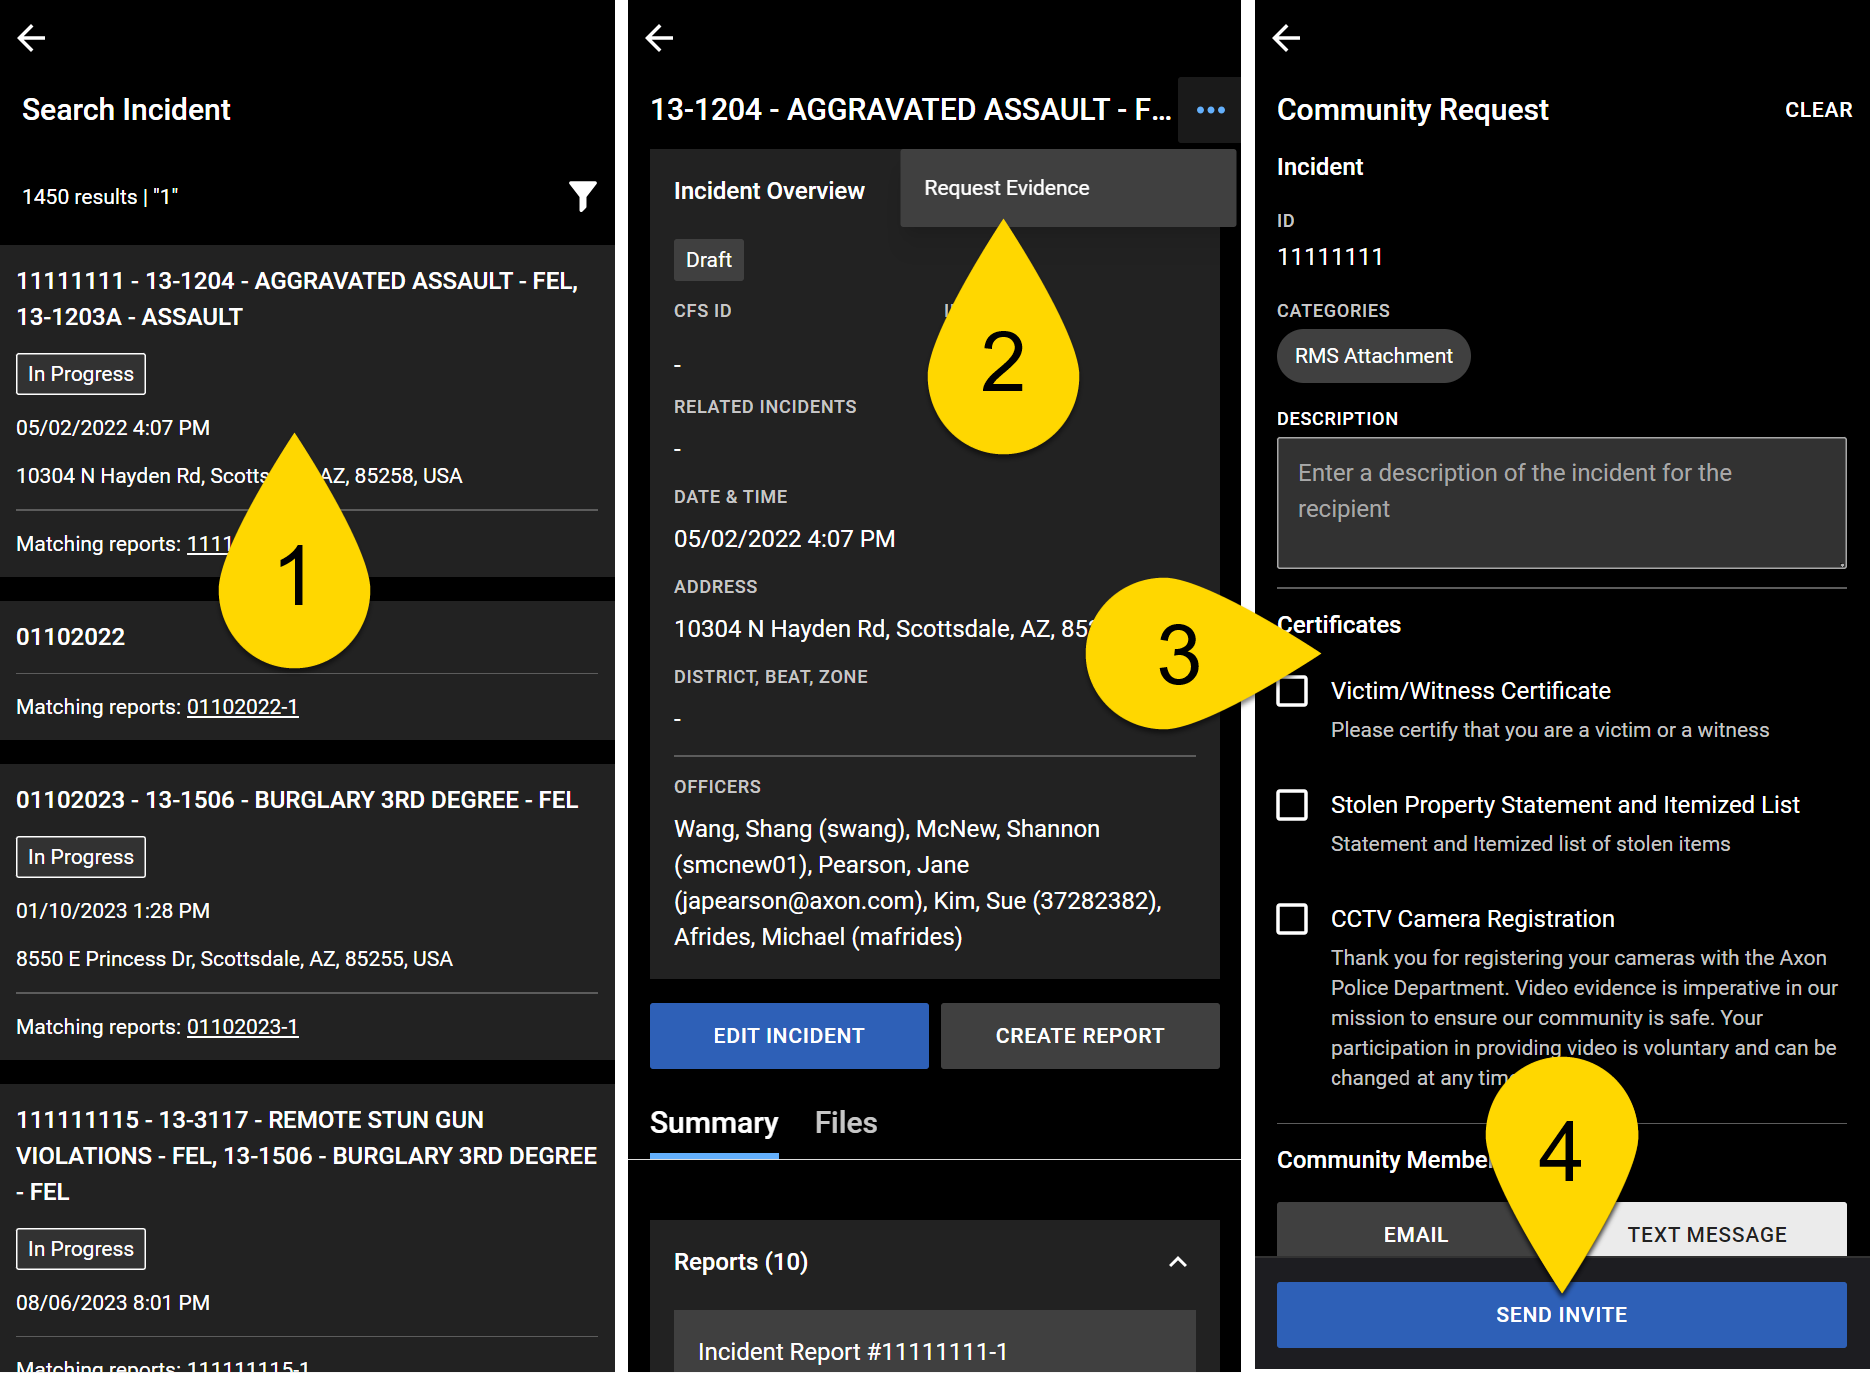
Start request from incident profile
If your agency does not use Axon Records or you don't have permissions for it, you will not see this functionality.
- Use Incidents search to find and open an incident profile.
- Select More Actions [...] > Request Evidence.
- Complete the community request information as outlined in the previous section.
- When starting a request from an incident, the Incident ID and Categories are automatically filled.
- Select Send Invite.