Installation
These steps for dock installation and registration apply to both a TASER Weapons Dock and Body 2 and earlier docks.
If your dock is not registered to your Axon Evidence account, device logs will not upload. To register, you need the dock, a computer, power, and two ethernet cables.
Registration video
Watch this video for additional information about registering a body camera docking station.
To register a TASER Weapons dock, skip to Step 3: Connect to network.
Step 1: Accept the Axon Evidence administrator invitation
Ensure you know your user name, password, and agency domain name. This email invitation will come from [email protected].
If you do not accept the invitation, you will not be able to complete dock setup.
Step 2: Assemble the dock
- Take the dock out of the box and connect your core to all bays you plan to use. Do not attach more than five individual bays or one 6-bay to one core.
- Press the components together firmly so they fit flush, matching the ports as shown (1-to-1, 2-to-2). You should hear a click when pushing the core, bays, and bridge adapters together.
 Caution
Potential data and power loss. The system will not provide power to more than five individual bays on one core. Axon cameras in any extra bays will neither charge nor upload data to Axon Evidence.
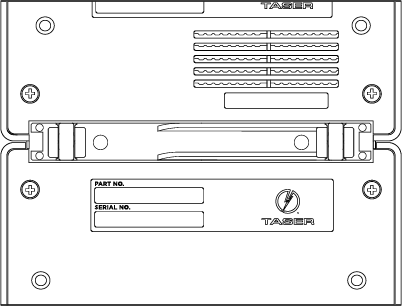
- Turn the dock upside down.
- Press the locking adapter into place between the core and bay. The two prongs on each end of the locking adapter should snap into place to hold the core and bay together.
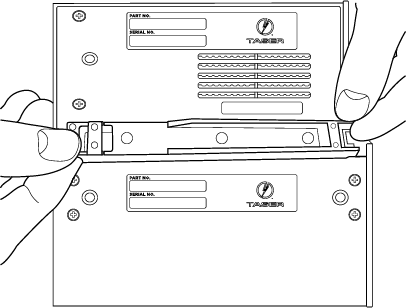
- When properly installed, the locking adapter is flush in place with the core and bay.
- Turn the connected dock right side up and place on a flat surface within reach of power and ethernet connections but away from heat sources and direct sunlight. For wall-mounting, see Wall-mounting, multi-bay.
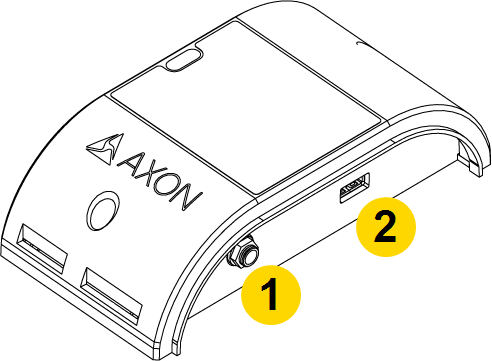
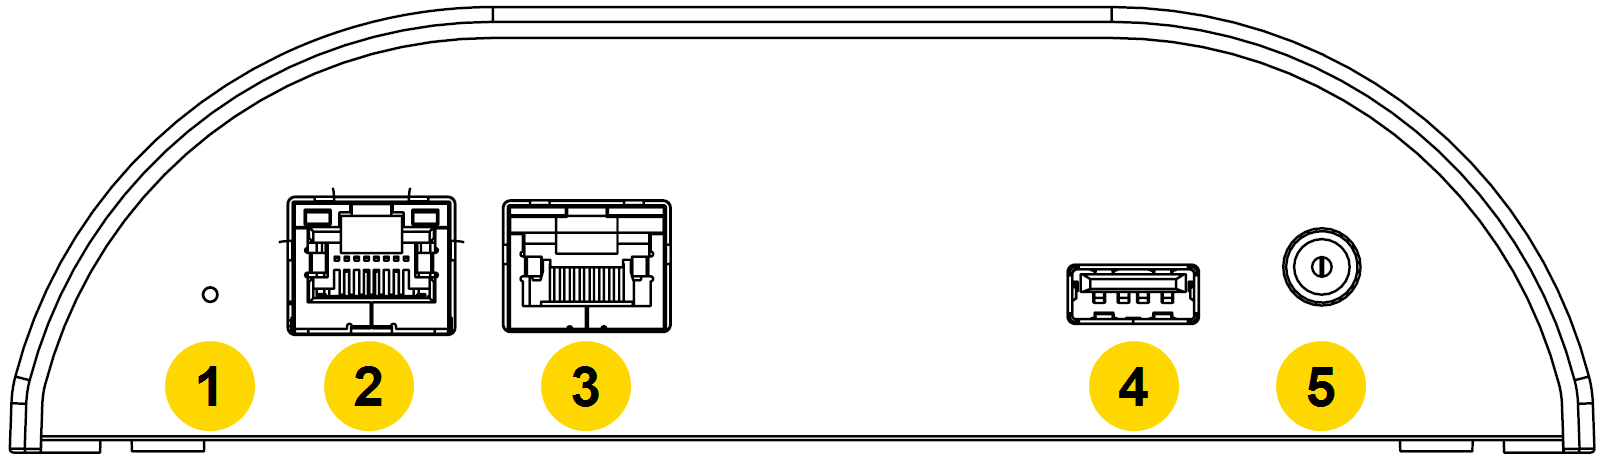
Step 3: Connect to network
The back of the dock core has two ports for ethernet cables: WAN and MGMT (LAN). The USB port on the rear of the core is non-functional.
|
|
- Plug one ethernet cable into the WAN port, and its other end into a networked agency port.
- Plug the other ethernet cable into the MGMT (LAN) port, and its other end into your computer.Caution
DO NOT connect the MGMT (LAN) port to the networked agency port.
- Connect the power cord to the power supply.
- Connect the power supply plug to the core and plug the adapter in a power outlet. The green Power LED on top will illuminate when the dock is powered.
- Allow the dock five minutes to fully start. The green Status LED on top will light up when the dock has started.
Step 4: Connect to the dock
- On the computer connected to the dock:
- Ensure the computer has internet access for signing into Axon Evidence.
- Disable any VPN (remote access) software.
- Open a web browser (Internet Explorer is no longer supported).
- In the URL address box, enter 10.10.1.1 and press Enter.
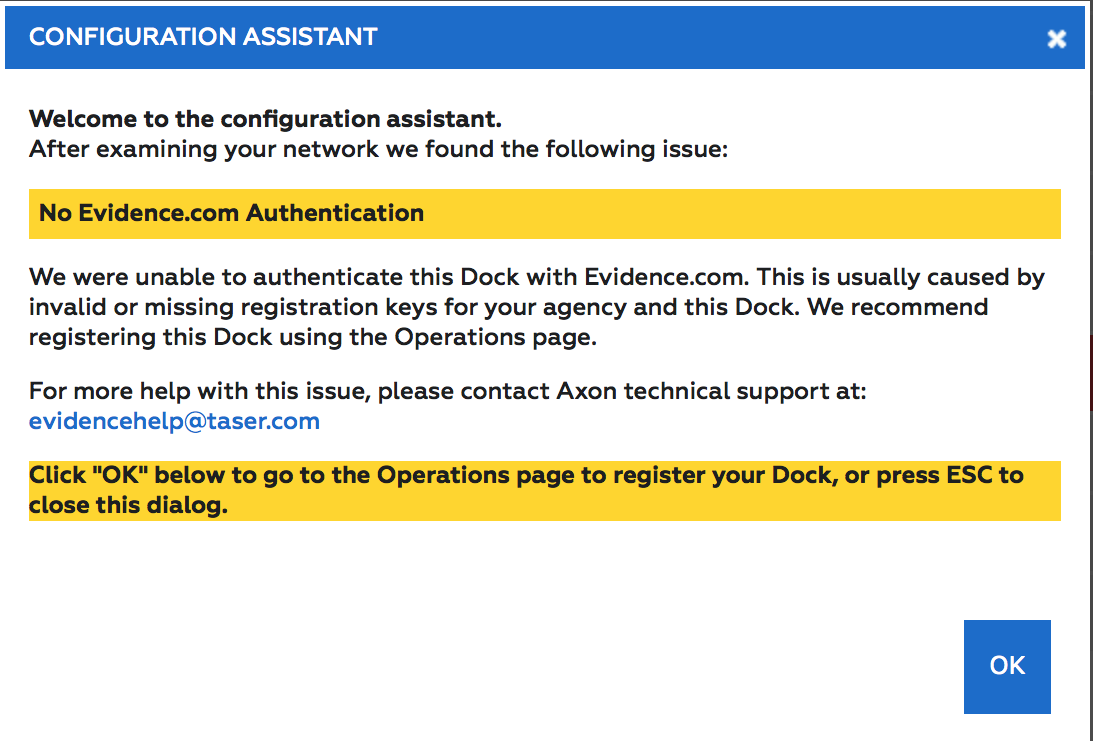
- In the Configuration Assistant dialog box, select OK.
Step 5: Device configuration
Complete the information for the Authentication Required dialog box.
- For User Name, enter admin.
- For Password box, enter admin.
- Select OK.
- Set a new password:
- In the Administration tab, enter the existing user name and password.
- In the Password Change section, enter a new password twice. You MUST change the default admin username and password during device configuration and MUST use a strong password (minimum 15 characters, upper and lowercase letter(s), number(s), and special character(s).
- Select Save Changes.Caution
Potential system access loss. Ensure you remember the password. It can't be reset.
Step 6: Administrator login
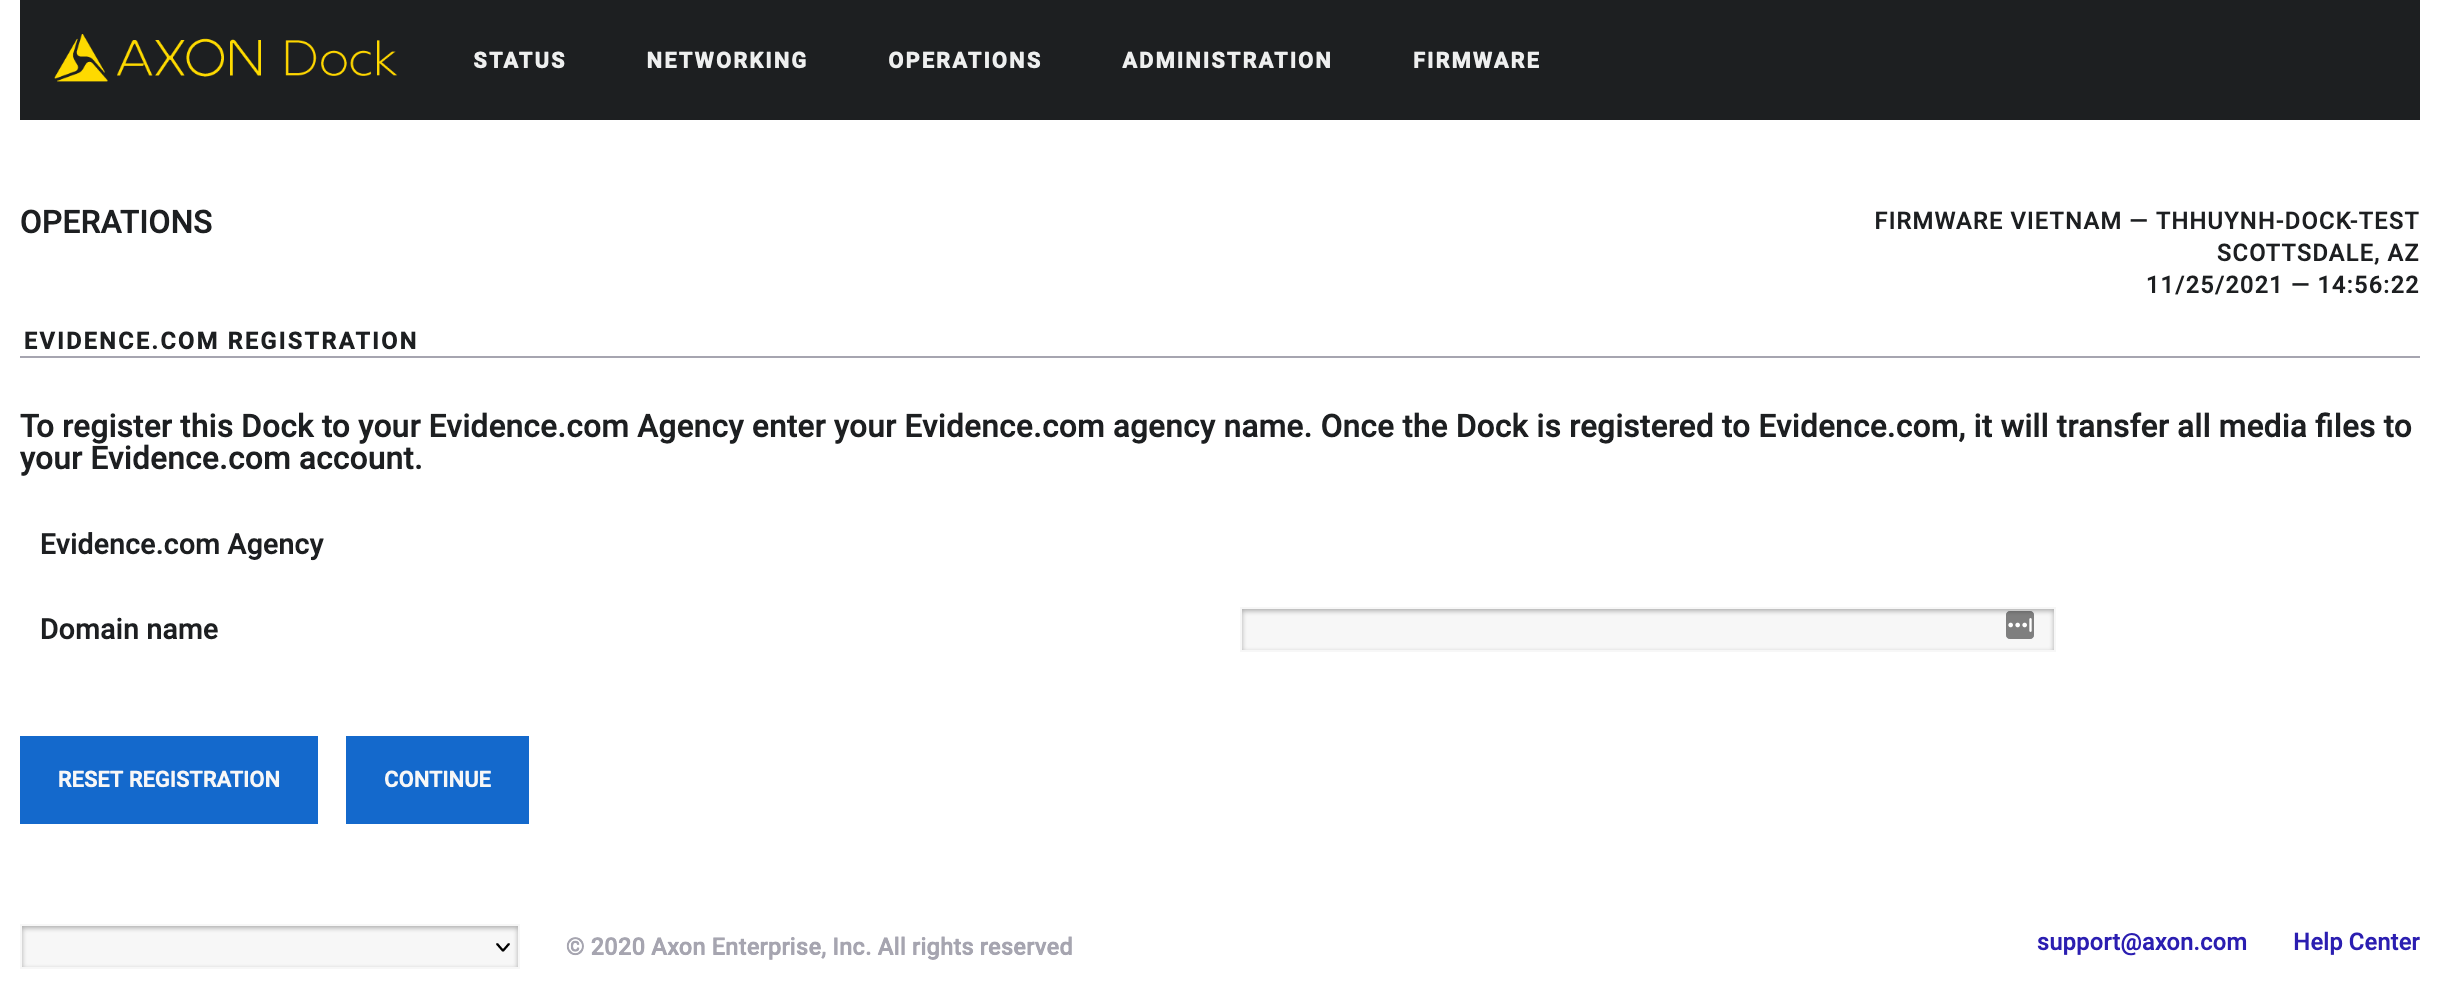
- Enter your agency’s Axon Evidence Domain name. For example, in axon.evidence.com, axon is the domain name.
 Note
NoteAfter 15 minutes of inactivity, the app will open a new tab and ask you to sign back in with your Axon Evidence credentials.
- Select Continue.
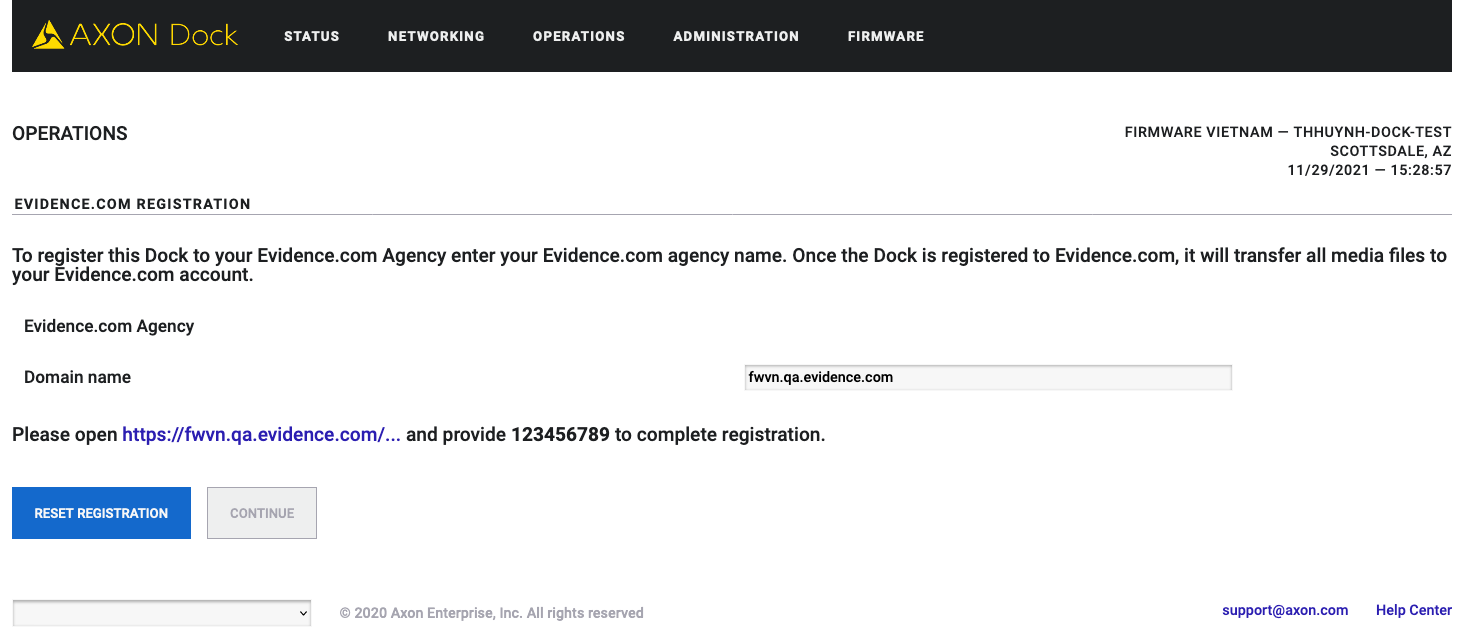
- Select the link in the "Please open..." sentence and use the number provided there to complete registration.
Step 7: Registration
The system reports it is Registering the dock, then Generating security tokens, and finally Restarting the dock.
- Allow two minutes for the system to restart.
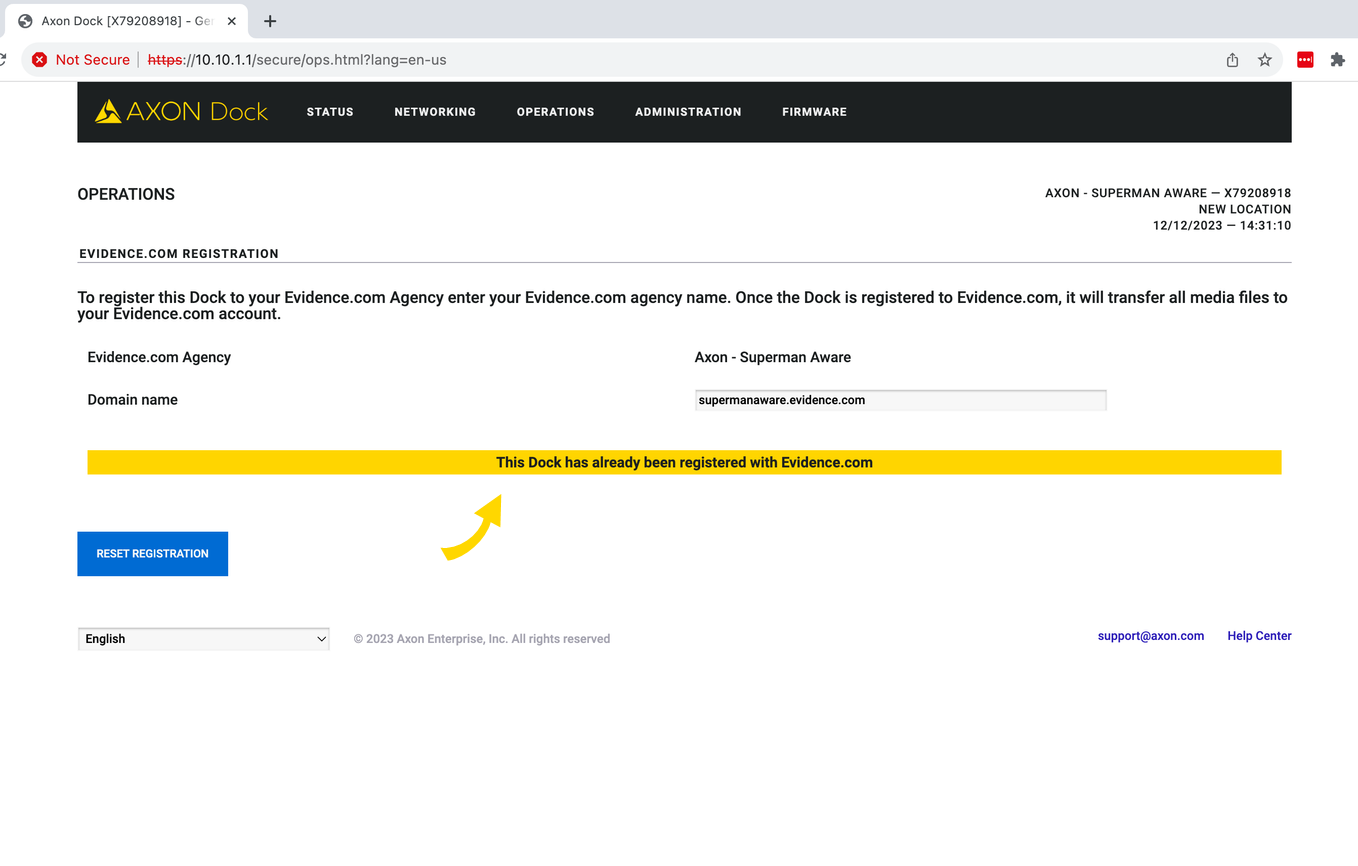
- On successful registration, a banner displays “This Dock has already been registered with Evidence.com”. This is not an error. Continue with step 8.
Step 8: Confirm registration
Select Status in the menu bar. There should be six green check marks on the left side of the screen. This dock is now registered.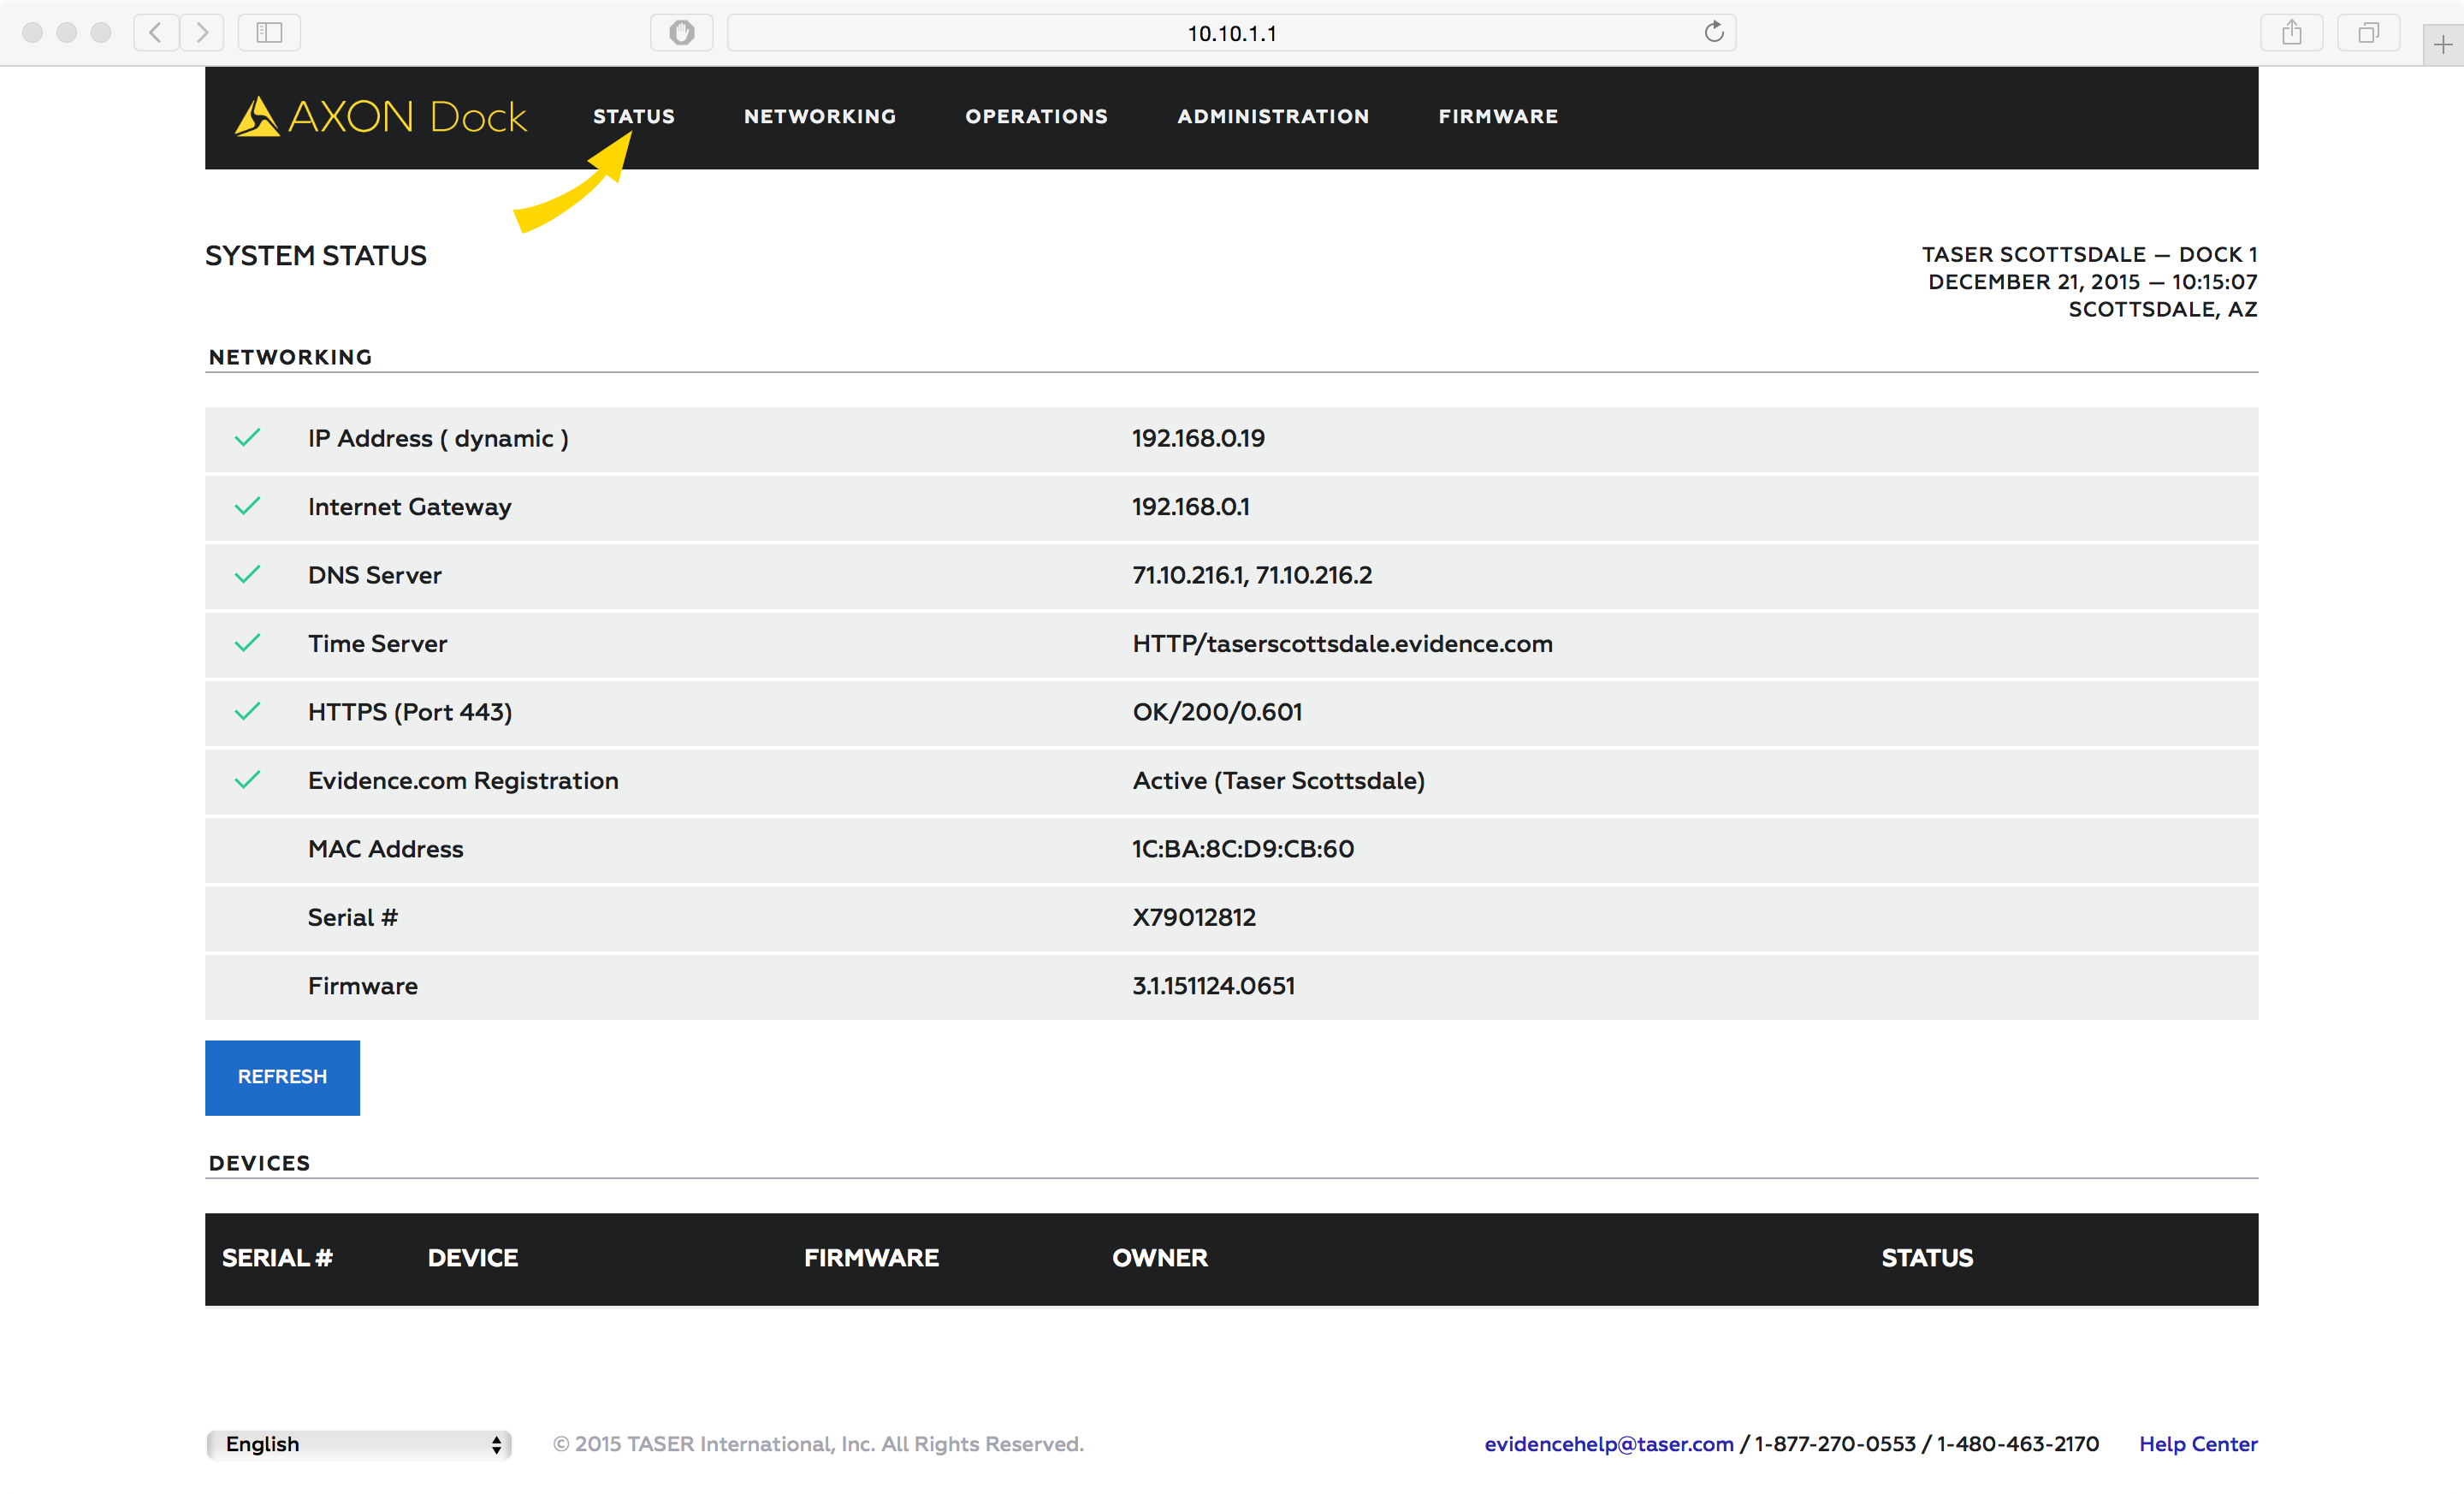
Battery charging and LEDs
An Axon Body 2 camera or Axon Flex 2 Controller will begin charging when placed in a bay. The color of the battery LED around the camera's EVENT button indicates the battery’s status; see the camera's user guide for details on what the different LED colors and actions mean.
Axon Fleet cameras do not charge in the Axon Dock; the battery LED will display solid green.
| Body Camera Battery Capacity | Battery LED while in Dock |
|---|---|
| Fully charged (greater than 98%) |
 Green Green |
| Charging in progress (20–98%) |
 Yellow Yellow |
| Charging in progress (less than 20%) |
 Red Red |