Get to know your camera
Button actions
There are several buttons and features that perform as described below.
Watch this video for an overview of Body 4 button layout and functions.
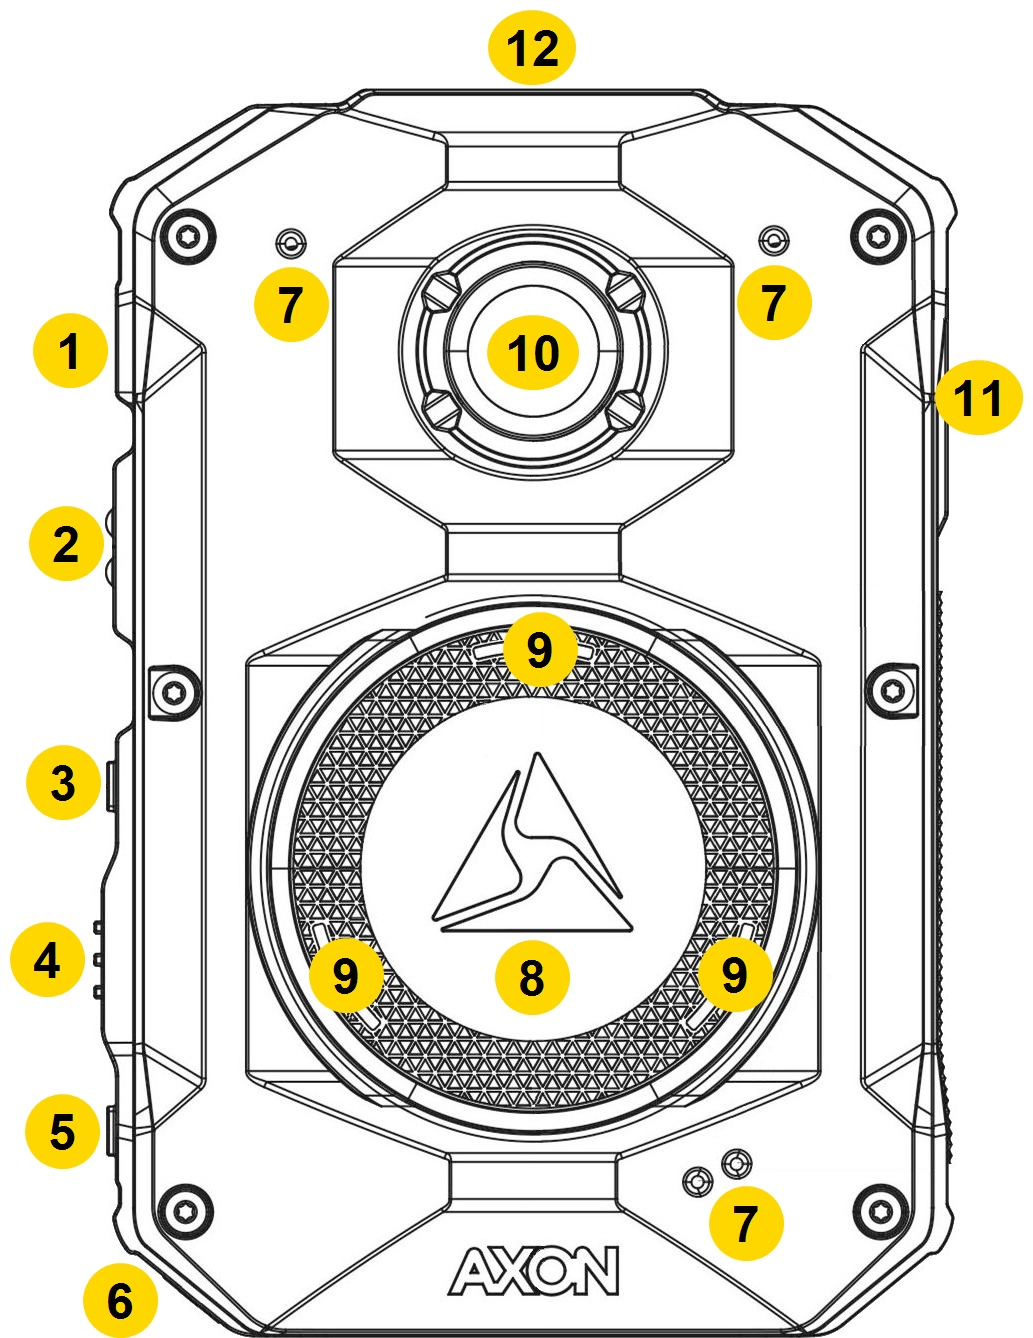
Front view
|
|
| Action | Button Presses |
|---|---|
| Lights | Press Volume Up p for three second, then tap to toggle modes |
| Marker, add | Press Select while recording |
| Menus |
|
| Mute on/off | Press Select for three seconds while recording |
| Pairing | Press Event + Select simultaneously |
| Power off |
|
| Power on |
|
| Programmable Button 1 | Double-press Programmable Button 1 (default: Watch Me) |
| Programmable Button 2 | Single-press or long-press Programmable Button 2, depending on how device behavior is set |
| Recording start | Double-press Event |
| Recording stop | Press Event for three seconds |
| Sleep mode, enter | Press Power then Select to confirm |
| Sleep mode, exit | Press Power or start a recording |
| Stealth mode, enter |
|
| Stealth mode, exit |
|
| Volume, speaker | Press Volume Up p or Volume Down q |
* The camera remembers the previous volume and light settings when exiting Stealth mode.
For details on screen icons and meanings of both the top Operation and front Triad LEDs, see .
For details on programmable button options, see Programmable buttons.
POV Connector Port – Used to connect the POV and body camera together via the POV Cable. All Axon Body 4 cameras ship with a plastic cover over the port. If a camera will not be using the POV, leave this cover on to protect the port.
Top view

|
|
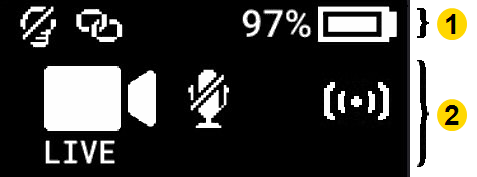
Camera Display – Shows information on camera status and activity. Different information appears depending on if the camera is in the field and in an Axon Dock. Some icons may not be active at your organization. The display is divided into a Status Bar and Activity Area.
|
|
For details on all the icons that may display both in the field and during dock charging, see Icons, LEDs, and sounds.
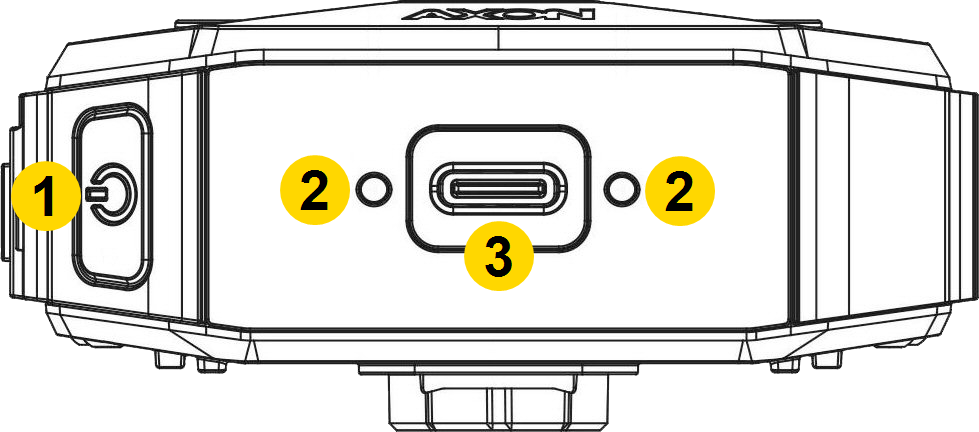
Bottom view
|
|
- USB-C connector – Used for data transfer and charging when placed in an Axon Dock.
- Power button – Used to turn the camera on/off.
- Magnetic charger port – Used to connect the magnetic charging cable.
Accessories and mounts
The
As with any radio frequency or electronic device, Axon recommends to avoid placing the camera directly next to your radio to prevent inadvertent radio activation.
The various mounts that use this system can be used with a wide variety of uniforms to fasten the camera to your shirt,
In general, Axon mounting systems consist of the attachment piece (called the key) on the camera and the attachment receiver (called the lock) on the mount. To lock a camera in place, insert the key of the camera into the lock of the mount (the camera will typically be sideways) and turn it 90 degrees counterclockwise (when you are looking straight at the mount). To release the camera from the mount, turn the camera 90 degrees clockwise.
When wearing the camera, you can use the livestreaming feature of the Axon View app to show the camera's view.
Watch this video to see different body camera mounting options.
You can find further information on mounting options, including demonstration videos, at Body Camera Mounting Options.