Change body camera settings
When you connect an Axon Body Camera to the View XL application, you can use it change the camera settings.
- On the Control
 tab, select Settings
  next to the camera serial number.
 - Adjust settings as needed.
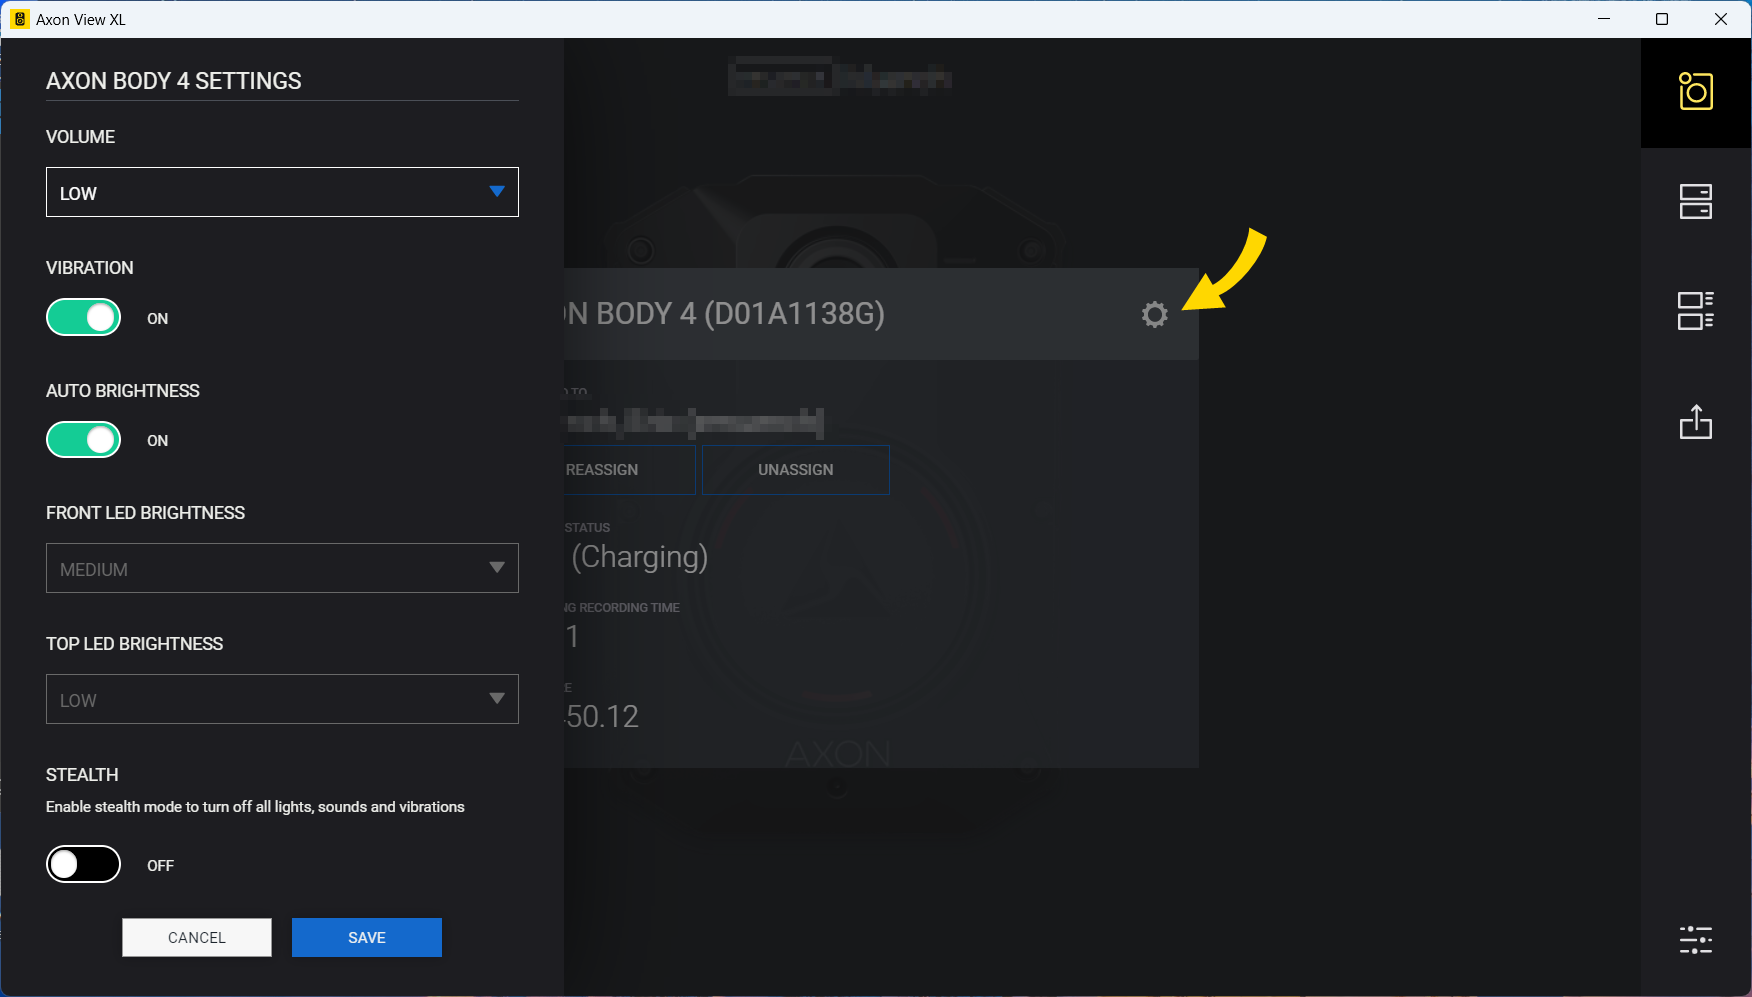
- Volume – Set the volume of the camera’s audio prompts, which are used to notify the user of camera status.
- Vibration – Toggle vibrations (haptic feedback) that notify the user of camera status.
- Auto Brightness – Toggle auto-brightness on or off.
- Front LED Brightness – Set the brightness of the Triad LED on front of the camera.
- Top LED Brightness – Set the brightness of the Operation LED on top of the camera.
- Stealth – Turn Stealth Mode on or off. When Stealth mode is on, the camera will not beep or vibrate, regardless of other settings, and all camera lights are off.
- Save
 your changes.
Assign, reassign, or unassign a body camera
Your Axon Evidence role must have Device Administration privileges to assign a camera.
- On your computer, sign in to View XL and launch Standalone mode.
- Connect the laptop/computer to the powered-on camera with a
- The View XL screen will show two of the following three options:
- Reassign – Use this to reassign the camera to another user.
- Assign to me – Only shown if the camera is currently unassigned. Use to assign the connected camera to yourself.
- Unassign – Only shown if the camera is currently assigned to a user. Use to unassign a camera.
- Select the desired option and provide the requested information, such as new user name:

- Select Save.
- Disconnect the camera.
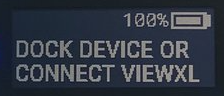
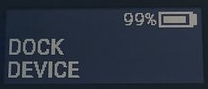
Register a body camera
The display will show DOCK DEVICE OR CONNECT VIEWXL if you can use View XL Standalone mode to register the camera. Cameras using older firmware will show DOCK DEVICE and must be registered with Axon Device Manager (ADM).
Requirements
- View XL v1.14 or greater
- Axon Body
Process
- Power on the camera.
- On your computer, sign into View XL and launch Standalone mode.
- Connect the laptop/computer to the powered-on camera with a
- If the camera is unregistered, you will be prompted to Register the camera. Select Register to continue; this process can take up to 20 seconds.
- Once successful, select OK and the camera will automatically connect to View XL where it can be assigned as needed.
- Following registration, agency camera settings from Axon Evidence are checked and applied to the camera.
- Power the camera off/on to apply any resolution configuration changes.
Update Axon Body Camera firmware
Screens in this section show the Axon Body 4 Camera.
When you connect an Axon Body Camera with suitable firmware (operating system) version to View XL (v1.14 or later) in Standalone mode on an internet-connected computer, it checks and notifies you if a firmware update is available: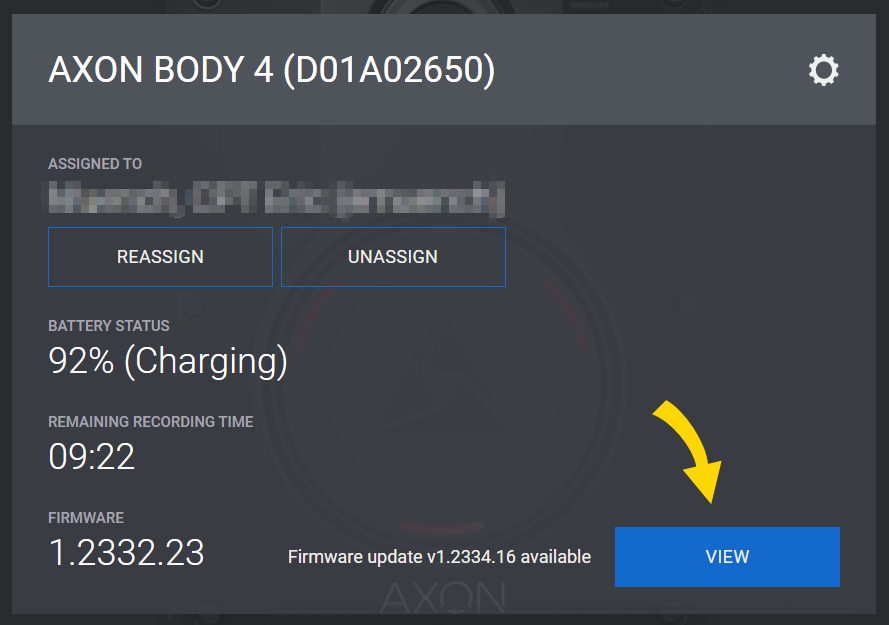
Do not begin a firmware update when using a limited internet connection such as an LTE router.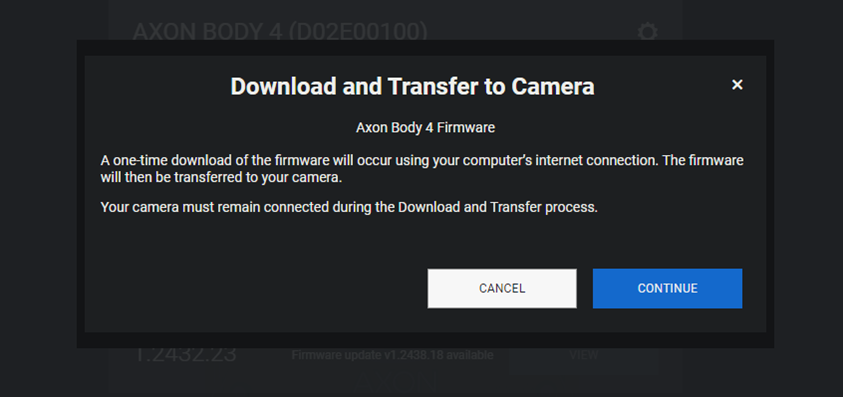
The download time will depend on your computer’s internet speed, but even at a relatively low download speed of 20 Mbps, the download should take less than five minutes. Once downloaded, the firmware can be transferred to the camera:
- When a camera firmware update displays in View XL, select View. The firmware download is stored locally on your computer and can be applied to multiple cameras.
- At the Download and Transfer to Camera dialog, select Continue to download the firmware.Caution
Leave the camera connected to View XL for the entire time when downloading and applying the firmware update. The download progress is tracked at the bottom of the screen.
- When the download is complete, select Update to apply the firmware update to the attached camera.
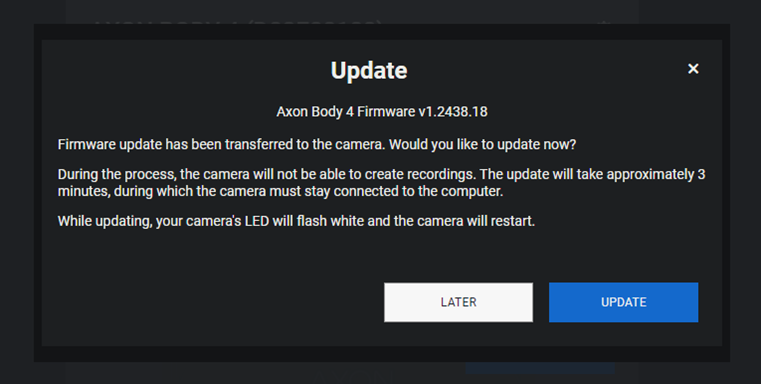
- The camera cannot record during the update, which will take about three minutes.
- The camera LEDs will flash white during the update and the display will show the firmware update icon:
 . The camera will restart when the installation is complete.
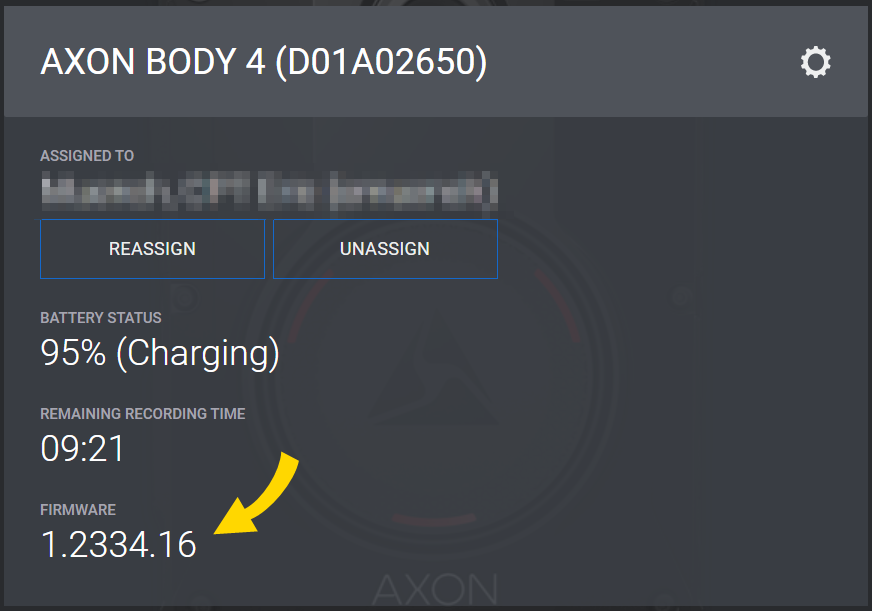
 - After the camera restarts and reconnects to View XL, the new firmware version displays at the bottom of the Control tab.
View XL updates
Axon periodically distributes updates for the Axon View XL application. When updates are available, the system automatically downloads the update and displays an Update button showing the update is ready to install. Axon recommends installing updates as soon as possible.
Select Update to install an update. Axon View XL will close during the update and automatically restart once the update is completed.
To see your current Axon View XL version, select Info ![]() .
.