View XL tabs
The Axon View XL interface has five tabs:
| Control – Shows the camera status. It is also the default page shown after signing in to View XL. | |
| Video Recall – Use to locate and upload Video Recall videos to Axon Evidence. | |
| Review – Use to review videos, add metadata to videos, and then submit a video for upload. | |
| Upload – Lets you check the upload status of videos. | |
| Info – Displays information such as Install ID, View XL version, connectivity, and camera storage. |
The following sections have a more detailed description of the tabs and different actions that can be taken on each tab.
Control tab
This tab ![]() shows the current status of the connected Axon Body Camera:
shows the current status of the connected Axon Body Camera: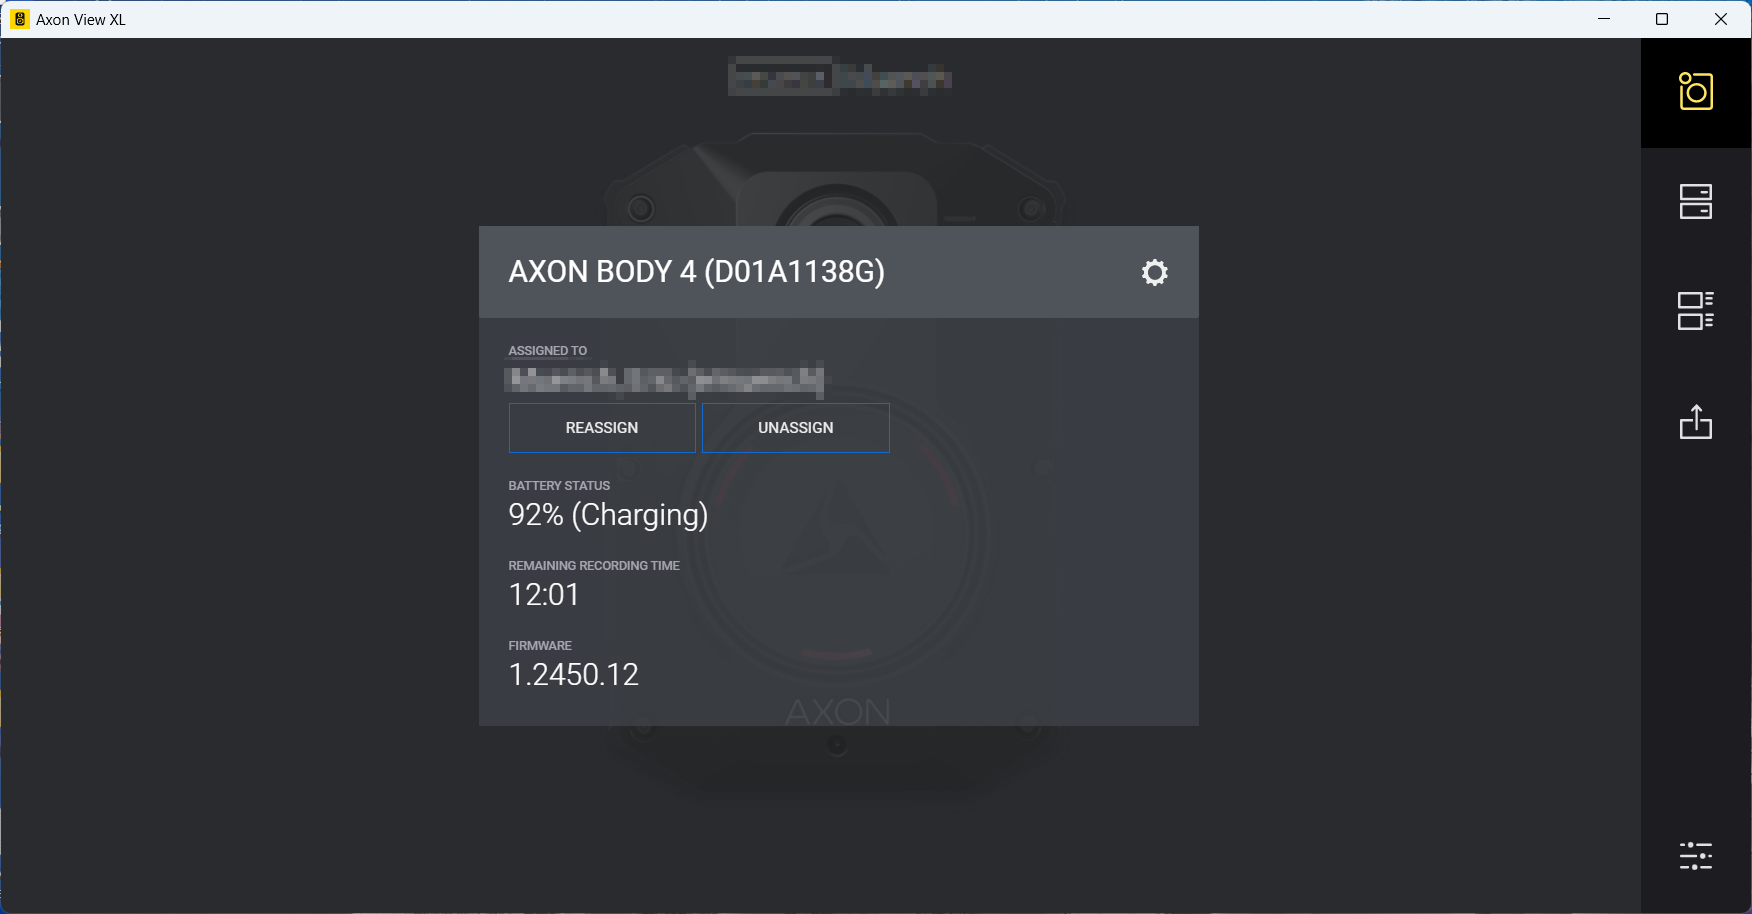
The camera status block includes:
- The camera’s serial number
- The last name and badge ID of the camera’s assigned user
- The current battery status of the camera
- The amount of remaining recording time for the camera in hours and minutes. The time remaining changes depending on the resolution settings of the camera and is configured in Axon Evidence. The higher the resolution, the fewer hours of recordings can be stored on camera’s internal memory card.
- The current camera firmware version
To change camera settings using View XL, see Change camera settings.
Video Recall tab
Use this tab ![]() to locate and upload Video Recall videos to Axon Evidence.
to locate and upload Video Recall videos to Axon Evidence.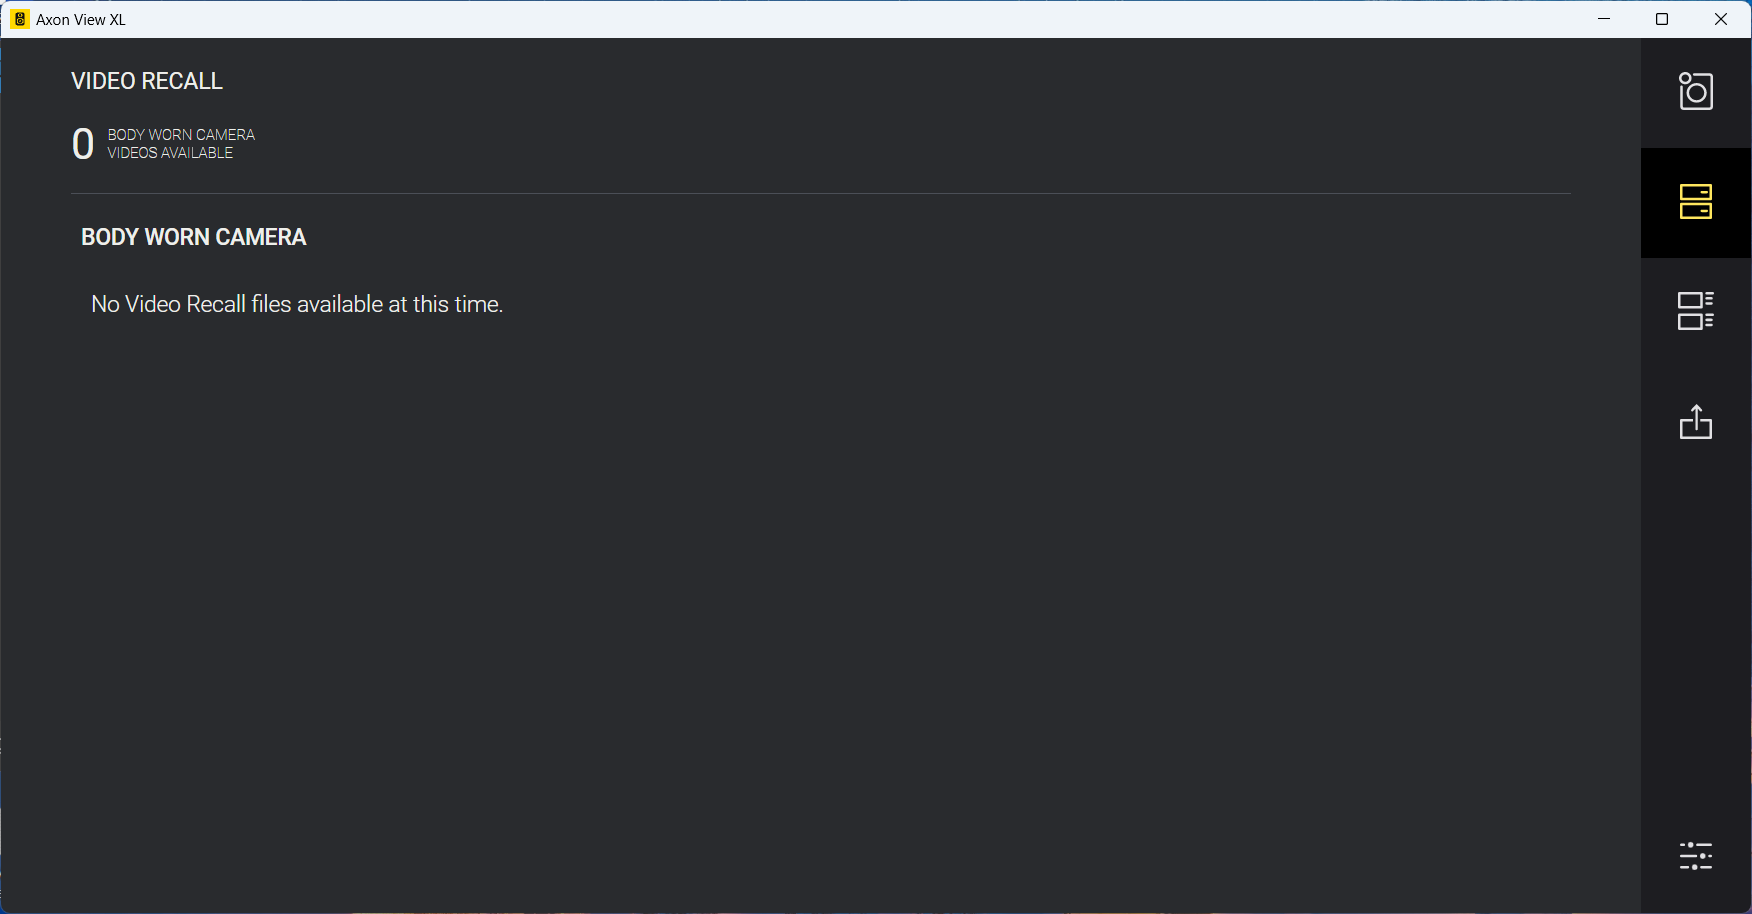
Review tab
Use this tab ![]() to review and add metadata to videos. You can also select to prioritize the upload for a video, placing it at the top of the upload queue.
to review and add metadata to videos. You can also select to prioritize the upload for a video, placing it at the top of the upload queue.
After selecting the Review tab, recordings on the camera that have not been queued for upload display on the left side of the page.
Recordings that start within one minute of the previous recording are automatically added to an incident group. The incident groups are sorted by date and time. The upper portion of the page shows the number of incidents the require review.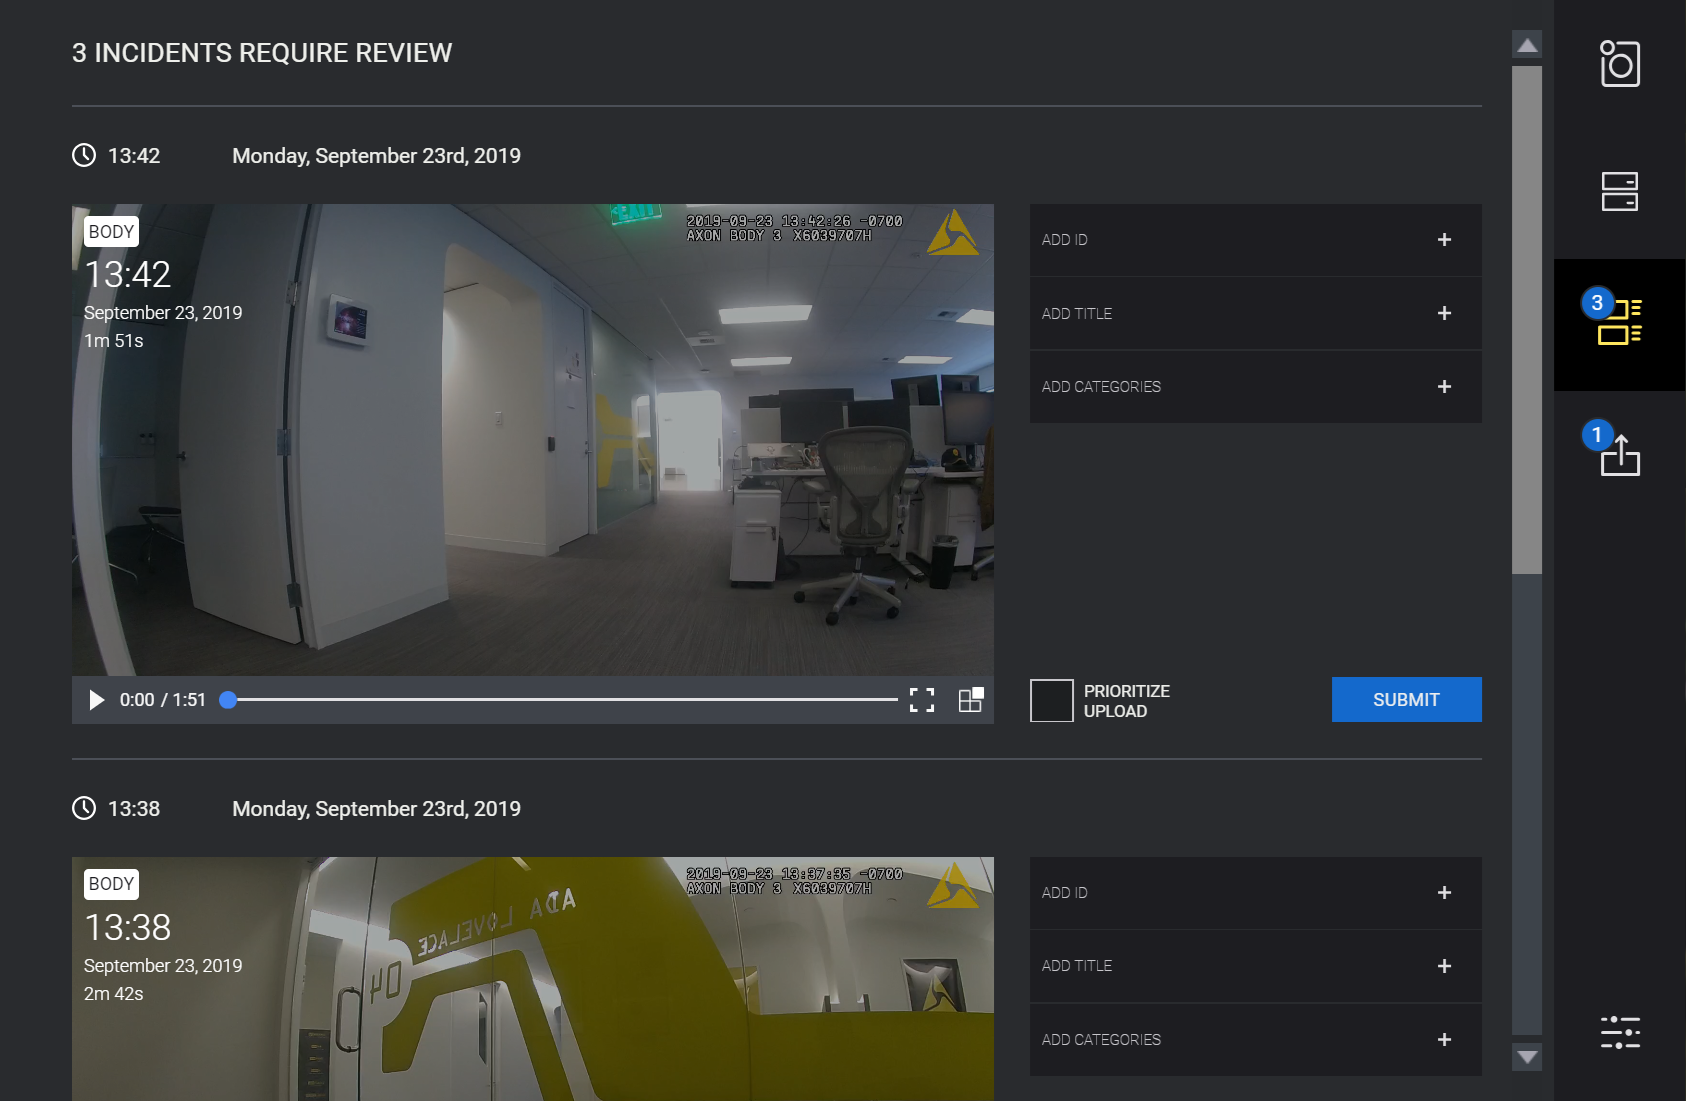
View a recording and add metadata
View XL lets you view recorded video on a connected Axon camera and tag video evidence files with metadata such as ID, title, and category. Recordings display together in incident groups so you can enter and apply metadata information to all recordings in an incident group.
Navigate between different videos using the scroll bar. You can also play the video and view the playback in full screen mode.
Common commands when conducting a typical review:
- Select Review
 .
. - Select a video to start or stop play it. Select Full Screen
 to view the video on the full screen.
 - To remove a recording that doesn't belong in an incident group, select it and select Remove
 .
. - To add or edit the metadata tags:
- ID – Select the ID box and type the case ID that you want to apply to the video evidence file.
- Title – Select the Title box and enter the title you want to apply to the video evidence file.
- Categories – Select Categories, scroll through the category list, then select the one you want to apply to the video-evidence file. Start typing the name of a category to narrow down the list. You can add multiple categories to the same video. Select the X by the category name to remove it.
- Select Prioritize Upload to move this video to the top of the upload queue. This option also allows you to place video from the connected camera at the top of the upload queue.
- Select Submit to save the metadata and move the video from the Review tab to the Uploads queue. If the camera becomes disconnected while uploading a video, simply reconnect to continue.
- After clicking Submit, you have approximately five seconds to Undo the save to the upload queue. If you don't select Submit, the metadata saves to the video but the video does not move to the upload queue.

Upload tab
This tab ![]() shows the upload status for videos. You can also select to prioritize the upload for a video, placing it at the top of the upload queue.
shows the upload status for videos. You can also select to prioritize the upload for a video, placing it at the top of the upload queue.
The number on the upper left of the Upload icon is the number of videos currently in the upload queue. It also provides a summary that shows the number of videos queued for upload and, if applicable, the number of videos currently uploading. If you don't select Submit, the metadata saves to the video but the video does not move to the upload queue.
Videos in the uploads queue automatically upload when Axon View XL connects to Axon Evidence. The status of a video displays to the right of the video thumbnail: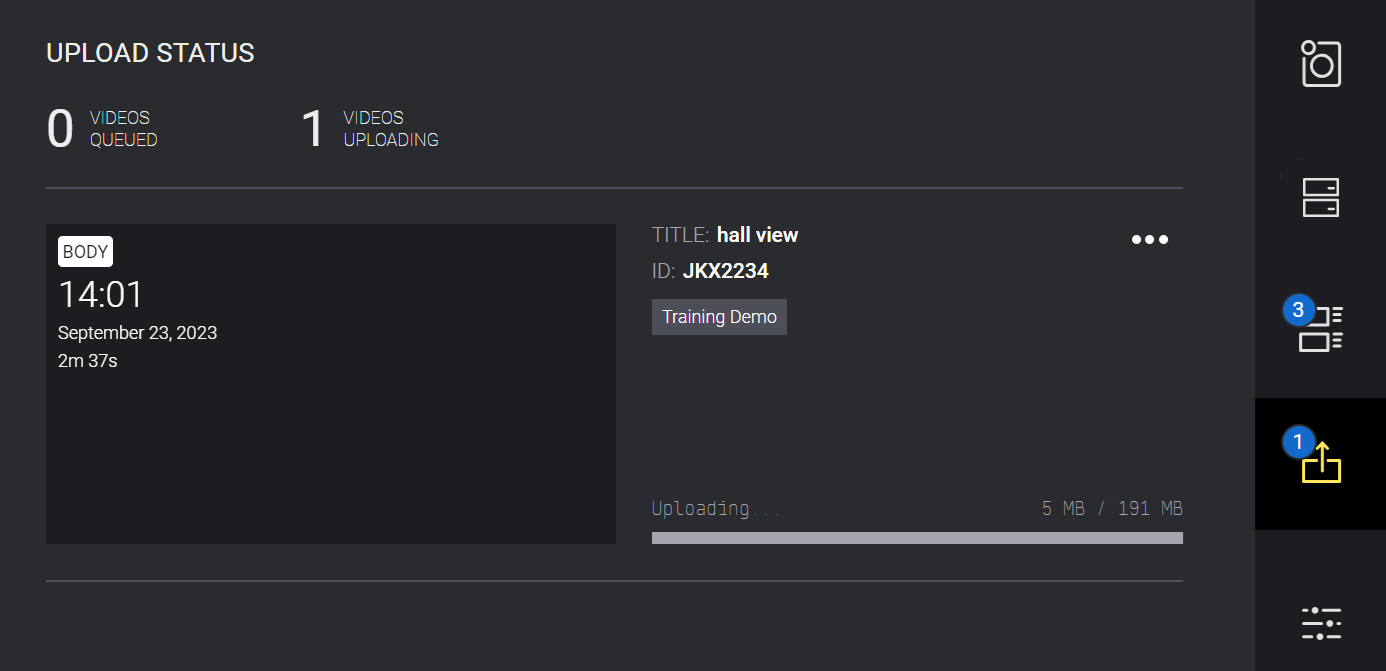
There are three statuses associated with videos in the uploads queue:
- Copying – Axon View XL is connected to the camera and is copying the video from the camera to View XL for uploading to Axon Evidence. The video file is not deleted from the camera at this time.
- Uploading pending – A video has been copied to Axon View XL, but is not being uploaded. Videos can be in this status while waiting to be uploaded or if Axon View XL is not connected to Axon Evidence and cannot upload the video.
- Uploading – Axon View XL is connected to Axon Evidence and is uploading the video. When the upload is complete, a check is done to verify the upload is accurate and complete. If the check passes, the video is deleted from the camera.
Prioritize video uploads
In situations where you want a video to be uploaded before others, select to prioritize the upload. If you selected Prioritize Upload in the Review tab, the video is already prioritized and you don't have to select it again.
- Find the appropriate video in the Upload tab list.
- Select Options
 , then Prioritize Upload.
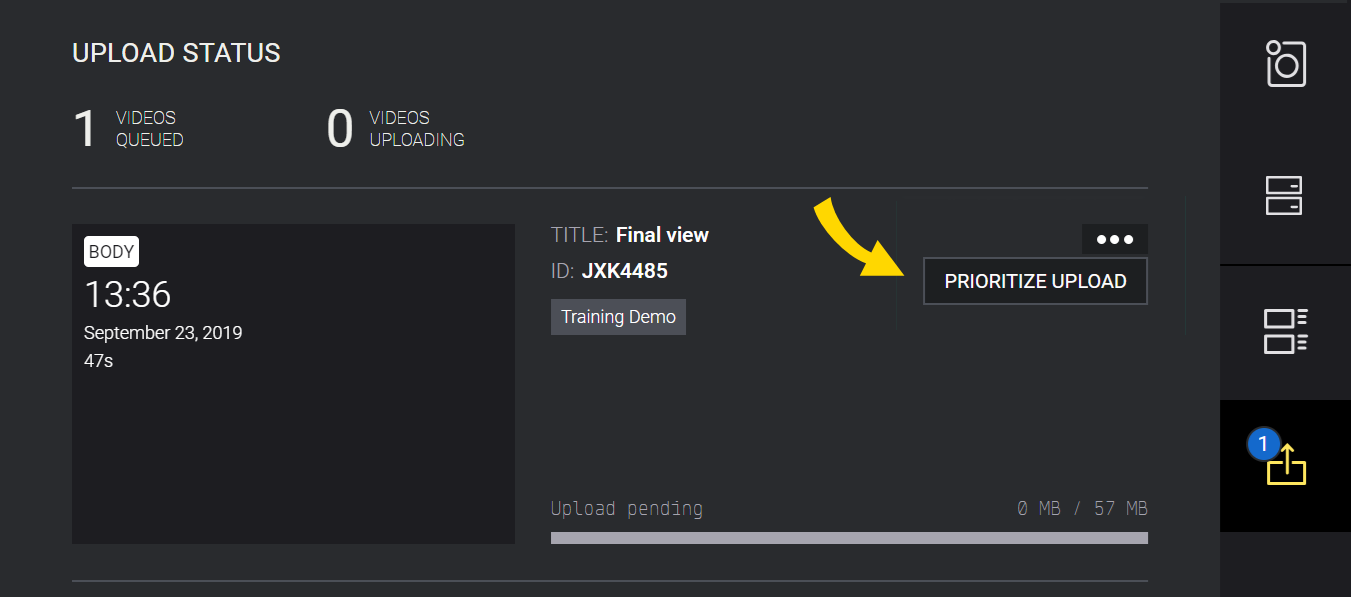
The video is marked as prioritized and moved to the top of the upload queue.
De-prioritize video uploads
De-prioritizing a video from the Upload tab removes it from the upload queue.
- Find the appropriate video in the Upload tab list.
- Select Options , then De-Prioritize Upload. The prioritized marking is removed from the video and videos from body worn cameras are removed from the upload queue.
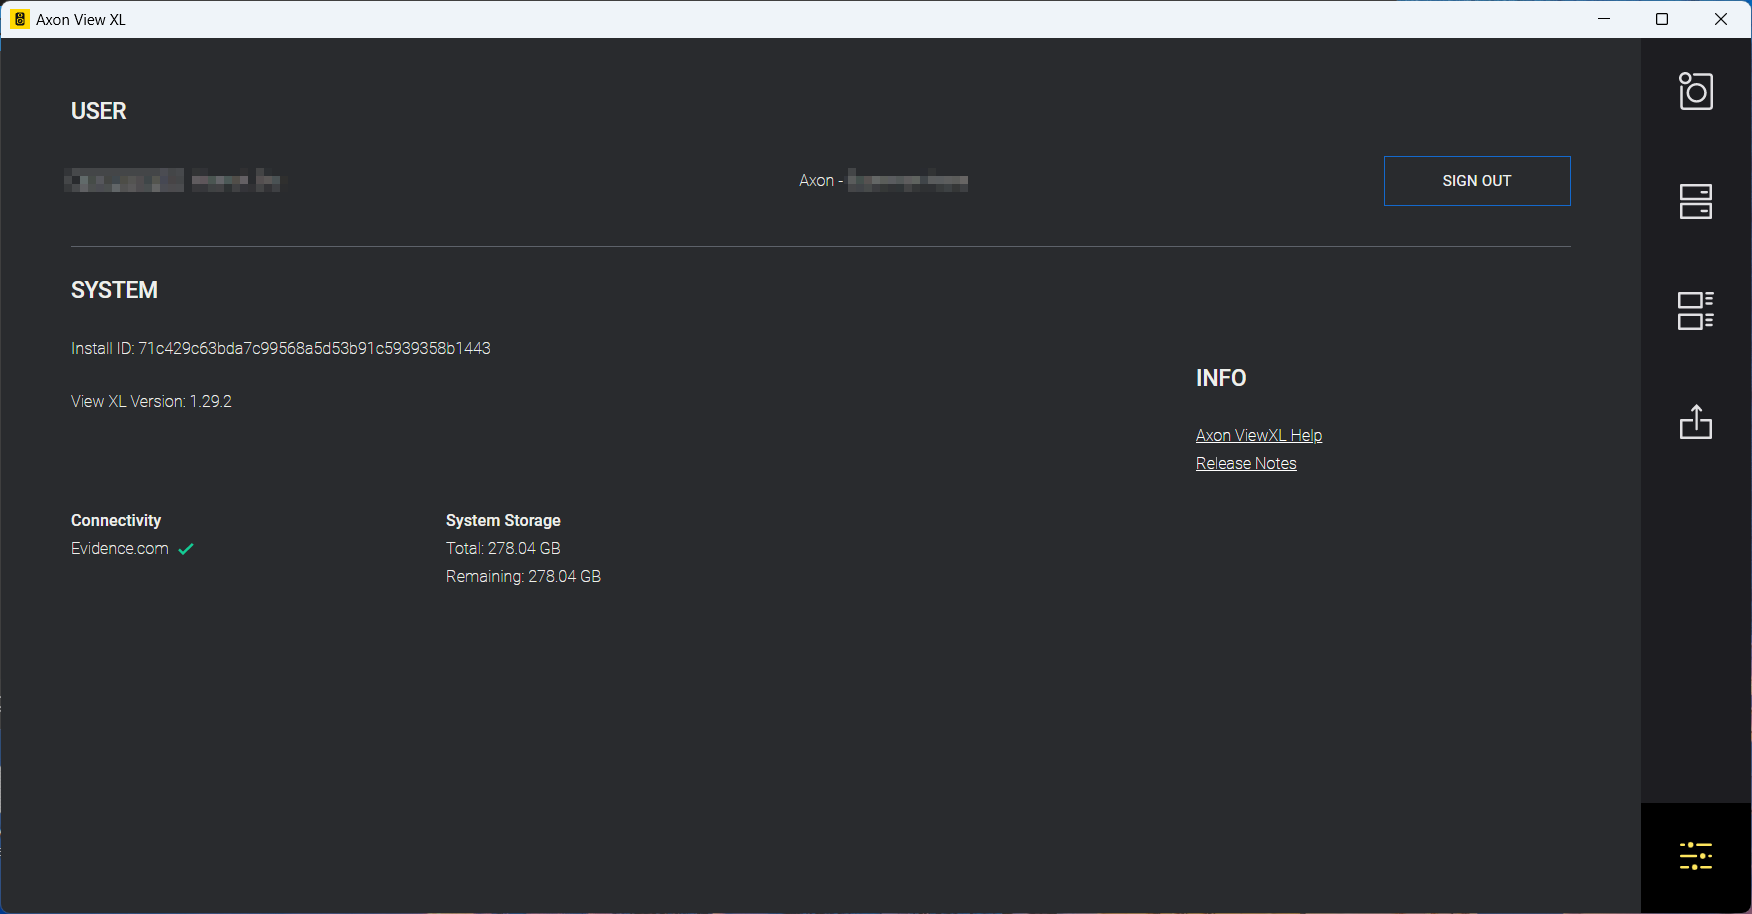
Info tab
Select Info ![]() at the bottom right to see information such as Installation ID, View XL version, connectivity, and camera storage. You can also sign out from this tab.
at the bottom right to see information such as Installation ID, View XL version, connectivity, and camera storage. You can also sign out from this tab.