Name, install, and align
Name it
Assign the device a name that corresponds to its location for easy identification. After saving, the device will register to the Axon Evidence account, appear in the device inventory and automatically apply all organizational settings.
When entering the name, only the following special characters are allowed: , & . - @
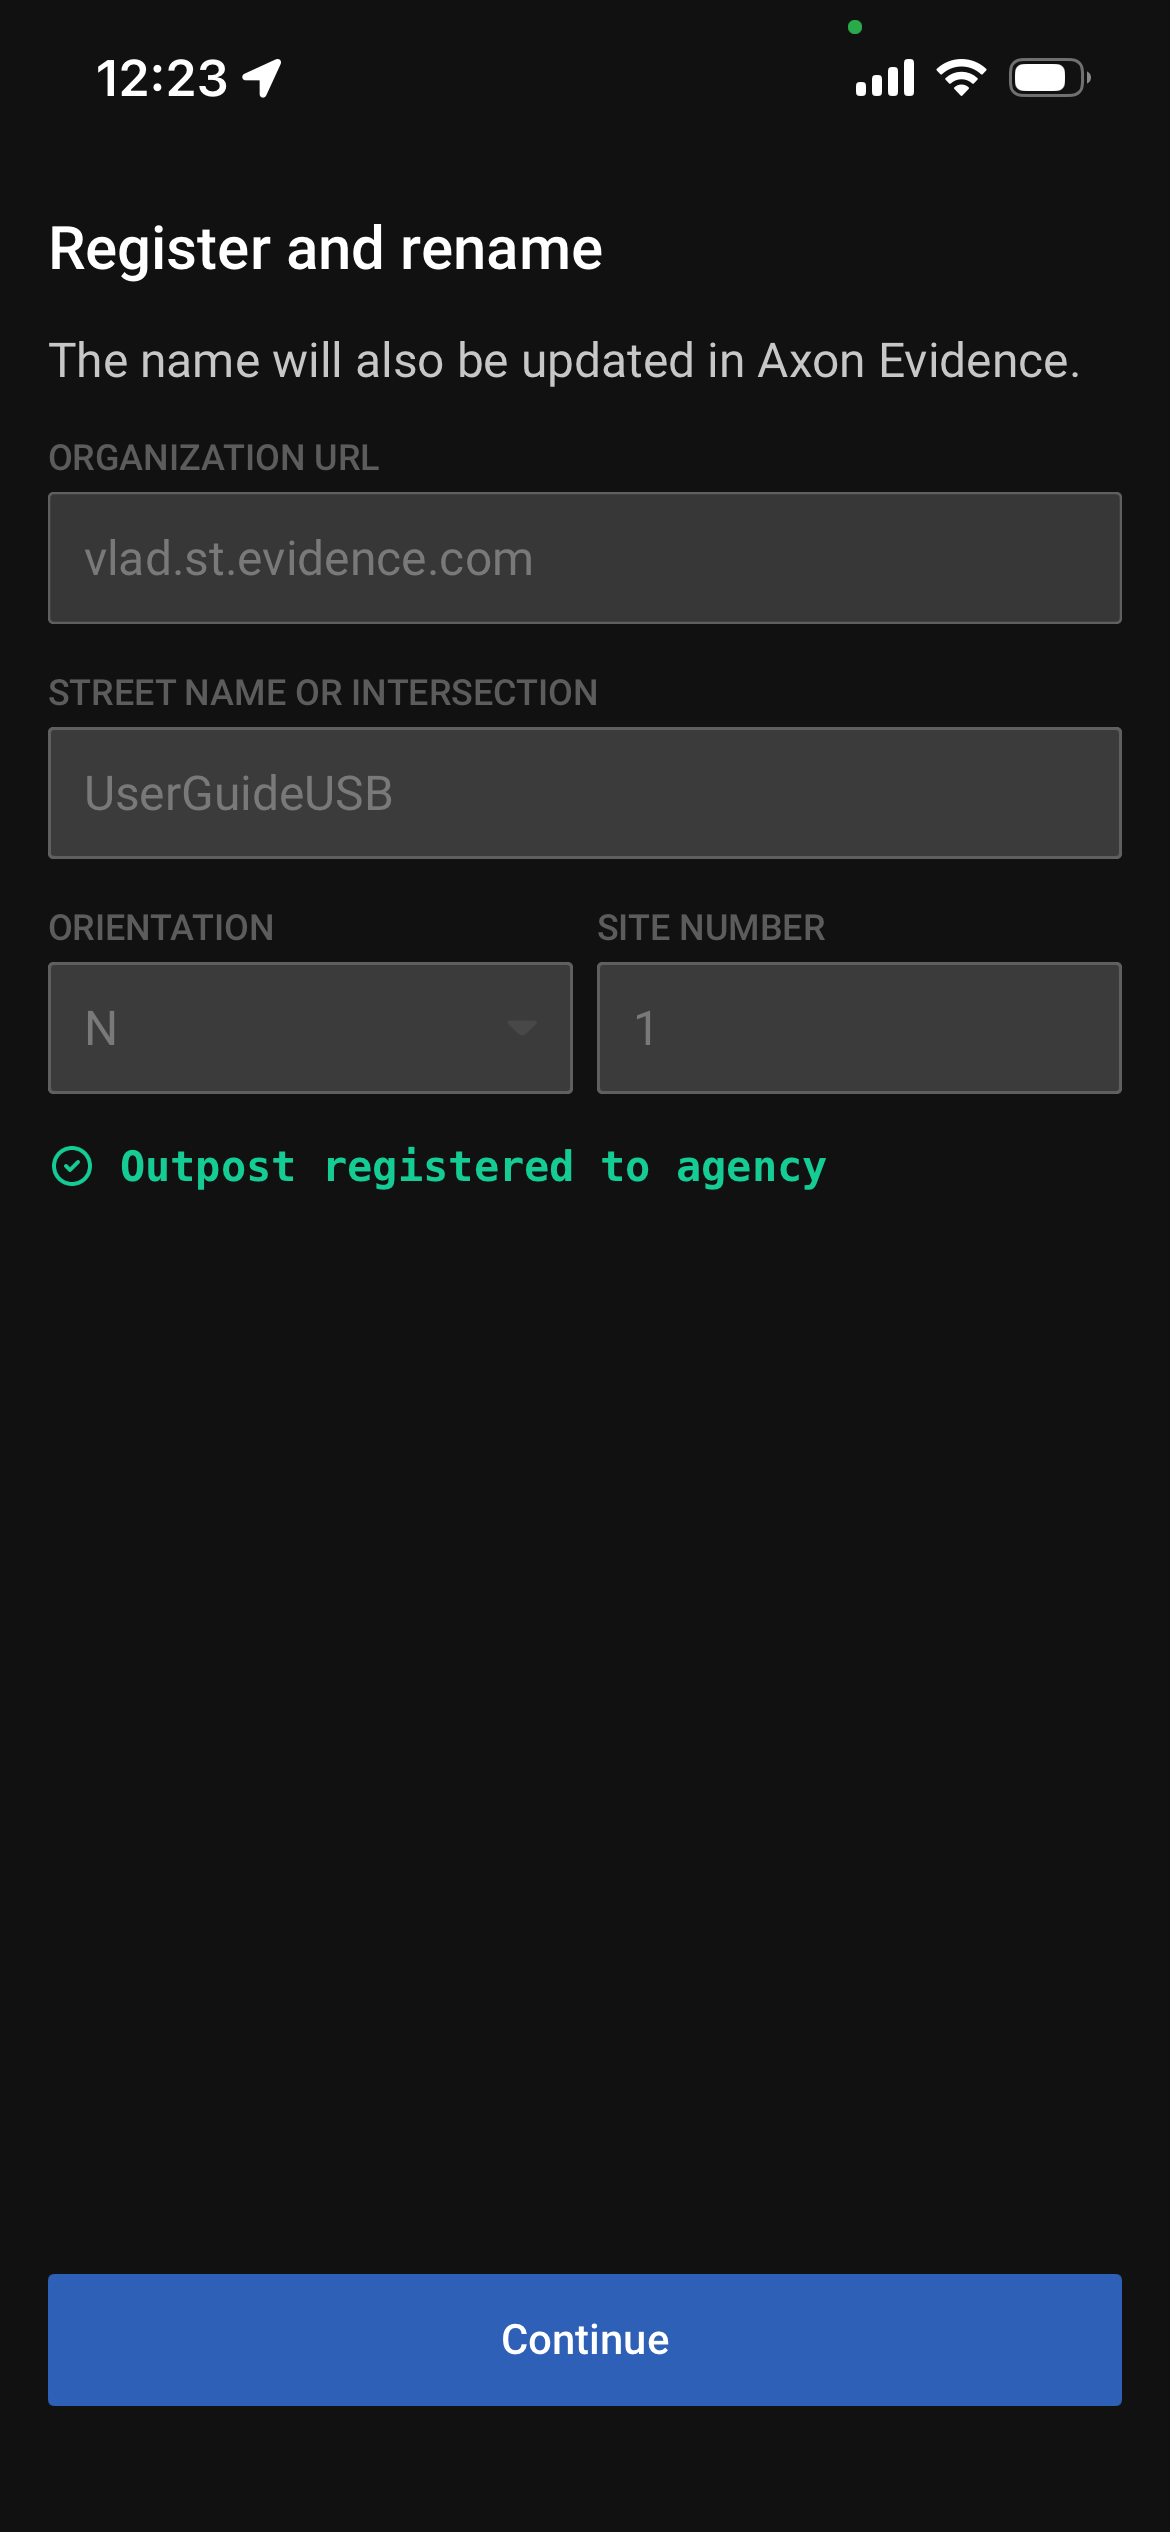
Note: The registration process may take up to 3 minutes. Once the device is successfully registered, a confirmation message will appear, allowing you to proceed with the setup.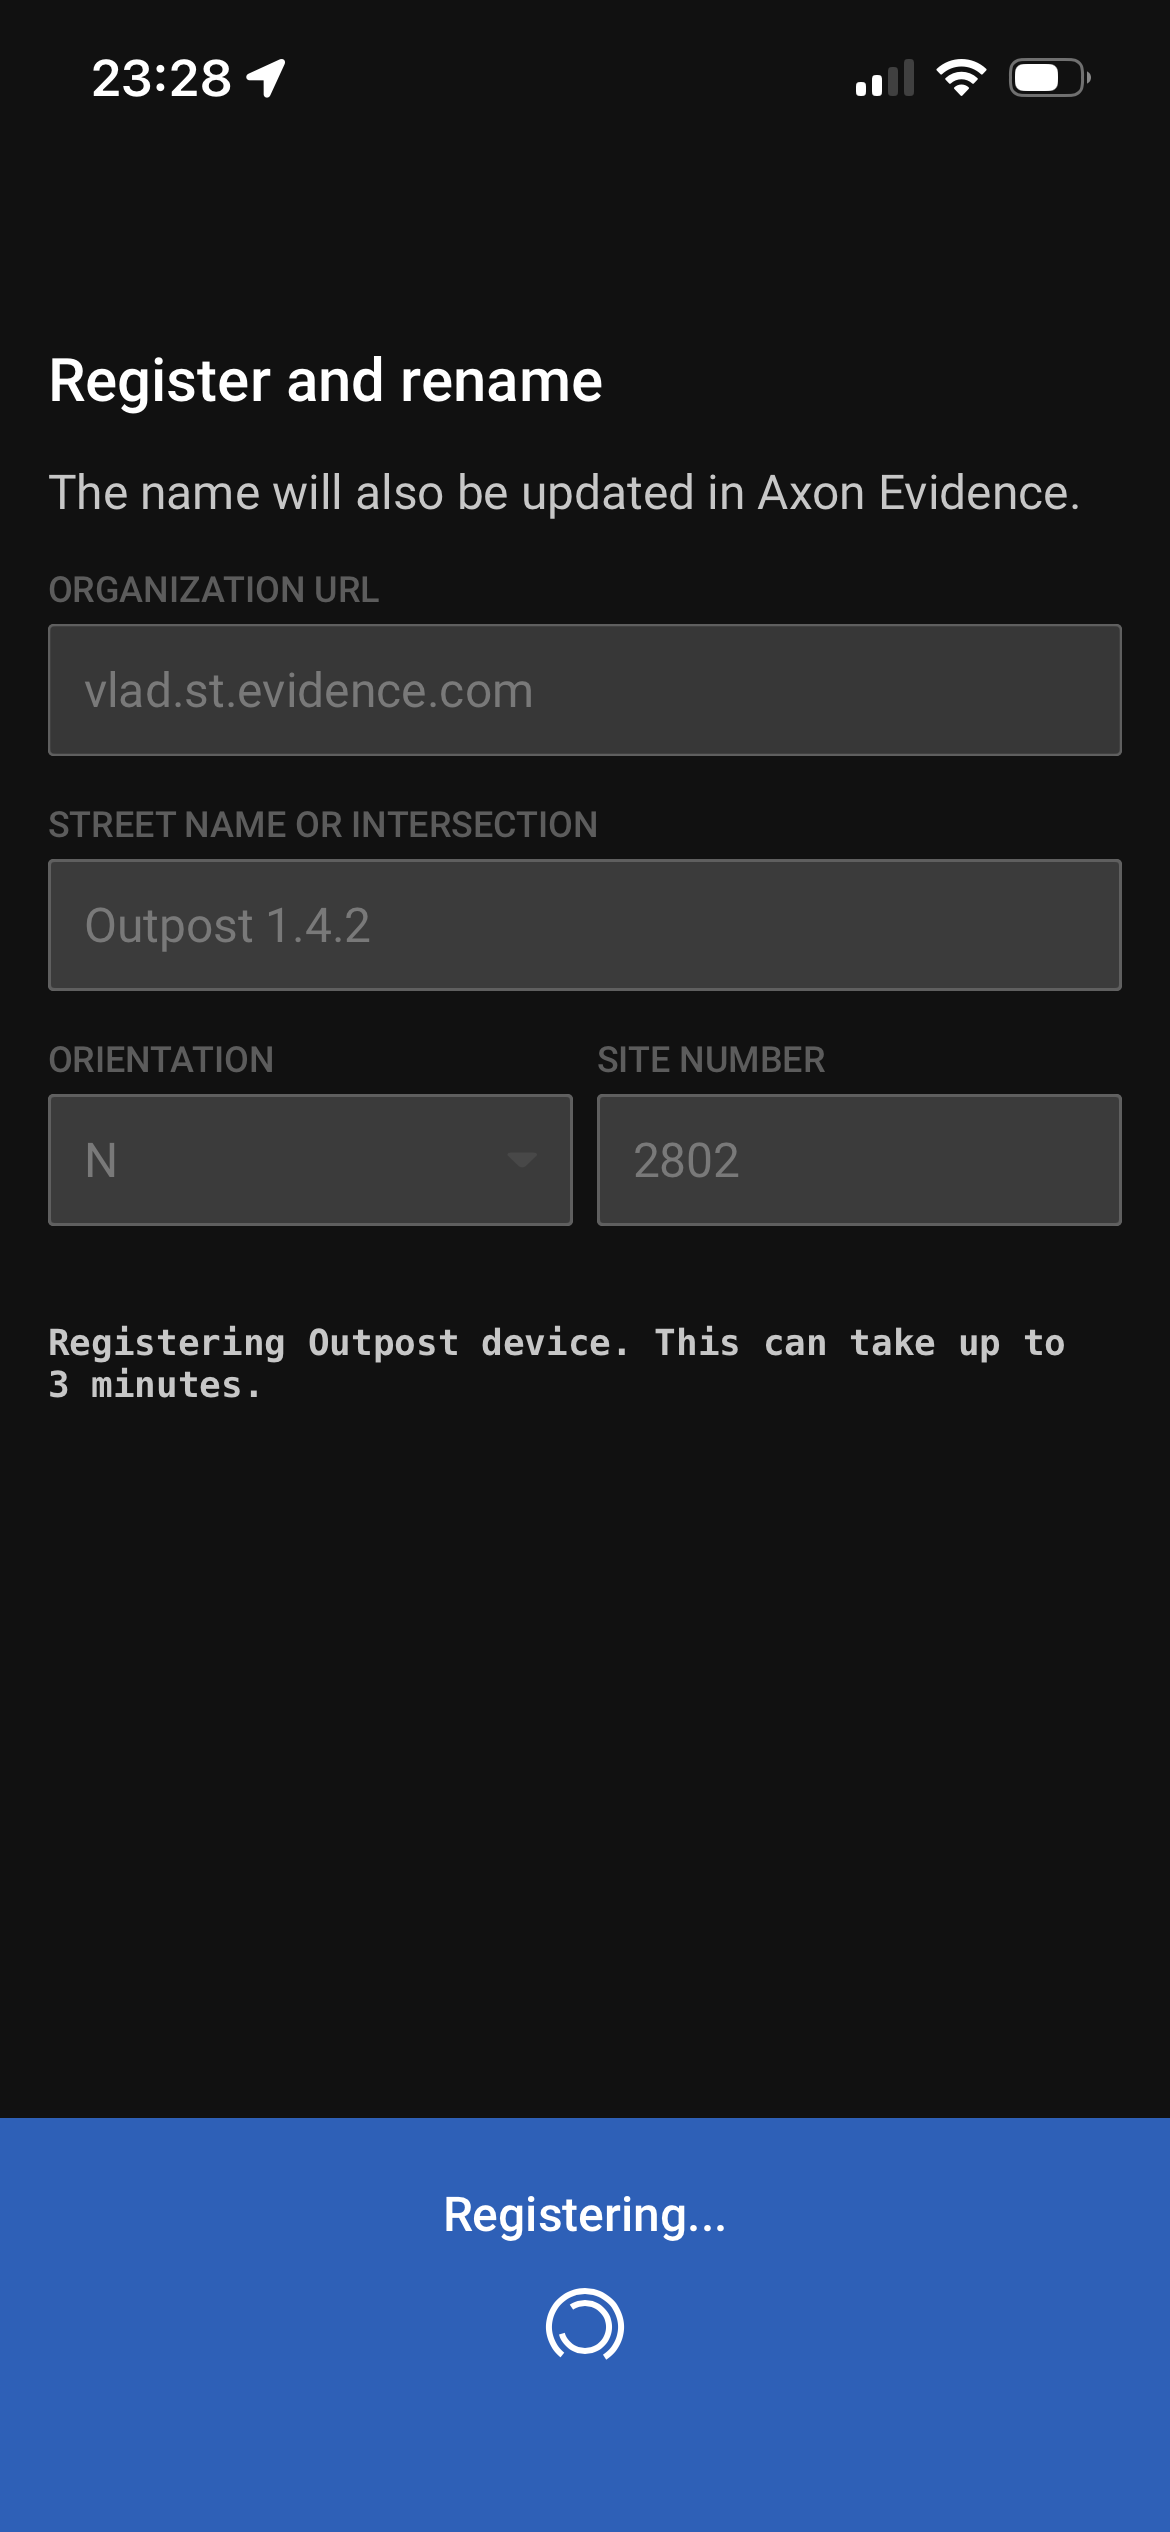
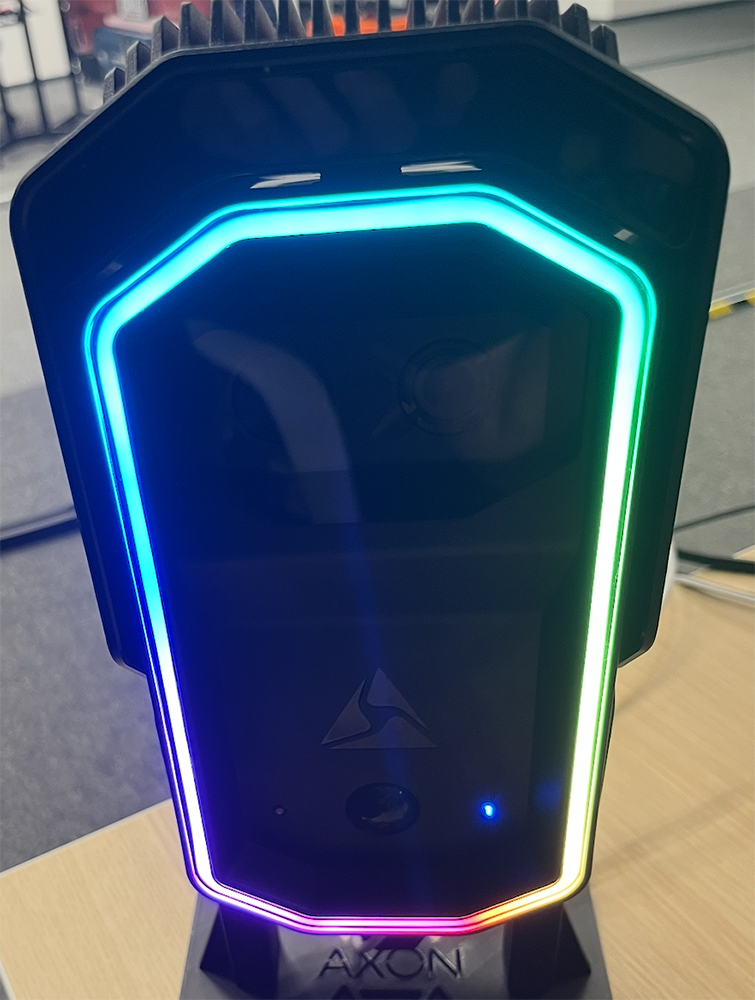
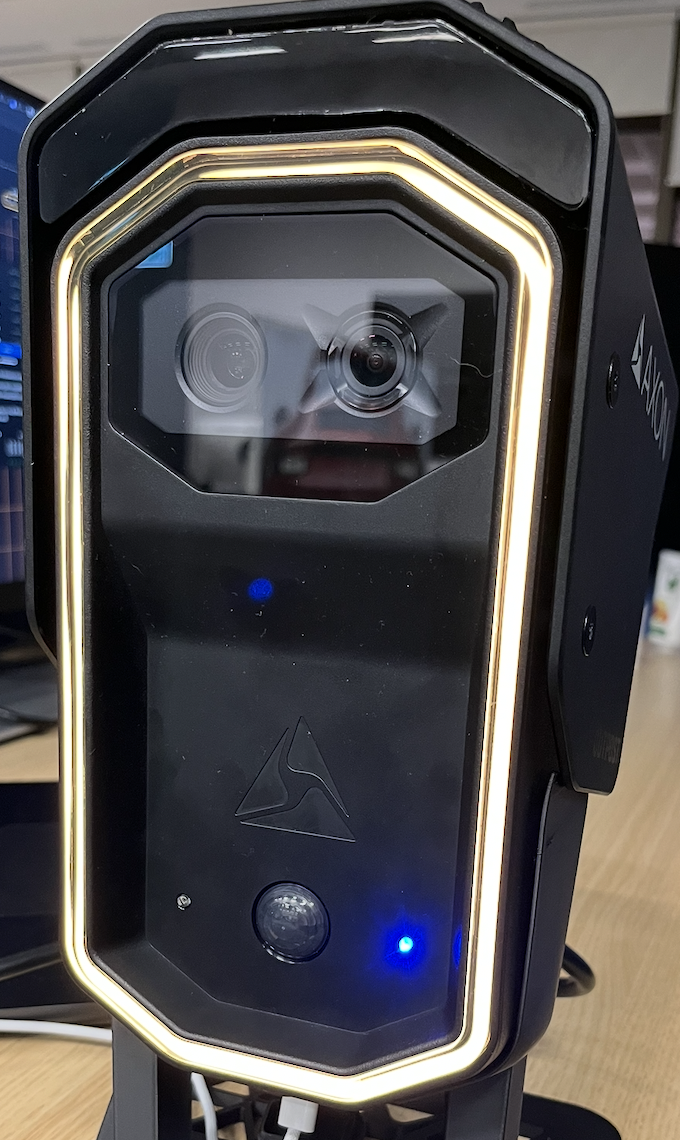
When the registration is successfully completed, the LED ring will glow a rainbow pattern as shown below.
Install it
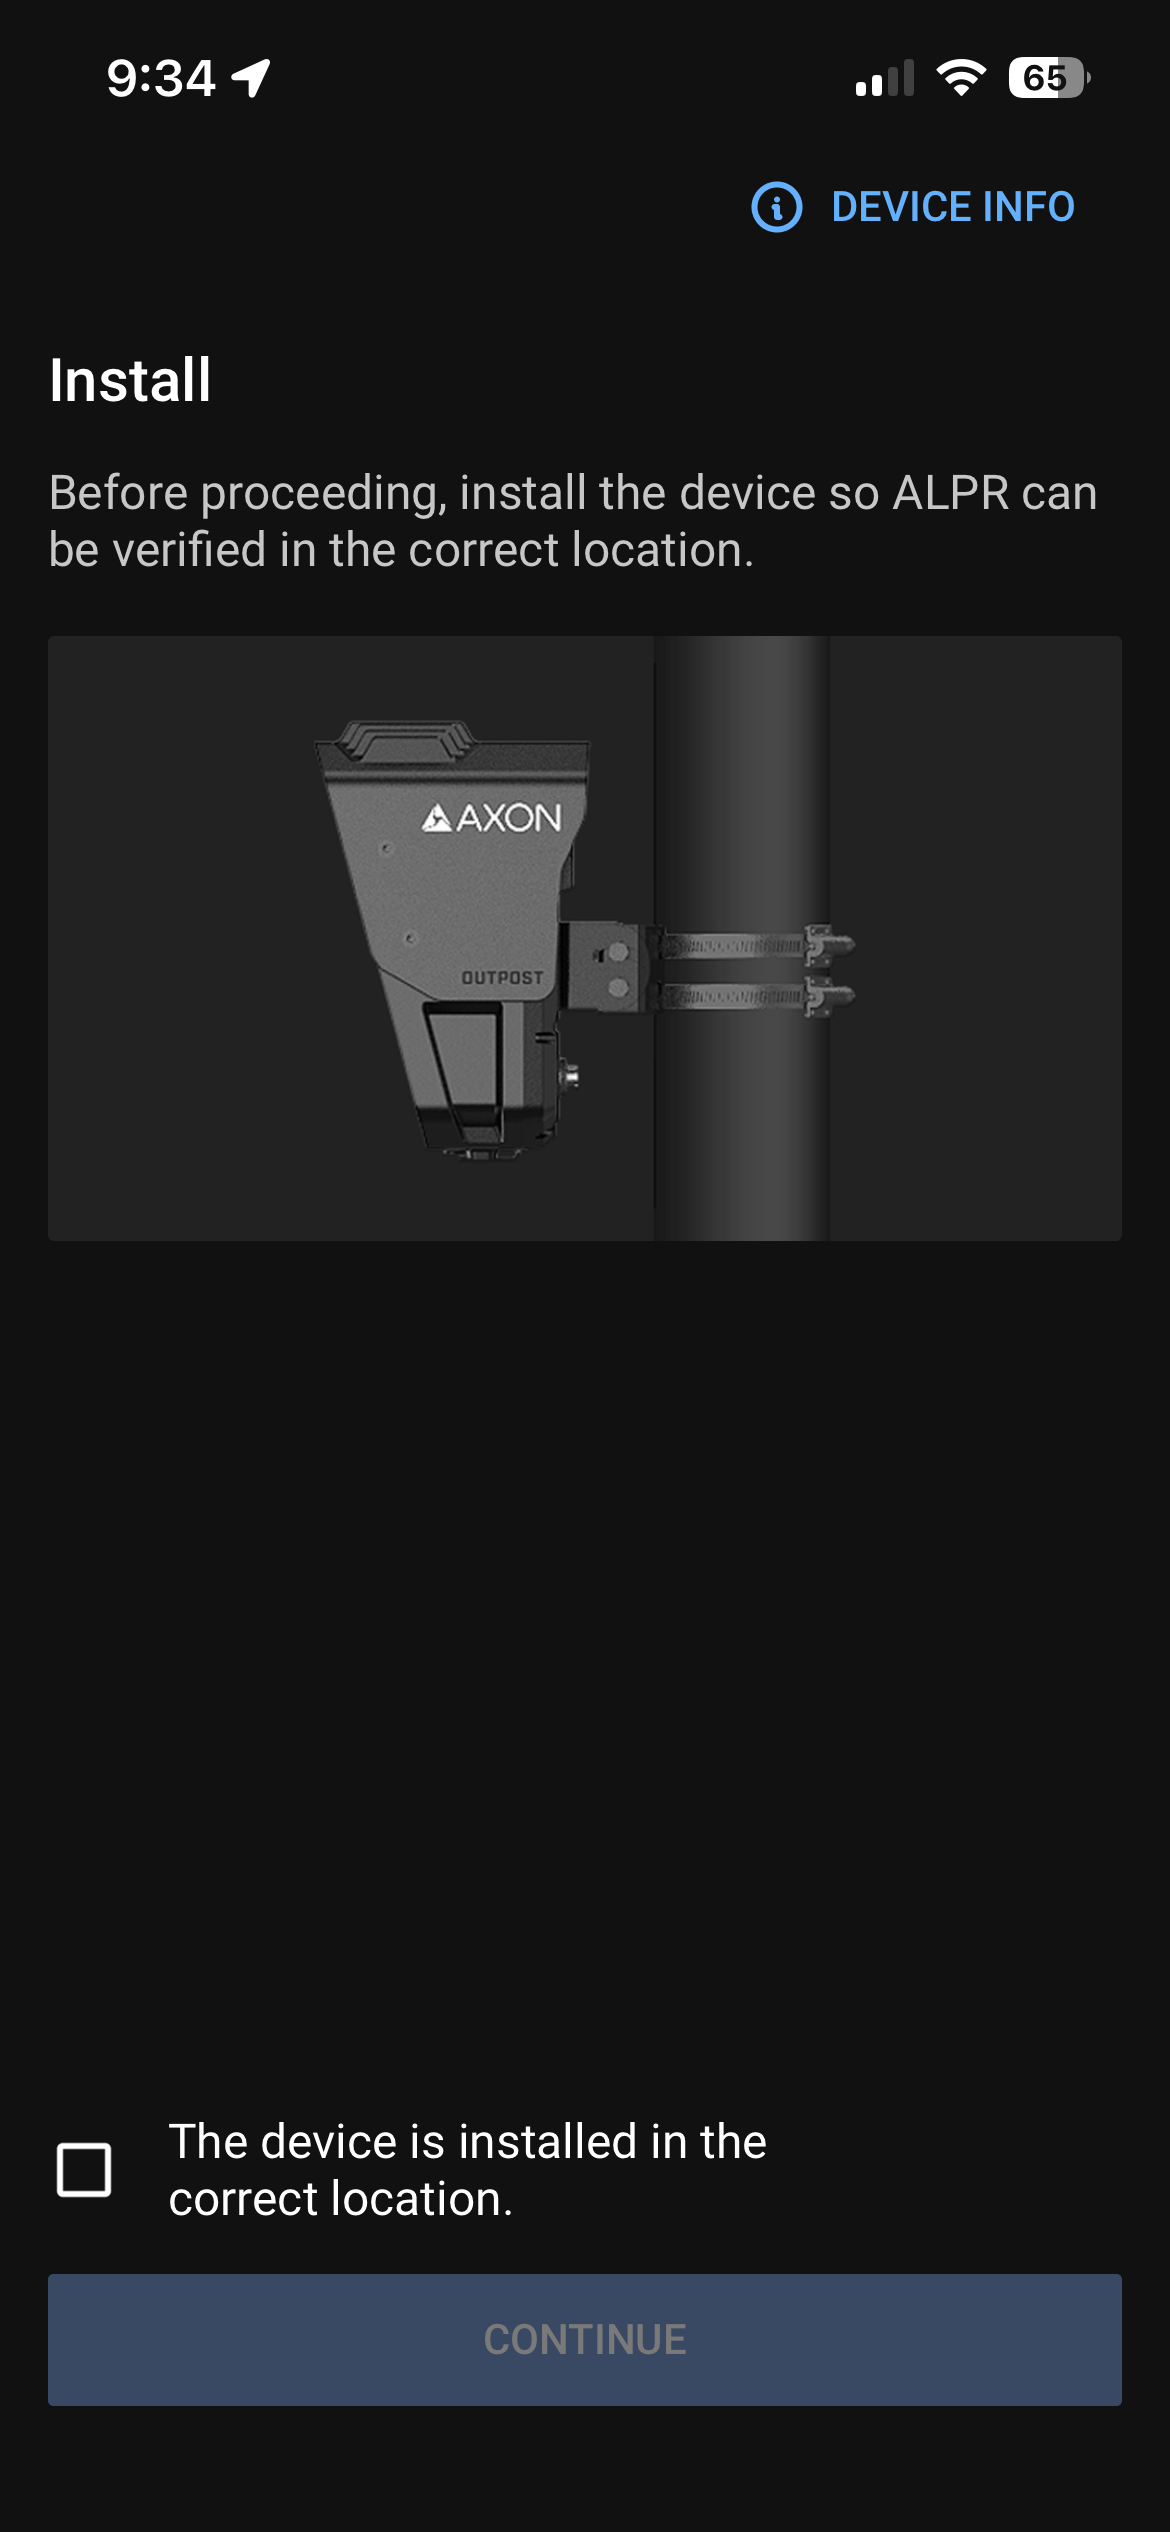
You'll find complete mounting and installation guidance in the Installation Guide. For a quick overview, continue here.
On the next step, ensure the camera is installed in its final intended location before proceeding. The application will then start a live view of the camera sensors and an ALPR test to assist with device positioning and orientation and to ensure the Outpost device is correctly detecting plates.
Once the camera positioning has been adjusted so that it captures the relevant viewport and plate reading functionality has been verified, you can view the results of the ALPR tests in the app. Tests can be performed in three modes: Day, Night (ALPR IR — activates the infrared LEDs; use this mode when performing the ALPR test at night or in low-light conditions), and ALPR Streaming.
The pitch angle is displayed below the step number during Step 1 (Day), Step 2 (Night/IR), and Step 3 (Camera Stream) in portrait mode, for both the First Setup and Reconnect flows. Use this live tilt readout to adjust the camera position as close as possible to 0° — this indicates the optimal camera placement before finalizing the installation.
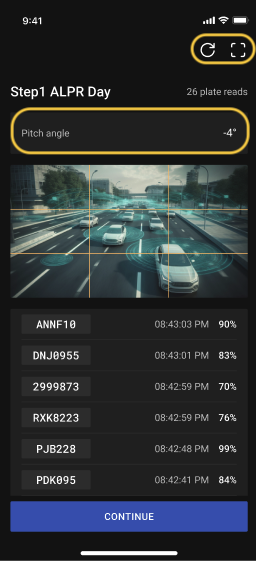
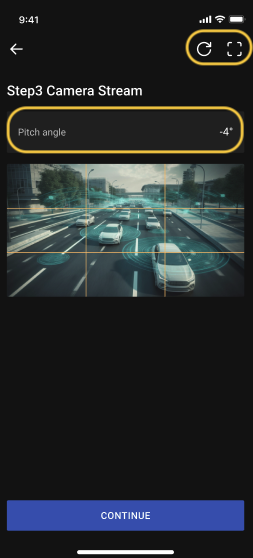
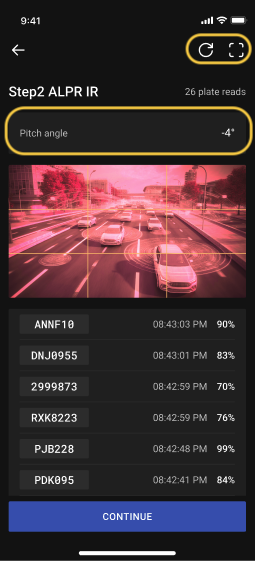
In the top-right corner, you will find two buttons with the following functions
-
Reload ALPR stream– Restarts the automatic license plate recognition stream.
-
Switch to Landscape Mode – Allows you to perform the ALPR test in landscape orientation. The license plate information displayed is the same as in portrait mode.
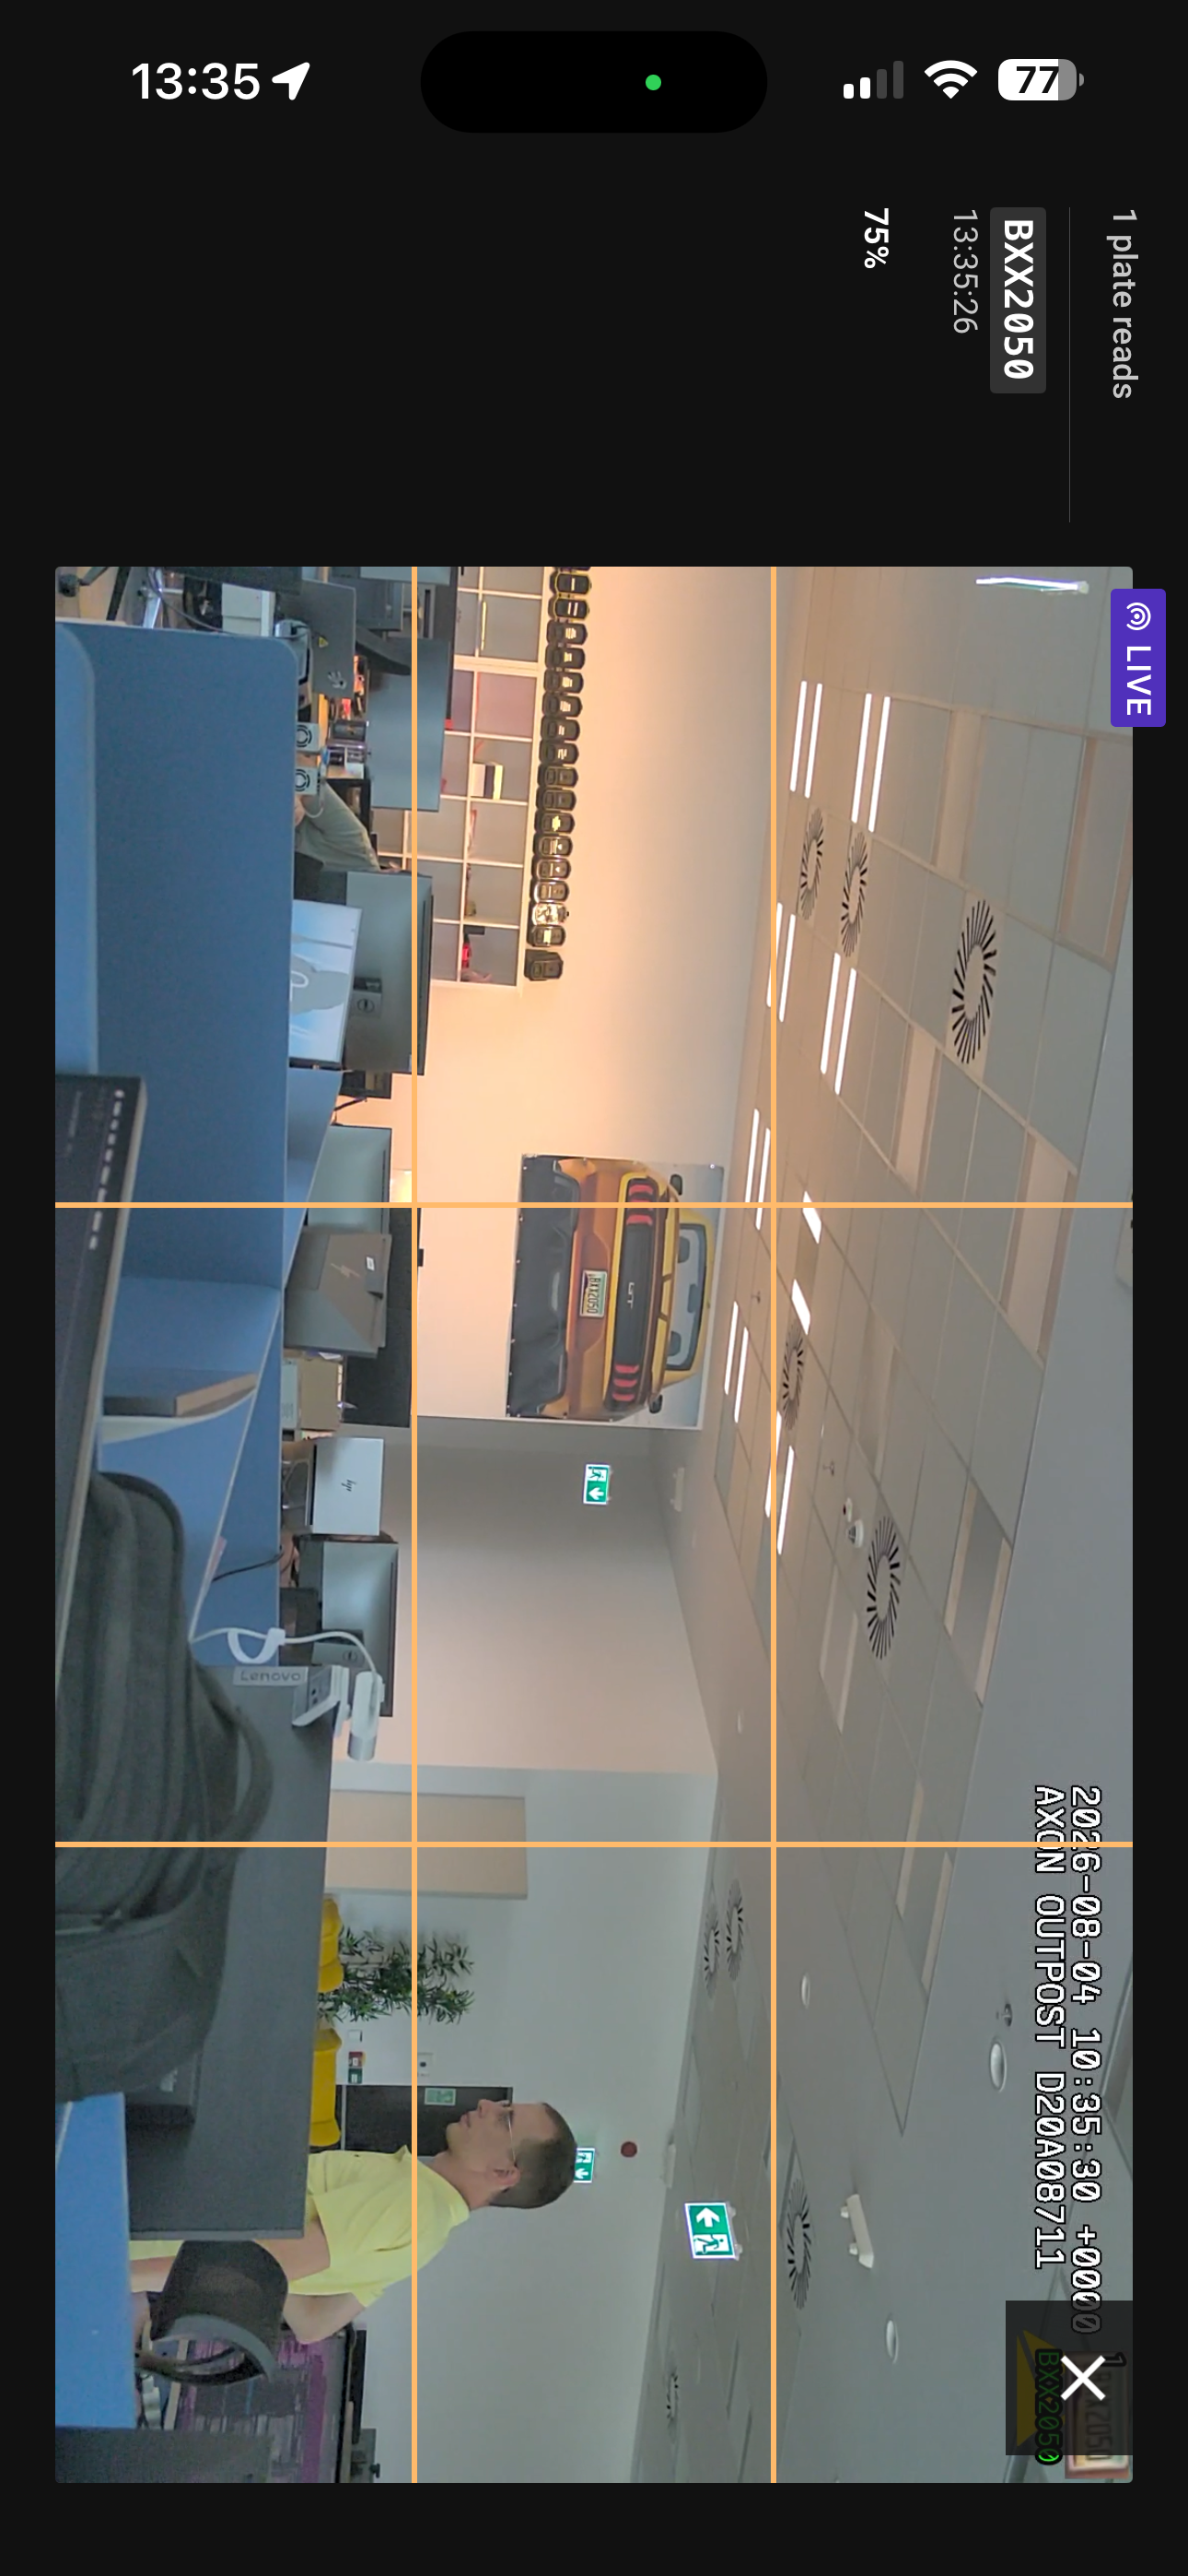
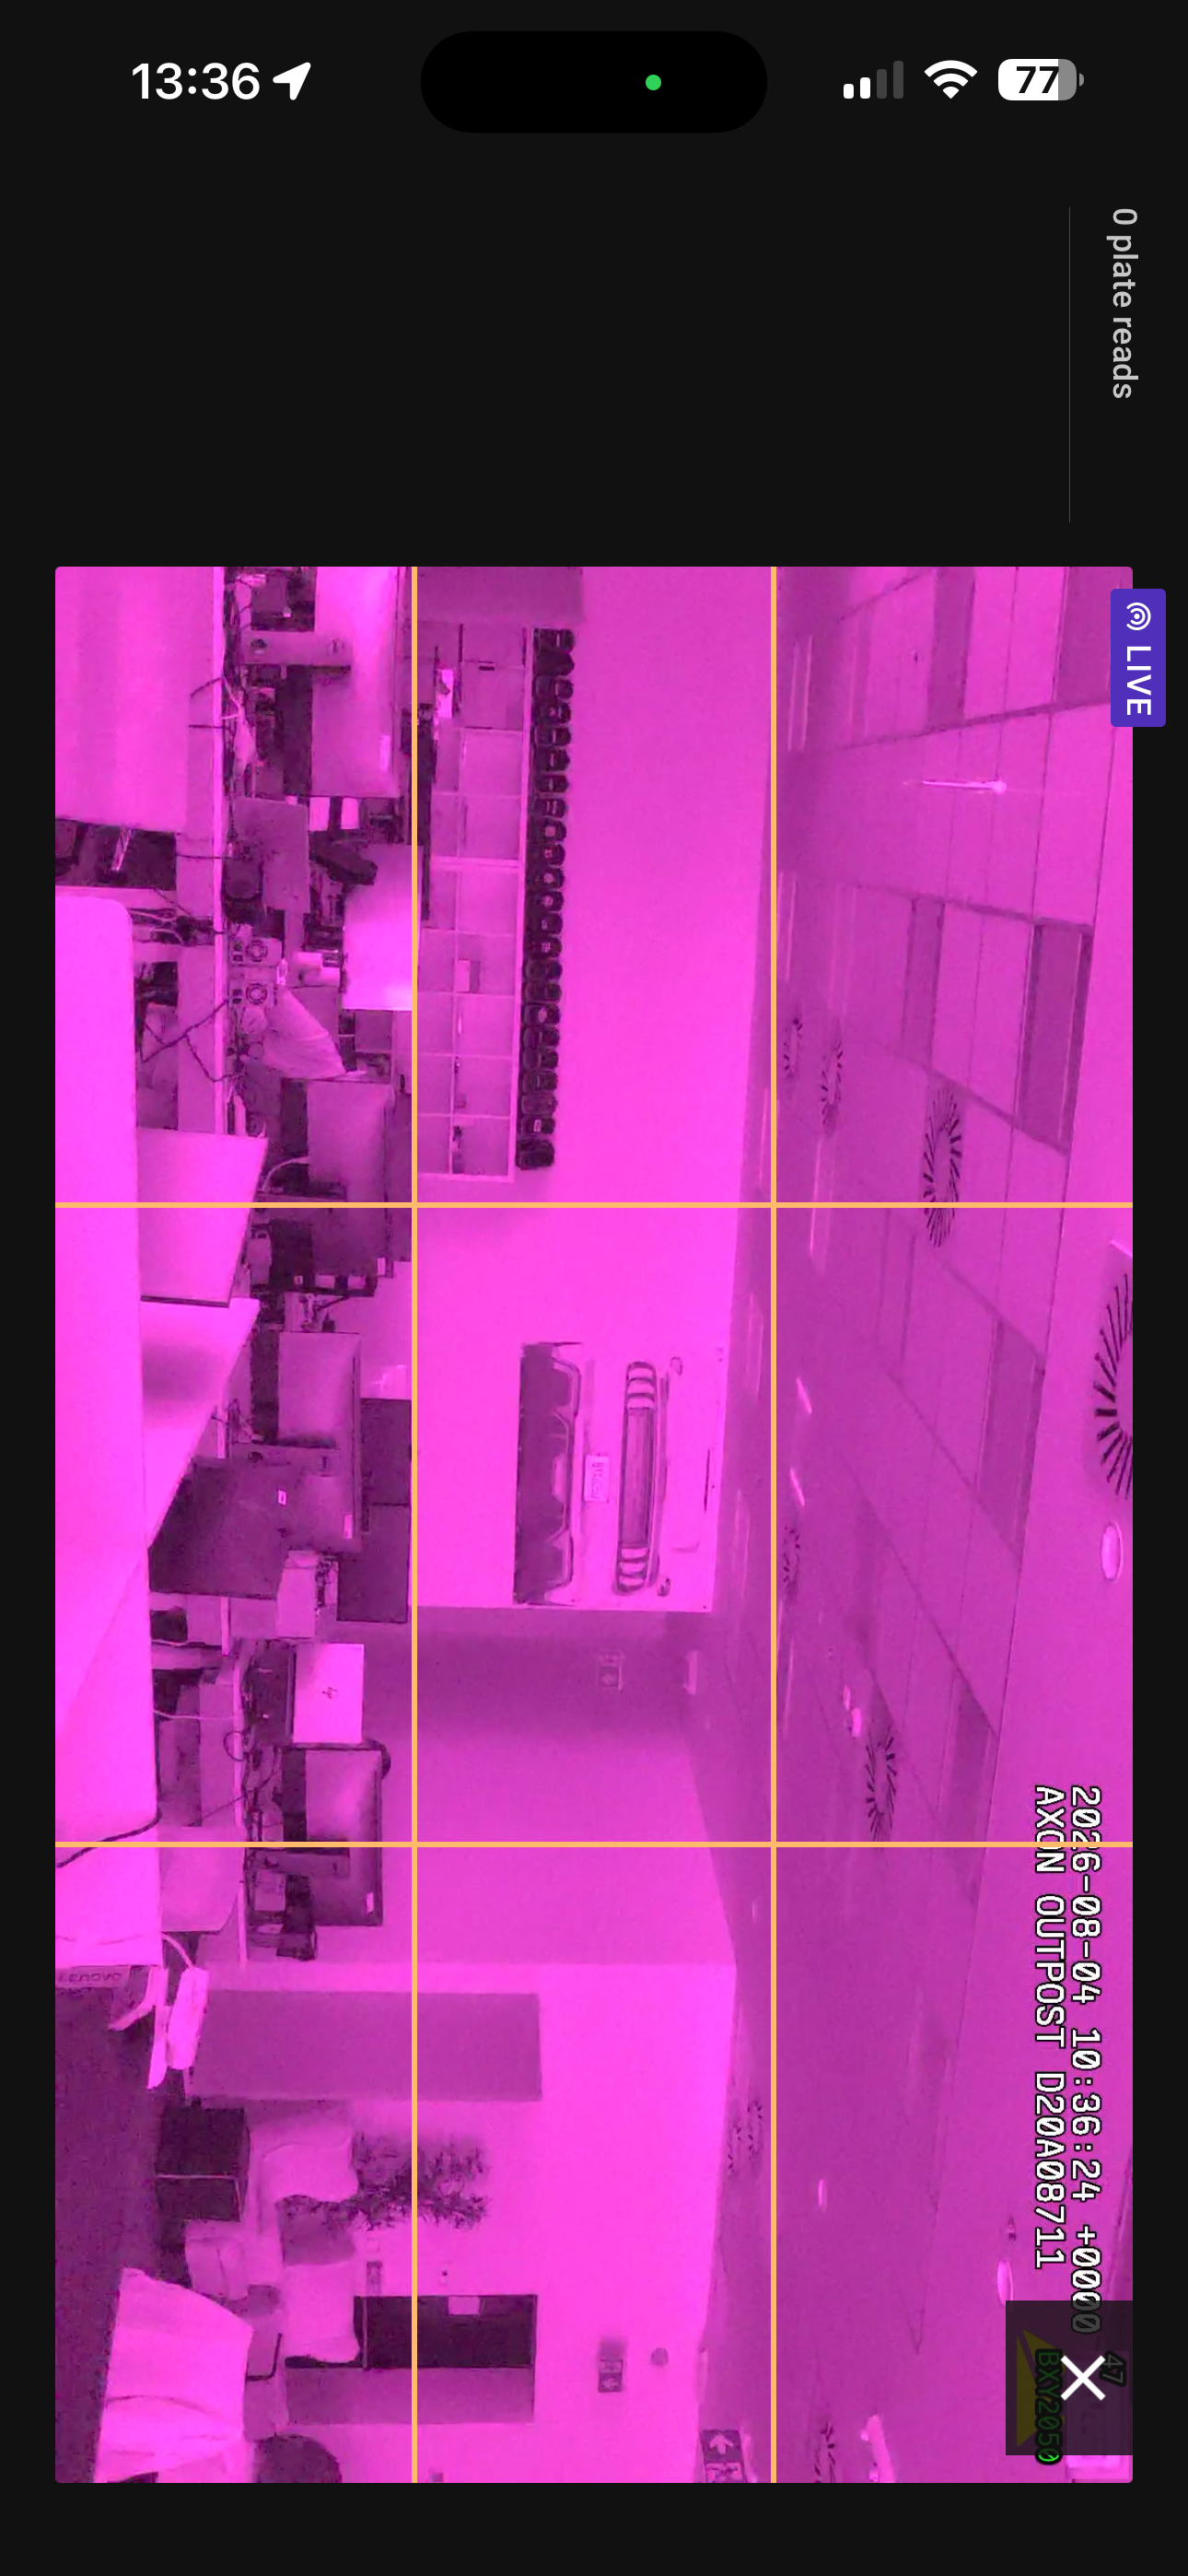
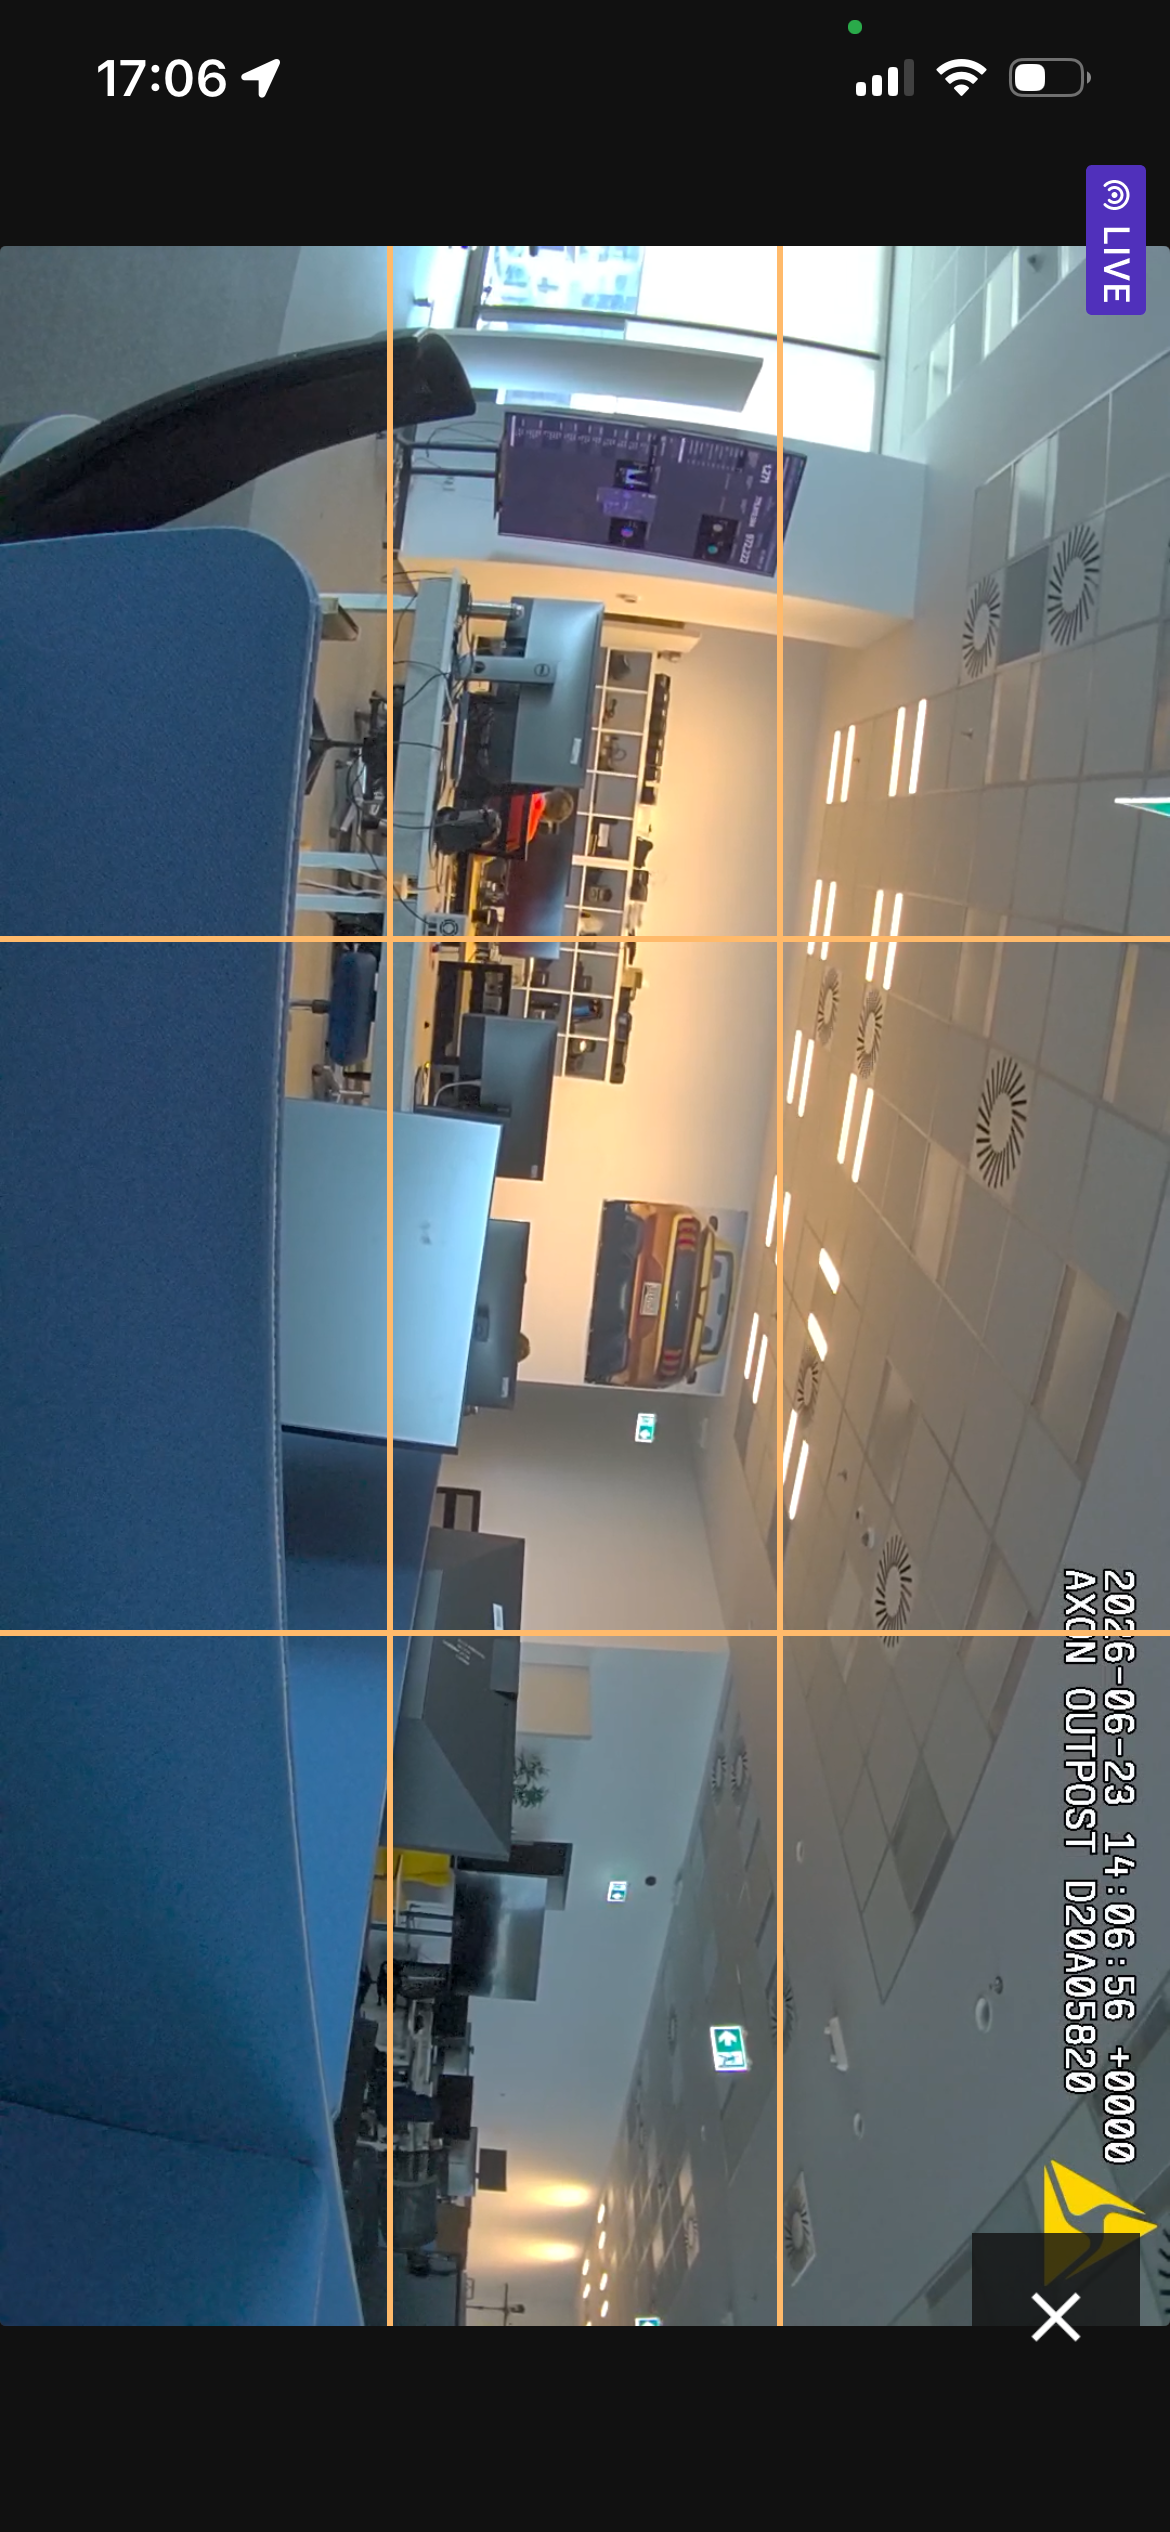
Note: The pitch angle is not displayed while the device is in landscape mode.
Selecting the Continue button will take you to the next screen, where you must confirm the result of each ALPR test individually as either passed or failed.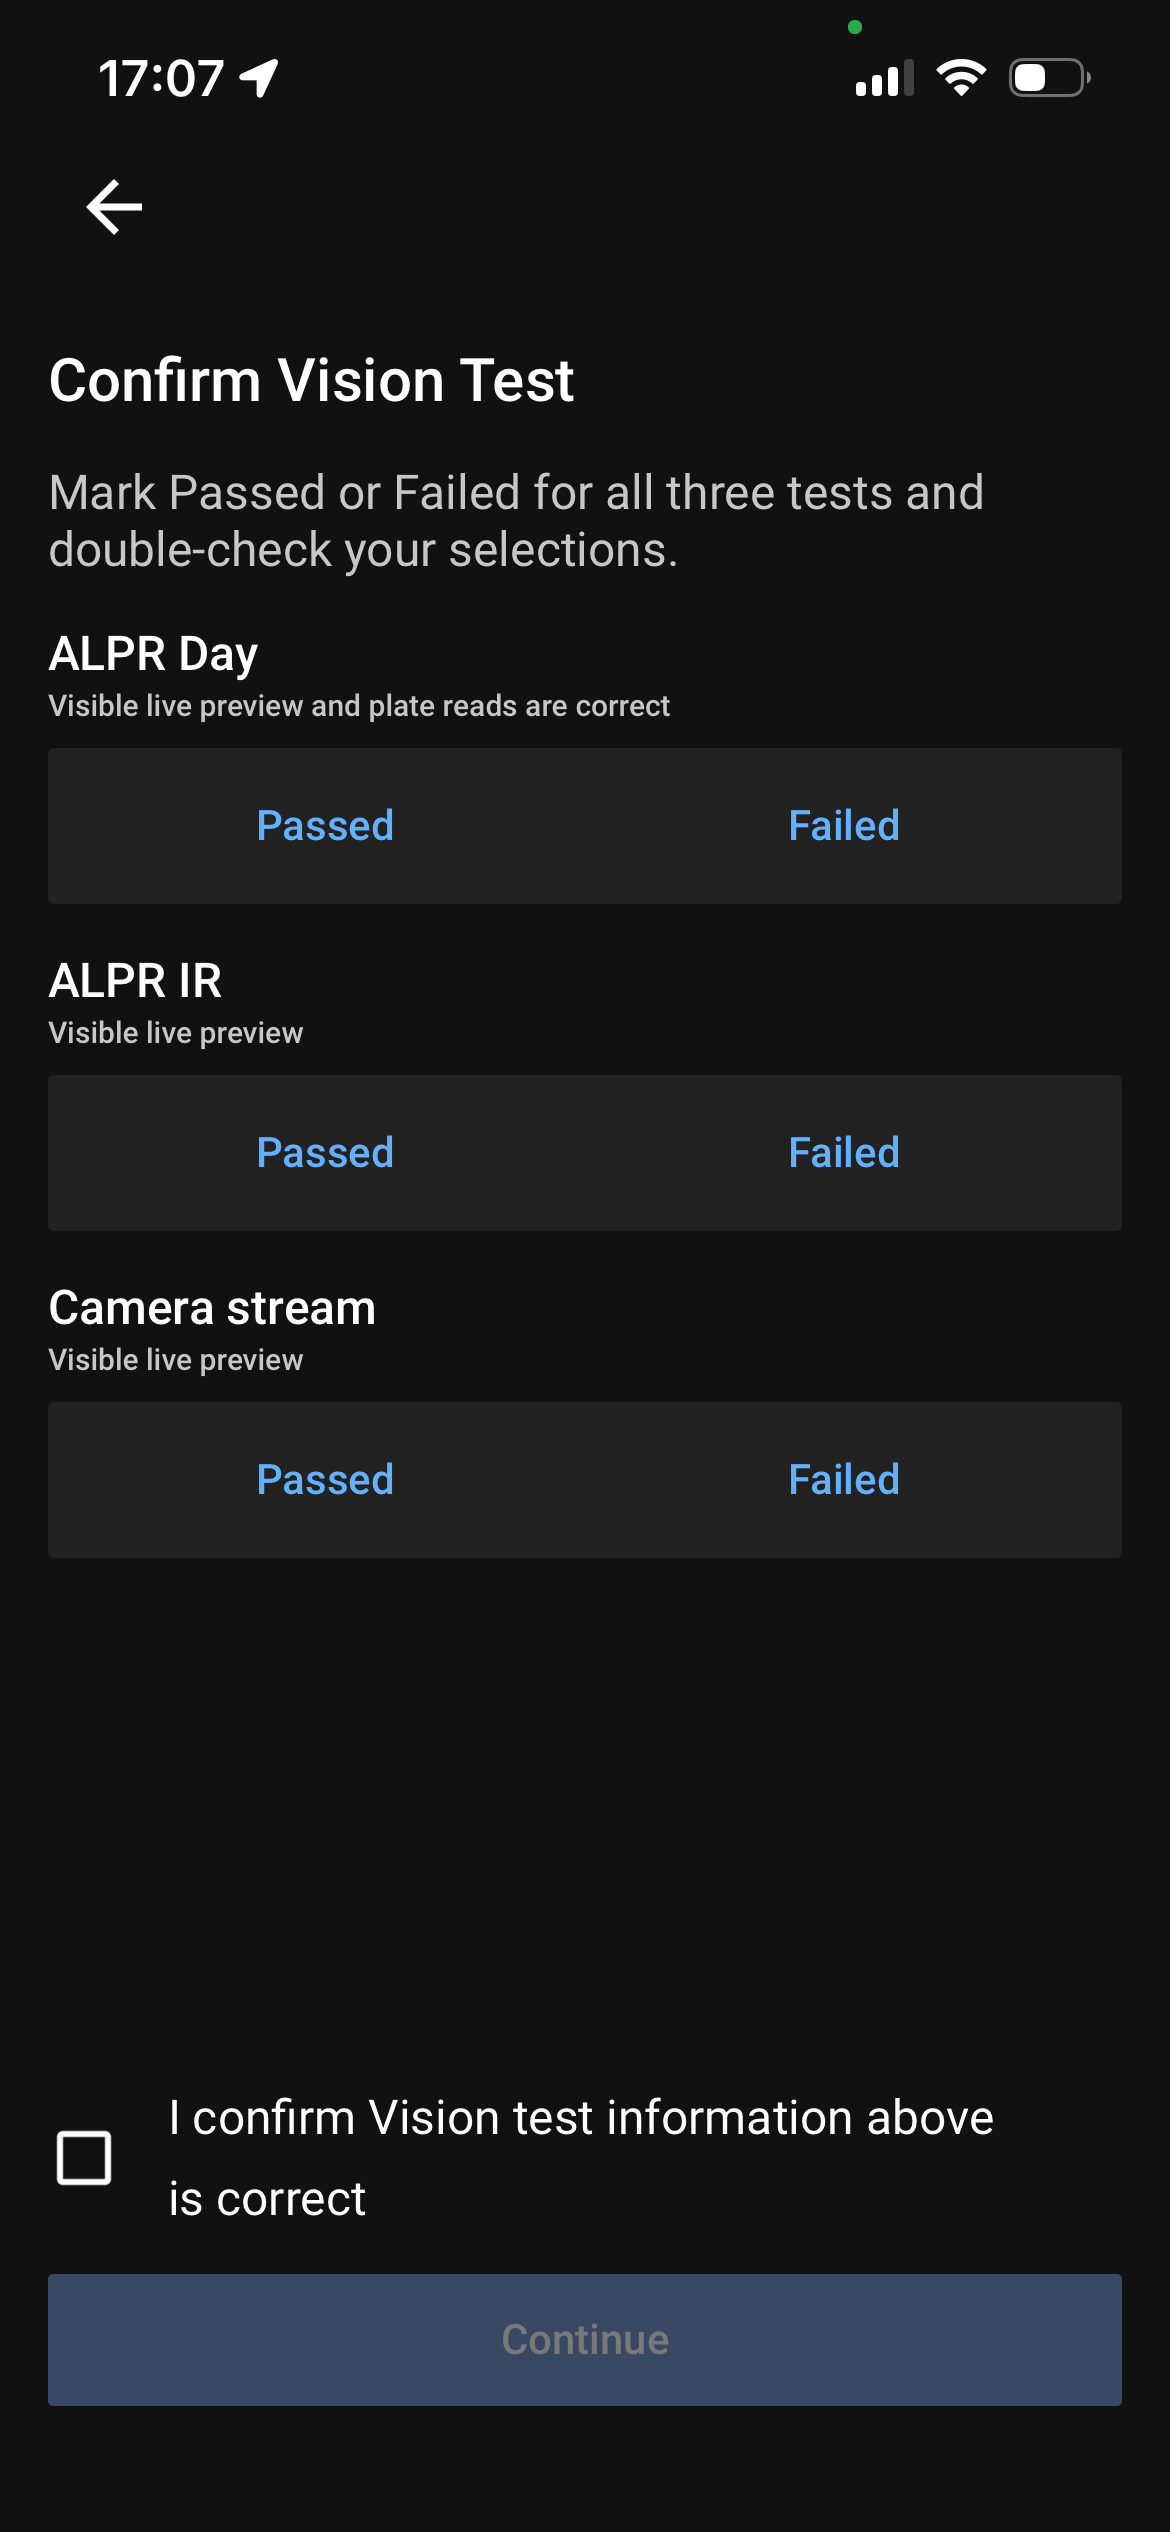
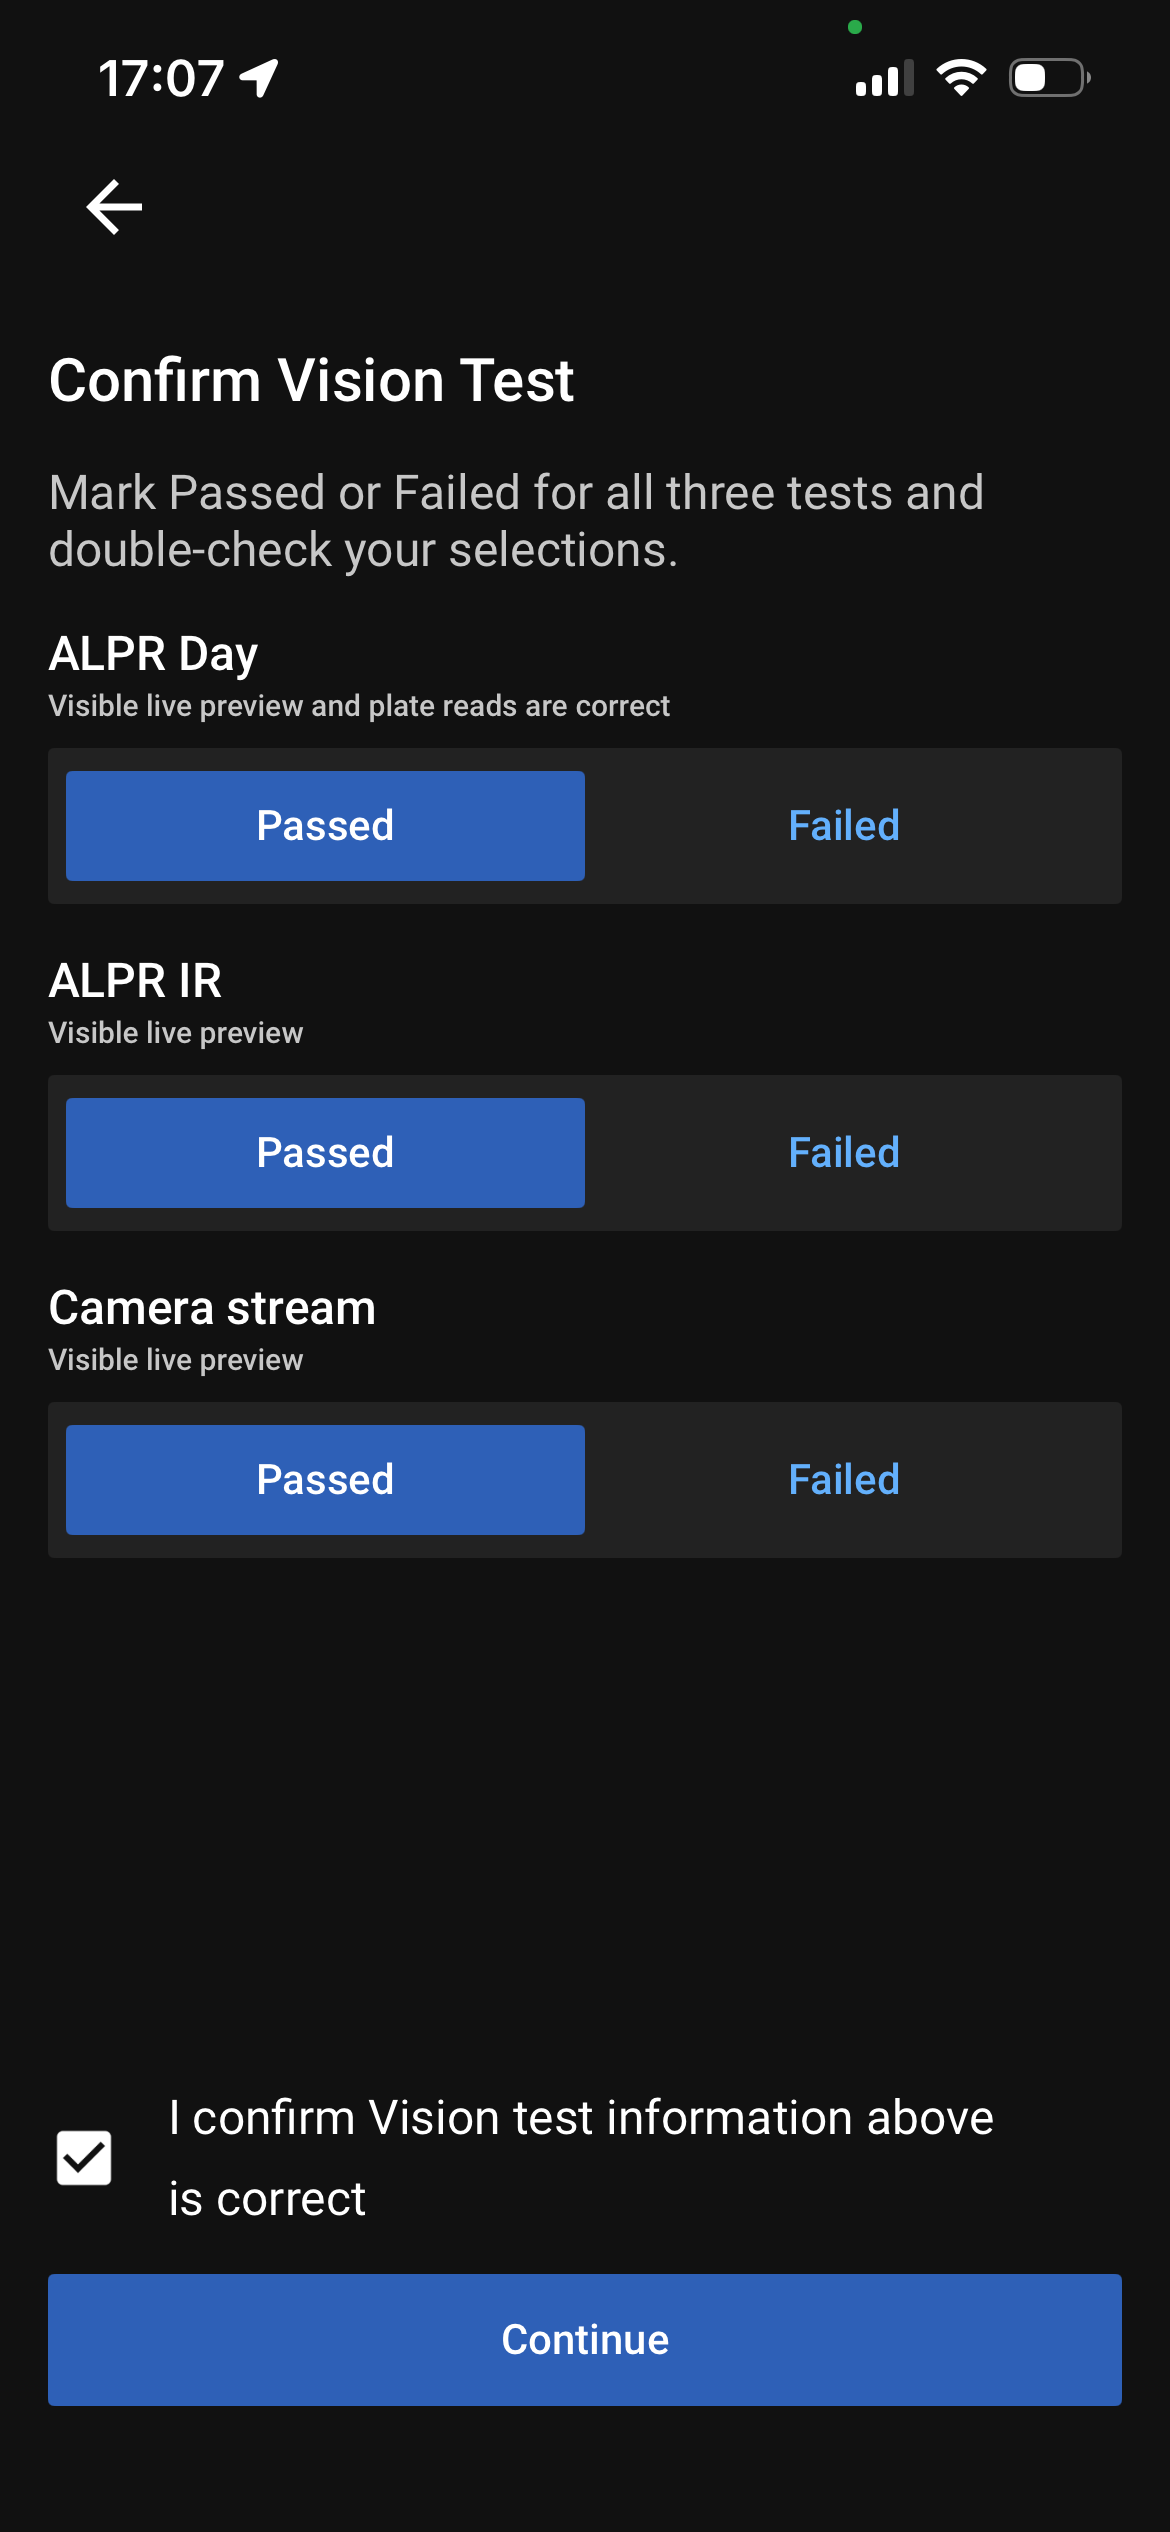
Note: At any point, if something goes wrong or you want to redo a specific test, you can select the Back button in the top-left corner of the screen to return to any of the three available tests.
When the ALPR test is running, the LED ring should appear yellow as shown below.
Align it
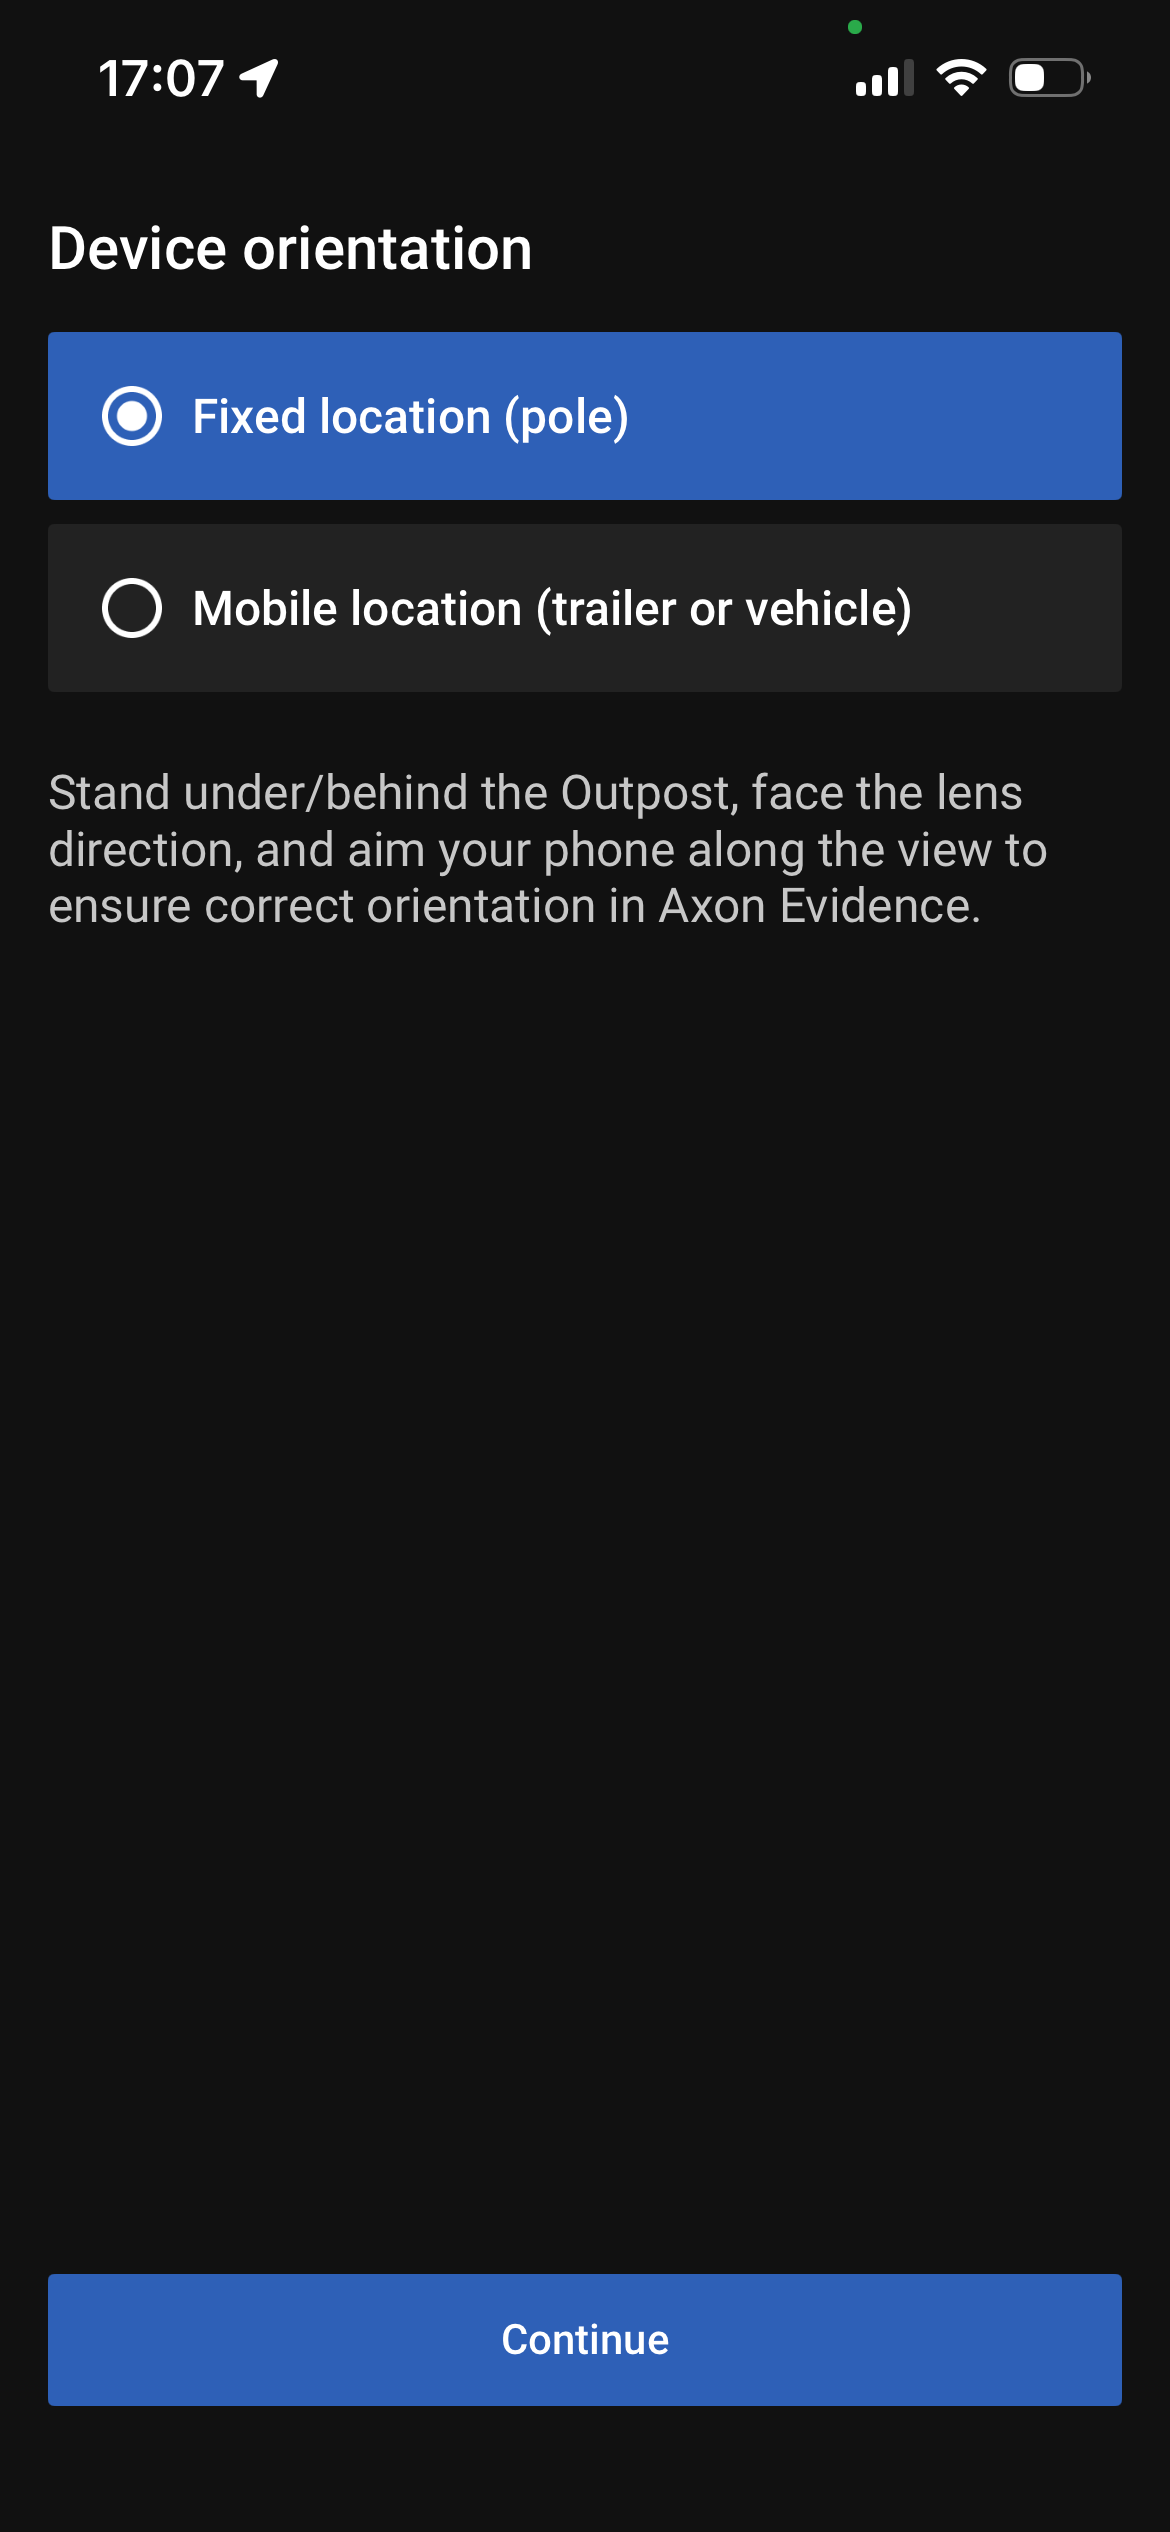
In the Device Orientation screen, you must first choose one of the two available options. By default, no option is selected.
-
Fixed location (Pole) — select this option when the device is installed in a permanent location and is not planned to be moved.
-
Mobile location (trailer or vehicle) — select this option when the device is placed in a temporary location that is planned to change in the future.
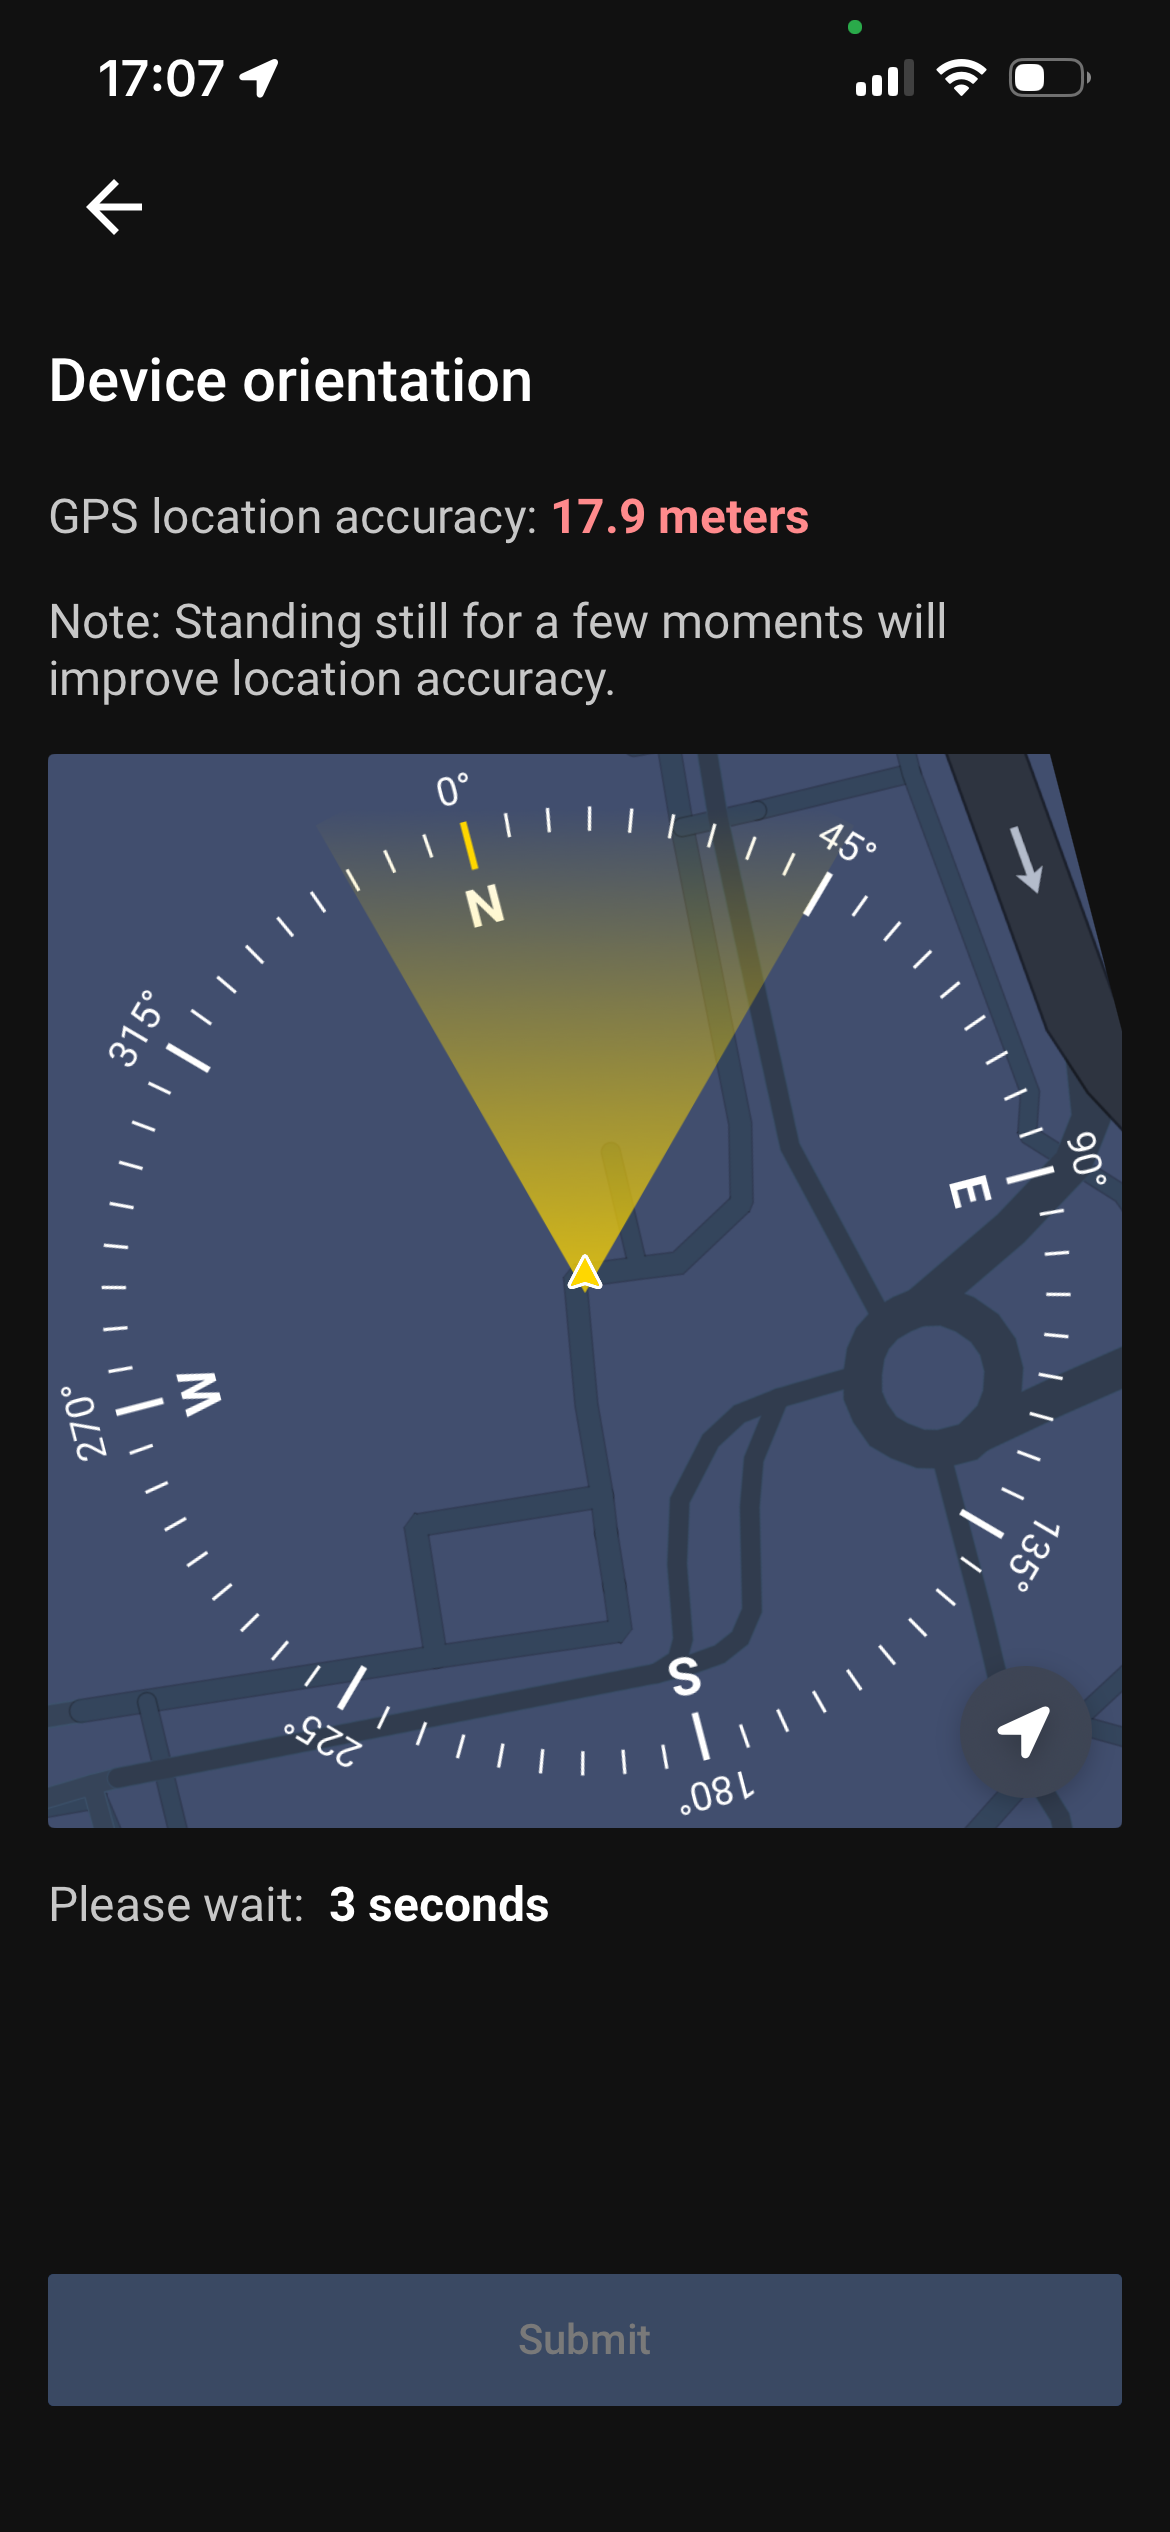
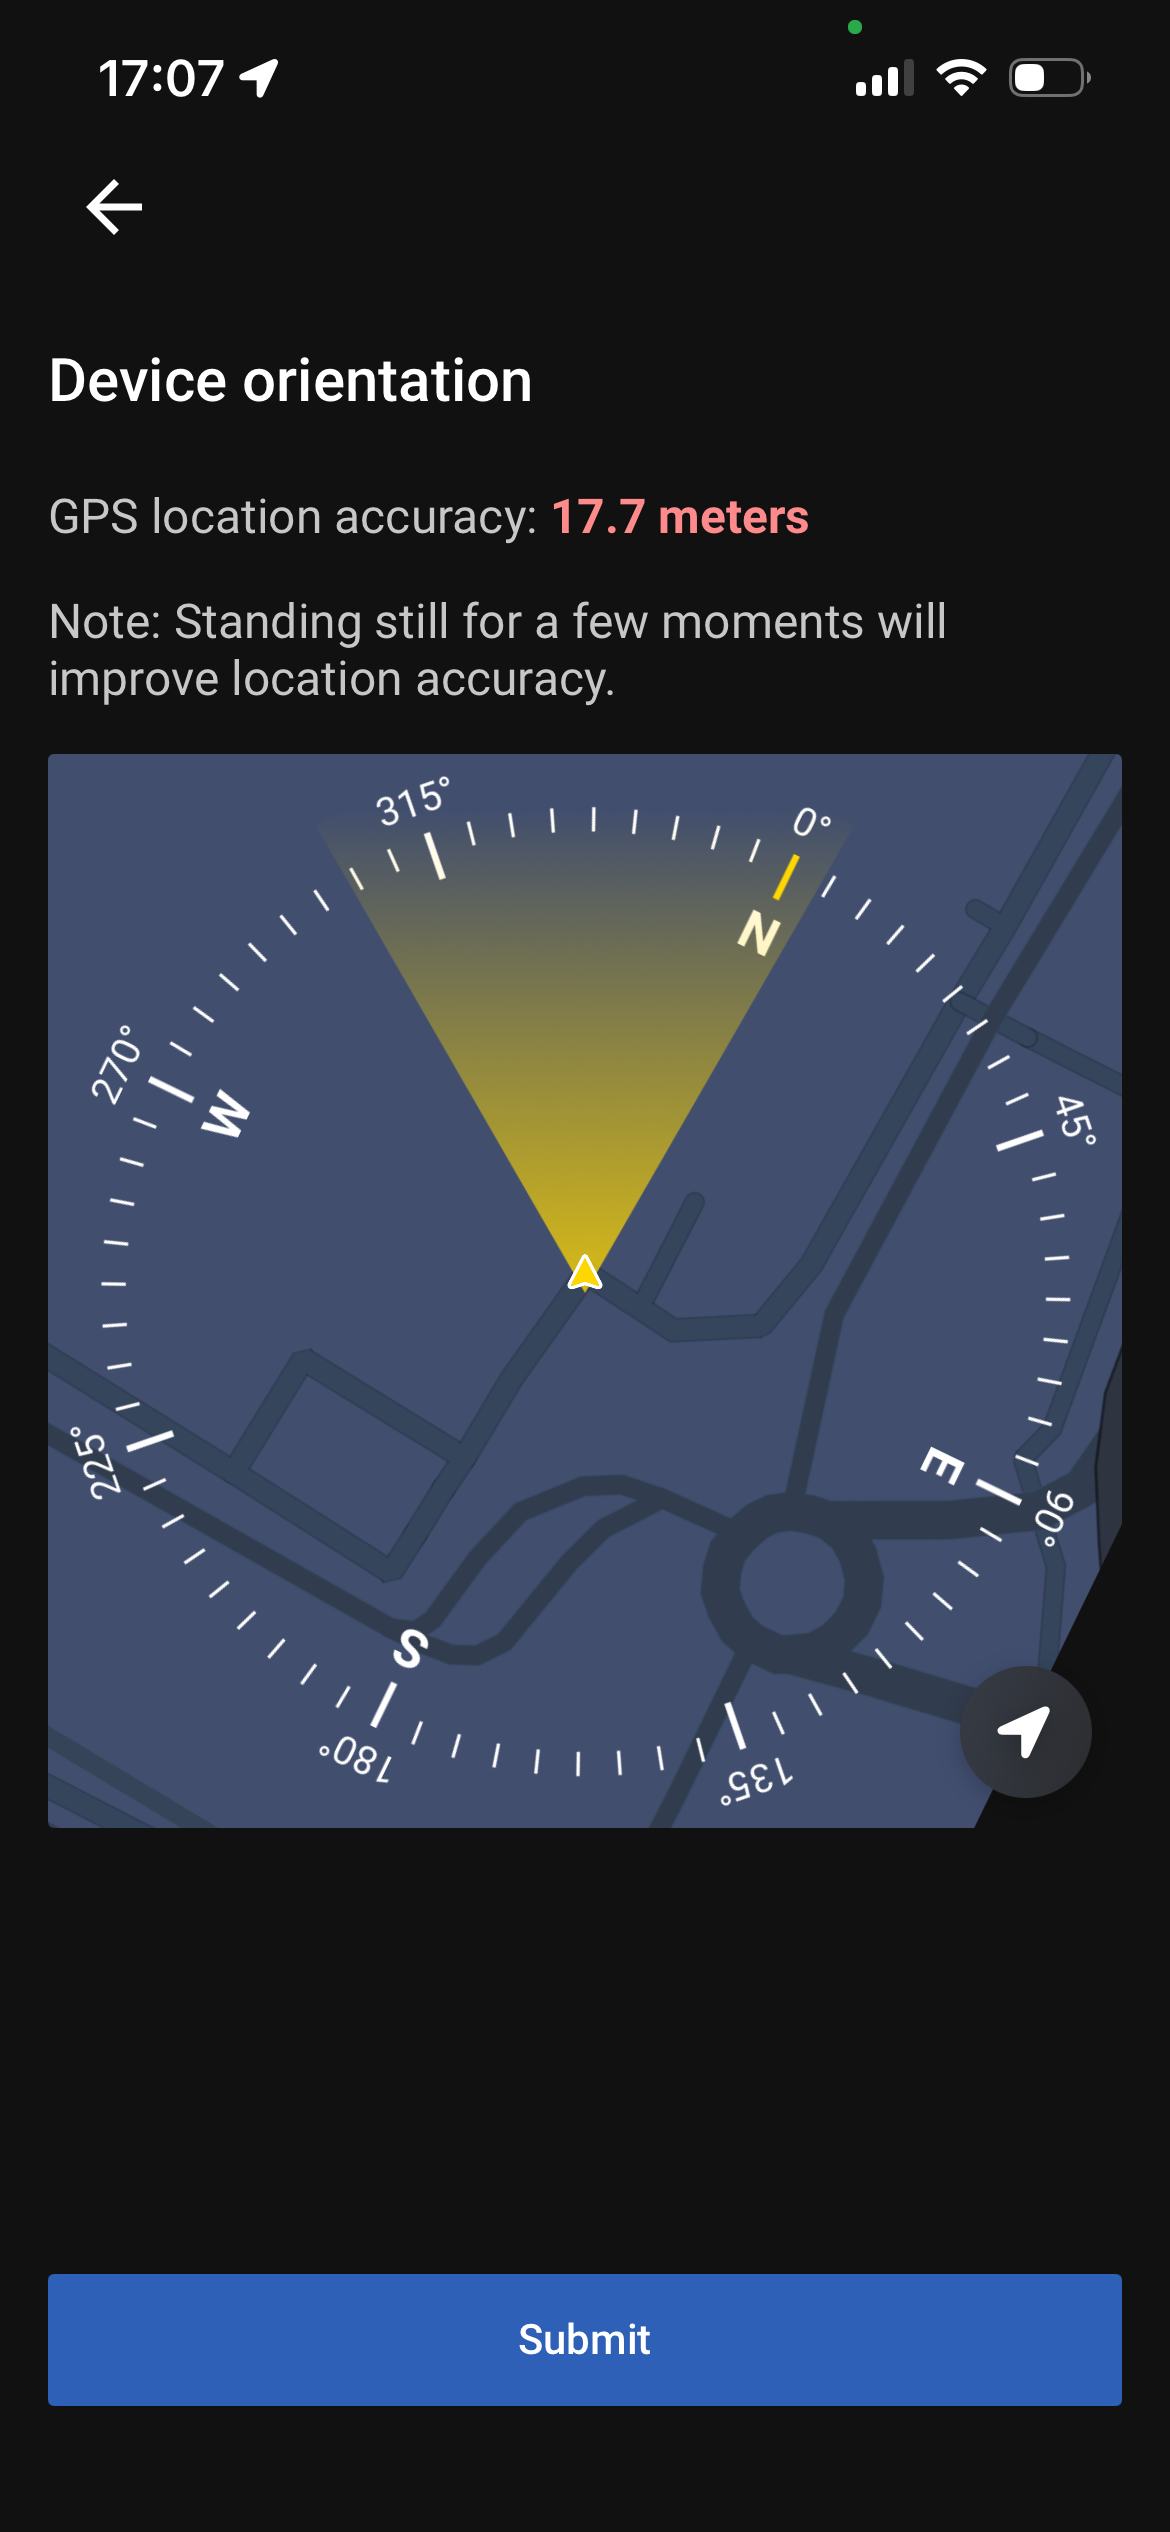
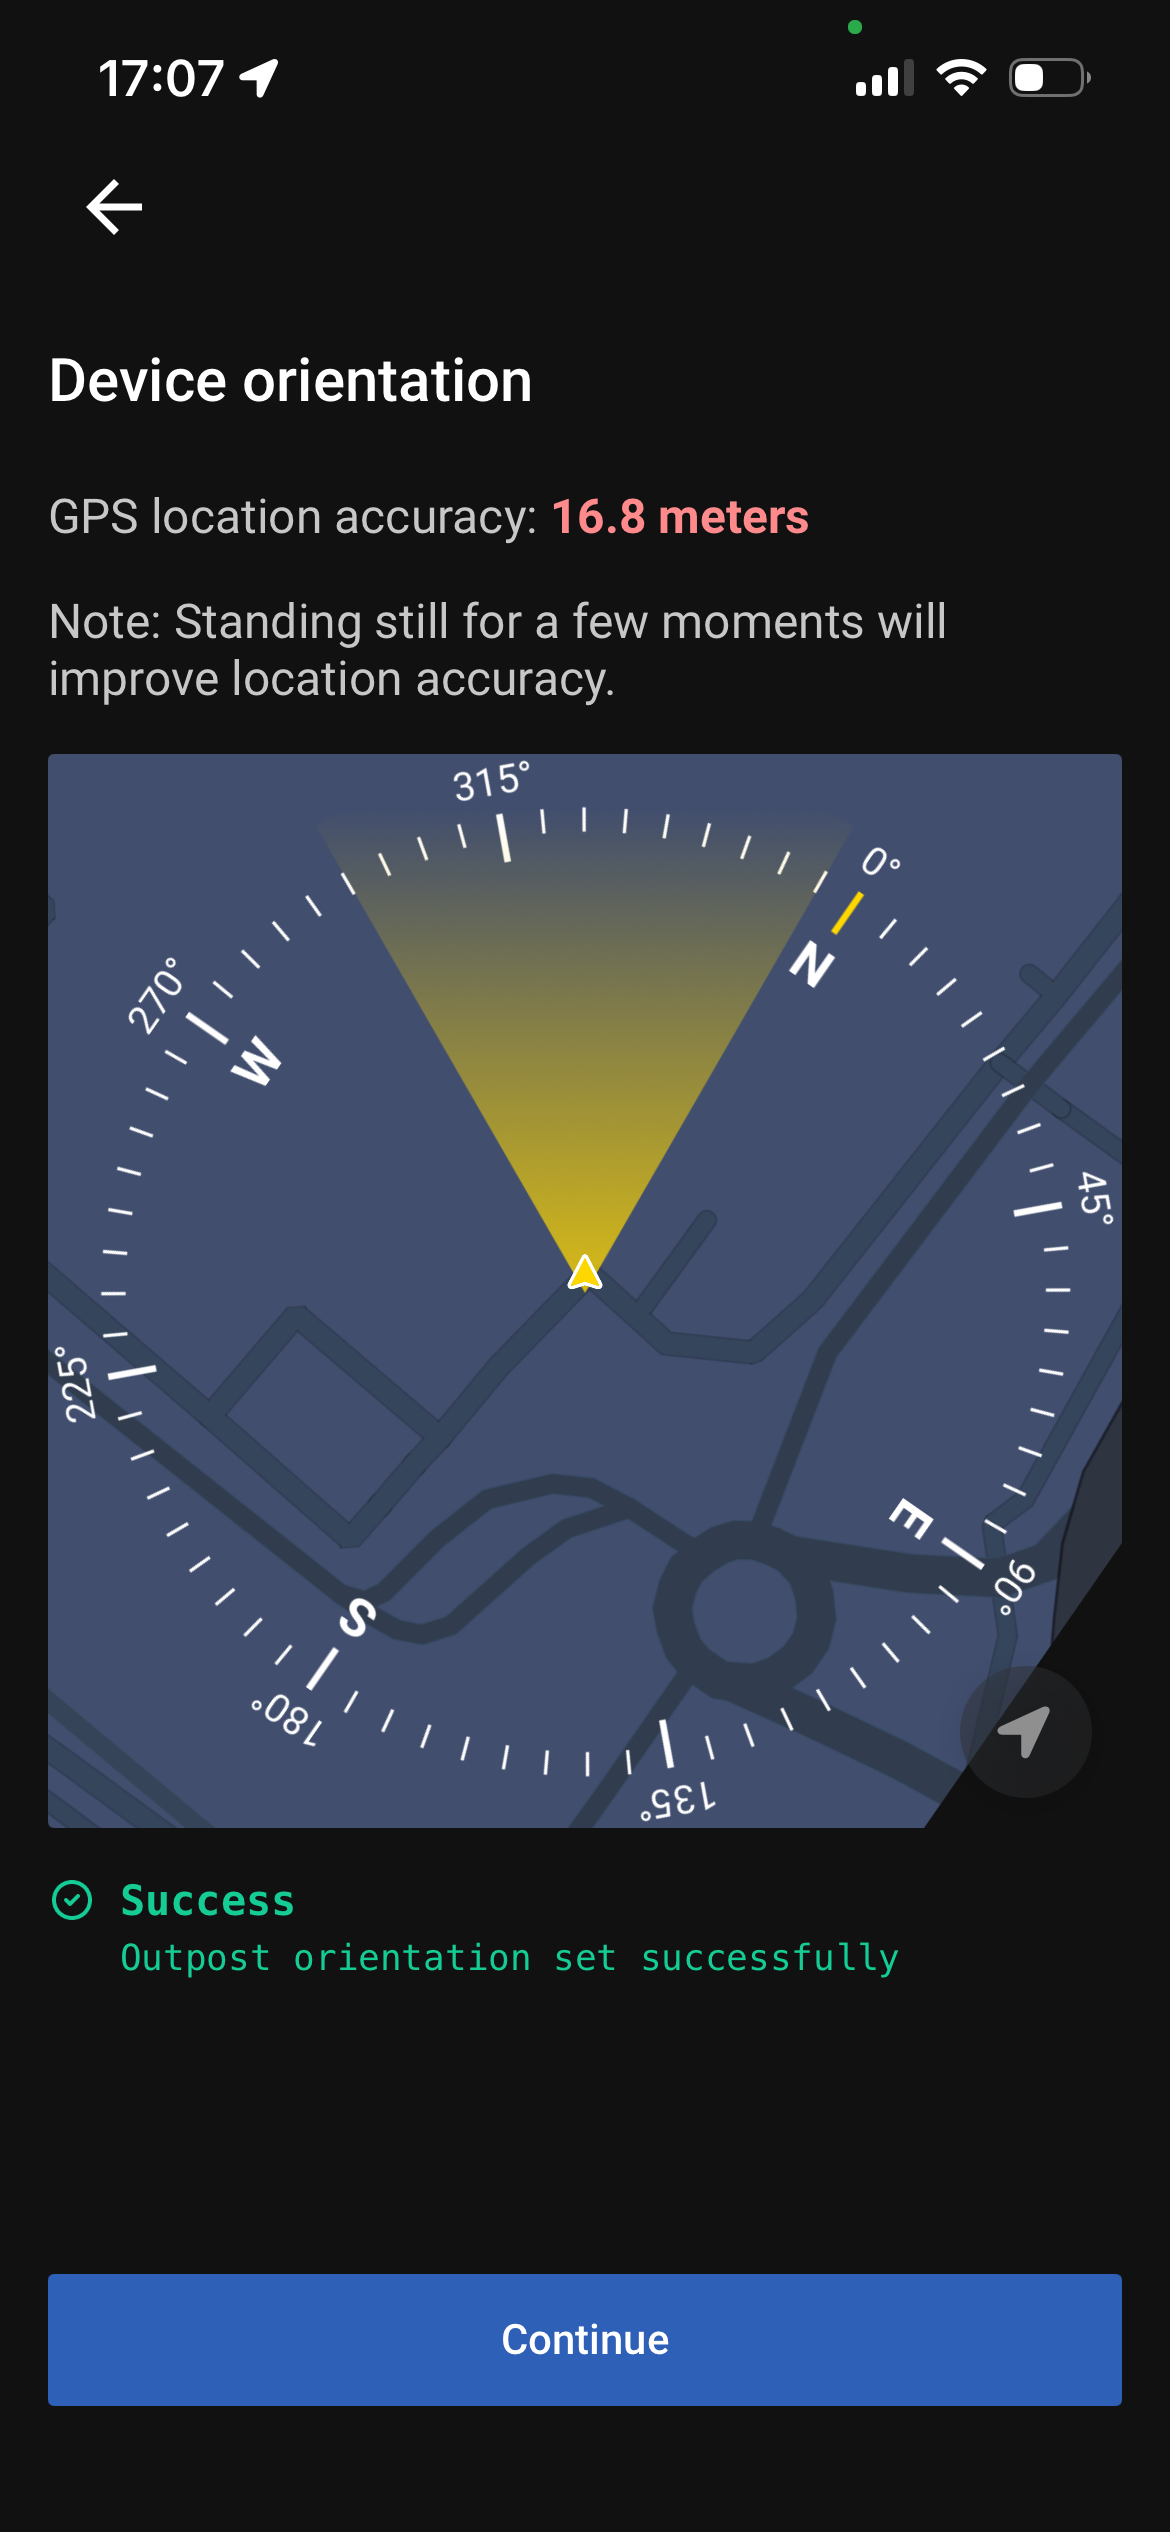
When the Fixed Location (Pole) option is selected and the Continue button is tapped, you are taken to a screen where you need to hold your phone with the screen facing upward and align the on-screen compass direction indicator with the direction the Outpost device is pointing. Once the phone and the device are facing the same direction, the Submit button becomes available once at least one of the following conditions is met:
-
The GPS location accuracy indicator shows less than 5 meters.
-
The 10-second timeout has elapsed.
Until at least one of the conditions are met, the Submit button remains disabled. You can also use the arrow icon on the map to re-center the view to your current location.
Note: The GPS location accuracy indicator may be misleading in some cases. If the accuracy value is above 5 meters, it does not necessarily mean you cannot proceed — if the positioning and orientation on the map match your phone and device coordinates, you can still continue to the next step. Once you are satisfied with your position on the map, tap the Continue button to proceed to the next installation step.
When the Mobile Location (Trailer or Vehicle) option is selected, you are taken directly to the Data Capture screen — no orientation configuration is required for this option.
After completing this step, the device can be verified in Axon Evidence and Fusus, where its location and orientation will be displayed, especially when the device was set as Fixed Location (Pole).
Data Capture
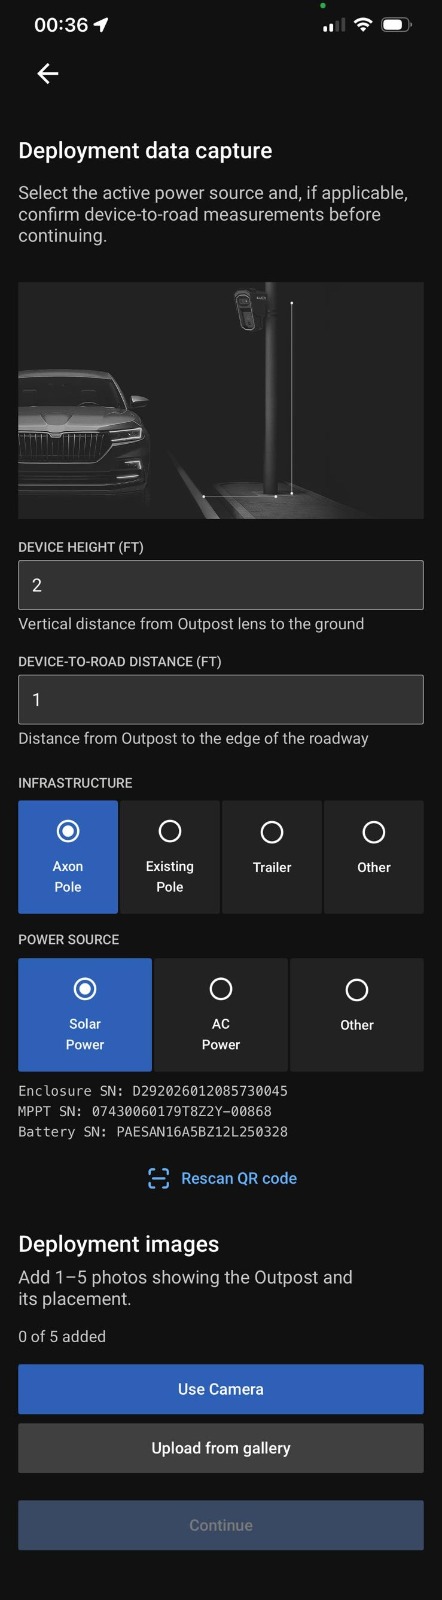
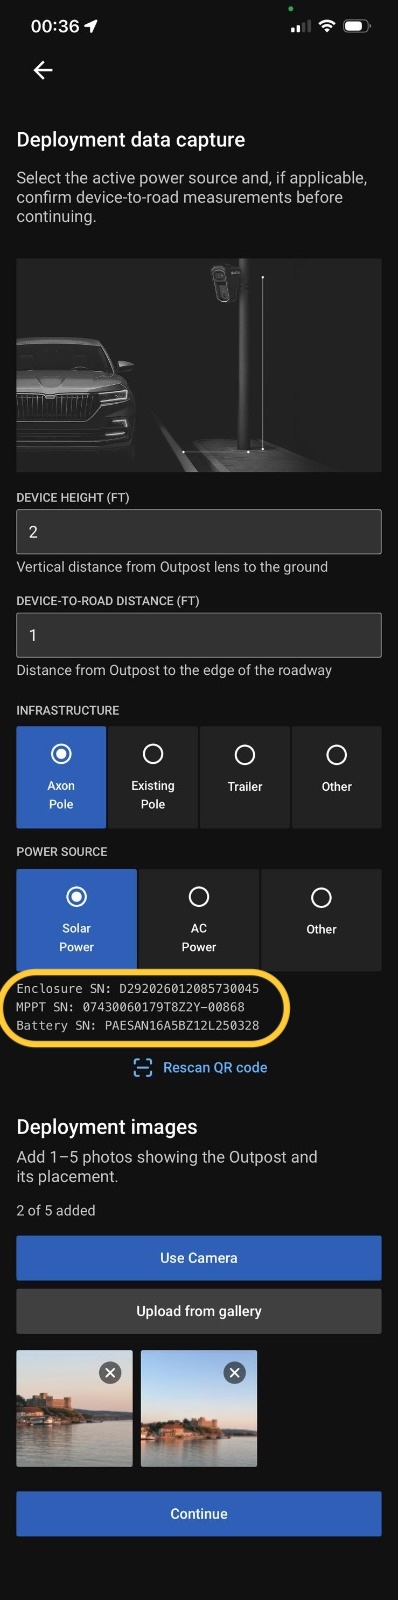
In the next step, both the Height and Distance to Road measurements are mandatory.
You need to select the appropriate option from the Infrastructure section based on how your device is installed. Available options include:
-
Axon Pole
-
Existing Pole
-
Trailer
-
Other
Next, select the Power Source connected to the device. Choose the option that matches your setup:
-
Solar Power – Select this option if the device is connected to an MPPT and uses:
-
An enclosure with a 40Ah battery, or
-
An enclosure with a 20Ah battery
-
When Solar Power is selected together with Axon Pole, Existing Pole or Trailer , the Scan QR Code option becomes available below the Power Source section. If Trailer is selected, scanning the enclosure QR code is optional.
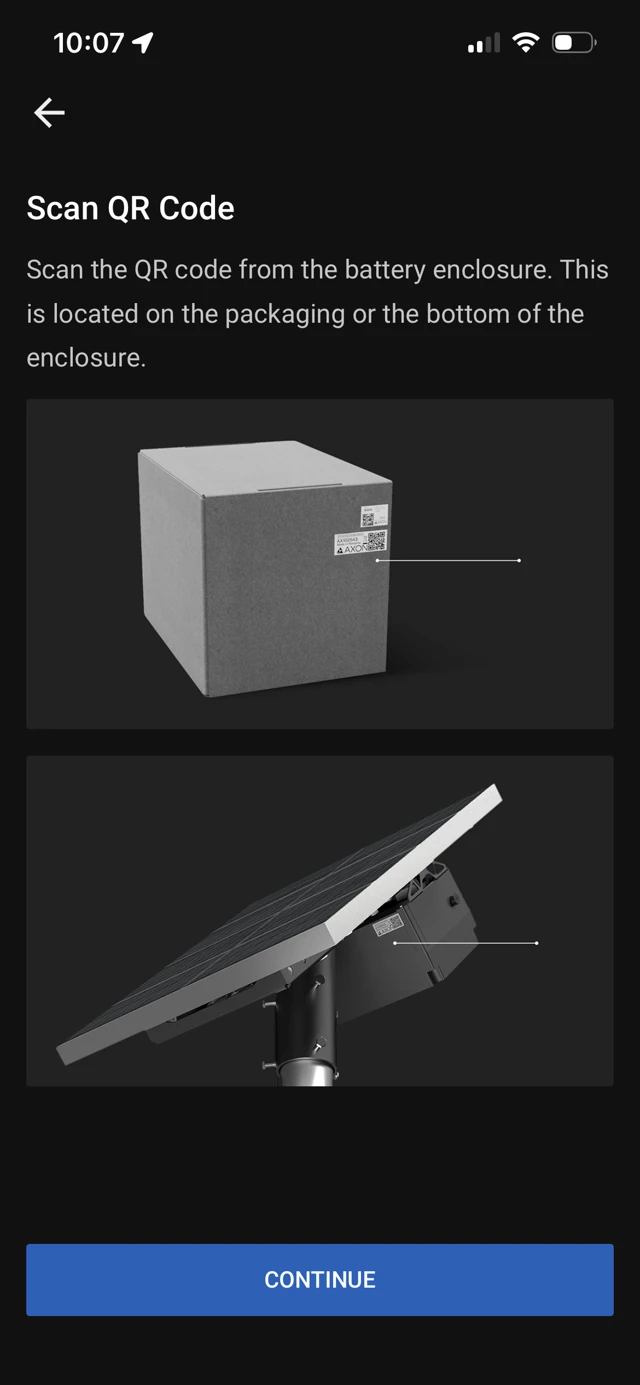
Tap Scan QR Code button to scan the QR code located on the enclosure, on the enclosure box or on the battery inside the enclosure. After tapping the button, the screen will display:
-
An image showing where the QR code is located on the enclosure/ box/ battery
-
An image showing where the QR code is located on the cardboard box.
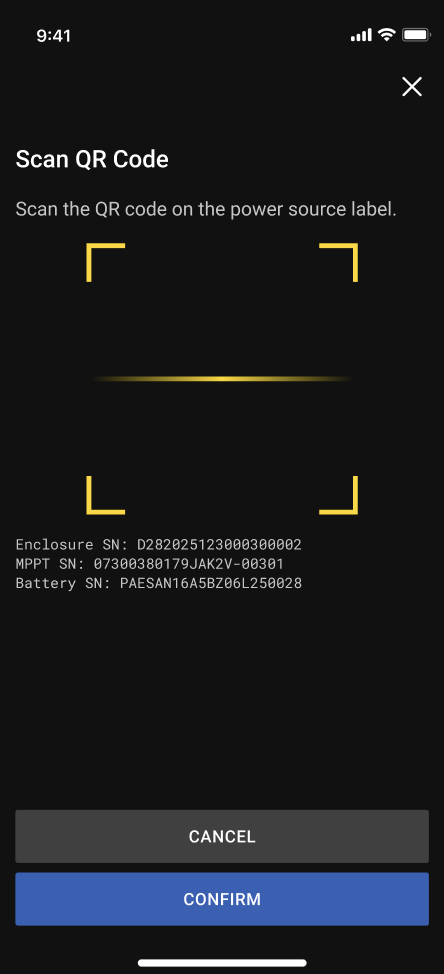
After tapping Continue, a scanner modal will appear, allowing you to scan the enclosure’s QR code.
Once the QR code is scanned, you can either confirm or cancel the action. If you cancel, you will be redirected back to the previous screen.
After successfully scanning a valid enclosure QR code, the system will display three serial numbers on the screen:
-
Enclosure serial number
-
MPPT serial number
-
Battery serial number
If your setup does not include a battery or MPPT and the device is connected directly to AC power, select AC Power. In this case, no QR code scan is required.
If your setup does not include a battery with MPPT or an AC power connection, select Other.
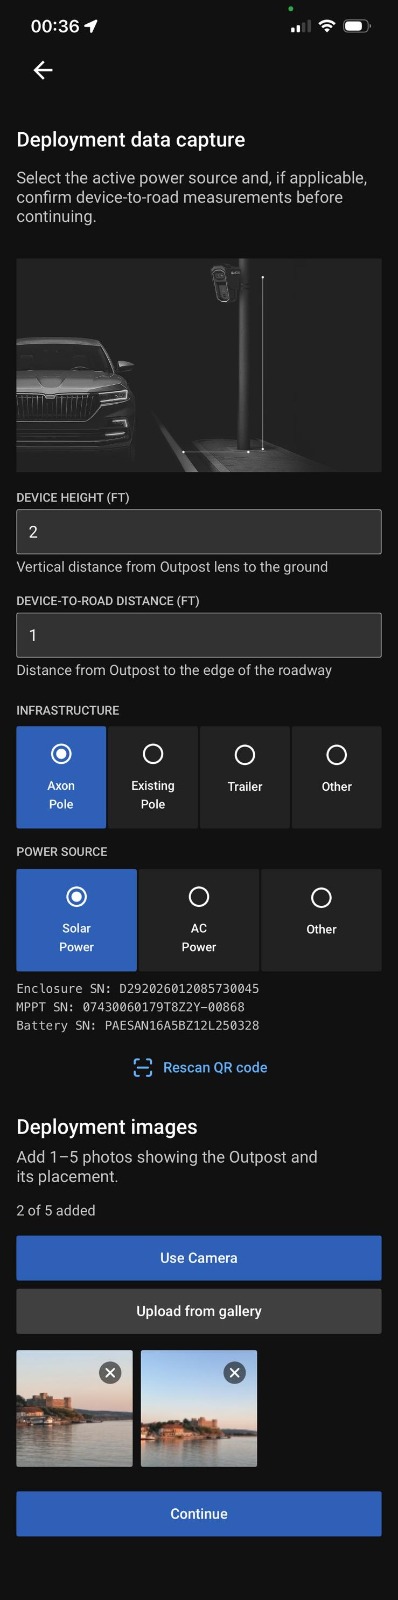
After entering the required deployment measurements and selecting the applicable infrastructure and power-source options, add images of the completed Outpost installation.
To add an image, tap on one of the following options:
-
Upload from the gallery — Select existing image from your device’s photo library (JPEG or PNG).
-
Use Camera — Open the device camera and take a new photo of the deployed setup.
Upload at least one image of the completed installation. You can add up to the maximum 5 images.
Ensure the images clearly document the deployed Outpost setup, including the device, mounting infrastructure, and power setup where applicable. Review each image before continuing. To remove an image that is unclear or incomplete, tap the X in the top-right corner of the image you want to remove.
The Continue button remains disabled until all required Data Capture fields are completed : Height, Distance to Road, Infrastructure, Power Source and at least one uploaded image.
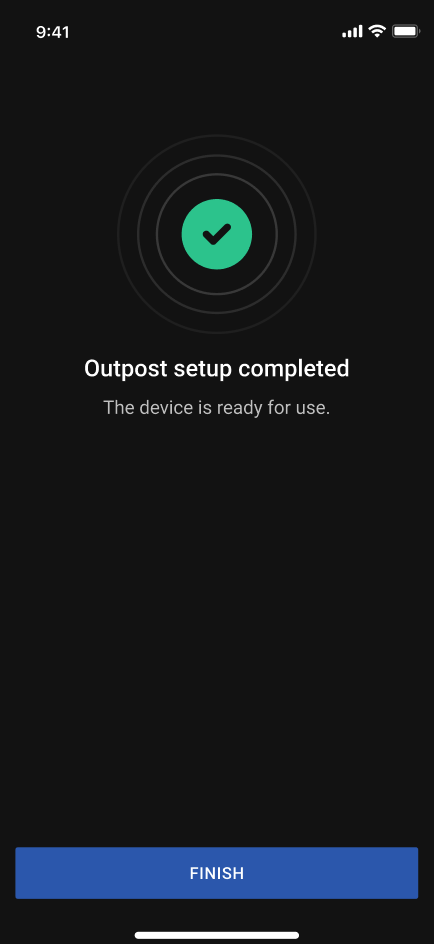
Once all required fields are complete and at least one image has been uploaded, the Continue button becomes available. Tap Continue to proceed to Setup Completed.
Note: Upload only images relevant to the Outpost deployment. Avoid capturing people, license plates, or other unnecessary sensitive information.
Complete setup
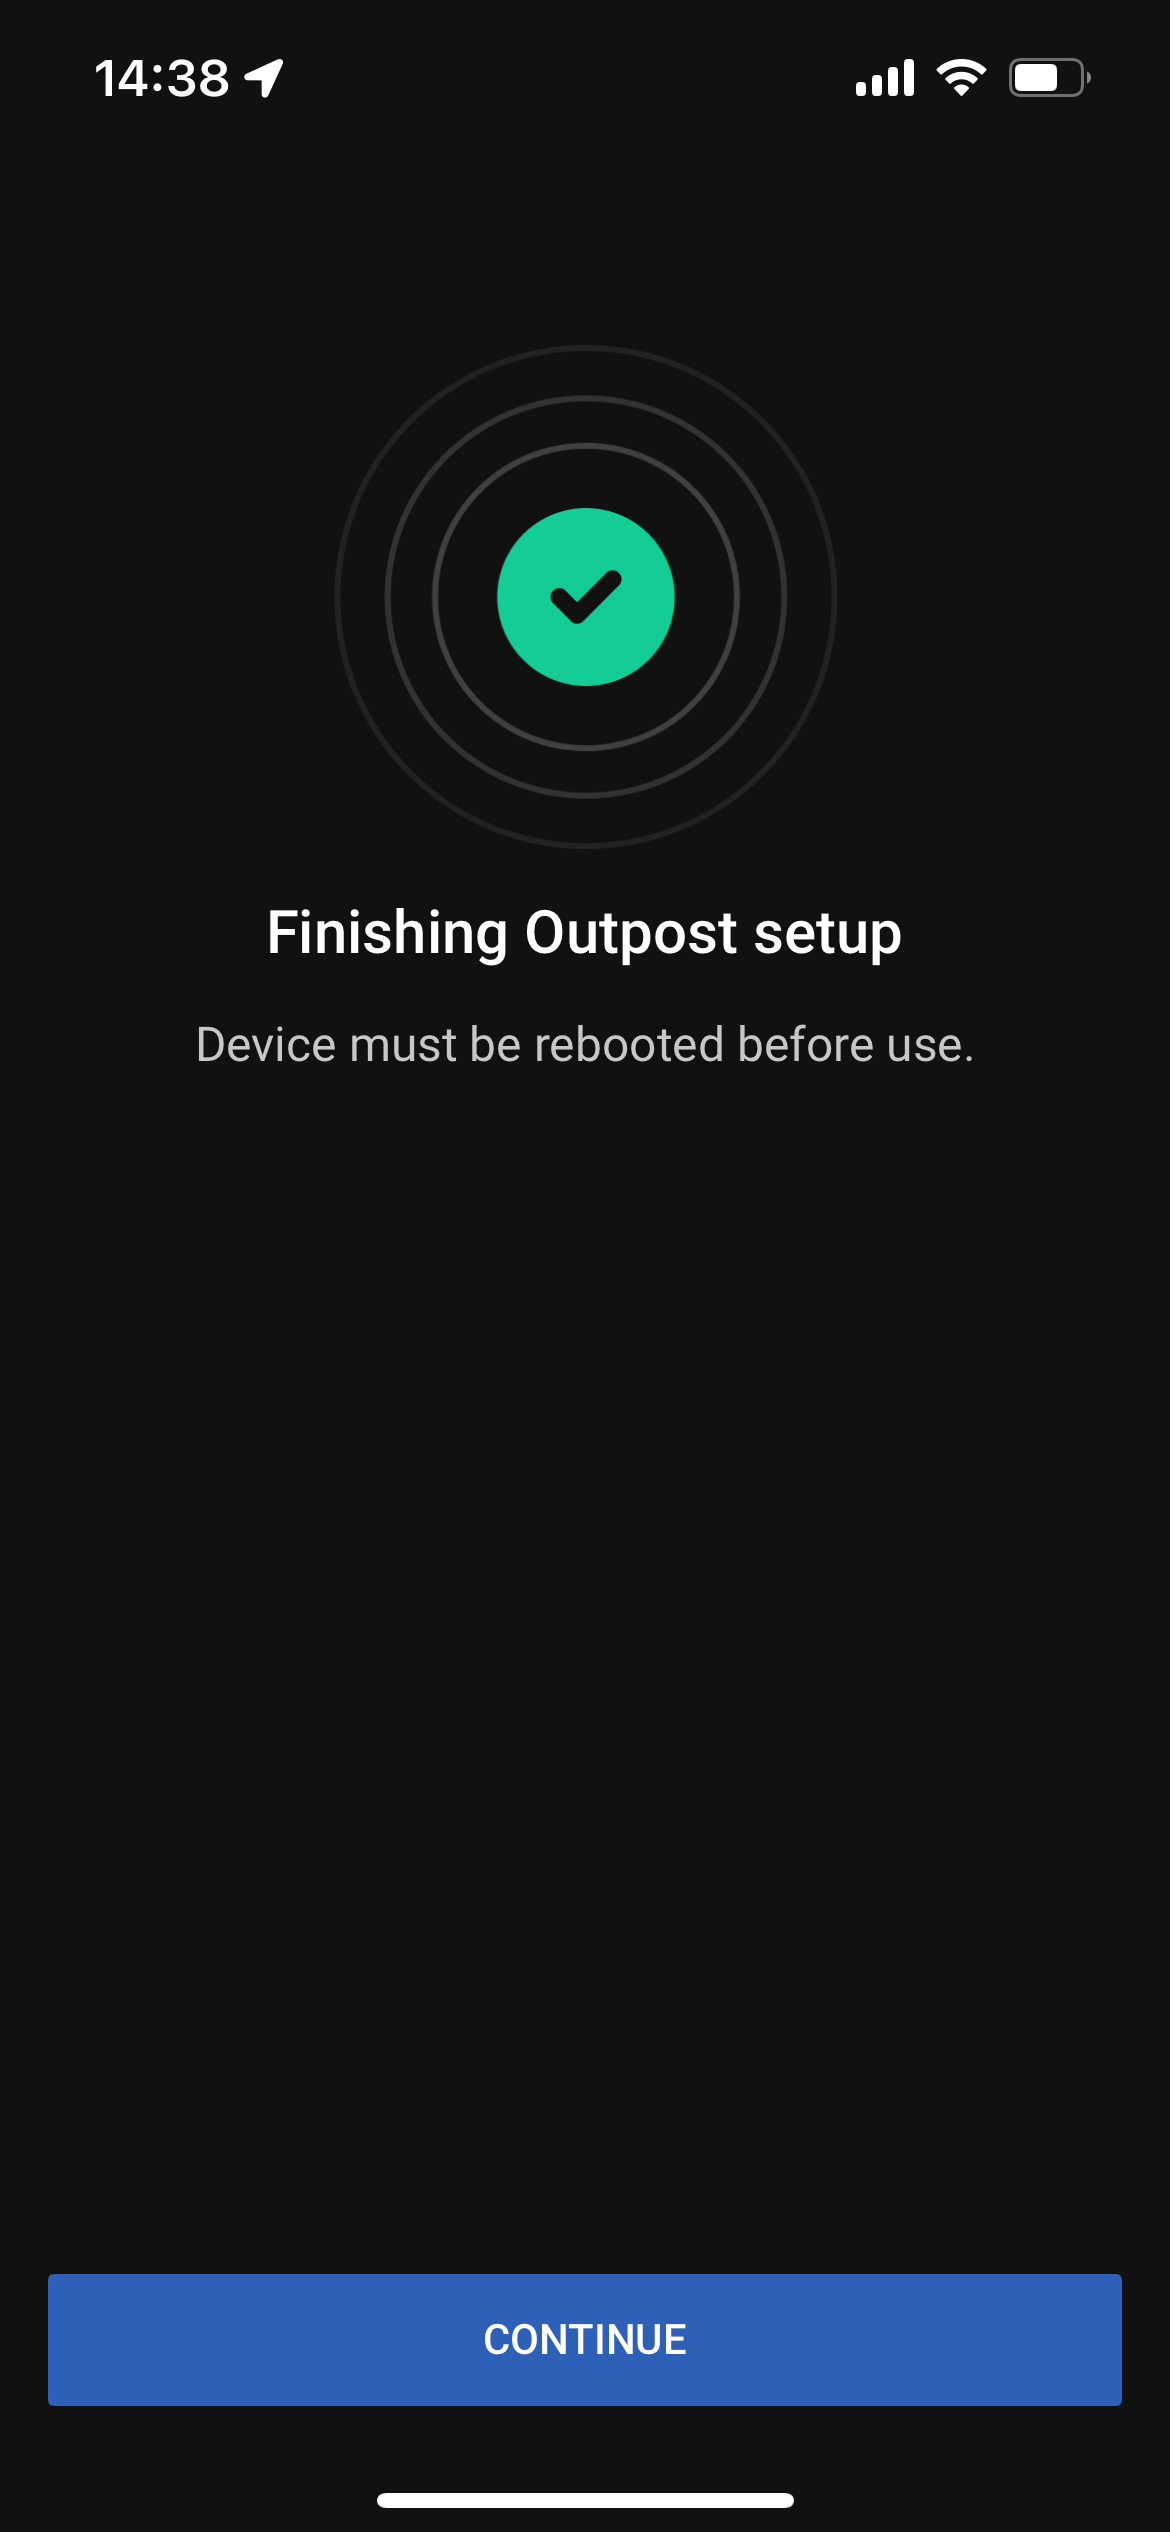
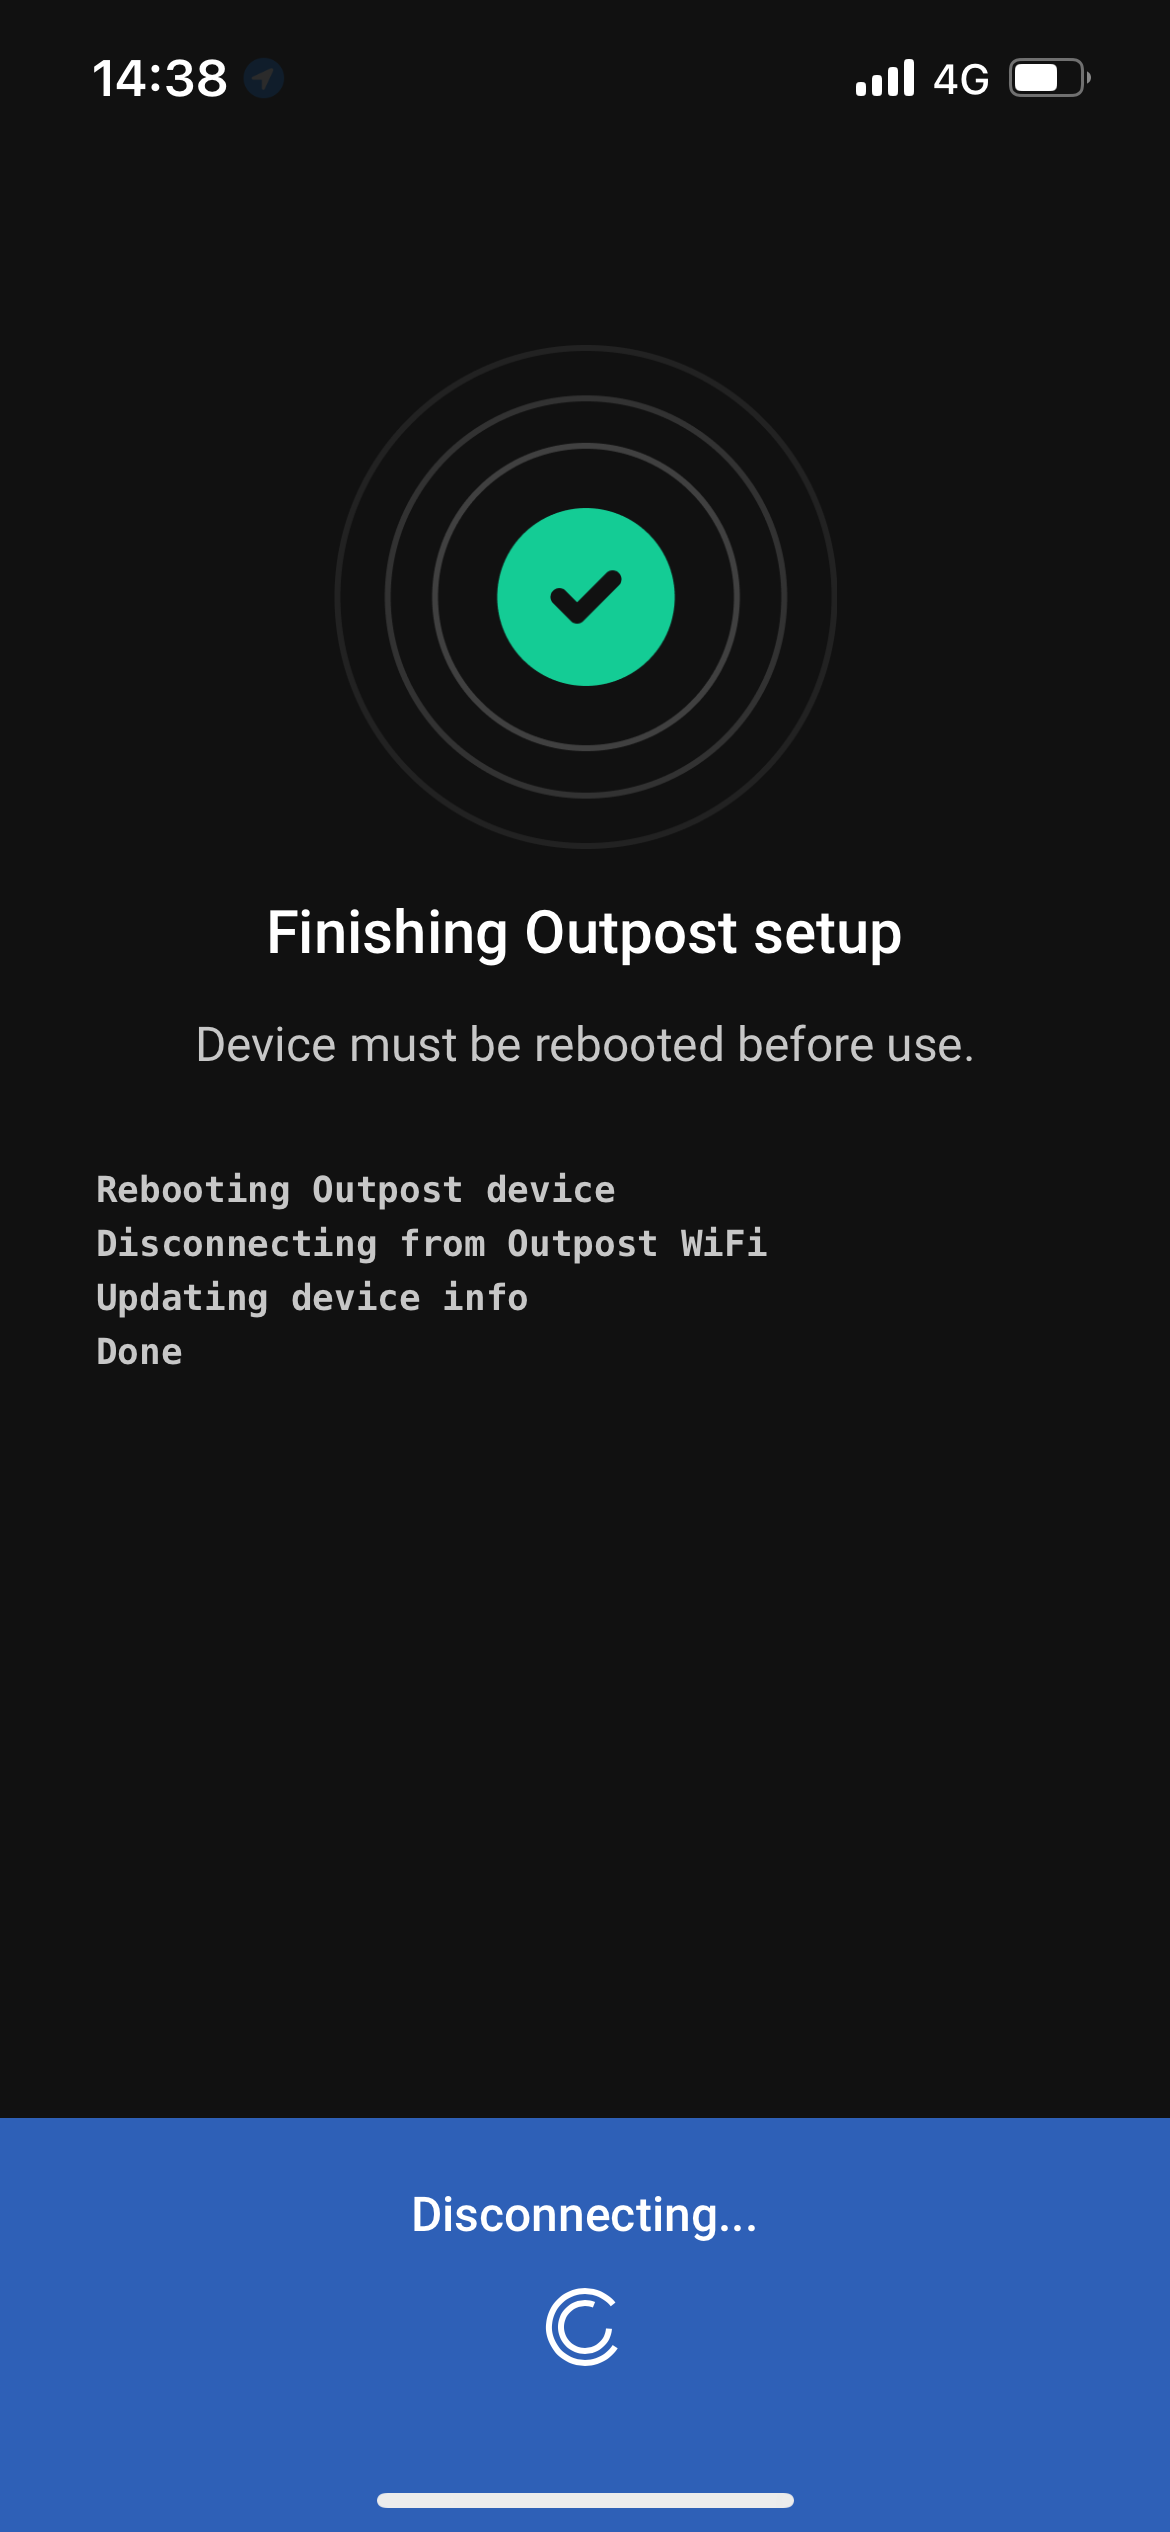
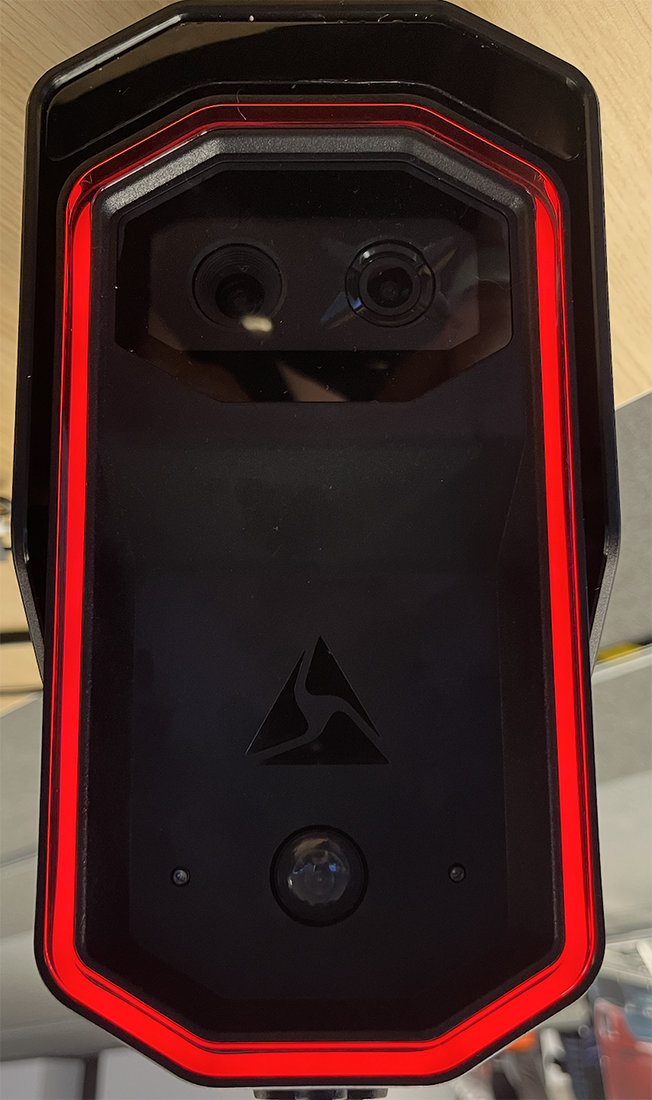
At the final stage of the installation, the device disconnects from Wi-Fi and Bluetooth, reboots, and becomes ready for use.
You can view the device and its details in the Axon Evidence portal, including its status, firmware version, battery level, and additional information.
When the reboot is successfully completed, the LED ring should appear as shown below.
iOS Accessibility settings compatibility
The following outlines which iOS accessibility settings (found under Settings → Accessibility) are compatible with the AOM app when enabled on your phone use for Outpost deployments. These settings are not controlled by the app and are managed entirely by iOS.
Supported settings
The following settings can be enabled without impacting the installation workflow:
-
Grayscale — The app functions correctly in grayscale mode.
-
Increase Contrast — The app operates normally. Some UI elements use fixed brand colors that do not fully adapt to this setting, but functionality is unaffected.
-
Smart Invert Colors — Compatible. Smart Invert is designed to exclude images and media, so the camera-based steps (QR code scanning, ALPR test) are unaffected.
-
Reduce Transparency — Compatible. Semi-transparent overlays in the app will remain semi-transparent as the app does not adapt to this setting. Functionality is unaffected.
-
Reduce Motion — Compatible. A few loading and scanning animations will continue to play regardless of this setting, but the installation flow is unaffected.
-
Differentiate Without Color — Compatible. All status indicators in the app that use color are also labeled with text, so color is never the only way information is conveyed.
-
VoiceOver — Compatible. The app does not use audio or rely on sound-based feedback, so these settings have no impact.
-
Zoom — Compatible. Note that the QR code scanning and ALPR test screens may be harder to use when zoomed in significantly.
-
AssistiveTouch — Compatible. If the floating button covers the QR code scanning area, drag it to a corner of the screen before that step.
-
Voice Control — Compatible. The app's buttons can be activated by name using Voice Control commands.
-
Touch Accommodations — Compatible. No impact on the installation flow.
-
Spoken Content (Speak Selection / Speak Screen) — Compatible. No impact on the installation flow.
-
Mono Audio, LED Flash for Alerts, Sound Recognition — Compatible. The app does not use audio or rely on sound-based feedback, so these settings have no impact.
Unsupported settings
The following settings are either not supported by the app or not recommended to have enabled during installation:
-
Larger Text — Not supported. The app uses fixed text sizes that do not respond to the Larger Text setting. Font sizes will remain unchanged regardless of what is configured.
-
Bold Text — Not supported. The app's text will not become bold when this setting is enabled.
-
Classic Invert Colors — Not recommended. Classic Invert applies to all screen content, including camera preview layers. The QR code scanning screen will appear color-inverted, which may cause scan failures.
-
Back Tap — Not recommended during installation. If configured to trigger an action (such as taking a screenshot or scrolling), it may cause unintended behavior during the network connection step. As noted in this guide, switching away from the app during that step can cause the installation to fail.
-
Guided Access — Not recommended. If Guided Access is active and restricts touch input or hardware buttons, it may block system-level prompts required during installation — specifically the Wi-Fi "Join" dialog that must be confirmed when connecting to the Outpost device. Disable Guided Access before starting an installation.


