Restrictions
You can apply restrictions to an entire incident, an entire report, or to specific report sections, such as information about a person, vehicle, or property.
Each restriction has three privileges associated with it that control how users can access information associated with that restriction:
- Access: Lets users view information associated with the restriction
- Add: Lets users add that restriction to information
- Remove: Lets users remove that restriction from information
If you want a user, team, or Command Hierarchy group to view a specific item that has been restricted, but you don't want to give them access to view all items containing that restriction, you can create a restriction exception.
Restriction types and restriction exception lists are managed from the Restrictions tool in the Administrator Console.
When managing and using restrictions, you can take the following actions:
- Reports, incidents, and events
- Administration
Restrict incidents
To apply a restriction to an entire incident:
- Open either the incident profile or a report contained within the incident.
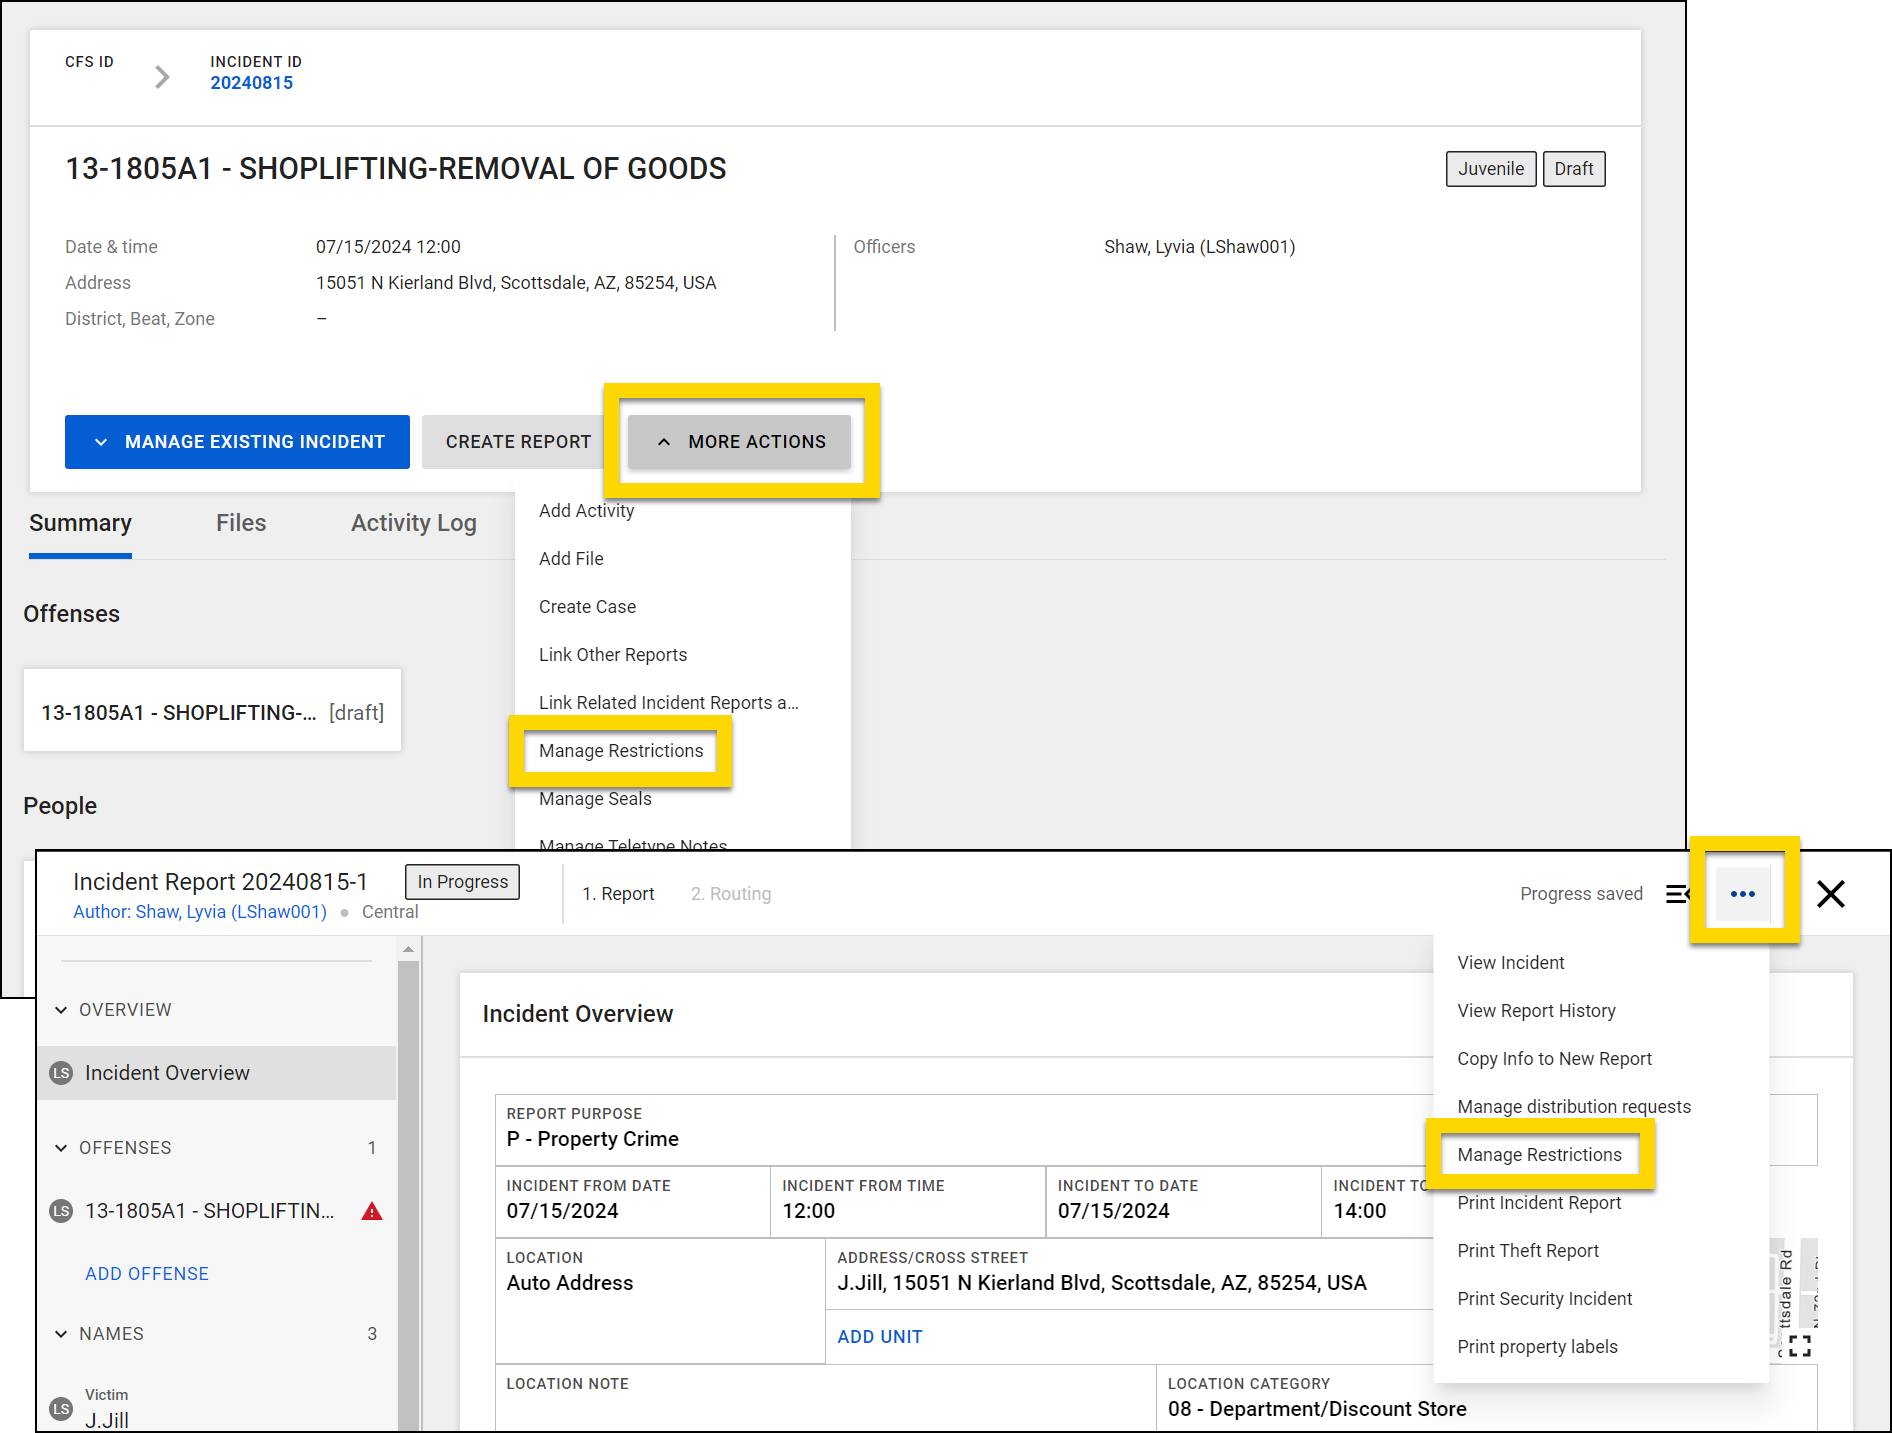
- Select More Actions [...] > Manage Restrictions.
- Select Add Restriction.
- Choose a Restriction Classification.
- You will only see restriction types for which you have the Add privilege.
- Select Entire Incident from the Information Restricted field.
- Select Save.

The Audit Log tool shows any unauthorized access attempts to a fully restricted item. This does not apply to items with partial restrictions.
When users with the necessary restriction privileges open a restricted item, a Restricted label is displayed at the top of the profile. Hovering over the label reveals the name of the restriction that has been applied. When users who do NOT have the necessary restriction privileges attempt to view restricted items, a message displays instead of the profile, explaining that they cannot view the item.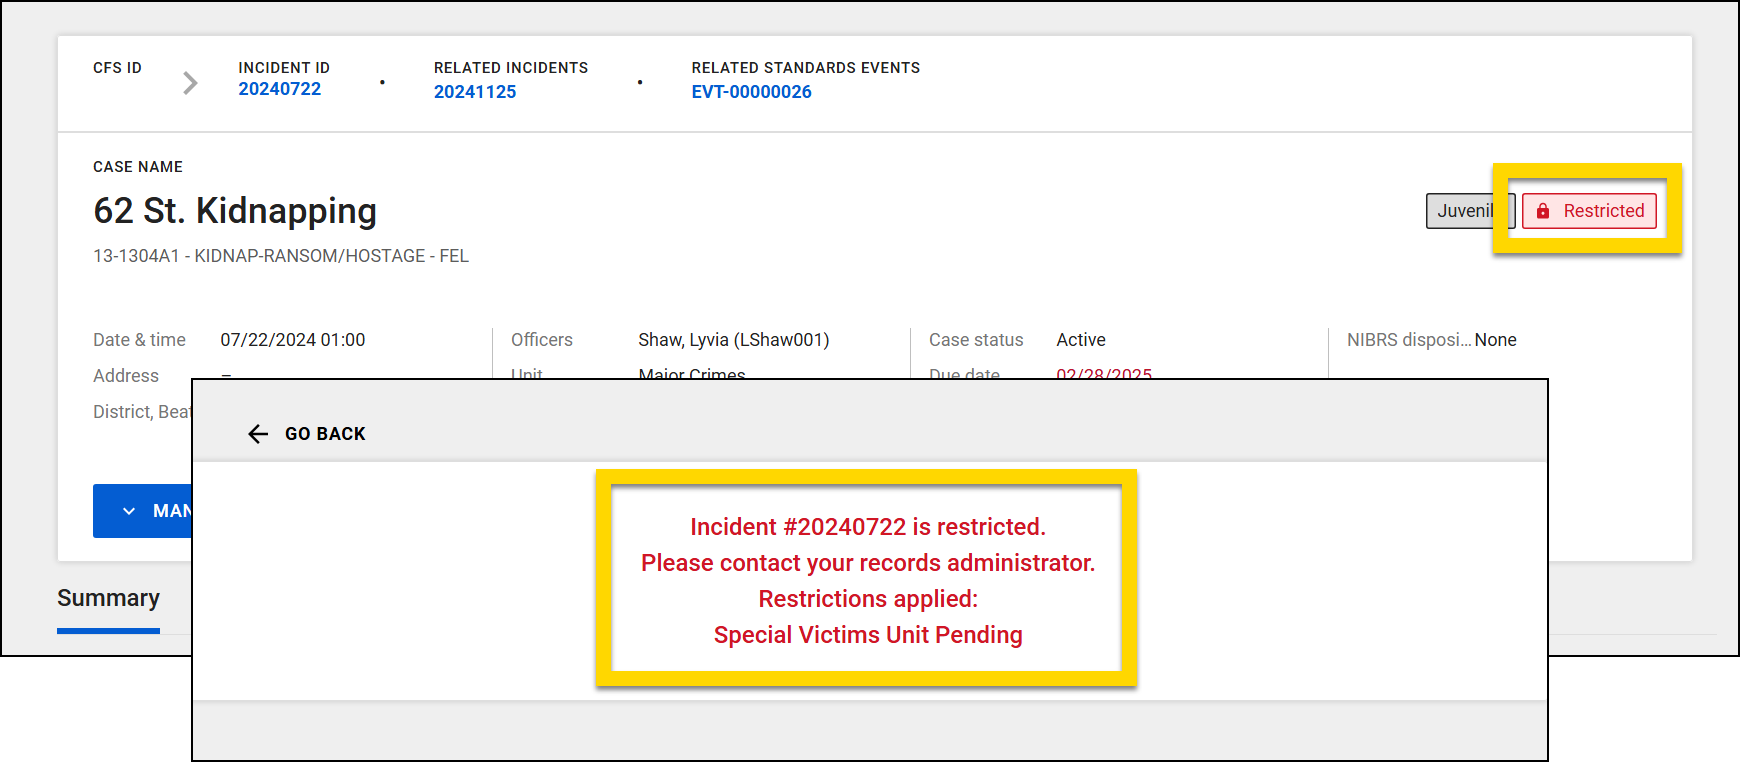
Restrict reports
In Axon Records, you can restrict an entire non-incident report without also restricting other reports that have been added to an incident. Note that this functionality only applies to non-incident reports. To restrict an incident report, you must restrict the entire incident. Similarly, the ability to restrict a single report is not available in Axon Standards. Instead, you must restrict the entire event.
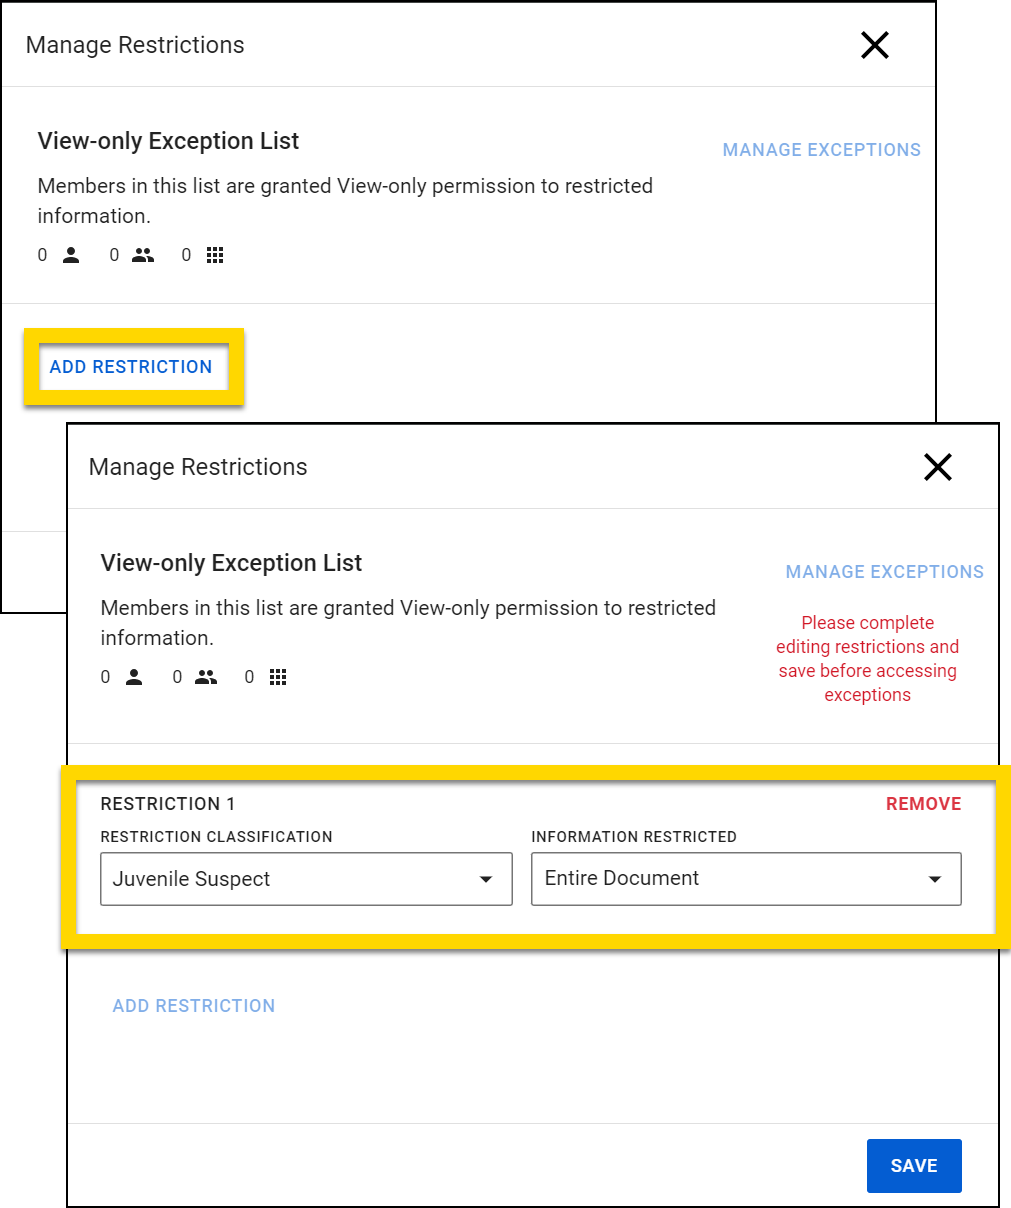
To apply a restriction to an entire report:
- Open the report.
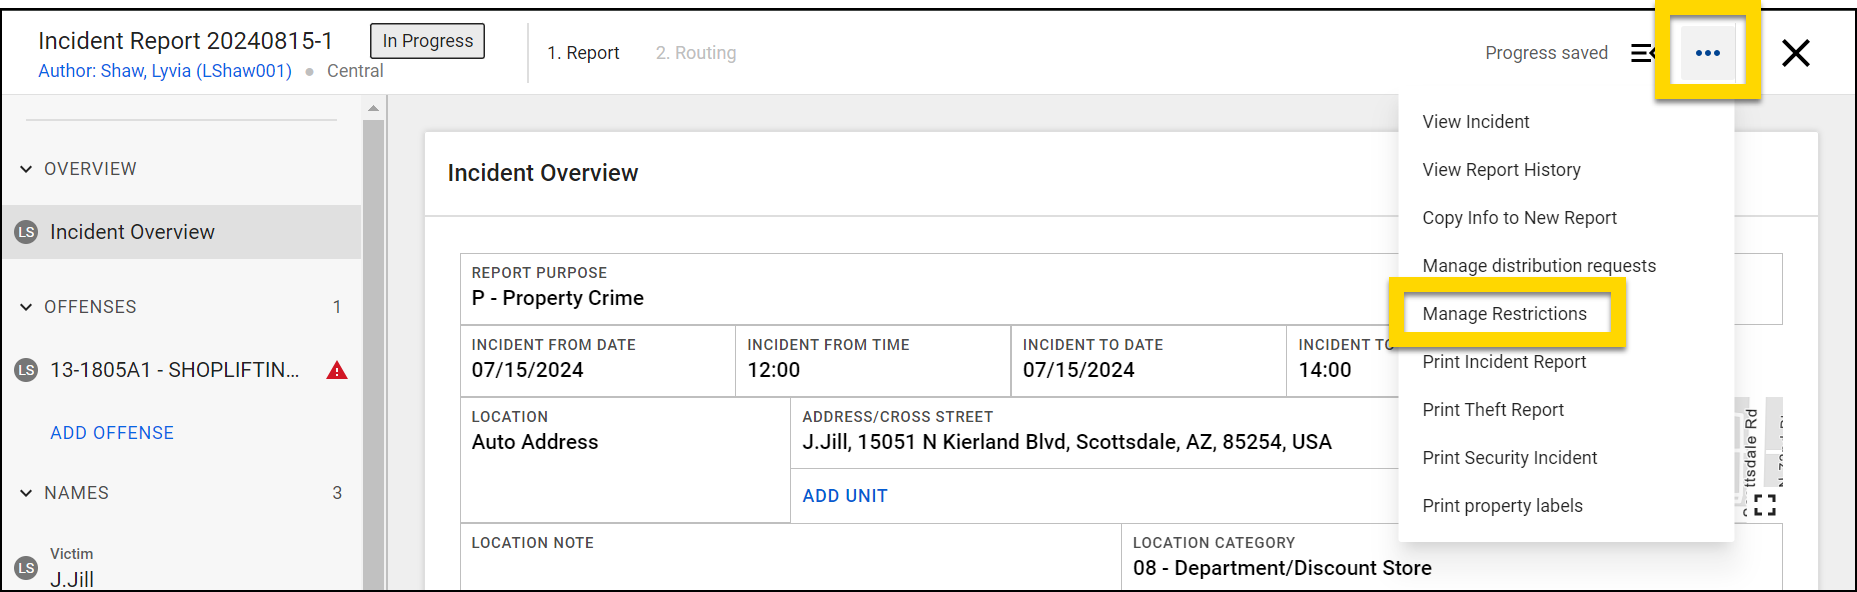
- Select More Actions [...] > Manage Restrictions.
- Select Add Restriction.
- Choose a Restriction Classification.
- You will only see restriction types for which you have the Add privilege.
- Select Entire Document from the Information Restricted field.
- Select Save.
When users who do NOT have the necessary restriction privileges open a restricted report, a message displays instead of the report, explaining that they cannot view it.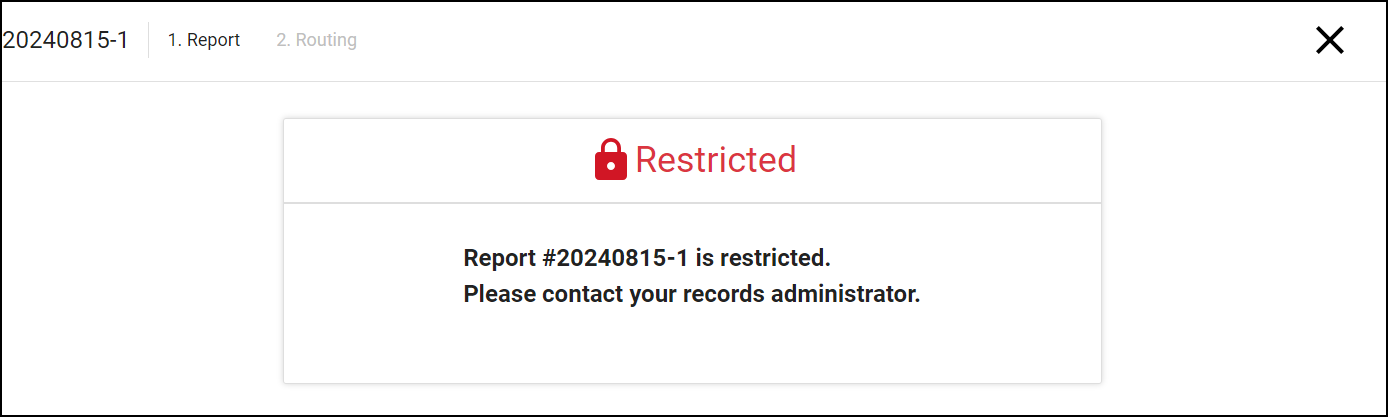
Partial restrictions
To partially restrict a report and make specific information in that report accessible only to authorized users:
- Open the report section you want to restrict.
- Select Actions > Manage Restrictions.
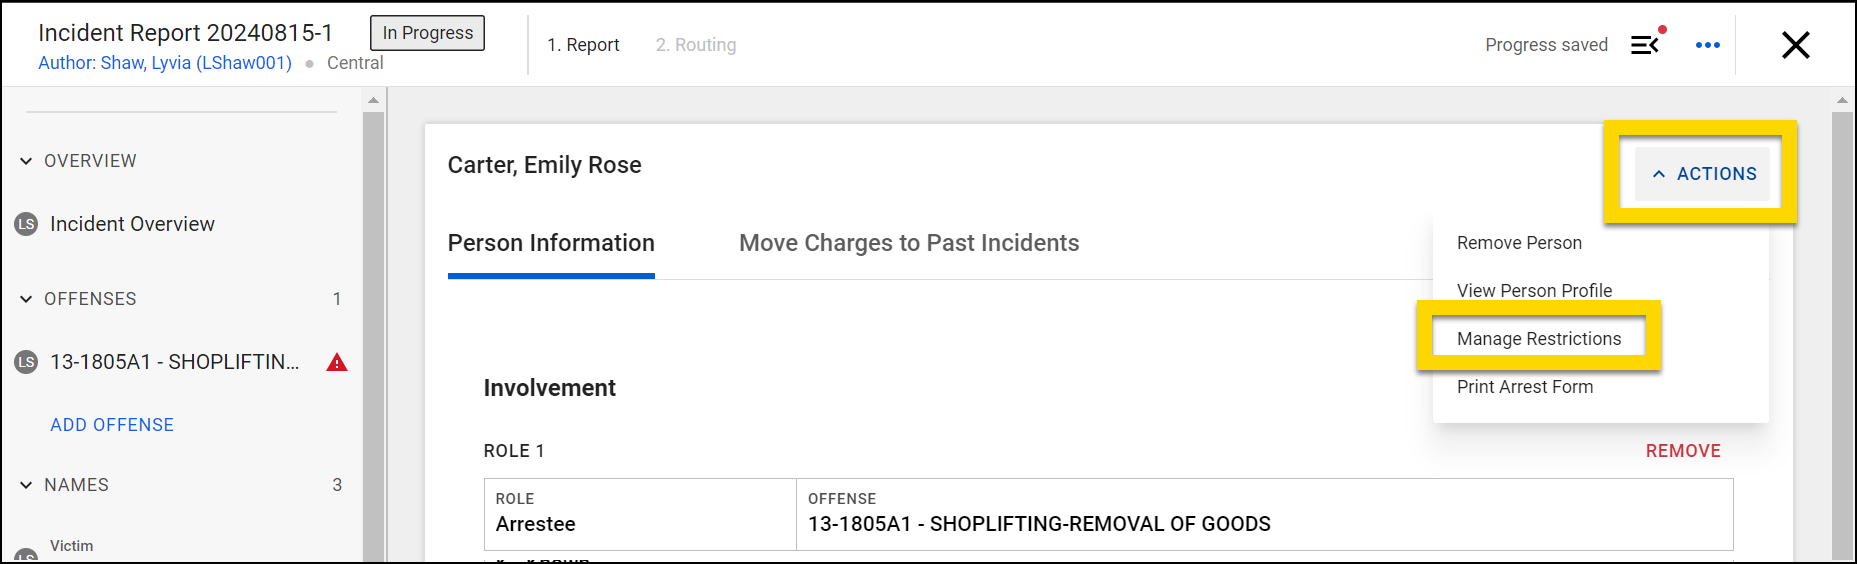
- Select Add Restriction.
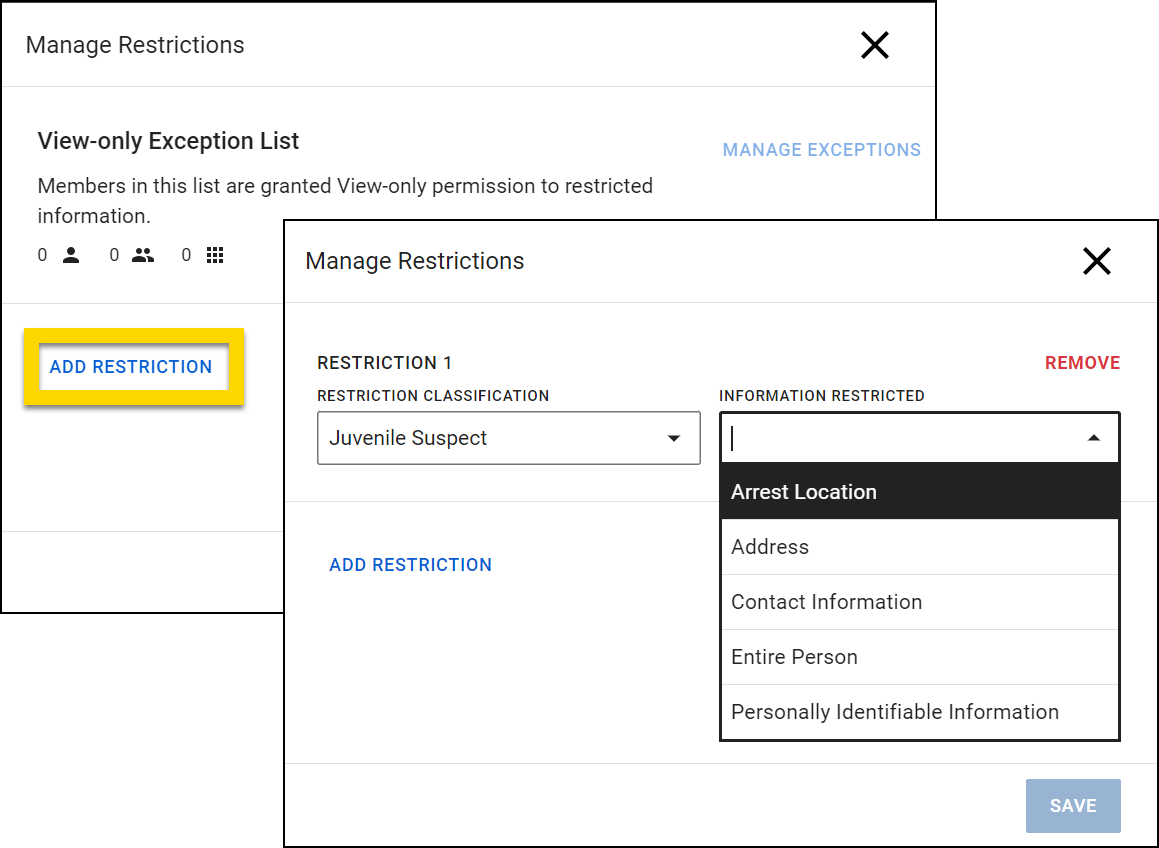
- Pick a type of restriction under Restriction Classification.
- Use the Information Restricted menu to select the exact information you want to limit access to.
- If you select Entire Person, any relationships between that person and any other people, vehicles, etc. are also restricted.
- If you select Personally Identifiable Information, the restriction will apply to:
- Name (first, middle, last, suffix)
- Aliases
- Date of Birth
- Birthplace (city and state)
- Contact information (address, phone, etc.)
- Identification documents (driver's license, passport, etc.)
- To add additional restrictions, select Add Restriction again.
- Select Save to apply the restrictions.
When users with the necessary restriction privileges open a restricted item, a Restricted label is displayed at the top of the section where the restriction was applied. Hovering over the label reveals the name of the restriction that has been applied. A lock icon appears beside each restricted section of the report.
Note in the image below that although a restriction was applied to a single person, additional report sections also display a lock icon because the entire person was restricted, thereby hiding their relationships with the other people in the report.
When users who do NOT have the necessary restriction privileges attempt to view restricted sections of the report, they also see lock icons and a Restricted label. Instead of showing the restricted information in the report fields, [REDACTED] is displayed.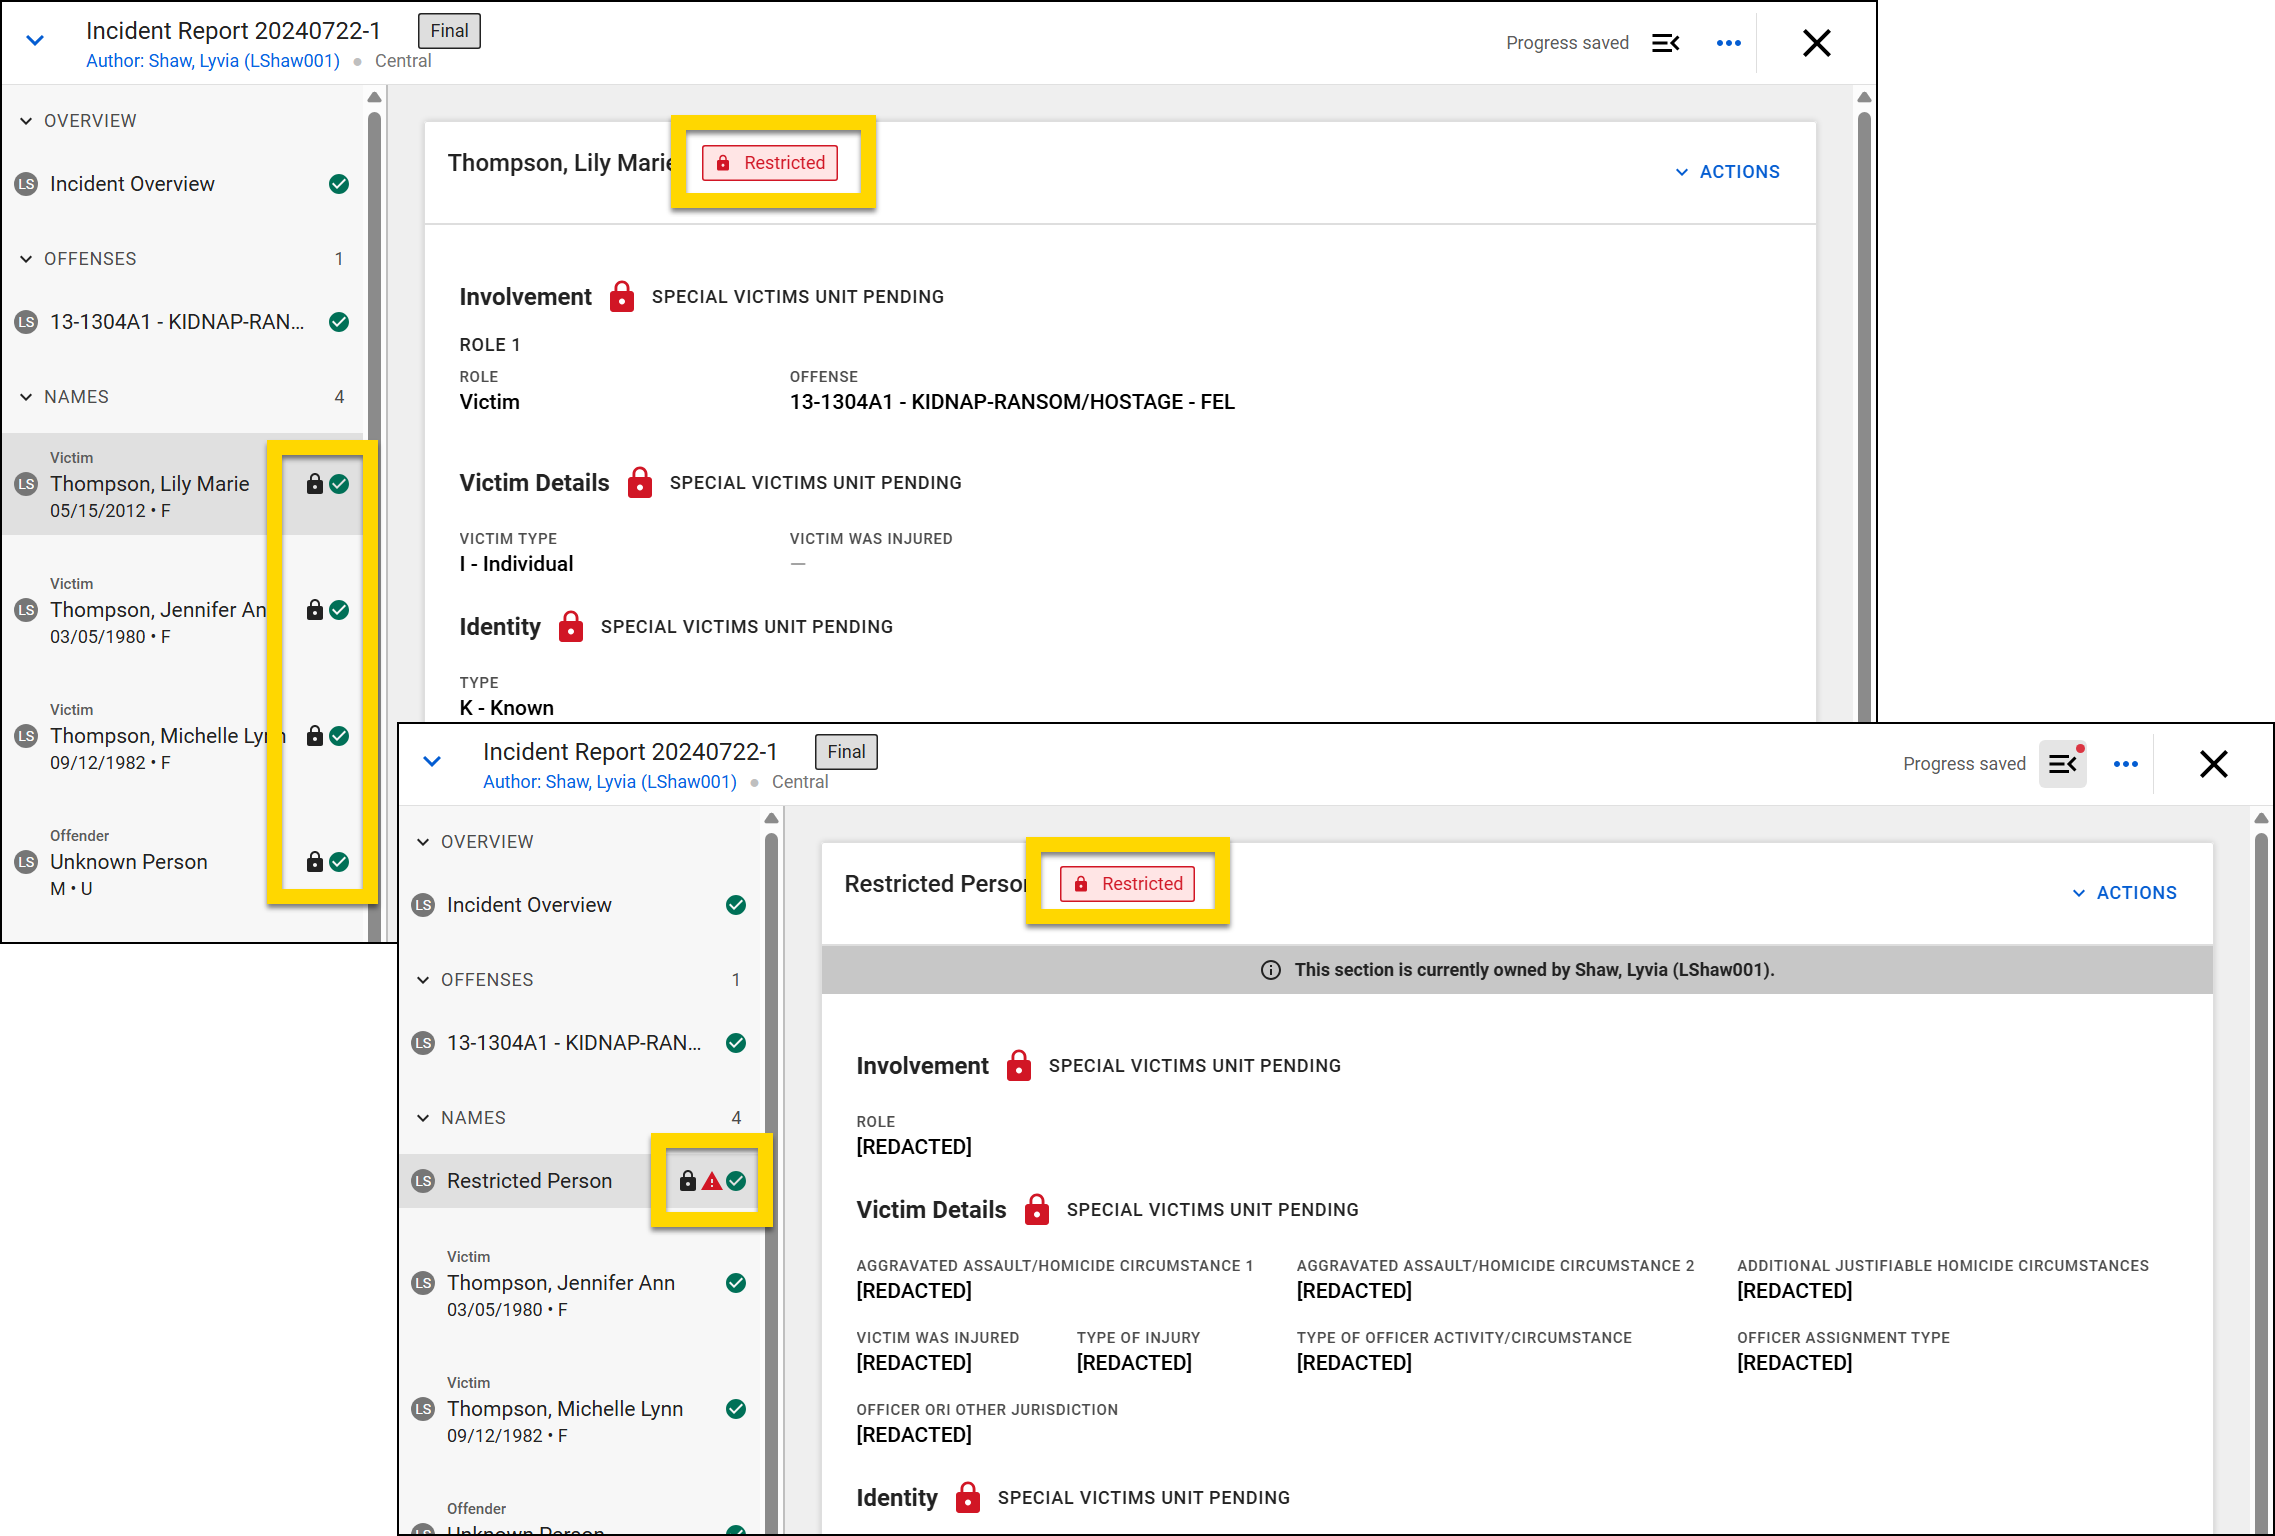
When users with the necessary restriction privileges open the incident profile the report is associated with, a Partially Restricted label is displayed at the top. A Restricted label appears on the information that has been restricted. Hovering over the label reveals the name of the restriction that has been applied. When users who do NOT have the necessary restriction privileges attempt to view an incident profile that contains restricted items, the Partially Restricted label appears and the restricted information is hidden entirely.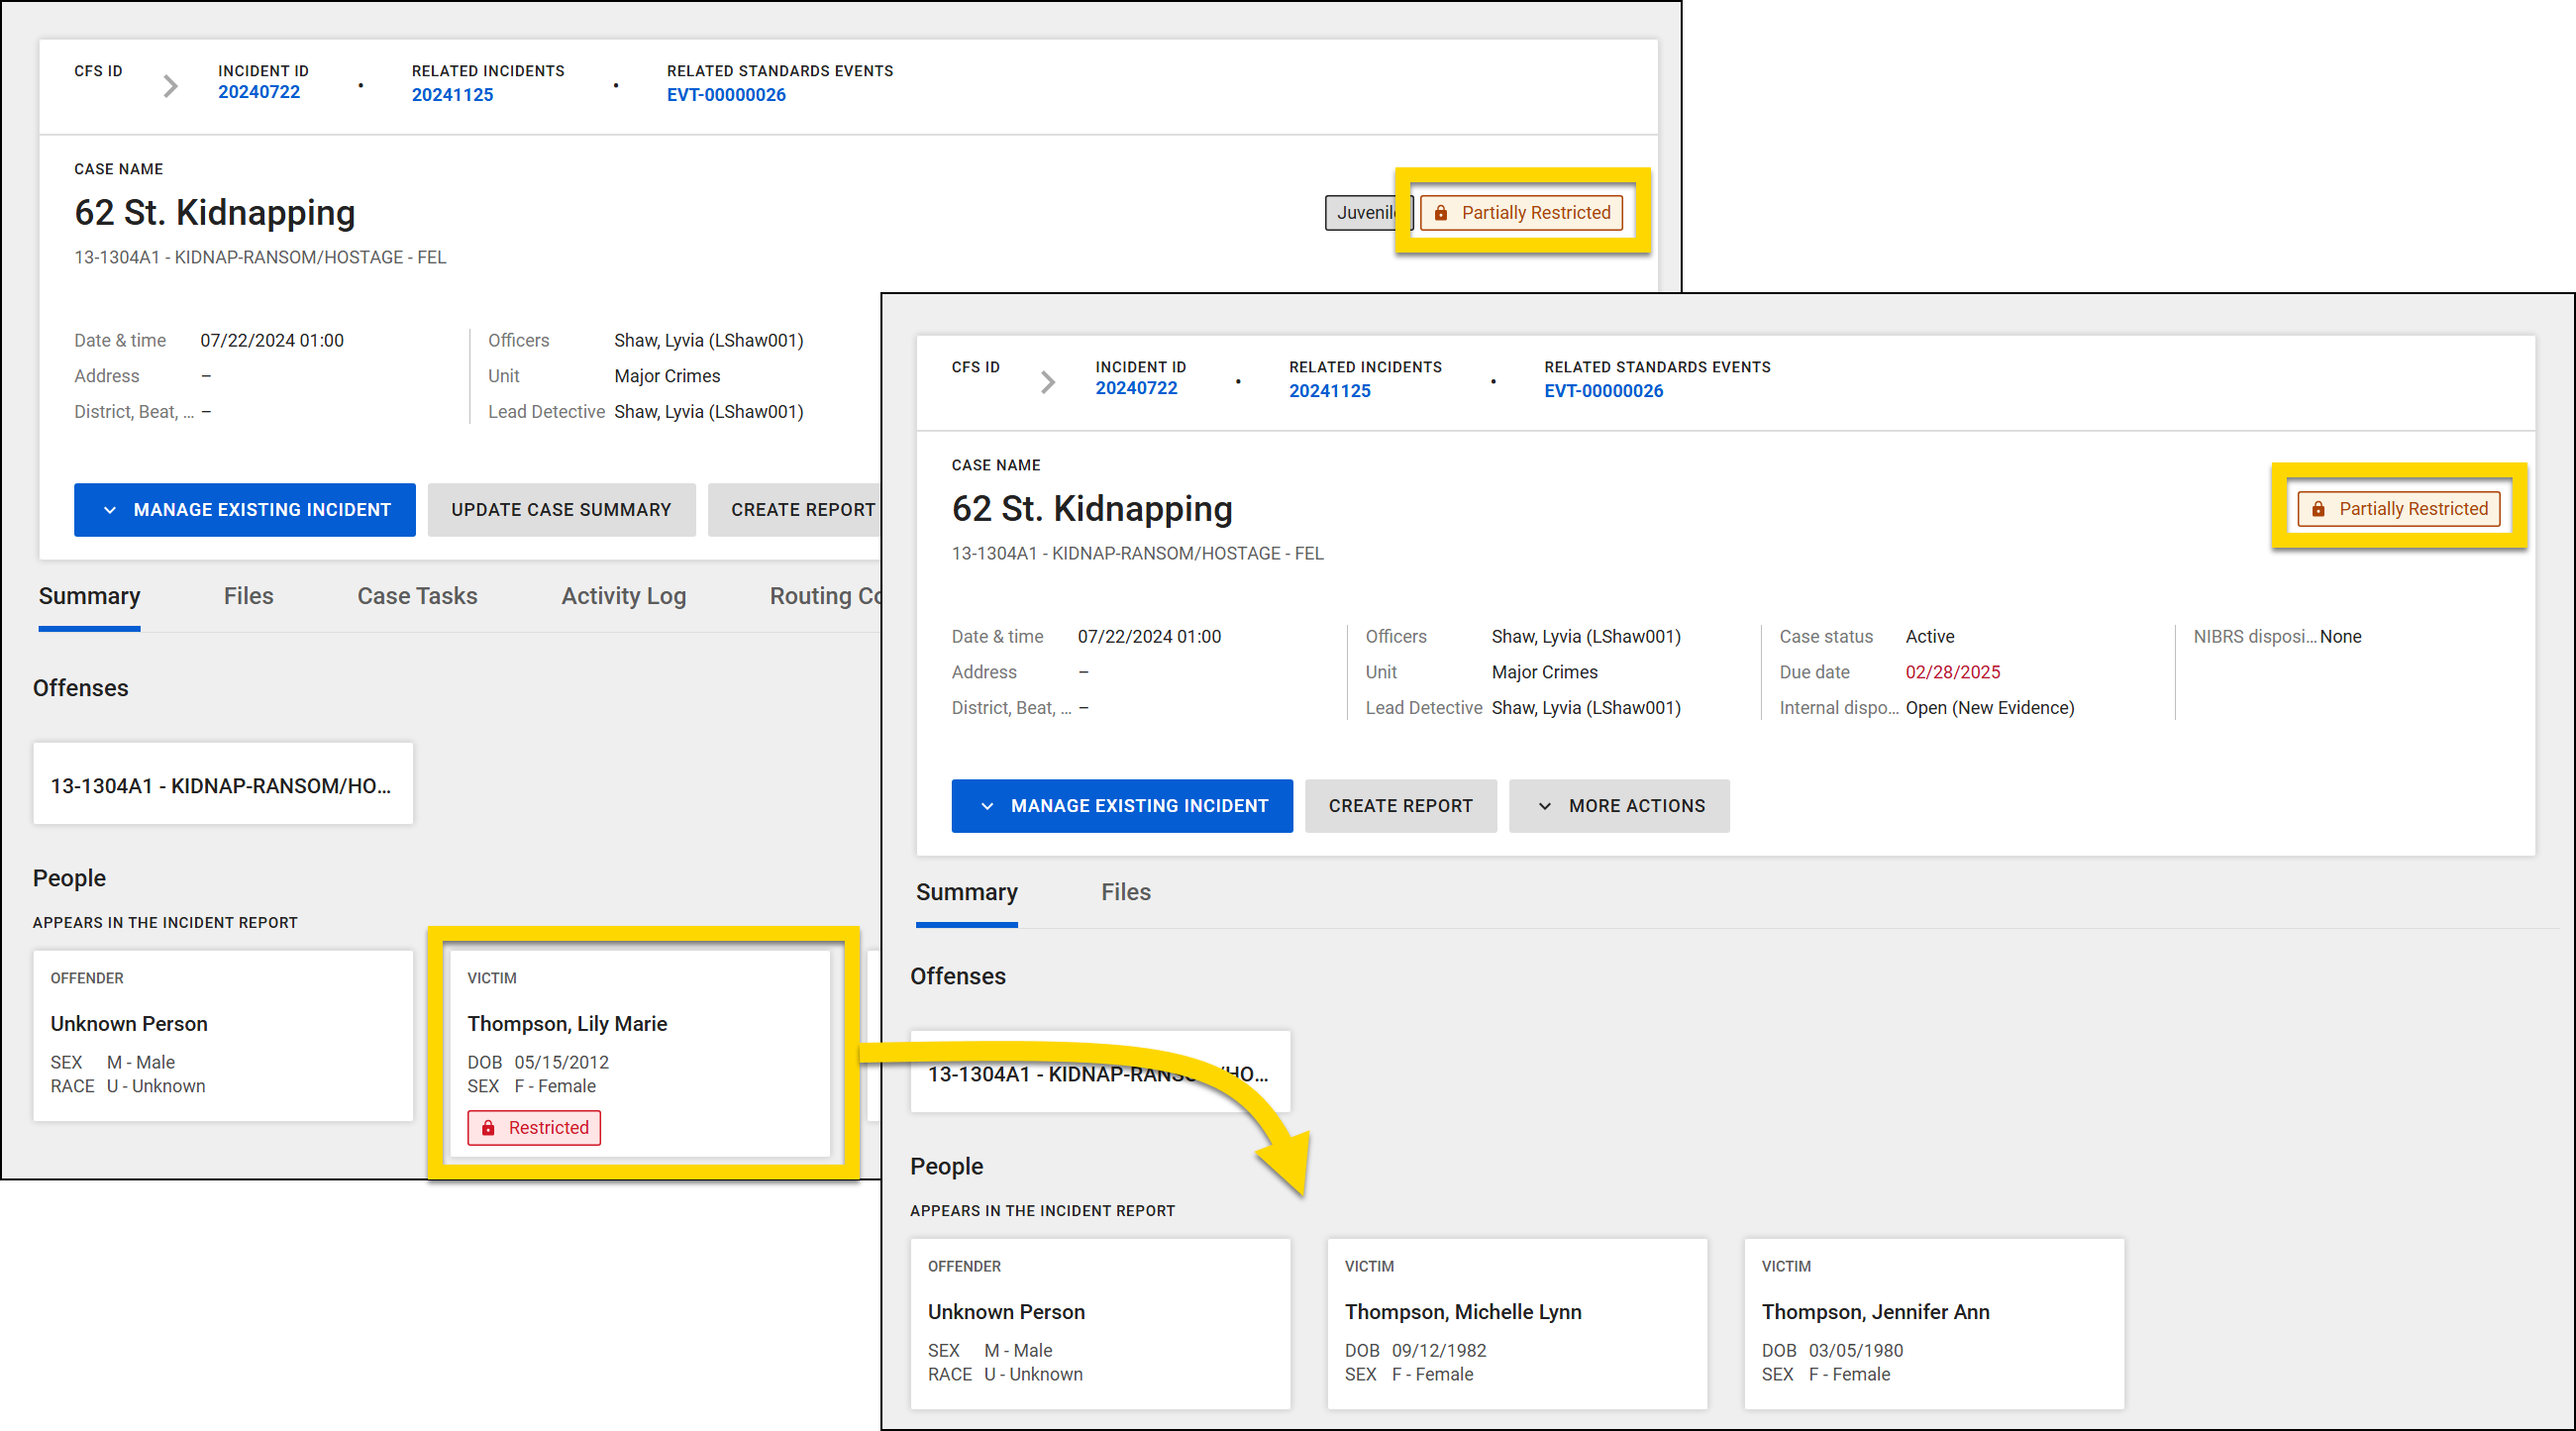
Edit and remove restrictions
If an entire report or incident has been restricted, you can remove the restriction by taking these steps:
- Open the report or incident from which you want to remove a restriction.
- Select More Actions [...] > Manage Restrictions.
- Select Remove on the restriction you wish to remove.
- Select Save to finalize your changes.

To edit or remove a partial restriction:
- Open the report section that contains the restriction.
- Select Actions > Manage Restrictions.
- Adjust the Restriction Classification or Information Restricted.
- Remove a restriction entirely by selecting Remove.
- Select Save.
Manage restriction exceptions
If you want a user, team, or Command Hierarchy group to view a specific item that has been restricted, but you don't want to give them access to view all items containing that restriction, you can create a restriction exception.
Restriction exceptions can be created only when the entire report or incident has been restricted. Exceptions can't be created for partial restrictions. All restriction exceptions that have been created for the organization appear in the Administrator Console Restrictions tool.
Users and groups who are given restriction exceptions can only view the restricted information; they can't manage the restrictions themselves. If you instead want the user or group to be able to add or remove that restriction type, you should instead give them the corresponding restriction privileges.
To view or manage existing restriction exceptions, take these steps:
- Open the report or incident from which you want to remove a restriction.
- Select More Actions [...] > Manage Restrictions.
- The current restriction exceptions appear at the top of the Manage Restrictions pane, and are broken out by different icons:
 Individual users
 Teams
Teams Command Hierarchy groups
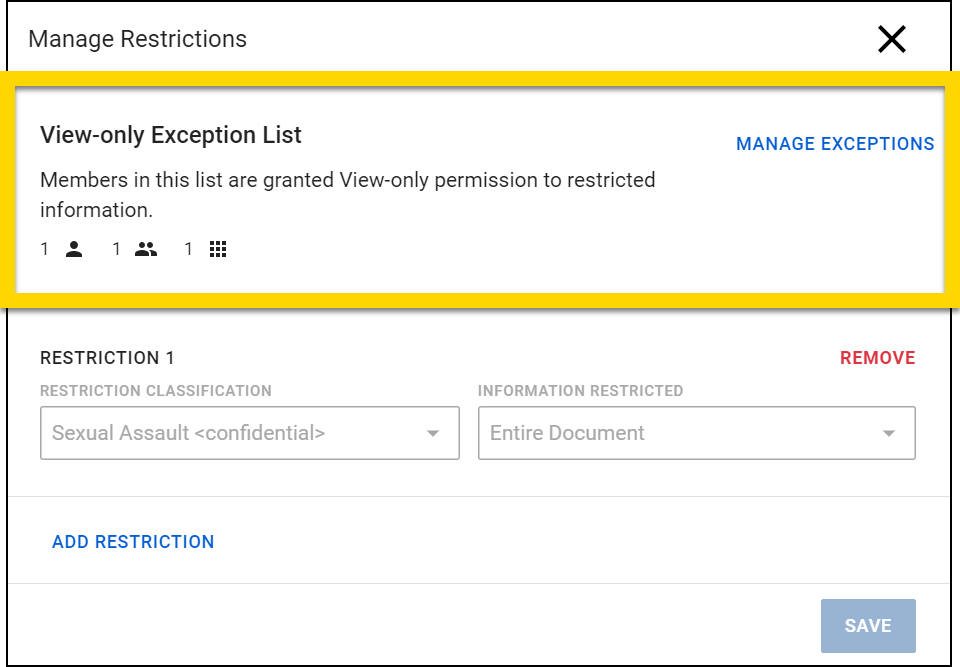
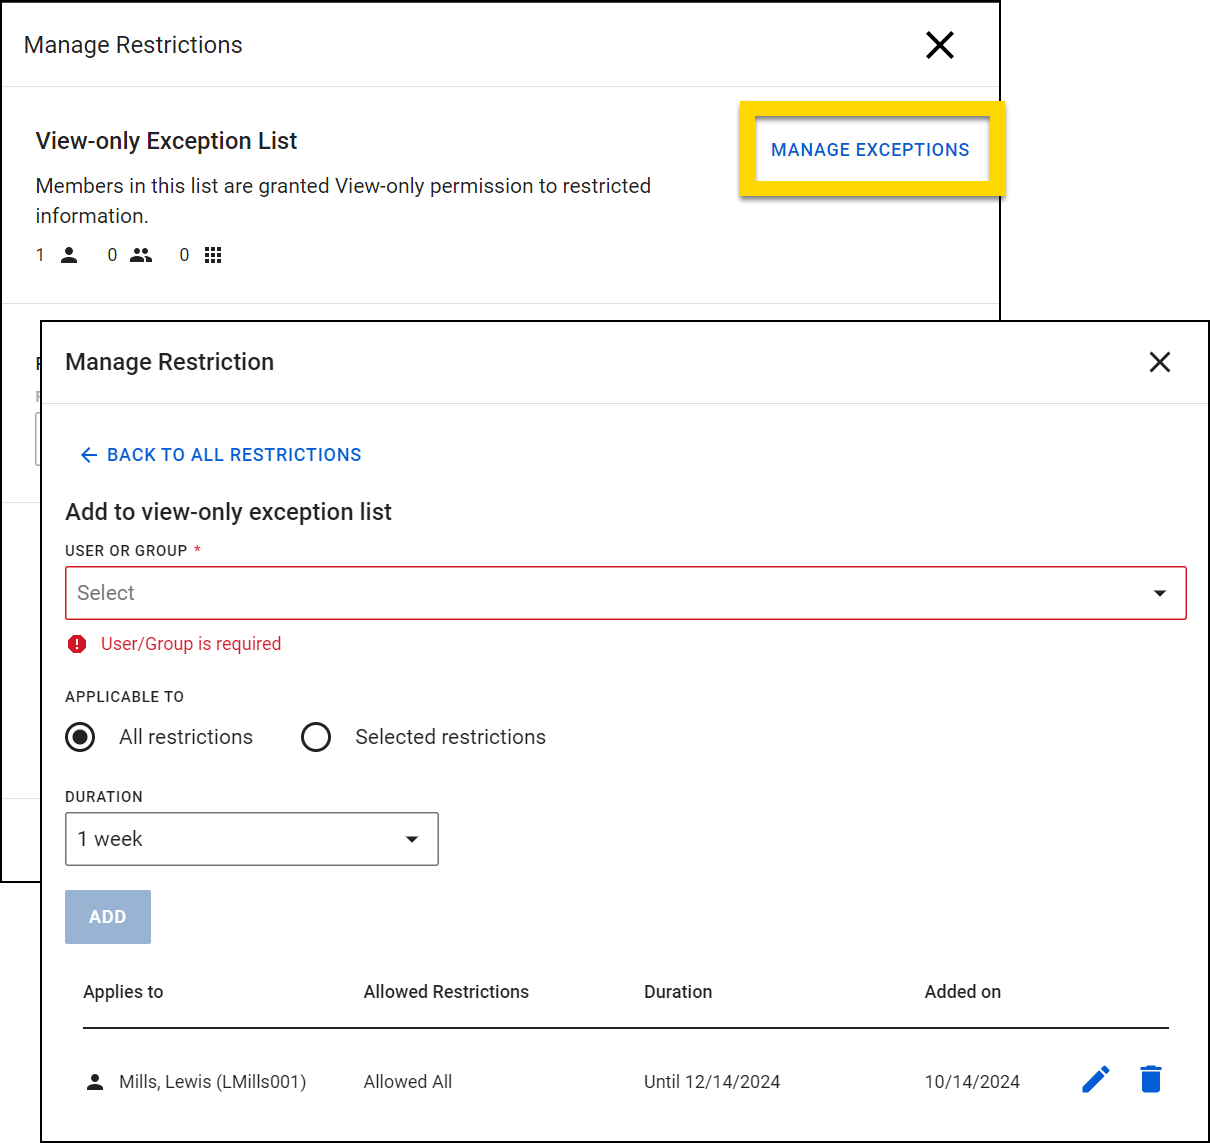
- Select Manage Exceptions to see which users, groups, and teams have been granted restriction exceptions and adjust as necessary:
- Pencil: Select to edit the allowed restrictions or duration
- Trash can: Select to delete the restriction exception
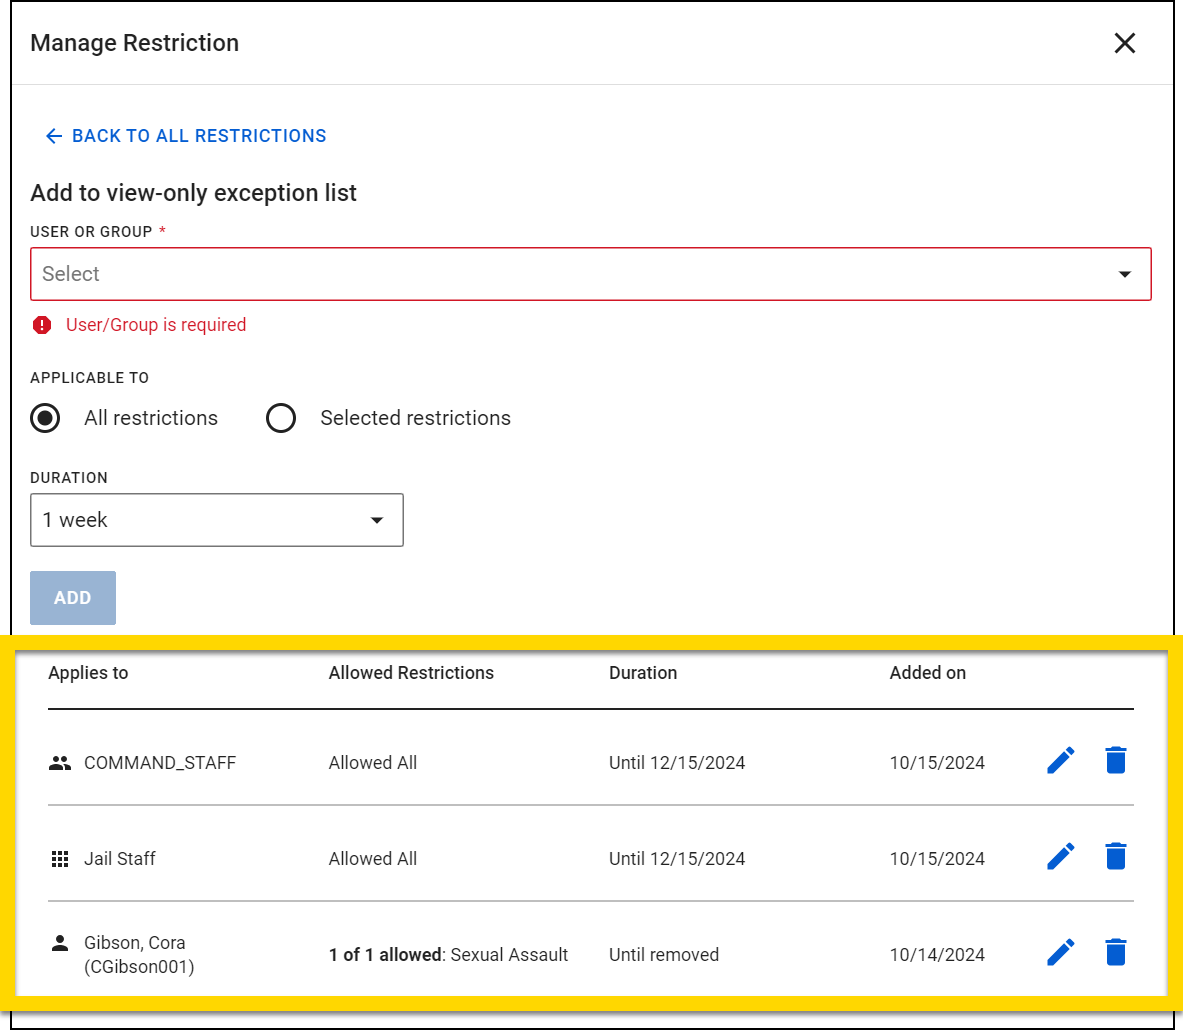
To create a restriction exception:
- After opening the Manage Restrictions pane, Select Manage Exceptions.
- Search for a user, team, or Command Hierarchy group in the User or Group field.
- You can add multiple users, teams, and groups to this field.
- When multiple restrictions have been applied, you can select which restrictions to include in the exception:
- All restrictions: Lets the user or group view all restricted information
- Selected restrictions: Lets the user or group view information only associated with specific restrictions
- Set a duration for which the exception will apply. Options include:
- 1 week
- 2 weeks
- 1 month
- 2 months
- Custom: Set a custom time frame.
- Until Removed: The exception will remain in place until someone opens the item and manually removes it.
- Select Add.