Case and investigation tasks
The case and investigation tasks feature lets you track the work being done throughout an investigation. Tasks break down investigative work into actionable steps and can track anything from administrative steps to complex investigative actions. Tasks can be configured to move through review workflows when oversight is needed. Tasks allow supervisors and detectives to:
- Assign work to individuals and teams
- Track progress and accountability
- Facilitate collaboration across units
Tasks can be found in the following locations:
- Tasks tab on case and investigation profiles
- My Tasks inbox in the Tasks module
- Team inboxes
Tasks tab
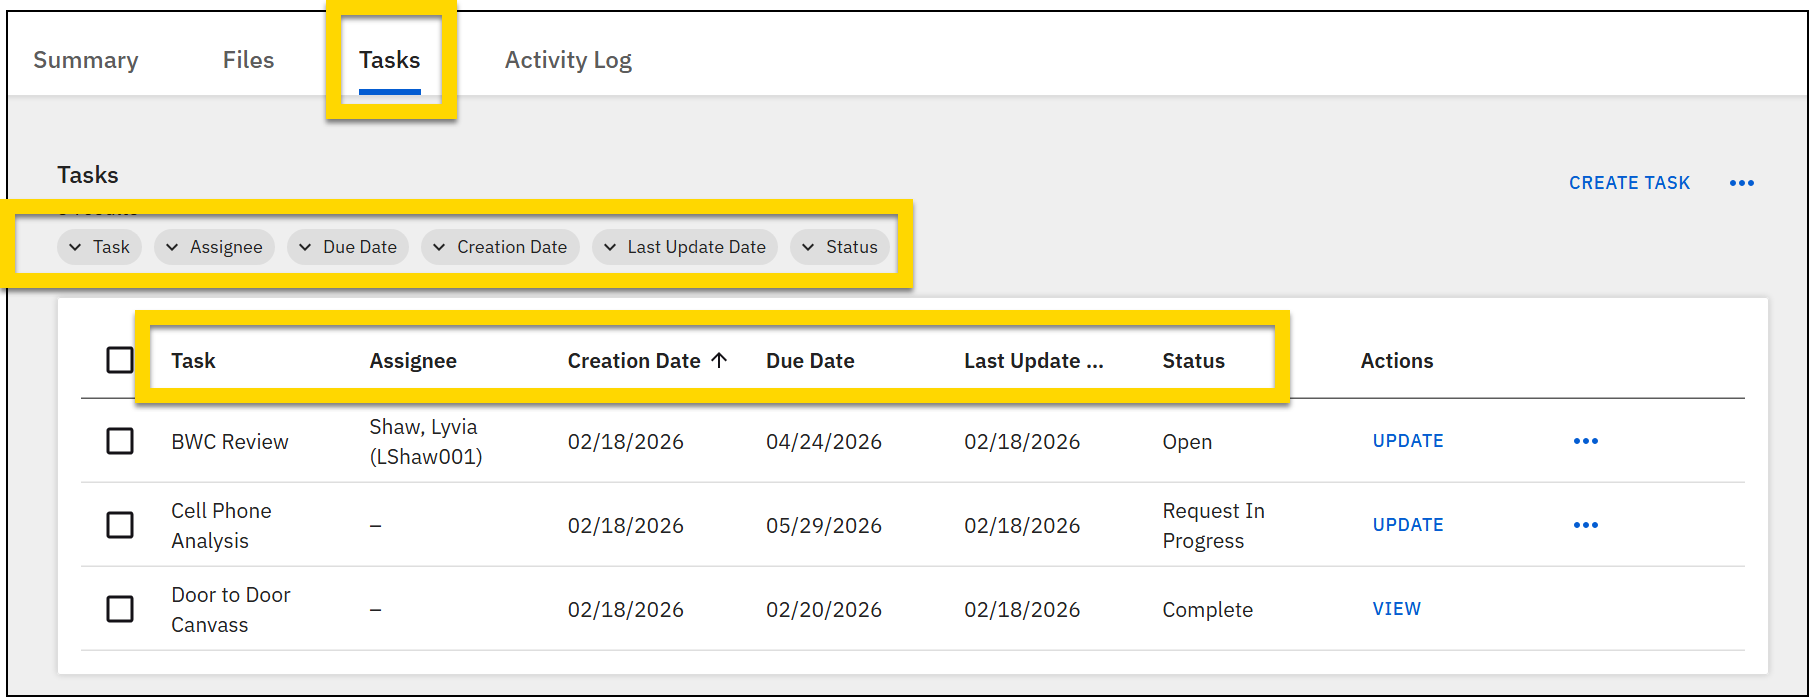
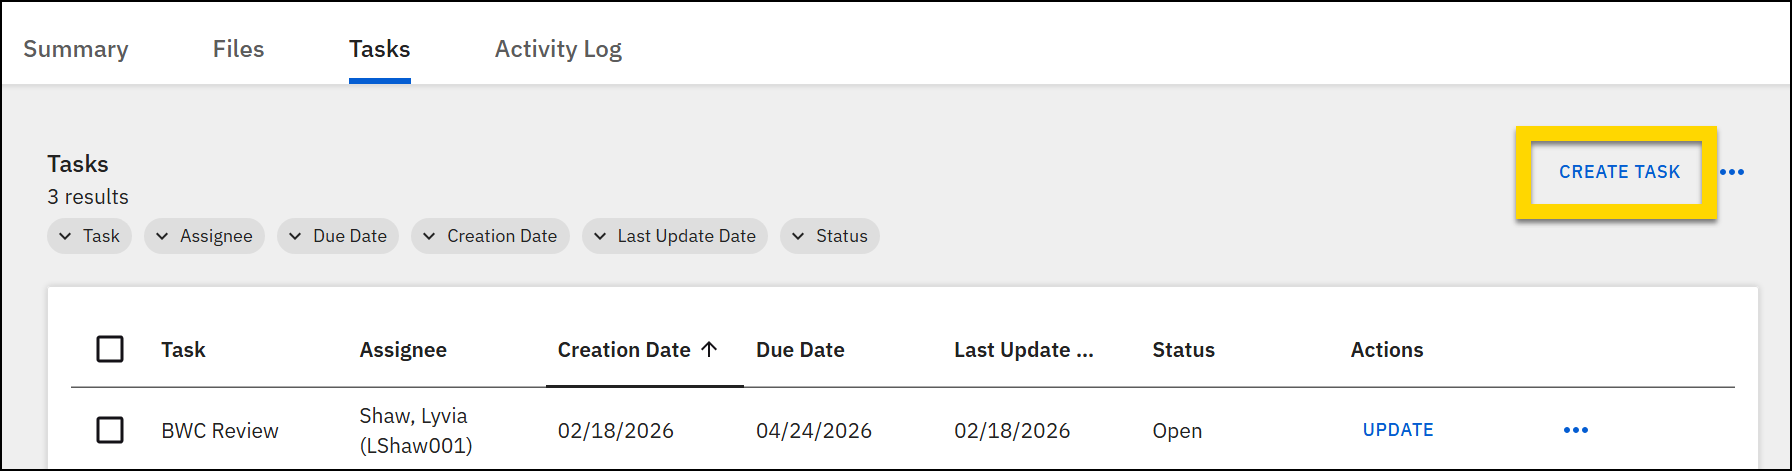
All tasks associated with a case or investigation can be found by opening the profile and switching to the Tasks tab. This tab only appears to users who belong to command hierarchy groups or teams with specific privileges.
The following information is displayed for each task:
- Task type
- Assignee
- Creation date
- Due date
- Status
Select a column name to sort the list either ascending or descending, according to the information contained in that column. Use the following filters to refine which tasks are displayed:
- Task name
- Assignee
- Due date
- Creation date
- Last updated date
- Status
My Tasks inbox
All tasks assigned to you appear in your My Tasks inbox.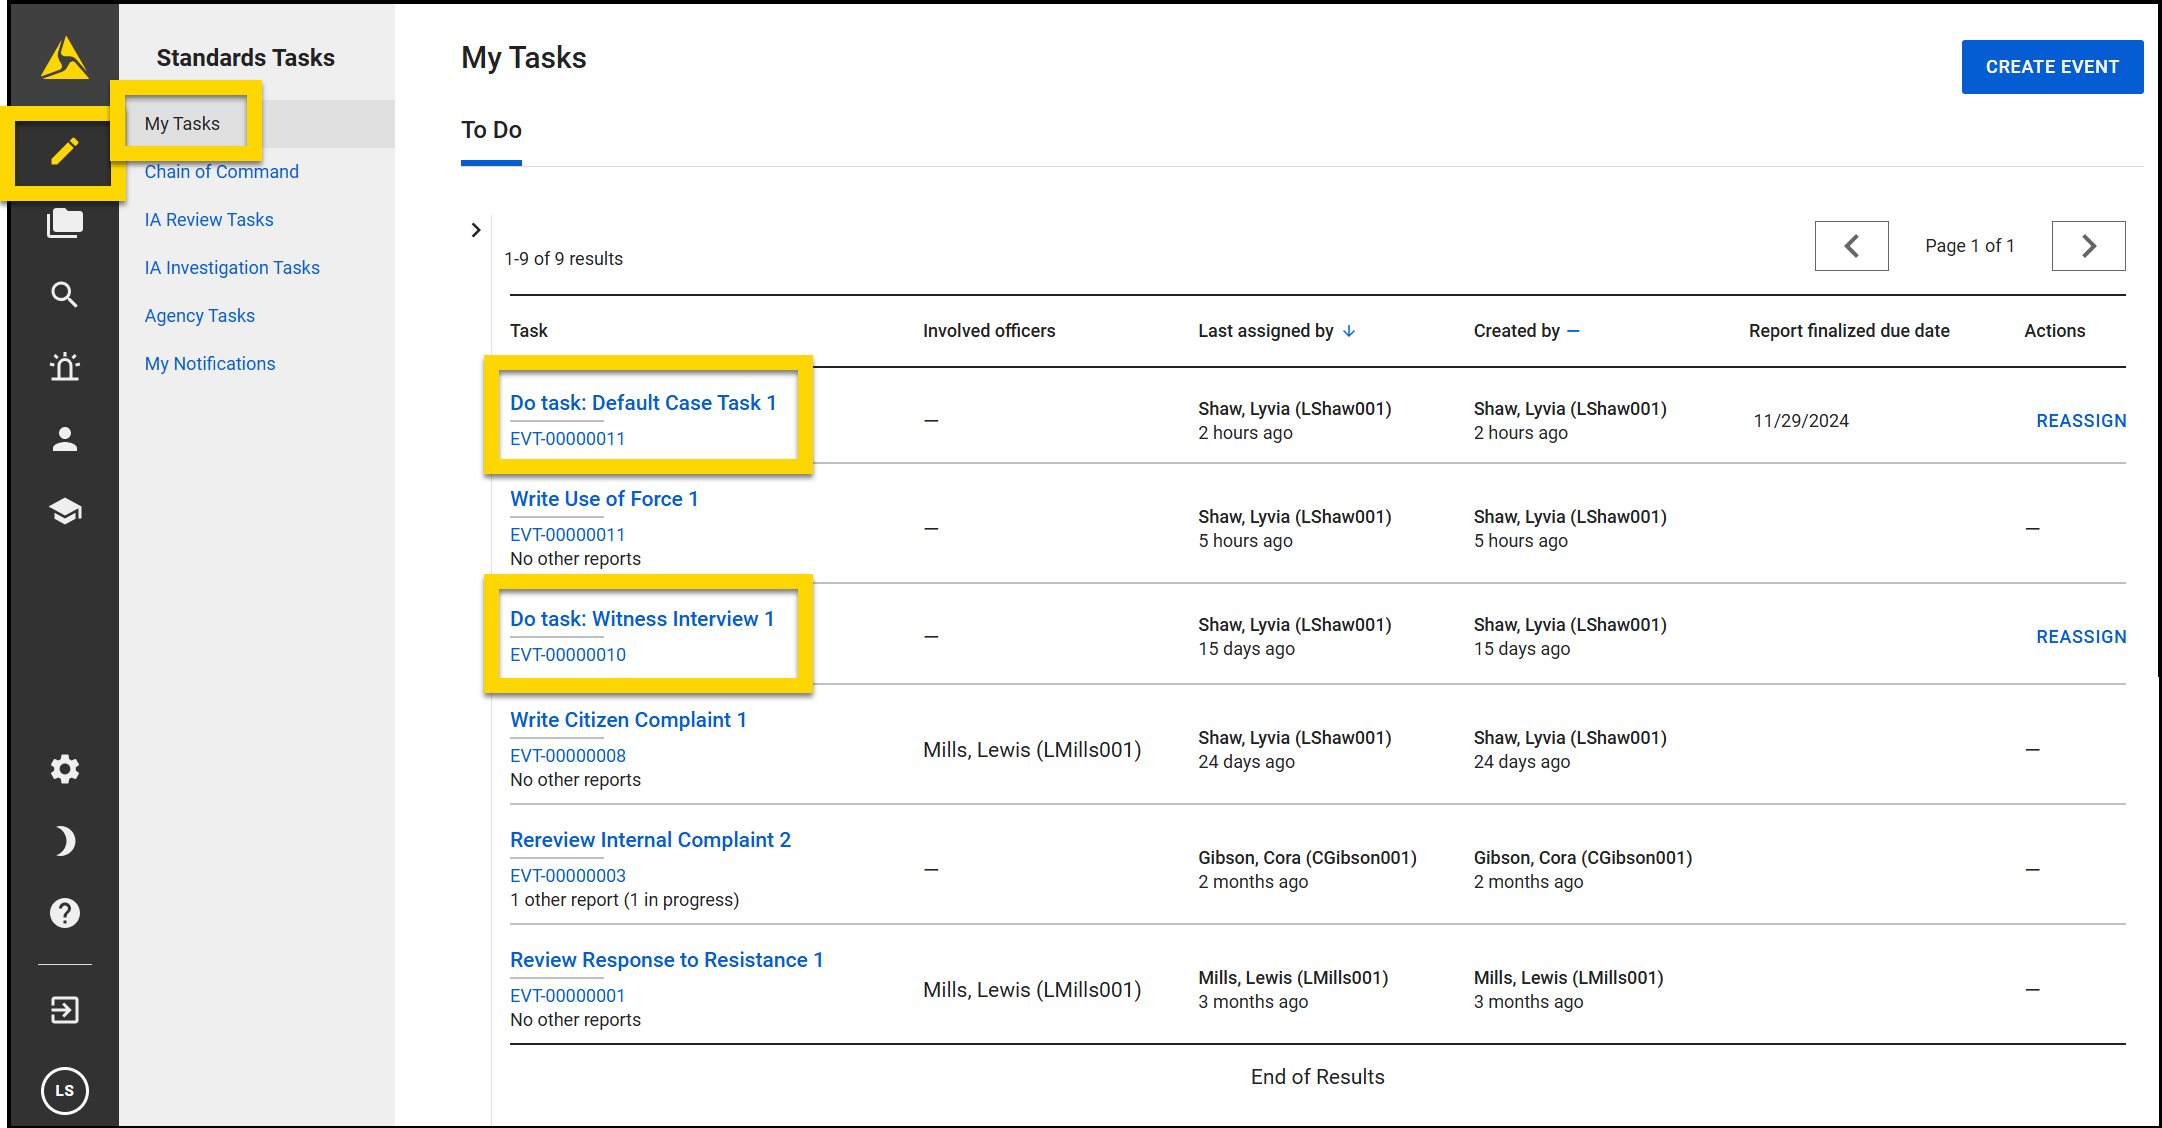
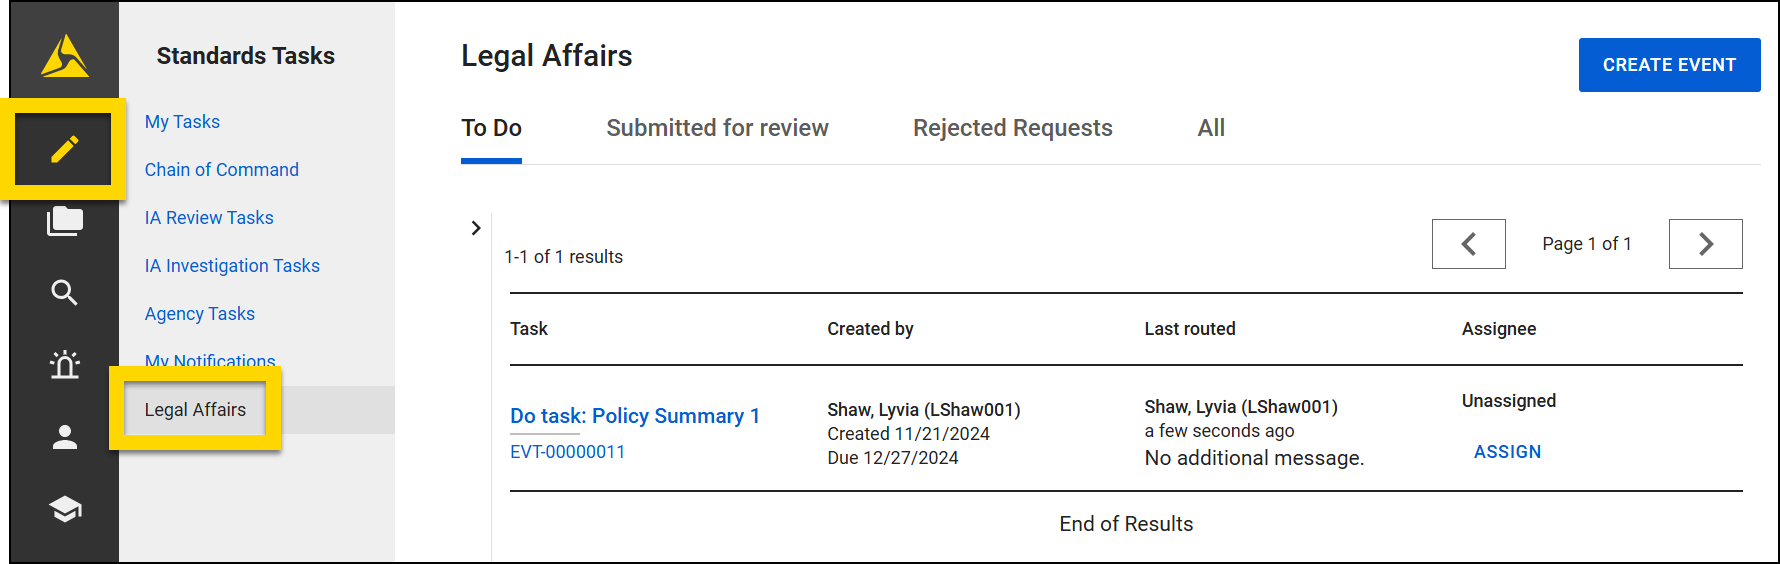
Team inboxes
Some tasks are routed to a specialized team inbox, such as Legal Affairs, that can be accessed by users who have certain privileges. These inboxes are configured for your agency and appear in the Tasks module along with the rest of the report task inboxes.
Team inboxes contain the following tabs:
- To Do
- Submitted for Review
- Rejected Requests
- All
The most recently updated tasks appear at the top of the list. Use the filters to constrain which tasks are displayed:
- Assignment (Team inboxes)
- Created by
- Due date
- Incident / Report ID
- Request date
- Task action
- Task type
The following information is displayed for each task in the inbox:
Task
- What the task is and the Task ID
Created by
- Who created the task
- When it was submitted
- When it was last updated
Last routed
- Who routed the task
- When it was assigned
- Any additional messages related to the task
Assignee
- Who the task is currently assigned to
Create tasks
Depending on how your organization has configured the Case Management module, tasks can follow two different workflows:
- Basic task: Can be completed independently and do not require a review before completion
- Review task: Require submission, review, and approval before completion
These two different task workflows help organizations enforce quality control for critical tasks while keeping simpler tasks lightweight.
To create a task:
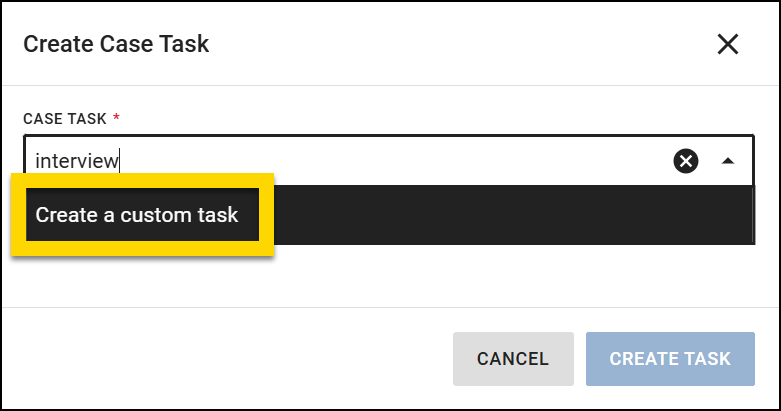
- Open the case or investigation profile, switch to the Tasks tab, and select Create task.
- Select a task type.
- If the task type doesn't appear when you enter letters into the field, a new option of Create a custom task appears. Select this option to create the custom task.
- Select Create task.
- The task will be automatically assigned to you once it is created.
- Update the due date, complete the form fields, add files, and insert comments, as needed.
- The Detective Notes field is only visible to detectives and users with specific privileges and can be used to document sensitive information related to the task. Usually, task contributors will not see this field, so don't include any information here that is needed to complete the task.
- Select Save and close the task to work on later or select Submit to complete it or route it to another user.
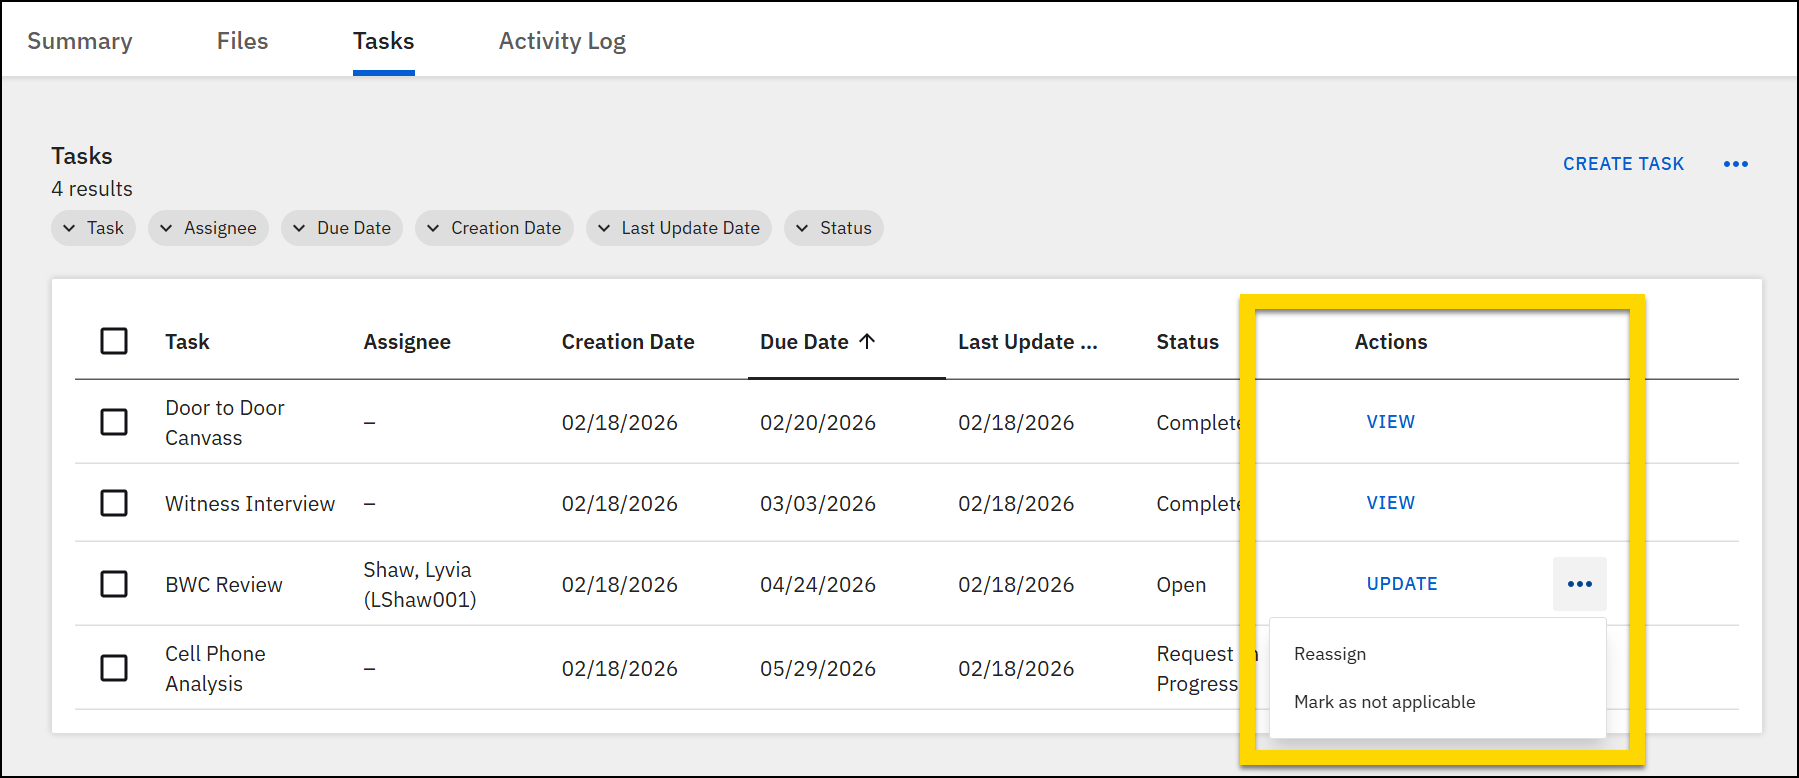
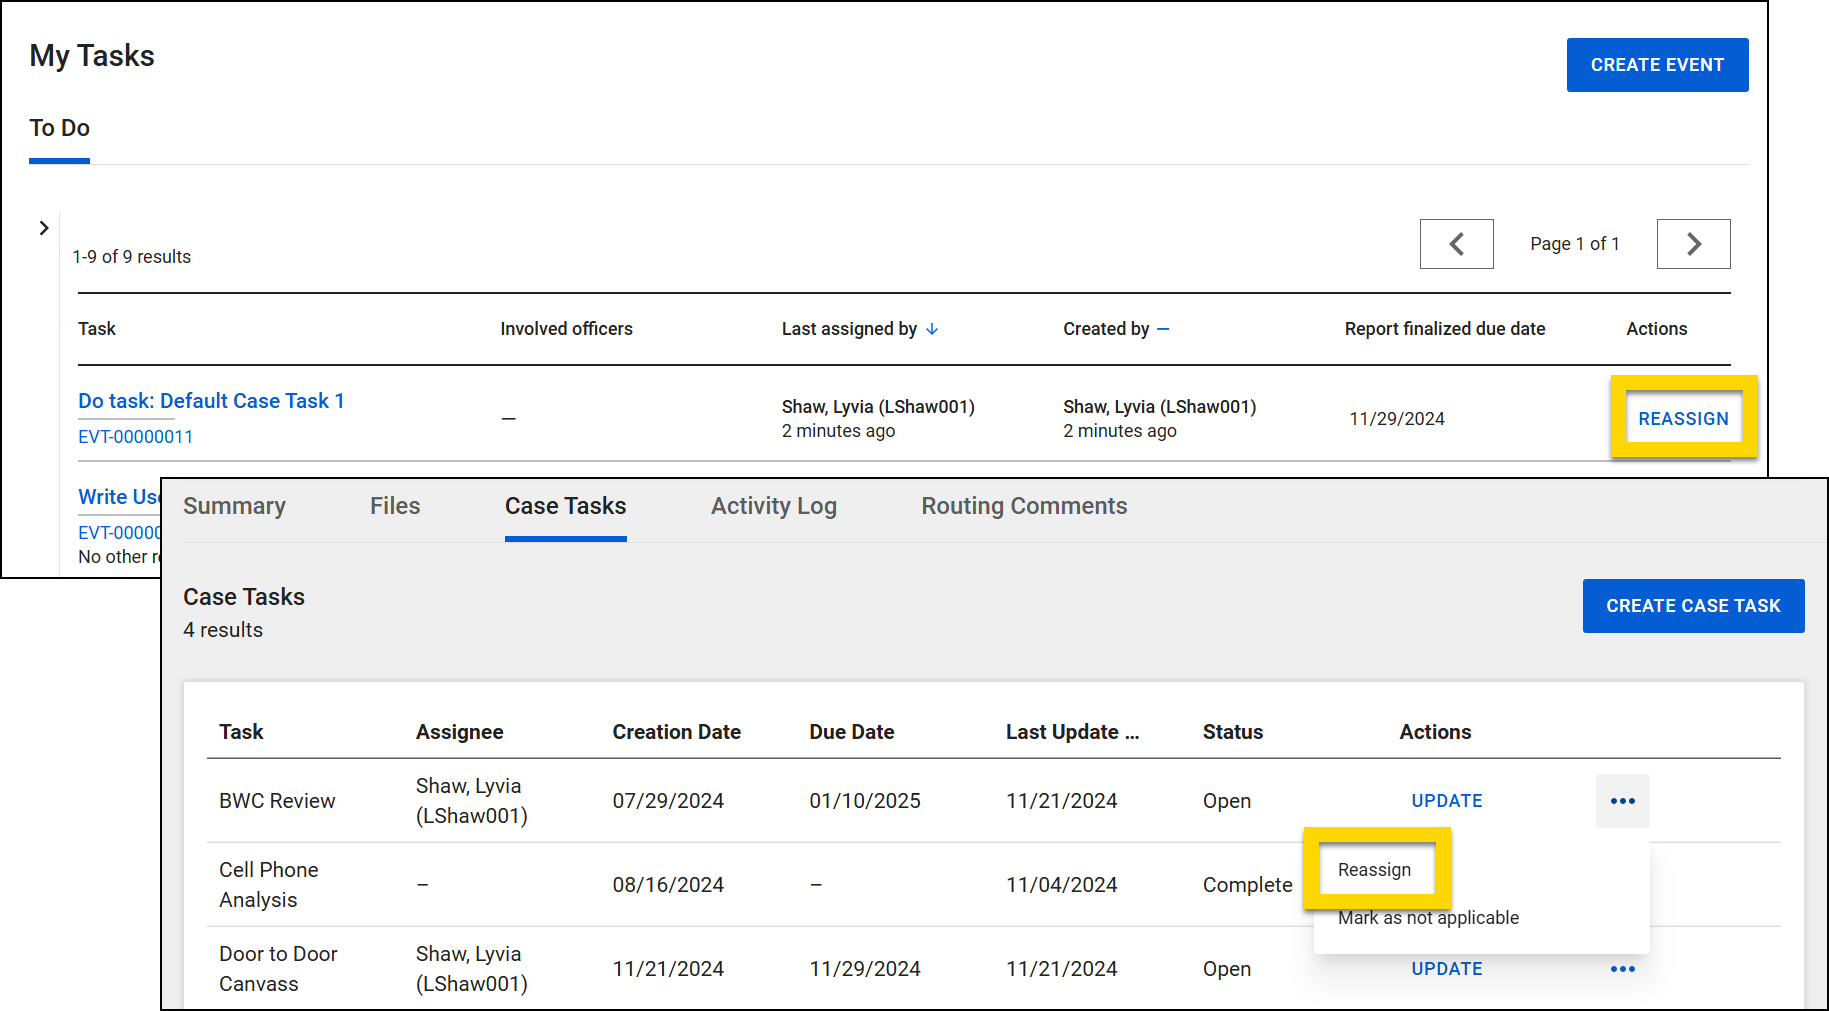
When you close a task, either after submitting it or marking it complete / not applicable, it appears on the Tasks tab. From here, you can take several actions:
- Update: Appears on open or in progress tasks; let's you open and continue working on the task
- View: Appears on closed and not applicable tasks; lets you view the task and reopen it if needed
- More actions [...] > reassign: Lets you assign the task to another user
- More actions [...] > Mark as not applicable: Lets you close the task and set its status to Not Applicable
Auto-created tasks
You can configure a set of tasks to be automatically generated when a case is created. This list of tasks can be the same for every case or vary based on the type of case or the unit it is assigned to.
For additional information, contact your Axon representative.
Work on tasks
You can take several actions when working on tasks:
- Update task
- Add task result
- Complete linked form
- Reject a task
- Review a task
Update task
To update a task, open the task either by selecting the task name in a task inbox or by selecting Update on the Tasks tab on the case or investigation profile. When the task opens, update the due date, add comments, add files, and complete the available fields.
Unlike when writing a report in Report Writer, information entered in the task window will not auto-save. To save your changes, select Save. If you have finished your work, select Submit to either mark the task as complete or to send it for review.
Add task result
Some tasks have an Add task result button that inserts a field where you can document your work for that task. Select Save when you have finished updating this field.
Complete a linked form
Some tasks require additional information to be entered into a linked form. Select Update to open Report Writer and complete the form. Information entered in this form is auto-saved, just as it is for reports. Select X to return to the task window where you can save or submit the task.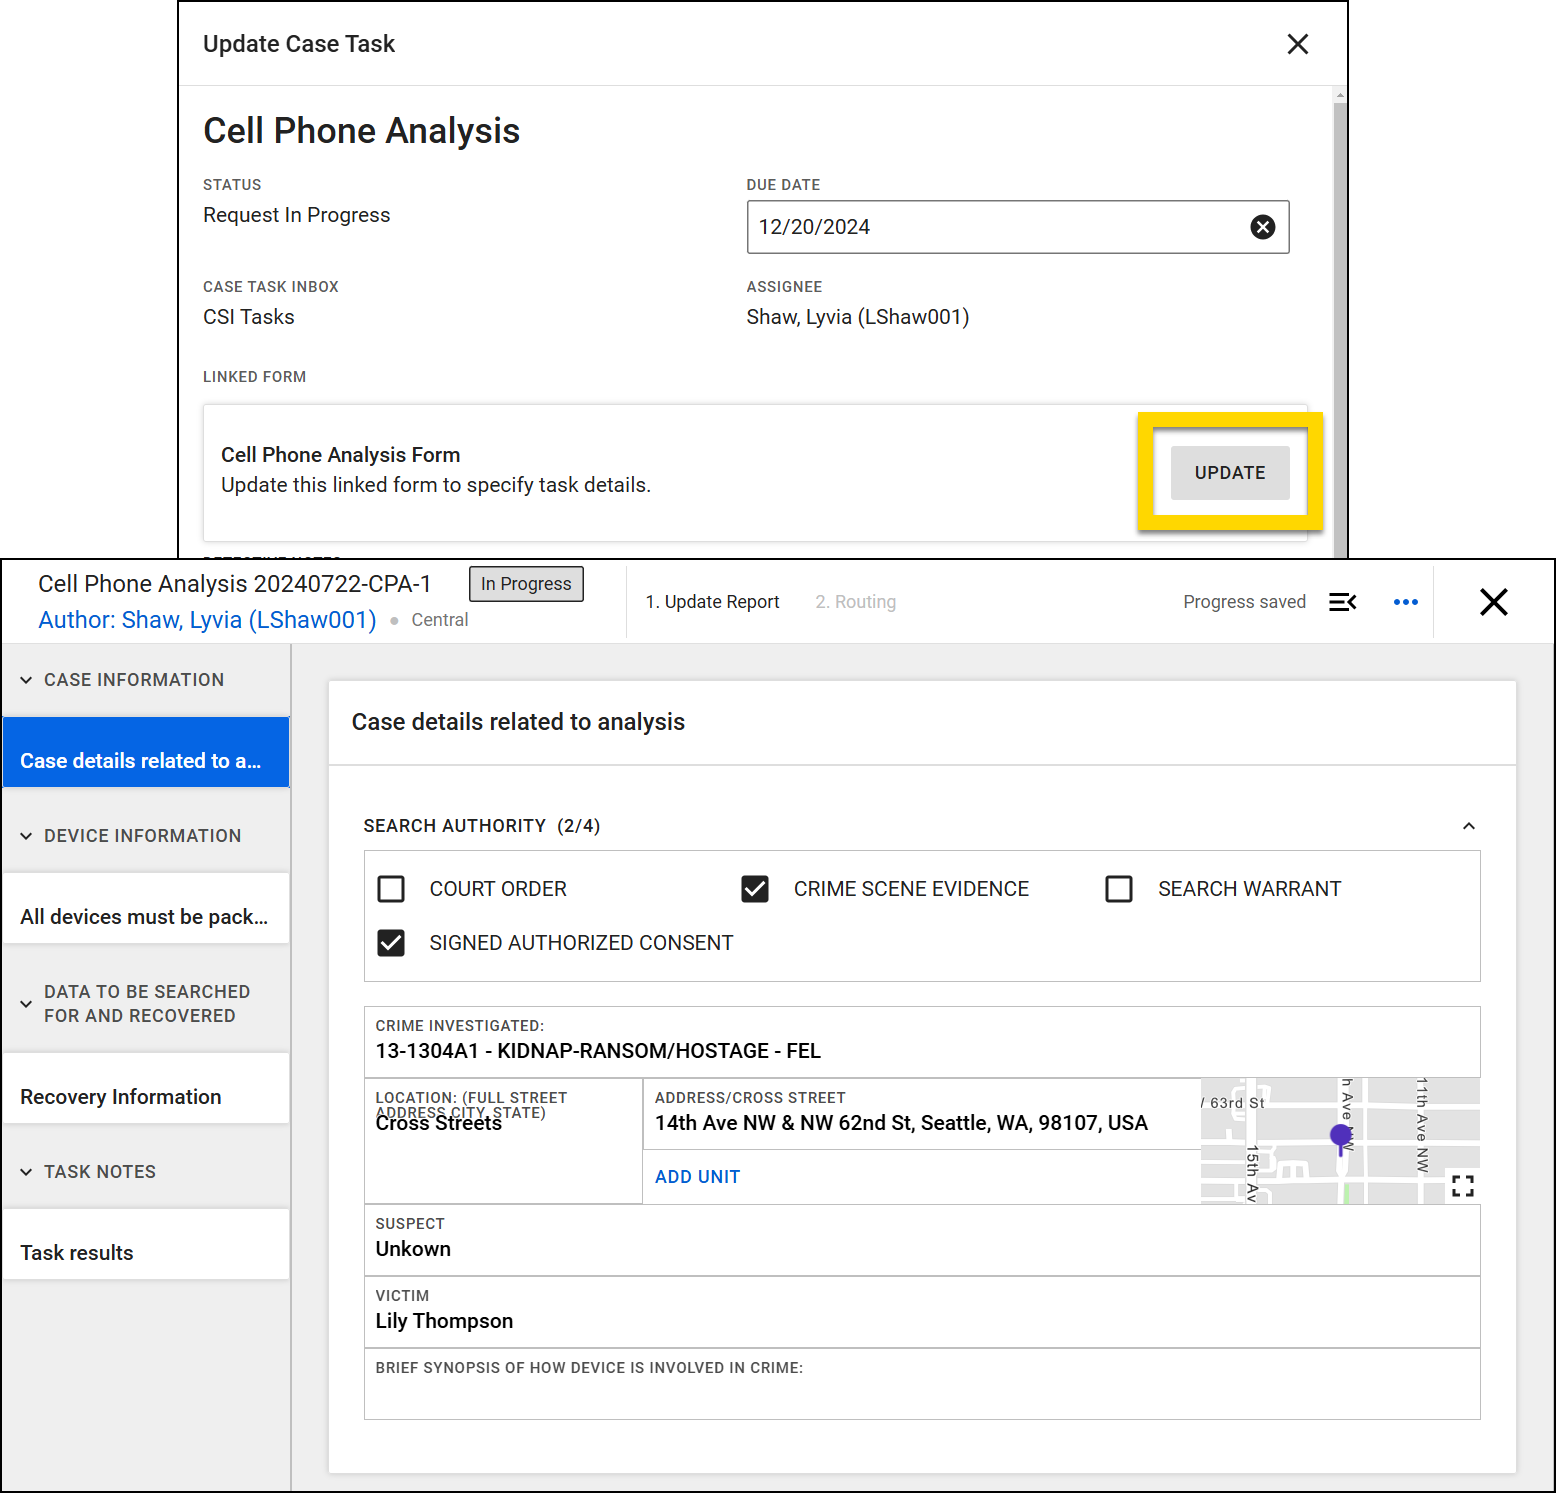
When adding people, organizations, vehicles, or property to a linked form, a list of suggestions appears if those items were previously added to the incident/event report or other case documents and tasks. Quickly add any of these items to the document by selecting it.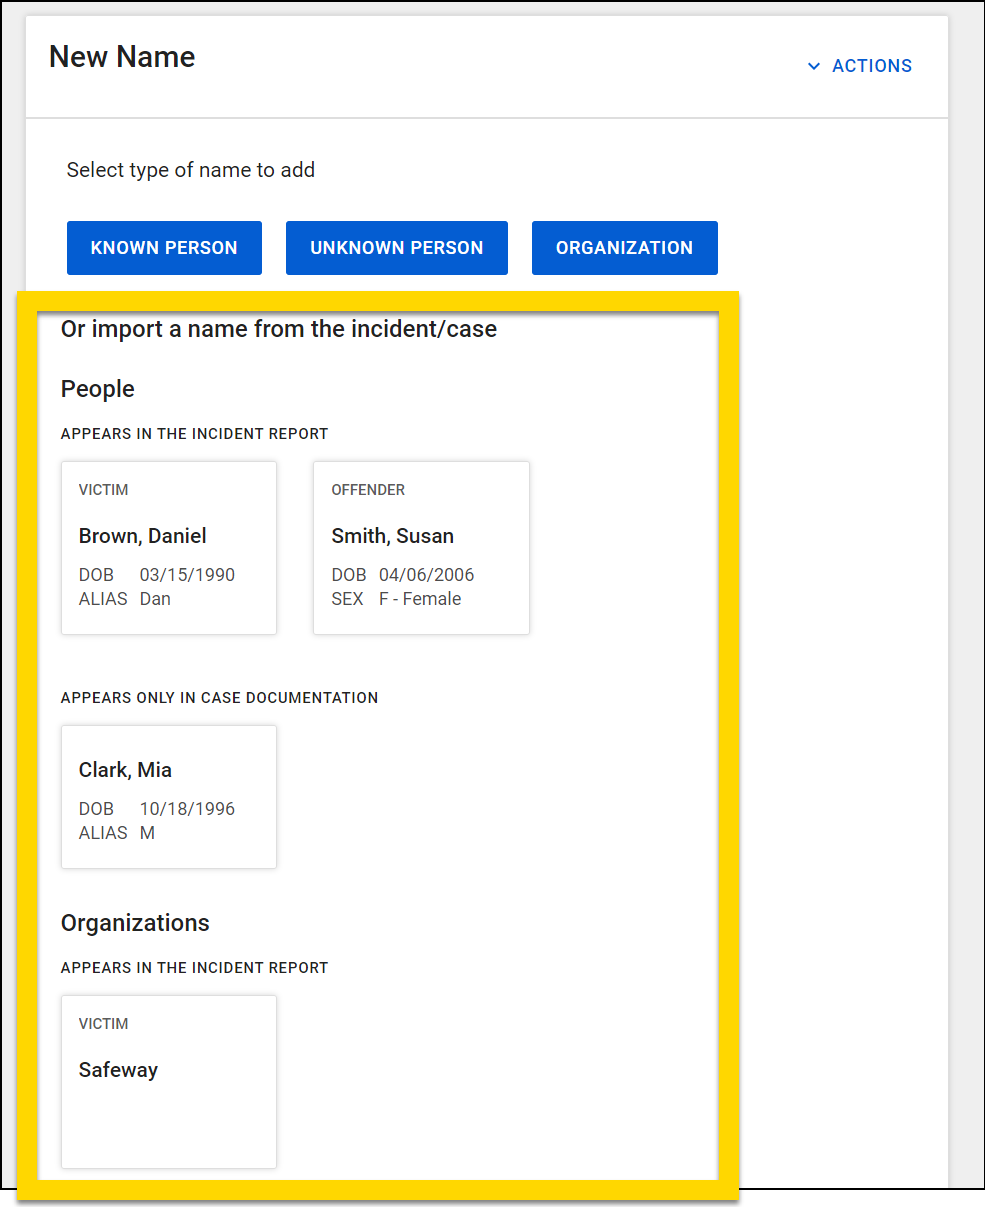
Reject a task
Some tasks can be submitted to other users/teams to be worked on. If a task is submitted by a detective but can't or shouldn't be worked on by the person it is submitted to, the task can be rejected by following these steps:
- Open the task either by selecting the task name in a task inbox or by selecting Update on the Tasks tab on the case or investigation profile.
- Select Reject request.
- The task is auto-assigned to the lead detective, but you can update this if needed. Leave comments as necessary, adjust the due date if needed, and select Reject request.
Review a task
Some tasks can be submitted to other users/teams, worked on, then submitted back to the lead detective for review. To review a task that has been submitted for Detective Review:
- Open the task either by selecting the task name in a task inbox or by selecting Review on the Tasks tab on the case profile.
- Select either Reject or Approve:
- Reject: The task can be routed back to the person who worked on it (or a different user) for revisions
- Approve: The task is marked as Complete and unassigned from all users.
Reassign tasks
A task can be reassigned to a different user at any time from two locations:
- Task inbox: Select Reassign in the Actions column.
- Case or investigation profile: Select More actions [...] > Reassign.
Select a user from the Assign to field and add comments or update the due date as necessary. To change just the due date, keep the task assigned to the same user and instead only update the Due date field. Select Reassign.
To assign the task to a detective for review, submit the task instead of reassigning it.
Submit tasks
After you create a task or a task is assigned to you, you can submit it either as complete or as Not Applicable. The submission process for the two kinds of tasks is slightly different.
Basic tasks
To submit a basic task, take these steps:
- Open the task either by selecting the task name in a task inbox or by selecting Update on the Tasks tab on the case or investigation profile.
- Add files or comments to the task as necessary and select Submit.
- Select one of the two completion options:
- Mark as complete: Unassigns the task and sets its status to Complete
- Mark as not applicable: Unassigns the task and sets its status to Not Applicable
- Add comments as necessary and select Submit.
- The task remains on the Tasks tab and can be viewed or reopened by selecting View.
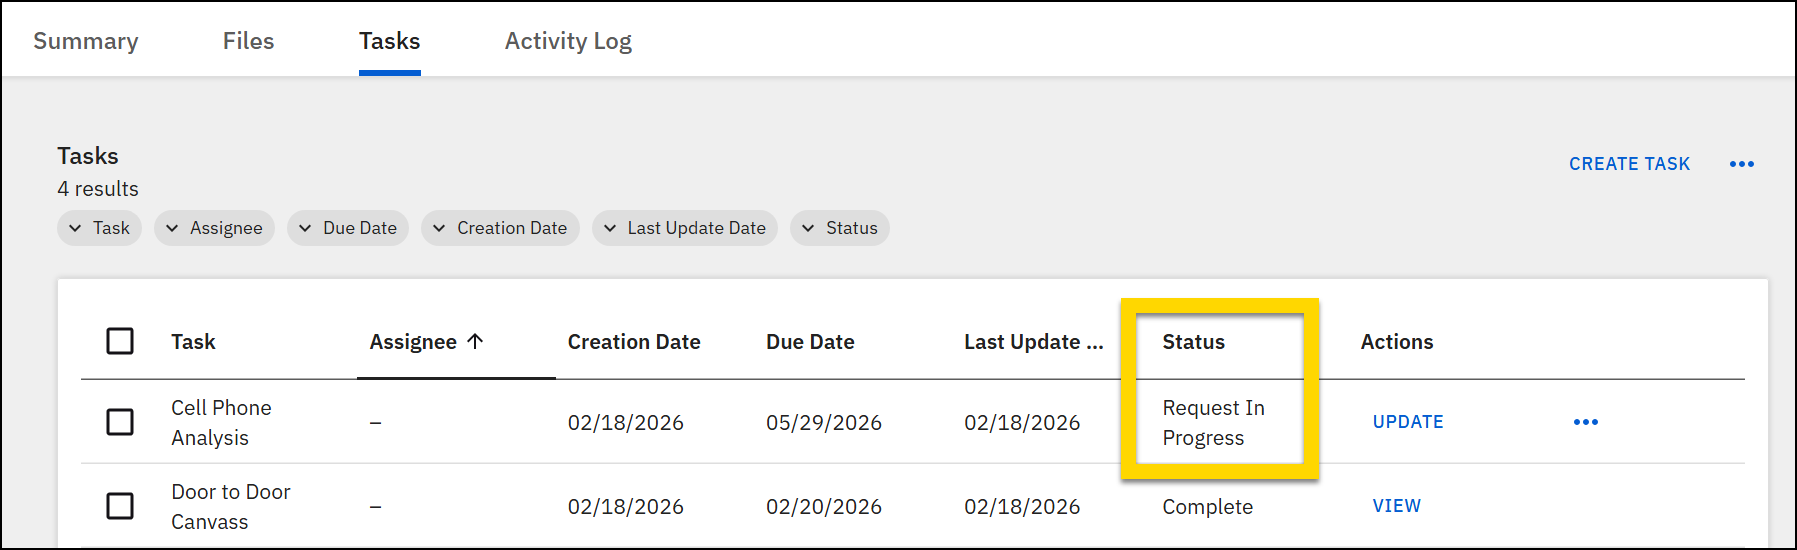
Review tasks
To submit a review task to another user or team to work on, take these steps:
- Open the task either by selecting the task name in a task inbox or by selecting Update on the Tasks tab on the case or investigation profile.
- Add files or comments to the task and select Submit.
- Select Request in progress.
- A new set of fields appear where you can specify who the task should be routed to, as well as its due date.
- You can submit a task to a specific user, to a team task inbox, or to both.
- After assigning the task, select Submit.
- The task remains on the Tasks tab with a status of Request In Progress.
Once submitted to a user/team, a review task can be rejected or worked on and submitted back to the detective for review:
- Open the task either by selecting the task name in a task inbox or by selecting Update on the Tasks tab on the case or investigation profile.
- The task is auto-assigned to the case's lead detective, but you can update this if needed. Leave comments and adjust the due date if needed.
- Select Submit for detective review.
- The task is assigned to the lead detective, and its status on the Tasks tab is updated to Detective Review.
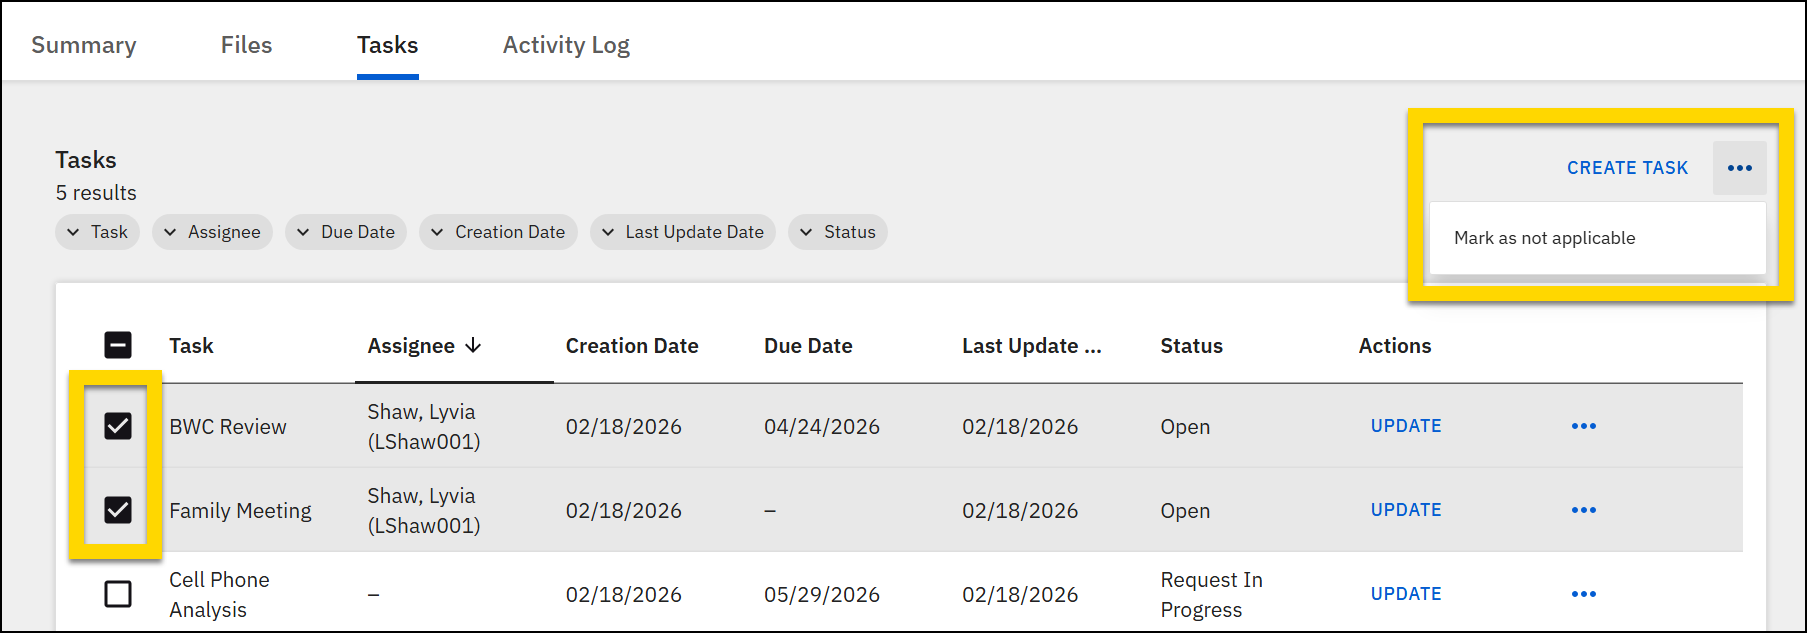
Mark tasks as not applicable
To submit multiple tasks as Not Applicable:
- Open the Tasks tab on the case or investigation profile.
- Use the checkboxes to select multiple tasks.
- Select More actions [...] > Mark as not applicable.
Reopen tasks
If a task has been marked as complete but later needs to be updated, you can open the task and select Reopen task. After assigning the task, setting a due date, and adding comments, the task can be reopened.
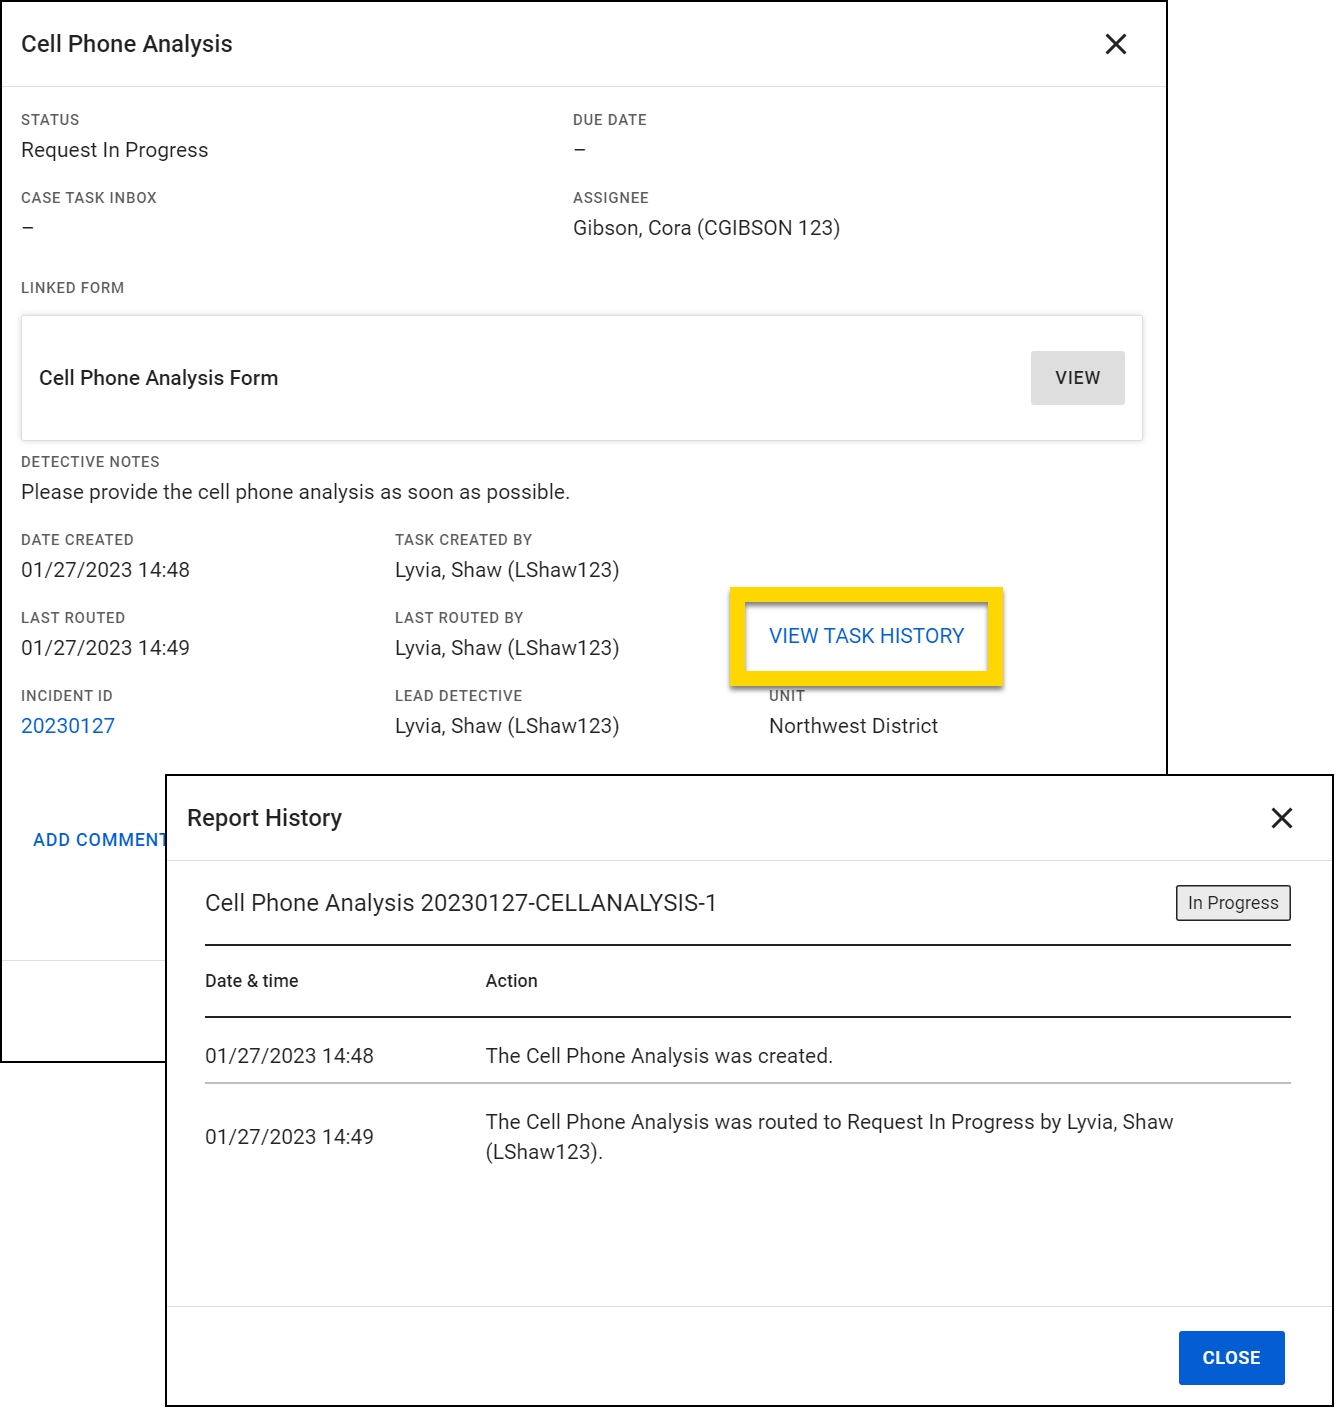
View task history
To view actions taken on a task, open the task and select View task history. The pane that opens displays actions taken on the task, as well as the date and time the action was taken.