Manage curricula
All curricula that have been created for your organization can be found by opening the Training module and going to Training Management > Curricula.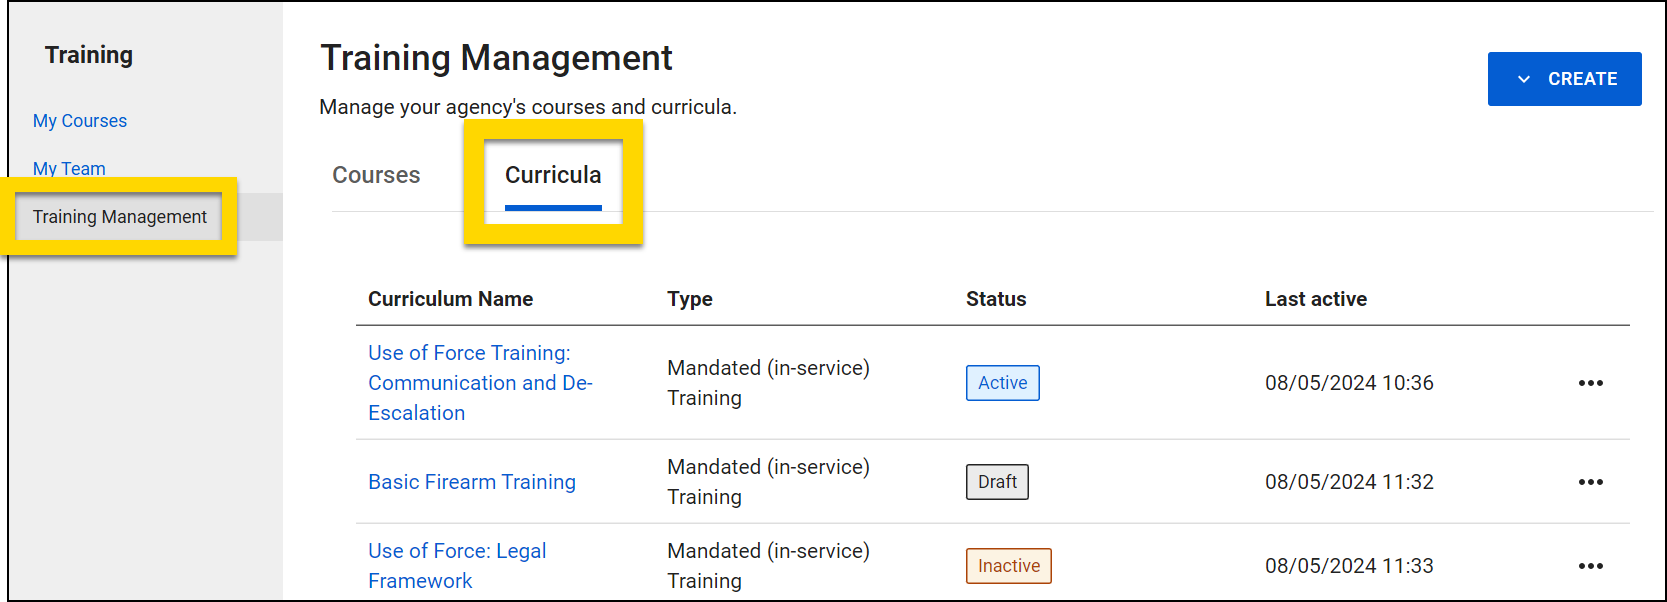
Use the search bar to find a specific curriculum and the filters to refine which curricula are displayed in the list. Options include:
- Status
- Type
Use the Sort By menu to set the order in which curricula are listed. Options include:
- Created Date (Newest to Oldest)
- Created Date (Oldest to Newest)
- Last Update (Newest to Oldest)
- Last Update (Oldest to Newest)
The following information is included for each curriculum listed on this tab:
- Curriculum Name: The name of the curriculum. This name is displayed on the course details page for any courses it is added to.
- Type: Either mandated (in-service) or supplemental (non-mandated).
- Status: A curriculum can have one of three statuses:
- Draft: The curriculum is being created and can be added to one or more courses once it is published.
- If you make updates to an Active curriculum, the status of the curriculum changes to Draft. When the curriculum is republished, its status changes back to Active.
- Active: The curriculum is active and can be added to one or more courses.
- Inactive: The curriculum is inactive and can't be added to any courses unless it is restored and republished.
- Draft: The curriculum is being created and can be added to one or more courses once it is published.
- Last active: The last date/time the curriculum was edited.
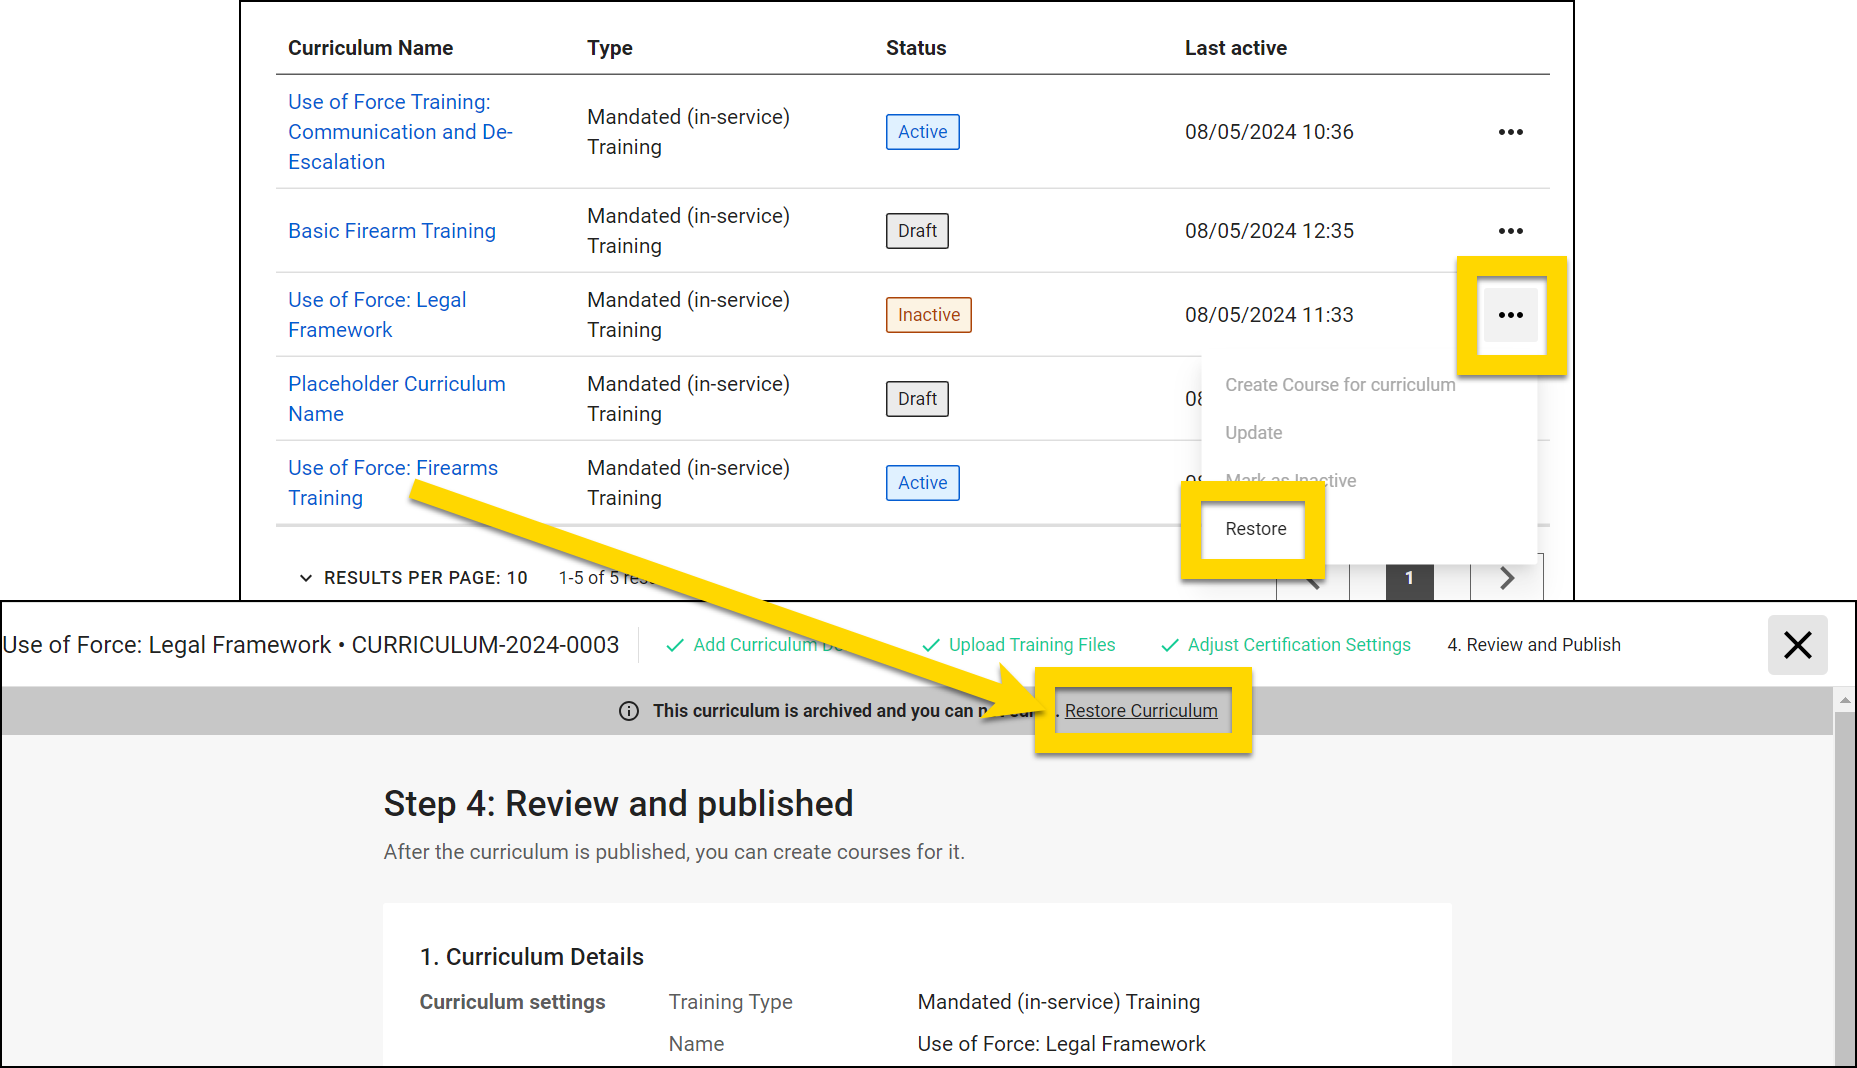
Select More Actions [...] on any curriculum to:
- Create course for curriculum
- Update
- Mark as inactive
- Restore
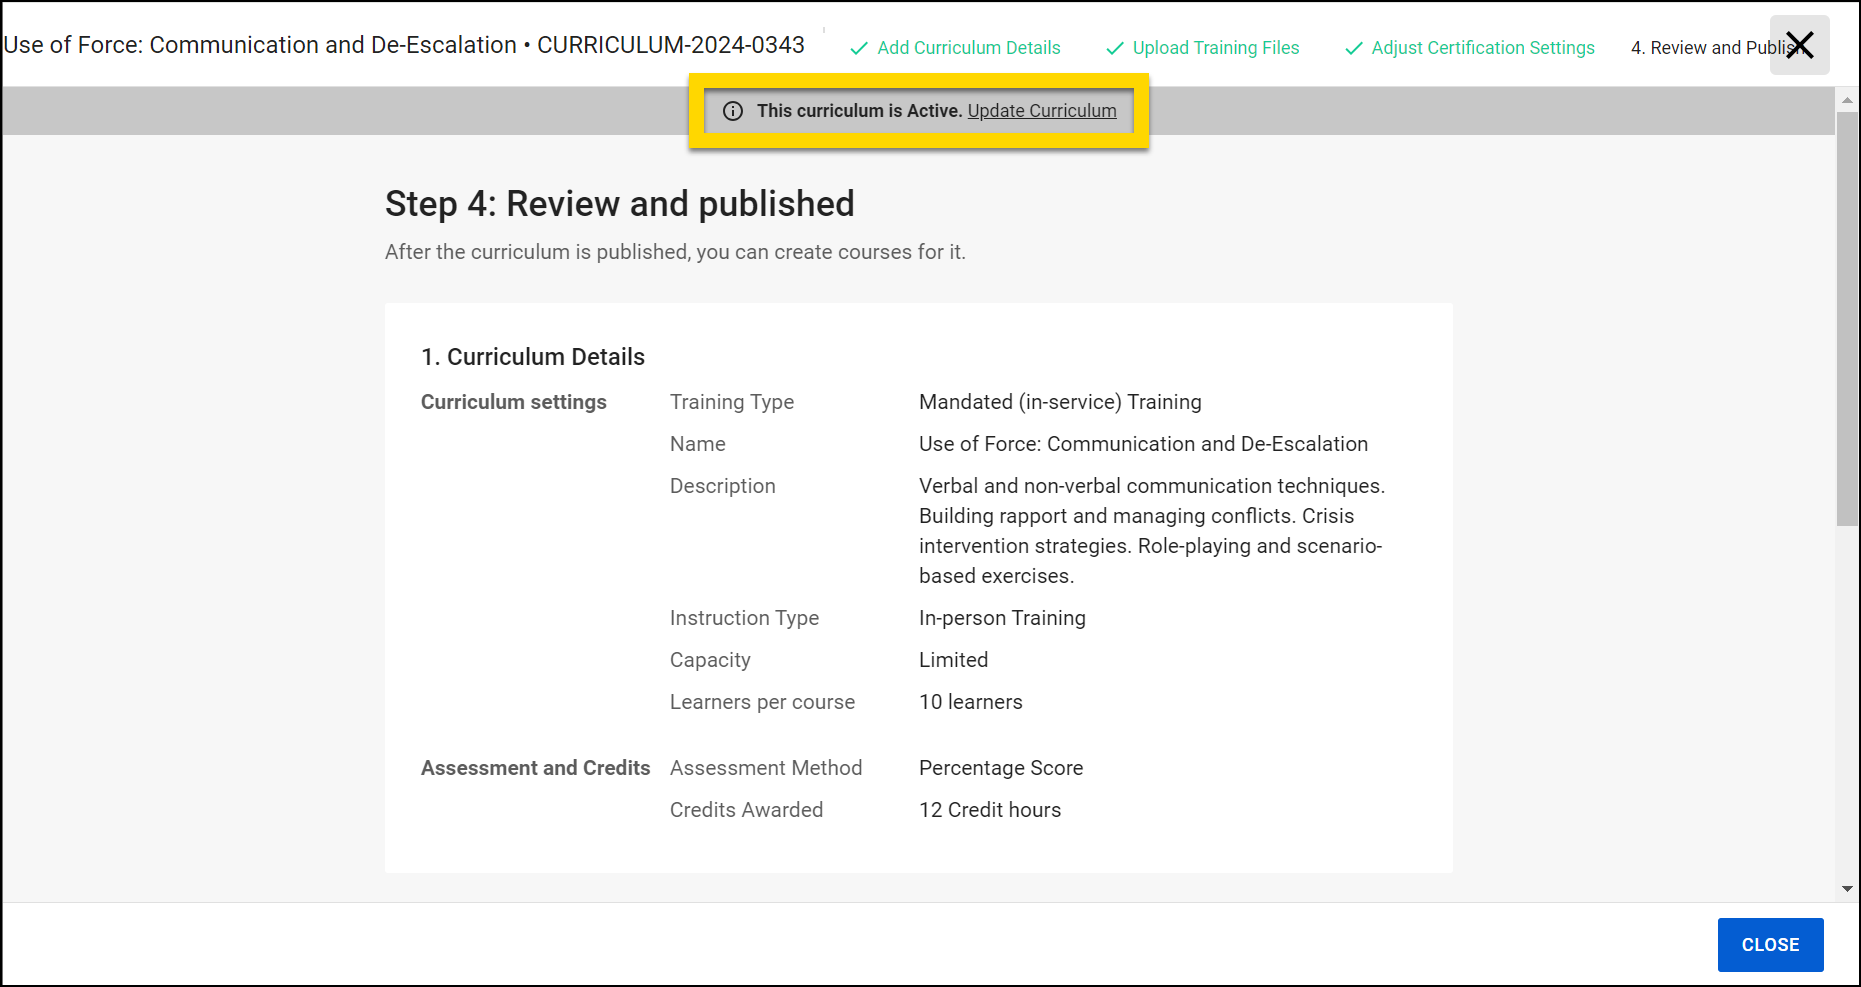
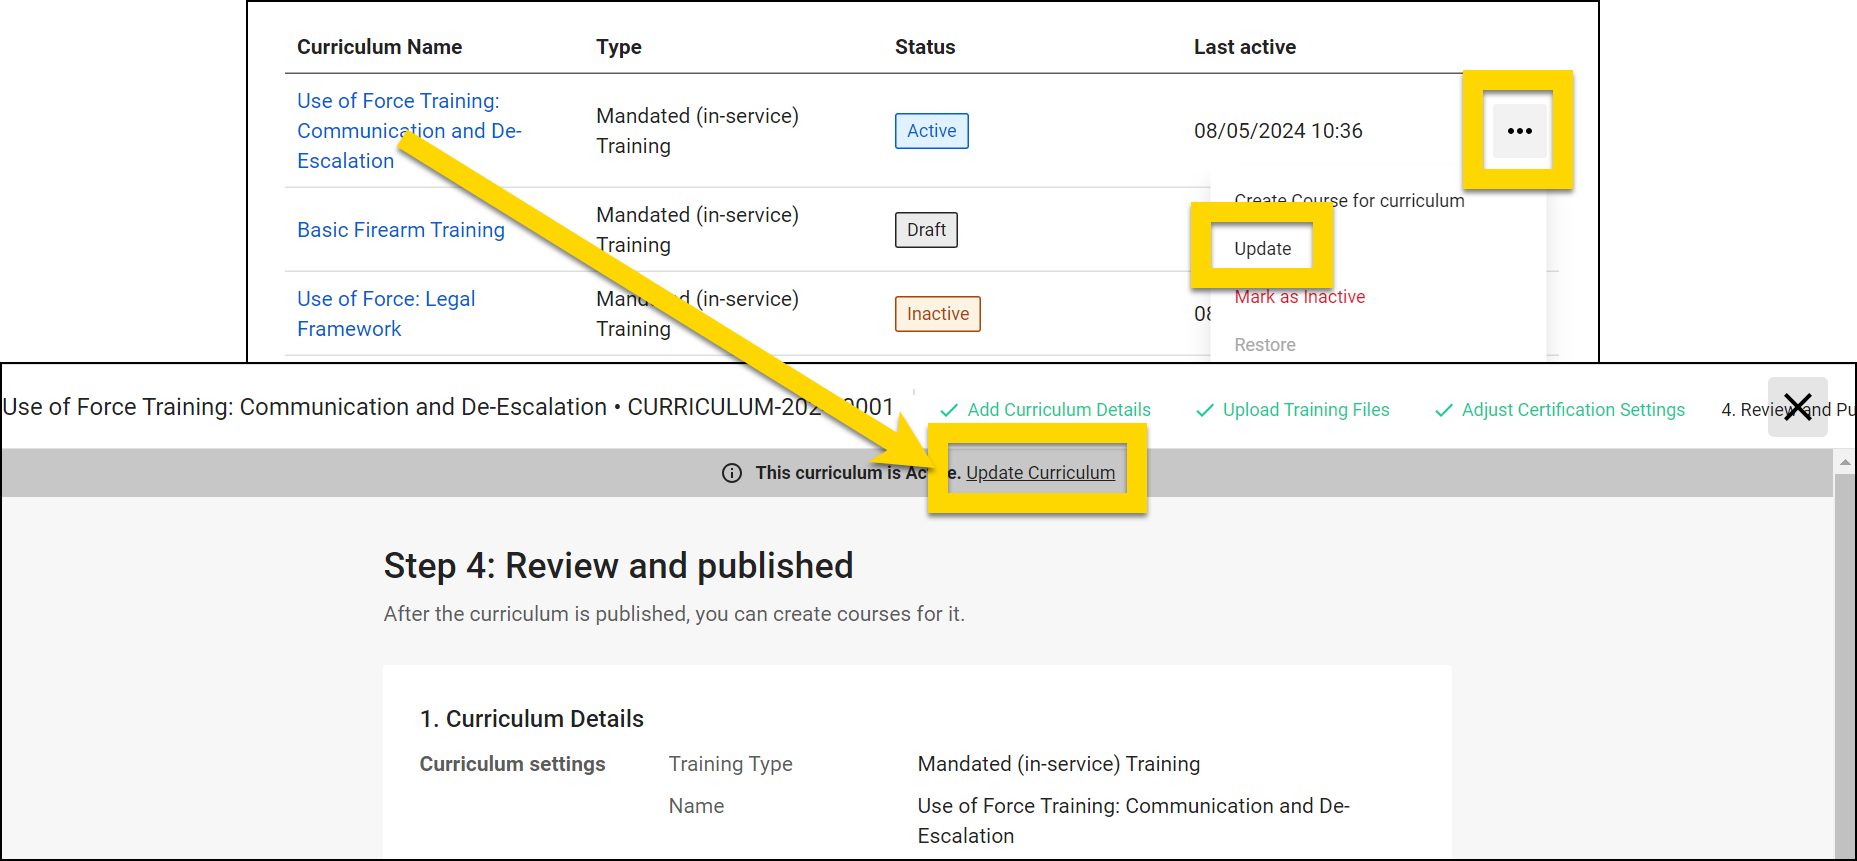
Select a curriculum name to view the curriculum, including all curriculum details, training files, and certification settings. Based on the curriculum's current status, you can take the following actions by selecting the link in the top gray banner:
- Draft: Continue editing and publish
- Active: Update the curriculum (return it to Draft so you can edit it).
- Inactive: Restore the curriculum to Draft, update as needed, then republish.
Create curricula
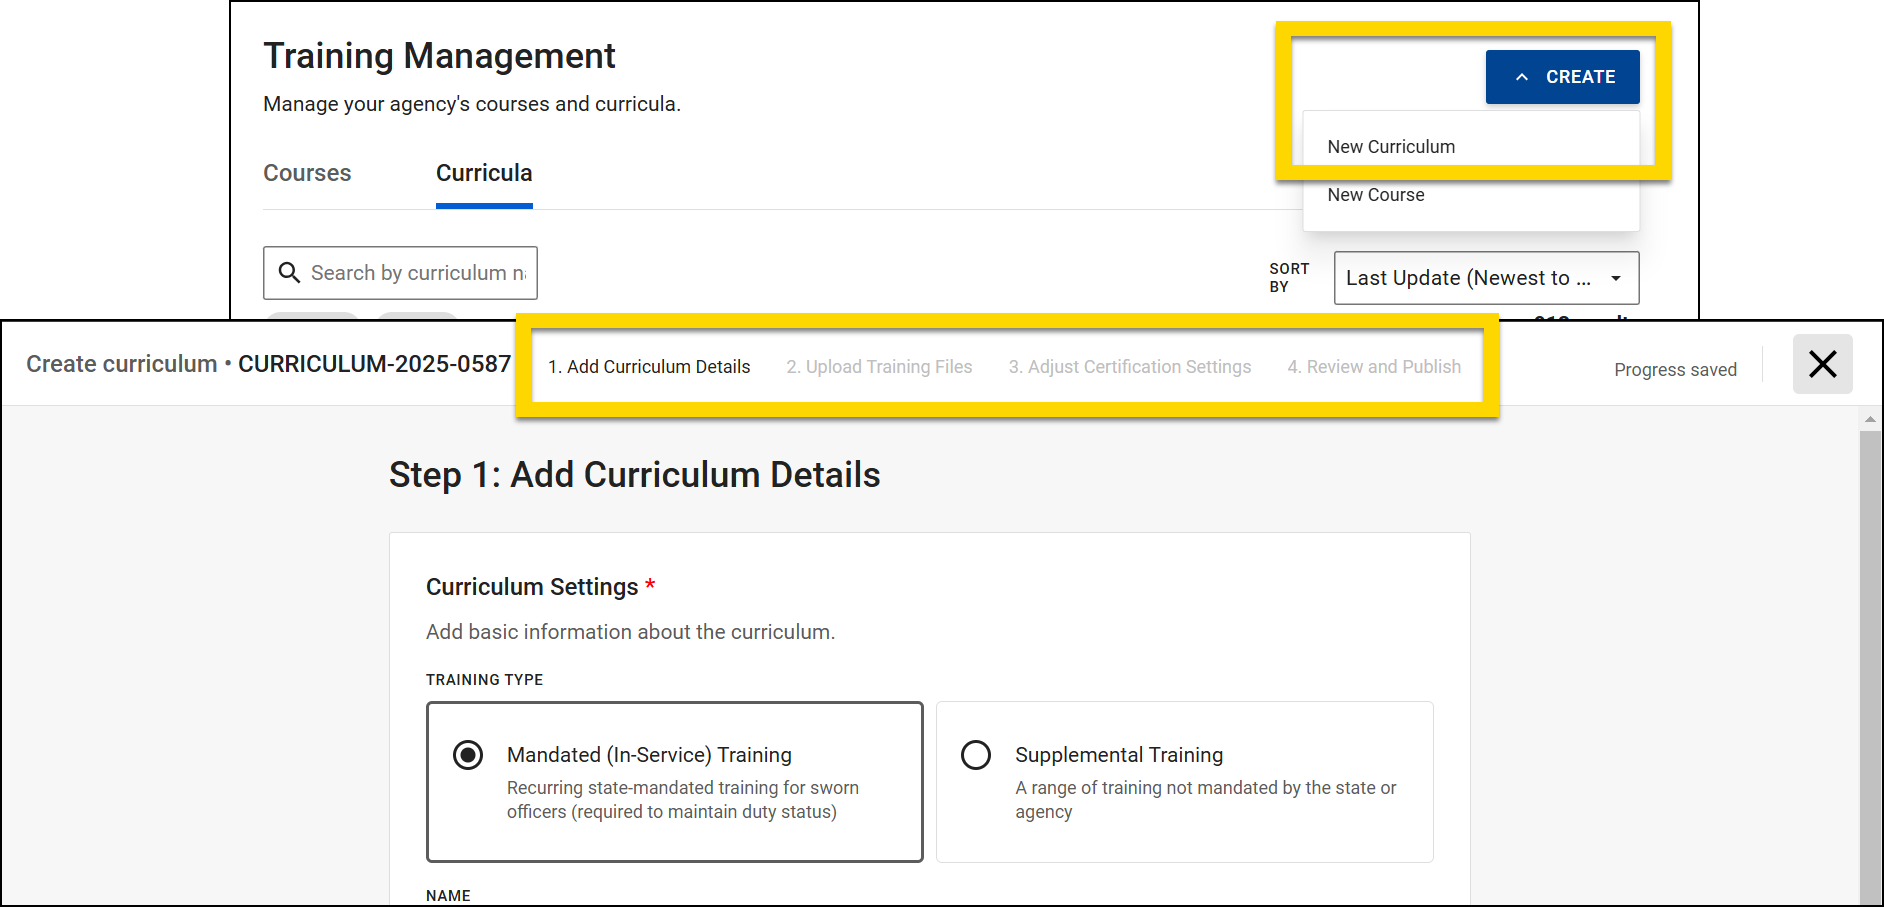
To create a curriculum, take these steps:
- Open the Training module then select Training Management.
- Select Create > New Curriculum.
- Add all curriculum details.
- Upload training files. These are the files containing the actual curriculum that the instructor teaches during the course.
- Files must be no larger than 5 M.
- Adjust certification settings for courses created that use this curriculum.
- To change information on a previous screen, select Back to return to that step to update the information.
- You can close the curriculum at any time by selecting the X in the top right corner.
- All information you have entered will automatically be saved and the curriculum will remain in Draft status until you publish it. While a curriculum is in Draft, it can't be added to any courses.
- After providing all information, review and publish your curriculum. Select Publish Curriculum to make the curriculum Active so it can be added to courses.
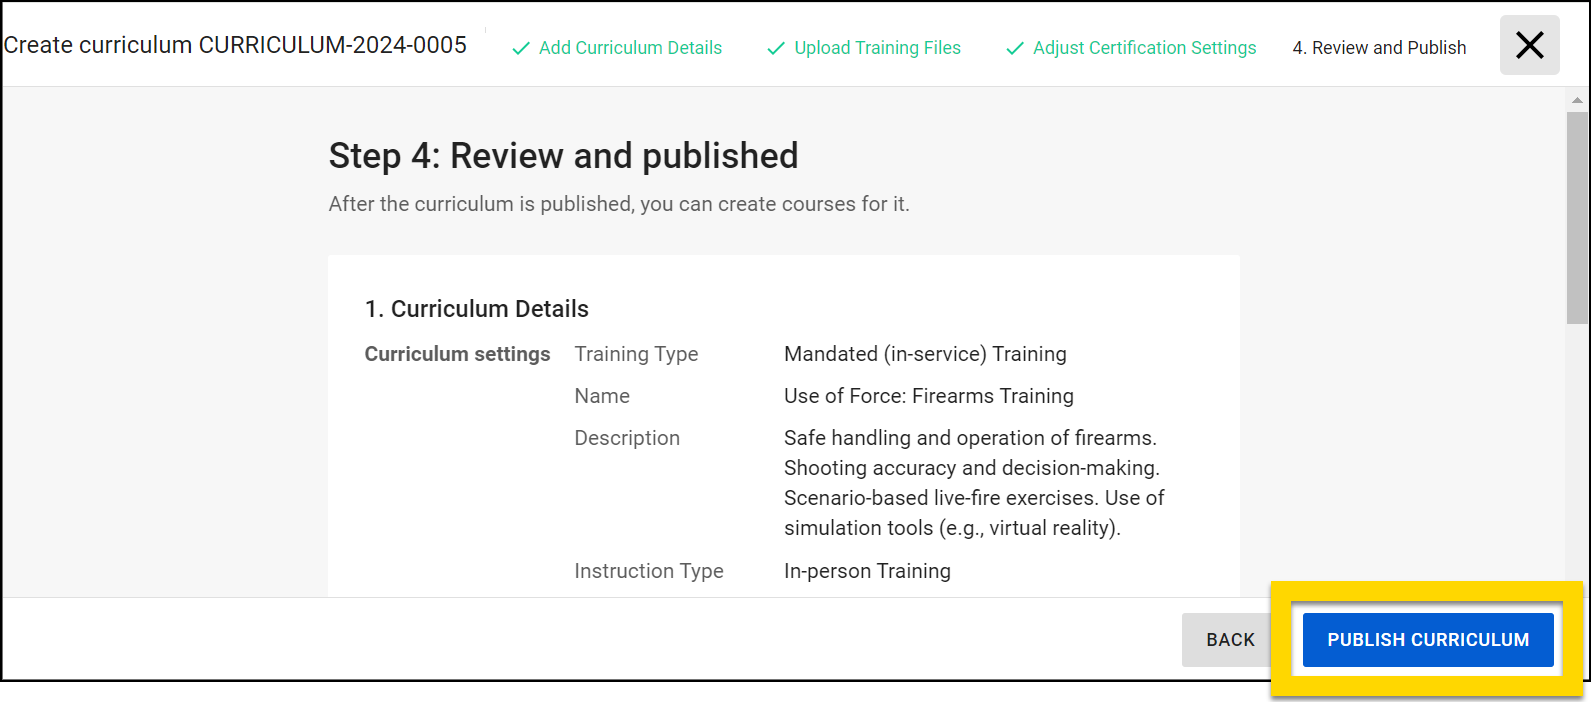
- Once a curriculum is published, you can view it and update as necessary from the Curricula tab.
Curriculum details
When creating or updated a curriculum, provide the following details:
- Training Type
- Mandated (In-Service) Training: Recurring state-mandated training for sworn officers (required to maintain duty status)
- Supplemental Training: Training not mandated by the state or agency
- Name: This is displayed to learners on their My Training page.
- Description
- Instruction Type: In- Person Training or Online Instructor-Led Training
- Capacity: Set the number of students who can be enrolled in courses that use this training.
- Limited: Specify the number of learners who can be enrolled
- Unlimited: An unlimited number of learners can be enrolled
- Assessment Method
- Category Score: Learners are assessed using a category score (pass, fail, withdrawn, etc.) rather than a numeric score.
- Percentage Score: Learners are assessed using a numeric score (90, 75, etc.) in addition to a category score (pass, fail, withdrawn, etc.).
- Credits Awarded
- Credits Awarded after Course Completion: Specify the number of hours awarded
- No Credits Awarded
Certification settings
When creating or updated a curriculum, you can adjust the type of certification expiration. Options include:
- From Completion Date:
Certification expires a specified amount of time after the course is completed.
- Enter the number of days, months, quarters, or years in the Certificate Expiring Duration field.
- Repeating Expiration Date: Certification expires on a set date at repeating intervals.
- Set the interval type (every 5 months, year, 2 years, 3 years, 4 years) and the date on which the expiration takes place.
- For example, if you want a course to expire every year on January 1, select Every Year for the interval, then January and 1 in the Month and Day fields.
- No Expiration Date: Certification never expires.
Watch this video for an overview of training management, including how to create curricula.
Update curricula
When updating a curriculum, you can change any of the curriculum details, training files or certification settings.
To update a Draft curriculum, either select the curriculum name or More Actions [...] > Update.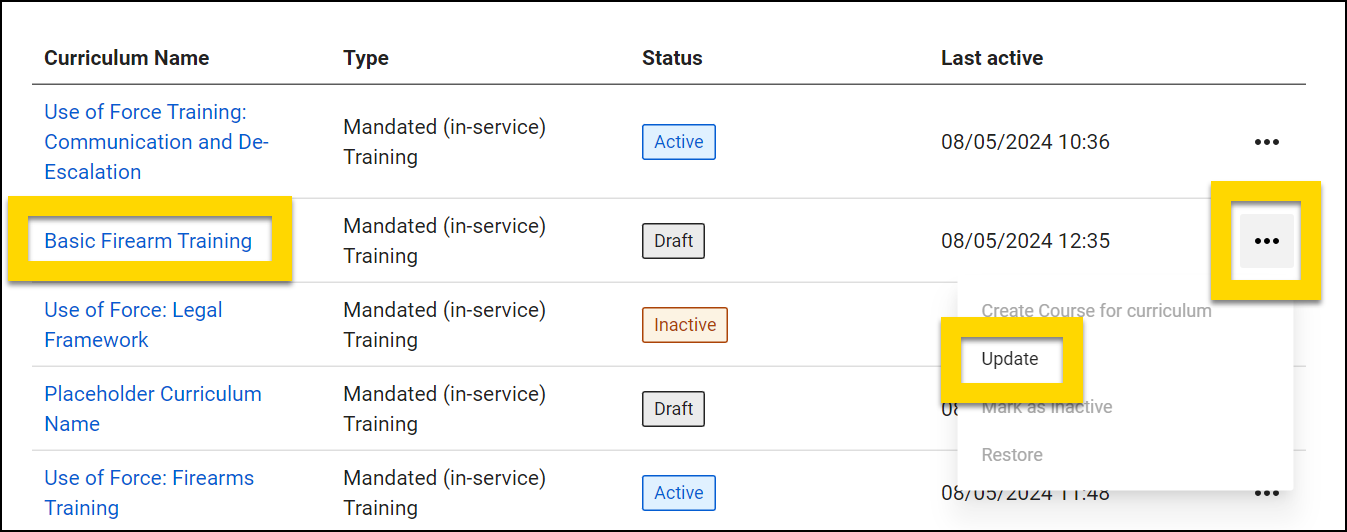
To update an Active curriculum, select More Actions [...] > Update. If you instead select the curriculum name, you can view the curriculum information in a read-only format. Update the curriculum by selecting Update Curriculum.
Active curricula have been published and may have already been added to courses. Any updates made to an Active curriculum will NOT reflect in any courses that curriculum has already been added to. Instead, you must cancel the existing courses and create new ones that use the updated curriculum.
Mark curricula as inactive
If a curriculum is inactive, it can't be added to any courses. To mark a curriculum as Inactive, select More Actions [...] > Mark as Inactive.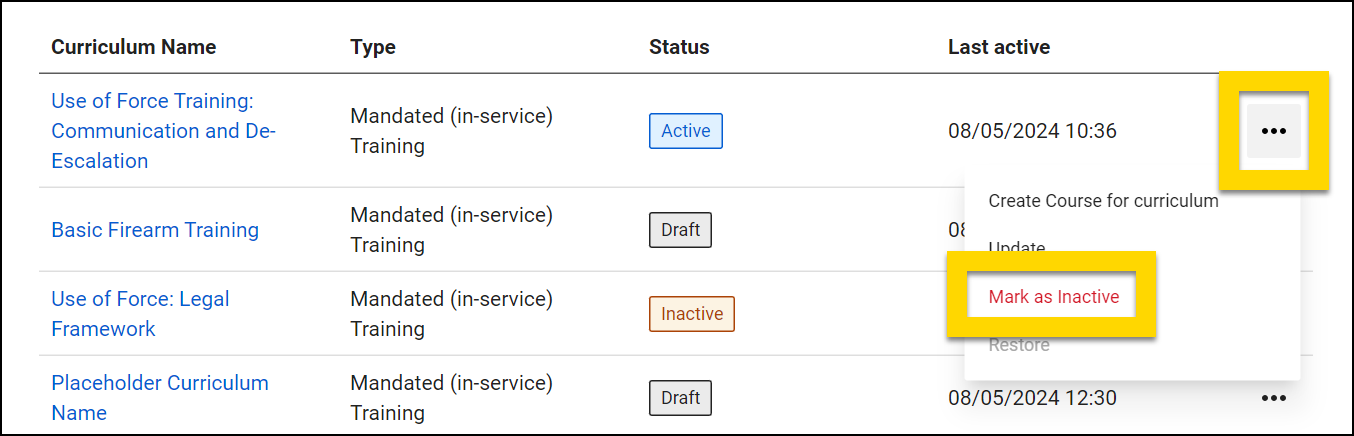
Restore curricula
To make an Inactive curriculum Active, you must first restore it. To do this, select More Actions [...] > Restore. If you instead select the curriculum name, you can view the curriculum information in a read-only format. Update the curriculum by selecting Restore Curriculum.
When a curriculum is restored, it is moved into Draft status. When a Draft curriculum is published, it becomes Active and can be added to courses.