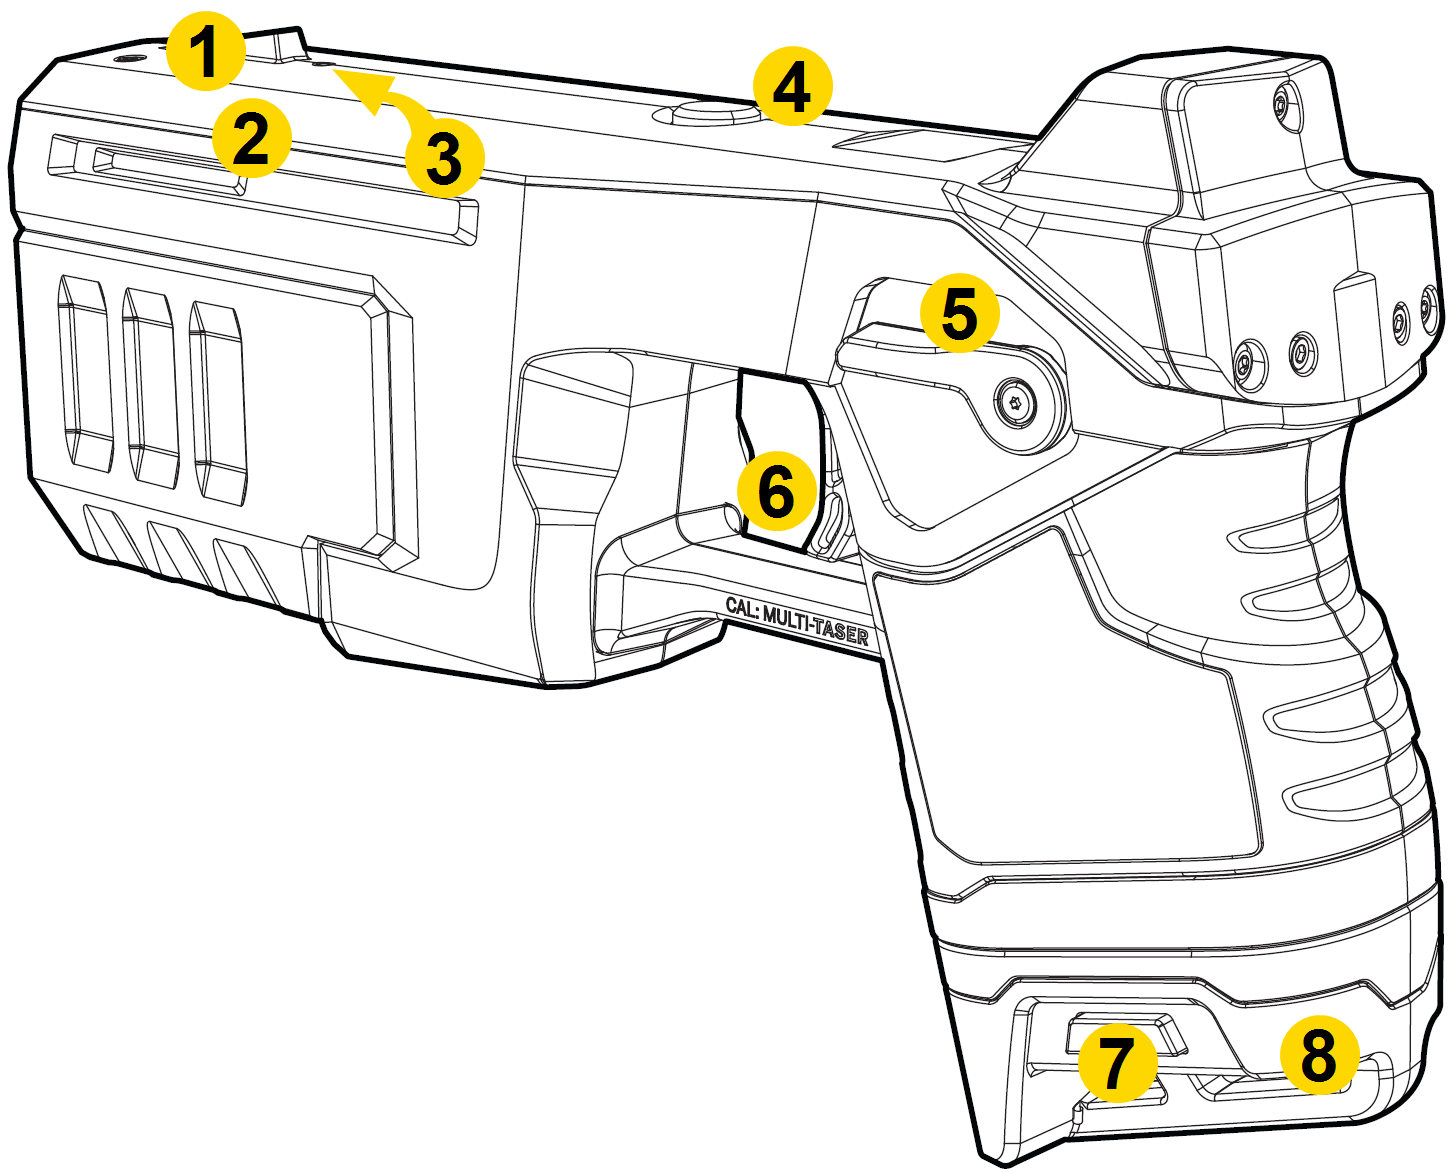
Controller features
Overview
|
|
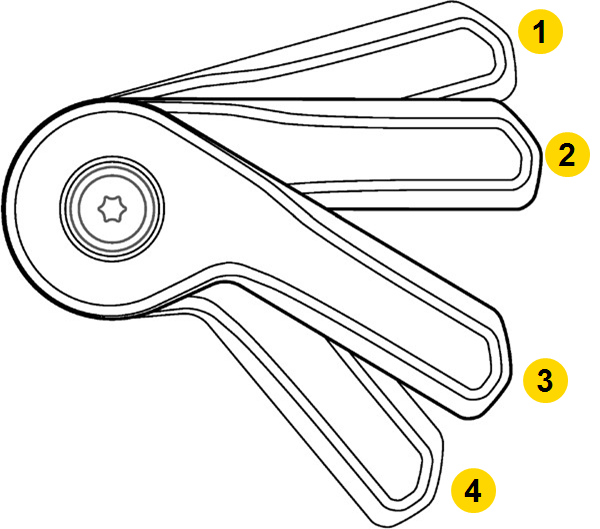
Selector switch
Previous TASER devices had a two-position safety: On (Armed) and Off (Safe). The TASER 10 VR Controller's selector switch has different operating modes
 = = |
|
Don’t block the Selector switch on one side of the TASER VR Controller while attempting to move it on the opposite side. This can break the switch and disable the controller.
Keep the TASER VR Controller in an Axon-approved, TASER VR Controller-specific holster when not in use.
Sidelight LEDs
Identical Sidelight LEDs on each side of the TASER VR Controller indicate current battery level (blinking) and trigger state, alternating between the two.
Once the controller recognizes the battery, the LEDs will display battery level and trigger presses as noted below.
| State/Message | Sidelight LED Color |
|---|---|
| Battery >50% |
 Green Green |
| Battery 15–50% |
 Yellow Yellow |
| Battery 5–14% |
 Orange Orange |
| Battery 0–5% |
 Red (rapid pulse) Red (rapid pulse) |
| Trigger press – Armed |
 Purple Purple |
| Trigger press – Safe |
 Blue Blue |
Do not add stickers or markings to the top of the TASER VR Controller as these will affect internal sensors.
Magazine
|
|
|---|
| NEVER attempt to attach a live TASER 10 magazine (whether loaded or unloaded) to a TASER 10 VR Controller. ONLY USE WHITE magazines with a VR controller. |
The TASER 10 VR Controller has a removable magazine that can be left installed. Orient it properly before attempting to insert it.
To attach a TASER VR Controller magazine:
- Set the selector switch to Off (Safe).
- Hold the magazine from the bottom and align the upper guides on the magazine with the rails on the device.
- Slide the magazine approximately halfway toward the back of the device before pushing upward.
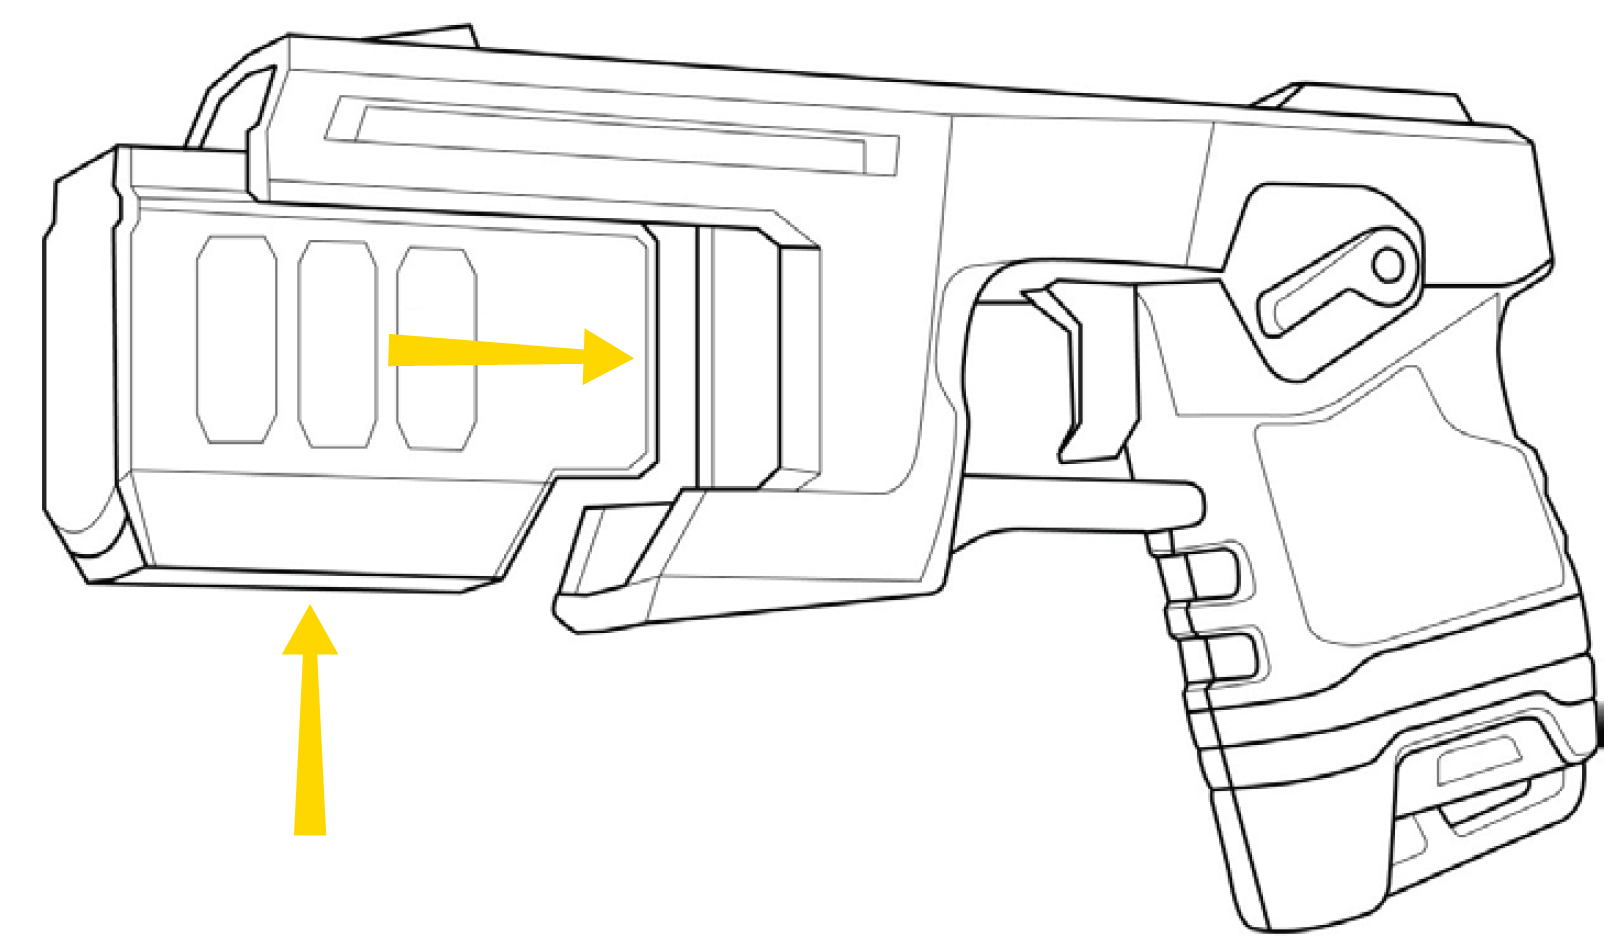
- Slide the magazine into the TASER VR Controller until you hear a click.
- Move the selector switch to On (Armed), then back to Off (Safe).
If the magazine does not "click" to the controller, remove it and confirm you're using a white VR magazine ONLY. The TASER 10 VR controller will still operate normally even without a magazine attached.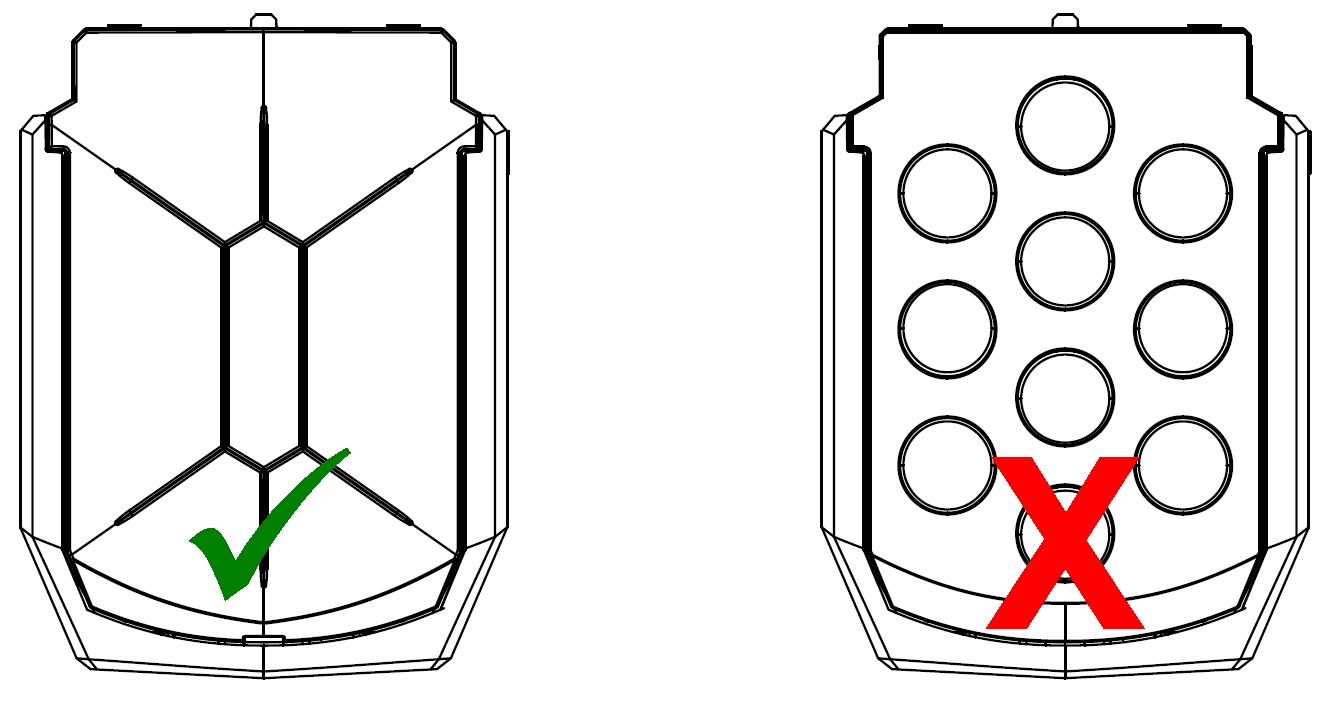
Use only VR magazines (left); do not use TASER 10 magazines (right).
The TASER 7 VR Controller will not accept live cartridges. You will select your cartridge load in the Axon headset app.
Timeout/sleep mode
To conserve battery, the controller might enter sleep mode, indicated by sidelights and LEDs turning off. If this occurs while the device is armed, cycle the Selector switch from Off (Safe) to On (Armed) to reactivate it. See Sleep mode.
Trigger
The TASER 10 VR Controller trigger is a momentary electrical switch. The trigger is operational in VR only when the Selector switch is On (Armed).
Holster tracking
The TASER 10 VR Controller can track when it is holstered and unholstered in specific types of holsters. This feature works with Blackhawk, Safariland, and Blade-Tech holsters made specifically for VR controllers. An S.O. Tech holster works for both a duty TASER 10 and the TASER 10 VR controller.
USB port
The USB-C port on the front is an alternative method for updating firmware and directly pairing the controller to a VR headset. Do not use this function without specific instructions/directions from Axon Technical Support.
A TASER 10 VR Controller can NOT be recharged with this port.
App button
Use the round App button on top of the TASER VR Controller for pairing and accessing the headset menu.
Pairing
Press firmly (so it clicks) for about five seconds and release to enter pairing mode. The Pairing LED behind the front sight will illuminate to indicate status:
-
Blue – not paired
-
 Blinking blue – trying to pair
 -
Green – paired
For details on pairing, seePair VR Controller with headset.
When pairing, don't hold the App button after the Pairing LED starts blinking; at ten seconds this will put the TASER VR Controller into Sleep mode.
Headset menu
Use the App button to open the headset VR menu while using the HTC VIVE headset, allowing access to features such as pairing, Wi-Fi settings, starting a screen recording, exiting the application, or putting the controller in Sleep mode.
- Press the App button once to open the headset VR menu.
- Press the App button twice to enter or exit passthrough mode, which lets you see your surroundings in low-resolution black-and-white.
Sleep mode
There are multiple ways to put the TASER VR Controller in Sleep mode:
- Press the App button for ten seconds.
- Remove the headset for more than three minutes (adjustable in headset settings).
- Tap the headset power button (at the back near the battery) to put both the headset and TASER VR Controller in Sleep mode.
- Move the TASER VR Controller out of range of the headset for more than 30 seconds.
Long-press the headset power button to turn the headset off, which will put the TASER VR Controller into sleep mode.
If the controller goes to sleep with the Selector switch On (Armed), wake up it up by toggling it down to Off (Safe) and back up to On (Armed).