Installation and setup
Note The information in this article is primarily intended for Admin roles. For information for non-Admin roles, see Get started with Evidence Upload XT.
System requirements
Evidence Upload XT v2 has the following minimum system requirements:
- Windows 10 operating system
- 4 GB RAM (8 GB preferred)
- Internet access with the ability to reach Axon Evidence (evidence.com)
After confirming your desktop computers meet the system requirements, you should confirm that your Evidence Upload XT users have the correct Axon Evidence permissions requirements.
Axon Evidence permissions requirements
To use Evidence Upload XT, users must be assigned to an Axon Evidence role with certain permissions enabled. For more information, see Roles and Permissions.
Sign in access
- Evidence.com set to Allow
- Evidence Sync set to Allow
User Access
- Download Sync Software set to Allow - only required if the user needs to download the Evidence Upload XT installation file
Search Access
- User Search set to Allow
Evidence Creation
- Upload External Files set to Allow
Case Management (required only if user needs to add files to a case)
- View set to Any Case
- View and Add Case Notes set to Any Case
After confirming your Evidence Upload XT users have the correct permissions, you can:
Download and installation
- Sign in to MyAxon, and go to the Evidence Upload XT product page.
- Scroll down to the Downloads header and select the link in that section.
- When the download is complete, open the .ZIP file, and then open the installer package.
- Follow the steps in the installer.
After downloading and installing Evidence Upload XT, if necessary, you can limit bandwidth use.
Bandwidth settings
If your organization has limited bandwidth, you can set limits for Upload XT to prevent using too much. You can also set limits to only be in effect during certain times. Limits can be set in your individual installation of the app, or admins can set a limit for your organization.
We don't recommend limiting the Evidence Upload XT bandwidth settings. This option is provided for organizations with bandwidth limitations, but is off by default.
Bandwidth settings in your installation of the app
- In the Upload XT app, select Settings (the gear icon).
- Expand Bandwidth Settings and switch it to On.
- Set your bandwidth limit, or optionally check the box next to Temporary limit and set a limit, plus start and end time for the limit each day.
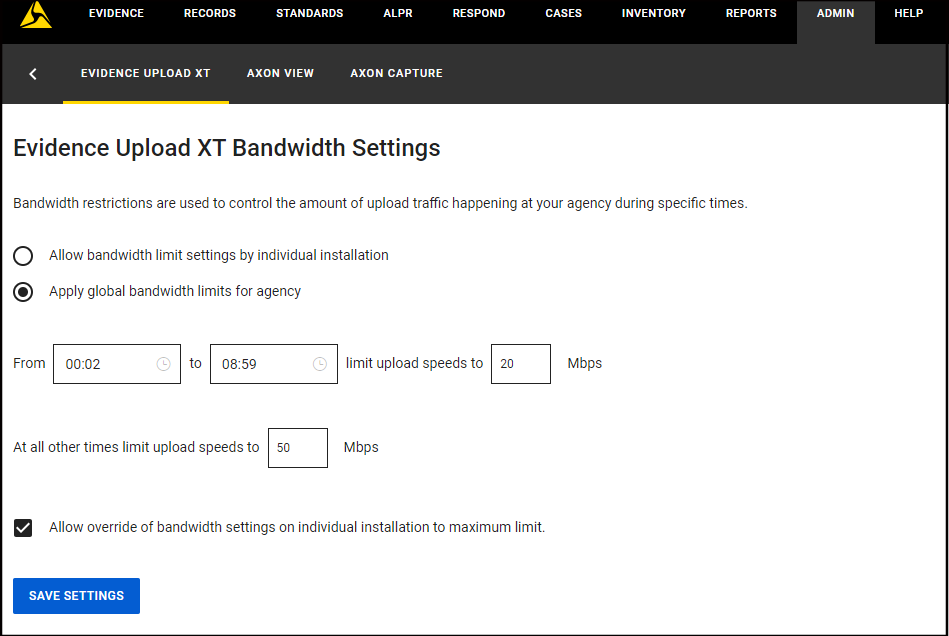
Admin organization-wide bandwidth settings
- Sign into your Axon Evidence account.
- Select Admin and then, under Applications, Evidence Upload XT.
- On the Bandwidth Settings page, select if you want to Apply global bandwidth limits.
- If you choose Allow bandwidth limit settings by individual installation, options will be unavailable. Skip to step 8.
- If you choose Allow bandwidth limit settings by individual installation, options will be unavailable. Skip to step 8.
- Select the From and To hour fields to enter the hours bandwidth throttling is active. These fields use a 24-hour clock.
- Enter the maximum Mbps that Upload XT can use during the set time.
- If needed, enter the maximum Mbps limit to apply outside of the global bandwidth limit timeframe.
- Optionally, select Allow override of bandwidth settings on individual installation to maximum limit.
- Select Save Settings.