XTO Tutorial
Get started in minutes
By following these steps, you will upload files using XTMT using an .XTO operation file. Version numbers in screen shots may vary.
Your agency may have required metadata which will be described below and will need to be applied to your implementation of XTMT operations. We recommend using a test agency, or if not available using a category for retention that will delete the test evidence.
Instructions for downloading and installing XTMT are found in XTMT Self-Service Migration Overview. For consistency with some samples we recommend putting the XDK file in the root drive. For example, c:\XDK\XDK-TestFiles and c:\XDK\XTMT_version
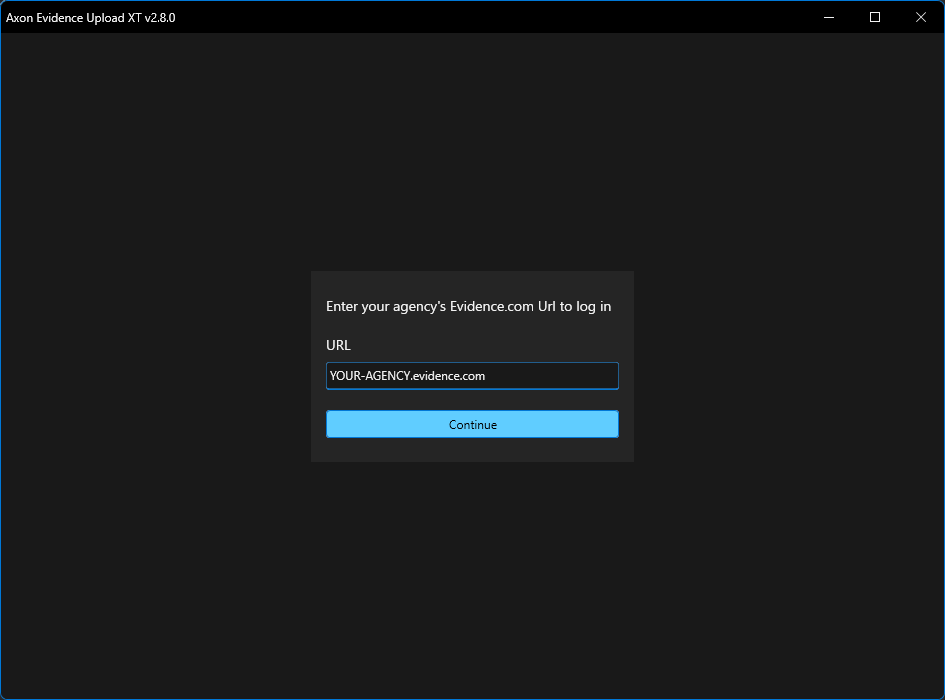
Sign into Upload XT
You need to sign in to the latest Axon Evidence Upload XT v2.x application to use XTMT. Sign in to Upload XT with either your existing Axon Evidence account or dedicated user account solely for uploads. You can only be signed in to Upload XT with a particular account on one device at a time. For your first upload testing, we recommend uploading to a test agency. Use non-evidentiary test files and a test operation name the first time.
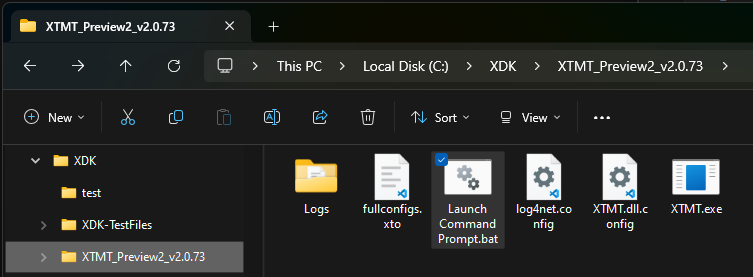
Launch XTMT from the Command Prompt
Open File Explorer and navigate to the latest XTMT release folder. Locate the “Launch Command Prompt.bat” file and double-click it to launch a command prompt in the XTMT directory.
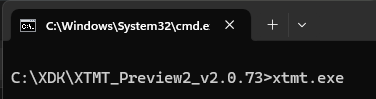
Run XTMT.exe
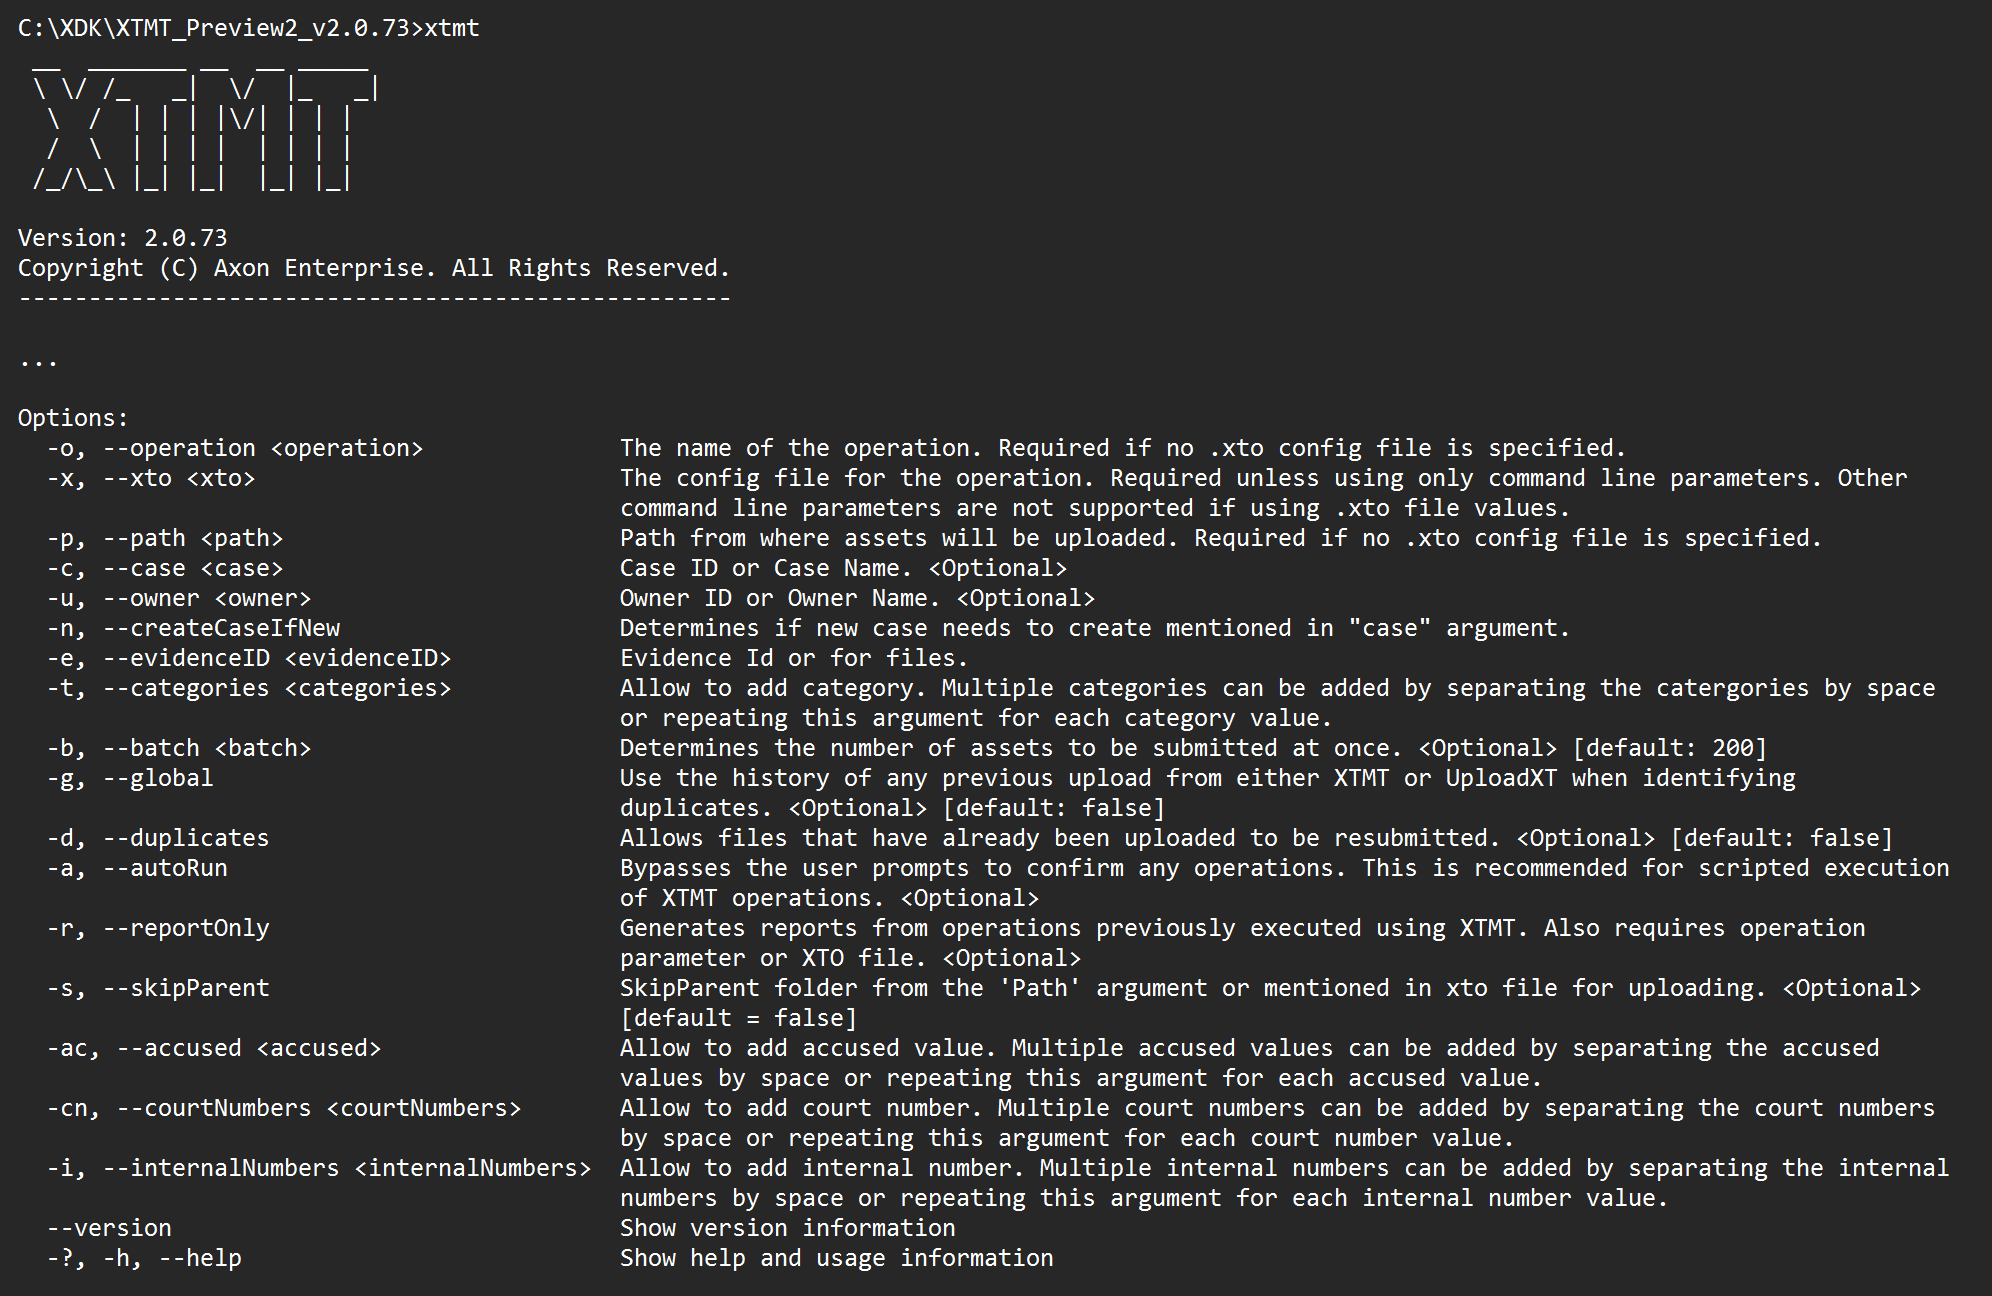
To see the tool output and options, type xtmt.exe at the command prompt and press Enter. This will not upload anything.
This will validate your authentication in Upload XT and display the latest information about usage, including the operation parameters that can be set in the Command line. To see the parameters as they should be entered in the .XTO file, see XTMT Operation Parameters.
Verify or modify the .XTO file
Navigate to the folder containing the XTMT files, and find the “HelloXTMT.xto” file.
Open this file in any text editor. Windows Notepad can be used if you don’t have a preferred text editor. Modify the Operation and Path settings. Assign an Operation name, inside quote marks. Enter the folder path with the files you want to upload, also inside quote marks. If you don't need to add any optional operation parameters, save the .XTO file.
{
"Operation": "MyFirstXTO"
,"Path": "C:\XDK\XDK-TestFiles\HelloXTMT"
}
Add metadata
You can also set the other upload parameters here using JSON, but only Operation and Path are required.
Additional parameters must be formatted as follows:
- Add a row, starting with a comma.
- Include the parameter, inside quote marks, followed by a colon.
- After the colon, add a space and include the parameter value, inside quote marks.
For example:
{
"Operation": "MyFirstXTO"
,"Path": "C:\XDK\XDK-TestFiles\HelloXTMT"
,"EvidenceID": "CFS-2024-12345"
}
Categories and Case require specific formatting. See the instructions for those below. A list of all parameters and their required formatting is in XTO Tutorial. Save the .XTO file when you are done adding parameters.
Categories
Currently, Categories metadata requires some additional formatting:
-
On a new line, add a comma, "Categories":, followed by a space.
-
Add a bracket [
-
Inside braces { add "CategoryName": followed by a space, and the category name in quote marks
-
Repeat 3 for any additional CategoryName values
-
Add a closing bracket ]
Example:
{
"Operation": "MyFirstXTO"
,"Path": "C:\XDK\XDK-TestFiles\HelloXTMT"
,"EvidenceID": "CFS-2024-12345"
,"Categories": [{"CategoryName": "Pending Review"}, {"CategoryName": "Migration"}]
}
In this release you must include a CategoryName and value for each category you wish to add. We are planning to simplify this formatting in a later release.
Case
You must add the evidence to a case if you want the folder structure maintained in Axon Evidence. Evidence not added to a case will be stored in Axon Evidence as individual, unorganized files.
If you want to add the evidence to a case, add ,"Case": followed by the case name or ID in quote marks. If the case doesn't exist in Axon Evidence yet, you can create a case by adding ,"CreateCaseIfNew": true.
Example:
{
"Operation": "MyFirstXTO"
,"Path": "C:\XDK\XDK-TestFiles\HelloXTMT"
,"EvidenceID": "CFS-2024-12345"
,"Categories": [{"CategoryName": "Pending Review"}, {"CategoryName": "Migration"}]
,"Case": "XTMTtest01"
,"CreateCaseIfNew": true
}
Start the upload operation with the .XTO file
Save the .XTO file using your text editor. The following steps will upload evidence into your agency. In the same command prompt window, type the following command with the configuration file name, including the .xto extension, in quote marks. For example (note version numbers may differ but use latest version):
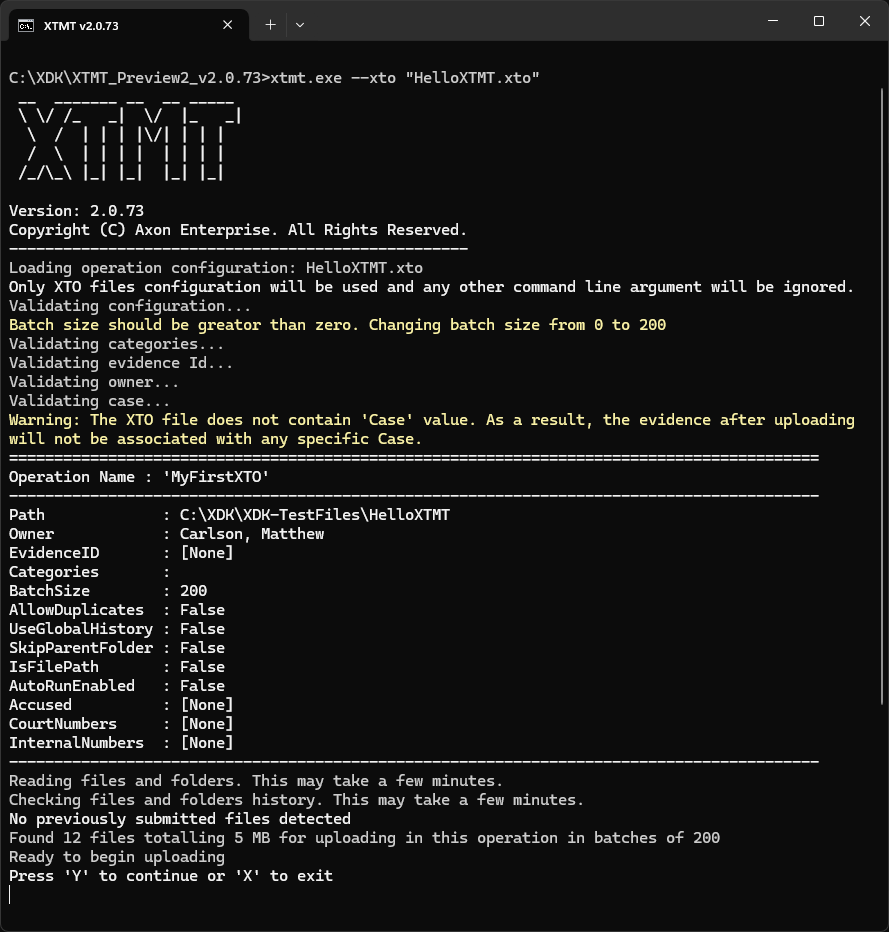
xtmt.exe --xto "HelloXTMT.xto"Hit Enter to continue. This command validates your authentication and provides information about the pending operation:
Review the details and press Y to start the upload:
Monitor the upload operation
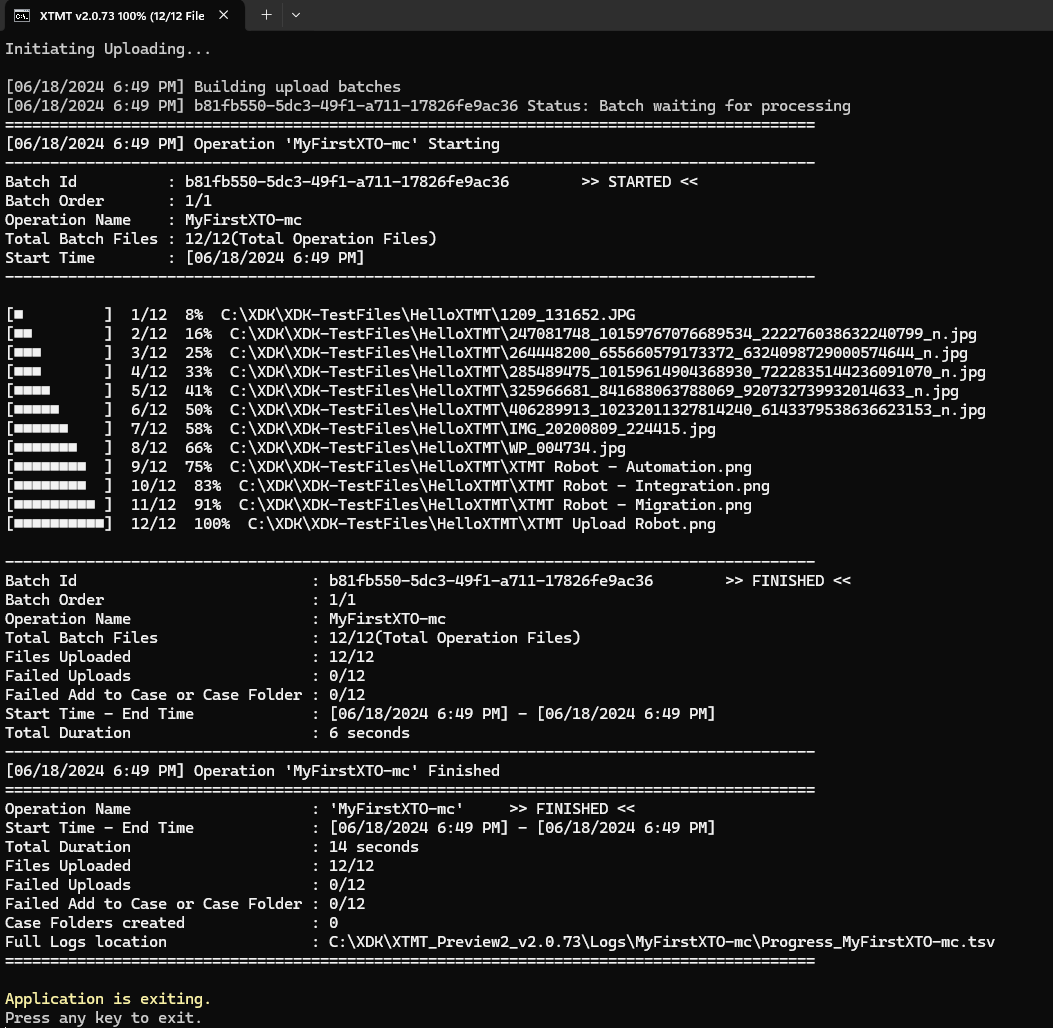
Follow the command prompt for real-time updates on the progress of the upload operation. XTMT will provide continuous feedback on the status of each file being migrated including any errors that occur. The title bar will update to show the total progress of the operation, even if it is split into multiple batches by XTMT.
Once the operation concludes, review the summary detailing the successful and failed uploads. XTMT will provide specific details to facilitate troubleshooting. Details in the summary can vary by version.
Review in Axon Evidence
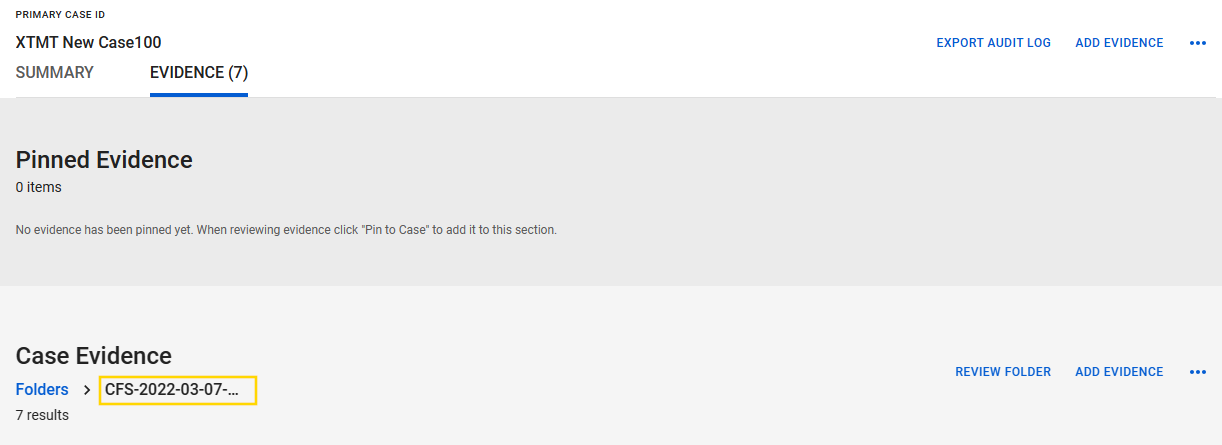
Sign in to Axon Evidence and search for the evidence to verify that files have been uploaded with the specified metadata. If you uploaded the files to a case, confirm the accuracy of the folder hierarchy as well.
Notice that in the following example, there is a folder created in the root of the case called "CFS-2022-03-07-01" (highlighted in the image below), which was the end of the Path value. To prevent this and only create folders for the child folders of the Path, set the SkipParent value to true.
Next steps
If you want to learn how to use the command line interface to upload evidence with XTMT, see XTMT Command Line Tutorial. The command line option is useful for doing Automation with XTMT.