Solar mount
Installation of 50W solar panels
Top mount 50W
- Unbox the solar panel.
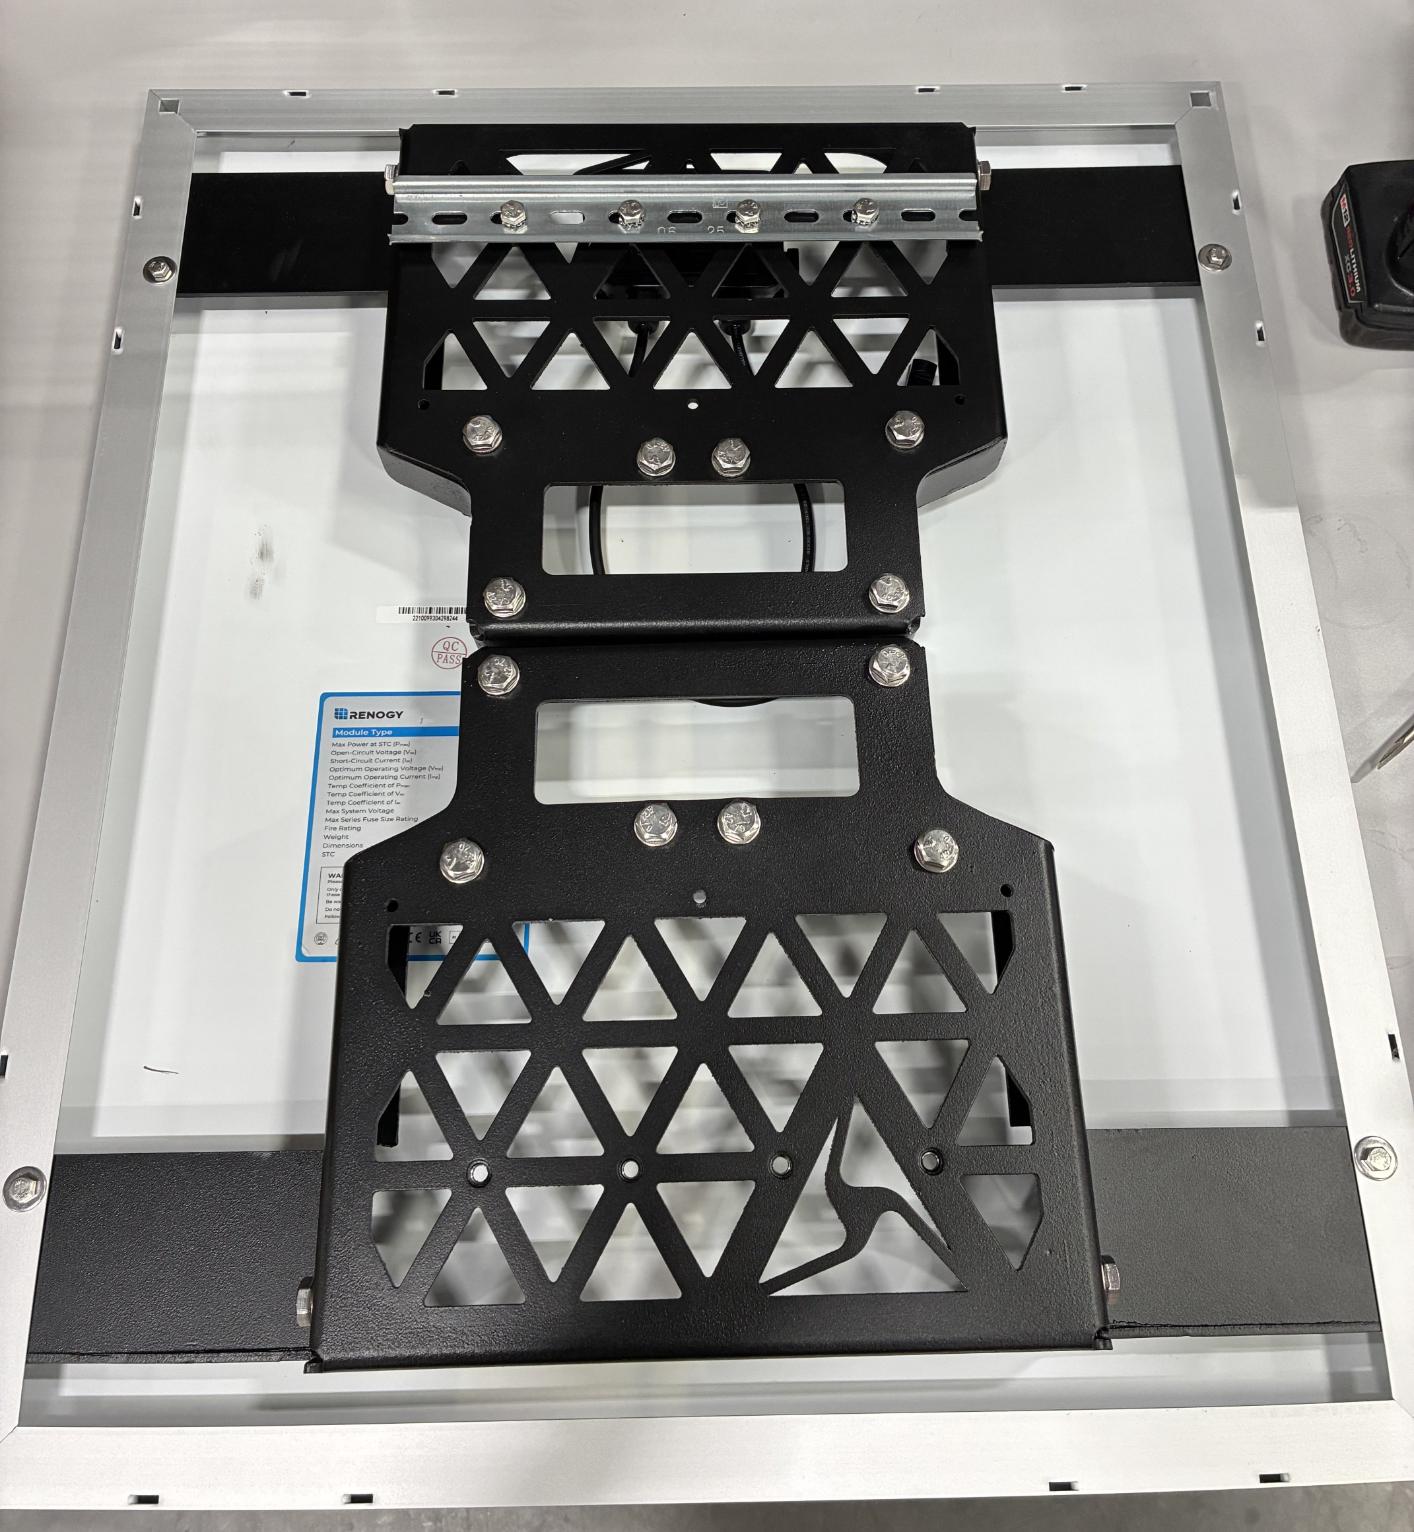
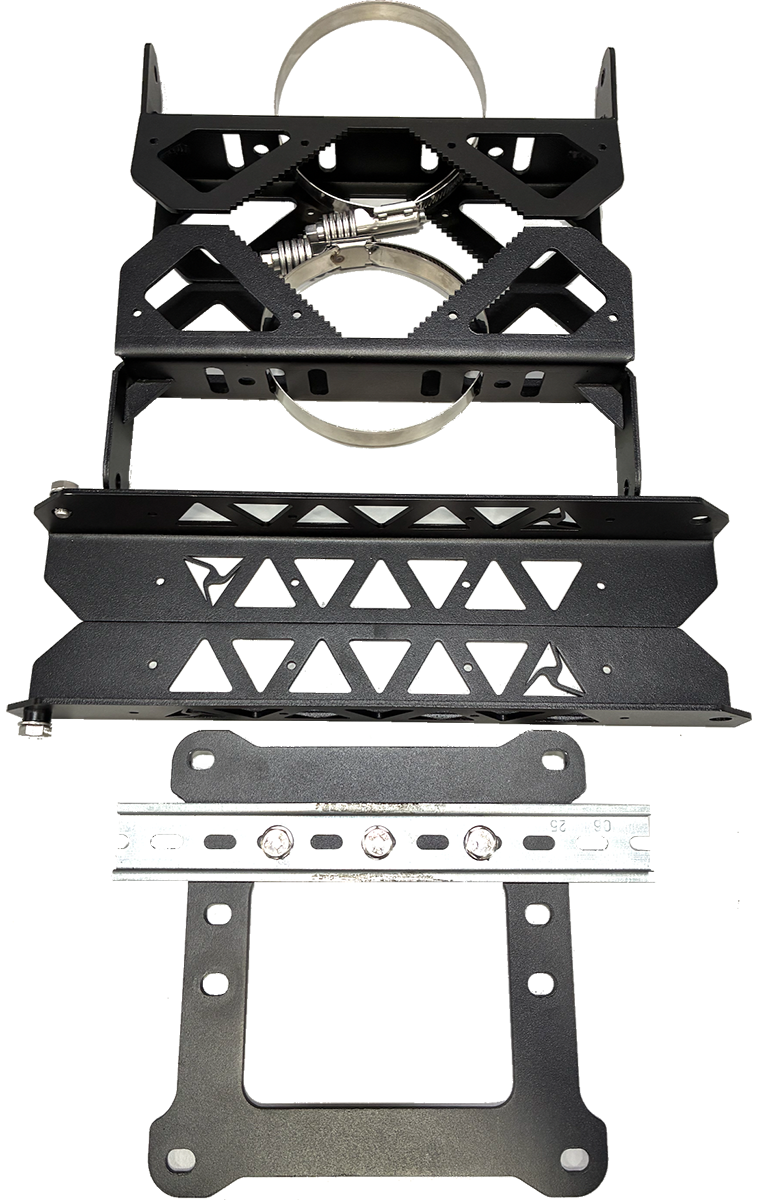
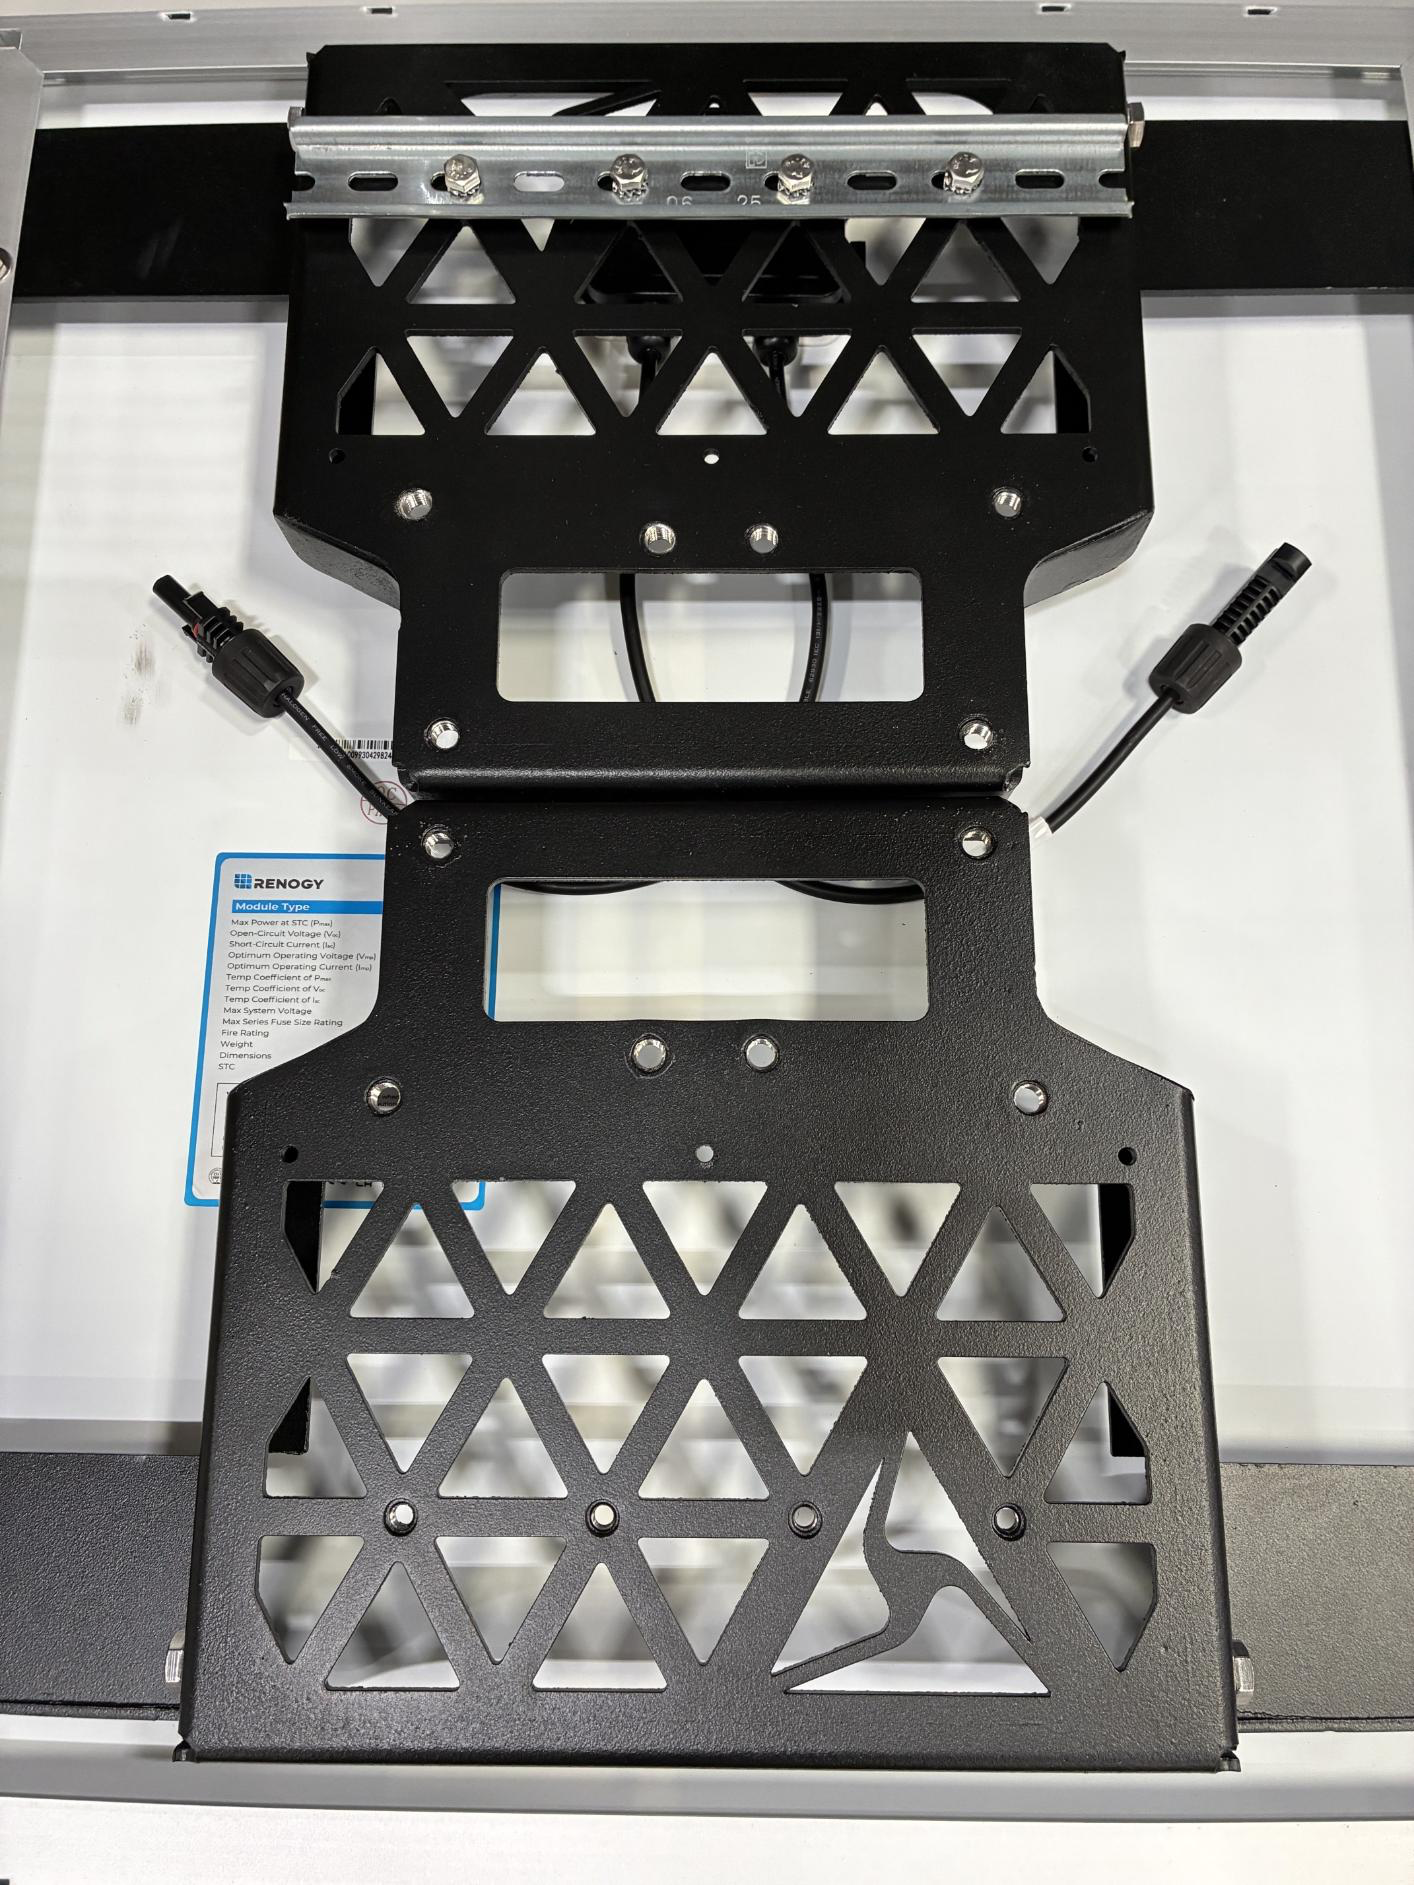
- Unbox the 2 solar panel bracket pieces. One has a pre-attached DIN rail; leave this rail on.
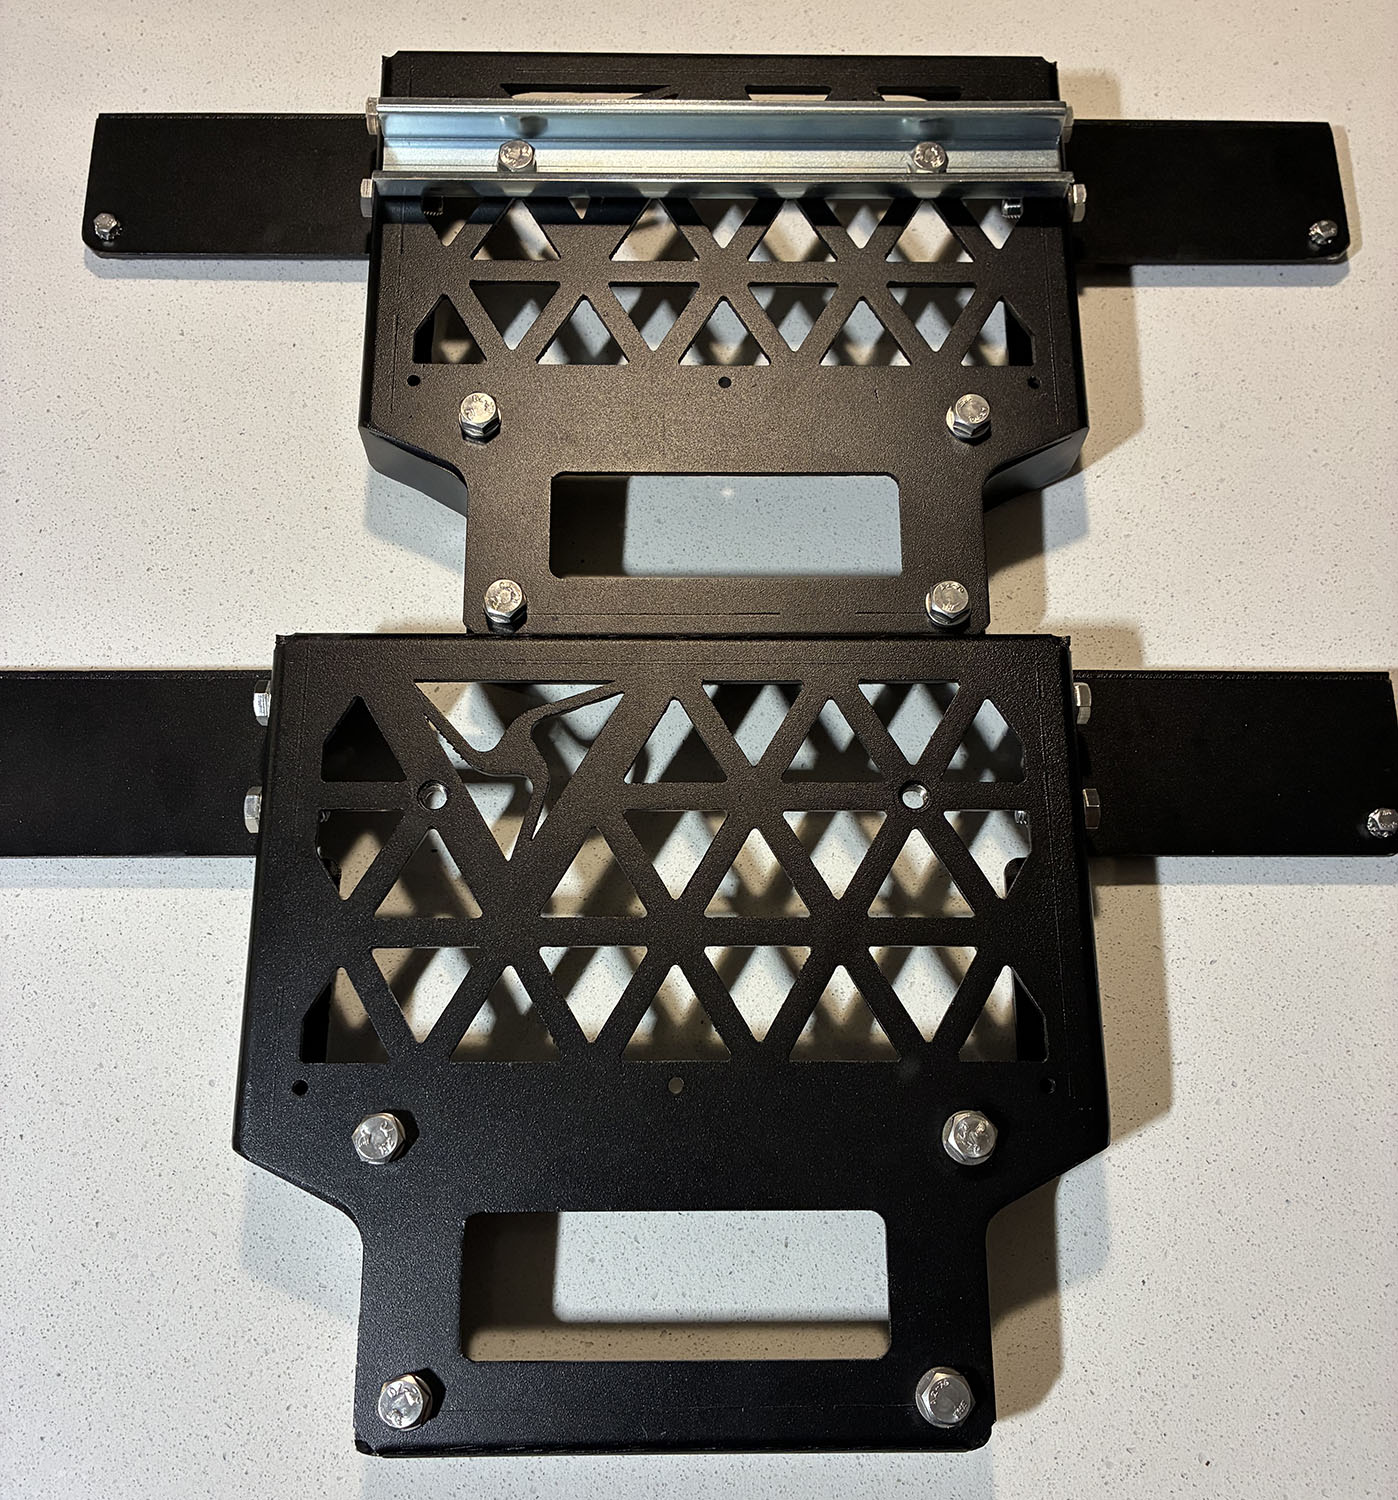
- Remove the 2 8 mm hex bolts from both solar panel brackets (4 bolts total).

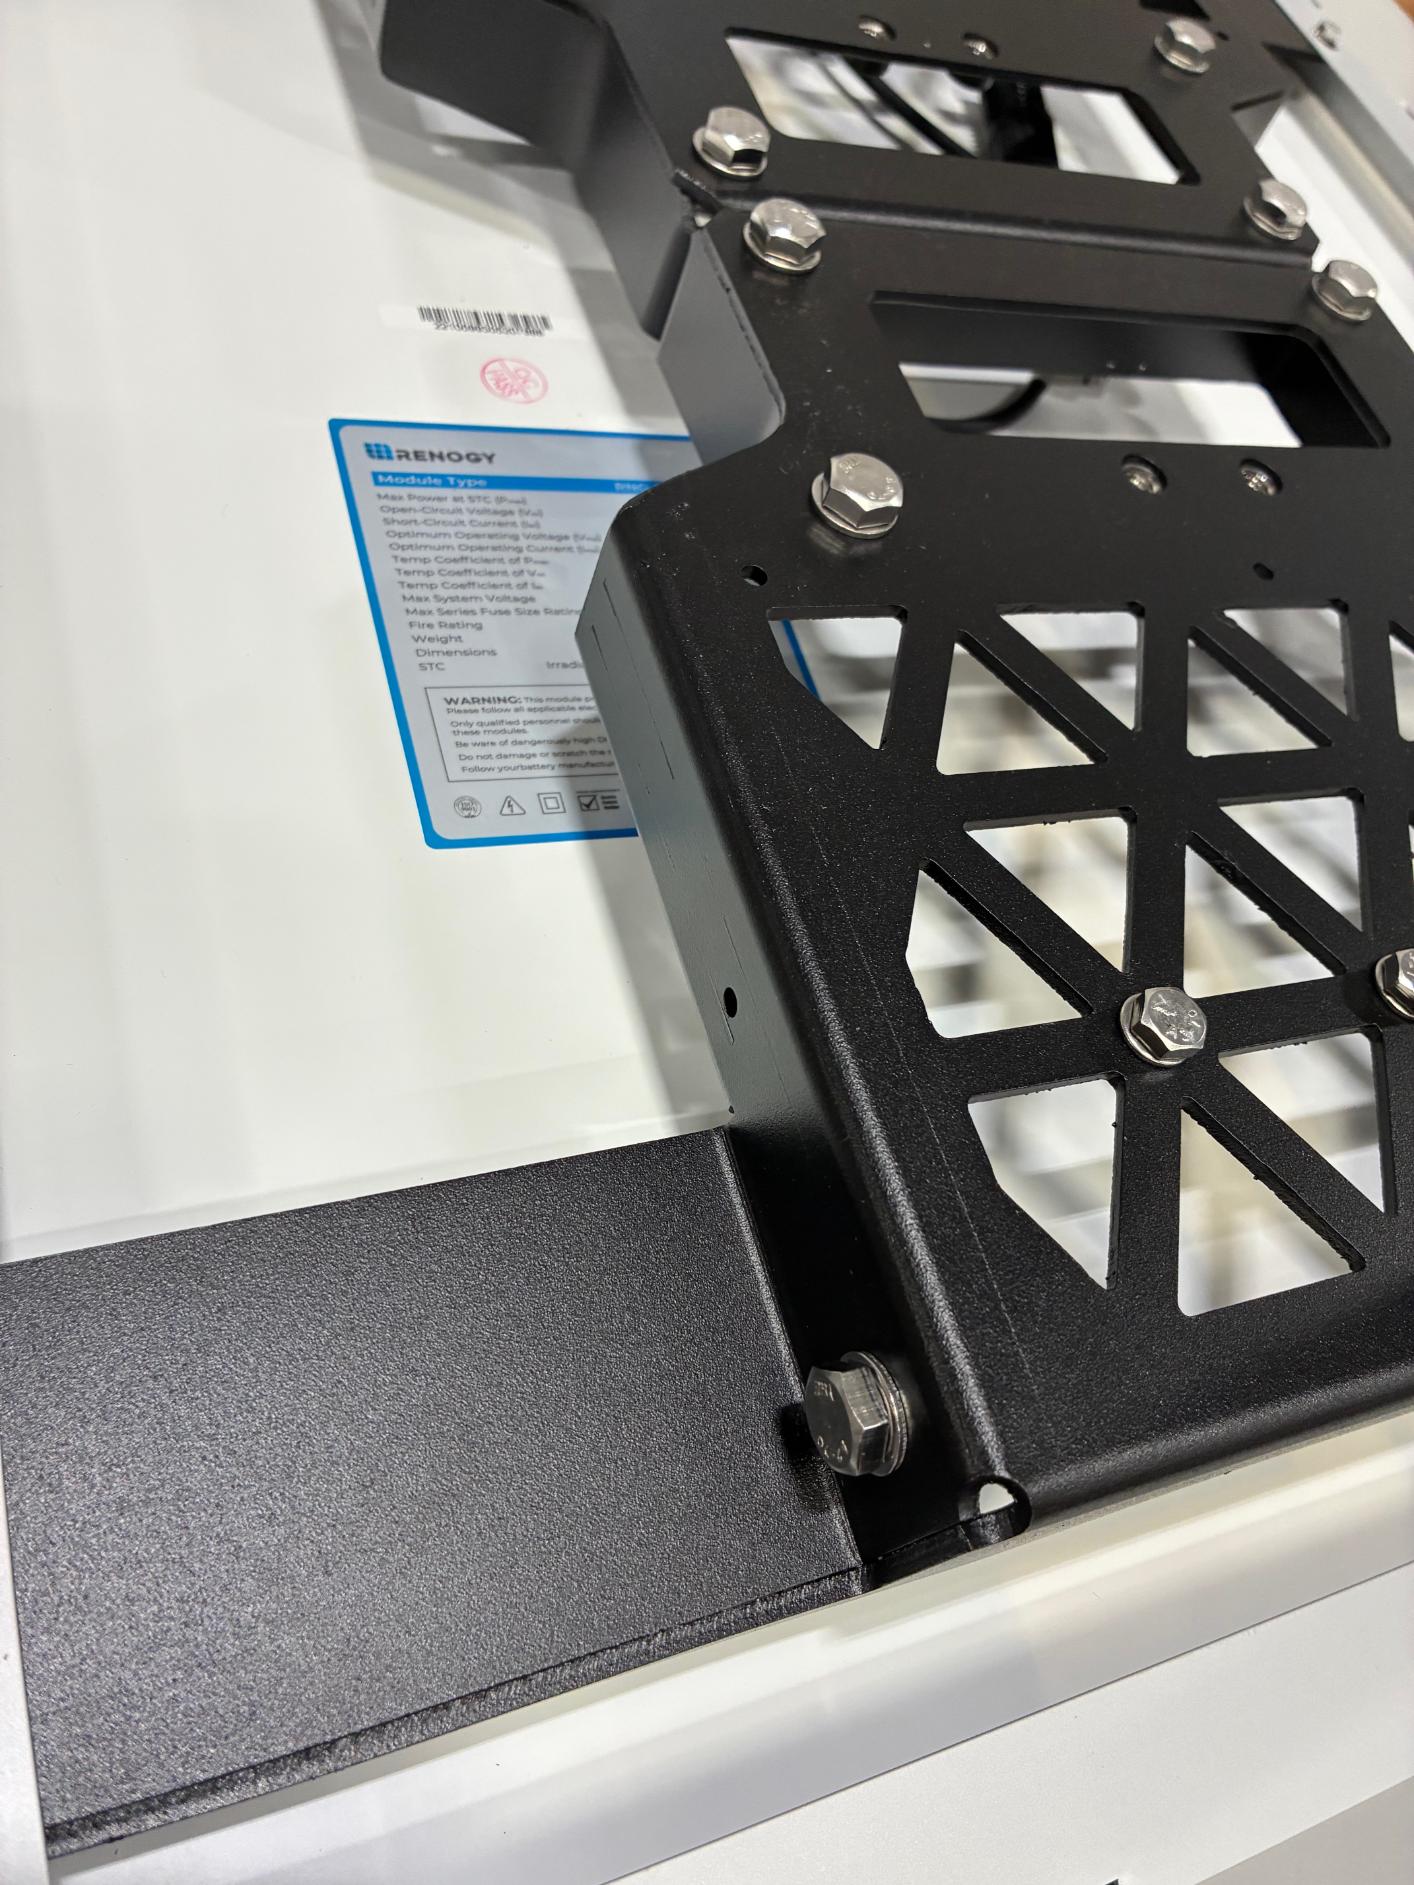
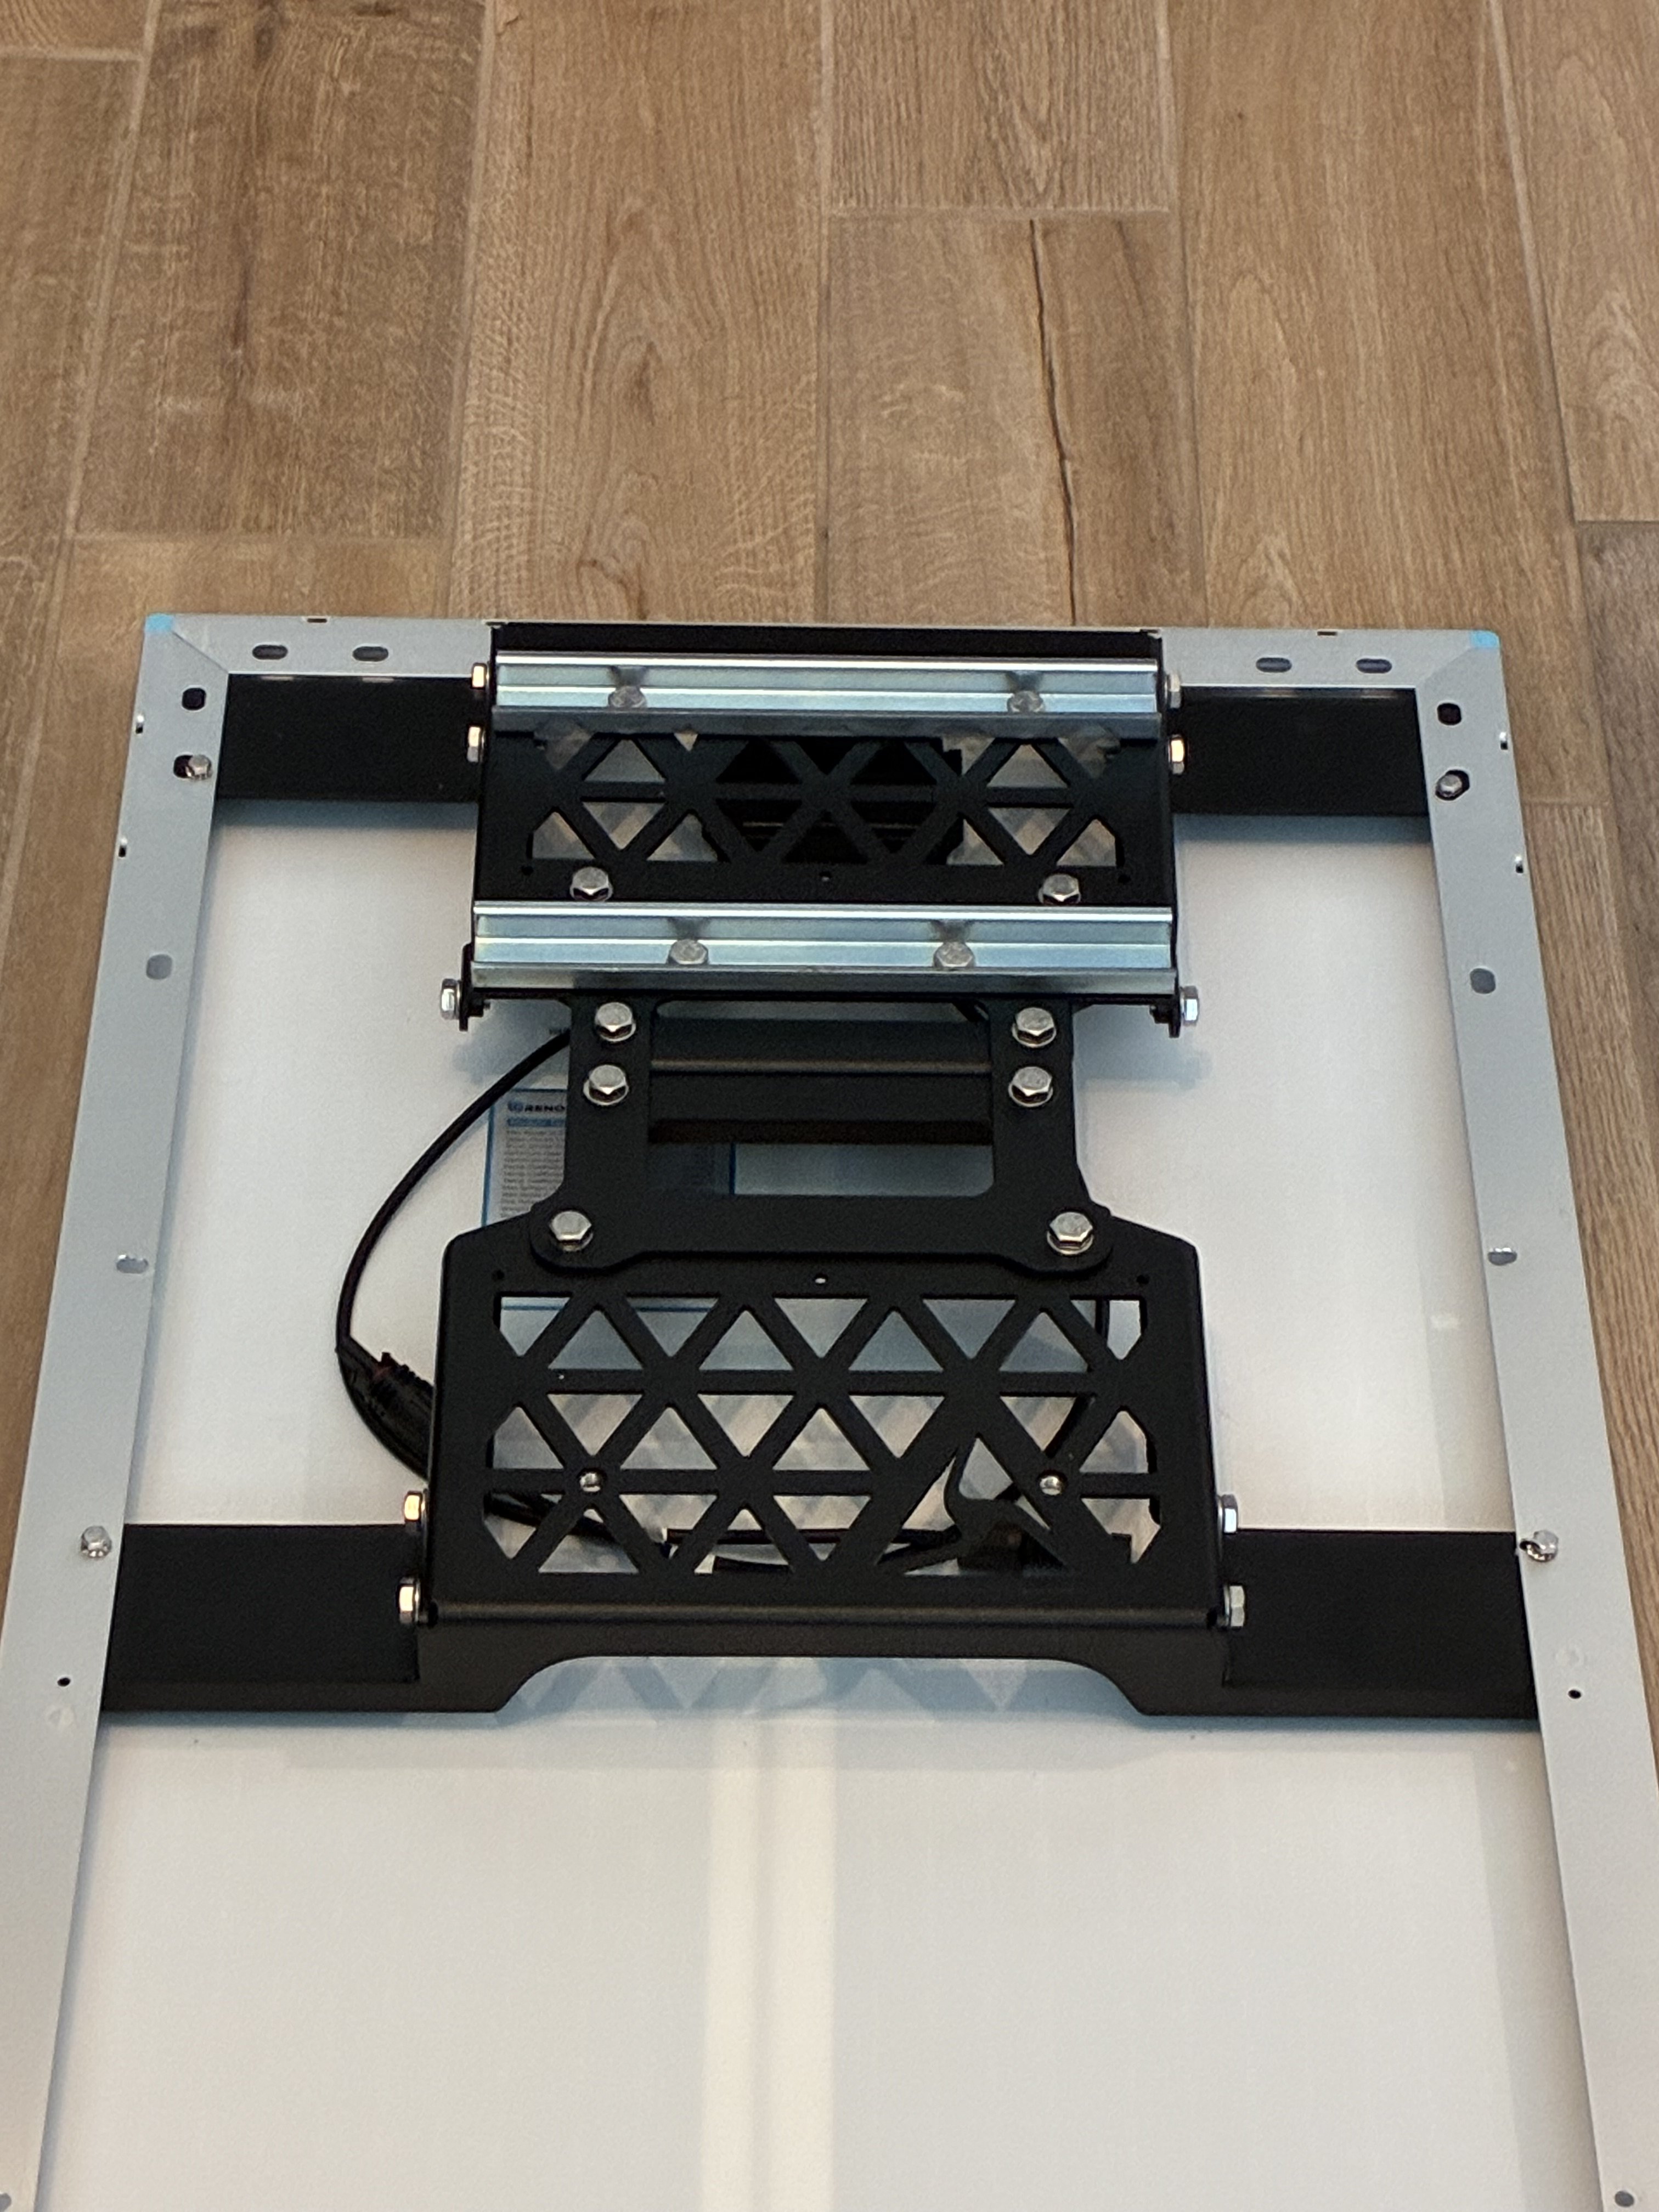
- Install the solar panel brackets under the solar panel frame. Slide each bracket in at an angle and use a rubber mallet as needed to align properly.
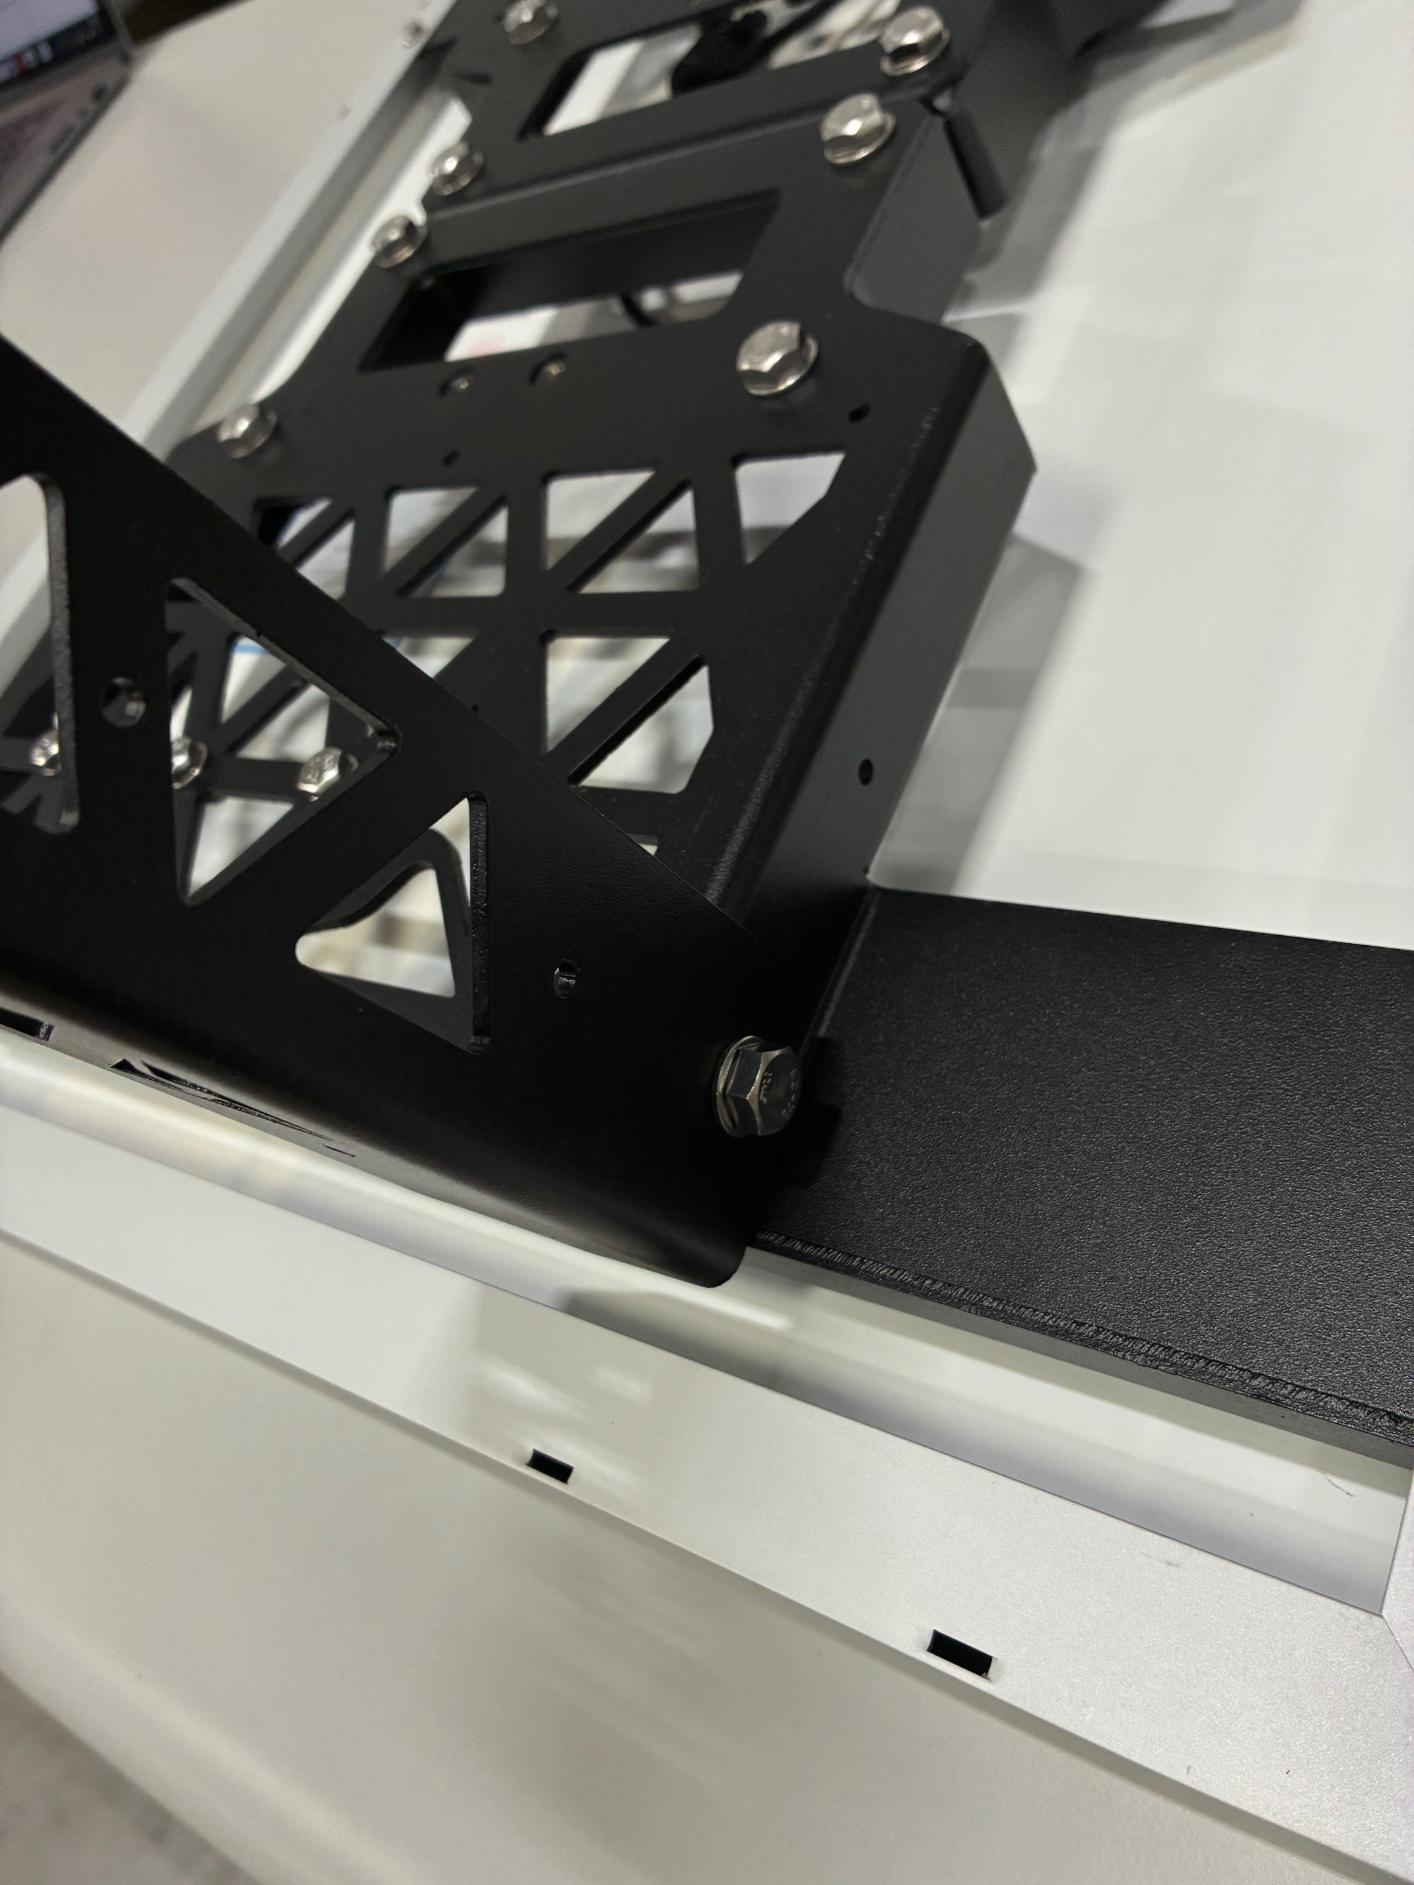
- Align the mounting holes from the solar panel brackets with the solar panel frame. Secure using the 4 8 mm hex bolts.
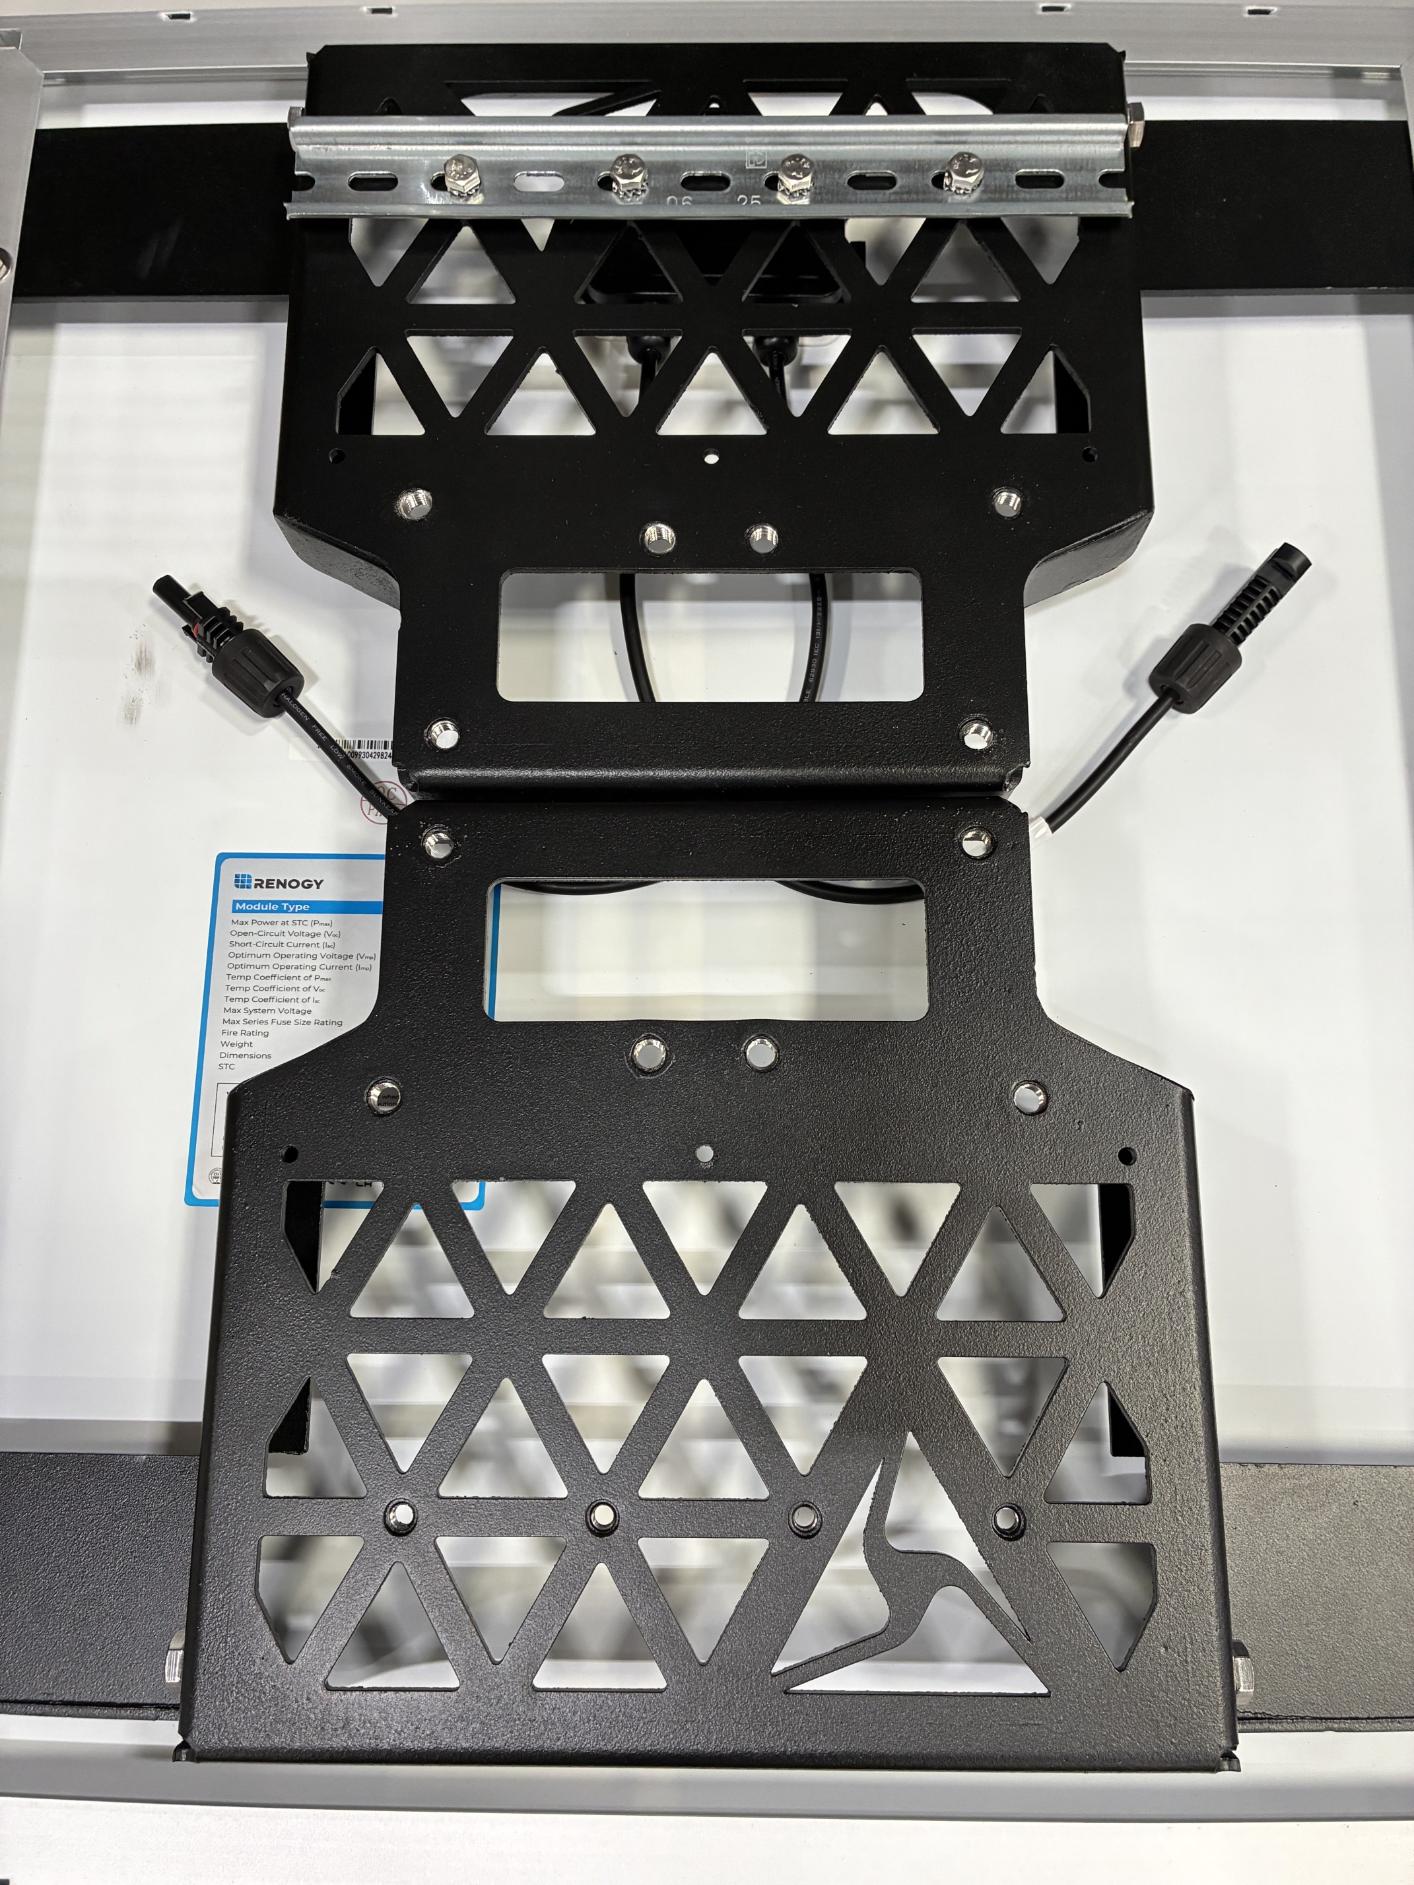
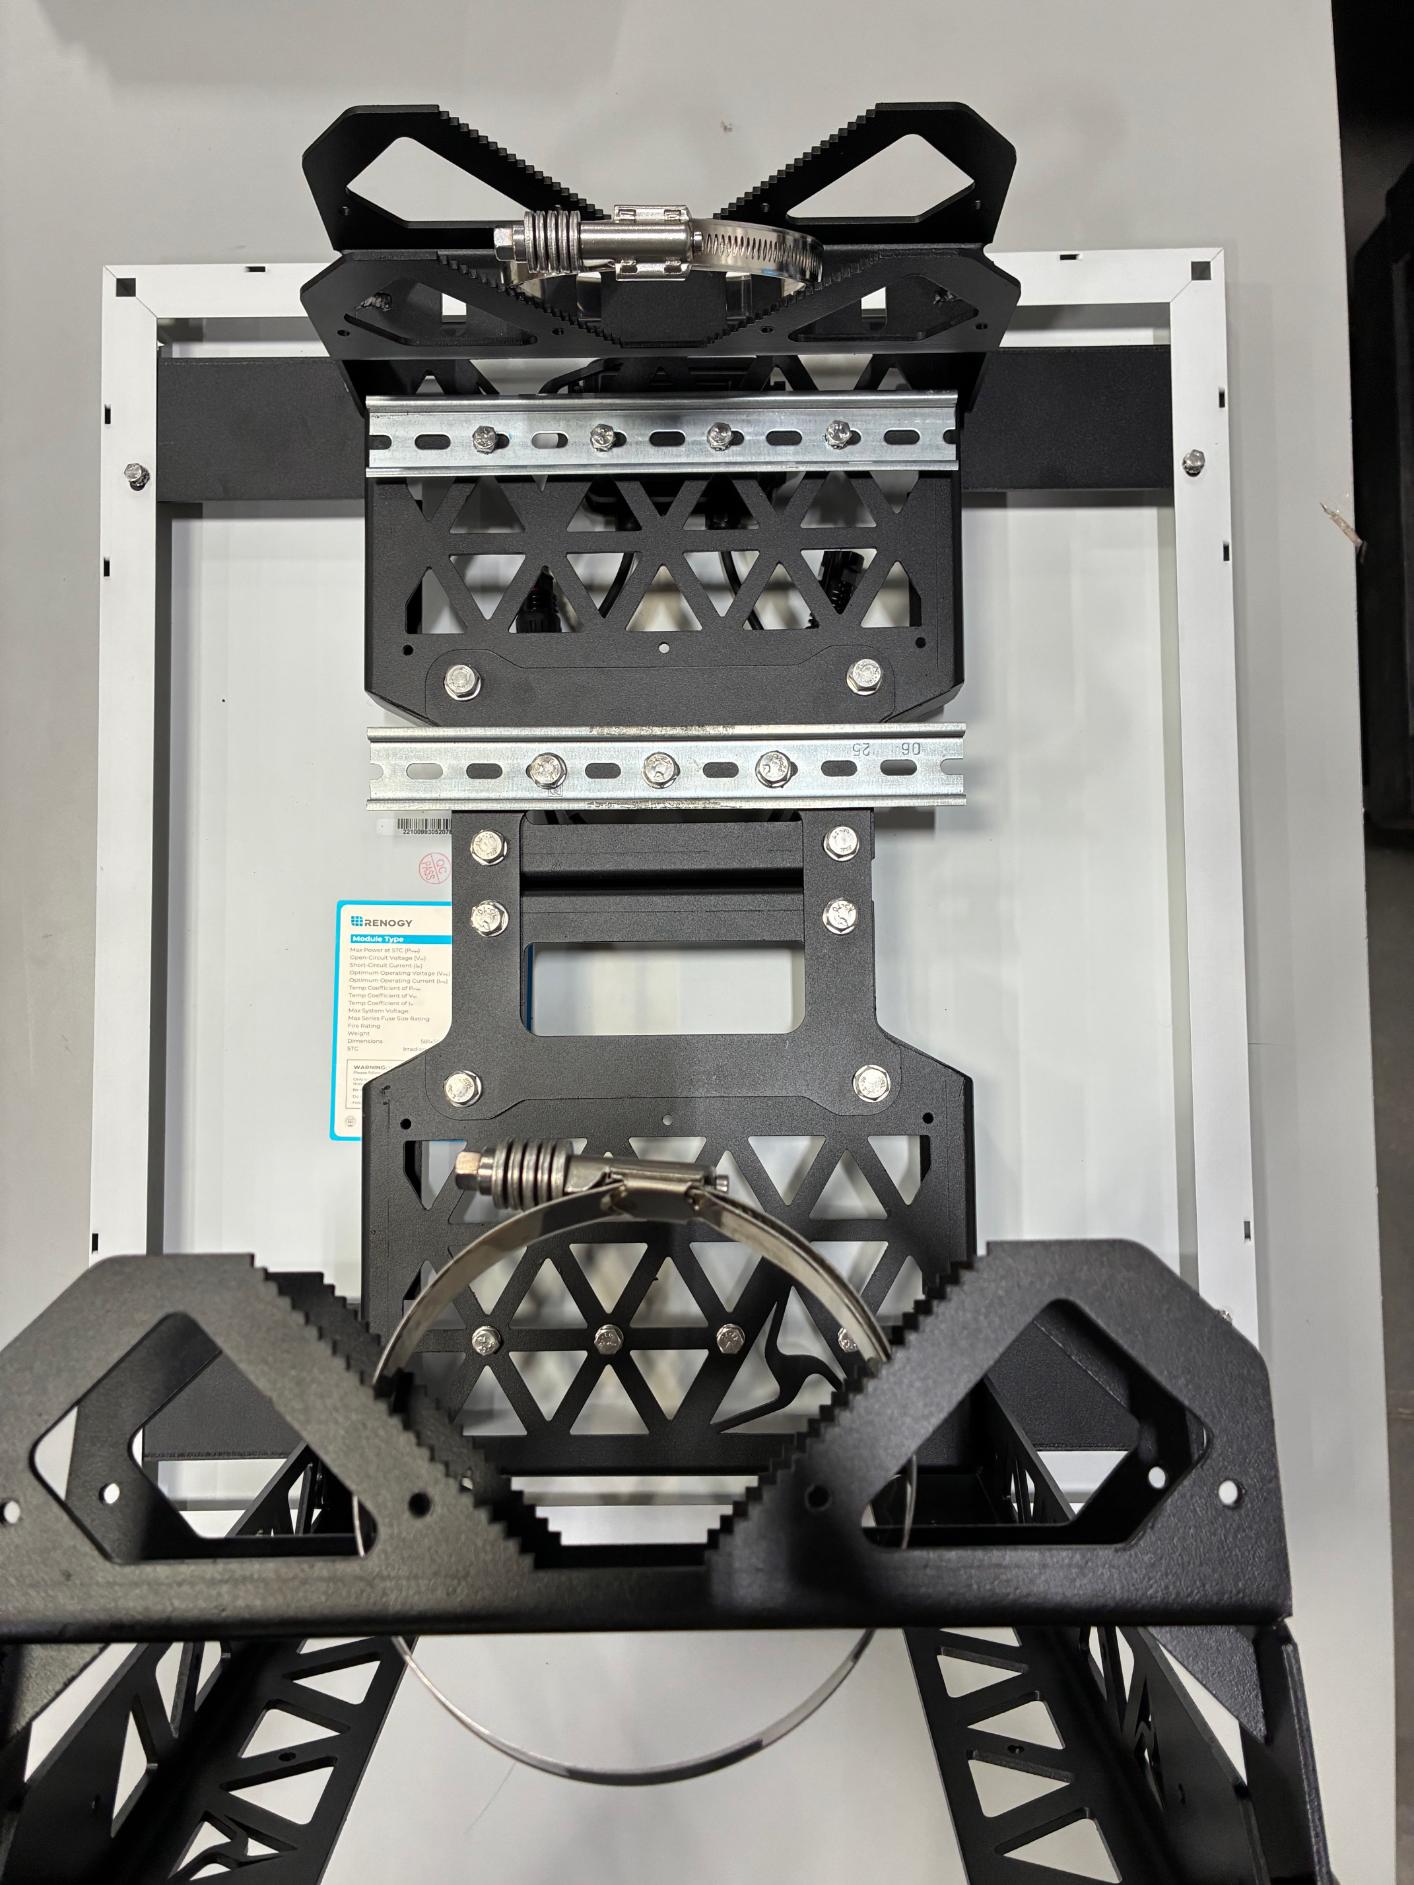
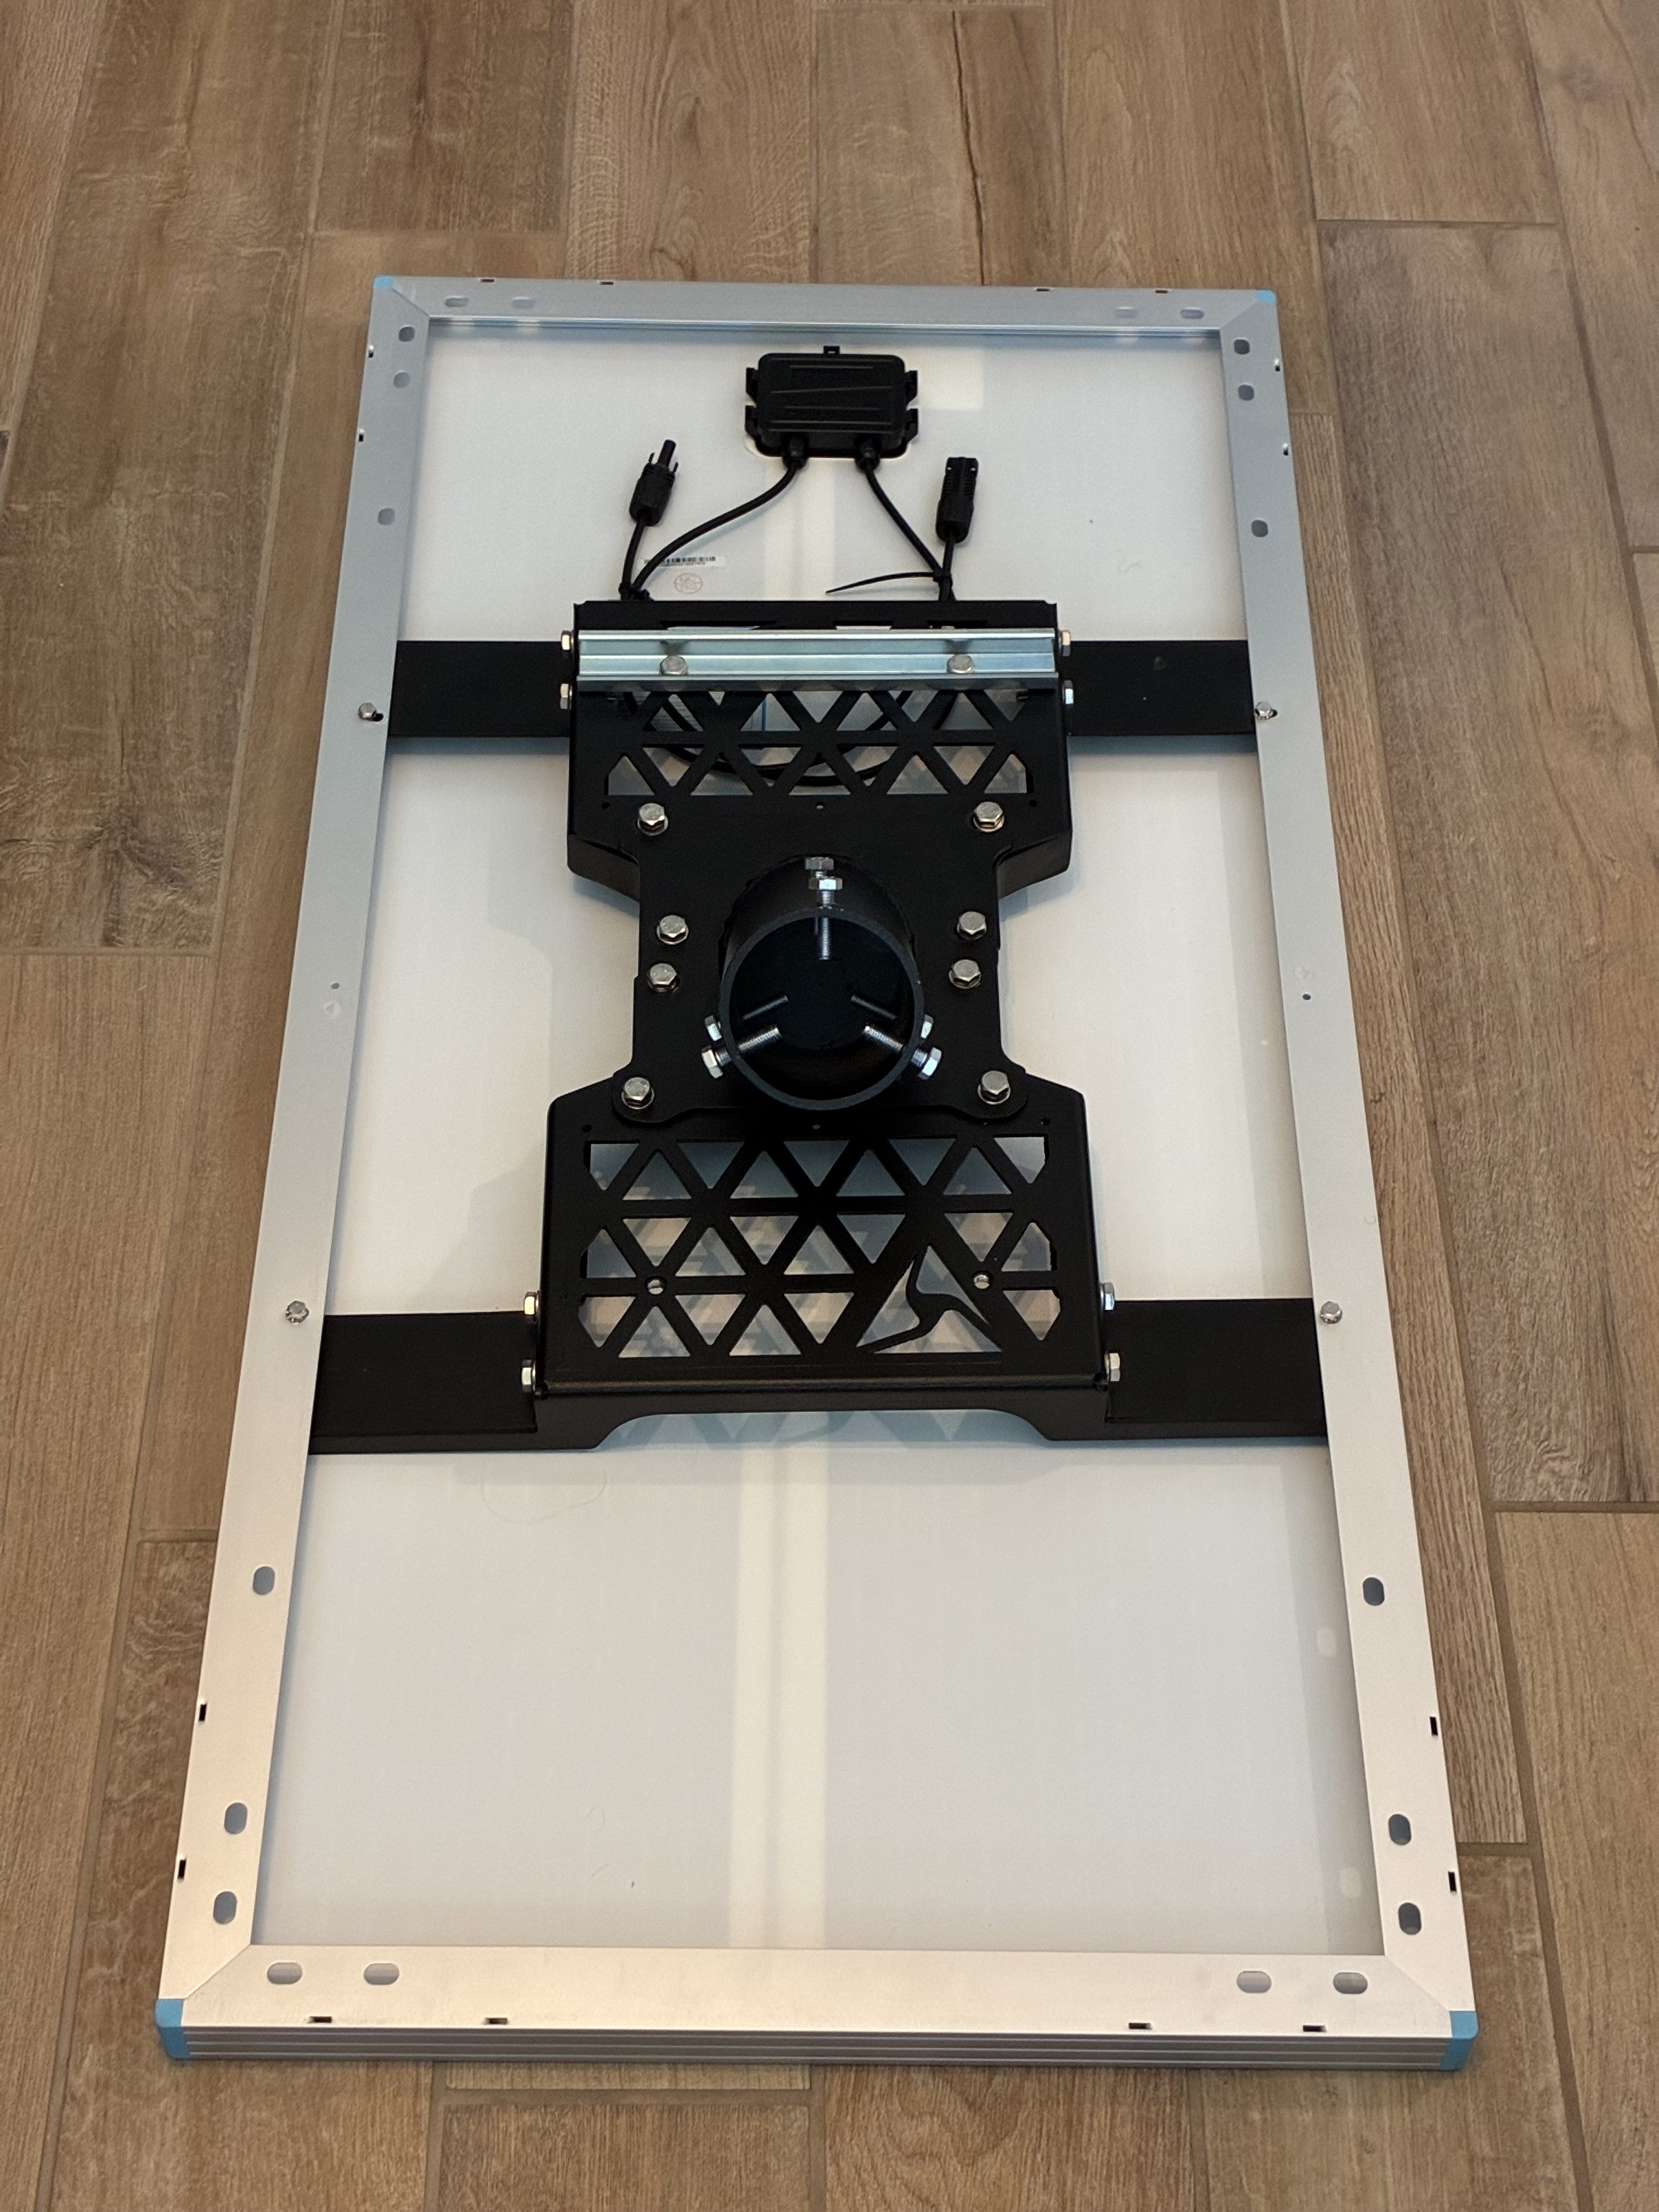
- Remove the 8 13 mm hex bolts from the solar panel brackets. If you are doing side-mount installation from the next section, return to step 2.
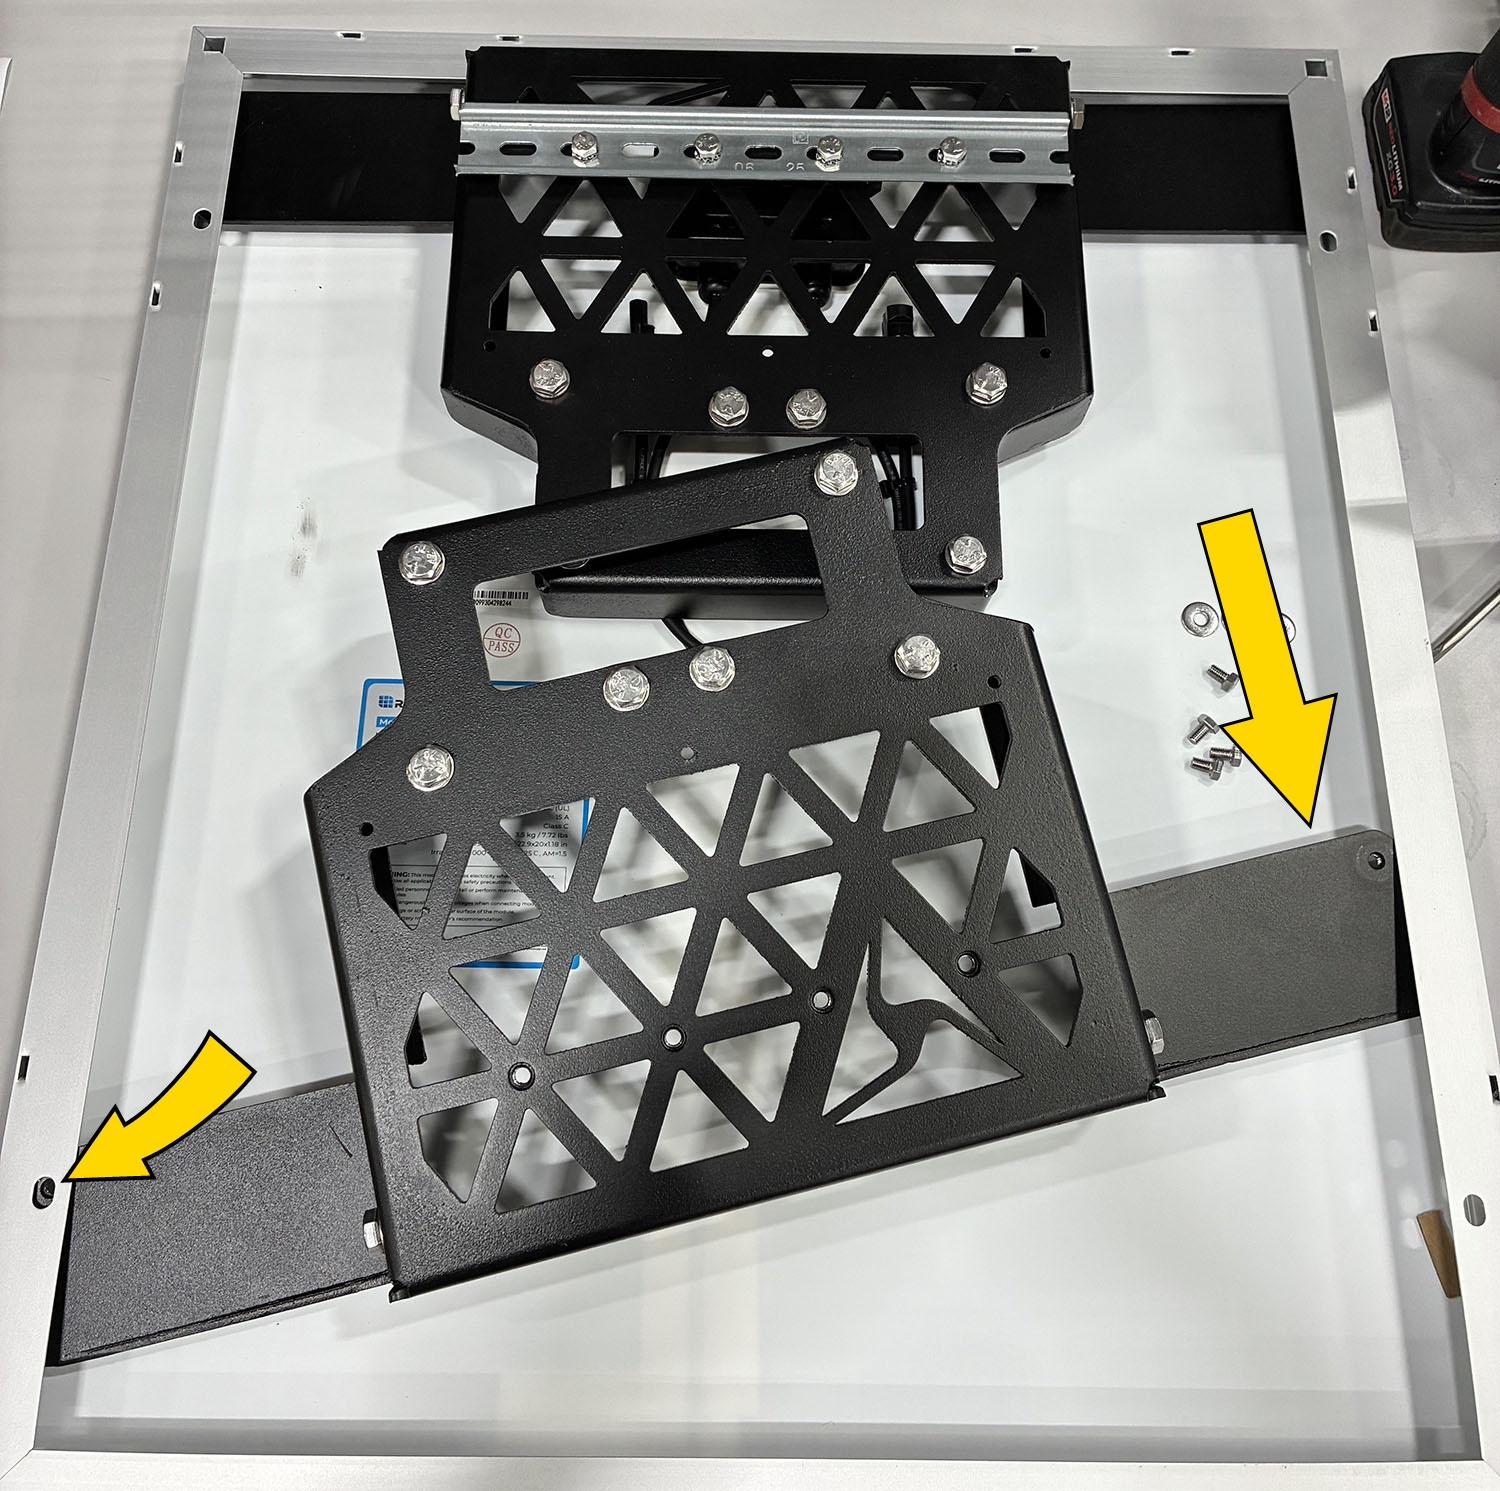
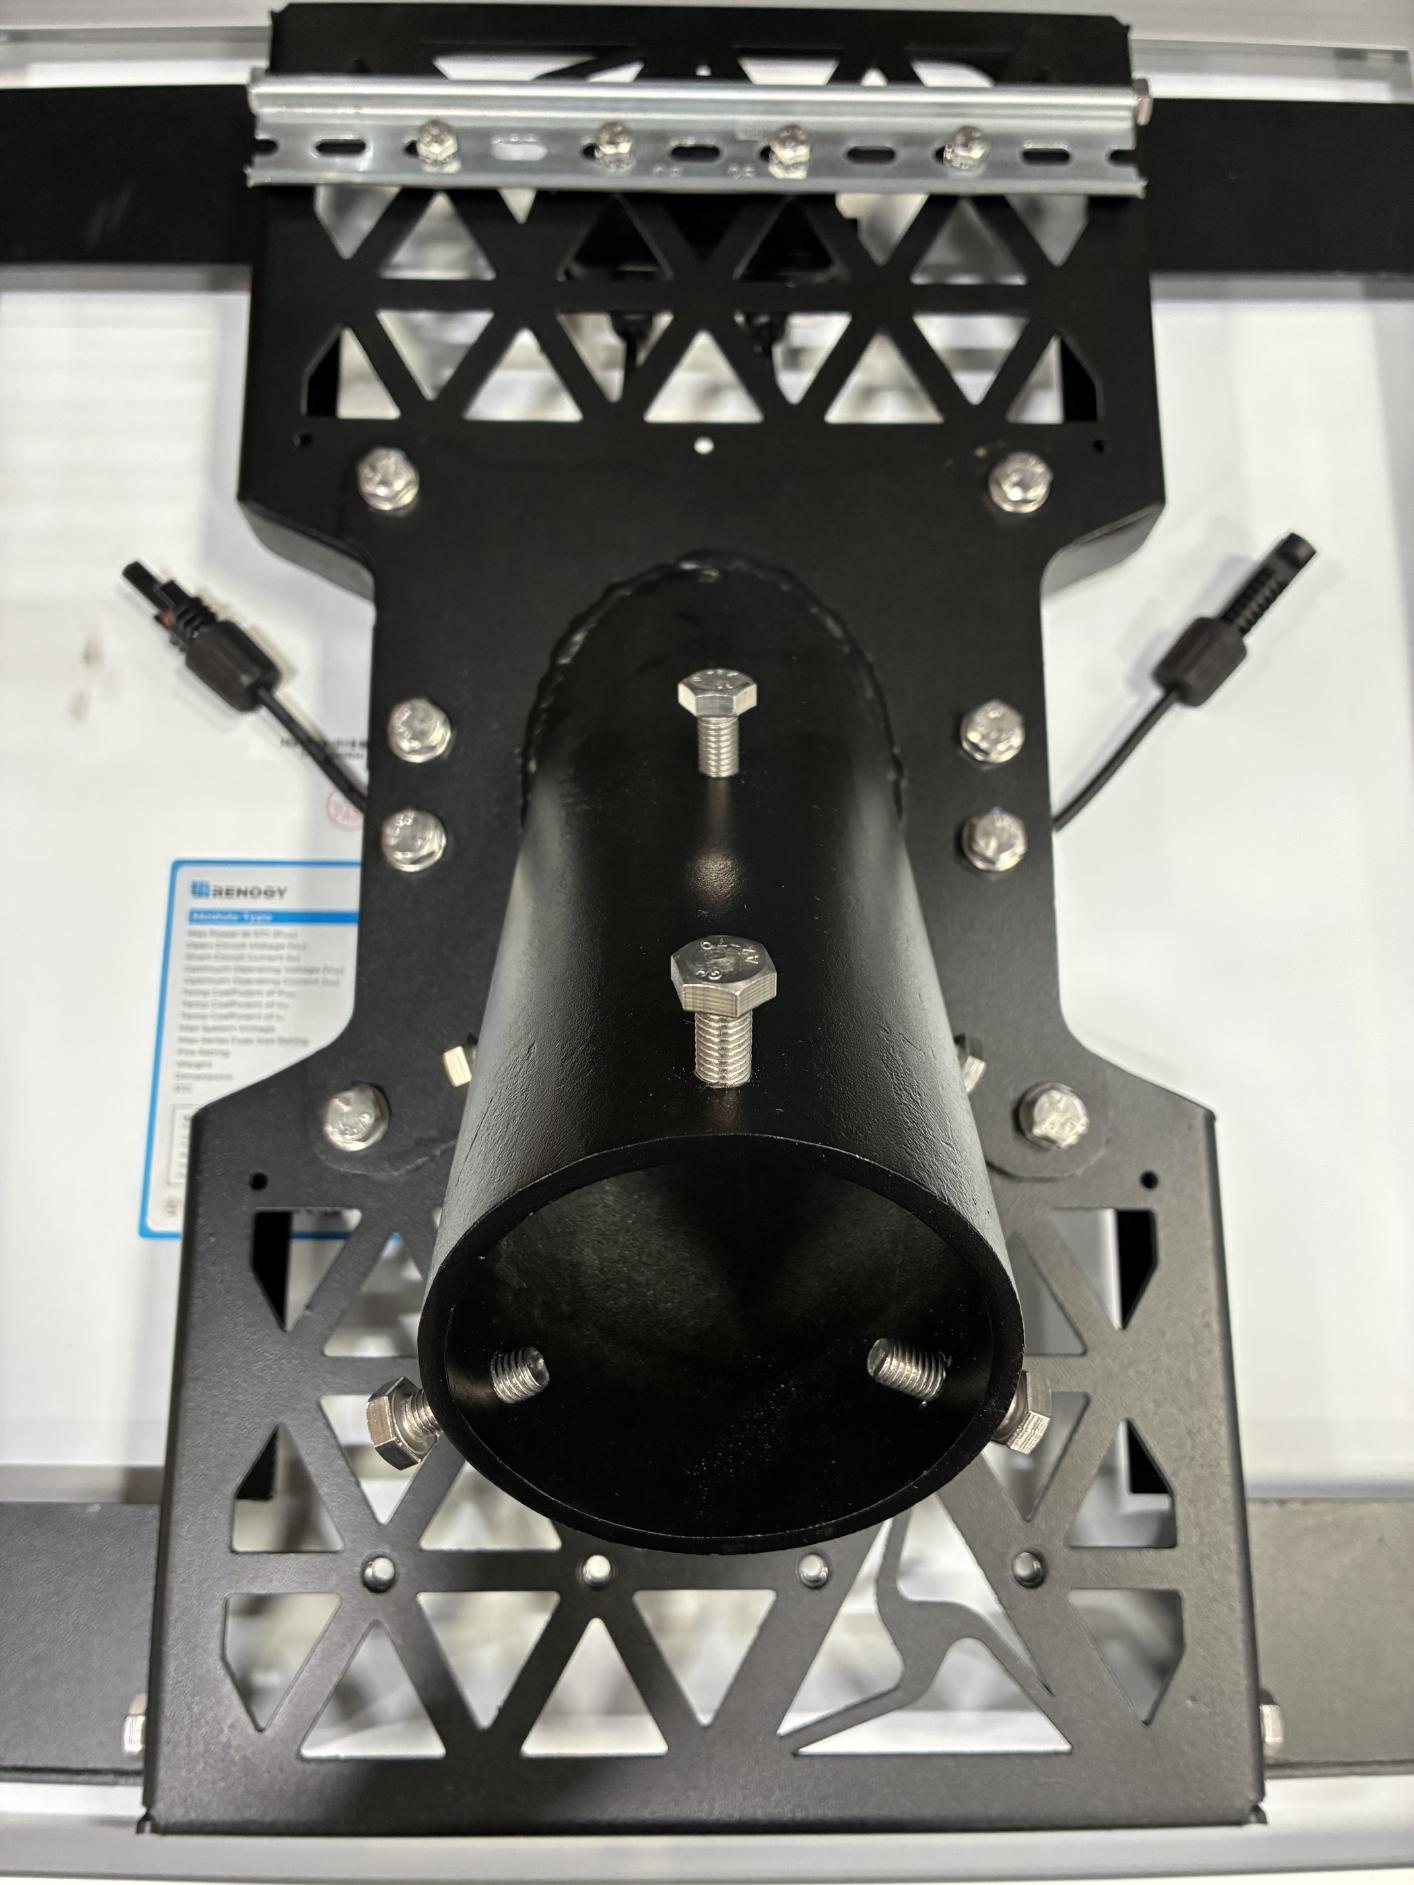
- Locate the pole end cap.

- Place the end cap on top of the solar panel brackets. Align the mounting holes on the end cap with the holes on the solar panel brackets.
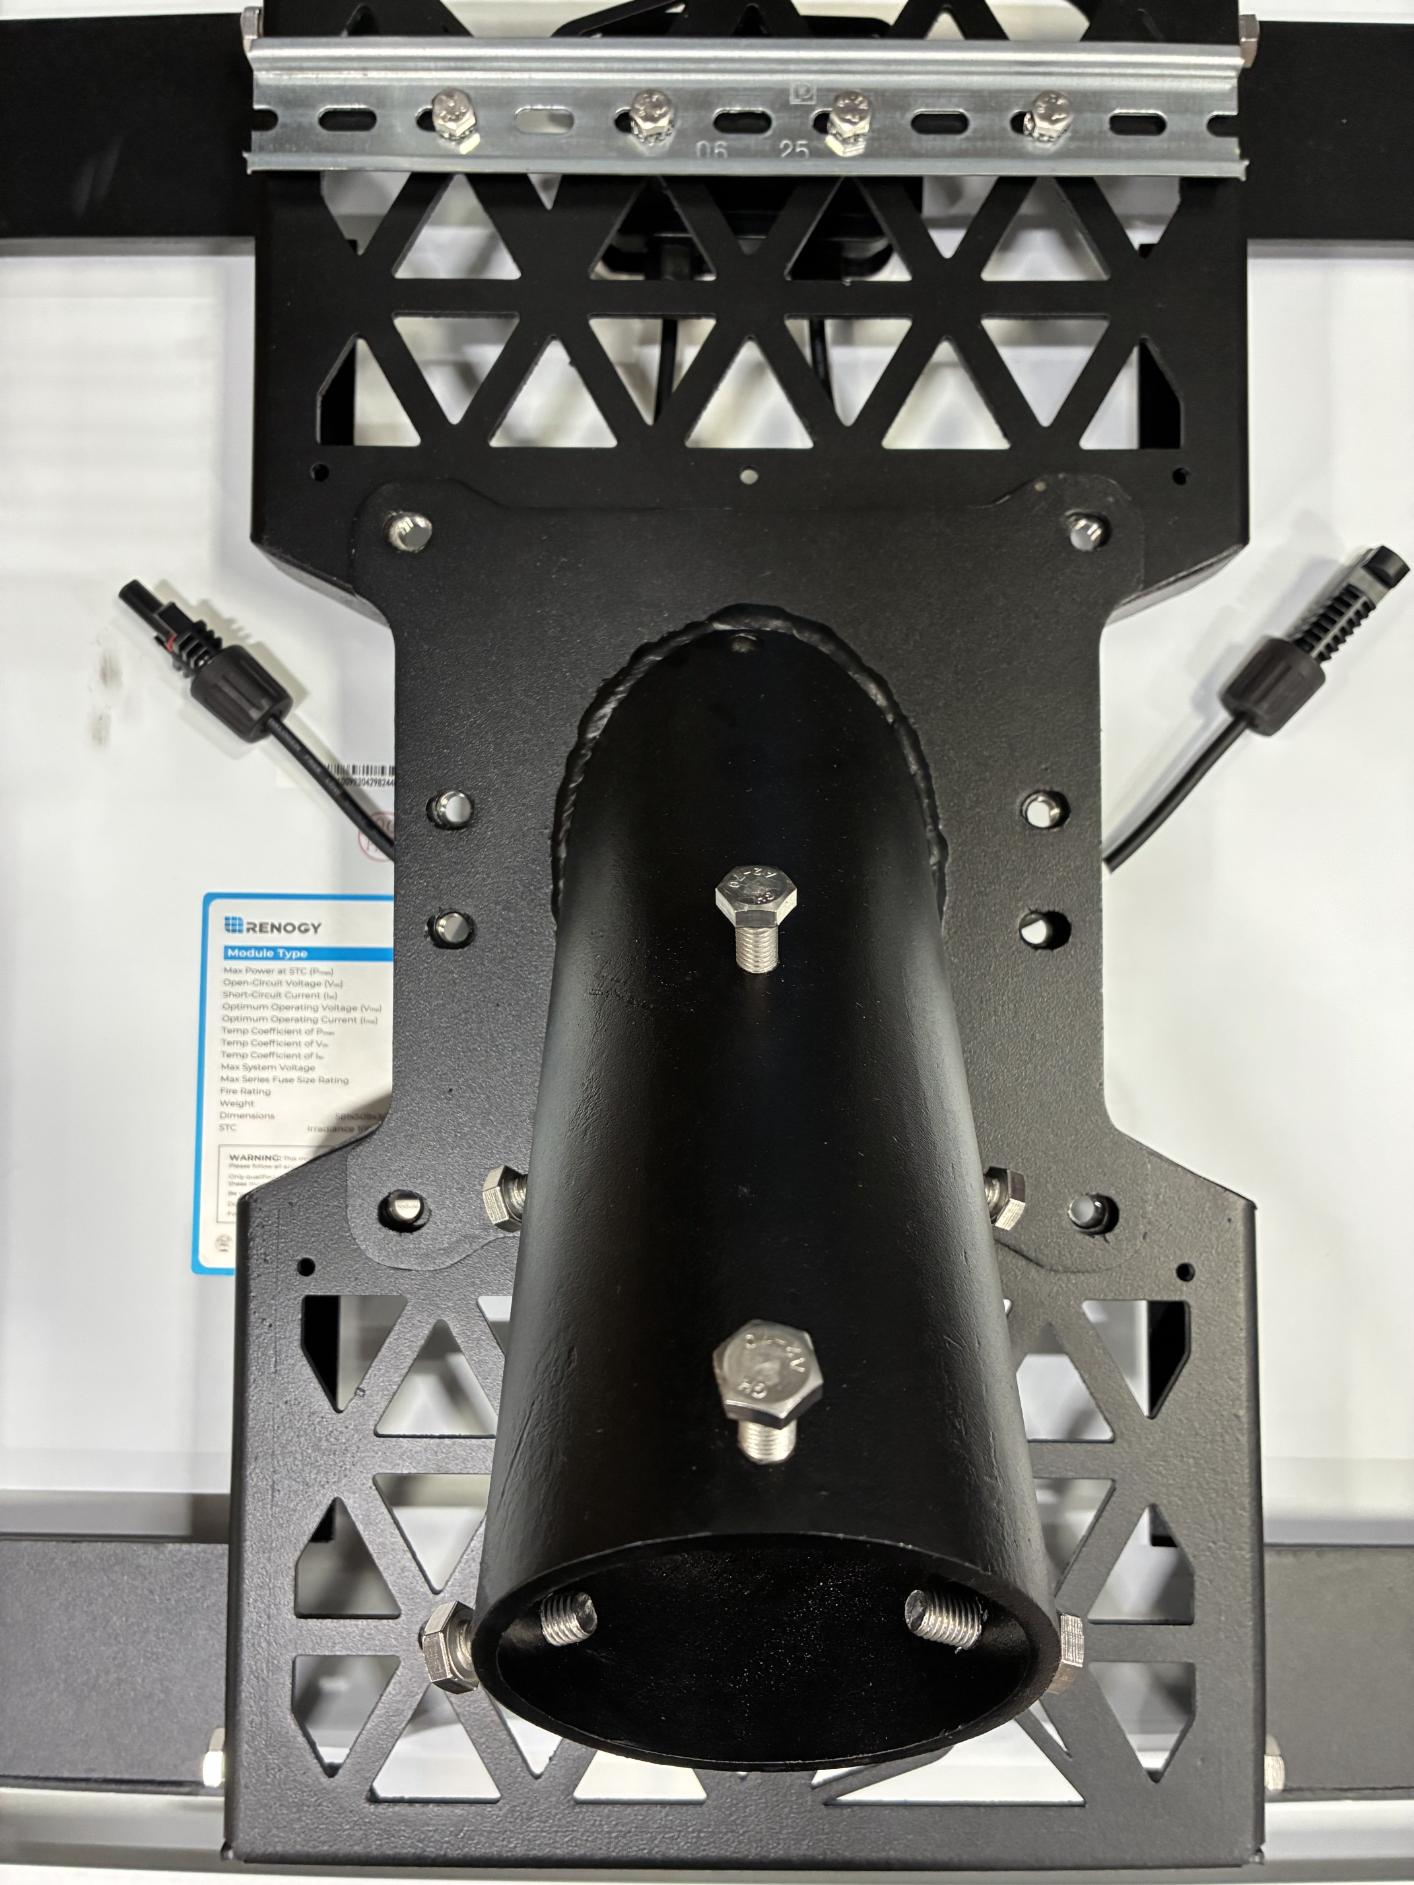
- Secure the end cap to the solar panel brackets using 8 13 mm hex bolts.
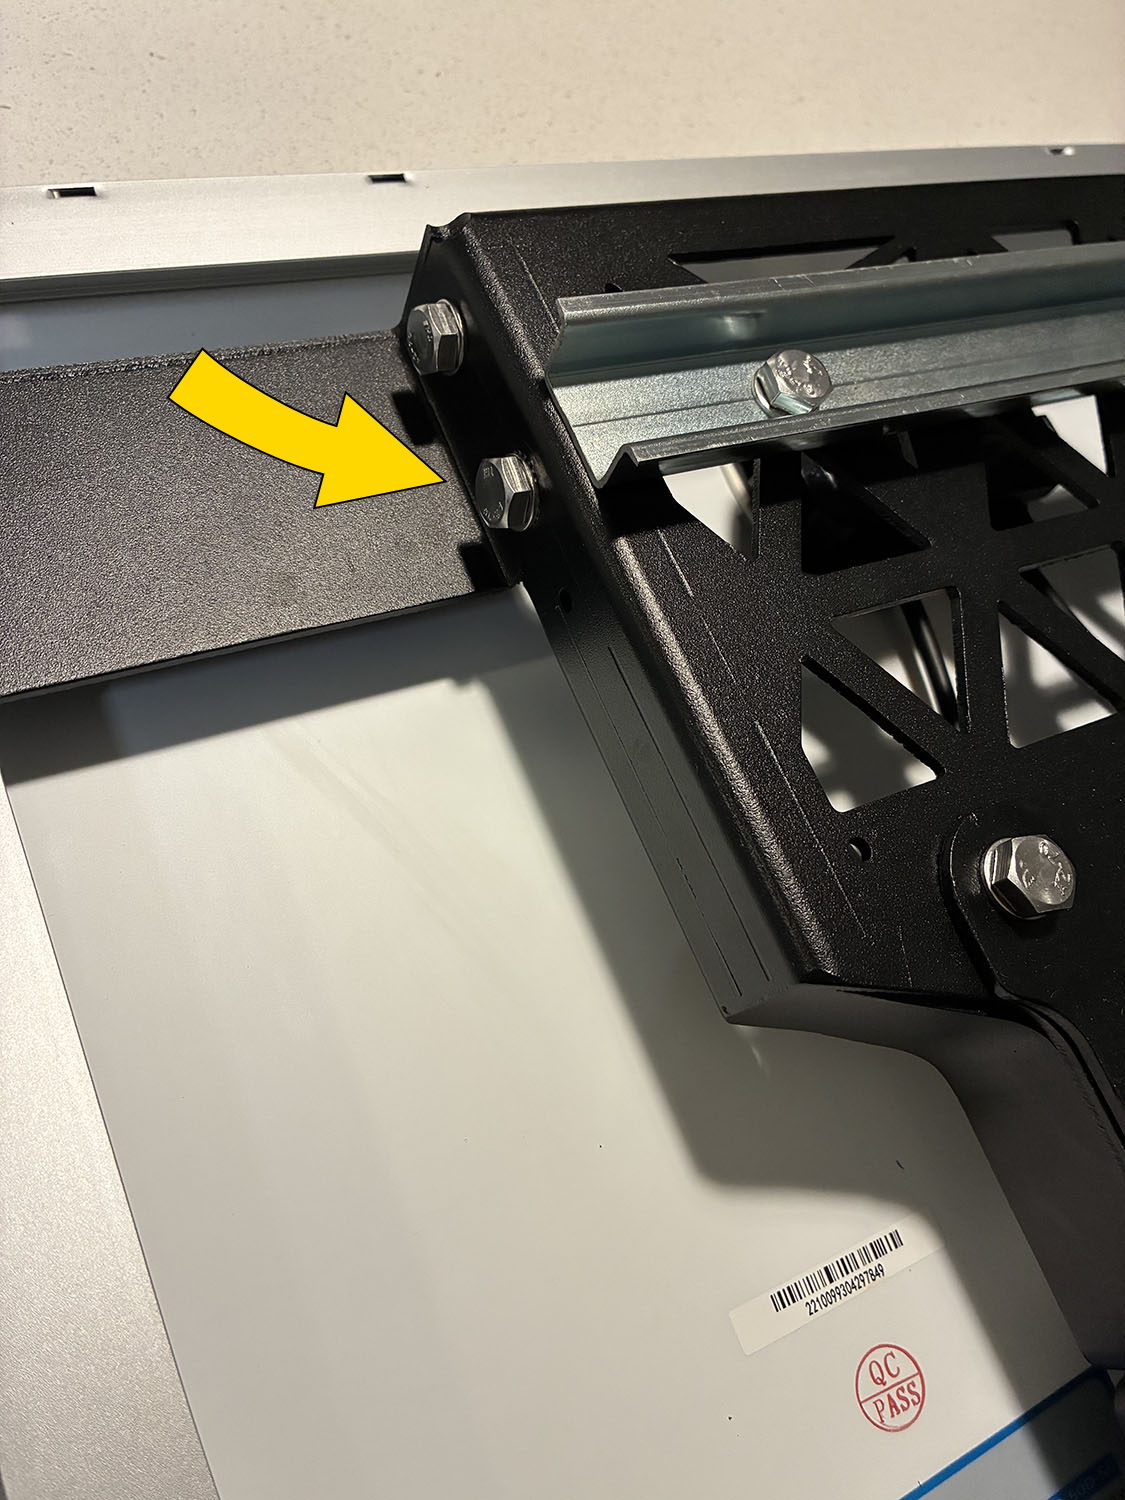
-
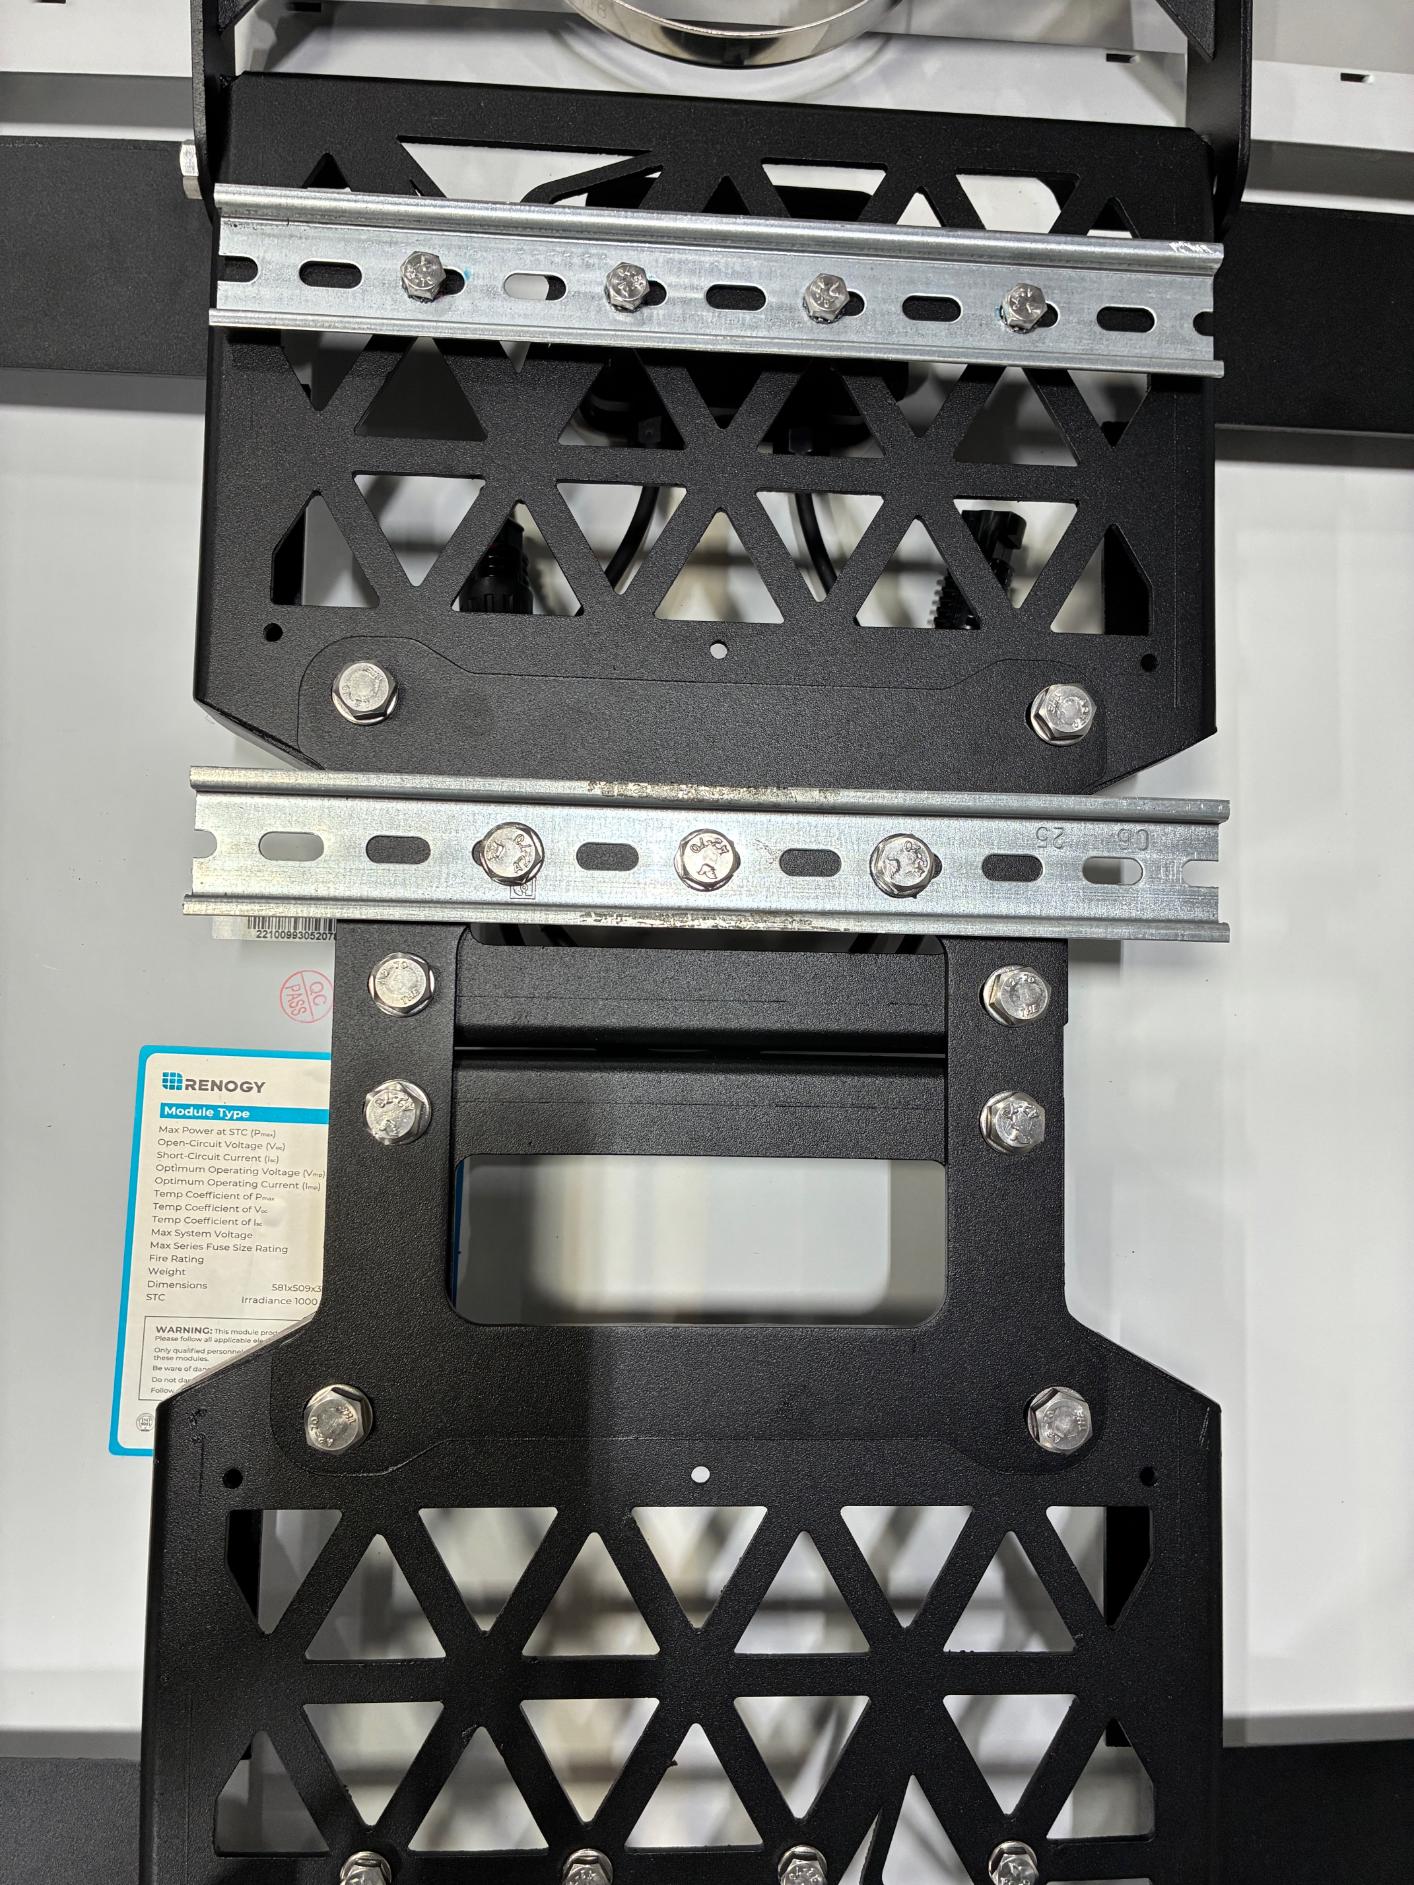
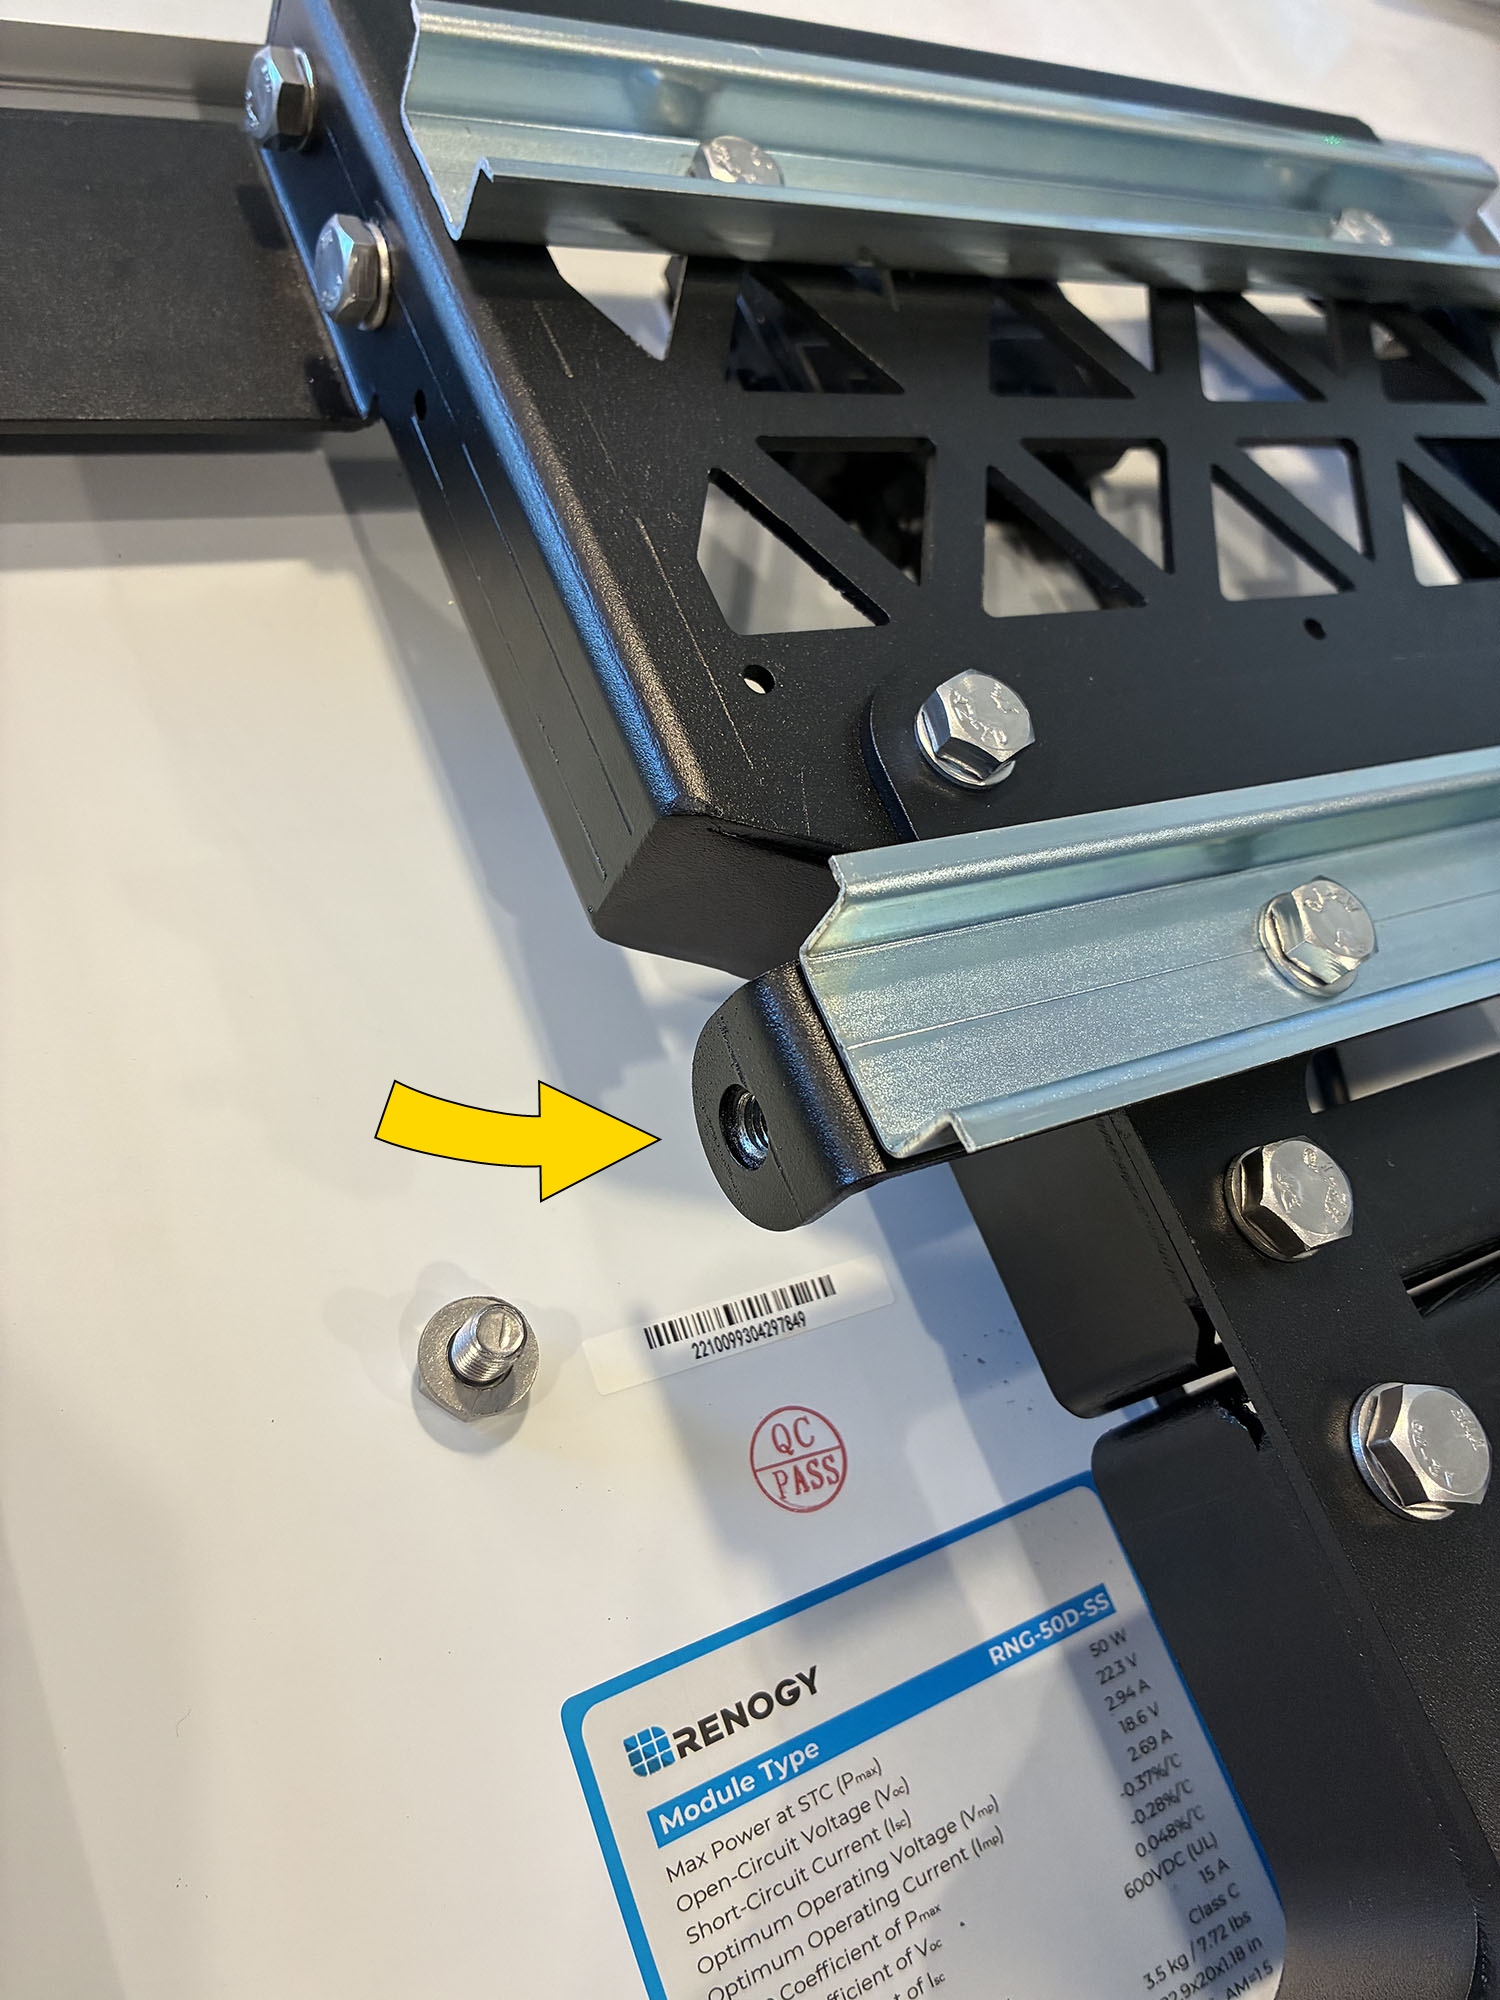
Remove the 2 13 mm hex bolts inline with the DIN rail (left bolt shown here; other bolt is on the opposite end).
-
Attach and snap the assembled battery enclosure onto the center DIN rail. Start with the top side of the enclosure, hooking it onto the rail, then press down on the front side to snap into place. Ensure both sides of the enclosure are securely attached to the DIN rail and that the enclosure attachment bracket aligns with the previously removed hex bolt holes.
-
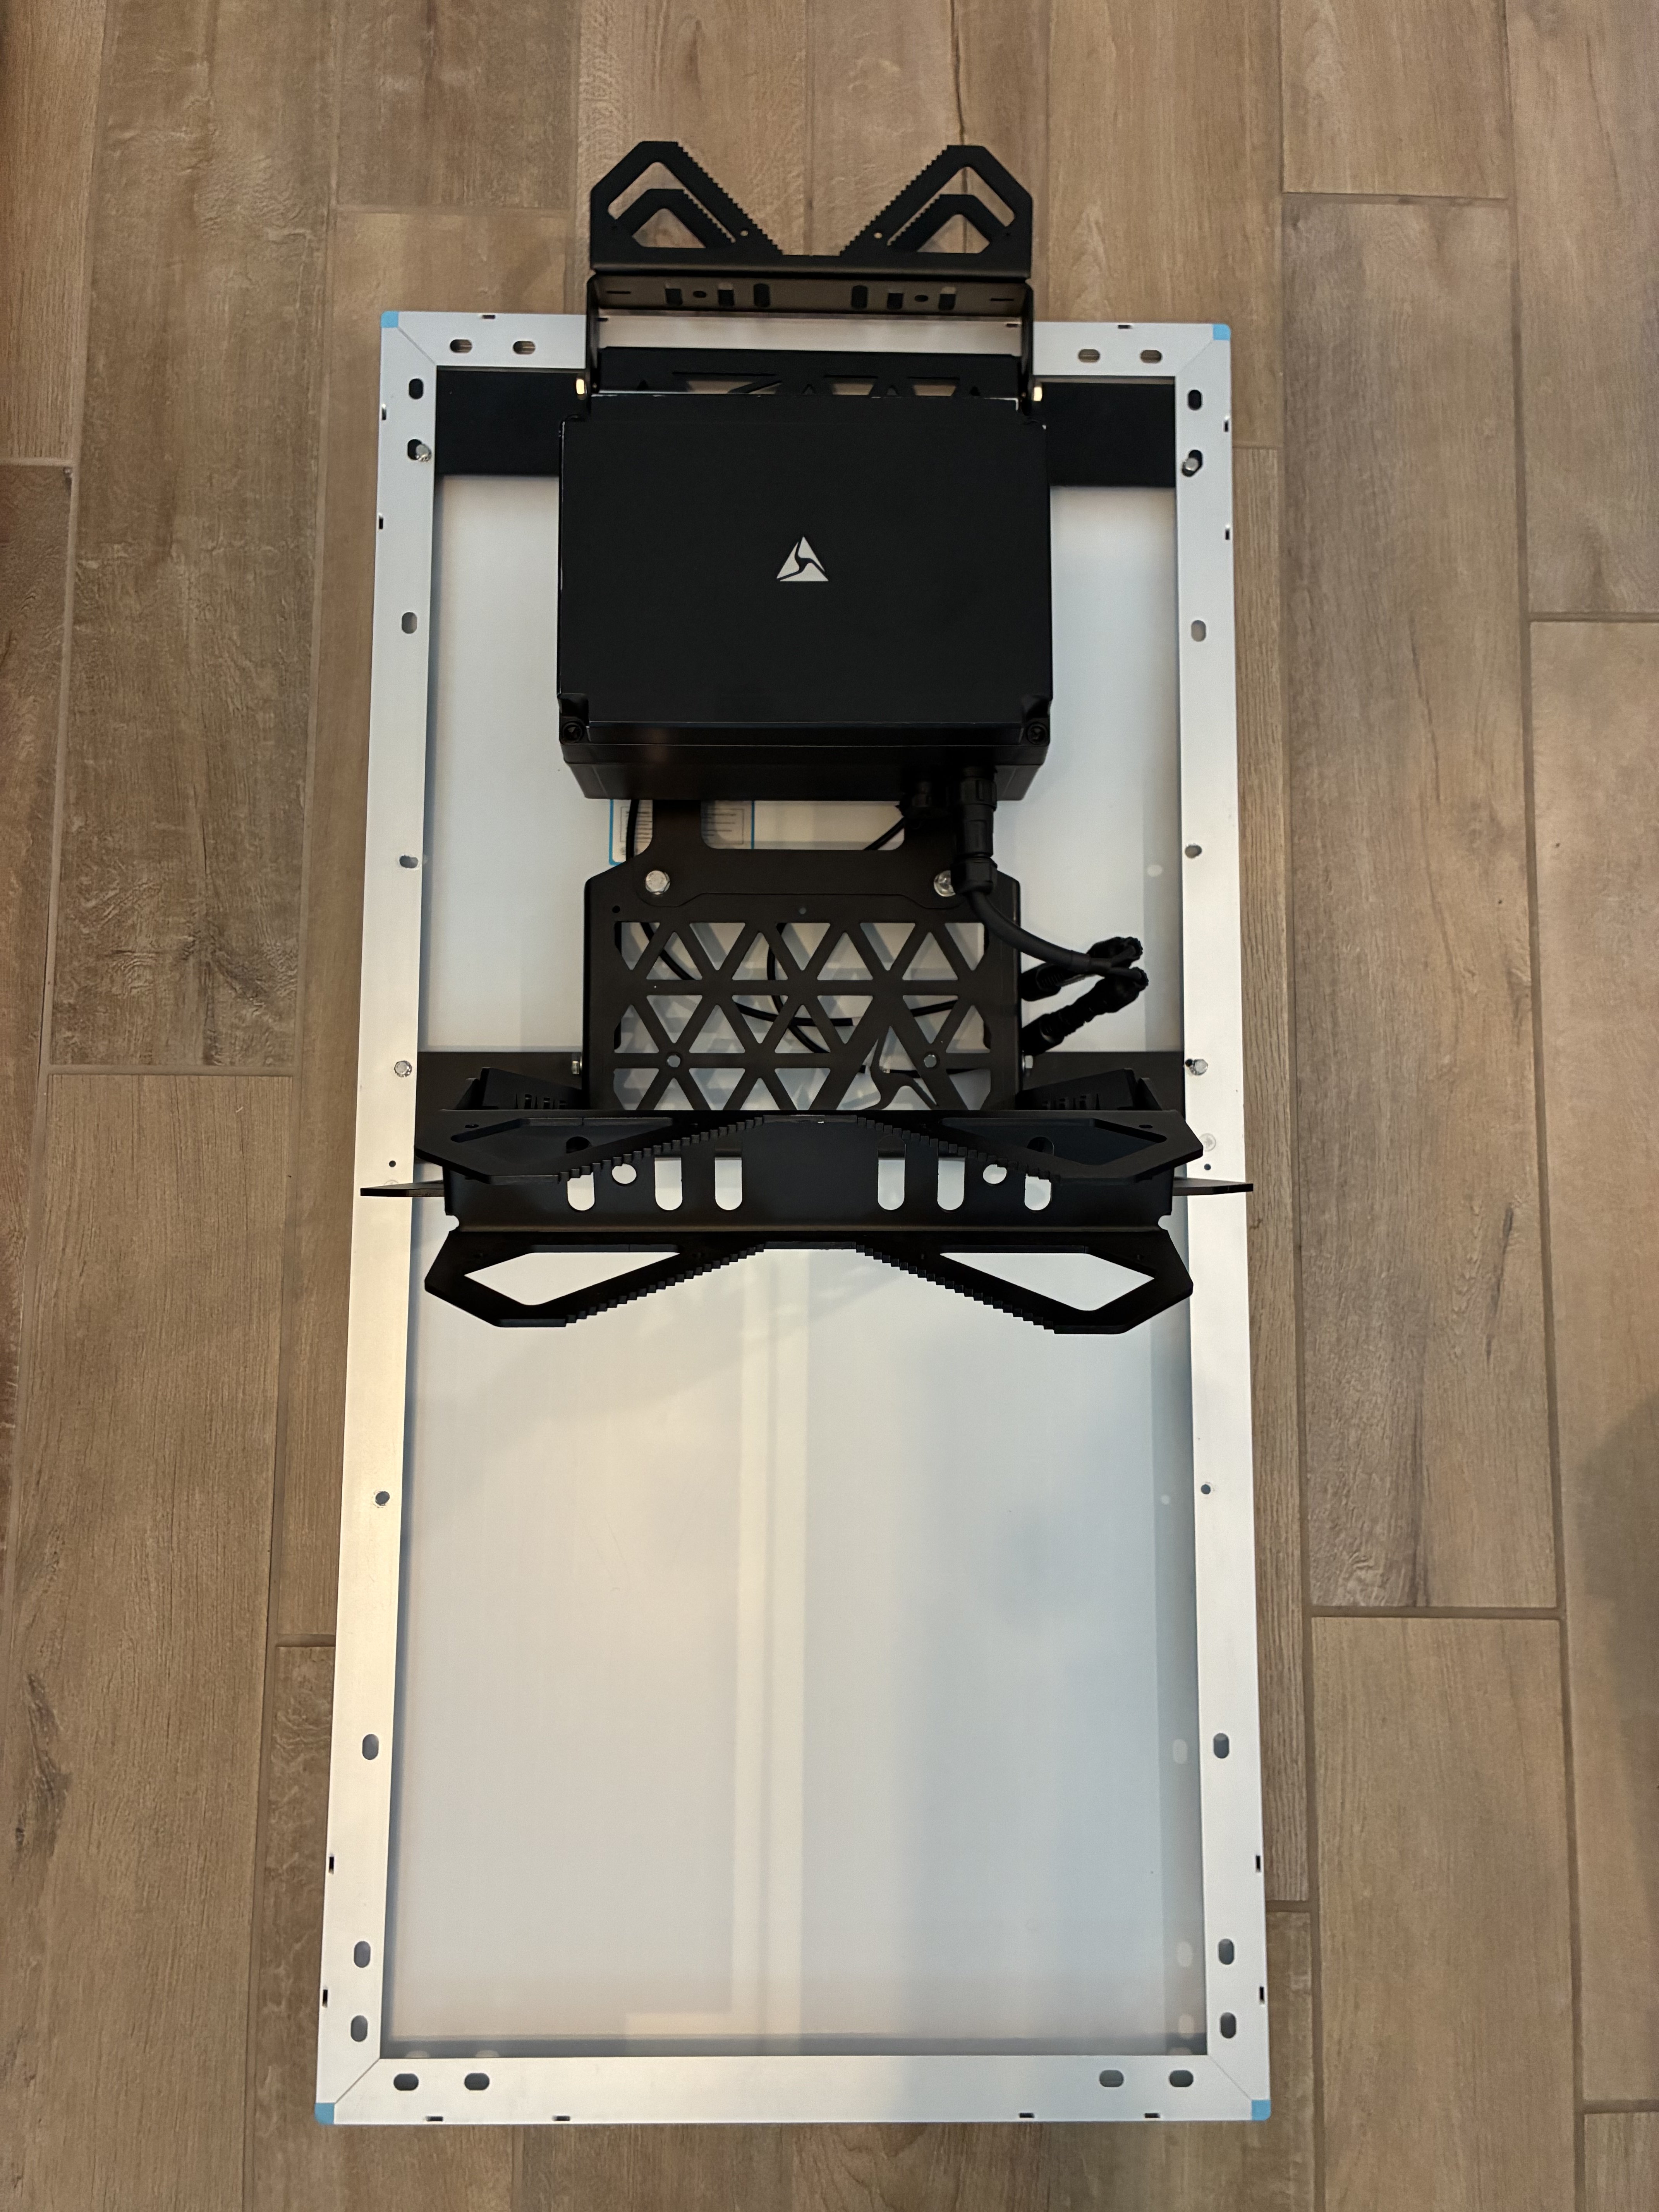
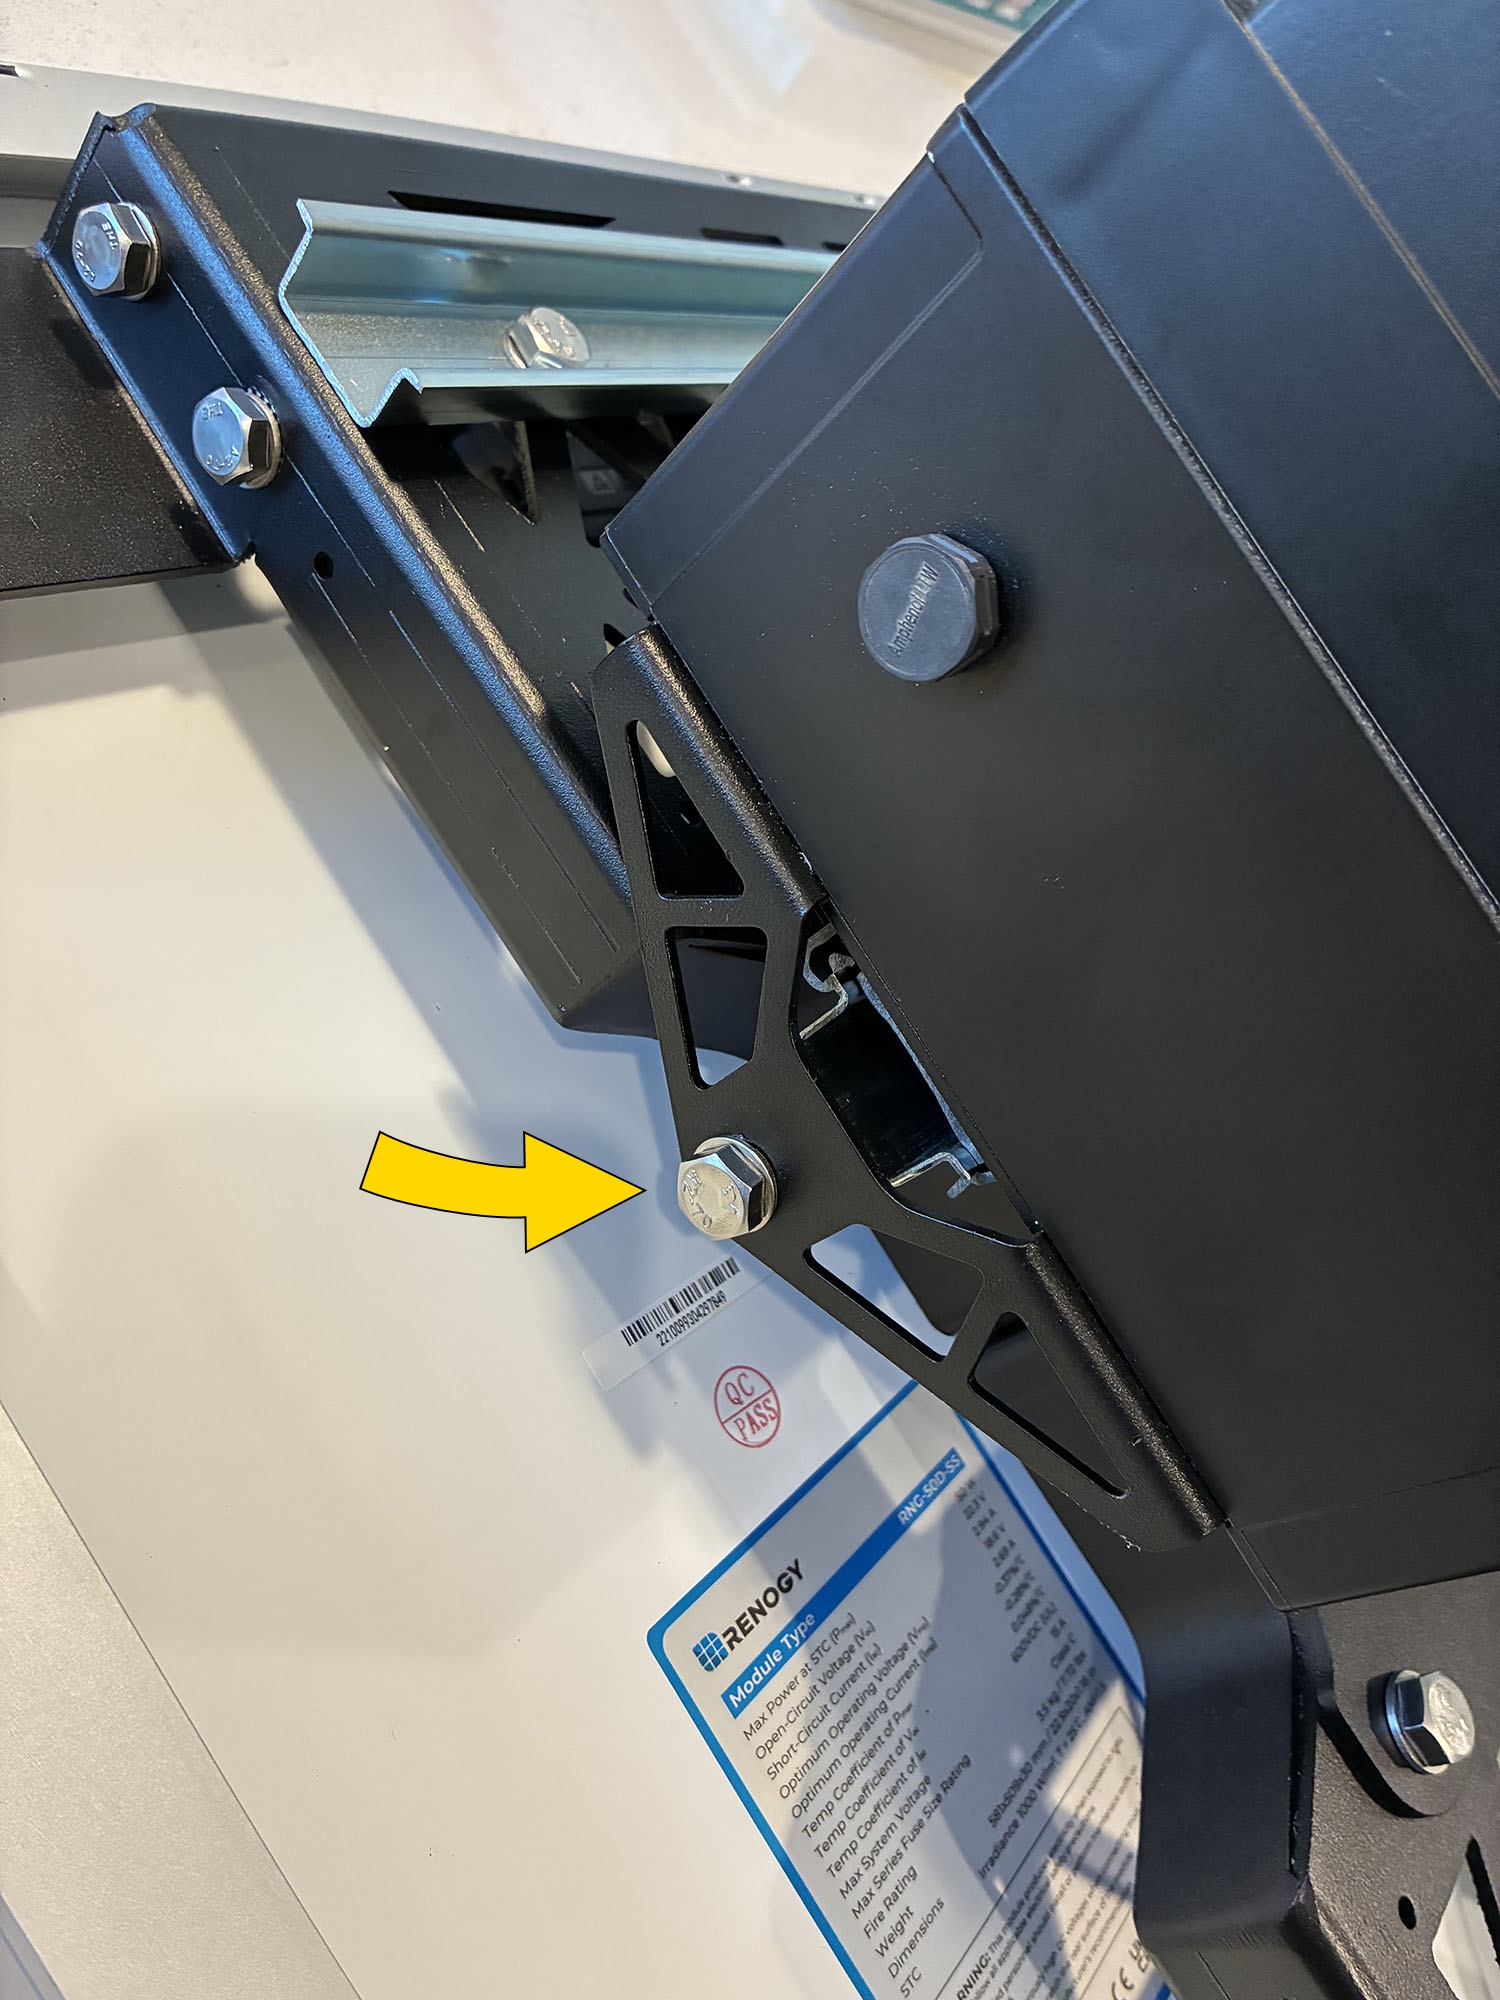
Secure the battery enclosure to the solar panel bracket using the 2 13 mm hex bolts.
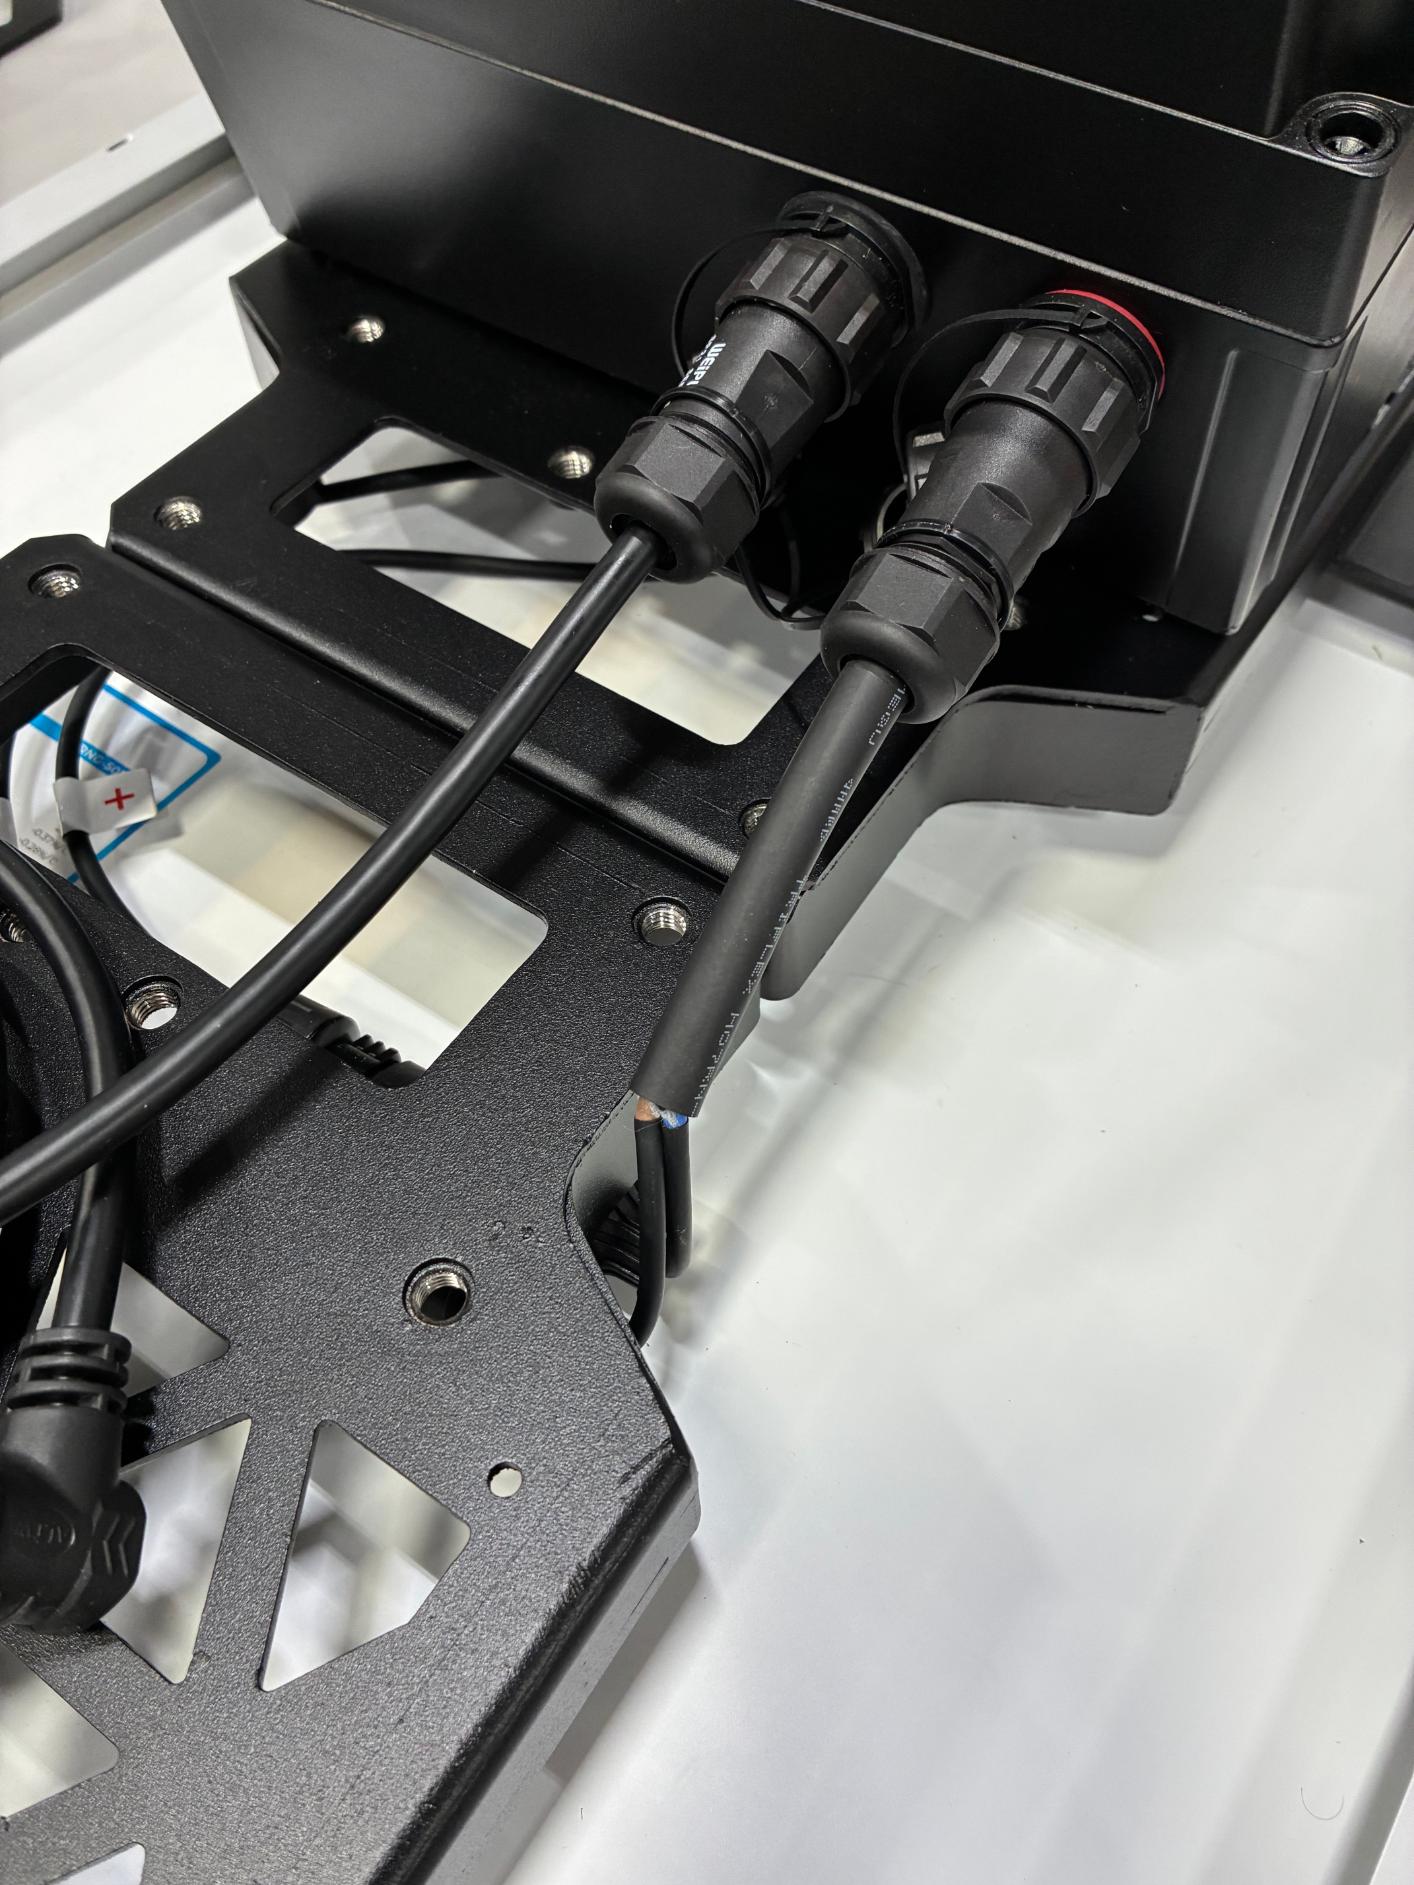
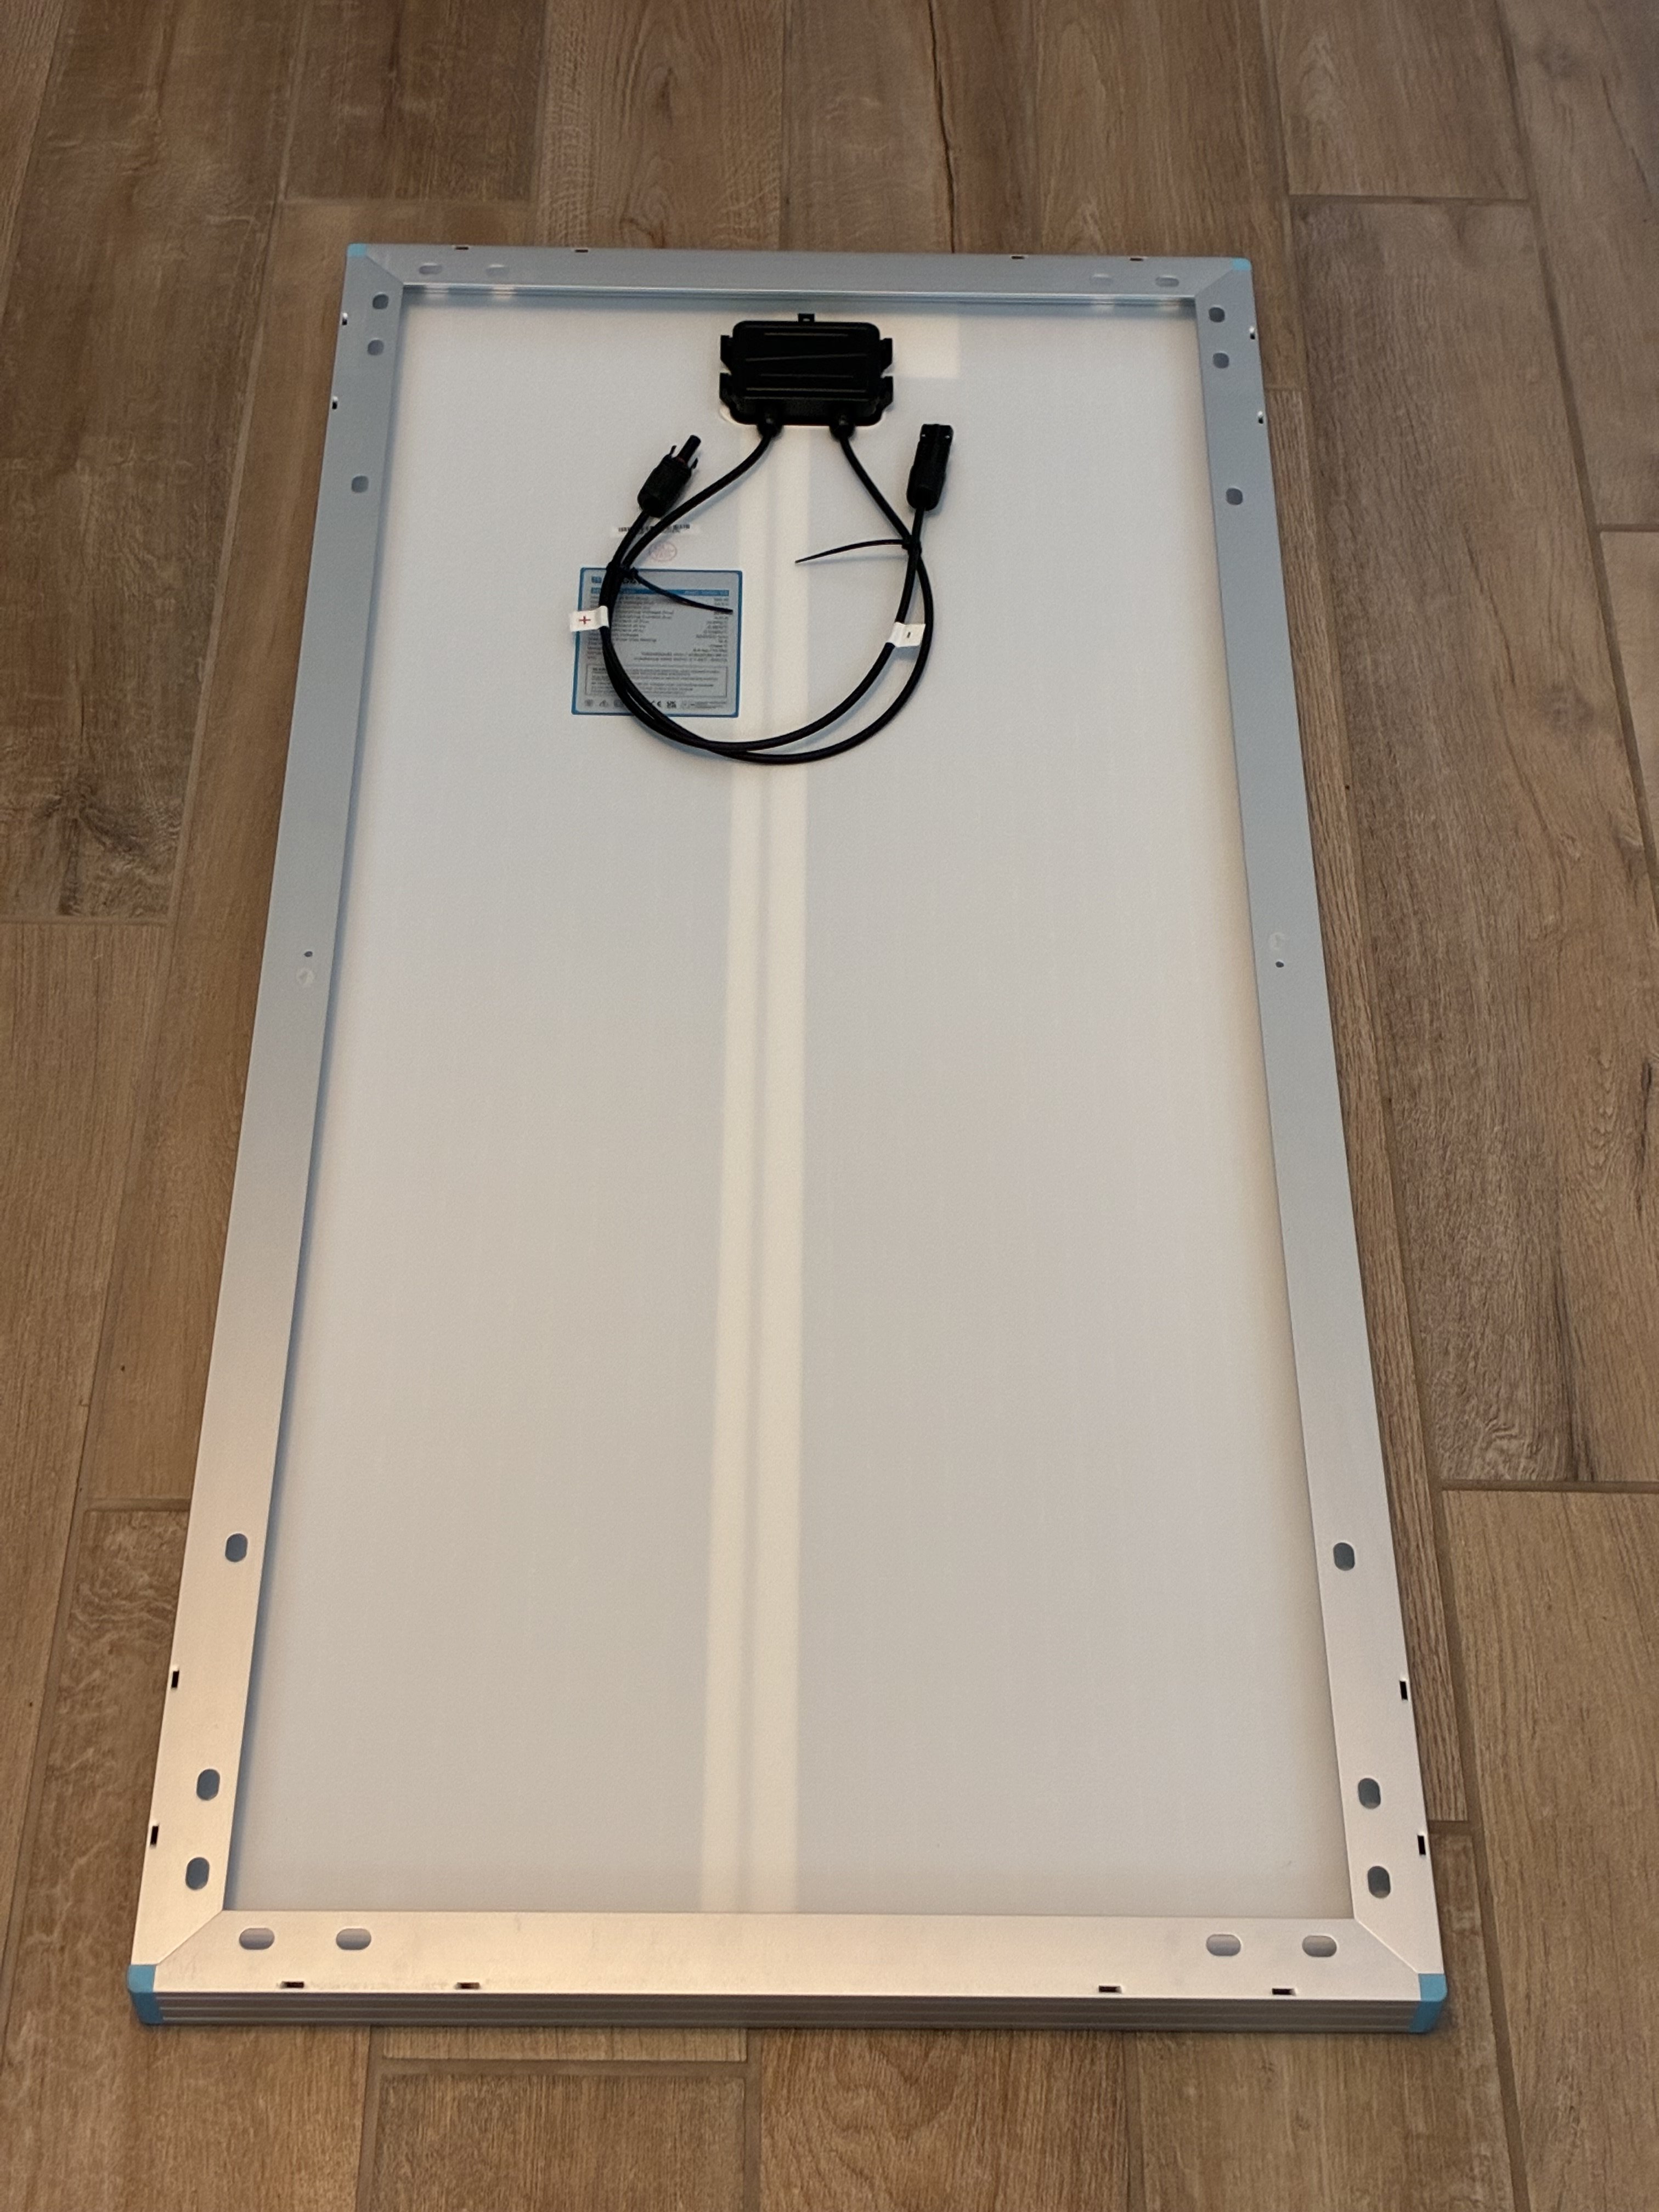
- Remove and discard the caps covering the camera and solar ports on the enclosure.
- Locate the camera power and solar cables. Connect the camera cable first (left), followed by the solar cable (right) to the battery enclosure. Line up the dots on the connectors and plug into the appropriate ports. Firmly twist each cable end to lock into place.
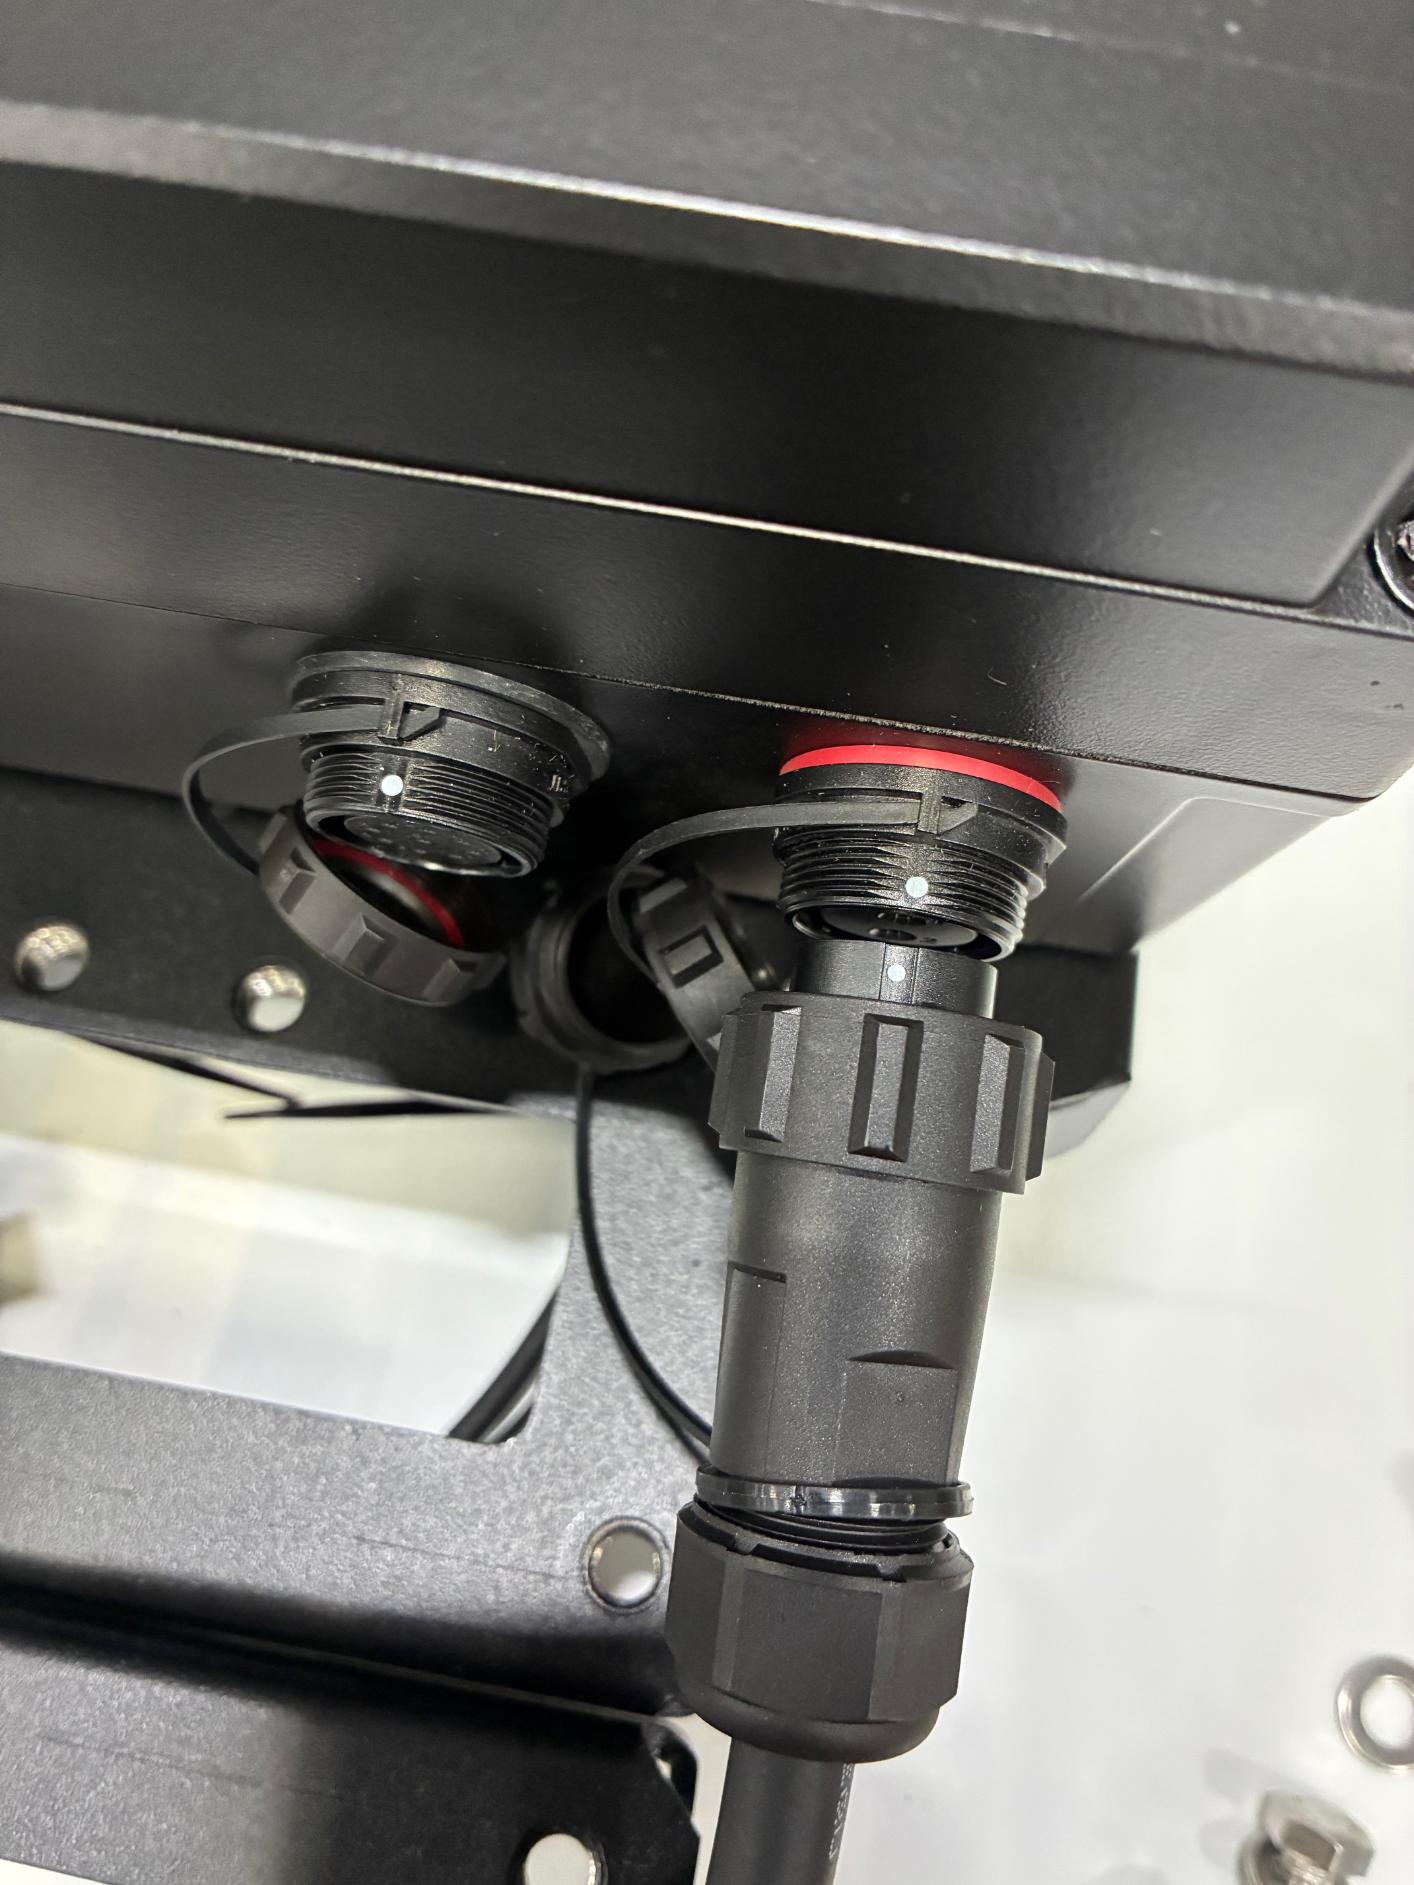
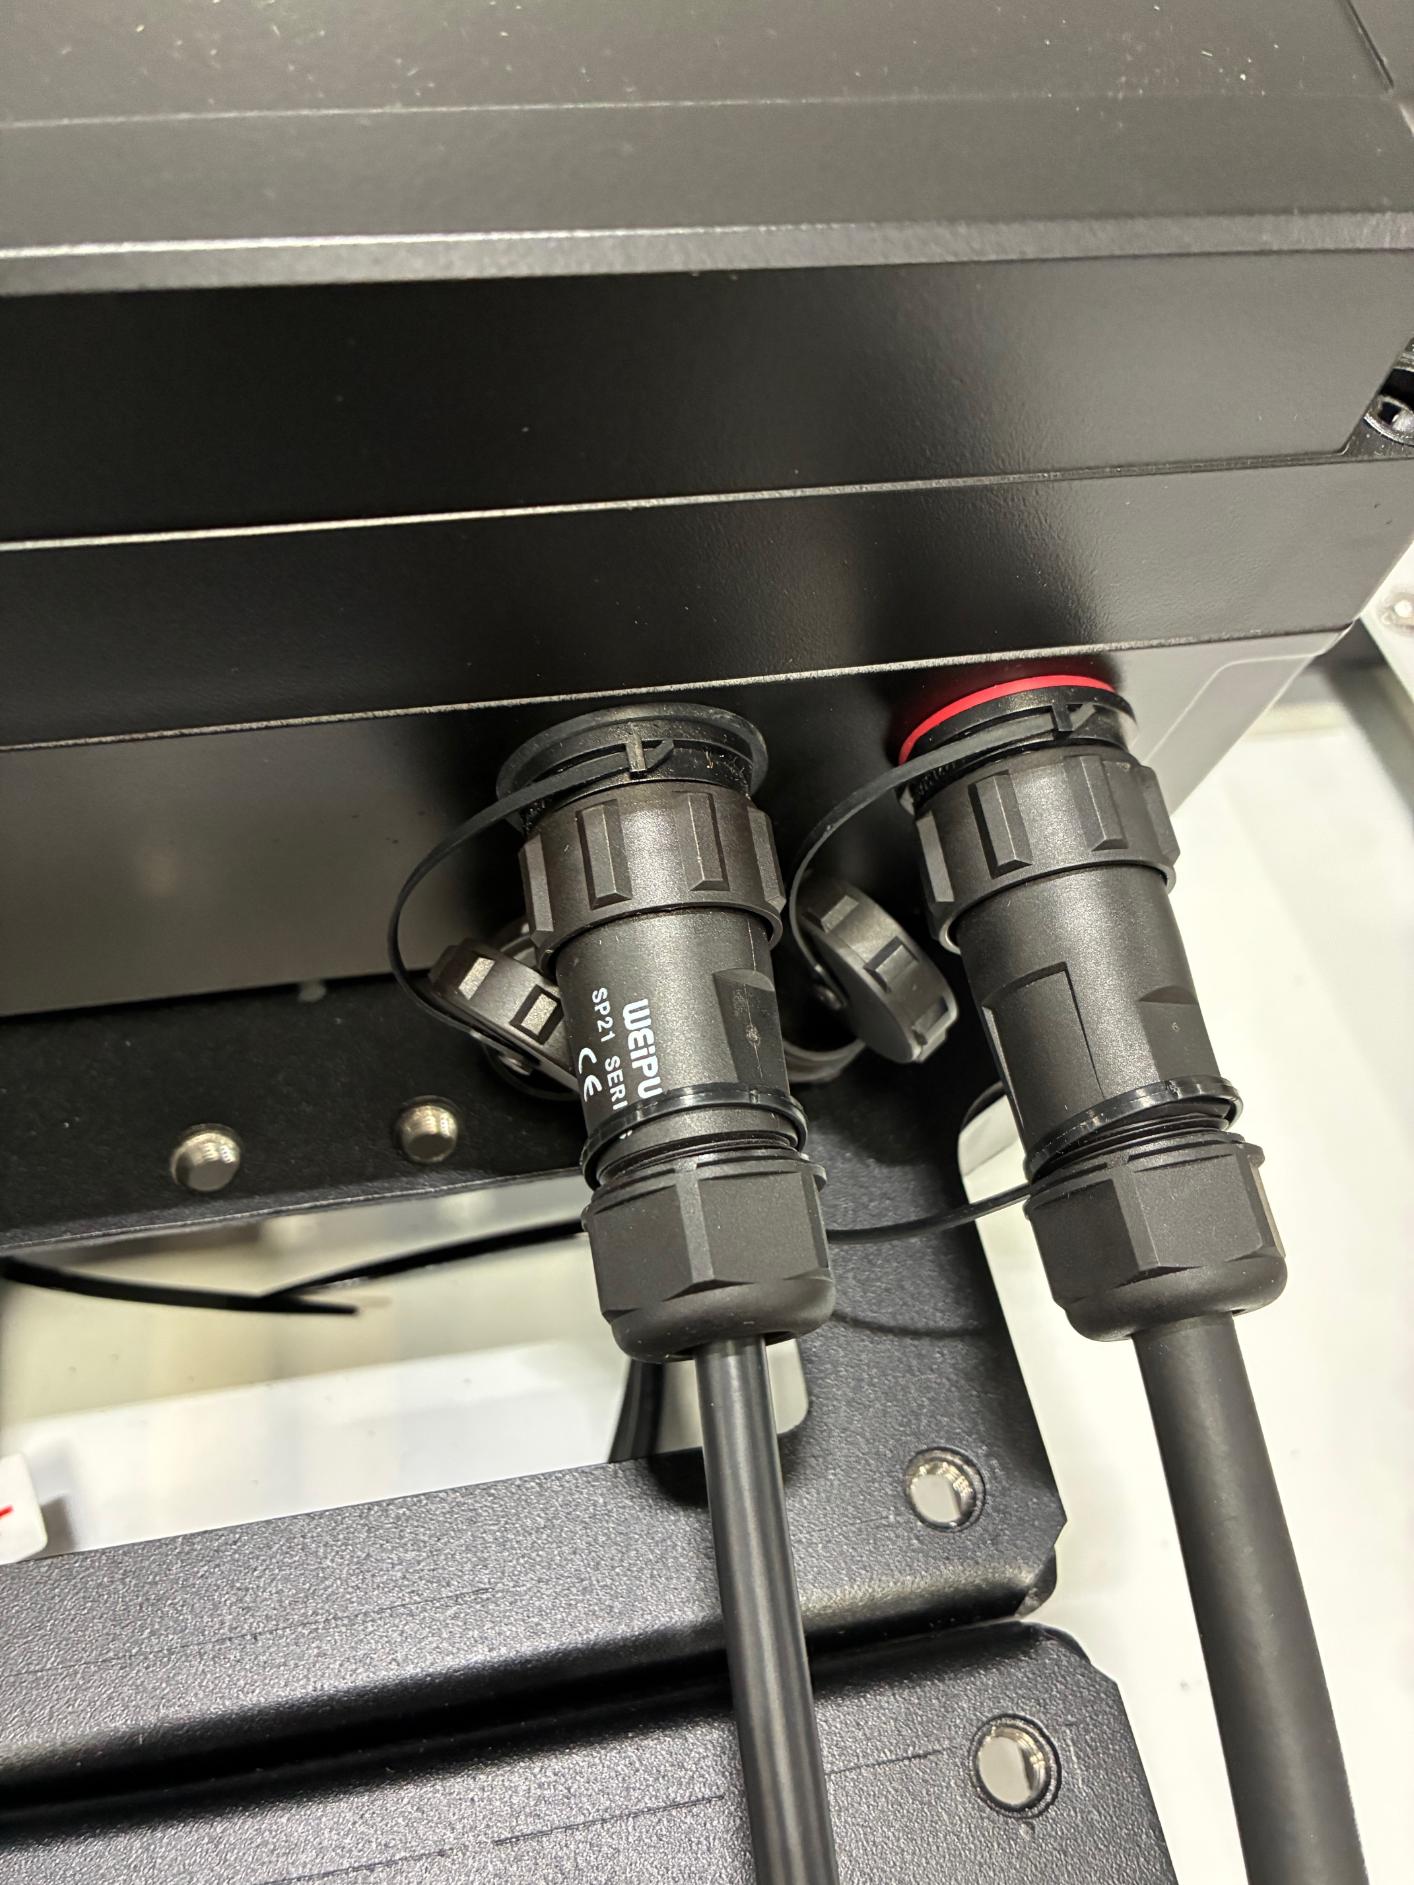
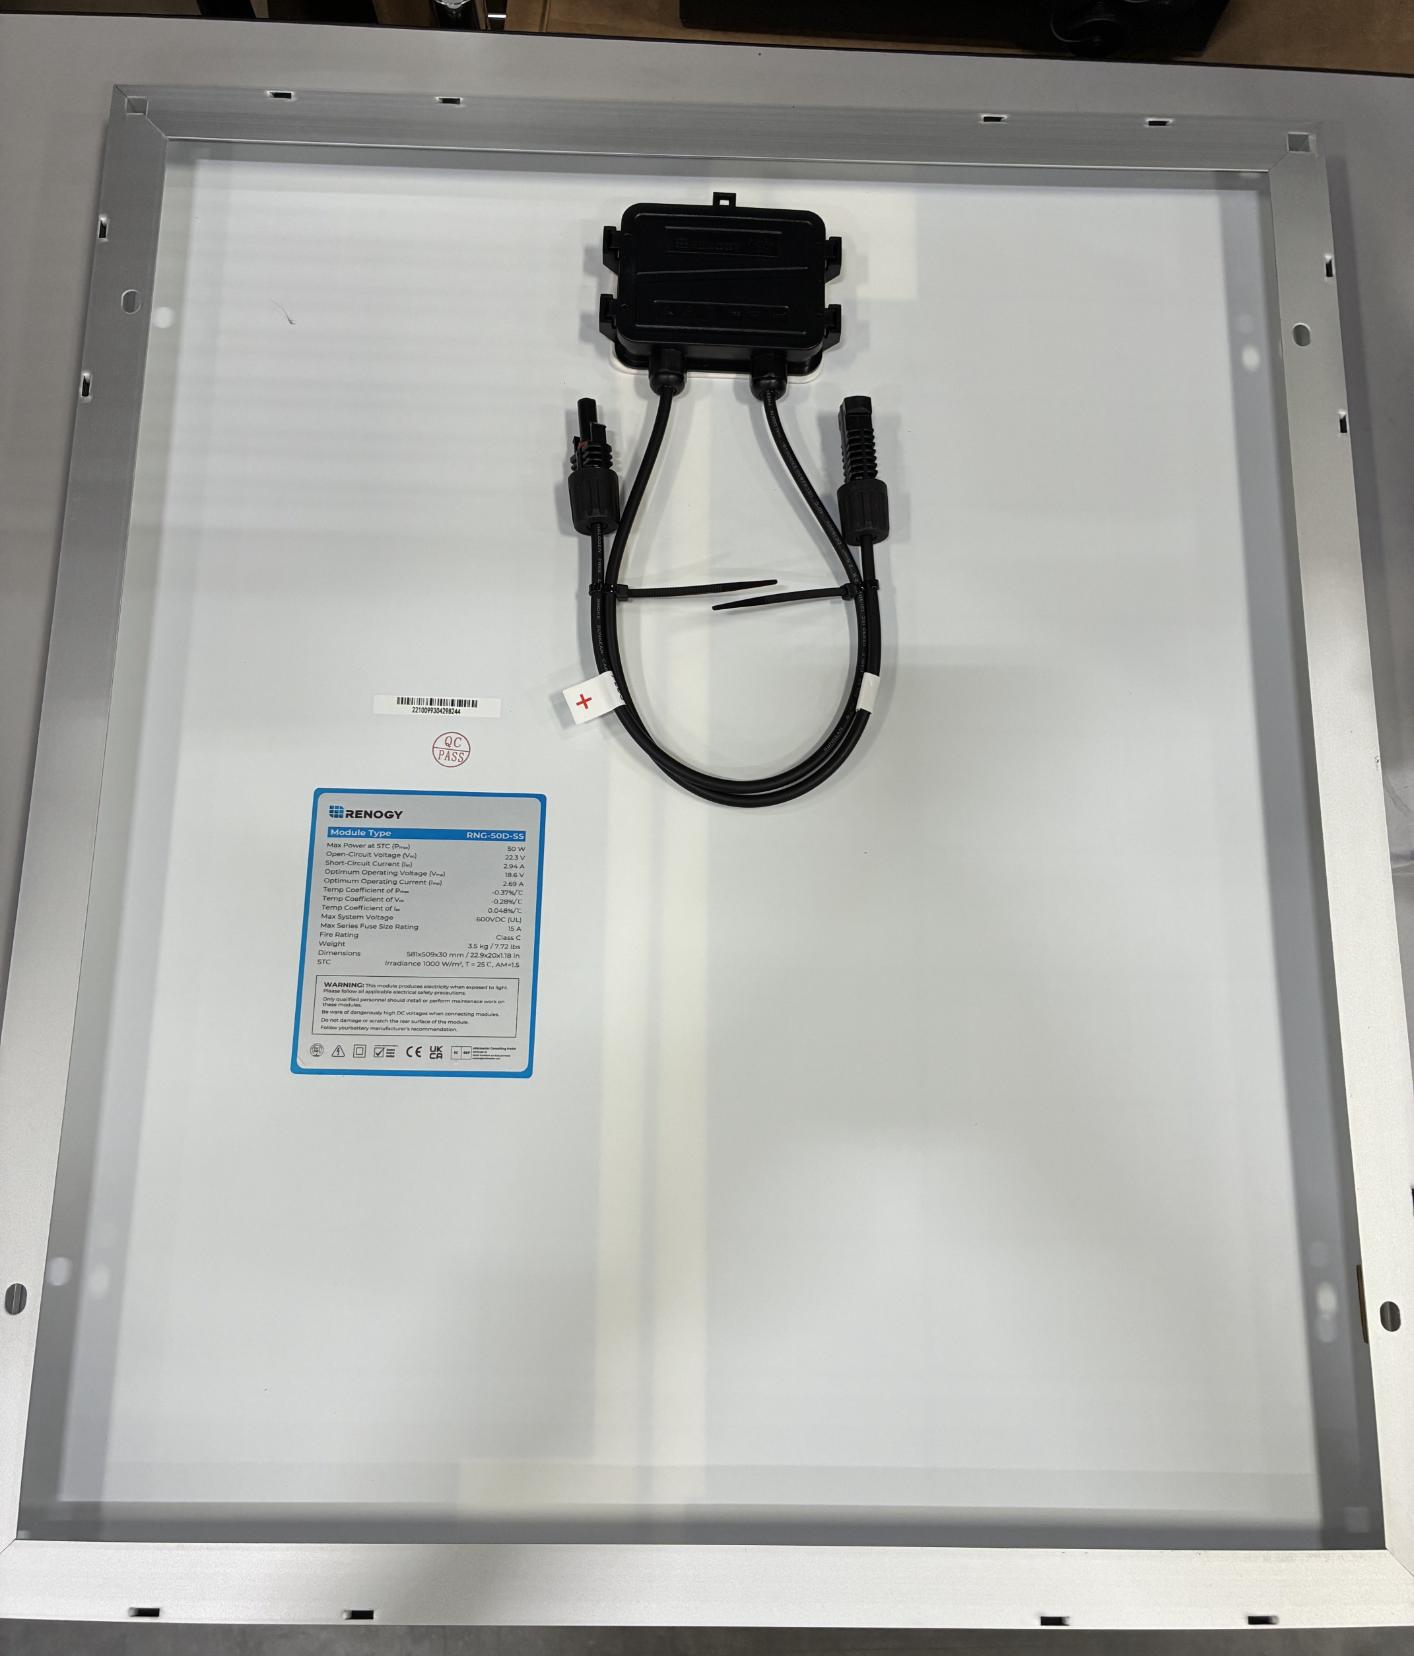
- Connect the solar panel positive/negative cables to the solar cable enclosure pigtail. Tuck the solar cable under the brackets.

-
Locate the push button on the battery enclosure and push it in flush (left image below) so the battery connects to the charge controller. The image on the right shows the button in the Off state.
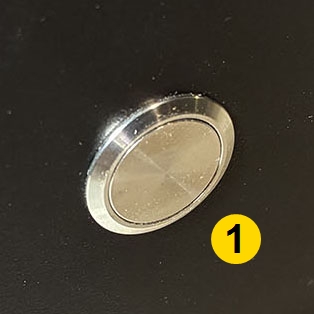
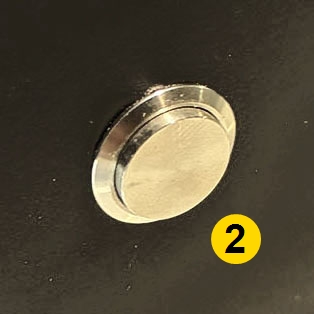
- On
- Off
Final assembly reference: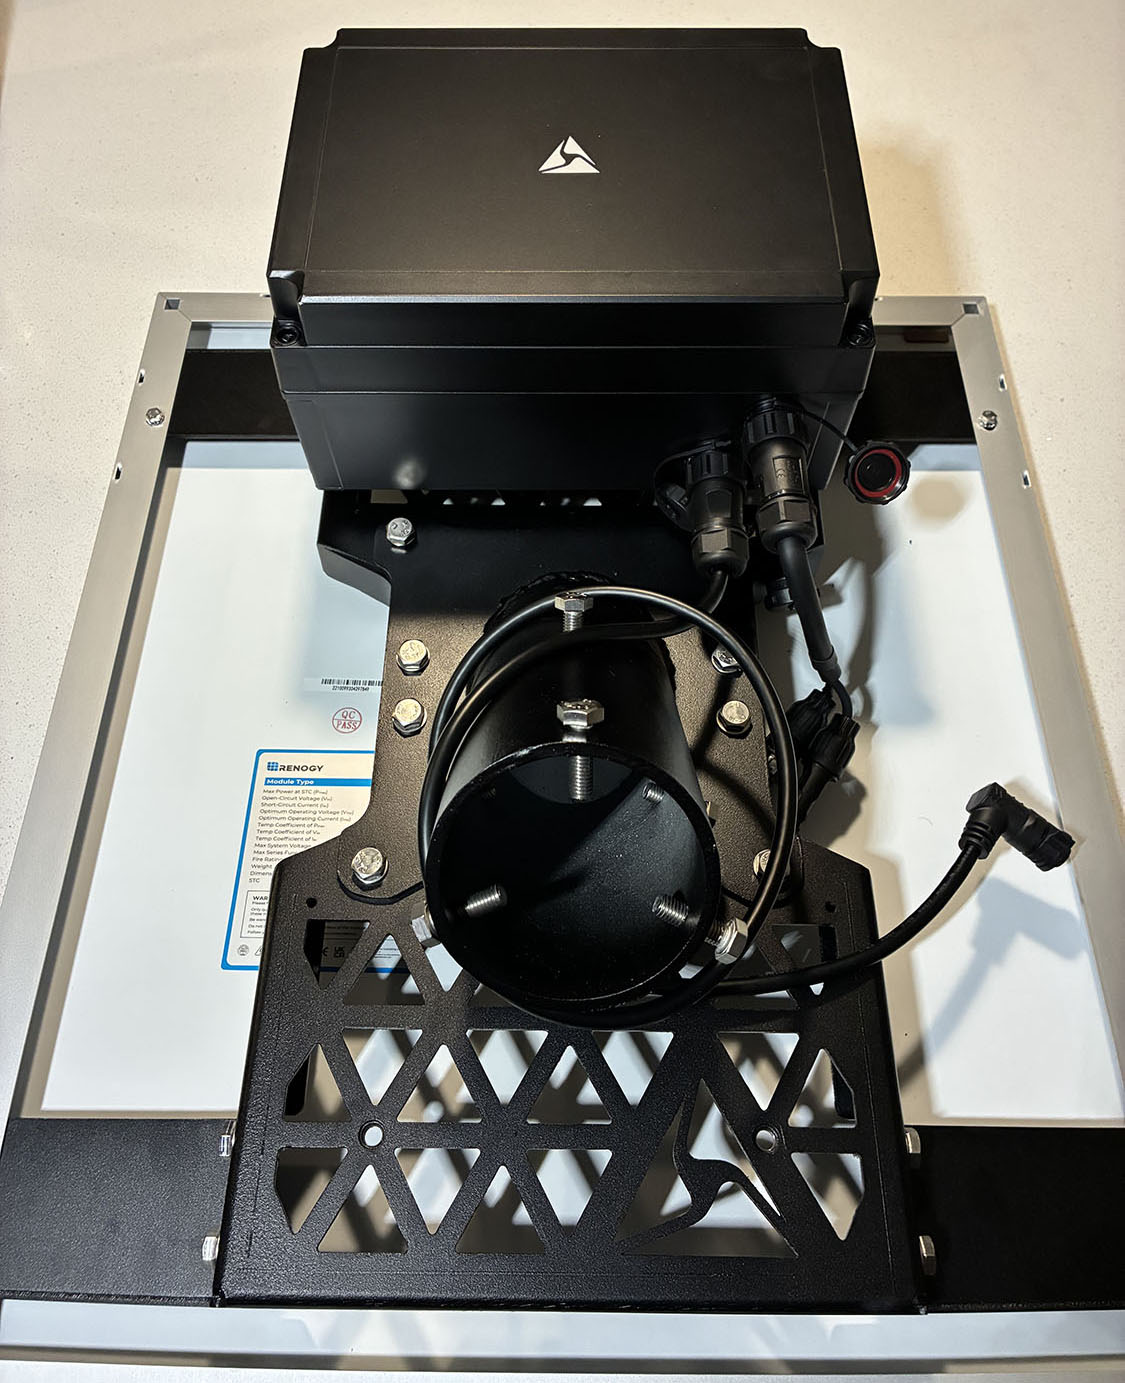
Side-mount- 50W
Note:Included band strap hardware fits 3"–4.5" diameter poles. For larger infrastructure, installers must supply appropriately sized stainless banding/straps and follow local best practices. Supported banding width: ≤ 3/4".
- Follow steps 1–6 of Solar mount.
- Unbox the Side Mount Hardware Kit.
- Place the square end cap on top of the solar panel brackets. Align the mounting holes on the end cap with the holes on the solar panel brackets. Secure the end cap to the solar panel brackets using 8 13 mm hex bolts.
- Remove the pre-attached 13 mm hex bolts from the upper and lower sides of the solar panel brackets.
- Attach the side mount arms to the solar panel bracket using the 13 mm hex bolts. Install the arms on the bracket opposite of the DIN rail.
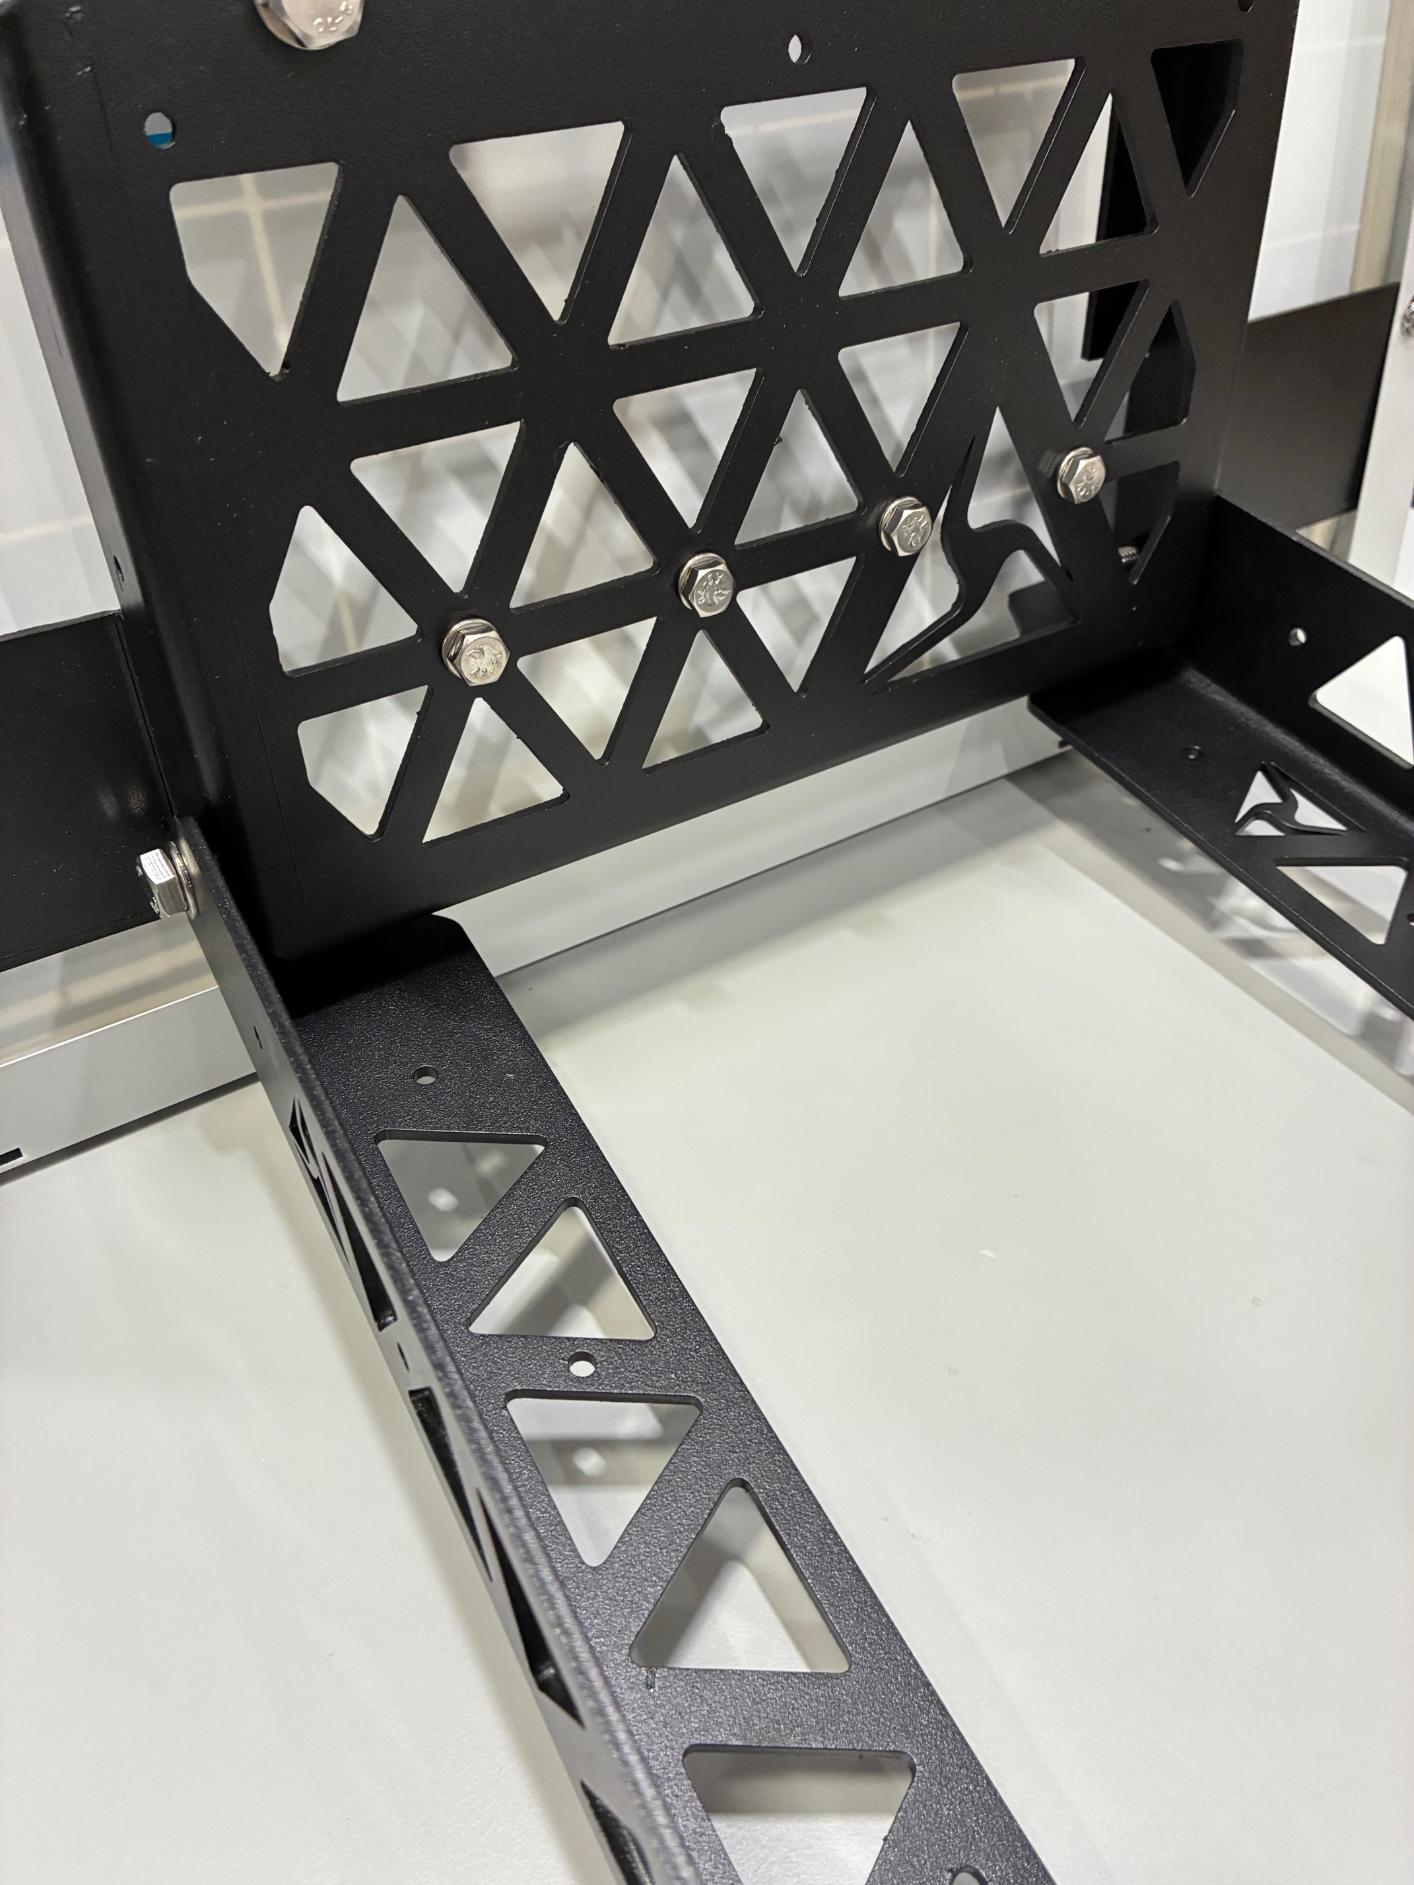
- Attach one of the pole brackets to the ends of the arms using the pre-installed 13 mm hex bolts.
- Attach the other pole bracket to the top solar bracket using the pre-installed 13 mm hex bolts.
-
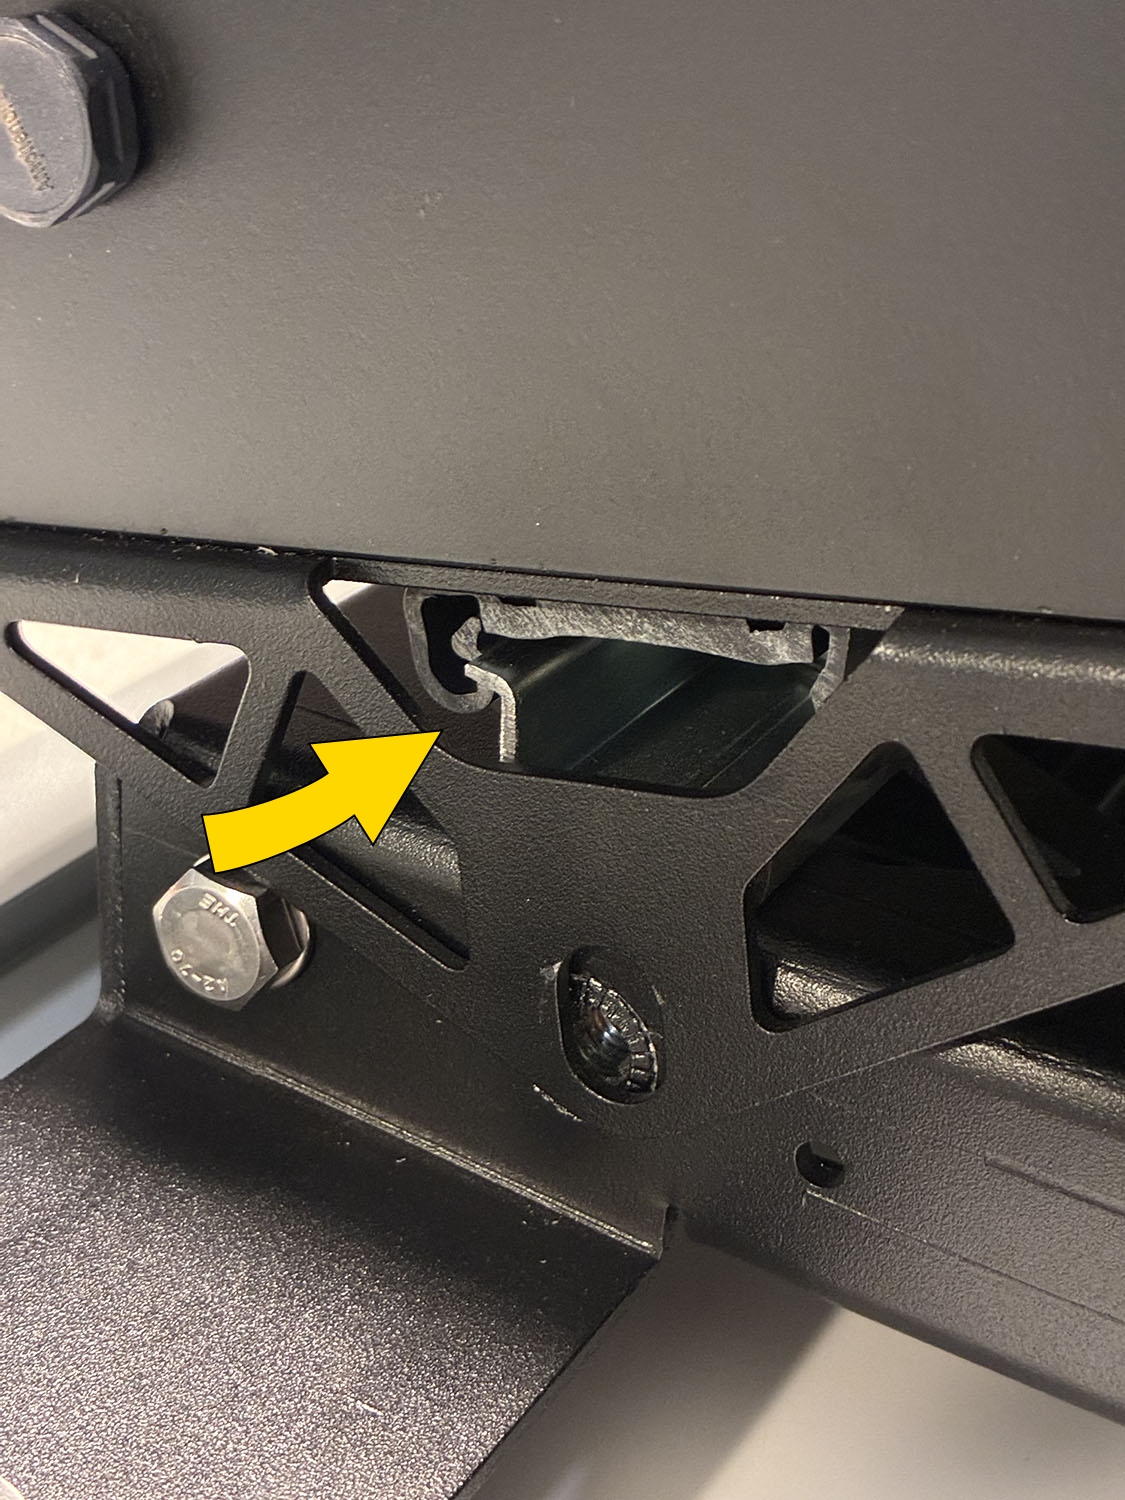
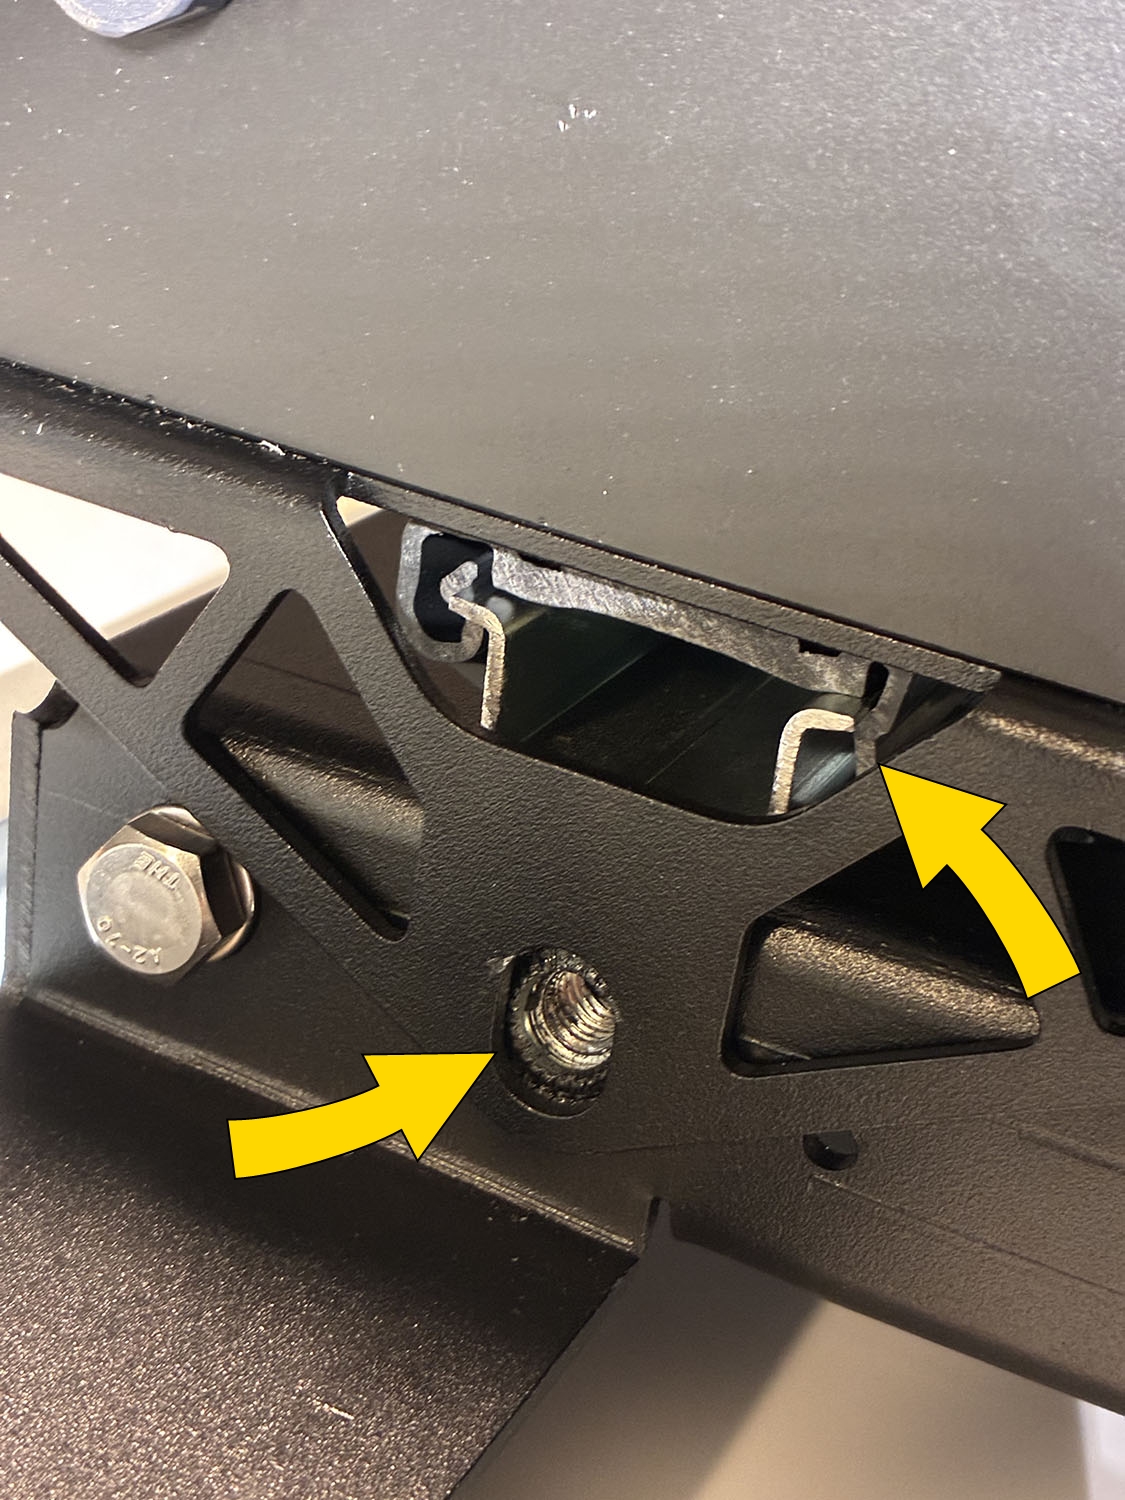
Remove the 2 13 mm hex bolts on either end of the middle (second) DIN rail.
-
Attach and snap the assembled battery enclosure onto the center DIN rail. Start with the top side of the enclosure, hooking it onto the rail, then press down on the front side to snap into place. Ensure both sides of the enclosure are securely attached to the DIN rail and that the enclosure attachment bracket aligns with the previously removed hex bolt holes.
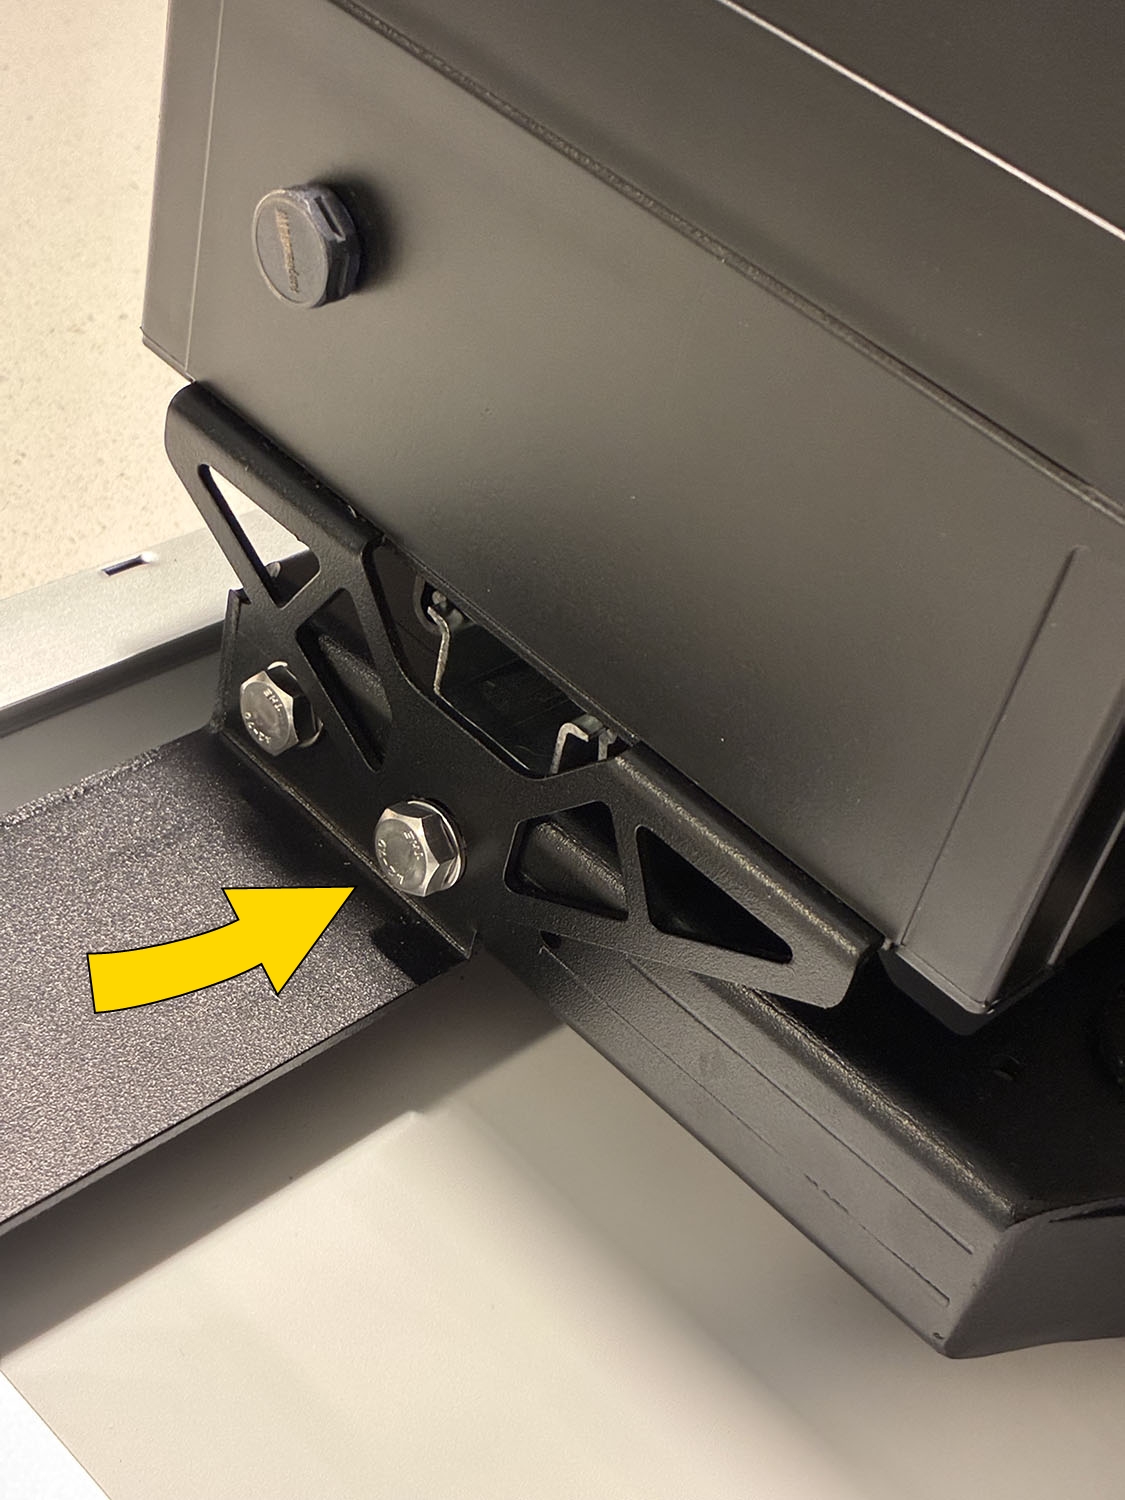
-
Secure the battery enclosure to the solar panel bracket using the 2 13 mm hex bolts removed previously.
-
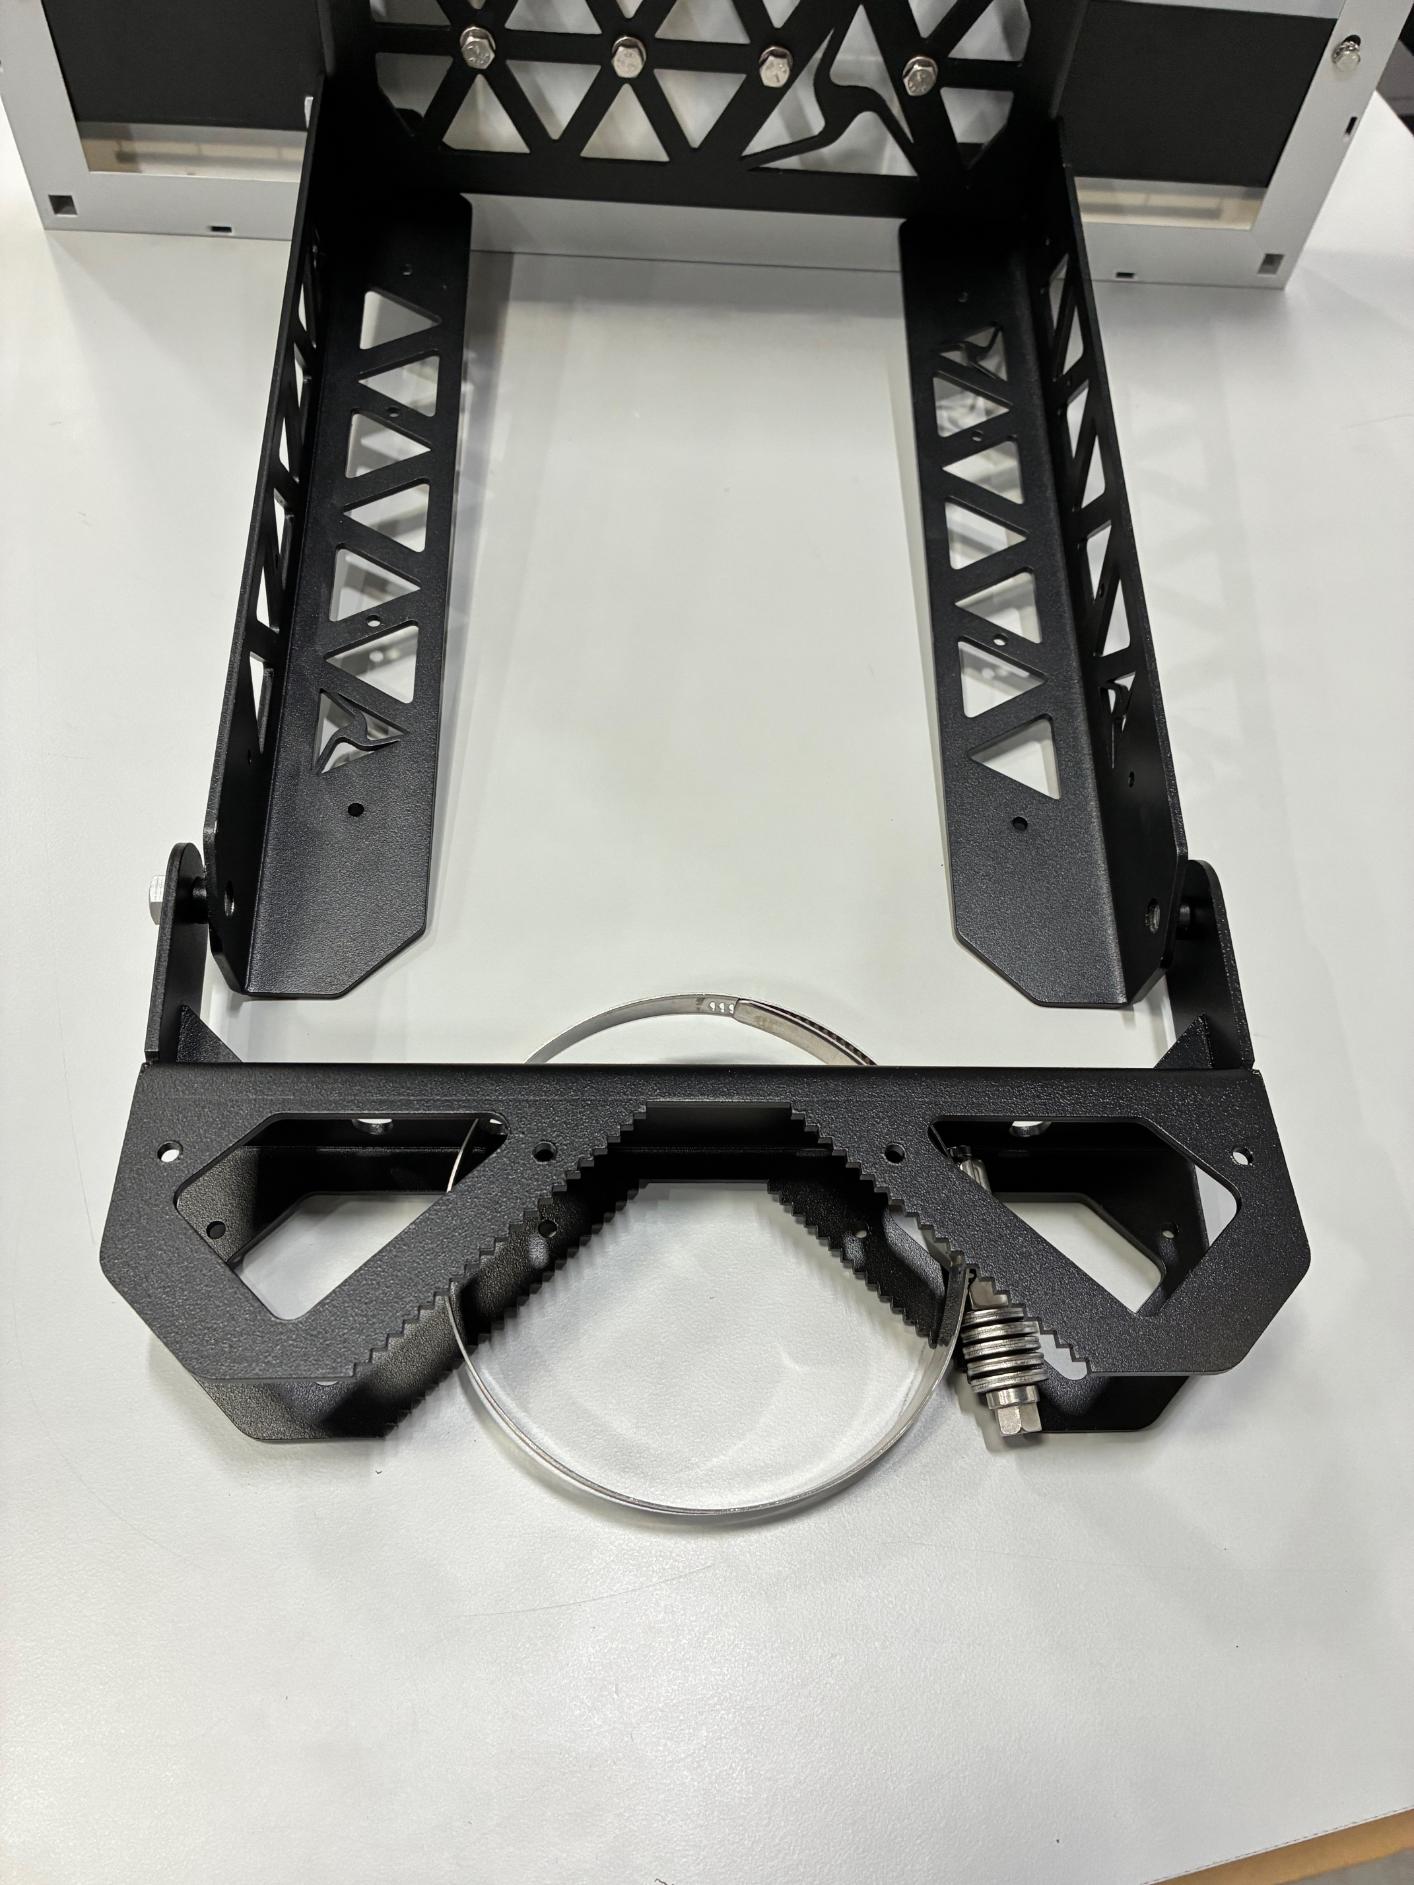
Route hose clamps through the slits in both the top and bottom pole brackets to prepare for installation.
Final assembly reference: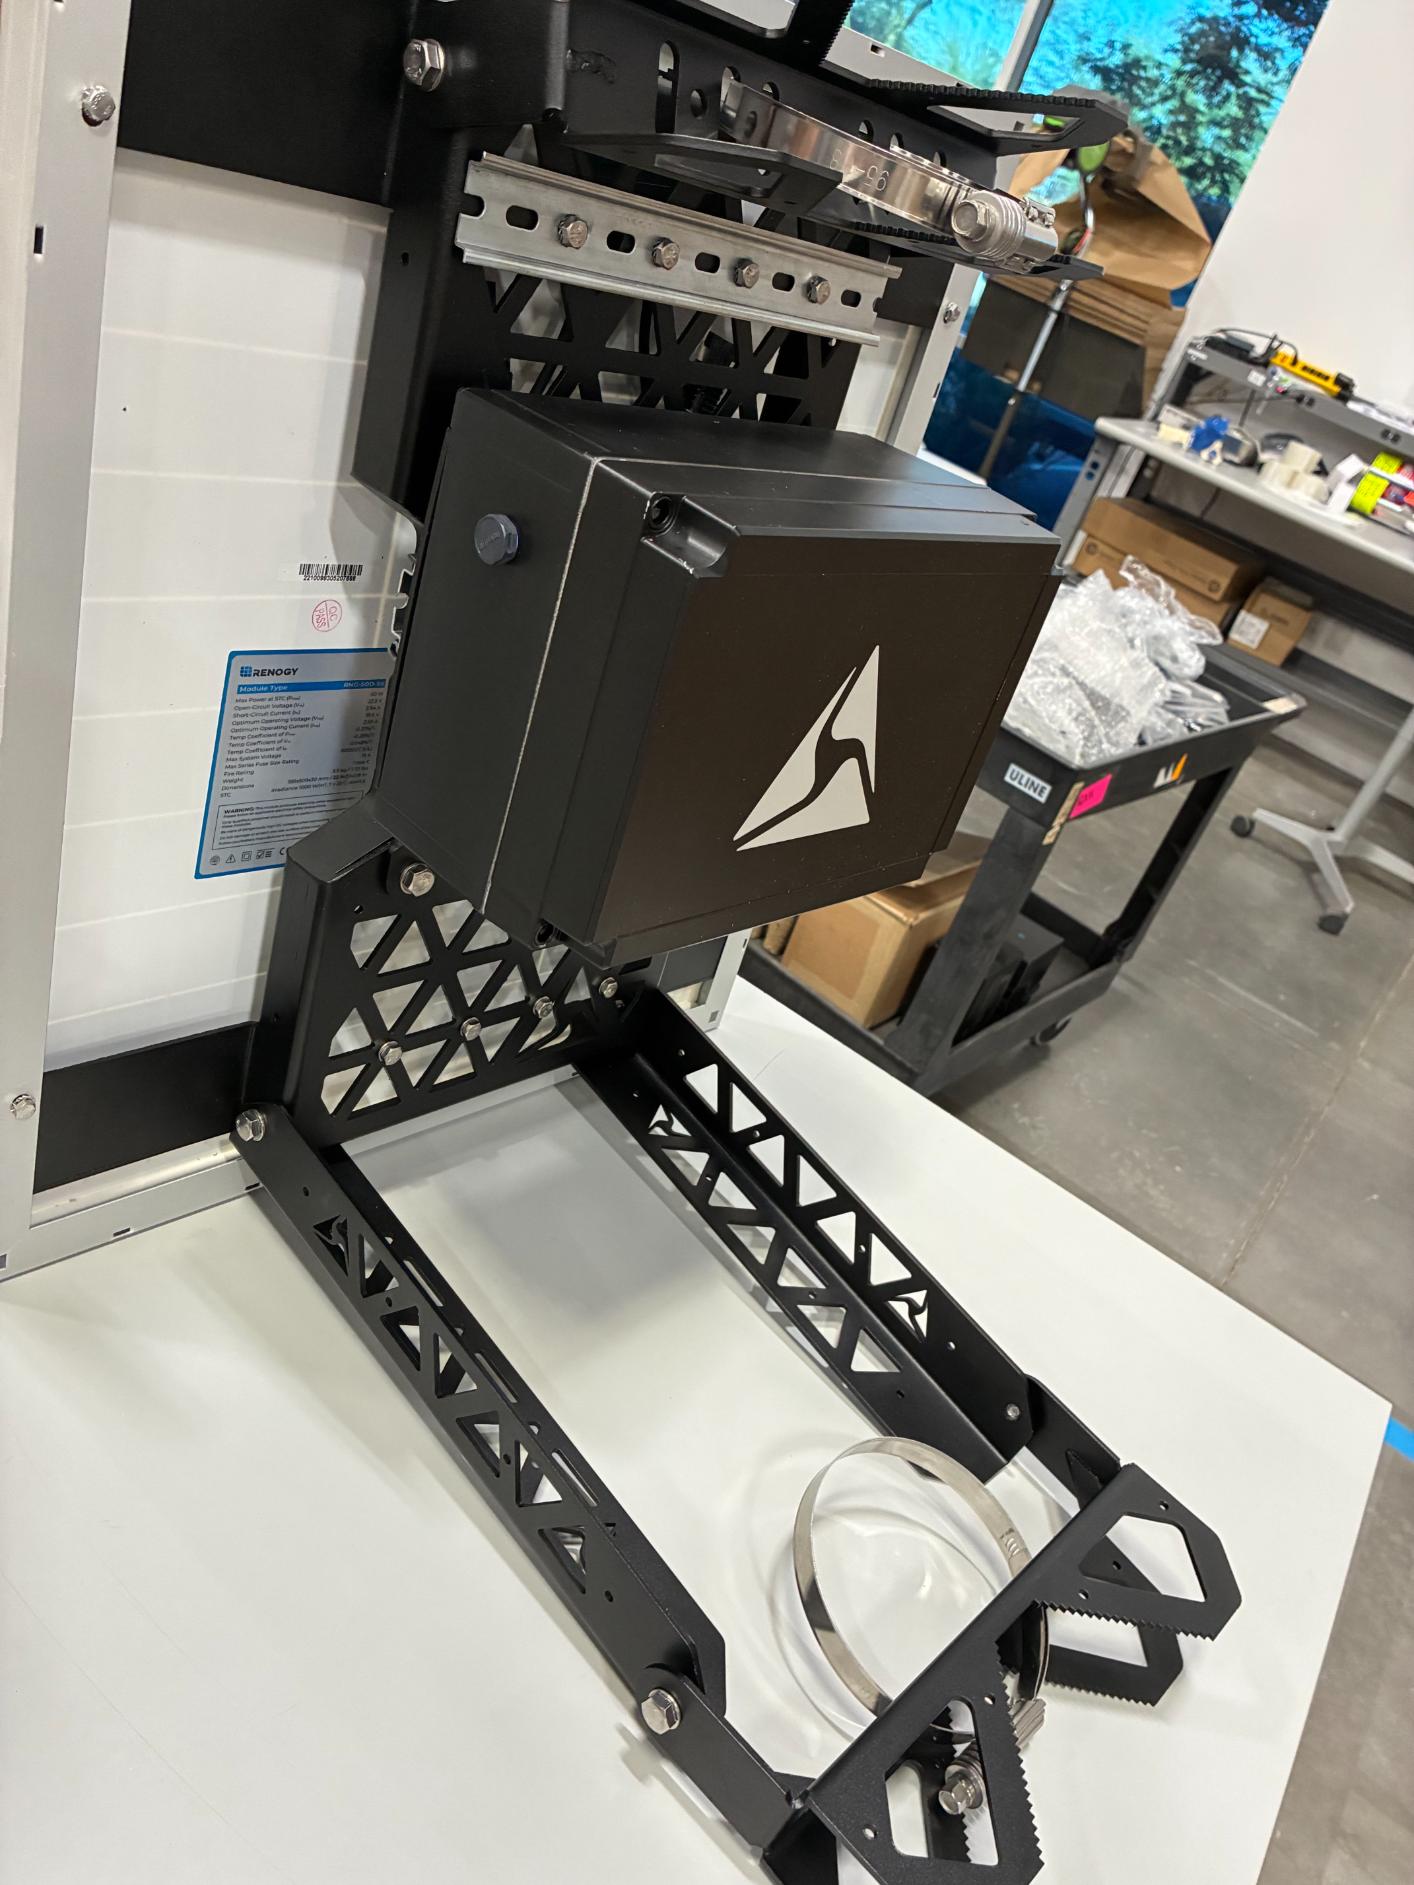
Installation of 100W solar panels
Top mount 100W
- Unbox the 100W solar panel from its packaging.

- Unbox the 2 solar panel bracket pieces. One has a pre-attached DIN rail; leave this rail on. Remove the (2) 8 mm hex bolts from both solar panel brackets (4 bolts total)

- Line up both solar panel bracket halves, with the dividing line centered horizontally with the center of the solar panel. Ensure the bracket arms sit flush on the top edge of the solar panel. The pre-drilled grounding holes on both sides of the panel serve as the center point.
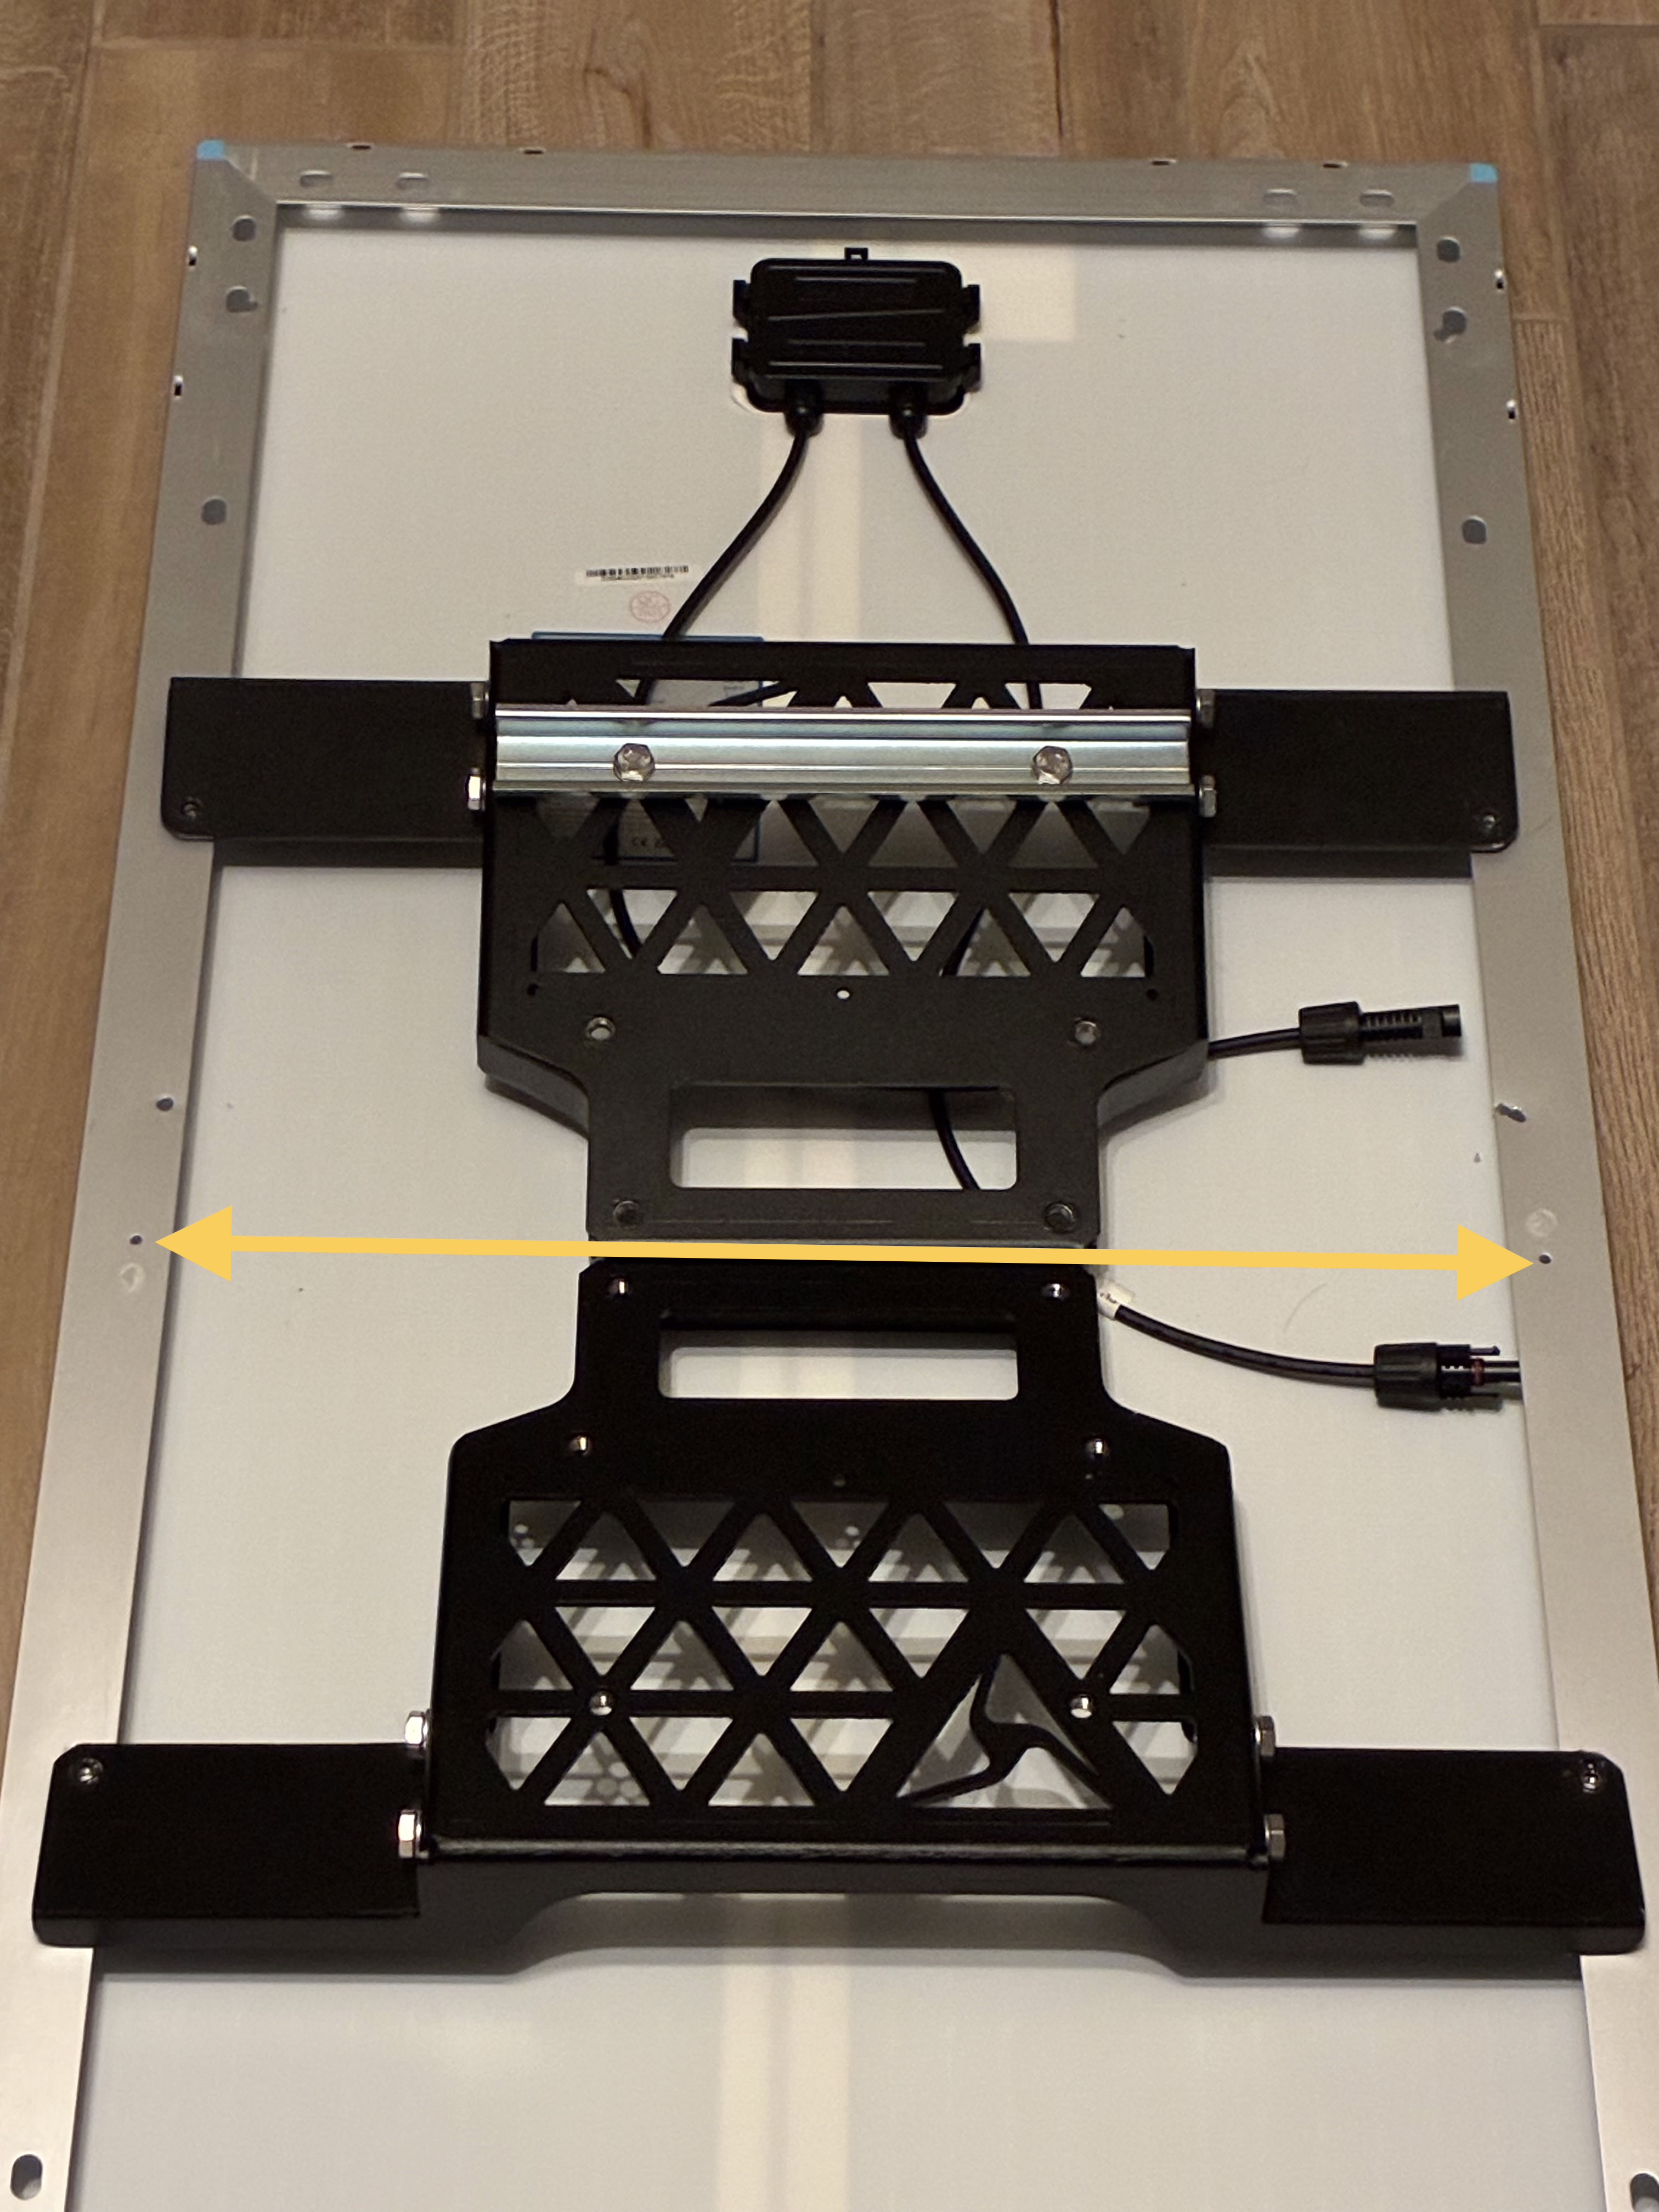
- Mark where the 4 holes from the solar panel brackets meet with the solar panel frame, to prepare for drilling.
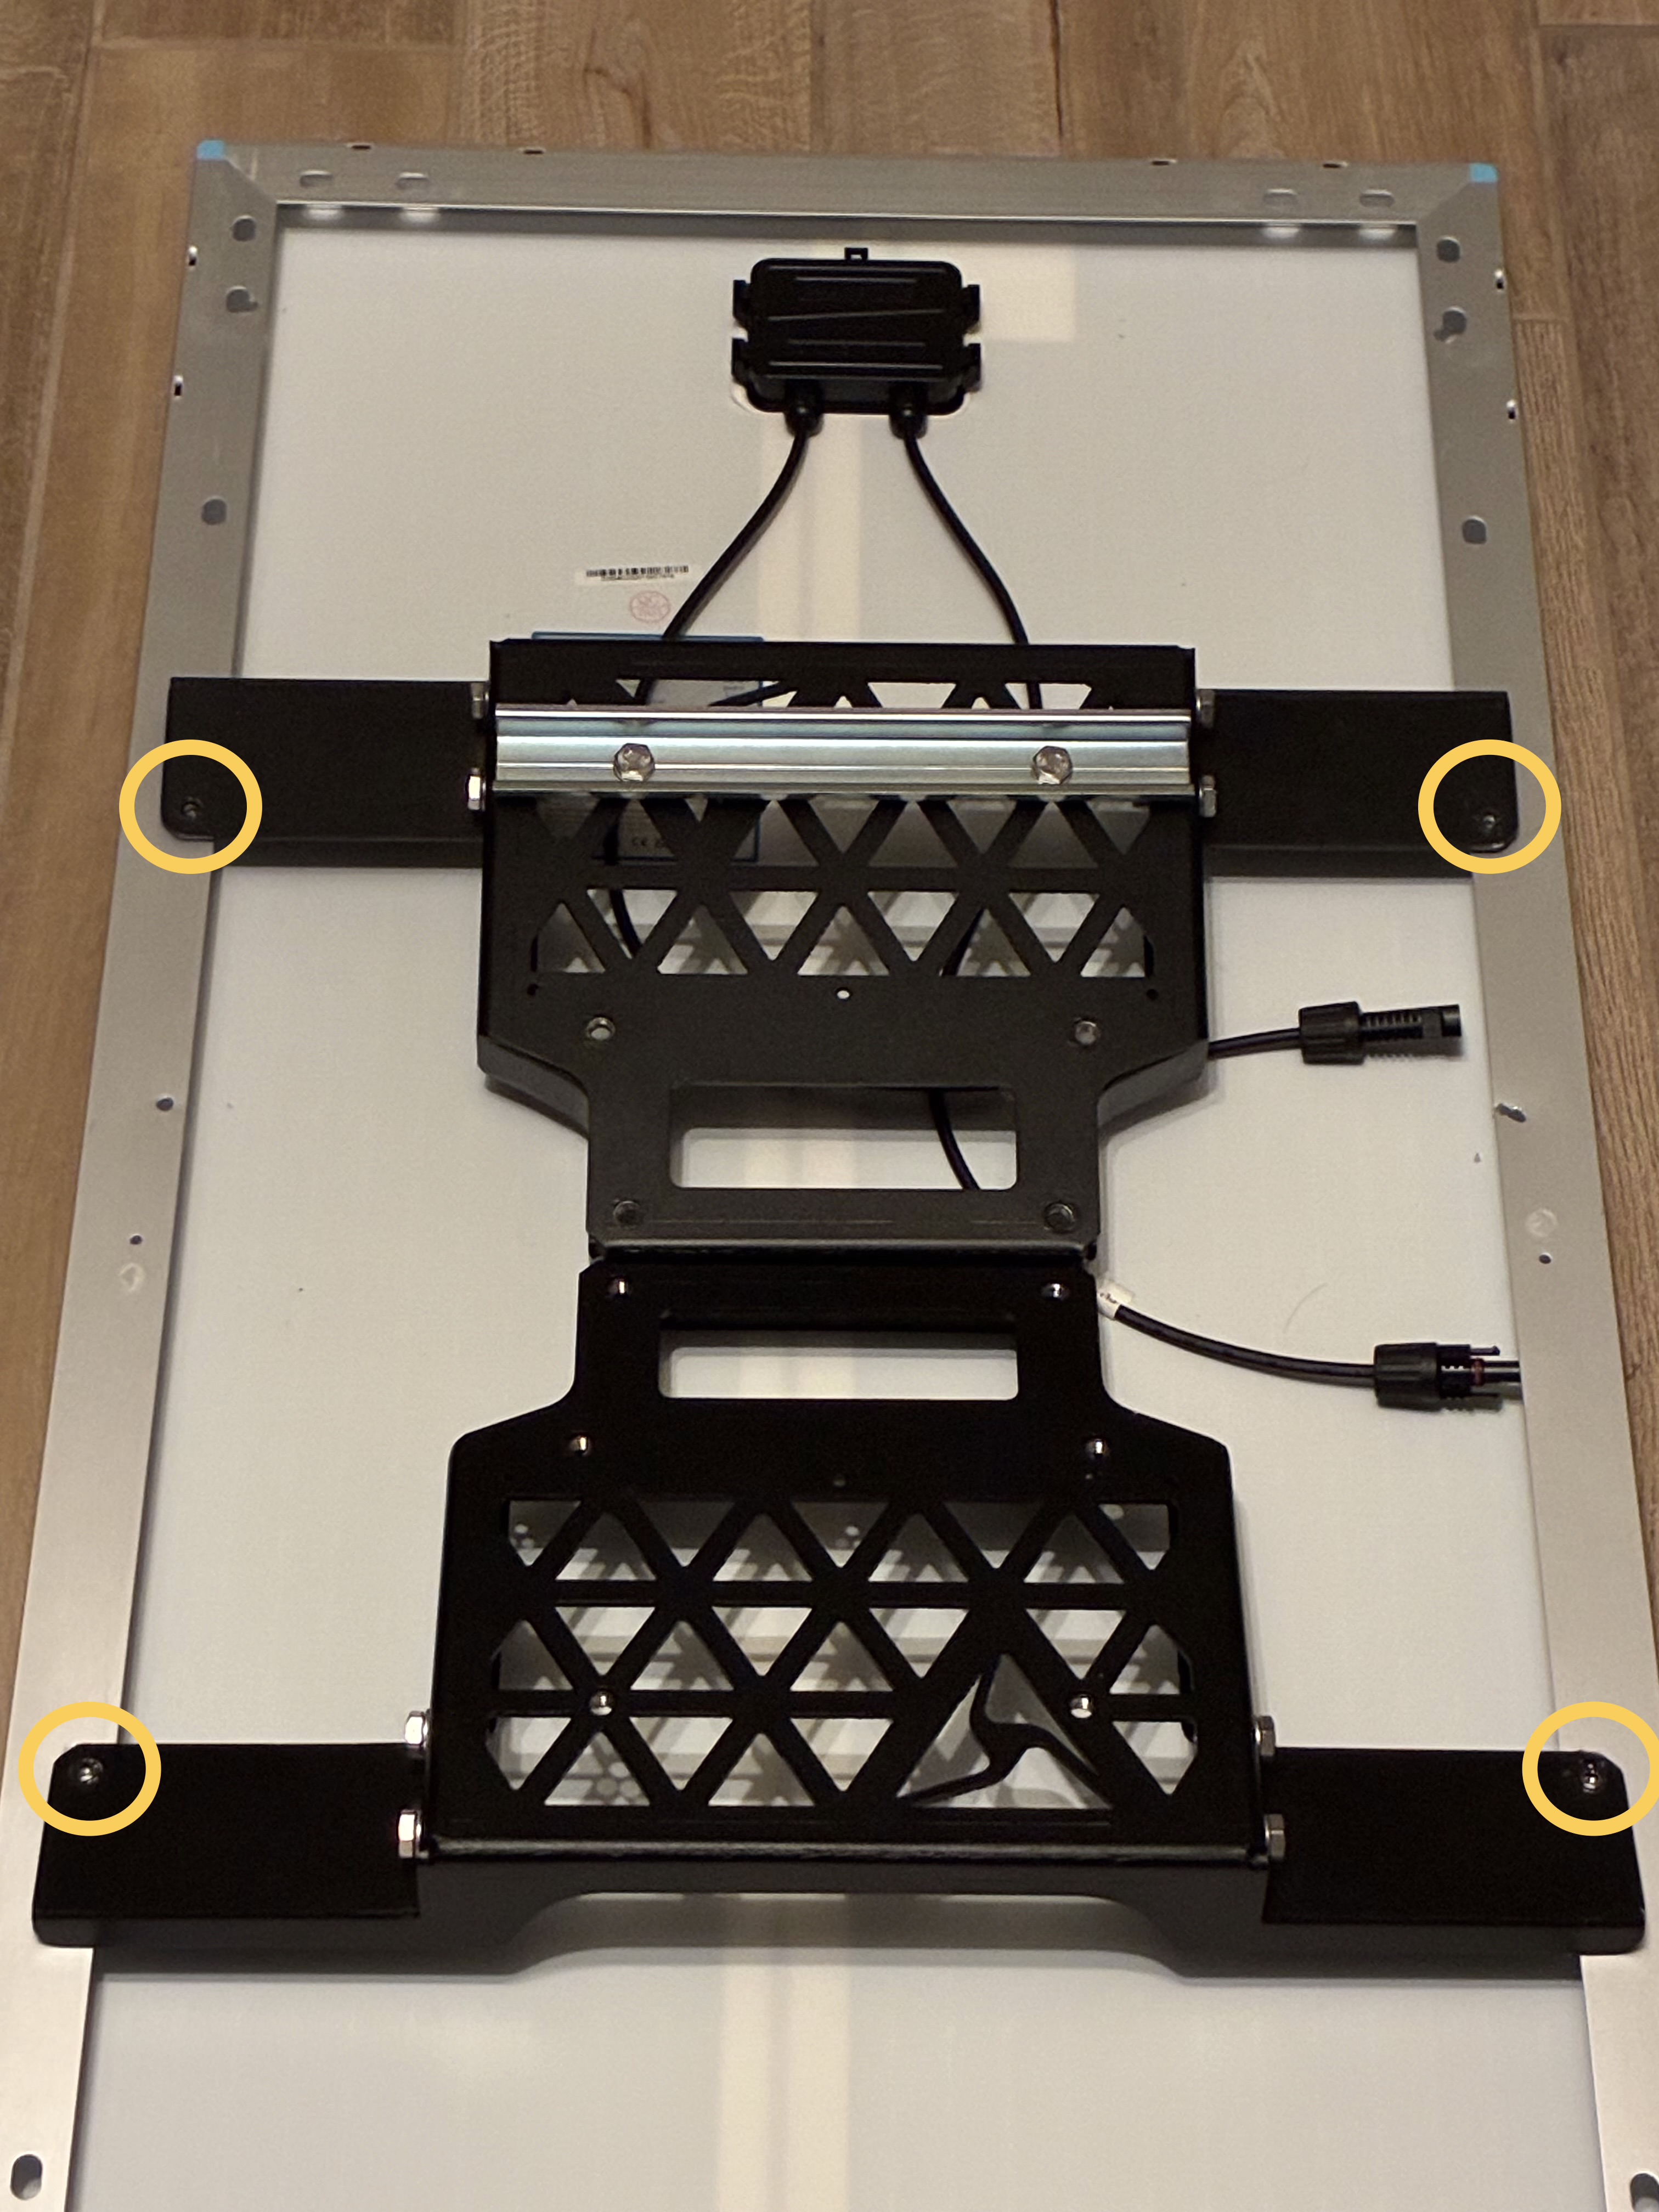
- Move the brackets aside. Drill the marked holes through the aluminum frame using a 7/32” step drill bit. Avoid drilling into the panel backing or laminate. Clear all metal shavings from the panel and surrounding area.
- Install the solar panel brackets under the solar panel frame. Slide each bracket in at an angle.
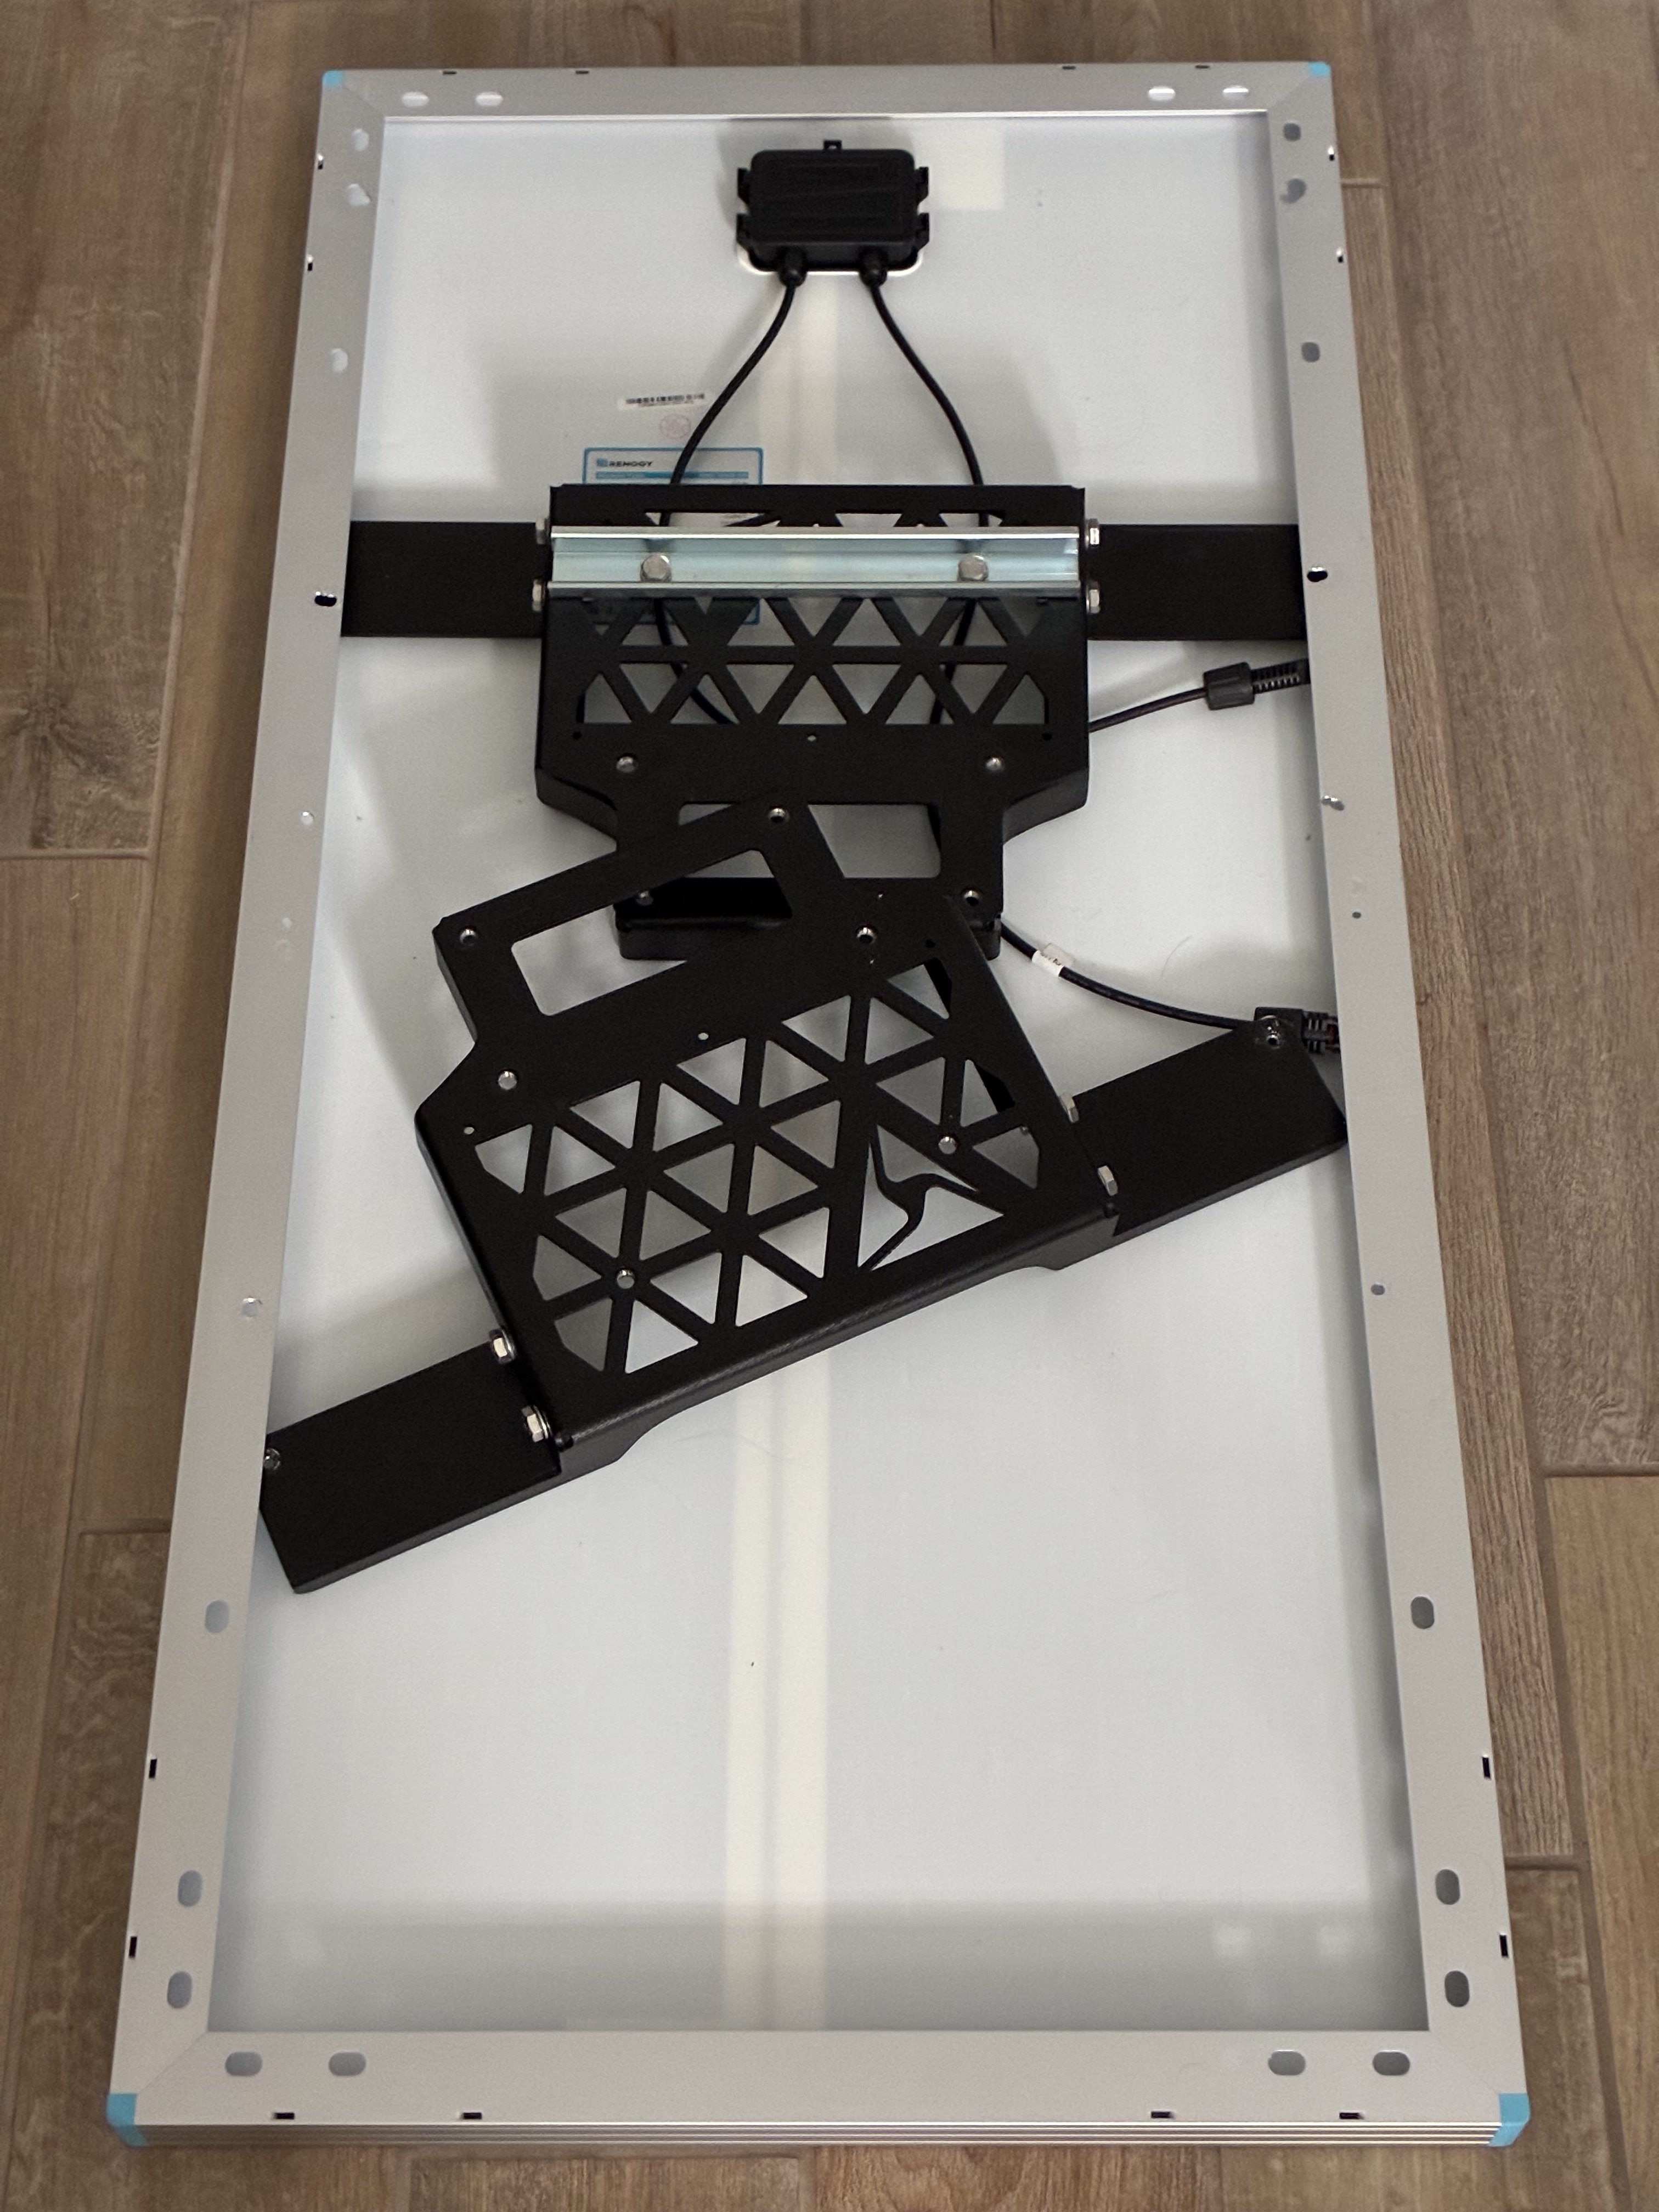
- Align the mounting holes from the solar panel brackets with the solar panel frame. Secure using the (4) 8 mm hex bolts. Use #10 flat washers if necessary.
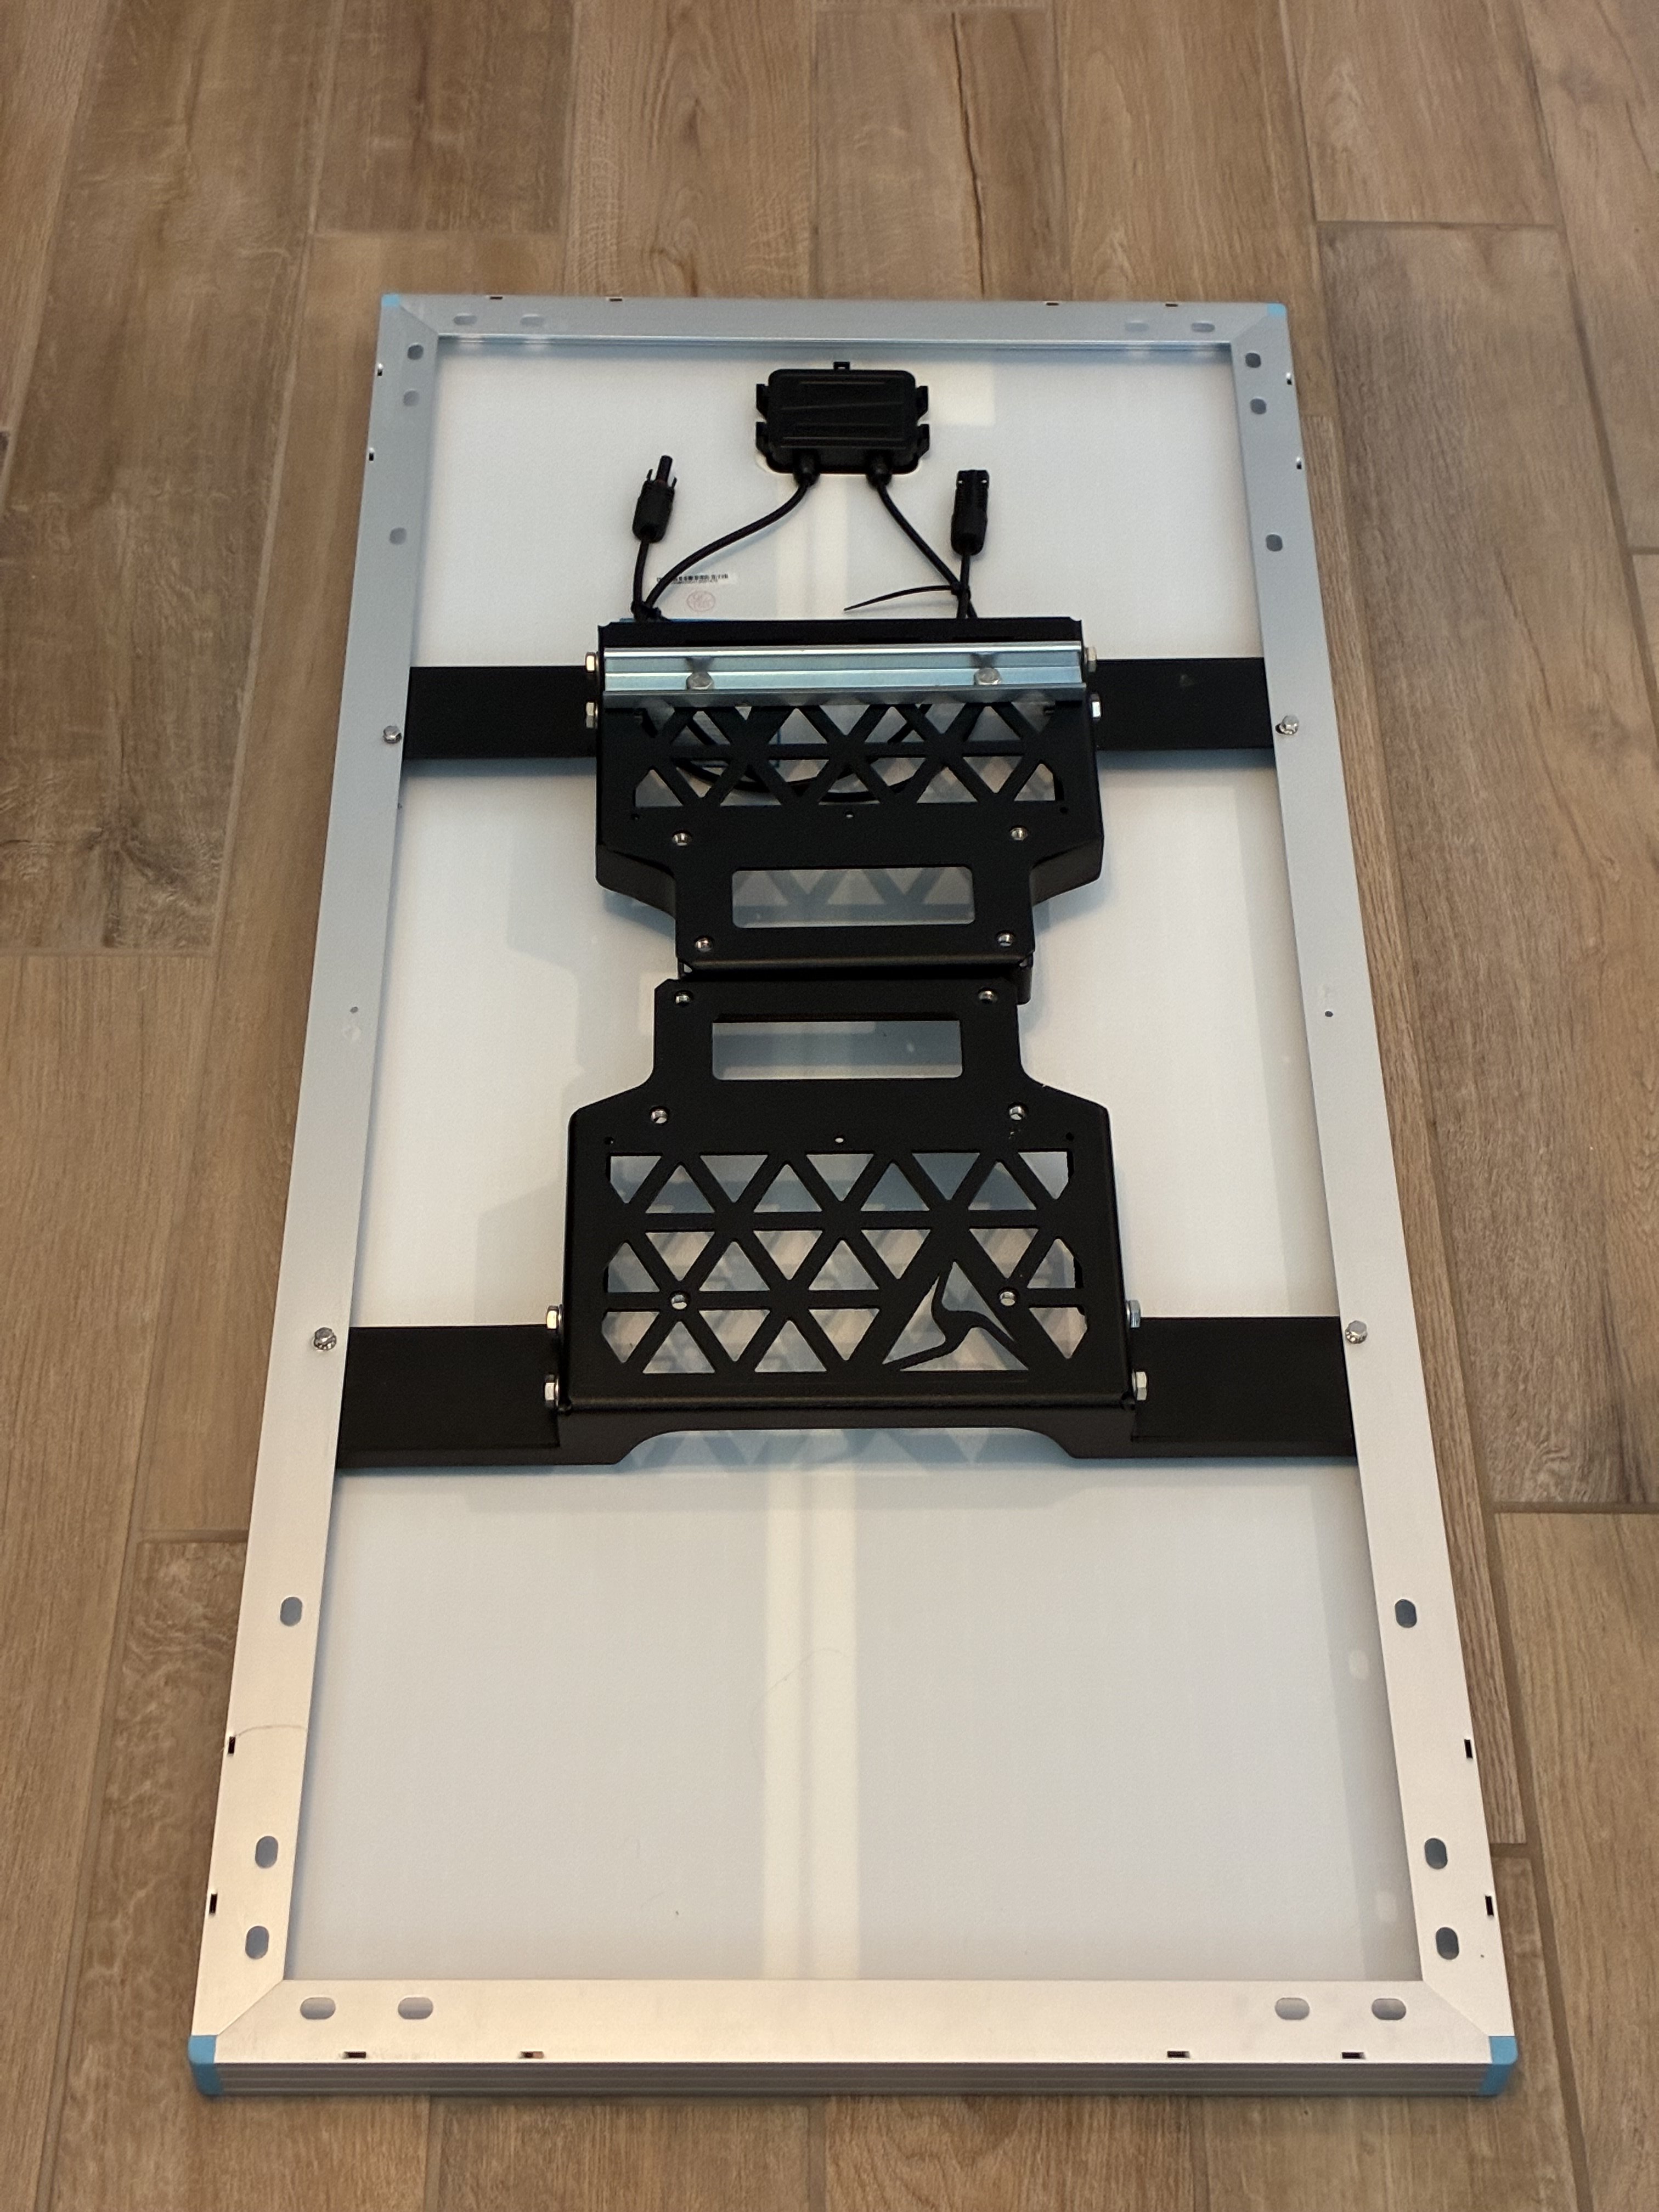
- Remove the (8) 13 mm hex bolts from the solar panel brackets. Locate the pole end cap and place the end cap on top of the solar panel brackets. Align the mounting holes on the end cap with the holes on the solar panel brackets.
- Secure the end cap to the solar panel brackets using 8 13 mm hex bolts.
-
Remove the 2 13 mm hex bolts inline with the DIN rail (left bolt shown here; other bolt is on the opposite end).
-
Attach and snap the assembled battery enclosure onto the center DIN rail. Start with the top side of the enclosure, hooking it onto the rail, then press down on the front side to snap into place. Ensure both sides of the enclosure are securely attached to the DIN rail and that the enclosure attachment bracket aligns with the previously removed hex bolt holes.
-
Secure the battery enclosure to the solar panel bracket using the 2 13 mm hex bolts.
- Remove and discard the caps covering the camera and solar ports on the enclosure.
- Locate the camera power and solar cables. Connect the camera cable first (left), followed by the solar cable (right) to the battery enclosure. Line up the dots on the connectors and plug into the appropriate ports. Firmly twist each cable end to lock into place.
- Connect the solar panel positive/negative cables to the solar cable enclosure pigtail. Tuck the solar cable under the brackets.
-
Locate the push button on the battery enclosure and push it in flush (left image below) so the battery connects to the charge controller. The image on the right shows the button in the Off state.
- On
- Off
Final assembly reference: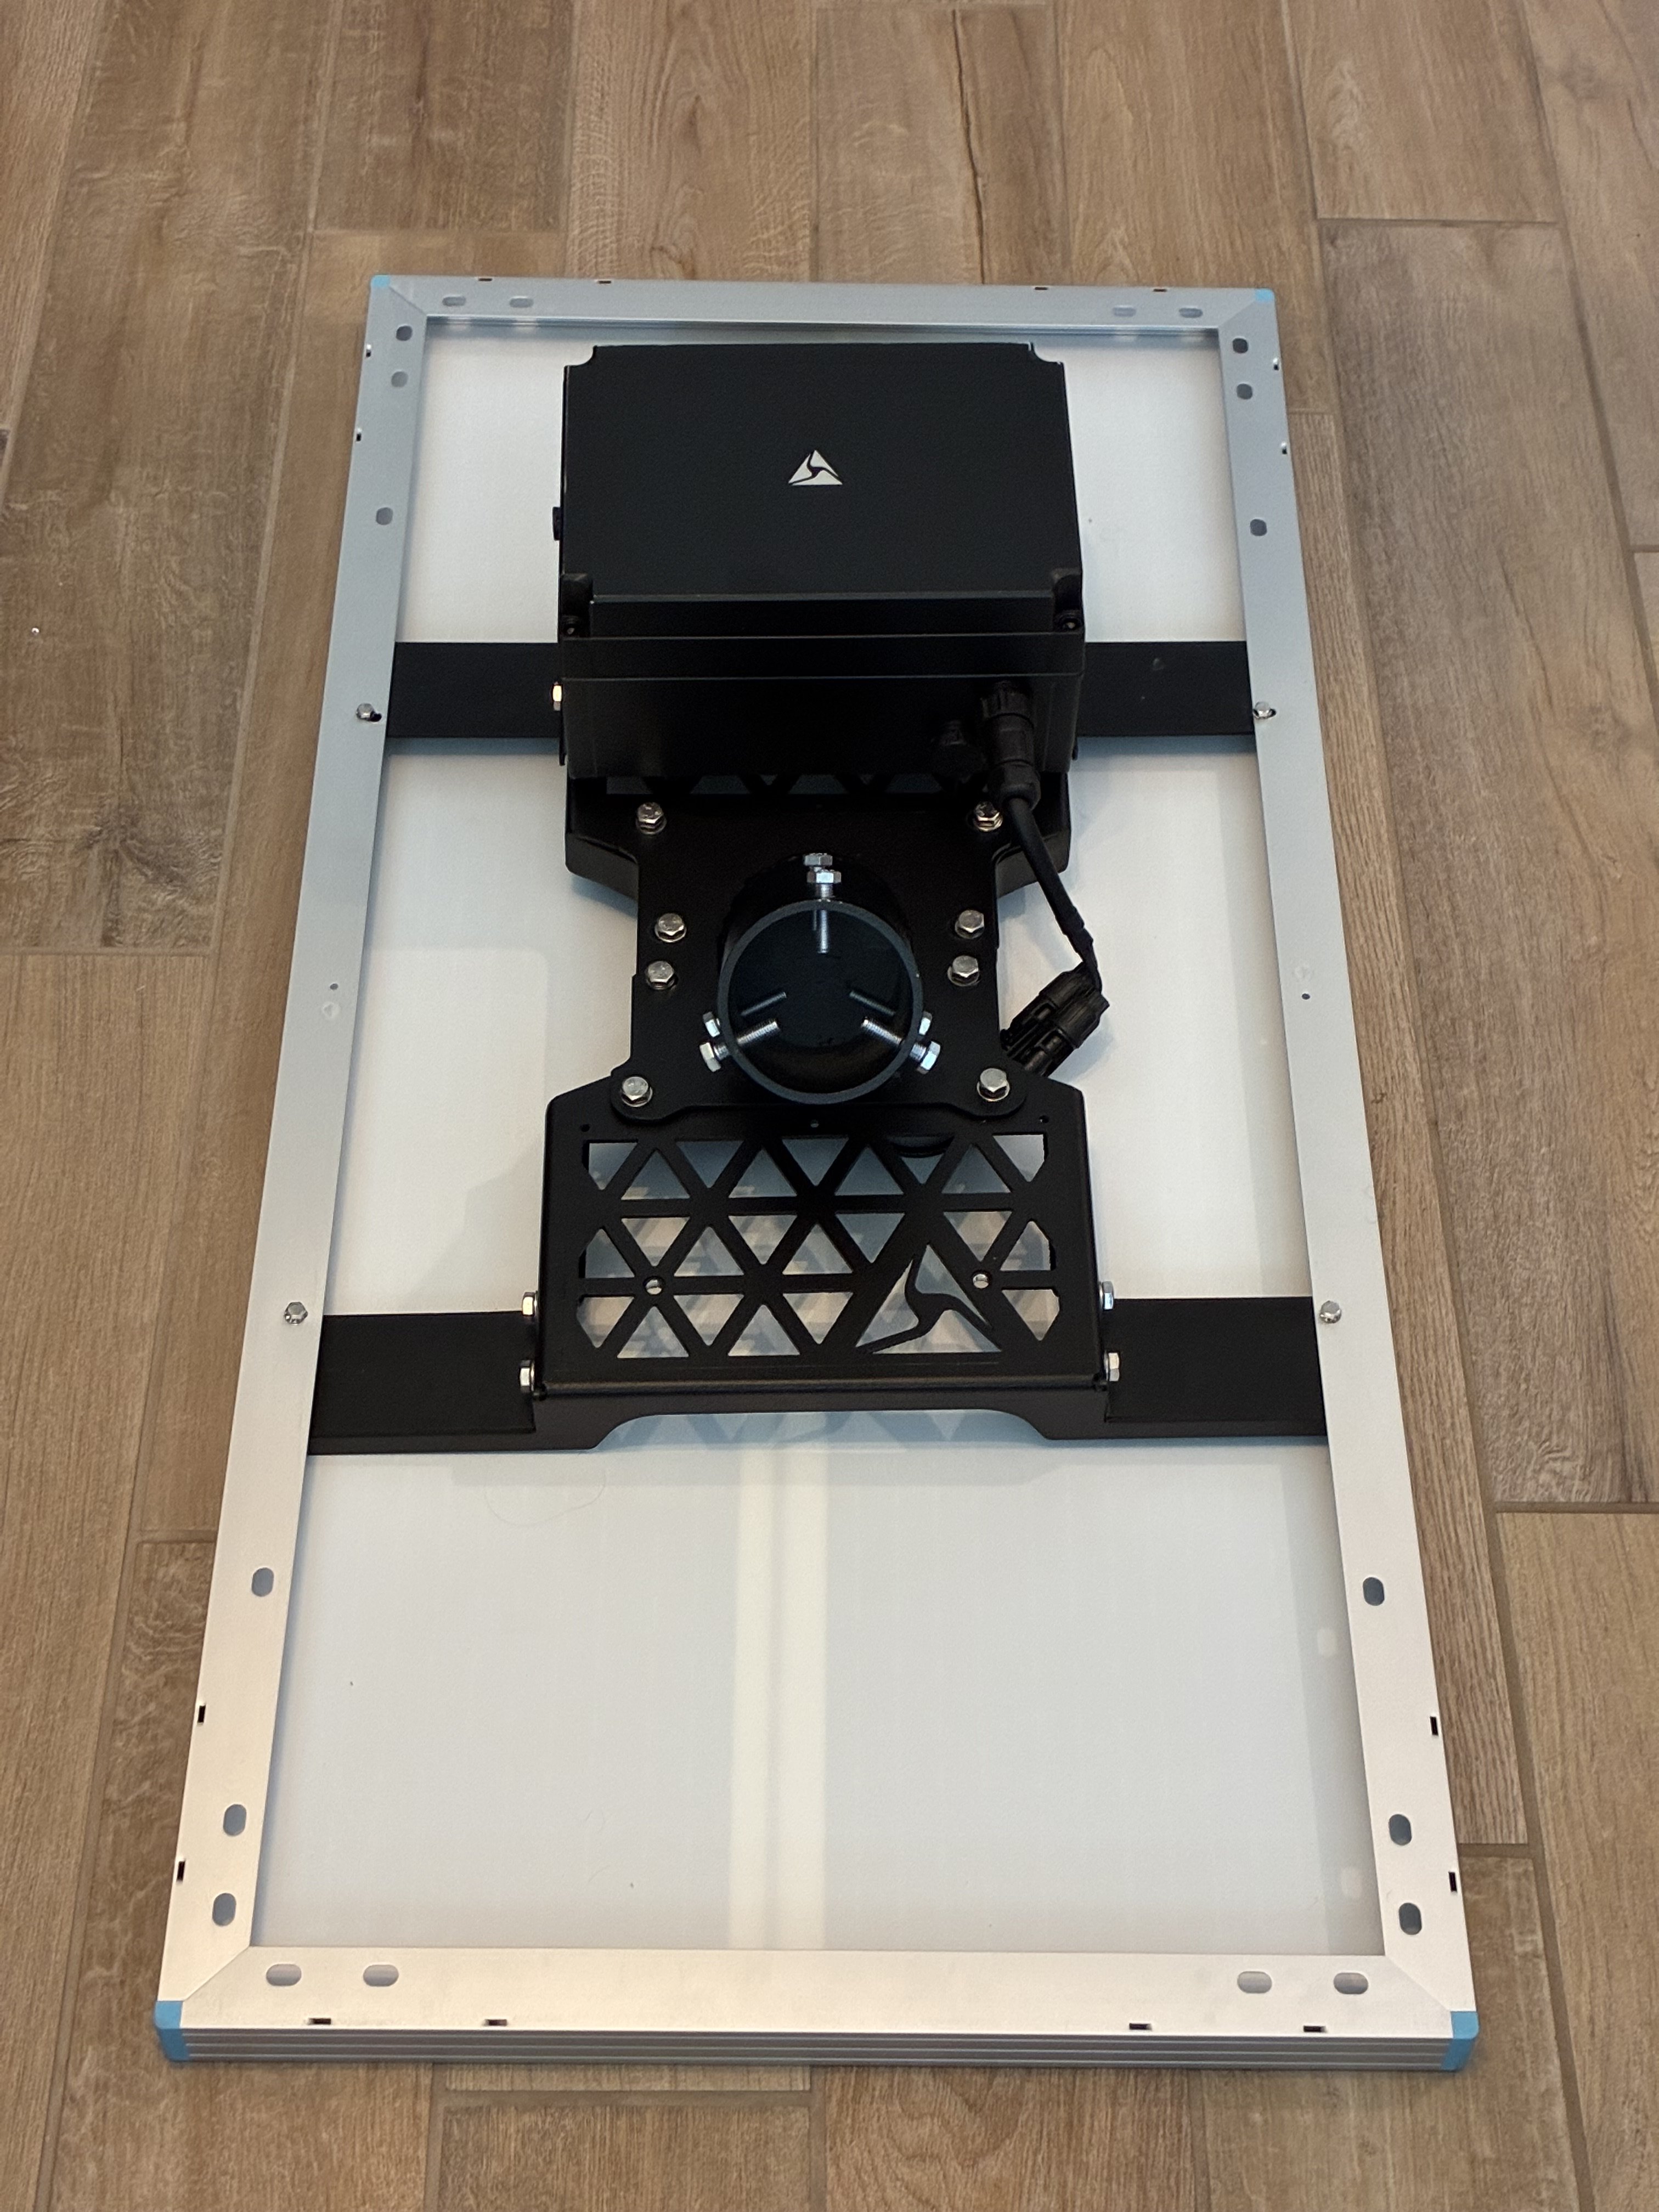
Side-mount-100W
- Unbox the 100W solar panel from its packaging.
- Unbox the 2 solar panel bracket pieces. One has a pre-attached DIN rail; leave this rail on. Remove the (2) 8 mm hex bolts from both solar panel brackets (4 bolts total)
- Line up both solar panel bracket halves and place them towards the top of the solar panel. Ensure the bracket arms sit flush on the top edge of the solar panel.
- Mark where the 4 holes from the solar panel brackets meet with the solar panel frame, to prepare for drilling.
- Move the brackets aside. Drill the marked holes through the aluminum frame using a 7/32” step drill bit. Avoid drilling into the panel backing or laminate. Clear all metal shavings from the panel and surrounding area.
- Install the solar panel brackets under the solar panel frame. Slide each bracket in at an angle.

- Align the mounting holes from the solar panel brackets with the solar panel frame. Secure using the (4) 8 mm hex bolts. Use #10 flat washers if necessary.
- Remove the (8) 13 mm hex bolts from the solar panel brackets.

- Unbox the Side Mount Hardware Kit.

- Place the square end cap on top of the solar panel brackets. Align the mounting holes on the end cap with the holes on the solar panel brackets. Secure the end cap to the solar panel brackets using 8 13 mm hex bolts.
- Remove the pre-attached 13 mm hex bolts from the upper and lower sides of the solar panel brackets.
- Attach the side mount arms to the solar panel bracket using the 13 mm hex bolts. Install the arms on the bracket opposite of the DIN rail.
- Attach one of the pole brackets to the ends of the arms using the pre-installed 13 mm hex bolts.
- Attach the other pole bracket to the top solar bracket using the pre-installed 13 mm hex bolts.
- Remove the 2 13 mm hex bolts on either end of the middle (second) DIN rail. 2 13 mm hex bolts on either end of the middle (second) DIN rail.
- Attach and snap the assembled battery enclosure onto the center DIN rail. Start with the top side of the enclosure, hooking it onto the rail, then press down on the front side to snap into place. Ensure both sides of the enclosure are securely attached to the DIN rail and that the enclosure attachment bracket aligns with the previously removed hex bolt holes.
- Secure the battery enclosure to the solar panel bracket using the 2 13 mm hex bolts removed previously.
-
Route hose clamps through the slits in both the top and bottom pole brackets to prepare for installation.
Final assembly reference: