Forms
Forms in Records and Standards are used to capture data. When users create a report in Report Writer, the report they create uses the form administrators have created in Form Builder as a "template" for their report. All cards, sections, and fields contained in the form appear in the report that users fill out and submit.
Forms are structured in a hierarchy, similar to how a filing cabinet holds files and papers. Think of a form as a filing cabinet. It is a large container that holds structured information.
Within a filing cabinet are file folders. In Form Builder, these are called cards, which appear on the left side of the form in a navigation menu. Cards contain the various fields that capture related information.
If cards are like file folders, fields are like individual papers within a file folder. Users enter information into fields when writing their reports. Multiple different field types are supported in Form Builder.
You can introduce additional structure and organization to your forms by adding sections within a card. A section can contain a group of related fields. Think of a section as a group of papers in the file folder that are stapled together.
A card can additionally contain subforms, which are like sections but can stand alone. Think of a subform as a smaller file folder that has been added inside the larger file folder. Subforms can have a similar organization as a form, including section and fields. A good example of a subform is an Arrest subform that appears in incident reports.
Visually, you can think of the structure of a form as follows:
- Form
- Cards
- Fields
- Sections
- Fields
- Subforms
- Sections
- Fields
- Cards
This video explains how forms are structured.
Create forms
Form creation is currently not supported in Form Builder. If you need a new form, contact Axon Support or your Axon representative.
Edit forms
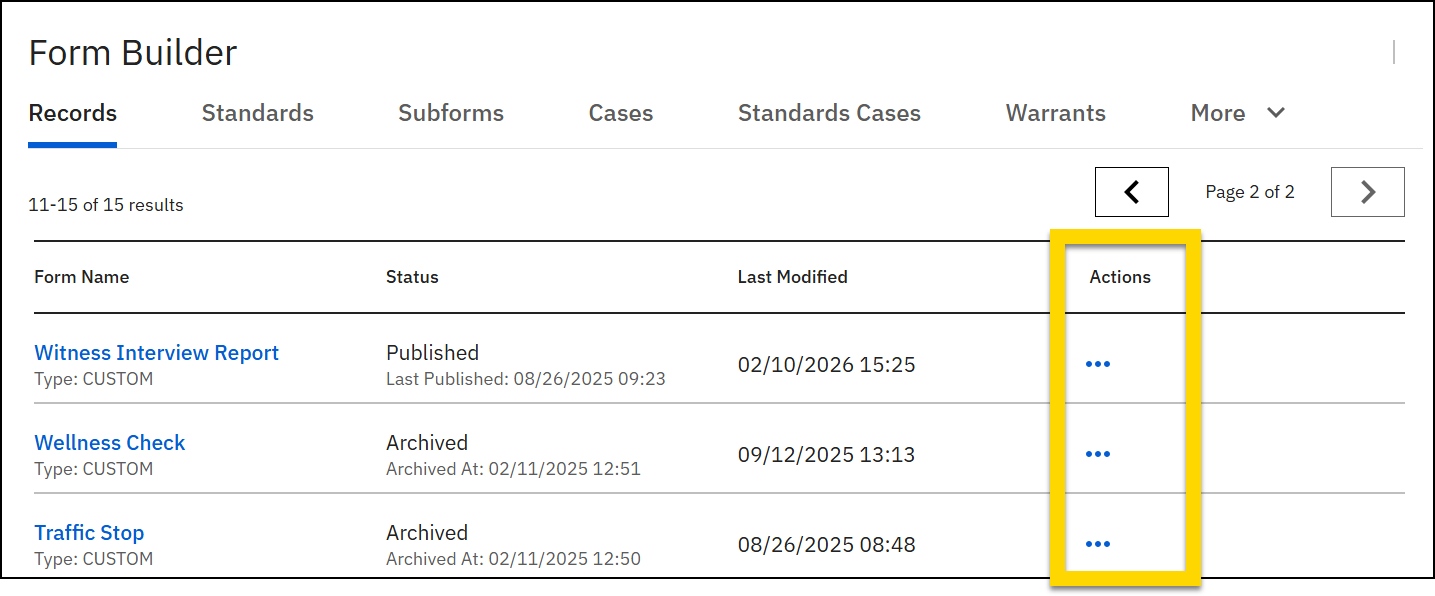
To edit a form, open Form Builder, switch to the tab containing the form, and select the blue hyperlink form name. See Cards and fields for details about managing these items in your forms.
When you edit a published form, you create a draft of that form, and the edits you make are considered a "draft" until you publish the form. This means that the changes you make in the form won't appear to users in Report Writer until you publish.
To avoid conflicting changes, only one person can edit a form at a time. When another user is actively editing a form, a lock icon appears beside the form name and the status column displays the name of the person editing the form.
- To make urgent changes while someone else is editing, in the Actions column of that form's row, select More actions [...] > Take over form.
- Remember, if you take over a form from another user, any changes they've made will be lost.
Edit form details
To edit the title of a form or update the options such as Requiring the Incident ID and Enabling default incident entities:
- Open the form.
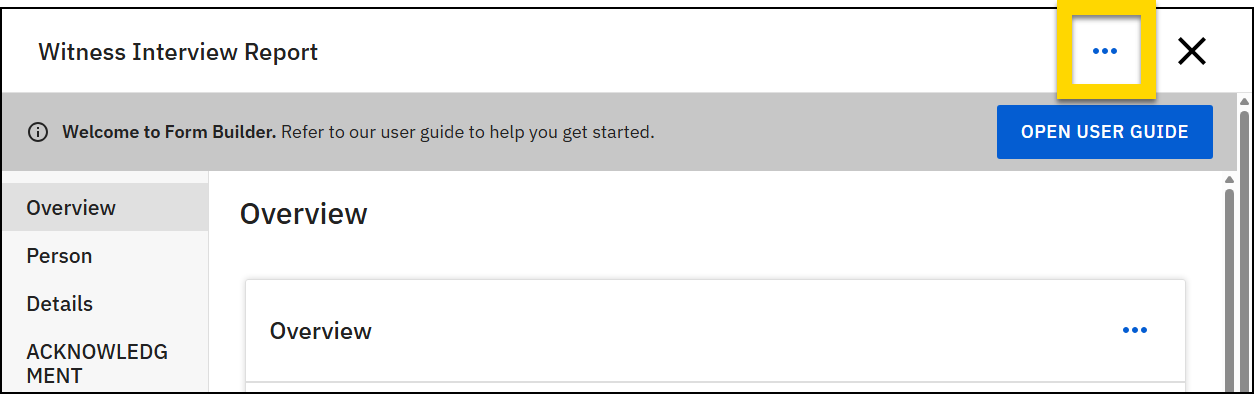
- Select More actions [...] > Edit form details in the upper right corner.
- You can modify the following options:
- Form name and short code: The form name and short code appear throughout the product whenever a user views a report.
- In the image below, the form name is highlighted in yellow, and the short code is highlighted in green.

- In the image below, the form name is highlighted in yellow, and the short code is highlighted in green.
- Incident ID is required: If this option is checked, users must provide an incident ID when creating this type of report.
- Form name and short code: The form name and short code appear throughout the product whenever a user views a report.
- Press Save to apply your changes.
- After making changes to your form, preview and then publish it.
Watch this video for an overview of how to update form details using Form Builder.
Preview forms
Preview mode shows how a report will appear to users in Report Writer when the form is published, allowing you to test rules, conditions, and overall functionality.
Select Preview at the bottom of the screen at any time during the creation or editing process to see how the form will look and behave.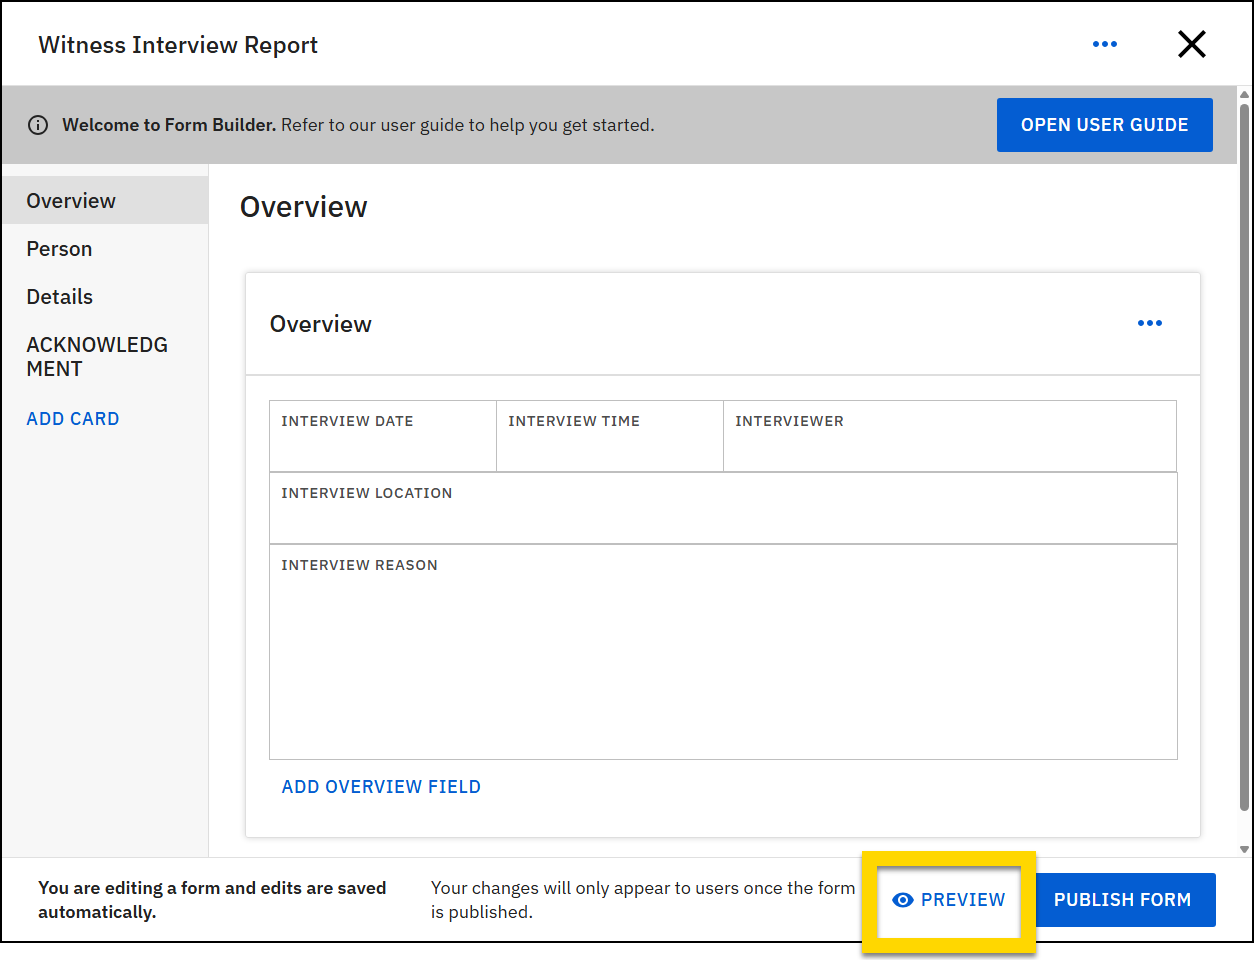
While in preview mode, you can enter sample data in the fields to test your fields, validation rules, and default values to ensure they function as intended.You can publish while in Preview mode or exit Preview mode and continue editing the form. See the following section for more information about publishing forms.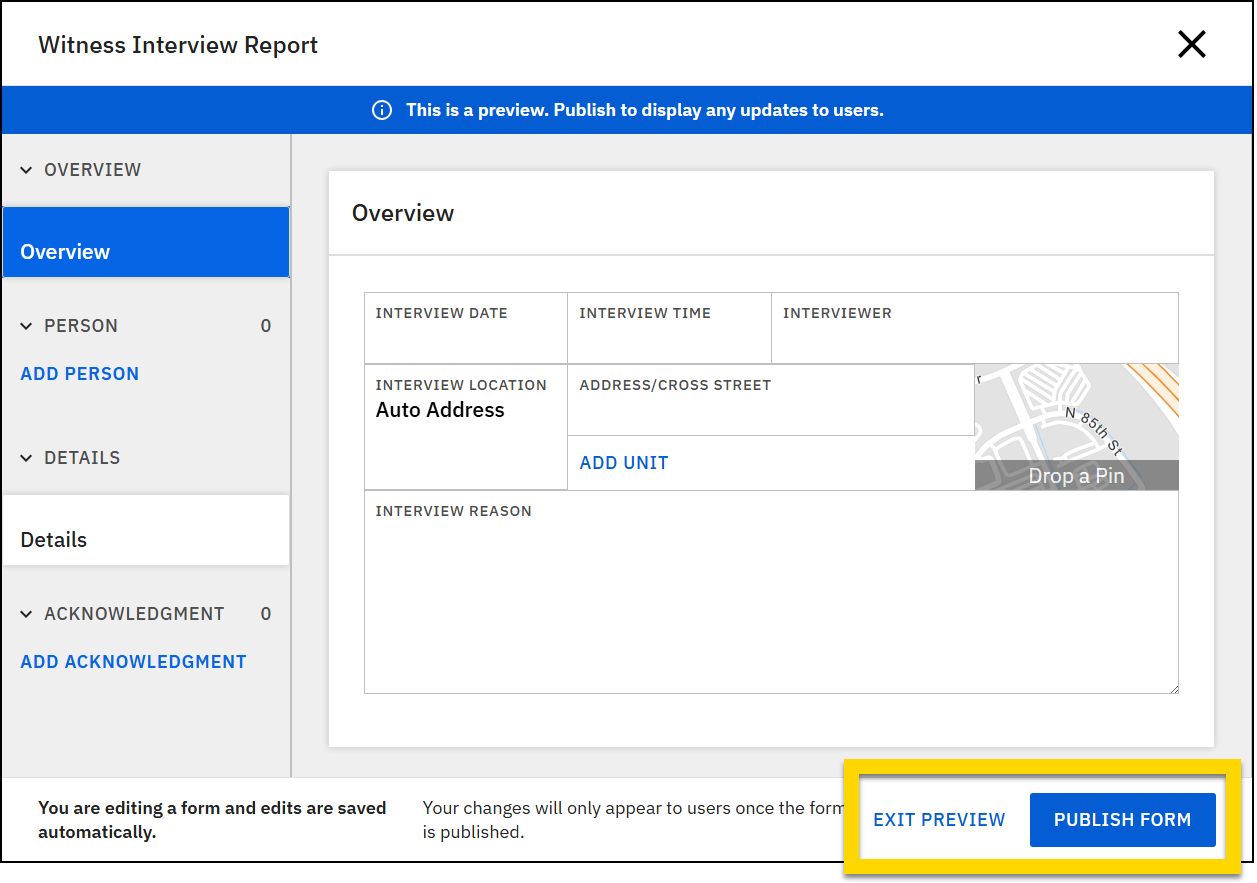
Publish forms
After completing your form, select Publish form at the bottom of the screen. When you publish a form, your changes to the form will be applied to all reports users create using that form from that moment forward. If a user created a report using that form BEFORE you published, their already created reports will NOT reflect your changes.
Watch this video for an overview of managing and publishing forms using Form Builder.
The publishing process is different for subforms. See Subforms for more information.
Discard drafts
When you edit a published form, you create a draft of that form, and the edits you make are considered a "draft" until you publish the form.
In Form Builder, you can discard a form's draft and revert back to the latest published version of the form (the version users are currently using when they create reports). When you discard a draft, you remove ALL changes made since the last time the form was published.
Discarding a draft cannot be undone. Once a draft is deleted, all changes are deleted and cannot be restored.
For example, you have a form that you published on Monday. On Tuesday, you make a number of changes to the form. However, at the end of the day, you decide you no longer want the changes you made to the form. You discard your draft (which contains all changes you made on Tuesday). When you edit the form on Wednesday, you do NOT see any changes you had made on Tuesday. Instead, you see a "fresh" draft that only contains the fields that were part of the form you published on Monday.
To discard a form's draft:
- Open the form.
- Select More actions [...] > Discard draft in the upper corner.
- A confirmation message will appear. If you’re sure you want to proceed, choose Discard draft on the confirmation message window that appears.
Watch this video, starting at 02:47, for an overview of discarding form drafts.
Restore previous version
With the Discard draft feature, you can discard a form's current draft and revert it back to the current published version. When you restore a form to a previous version, you move "back in time" one step farther and instead revert the form to the previously published version.
A form must have at least two published versions for this feature to be available. (In other words, you need a previous published version to revert the form back to.)
You can only perform this step once and revert back to the previously published version. You cannot after reverting, revert again and go back to an even older version of the form.
For example, you have a form that you published on Monday. This is version 1 of the form. On Tuesday, you make a number of changes to the form and publish it, making version 2 of the form. On Wednesday, you realize that the changes you made on Tuesday were incorrect. You revert to the previous version of the form, which is version 1.
Restore previous version and discard draft
If you revert to a previous version of a form and later decide you actually do not want to revert back to that version, you can use the Discard draft feature to return the form to its current published version.
For example, you have a form that you published on Monday. This is version 1 of the form. On Tuesday, you make a number of changes to the form and publish it, making version 2 of the form. On Wednesday, you realize that the changes you made on Tuesday were incorrect. You revert to the previous version of the form, which is version 1. However, after reverting to version 1, you realize you actually do want to use version 2. You use the Discard draft feature to discard your draft (which is version 1 of the form). When the draft is discarded, you are left with the currently published version of the form (version 2).
To revert to a form's previous version:
- Open the form.
- Select More actions [...] > Restore previous version as draft in the upper corner.
- A confirmation message will appear. If you’re sure you want to proceed, choose Revert draft on the confirmation message window that appears.
- When you revert to a previous version, you discard any changes you've made, and the form is reverted back to a previous version.
- The form is in draft, and the previous version is NOT automatically republished. As a result, users can continue to create reports using the most recently published version of the form (i.e., the version that you just reverted from) rather than the version that was published previously (i.e., the version you reverted to).
- If after reverting and reviewing the draft, you determine that you do not want to use it, you can discard the draft. This action will return the form to its current published version (i.e., the version that you just reverted from).
- To ensure that users immediately are reverted back to the previous version of the form, select Publish.
Archive forms
Archiving a form makes it unavailable as an option for users to select when they create reports. When a form is archived, any reports created using the form before it was archived are NOT impacted in any way.
To archive a form:
- Open Form Builder and switch to the tab containing the form.
- In the Actions column, select More actions [...] > Archive for that form.
- The Incident Report form cannot be archived.
- Select Archive form in the confirmation message window that appears.
Archived forms can be unarchived by opening the form and selecting Publish.
Watch this video, starting at 03:50, for an overview of archiving forms.