Manage warrants
The Warrants module includes tools for managing warrants from assignment through service and completion. Users can assign warrants to officers, mark service as complete, update paper statuses, and view or add entries to each warrant’s activity log. The module also supports printing court papers and letters, as well as performing bulk actions for efficiency.
Service assignment
If your organization manages which warrants are assigned to which officers for service, you can use the warrant assignment workflow in the Warrants module.
In this workflow, a user can assign a warrant to an officer for service. Officers can view a list of which warrants are assigned to them, and after serving a warrant, they can mark the service task as complete.
Assign warrant
To assign a warrant for service:
- Open the Agency Court Papers inbox and use the filters to find the warrants that should be assigned.
- Location: Reporting Area: Lets you filter warrant locations by district, sector, and zone
- Has Assigned Officer: When applied, shows only warrants that have been assigned for service
- Assigned Officer: Lets you see which warrants are assigned to specific users
- Use the checkboxes to select one or more warrants.
- Select Actions > Assign / Reassign for Service.
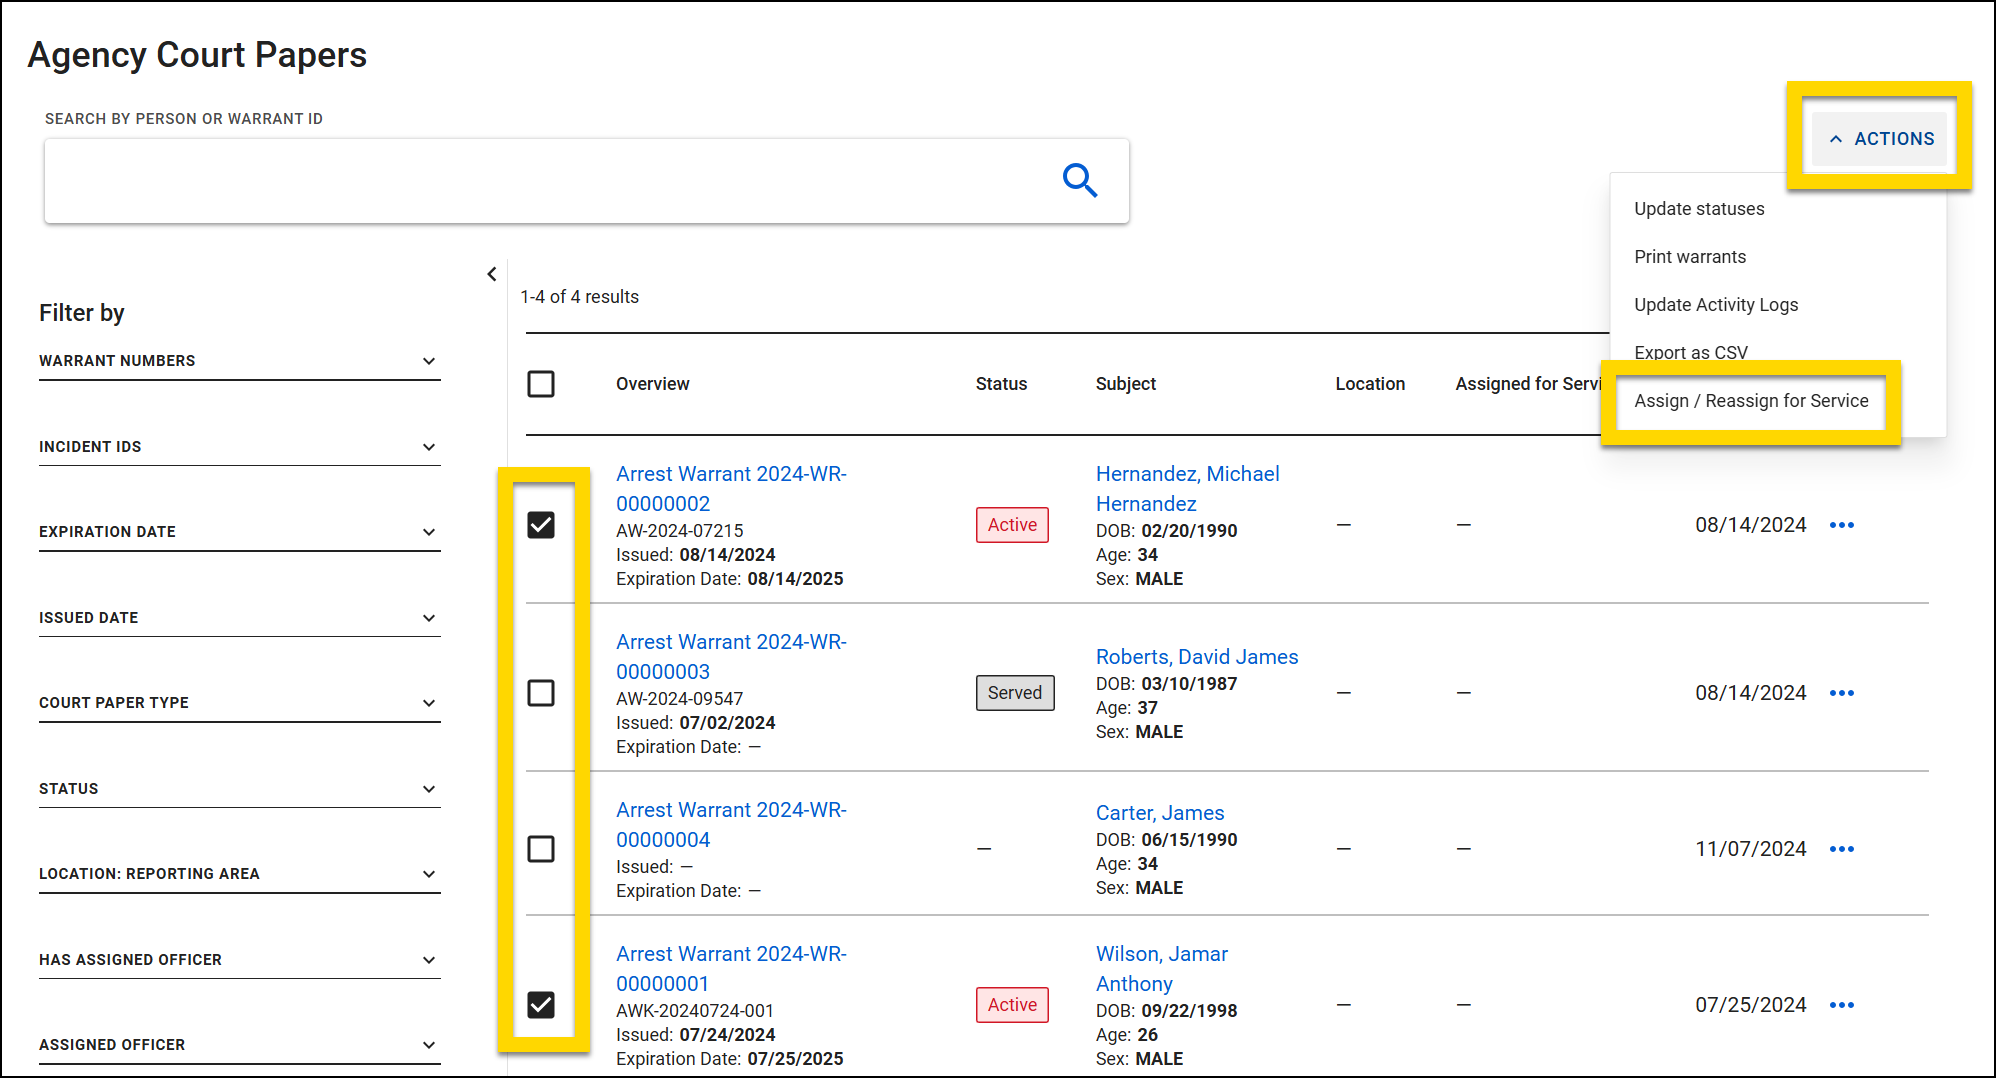
- Enter a user in the Assign to field.
- Select Assign.
- A Serve Warrant task is created in that user's My Tasks inbox > Assigned for Service tab in the Warrants module.
Complete warrant service
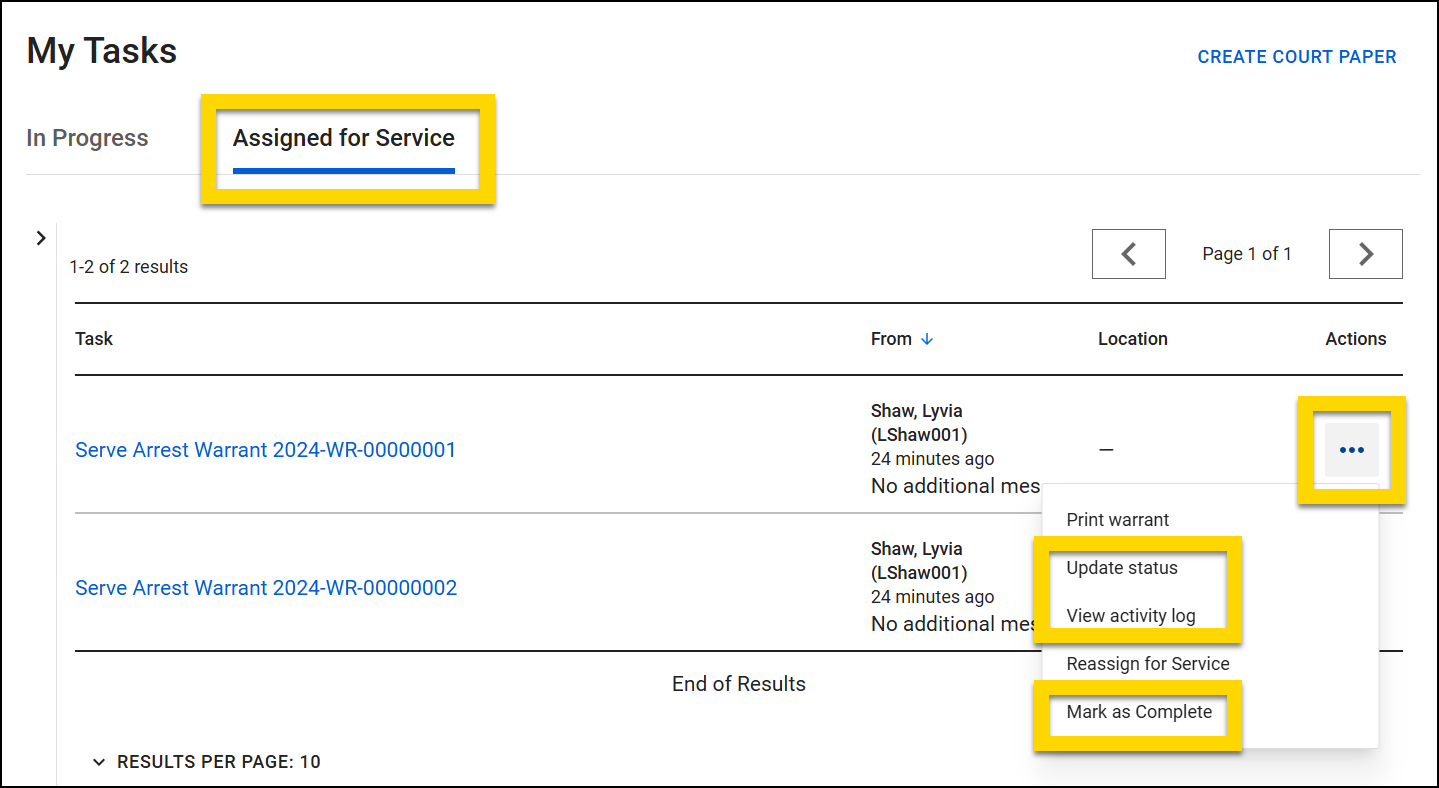
To document that a warrant assigned to you has been served:
- Open your My Tasks inbox in the Warrants module and switch to the Assigned for Service tab.
- Select the Serve Warrant task to view the warrant associated with that task.
- If the warrant has been served, select More Actions > Update Status.
- If you attempted to serve the warrant but were unsuccessful, you can instead select More Actions > View Activity Log and note that the service was attempted.
- To remove the Serve Warrant task from the list, select More Actions < Mark as Complete.
- A task can be returned to this list if the warrant is assigned to the user again
 .
.
- A task can be returned to this list if the warrant is assigned to the user again
If a warrant is assigned for service, but a user returns the warrant to a Draft state for updates, a Don Not Serve label is added to the warrant, indicating that it should not be assigned until it has been finalized.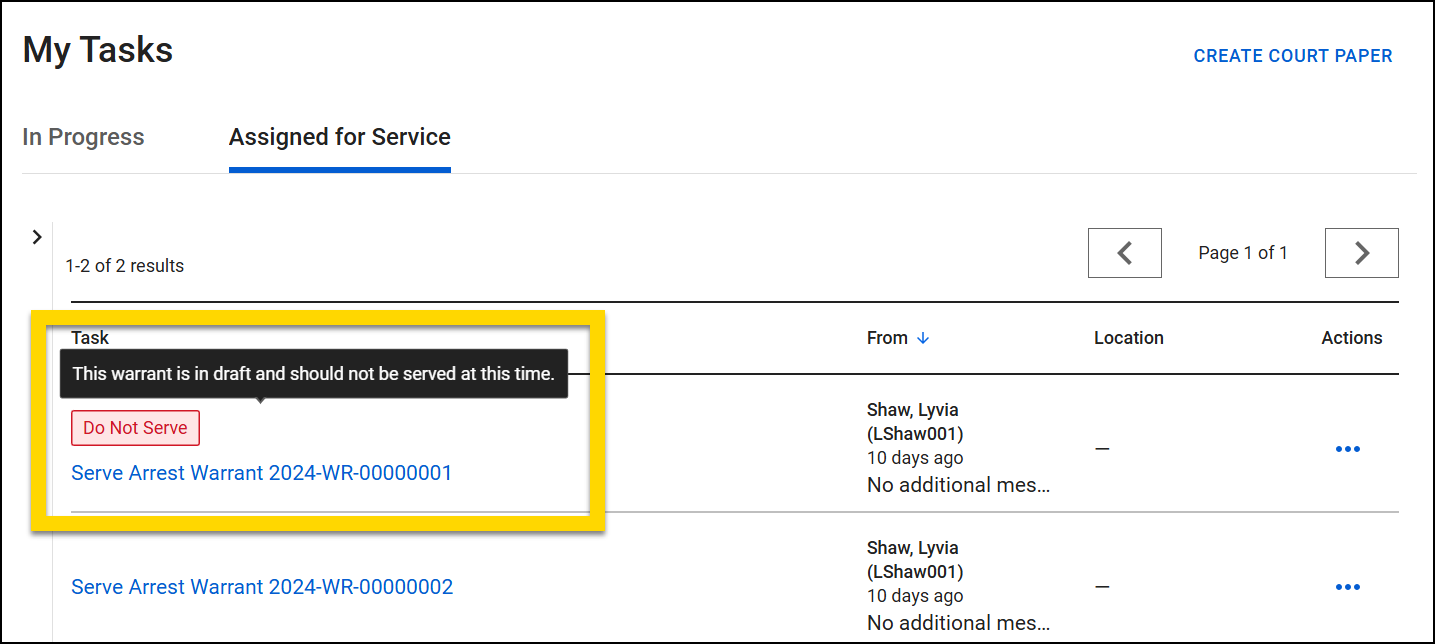
Print warrants
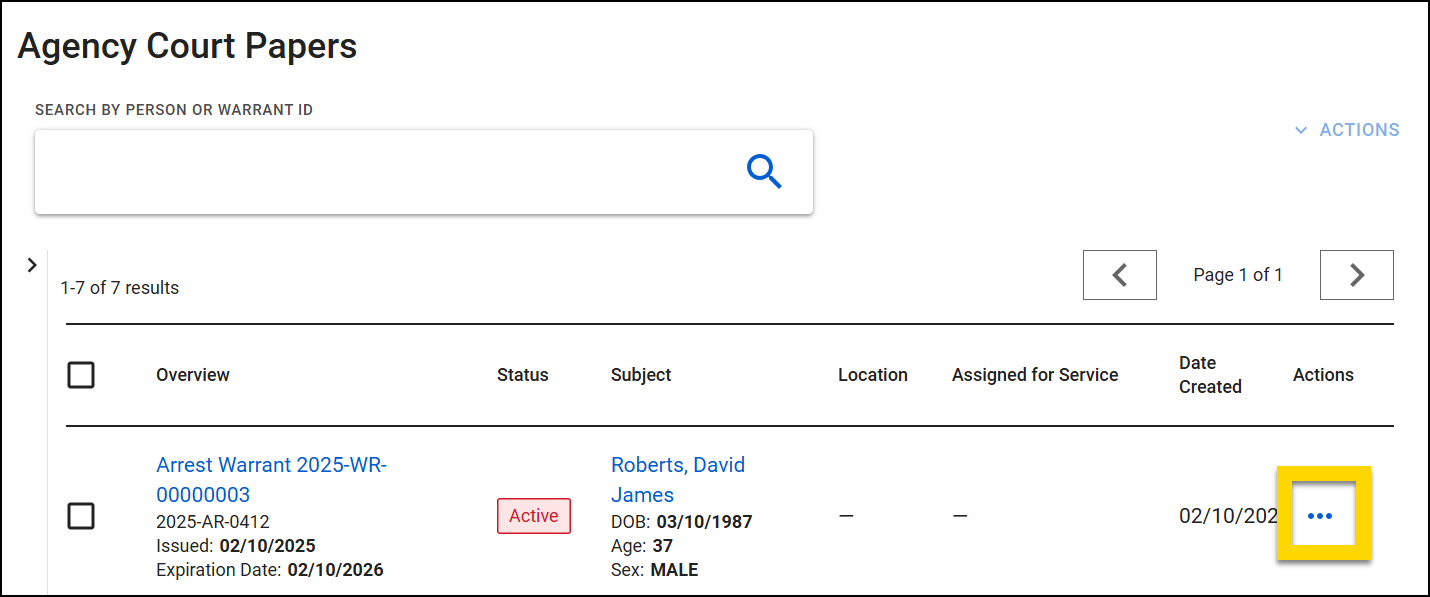
Court papers can be printed from the More Actions Menu [...] in Report Writer or in the Actions column in the Agency Court Papers inbox.
When printing, select the checkbox if you want to include the Activity Log in the printout, as well as set the header options (header off, on all pages, or on first page only). Provide auditing details (recipient and purpose) and select Print.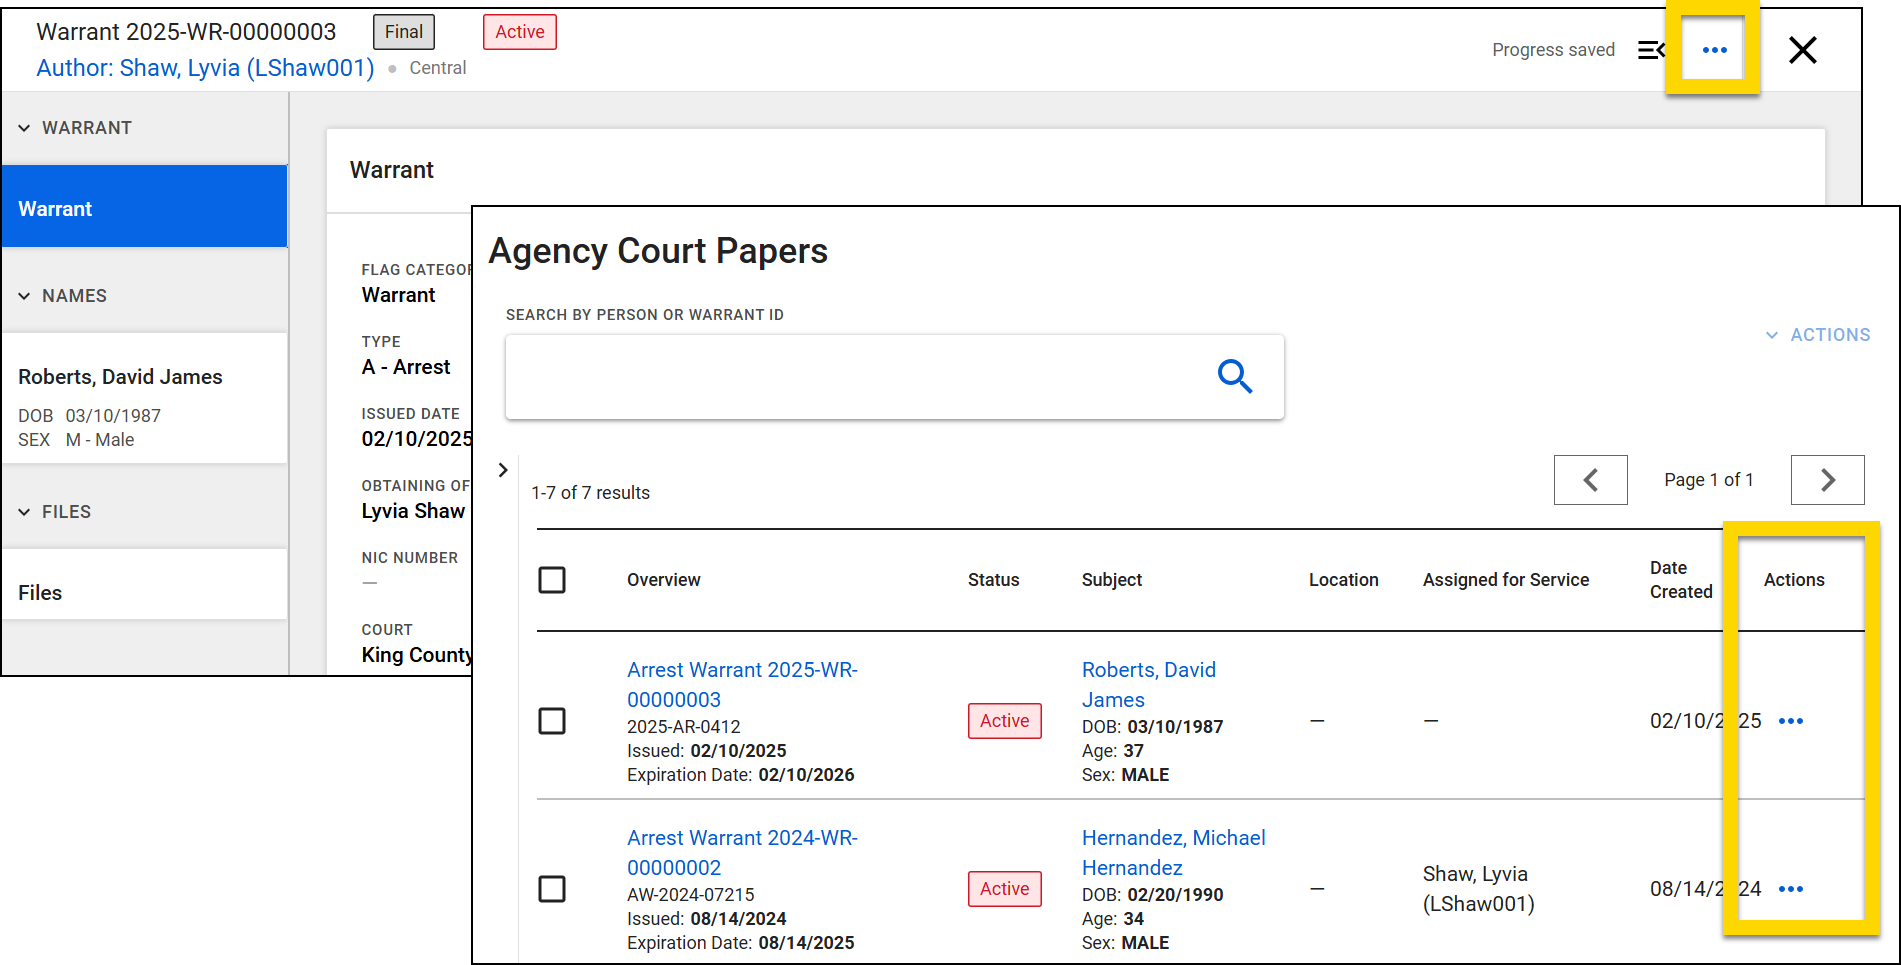
Some court papers, like warrants, also have a letter that can be printed. Agencies can contact their Axon representatives to configure these letters. Once configured, you can print a letter by selecting Actions [ ...] > Print letter.
Print multiple court papers by selecting the checkboxes beside multiple papers in the Agency Court Papers inbox then selecting Actions > Print warrants.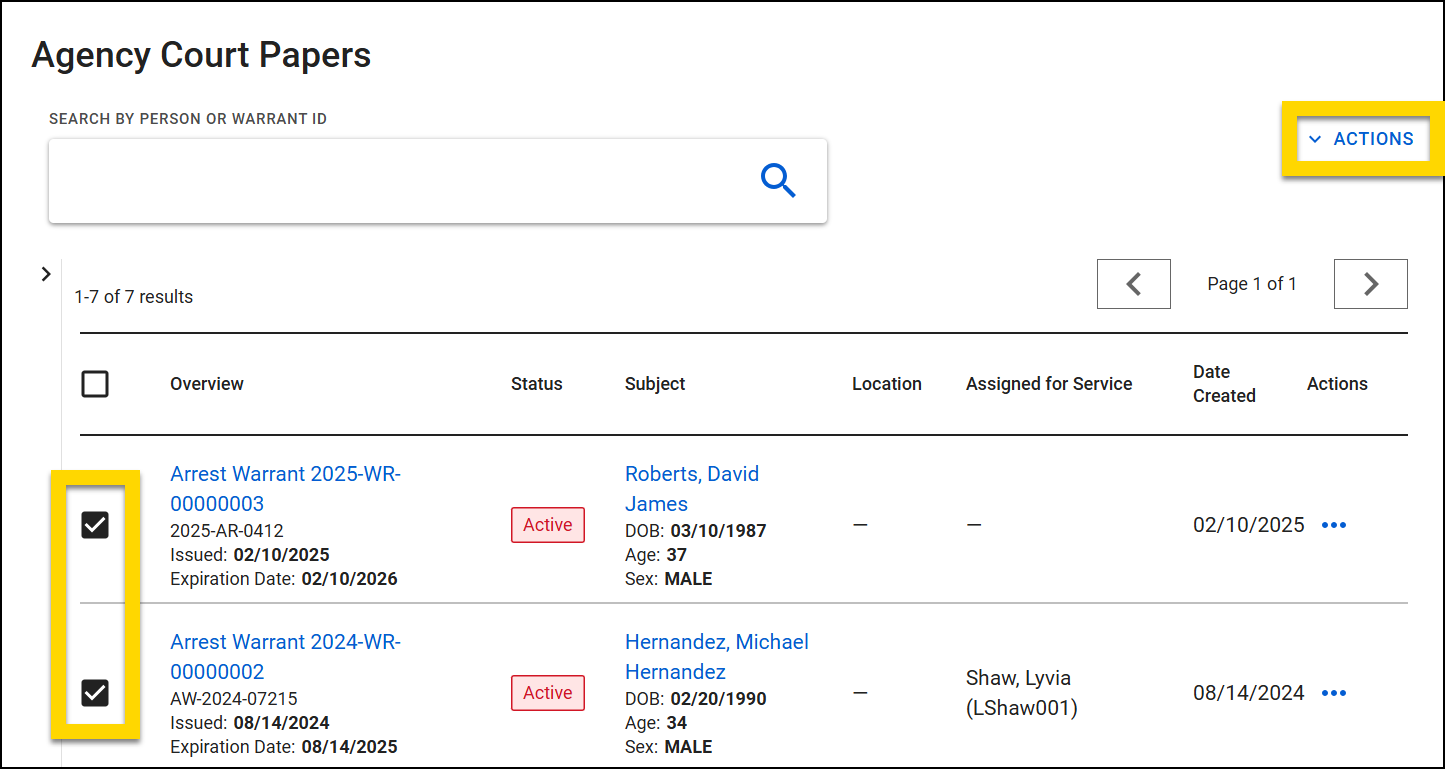
Update warrant status
A court paper's status can only be updated once the document has been finalized.
To update the status, take these steps:
- Open the Agency Court Papers inbox and find the paper.
- In the Actions column for that paper, select More Actions [...] > Update status.
- Select an option from the Status menu.
- Default options include Active, Served, Expired, Not Processable, Purged, Recalled.
- Contact your Axon representative to have additional statuses configured for your organization.
- Indicate which user is updating the status in the Activity Completed By field.
- Use the Notes field to provide additional information.
- Set the date and time the status was updated.
- Select Save.
Update the status for multiple court papers by selecting the checkboxes beside each paper that needs to be updated then Actions > Update statuses.
Contact your Axon representative to configure emails to be sent to groups of users when a warrant status is updated.
Manage the activity log
To view a court paper's activity log, open the Agency Court Papers inbox and in the row for the paper you want to view, select More Actions [...] > View activity log.
Each row of the log includes an activity type, description, who performed the activity, and when the activity was performed. Hover over the text in the Description column to view the full content or in the Actions column, select More Actions [...] View log to see the full details of that activity in a separate window.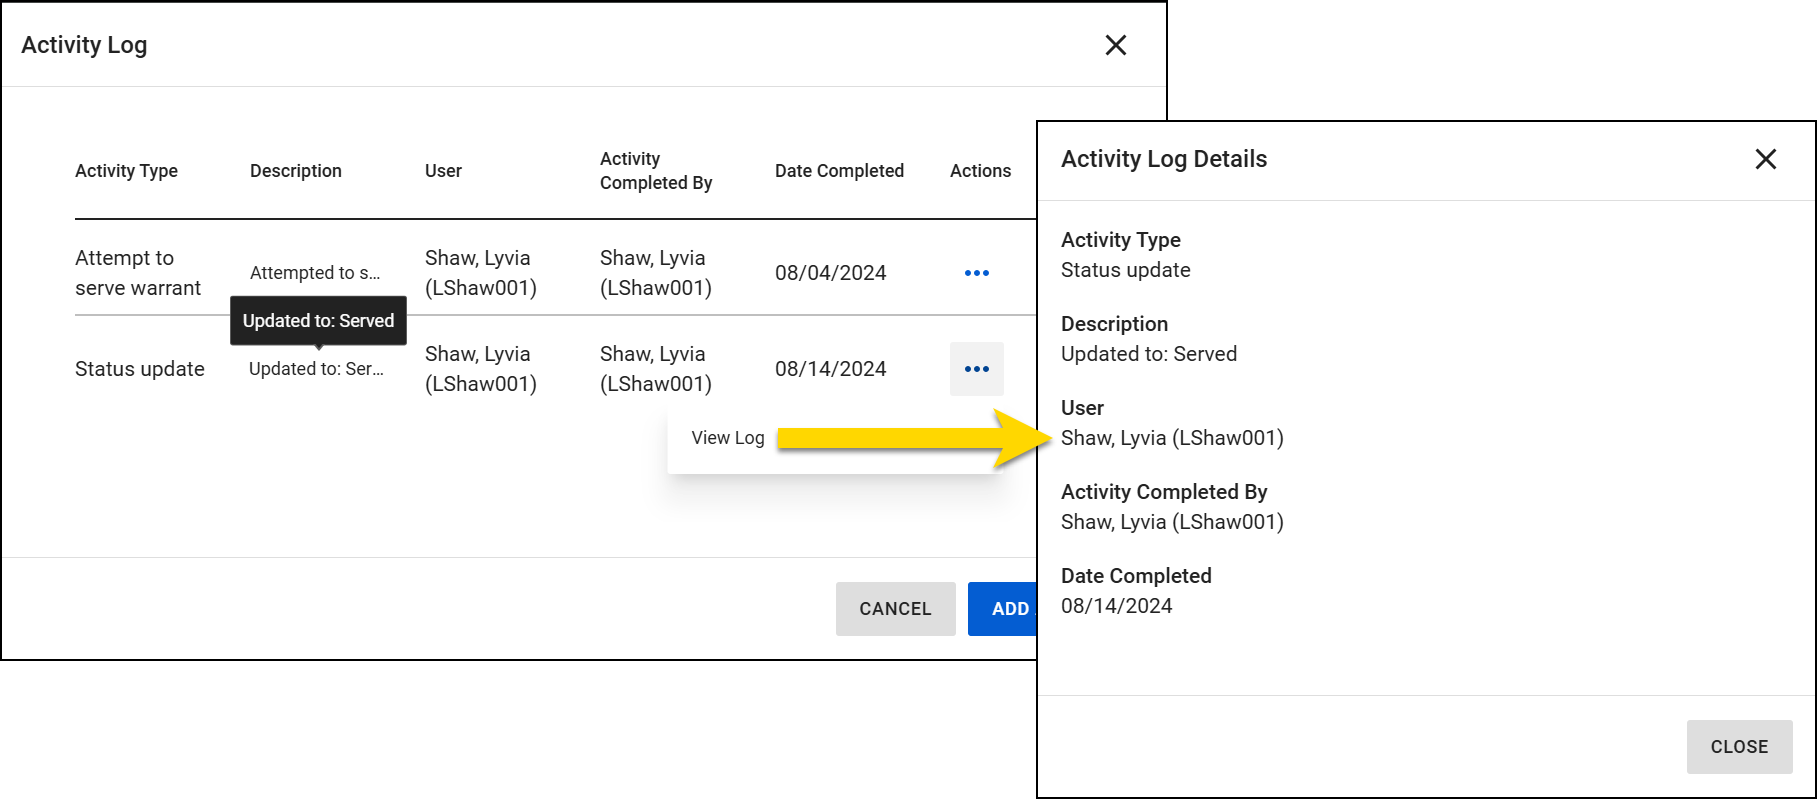
Updates to the court paper's status are automatically added to the log. To add an activity to a court paper's activity log manually:
- Open the activity log for that court paper.
- Select Add Activity.
- Select an activity type. Options include:
- Attempt to Serve
- Note
- Comment
- Warrant Validation
- Indicate which user is updating the status in the Activity Completed By field.
- Use the Description field to provide additional information.
- Set the date and time the activity was completed.
- Select Add.
Delete activities from the log by selecting More Actions [...] > Delete. You can only delete activities that have been added manually; automatic additions (like updates to the status) cannot be deleted.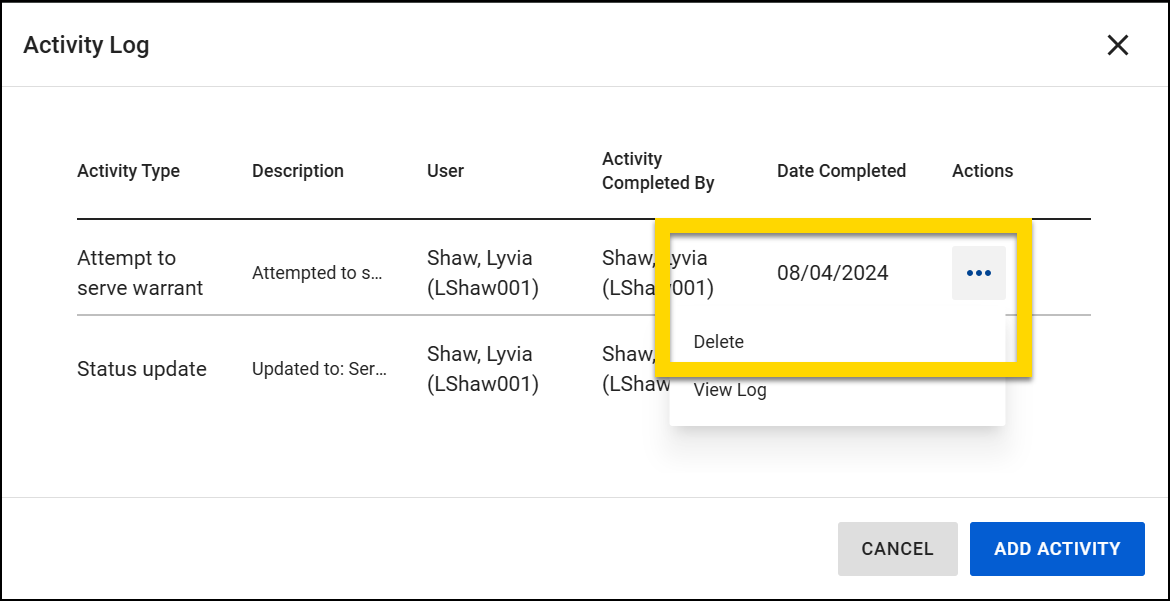
Contact your Axon representative to customize activity log type that appear for a court paper.