Create, submit, and review warrants
The warrant creation process lets authorized users create, submit, and review warrants or other court papers. Users can associate warrants with incidents and arrests, attach supporting files, and add a Warrant flag to individuals named in the warrant. Once submitted, warrants can go through a review process before being finalized.
Create warrants
To create a warrant or court paper, take these steps:
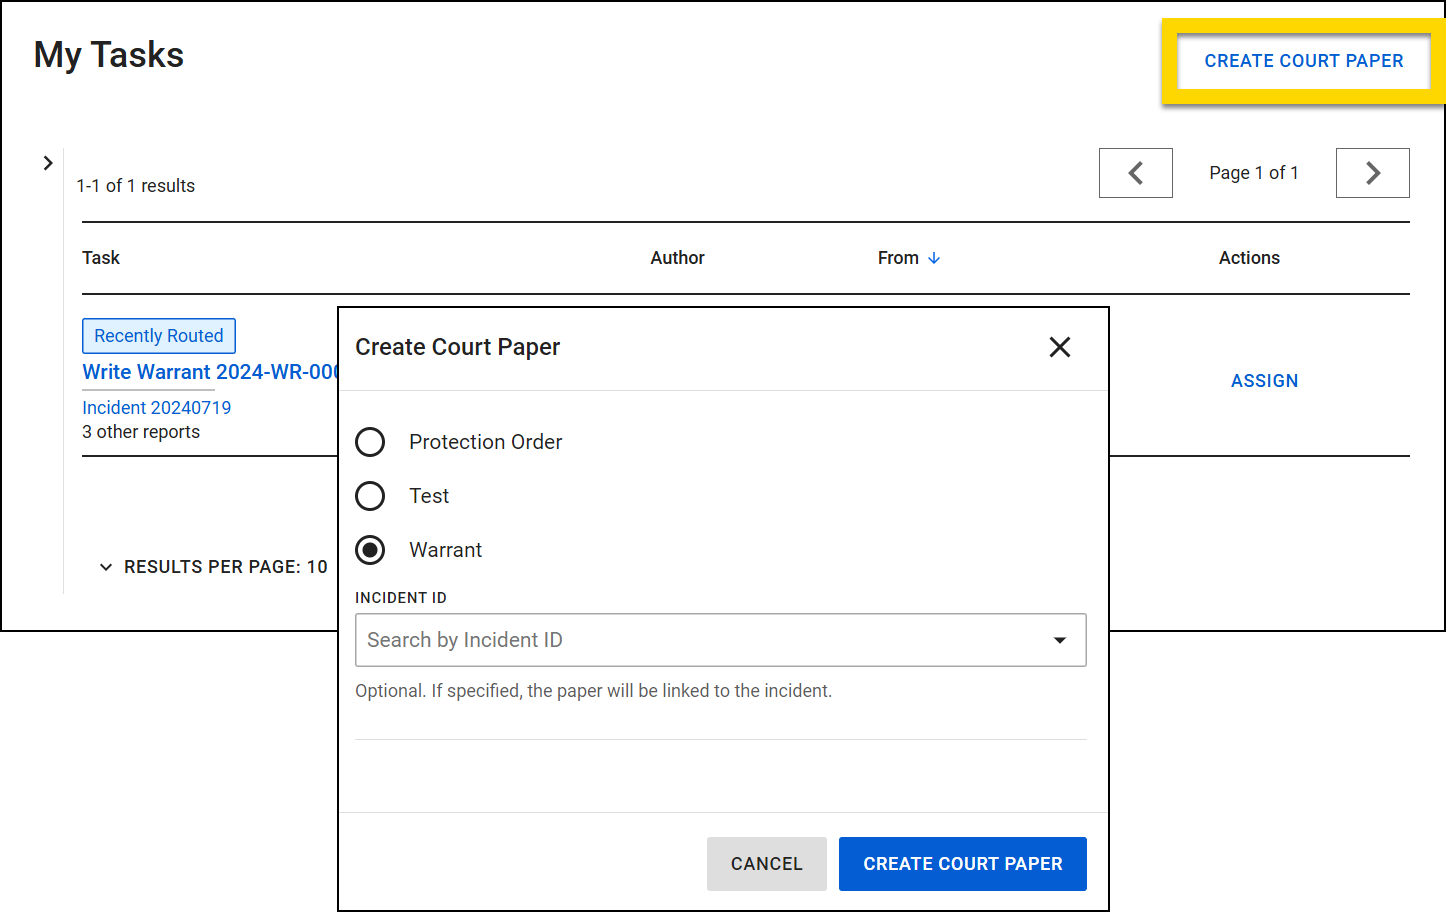
- From the My Tasks inbox, select Create Court Paper.
- Some organizations require an associated Incident ID.
- Select the type of paper you are creating, add the Incident ID of the incident the paper is associated with (optional), and select Create Court Paper.
- If you associate the warrant with an existing incident, copy the incident number to insert later into the warrant.
- The paper will open where you can enter information about the paper, specify who it is being served to, and add attachments.
Overview and actions
Selecting a Paper ID or creating a new paper opens the paper in Report Writer where the header, left navigation menu, central writing area, right sidebar, and footer function as they do when writing regular reports. See Report Writer for more information about these areas of functionality.
Unlike regular reports, a second status is displayed at the top of the screen for on finalized court papers. The first status is the status of the "document" (Final), and the second status is the status of the paper (Active, Expired, etc.).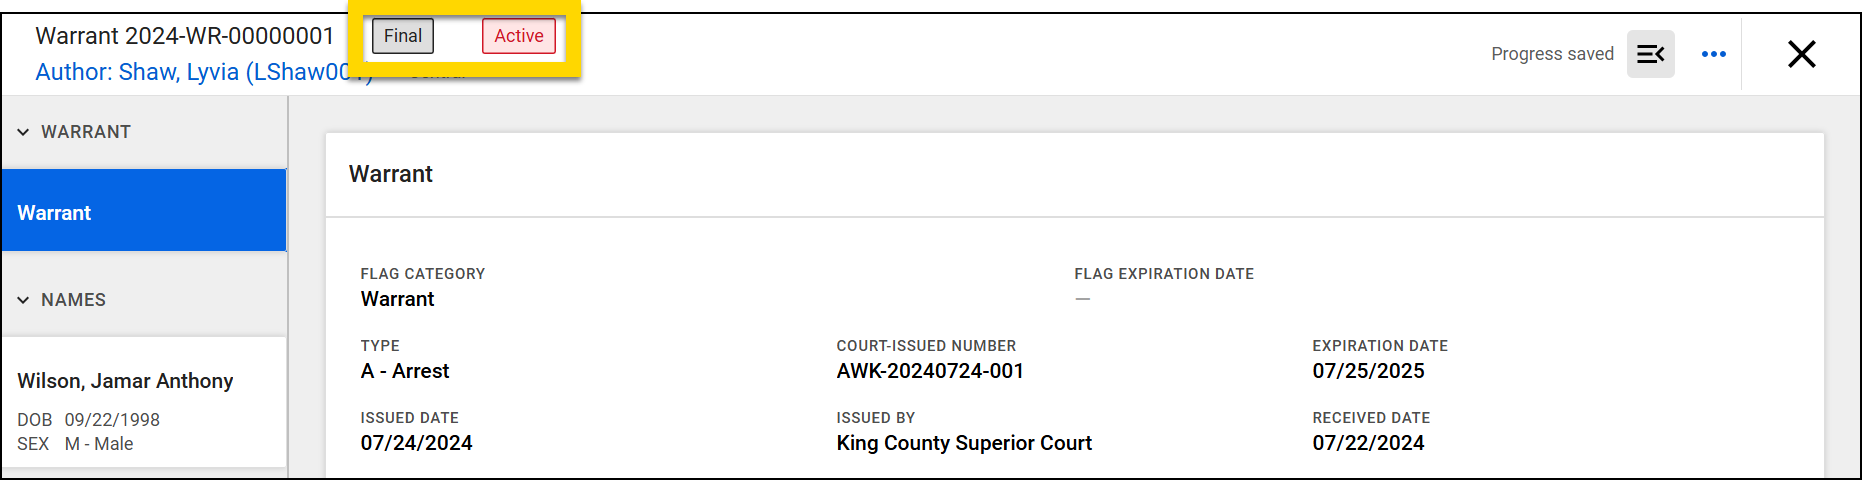
Use the links on the left side of the screen to jump to different sections of the paper, including:
Take the following actions from the More Actions [...] menu:
- View incident: Opens the related incident profile in a new tab.
- View history: Opens a log of all actions taken on the paper, including by whom and when
- Manage related incidents: Lets you associate the paper with an incident
- Print: Lets you print the court paper and, for warrants, a notification letter that can be sent to the person associated with the warrant
Warrant
When creating a warrant, you will see Flag Category and Flag Expiration Date fields at the top of the Warrant section. Select the Warrant option from the Flag Category menu to apply a warrant flag to the person added in the Names section of the warrant. The Flag Expiration Date is optional.
This Warrant flag appears in People search results and on the person's profile, notifying all Axon Records users that an active warrant is associated with that individual. Selecting the warrant flag on the profile scrolls down to the Associations section where you can quickly open the warrant.
When a warrant becomes inactive (expires, is served, etc.) this flag is archived and no longer appears on the person's profile.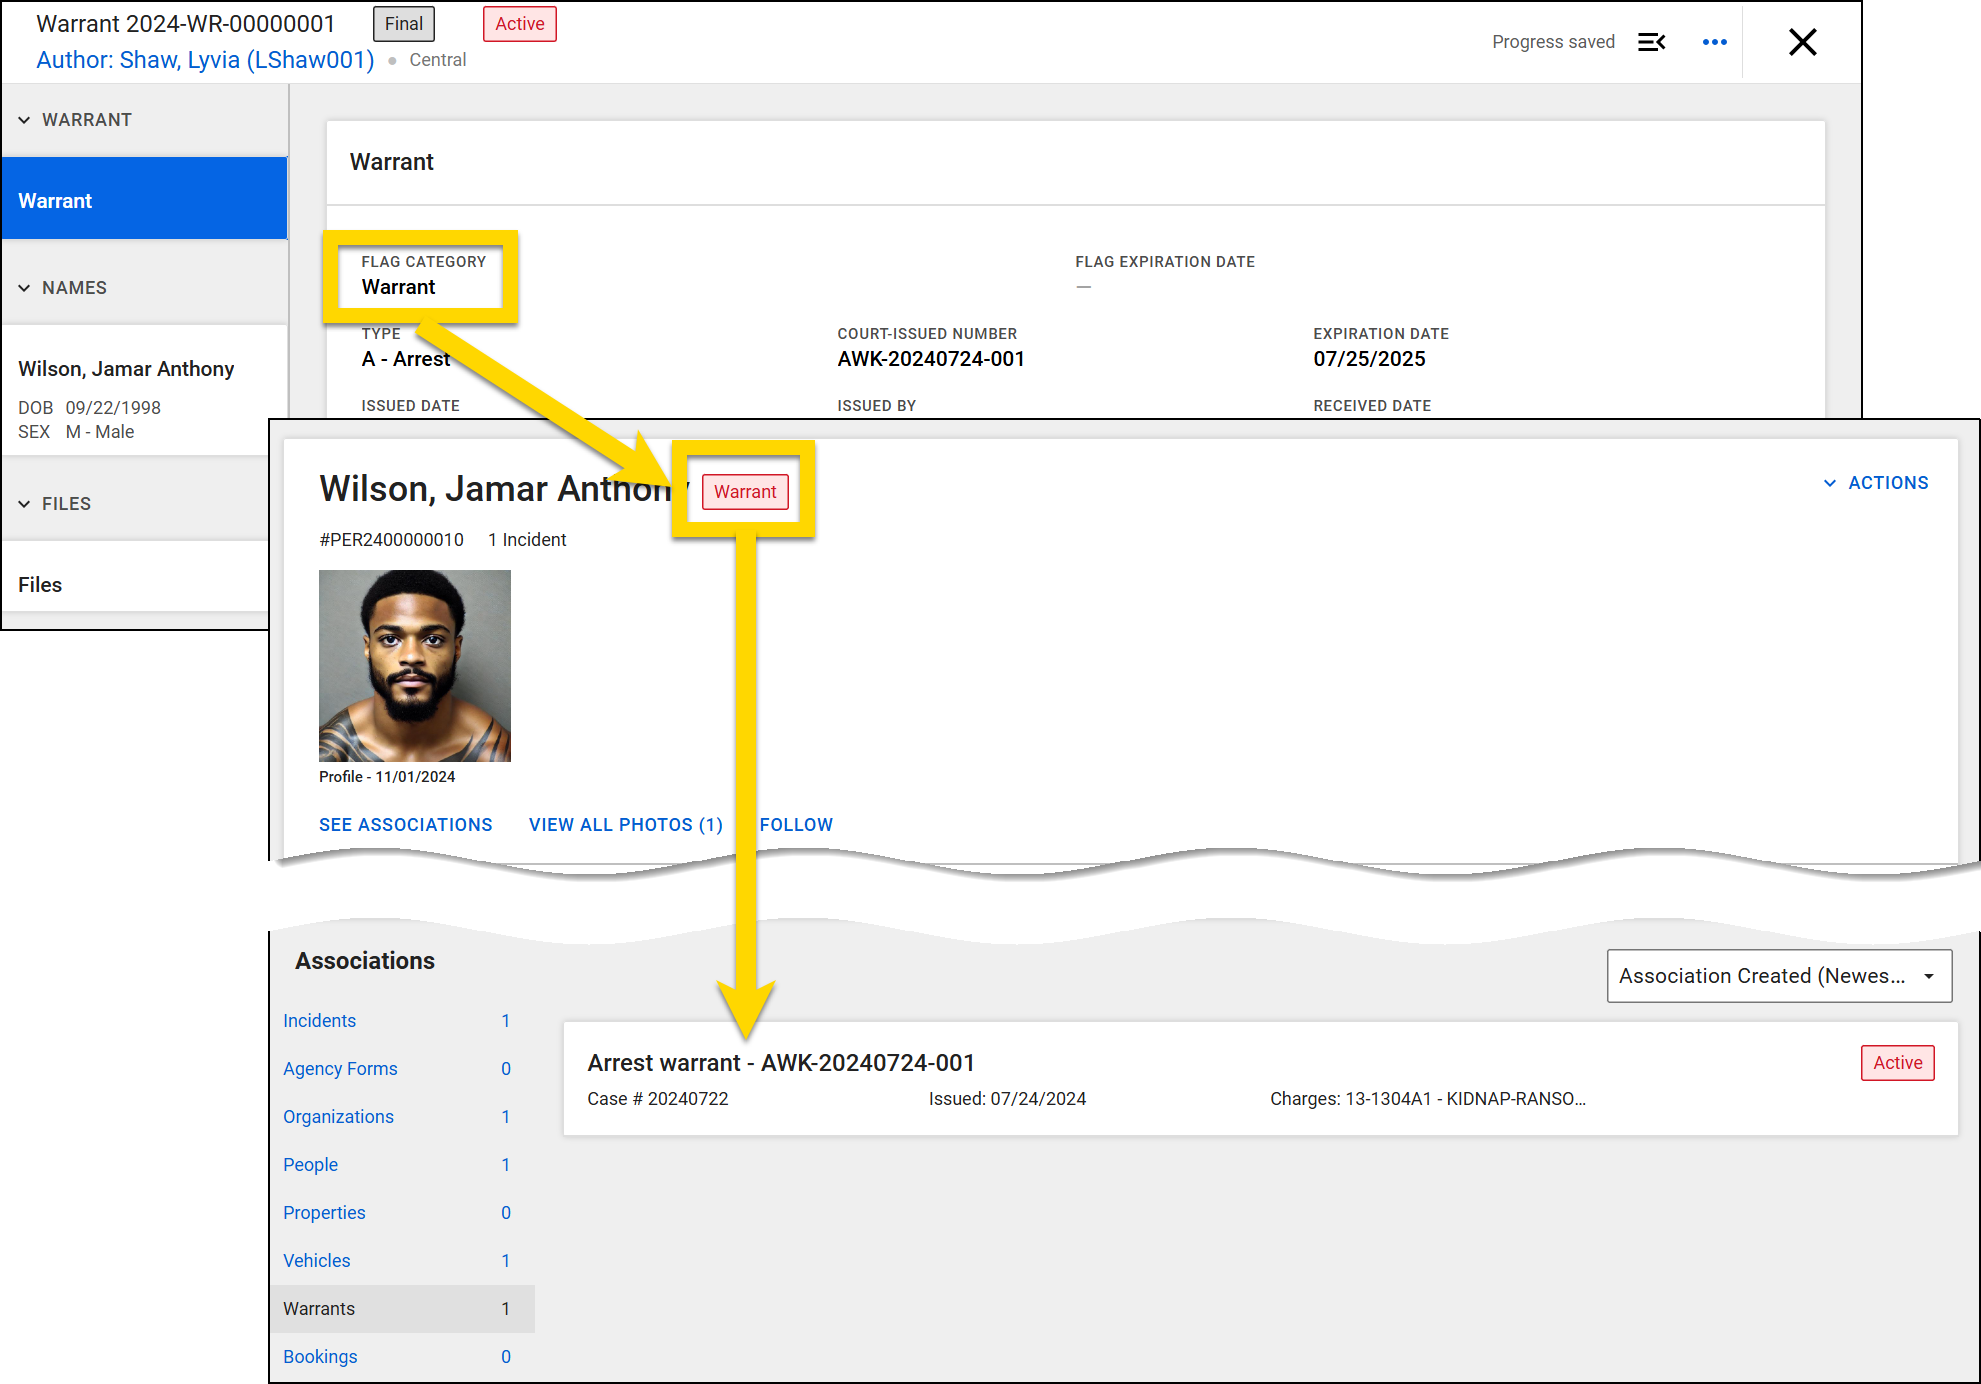
If you associated the warrant with an incident report when creating the warrant, enter that Incident ID in the Related Incident Number field, Select More Actions [...] > Manage related incidents to find this Incident ID.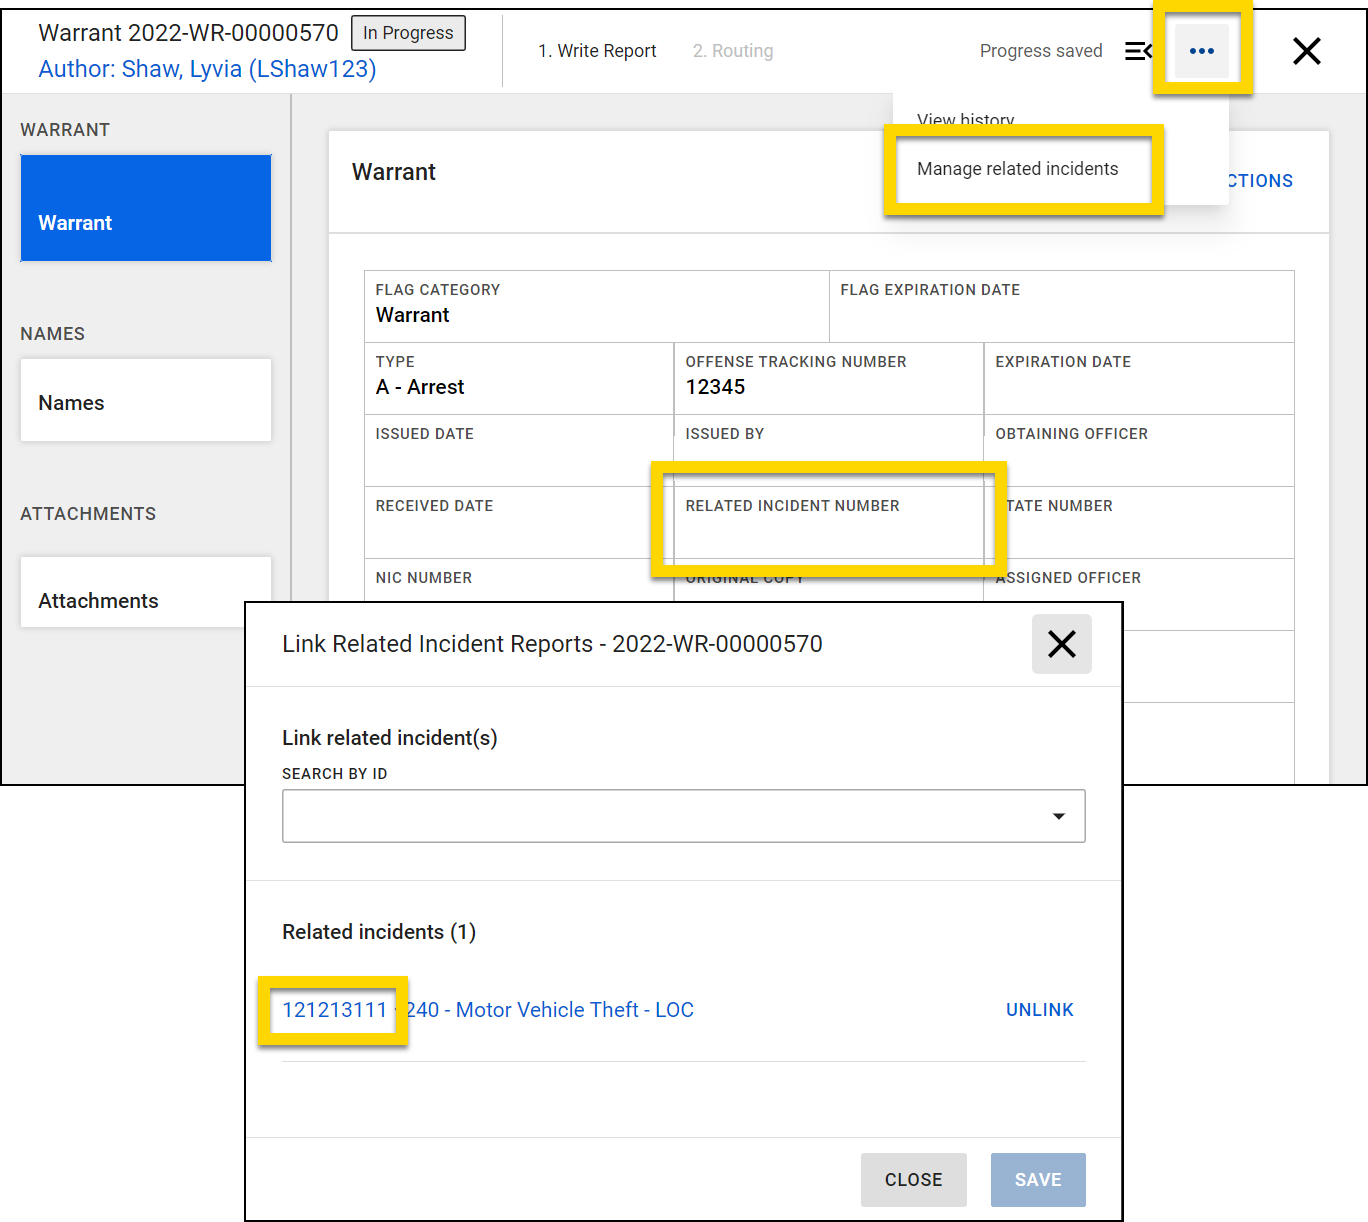
Use the Notes field to add information that the incident report author may need to know when they come in contact with the person associated with the warrant. The data entered here will be imported into the incident report if this warrant is added to an arrest. For example: "Call Detective Jones at 555-555-5555 when this person has been detained, he is wanted for questioning in an investigation."
Select Add Charge to specify the charges associated with the warrant.
Names
To associate a person with the court paper, open the Names section. Use the search fields to see if the person already exists in the database. Selecting a name opens a preview of that person profile and gives you the option to Import them into the paper.
If you associated the court paper with an Incident ID that contains people, those people appear as suggestions below the search filters.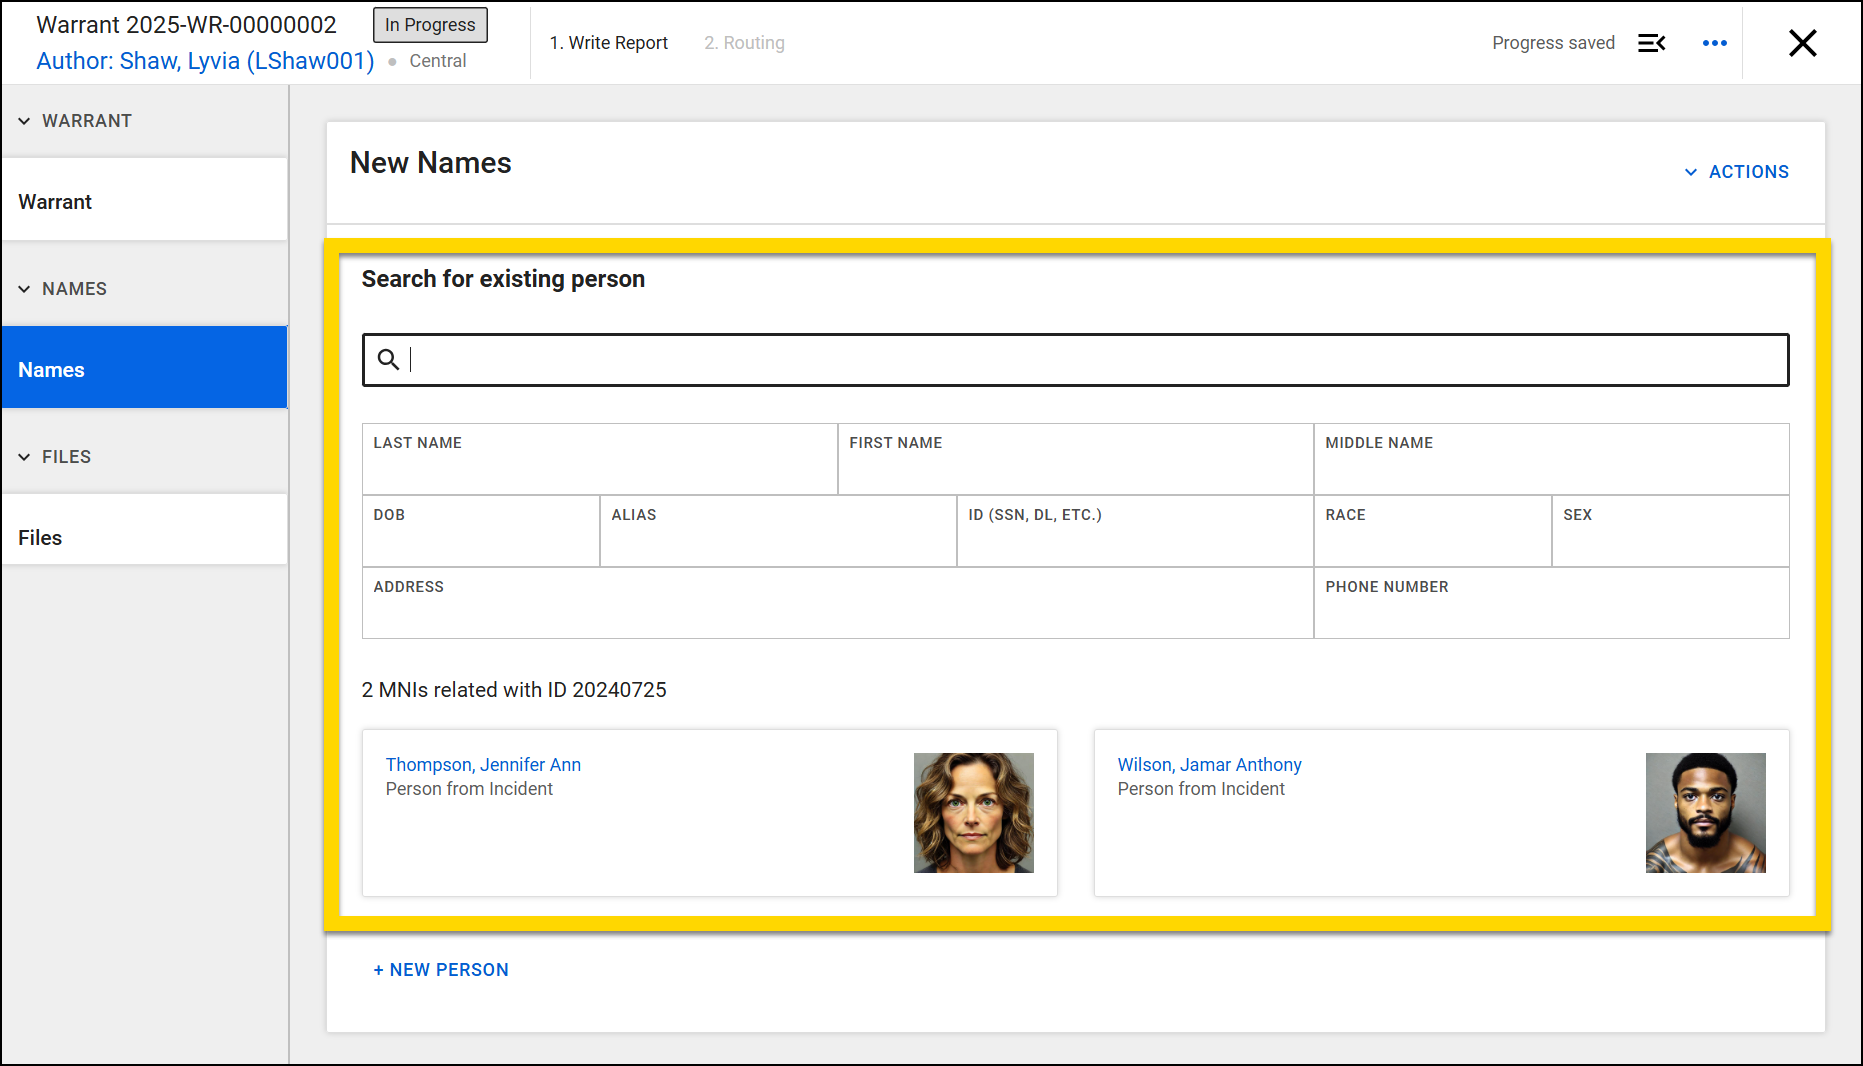
If you do not see the person in the search results list, select + New Person and enter all of their information in the new fields that appear.
Adding a new person will permanently add them to the Axon Records database. Select Actions to remove the person from the paper or view their profile (opens a new browser tab).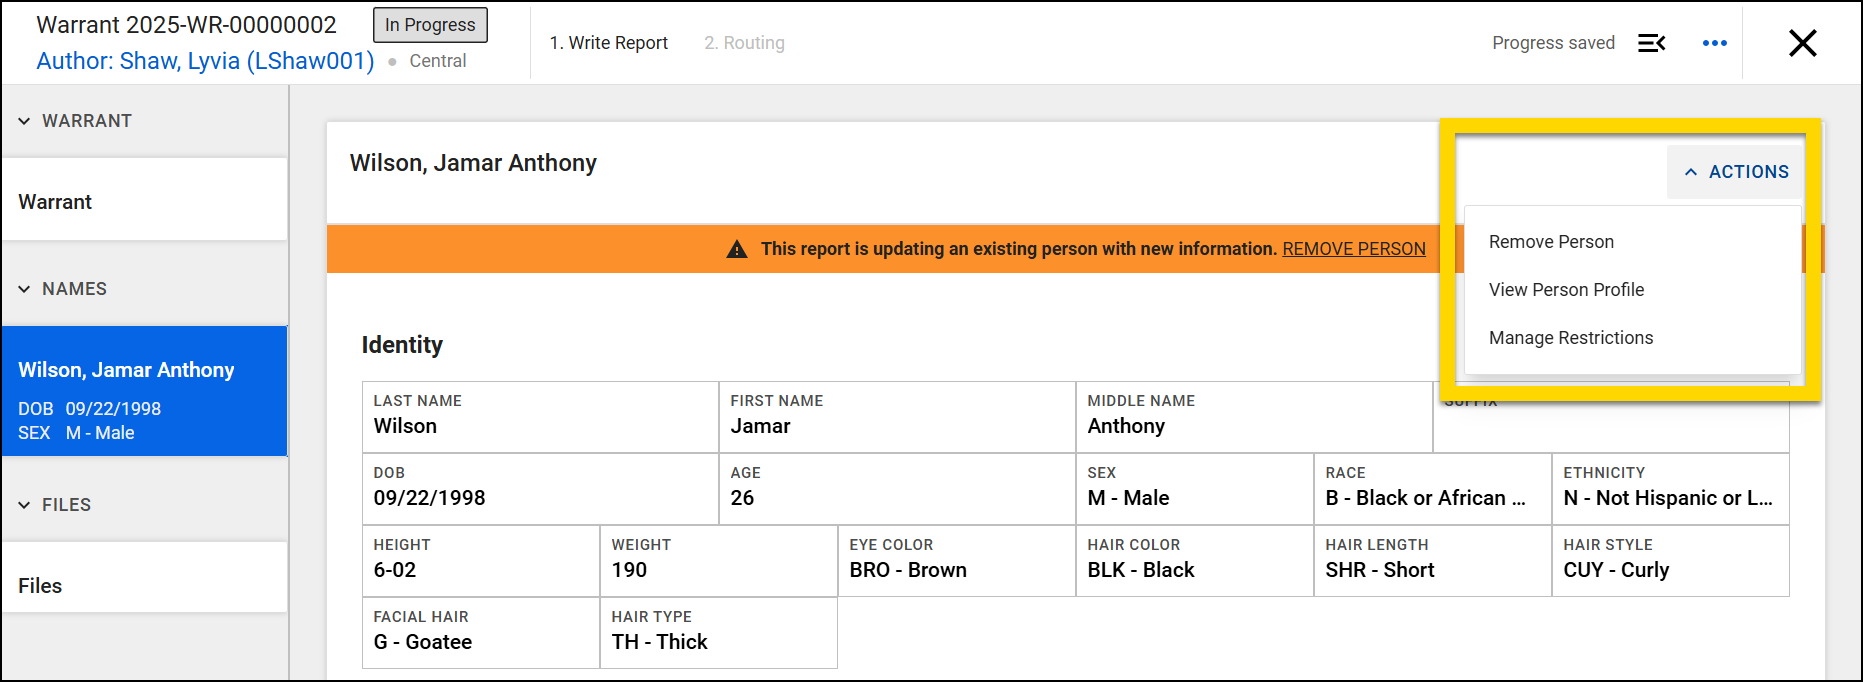
Files
Add photos, videos, documents, and other files to a paper by selecting Files > Upload File. See Add report information for full instructions on managing files in reports.
Submit warrants
After you've added all information to the warrant or court paper, select Submit.
If your agency follows a warrant review workflow, the warrant will be routed to a Triage inbox for review. If your agency does not incorporate this review step, the warrant will be finalized.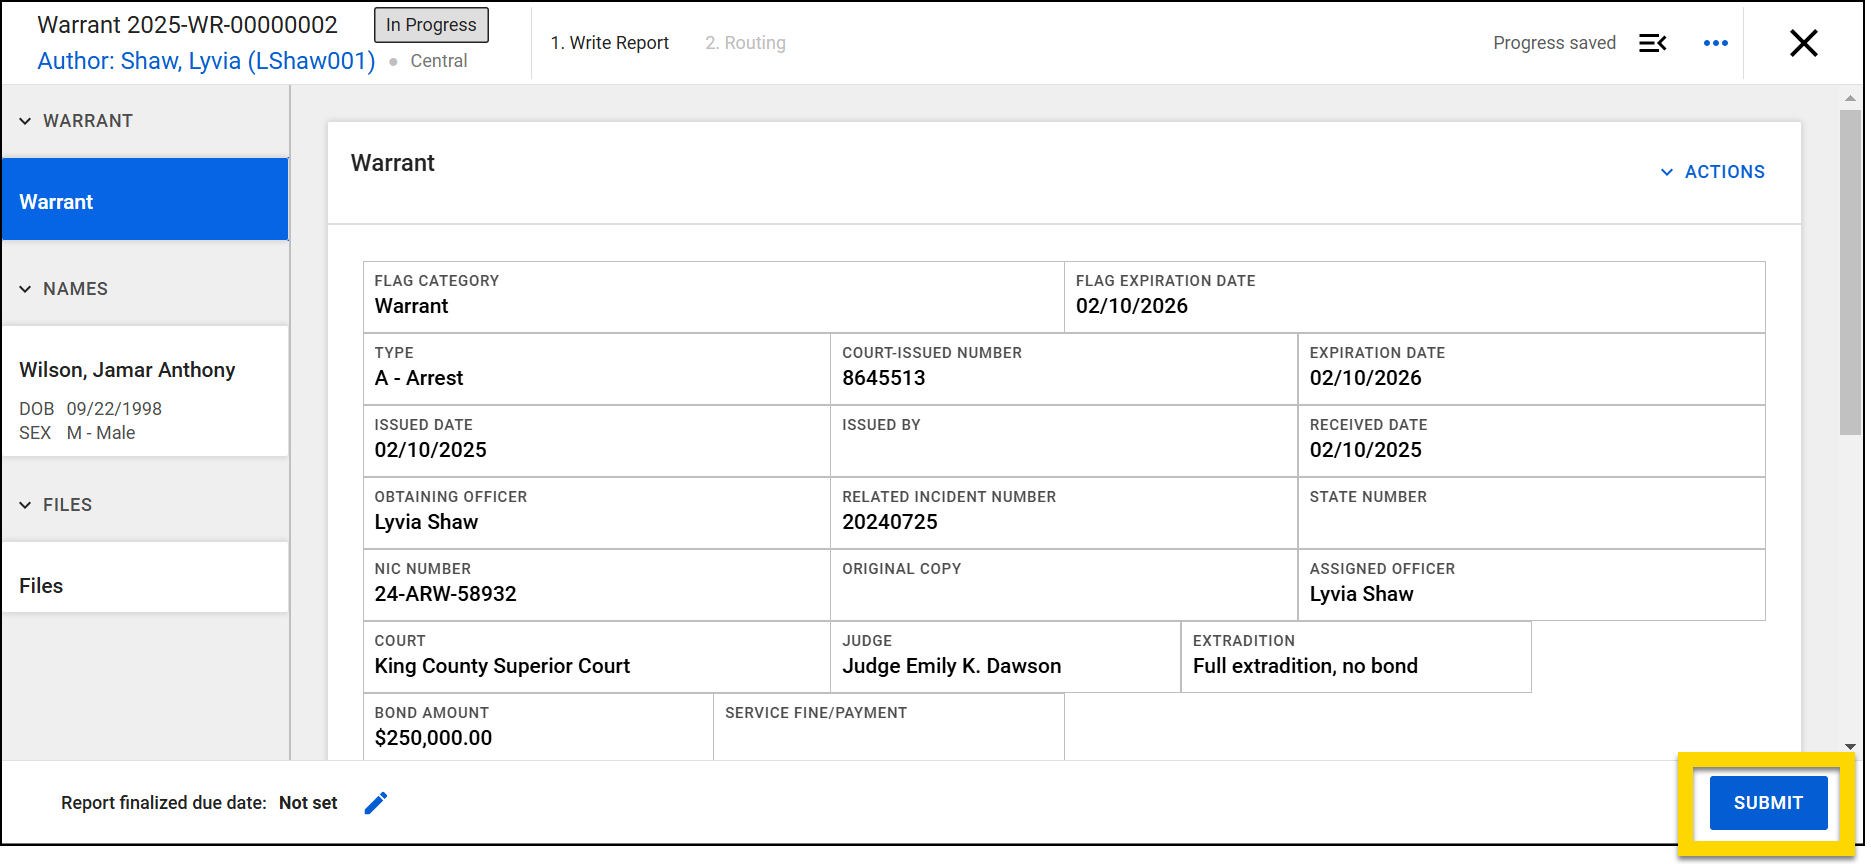
Review warrants
Uses with specific Triage inbox, which contains all court papers that require a review. To assign the review to another user, select Assign in the Actions column. To begin reviewing the paper yourself, select the paper name in the Task column.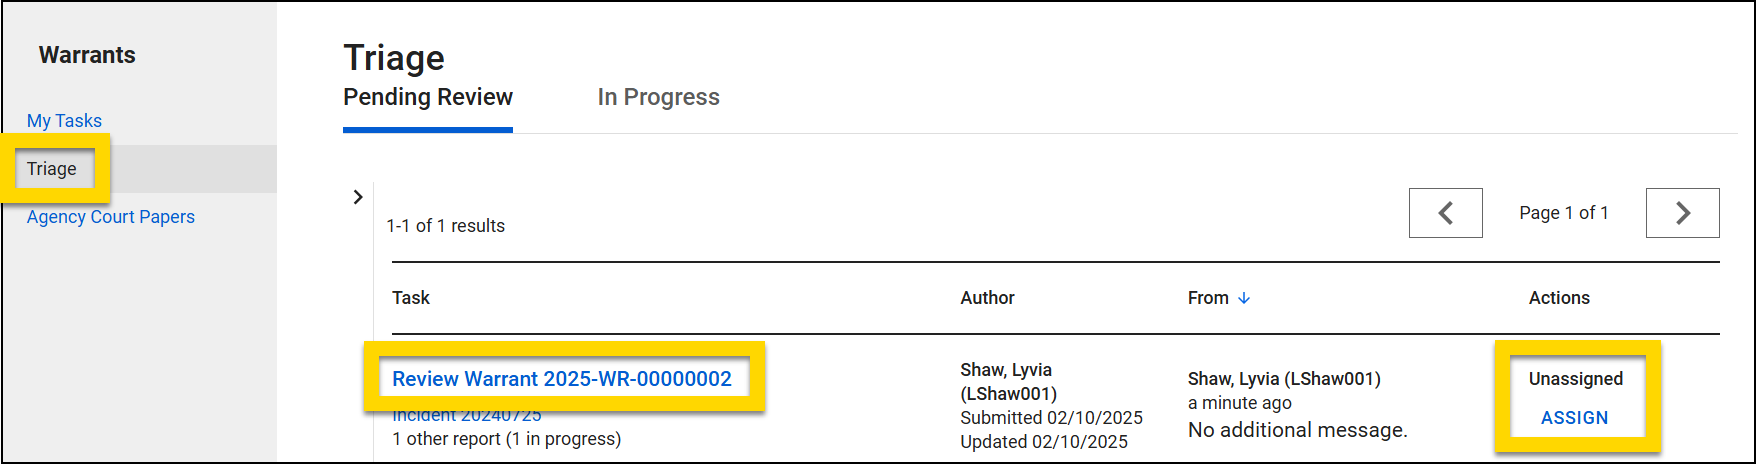
The paper will open where you can review all information and add comments as needed using the sidebar.
Select Reject if the paper needs to be revised before it can be finalized. You can either route the paper back to the original author to complete the revisions, or if you have the necessary privileges, you can revise the paper yourself. Select Submit if the paper is ready to be finalized.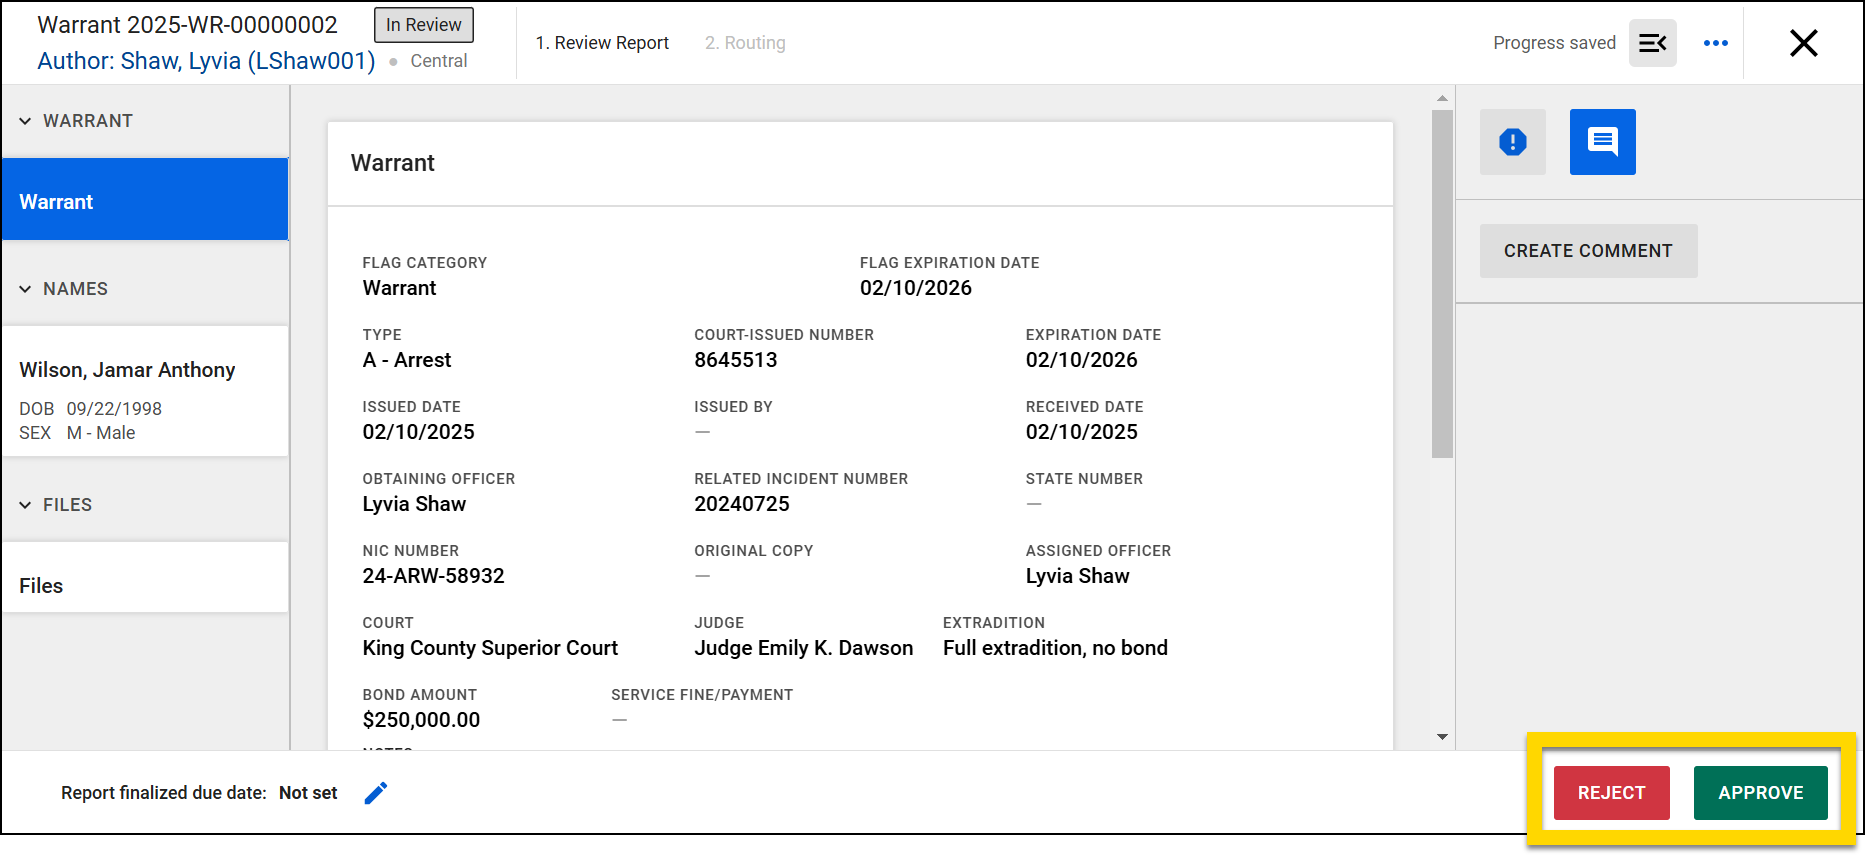
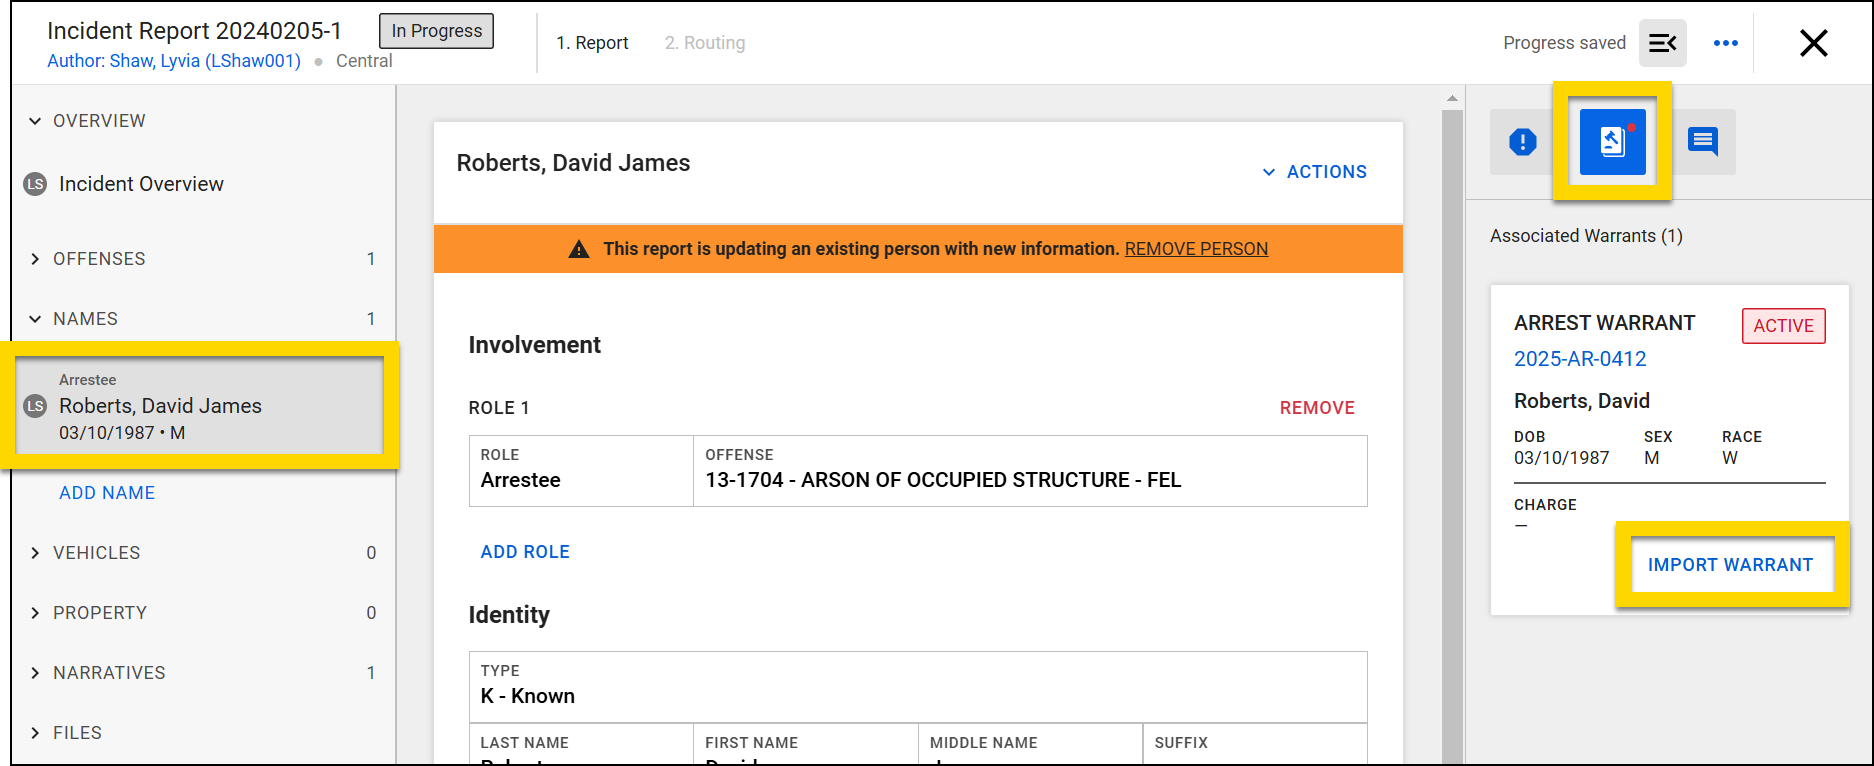
Add a warrant to an arrest
Once a warrant has been created in the Warrants module, you can add it to an arrest in an incident report.
This is an optional workflow. Contact your Axon representative if you would like this feature enabled for your organization.
To add a warrant to an arrest:
- Create the incident report, add the arrestee, and the arrest.
- Select the person's section in the left navigation area.
- In the sidebar, select the warrants icon to view all warrants associated with that person.
- Select Import Warrant to add a warrant to the report.
- The warrant information will copy into the report.