Report Writer
Select a task from any task inbox to open the associated report in Report Writer. To prevent data loss and saving errors, a report can only be open in one browser tab at a time. If you open the same report in multiple tabs, an error message appears, indicating that all but one tab should be closed before you continue working.
The Report Writer screen is split into five areas:
Header
The header at the top of the screen, includes the following information and options:
- A dropdown arrow that appears if multiple reports are associated with the incident.
- Select this arrow to reveal the other reports and quickly switch between them.
- Report metadata, including:
- If the task is flagged as Urgent
- Report type and ID
- Author: Select this name to view the report history.
- District
- Report status: (In Progress, In Review, etc.)
- Save progress
- Icon to open and close the sidebar
- More Actions [...] menu to take various actions on the report
- X button to close the report: Reports are auto-saved, so you can close at any time without losing your work

Depending on the type of report, you can do the following from the More Actions [...] menu:
- View incident: Opens the incident profile
- View report history: Opens a log of all actions taken on the report, including by whom and when
- Copy info to new report: Lets you copy the information from the report into a new one
- Manage distribution requests: Lets you view and send distribution requests
- Manage restrictions: Lets you edit, remove, and add restrictions
- Print: Lets you print the report. Multiple print options may be available.
- Print property labels: Lets you print labels for any property that has been added to the report and is in police custody.
The options that appear in this menu depend on your organization's specific configuration, as well as which privileges have been granted to you. Contact your administrator for more information.
Navigation menu
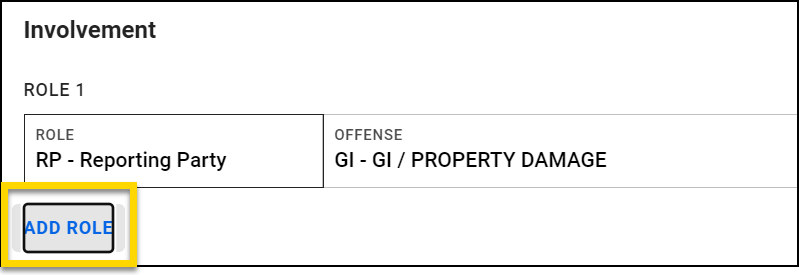
Use the Add buttons in the navigation menu to add new sections (composed of multiple fields) in the central report writing area where you can enter information.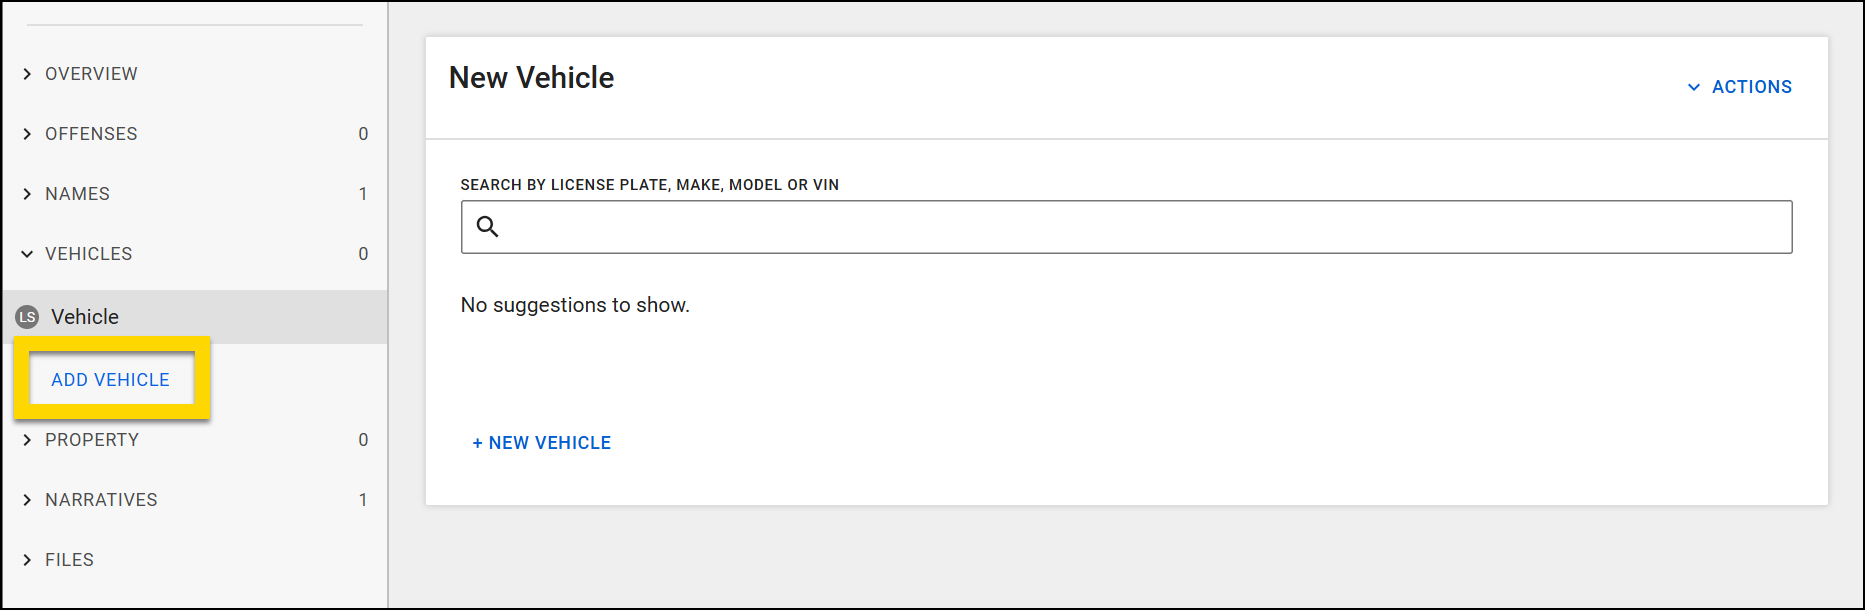
These sections vary depending on the type of report, but often include:
- Overview
- Offenses
- Names: Person and Organization
- Vehicles
- Property
- Narrative
- Files
To remove a section from a report, open the section and select Actions > Remove.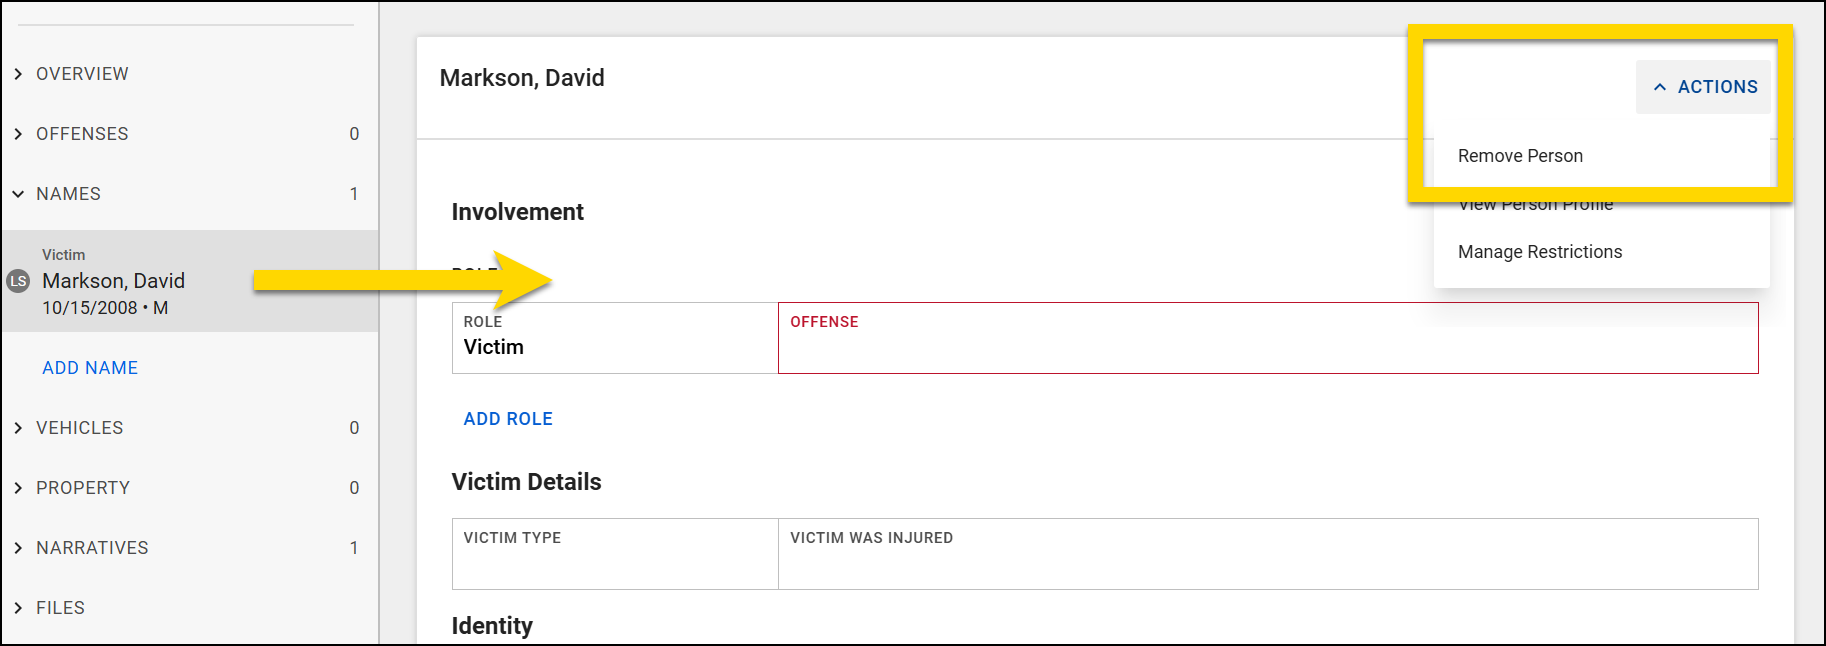
Central report writing area
Add information in the central report writing area by completing empty fields. Some fields display conditionally; they only appear once you've added other information to the report. Required fields, which are set by your organization, are outlined in red.
When you select a field and a drop-down menu appears, you must select an option from the list. Typing any other information in these fields will not be saved. See Keyboard shortcuts for information about quickly entering information into reports.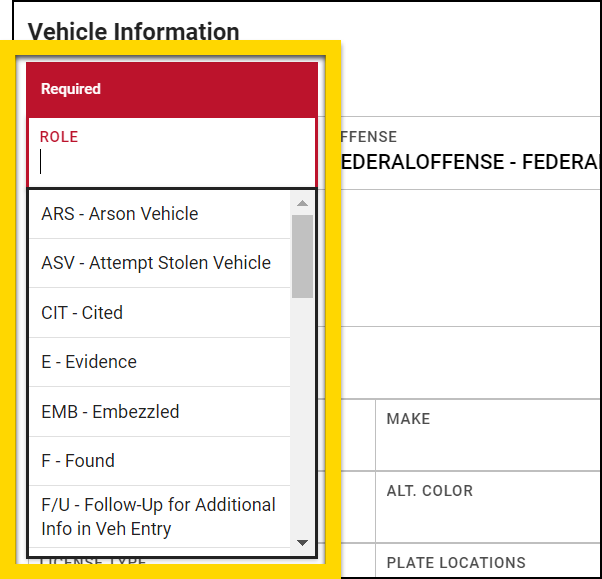
This video explains how to maximize report writing efficiency.
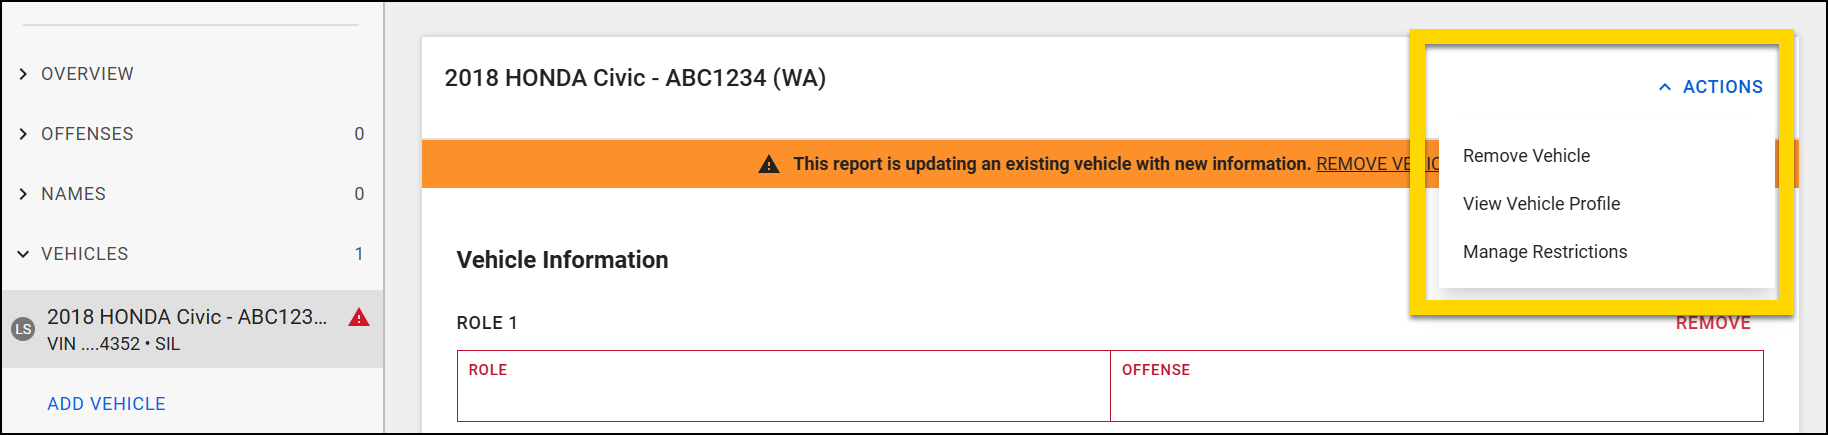
Open the Actions menu to take the following actions. These options vary depending on the type of report and the section within the report:
- Remove the section
- View the profile associated with that section
- Manage restrictions for that section
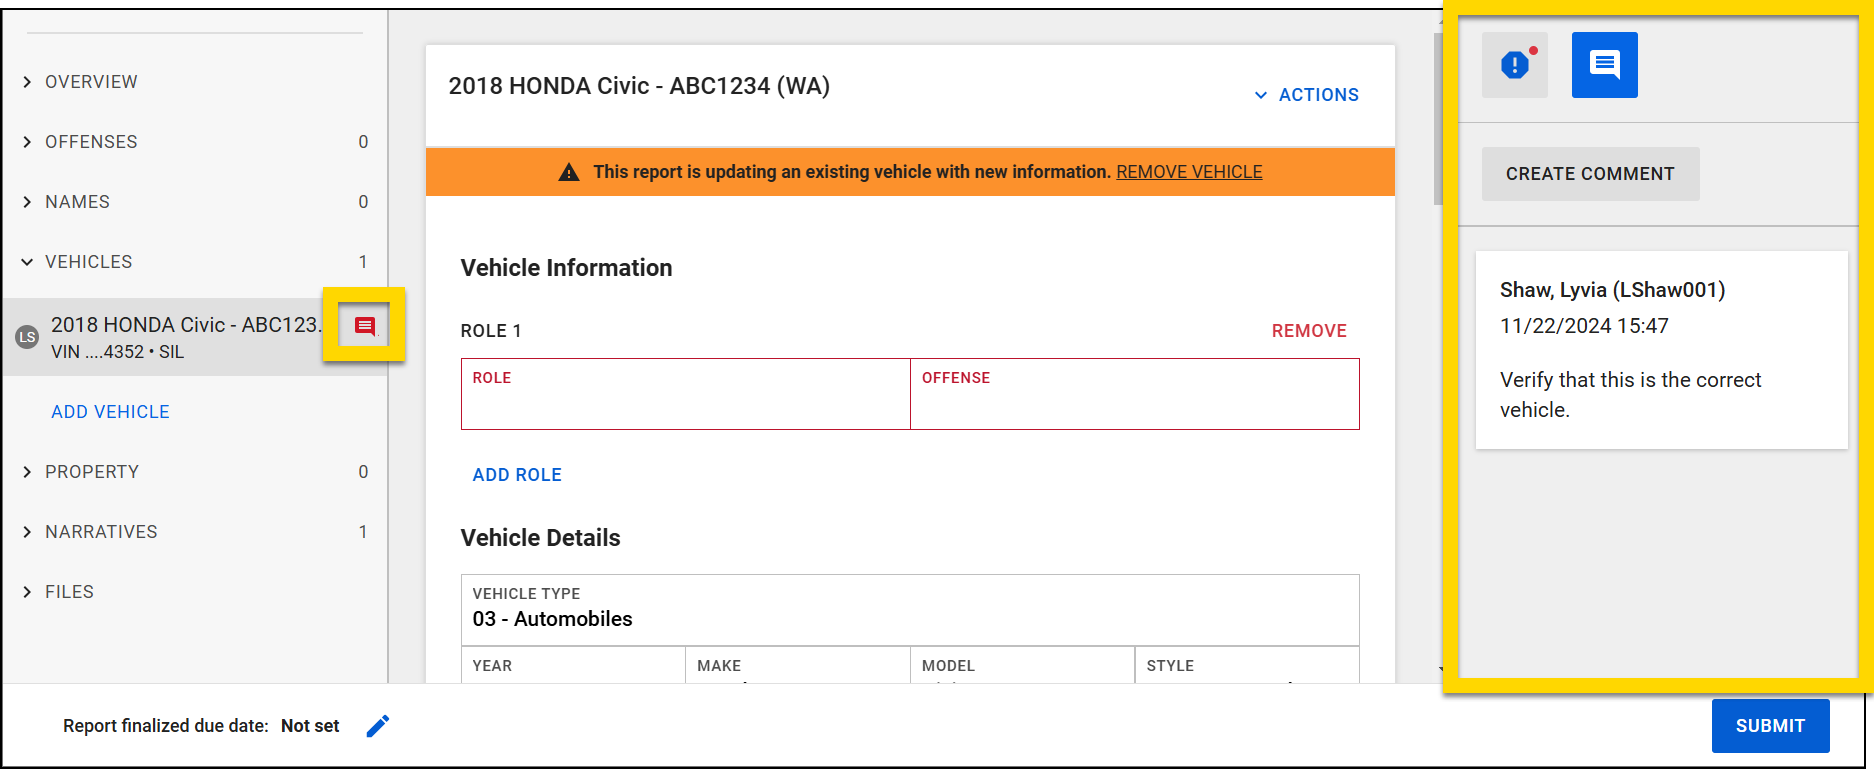
Sidebar
Expand the sidebar on the right to view validation errors or leave comments. Based on your organization's configuration, additional options may appear in this sidebar.
Comments created in the sidebar are associated with that section of the report. For example, if you leave a comment on a vehicle, then switch to view a person, the comment does not display. When you switch back to the vehicle section, the comment appears again. A comment icon appears in the left navigation menu, indicating which sections contain comments.
Once created, a comment cannot be deleted manually by a user. When the report is submitted for review, the comments can be seen by the report reviewers.
Your organization can configure if and when comments are automatically deleted. Comments can be deleted:
- When a report is finalized
- When a report moves between states (e.g., Review 1 > Review 2)
Contact your Axon representative or Axon support for assistance in configuring these comment deletion settings.
If your organization uses these settings to delete comments, when a comment is deleted, it is irreversibly removed from the system and cannot be recovered or retrieved by any user or administrator. Organizations with legal obligations to retain or disclose comment content should ensure that any necessary information entered in comments is documented directly in the report before it is finalized.
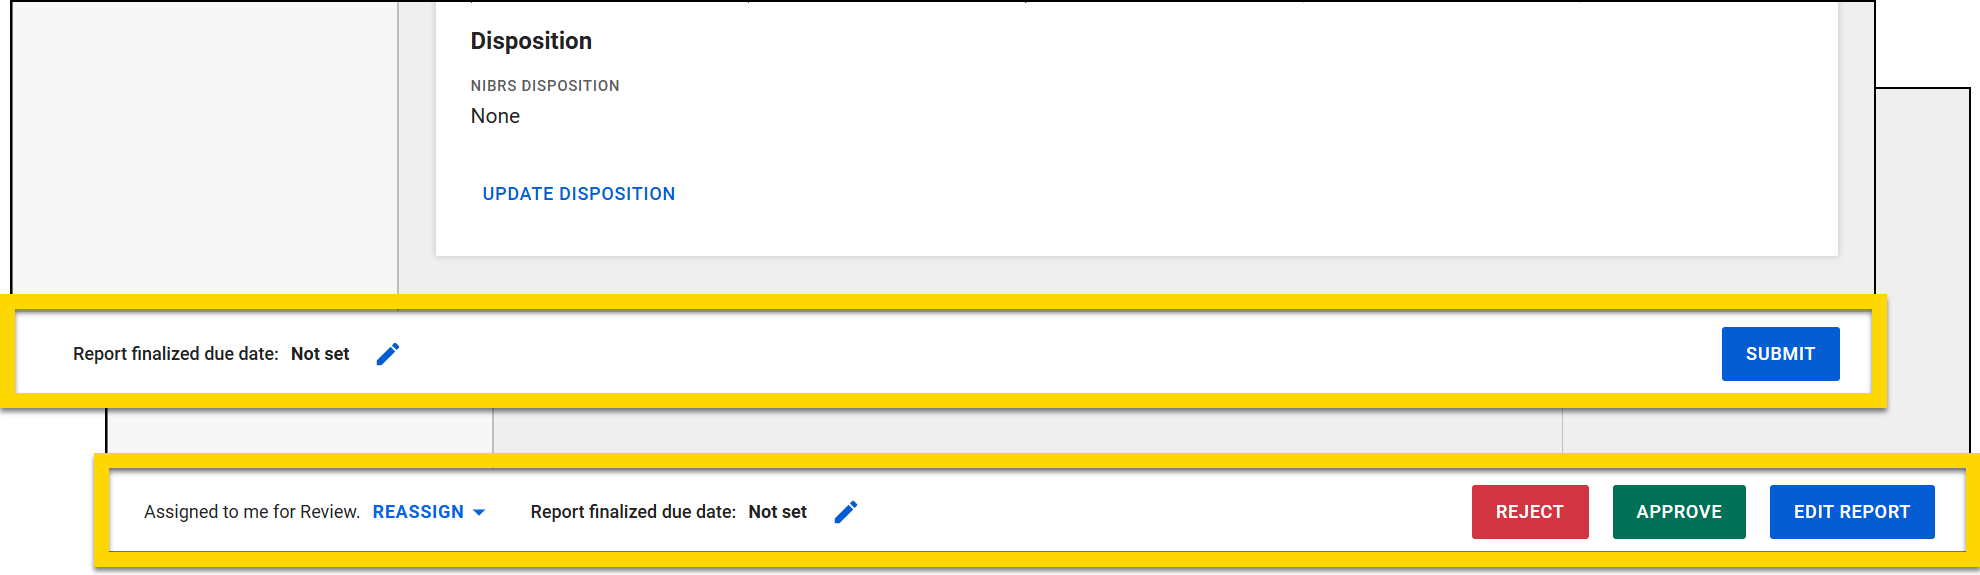
Footer
The footer options vary depending on the report state:
- All states
- Update the report finalization due date
- Draft state
- Submit the report for review or finalization
- Review state
- Assign/reassign the report for review
- Edit the report (depending on the organization's configuration
- Reject or approve the report
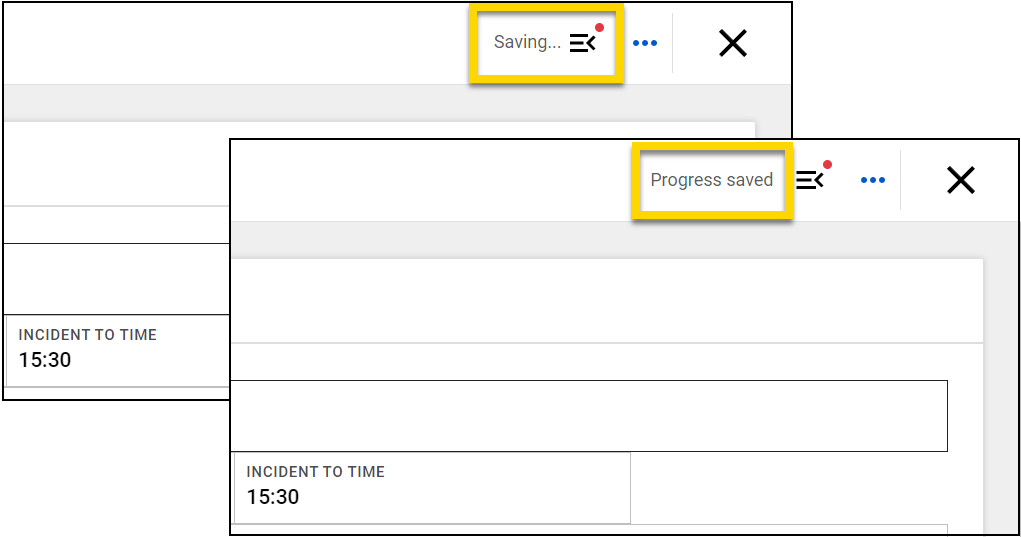
Auto-save
Report Writer includes an auto-save feature specifically designed to protect the information you enter into your report. As you enter information into Report Writer, the system automatically saves your work every few seconds.
The messages in the upper right corner of the screen display the status of your report:
- Progress Saved: Indicates all information that you've entered into the report up until that point has been saved
- Syncing: Indicates the system is currently saving information you entered into the report since the last time the report saved
If your device disconnects from the internet, your data may be saved if:
- You do not close the browser window or tab where you are writing your report
- You do not leave the Report Writer page to open a different page in Axon Records or Axon Standards
If the above conditions are true, once you regain internet connectivity, your report will automatically upload any information saved to your device to the cloud. Following this, the auto-save feature will continue to function as usual.
There is a risk of data loss if your device loses internet connectivity. To minimize this risk, a stable internet connection is recommended for whenever you are working on a report.
You can tell you are offline if a banner appears at the top of your screen informing you the network connection was lost. You will also see a change in the status message in the top right corner of the screen. The status text will turn red and display the last time your report was successfully saved.
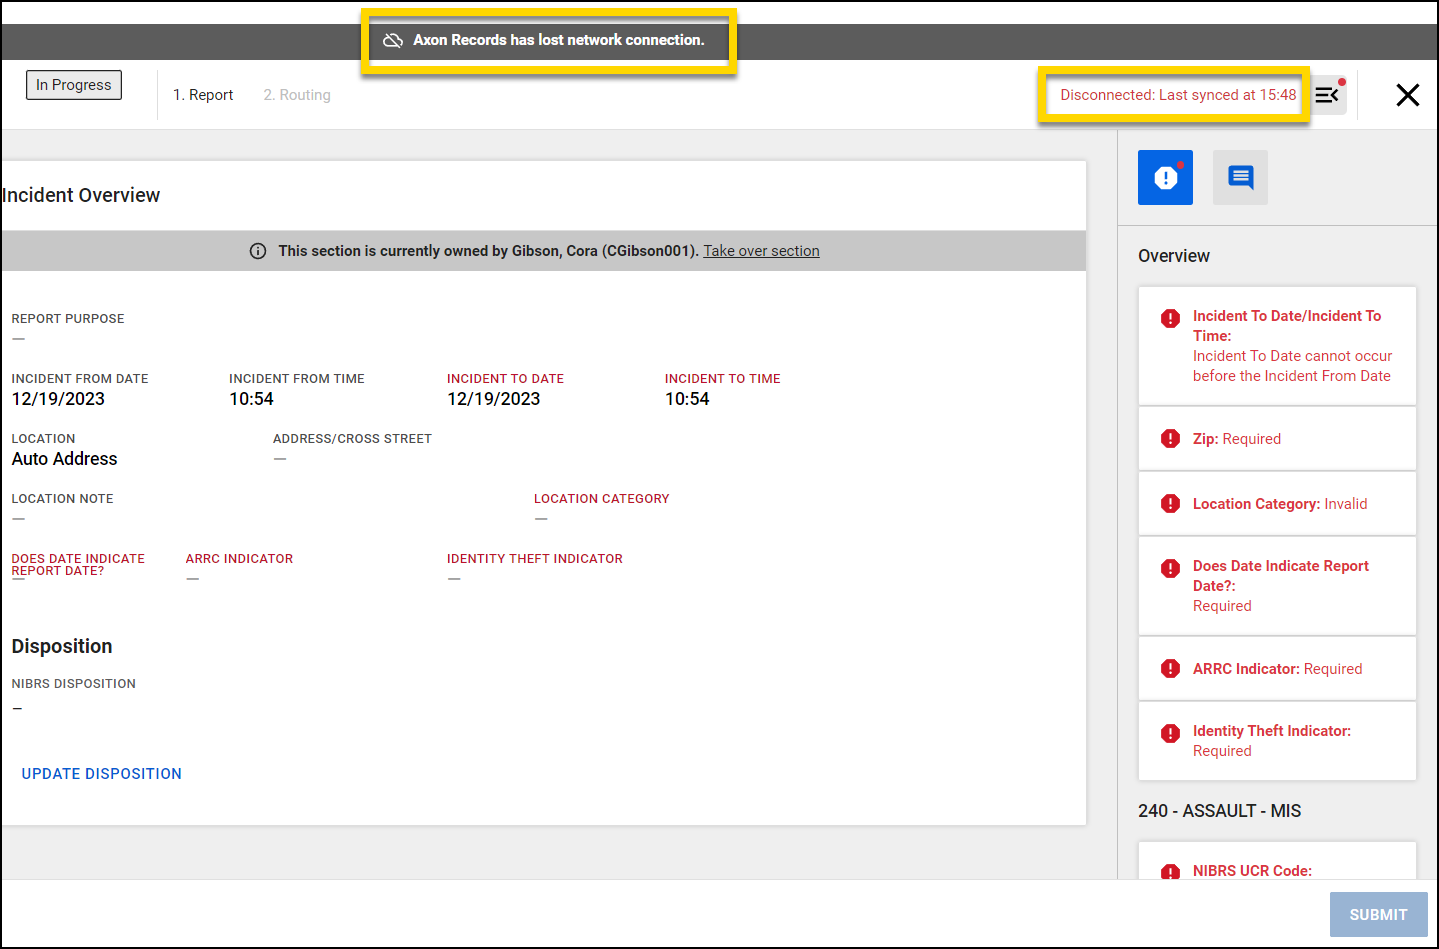
Validation errors
Required report fields, which are set by your organization, are outlined in red. Some required fields display conditionally; they only appear once you've added other information to the report.
If you leave a required field empty, a validation error displays in the sidebar on the right side of the screen. Select an error message to jump to that field in the report.
Incident reports contain many required fields for information relating to the National Incident-Based Reporting System (NIBRS), which is replacing the Uniform Crime Reporting System Summary (UCR) system. NIBRS is designed to collect data on each single crime incident, including information on each offense and arrest within that incident.
For more information about NIBRS requirements, see the NIBRS user manual or contact the UCR program manager for your state.
Administrators can specify for each report type if the report can be submitted if validation errors are present, or if the report author must first fix all errors before submitting the report for review.
For more information, see Report submission settings.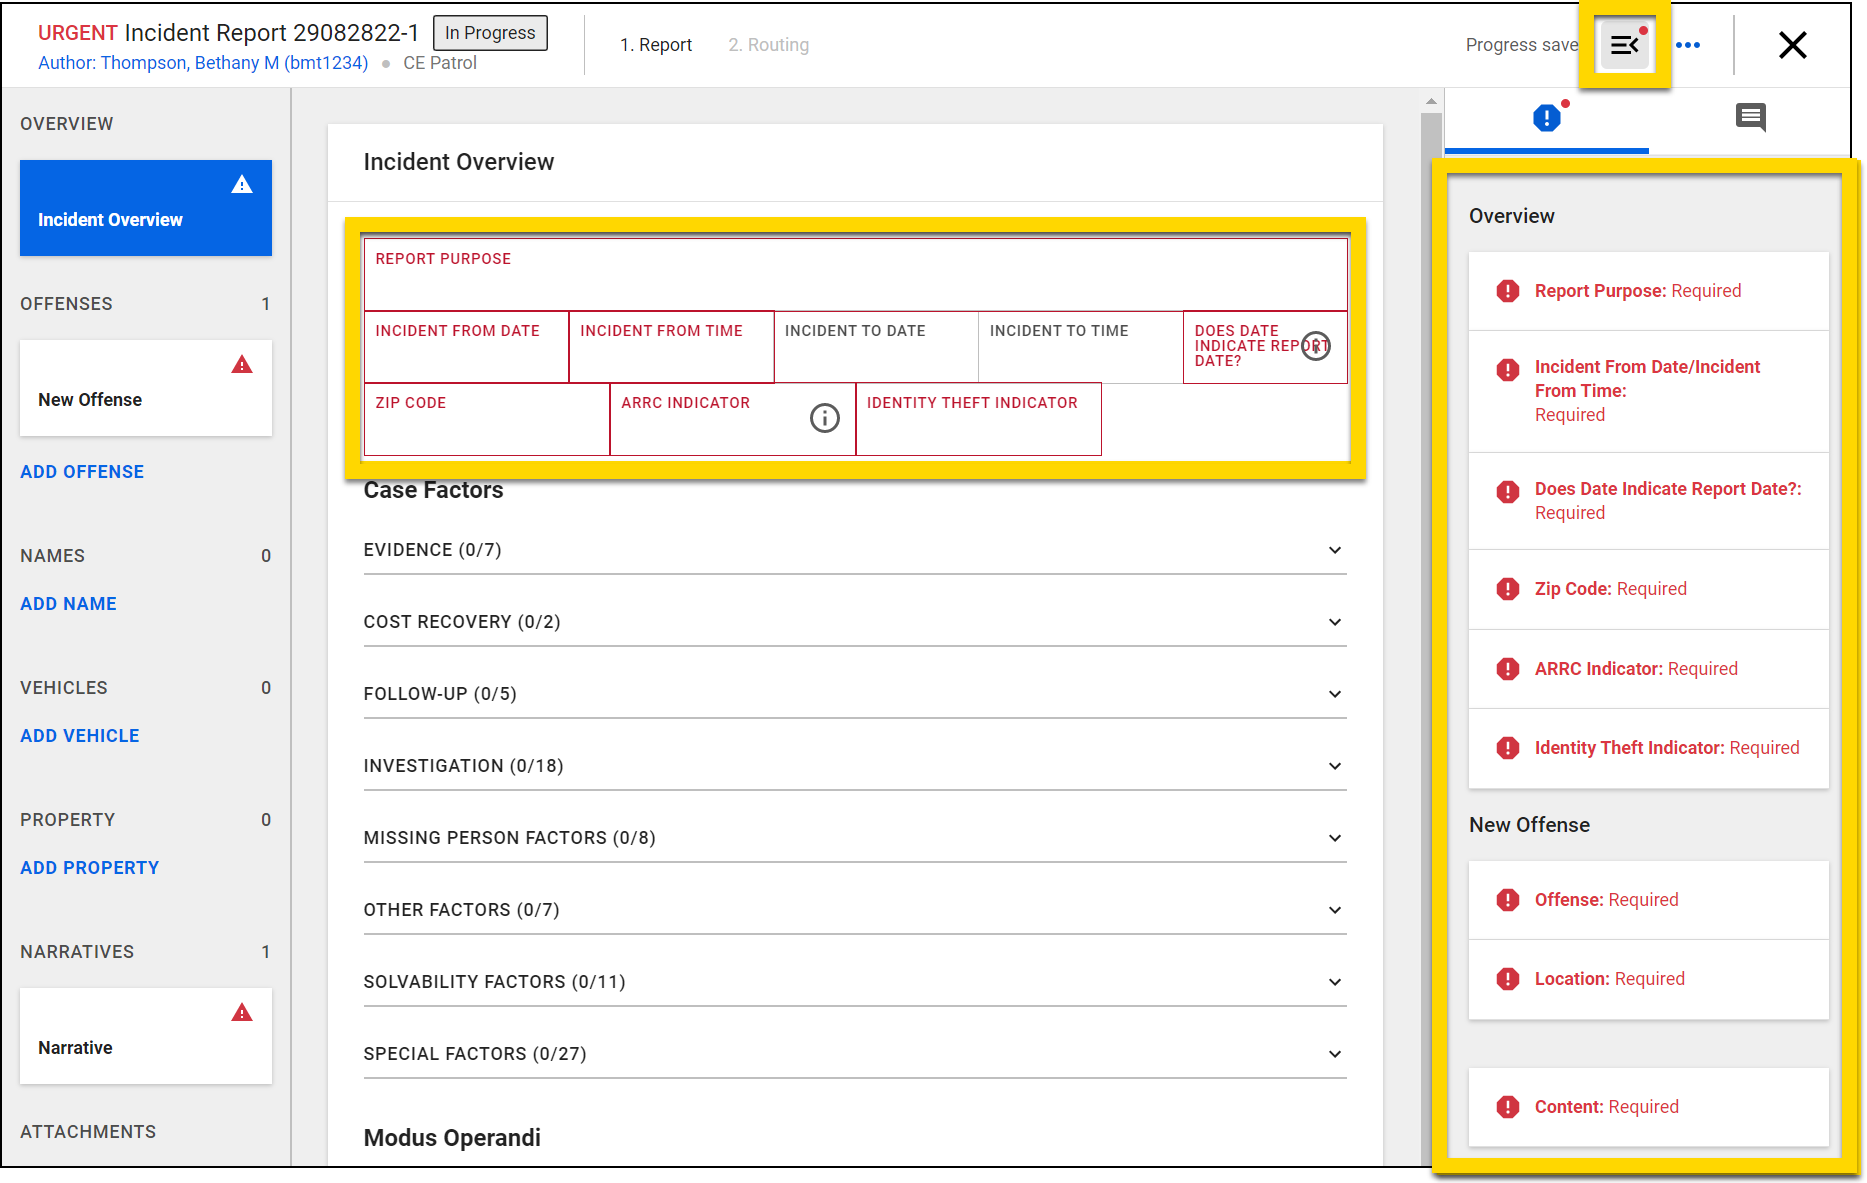
Keyboard shortcuts
Axon's Report Writer has keyboard shortcuts to help you write reports quickly and efficiently.
Field navigation
Move through the various fields in your report using these shortcuts:
- Tab: Go to the next field.
- Shift + Tab: Go back to the previous field.
- Enter: After information by pressing Enter on blue links.
Remove information by pressing Enter on red Remove links.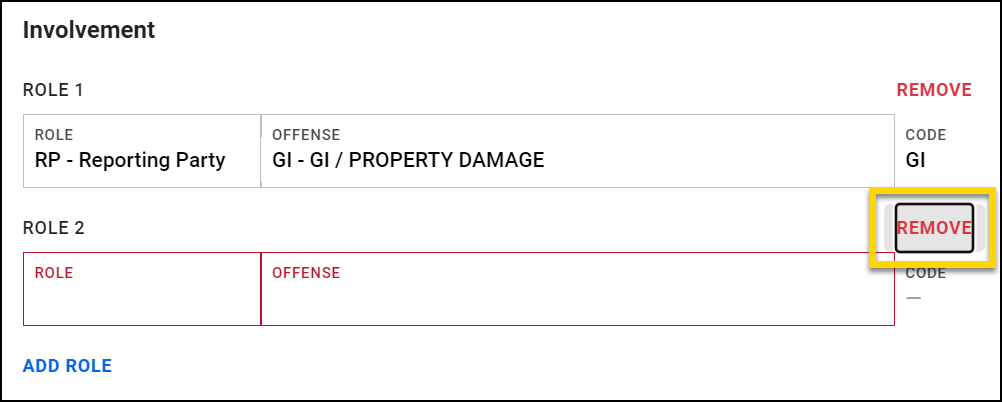
Date fields
Simplify entering a date using the following autofill shortcuts:
- T: Insert today's date and time.
- Y: Insert yesterday's date.
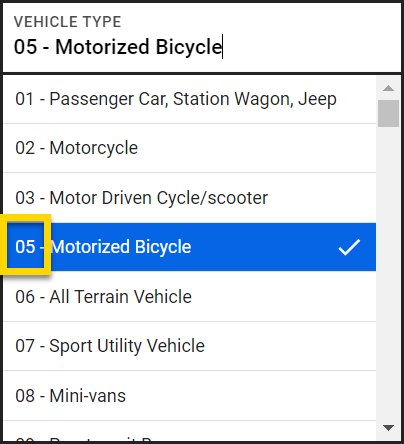
Drop-down menus
- Use the numeric or abbreviation shortcuts, followed by Enter or Tab.
- Navigate through the menu using the arrow keys.
The options in many drop-down menus are prefaced with either a number or an abbreviation. You can quickly select an option by typing that number or abbreviation then pressing Enter or Tab.
Alternatively, use the up and down arrow keys to scroll through drop-down menu options.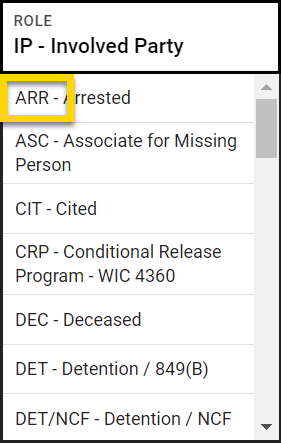
Text formatting
To make changes to the font or move text to another spot in a text field, use these formatting commands:
- CTRL + B (Windows) / CMD + B (Mac): Bold text.
- CTRL + I (Windows) / CMD + I (Mac): Italicize text.
- CTRL + C (Windows) / CMD + C (Mac): Copy text.
- CTRL + V (Windows) / CMD + V (Mac): Paste text
This video explains how to maximize report writing efficiency.