Installation
| Tip | This topic is intended for the armorer or administrator who will set up new Axon Signal Sidearm sensors. For user guidance, see Operation. |
Use a bracket to add Axon Signal Sidearm to a holster. Check the Mount compatibility guide on MyAxon to find the correct bracket for your holster.

Read this Installation section completely before beginning. The holster must be empty during installation.
Tools needed
- Either a 1/8 inch hex key or #2 Phillips screwdriver, depending on your holster
- A Torx T6 screwdriver to change the battery
Install Axon Signal Sidearm
These instructions show a sample holster. Your holster may look slightly different, but the overall procedure is the same.
-
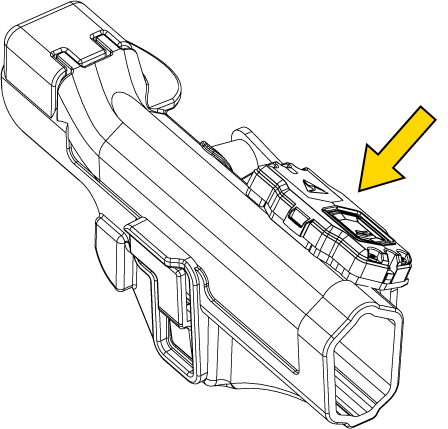
Remove the holster from the belt and remove the belt clip.
-
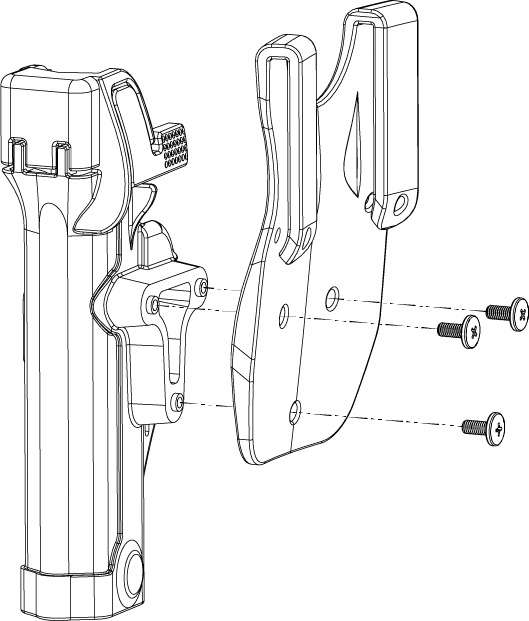
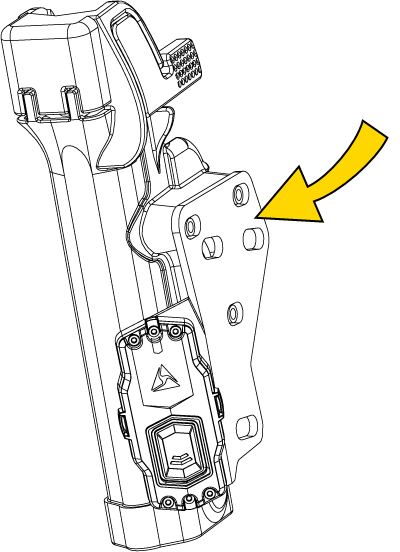
Select the bracket hole pattern corresponding to your holster that places the sensor closest to the holster.
The bracket must align with all three screw holes and sit as close to the holster as possible.

-
Reattach the belt clip to the holster with the longer screws provided.
Ensure the sensor stays as close to the holster as possible.
Note For a drop leg or QLS-accessorized holster, install the optional T-shaped spacer between the bracket and belt clip and use the longer screws provided with the spacer. 
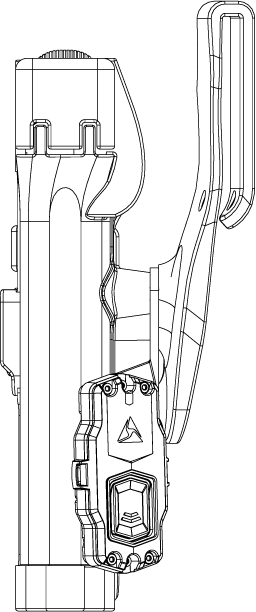
A completed installation looks like this:
Videos
Next steps
Before deploying, continue to the next topic to learn how to:
- Register and assign sensors to officers using Axon Device Manager.
- Calibrate each sensor to its holster.
- Maintain accurate device assignments to ensure audit trail accuracy and delivery of low battery notifications.
- Configure settings in Axon Evidence.