Setup
| Tip | This topic is intended for the armorer or administrator setting up new sensors. For user guidance, see Operation. |
Register and assign
Use one of the methods below to register and assign a sensor.
Maintain up-to-date device assignments to ensure accurate audit trails and delivery of low-battery notifications. Notifications cannot be sent for unassigned devices.
Method 1: Axon Device Manager app (recommended)
Axon Device Manager (ADM) records the sensor’s serial number using Near Field Communication (NFC) and is the easiest and most accurate way to record serial numbers and assignments in Axon Evidence.
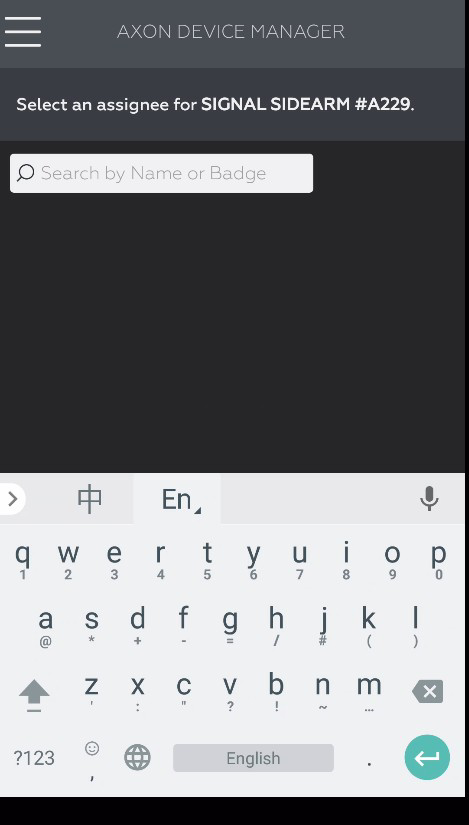
- Open Axon Device Manager on your mobile device.
- Sign in to your Axon Evidence account.
- Place the sensor on the back of the phone with the mute button facing the phone. Hold it in place until ADM detects the sensor.
-
Enter the assignee name or badge number and select Enter.
-
To reassign, tap Reassign, enter the new assignee, and select Enter.
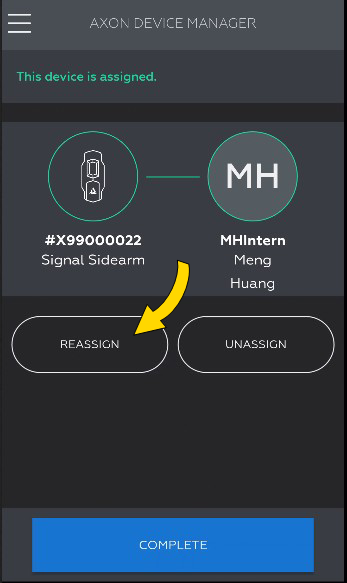
- Select Complete or scan another sensor.
Method 2: Axon Evidence
Administrators can manually enter serial numbers in Axon Evidence. Device Administration permission is required.
| Note | Register and assign sensors before installing them on holsters whenever possible. |
- Sign in to your Axon Evidence account.
- Go to Admin > Devices and Applications > Signal > Signal Sidearm.
-
Enter the serial number and optional assignee.
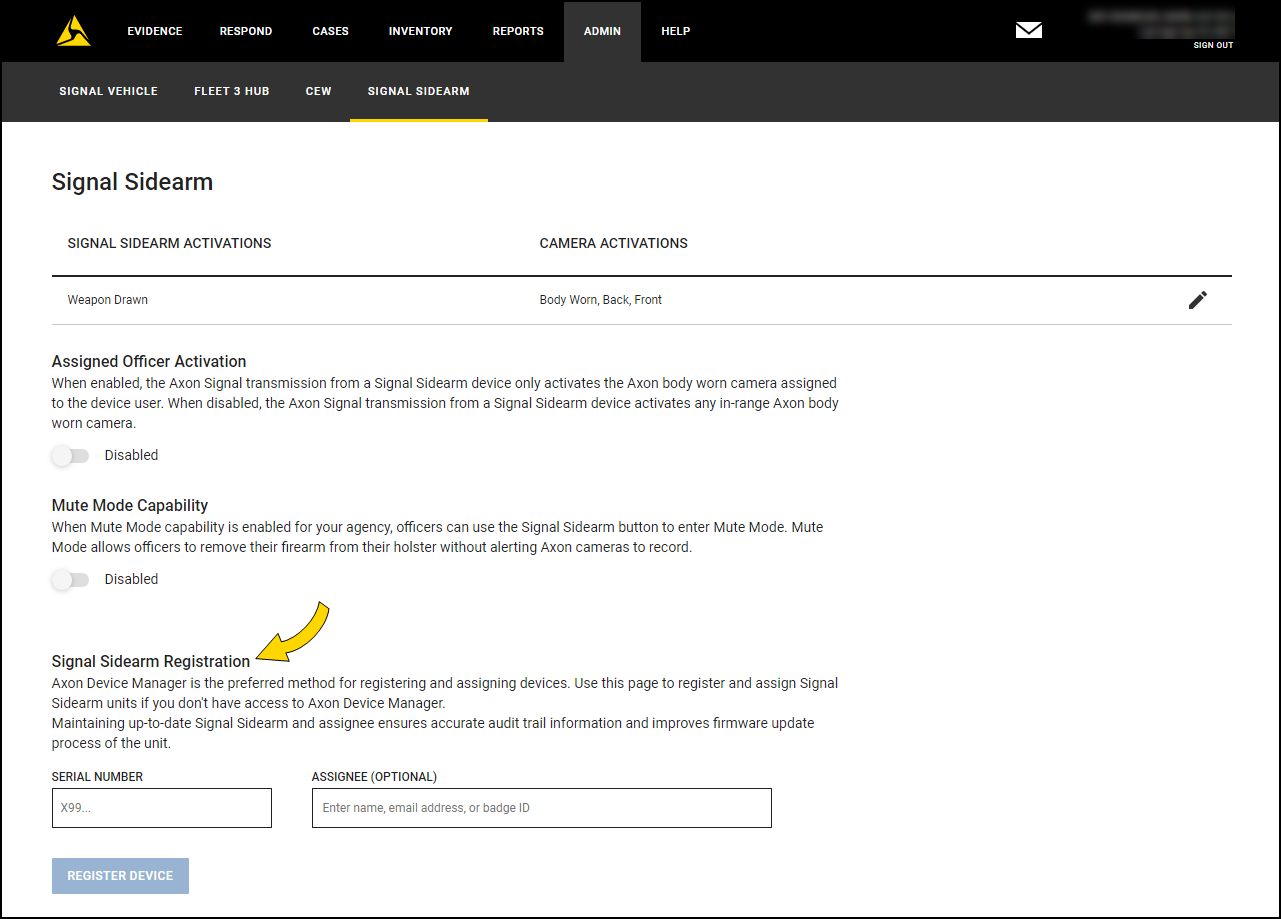
- Select Register Device.
Sensor calibration
| Note | The sensor does not alert cameras during calibration because it is in Test mode. Do not leave the sensor idle for 30 seconds or it will return to Low Power mode. |
| Warning | Ensure the firearm is unloaded during this process. |
Upload logs
If a sensor is not functioning properly, Axon may request internal logs.
- Follow steps in Update firmware.
- Select Options.
- Select Send Logs.
Sensor reset
You can reset the sensor from any mode.
| Note | A red icon during reset indicates low battery. Replace the battery before calibrating. |
- Press and hold the button for about 25 seconds.
- Release when the LED blinks blue to reset.
- Wait 30 seconds for return to Low Power mode.