Command Hierarchy Groups and teams
Your agency's Axon Evidence Command Hierarchy syncs with Axon Records and Axon Standards and is viewable in the Command Hierarchy & Teams tool in the Administrator Console. Any changes made to your Axon Evidence Command Hierarchy automatically reflect in Axon Records and Axon Standards, including when users are moved between groups due to reassignment or promotion.
Administrators in Axon Records and Axon Standards can create teams, manage team membership, and grant privileges to Command Hierarchy groups and teams. Any changes to squads or creation of new elements in your Command Hierarchy must be made in Axon Evidence.
For information about managing your agency’s Command Hierarchy in Axon Evidence, see the Axon Evidence User Guide.
If your organization is configured for both Axon Records and Axon Standards, all teams created for both Axon Records and Axon Standards appear in the Command Hierarchy & Teams tool, whether it is opened from Axon Records or Axon Standards.
Manage Command Hierarchy Groups
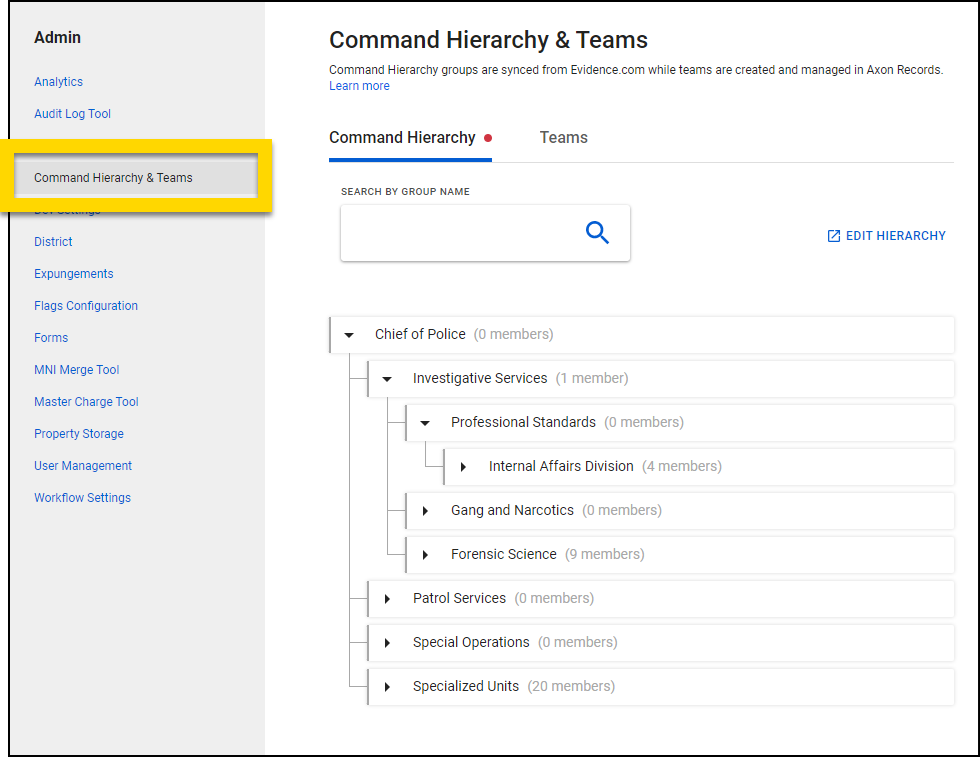
To access your agency's Command Hierarchy, select Command Hierarchy & Teams in the Administrator Console.
Select Edit Hierarchy to open Axon Evidence in a new browser tab where you can manage the structure of your agency's command hierarchy and add groups. A step-by-step guide for updating and managing your Command Hierarchy can be found here.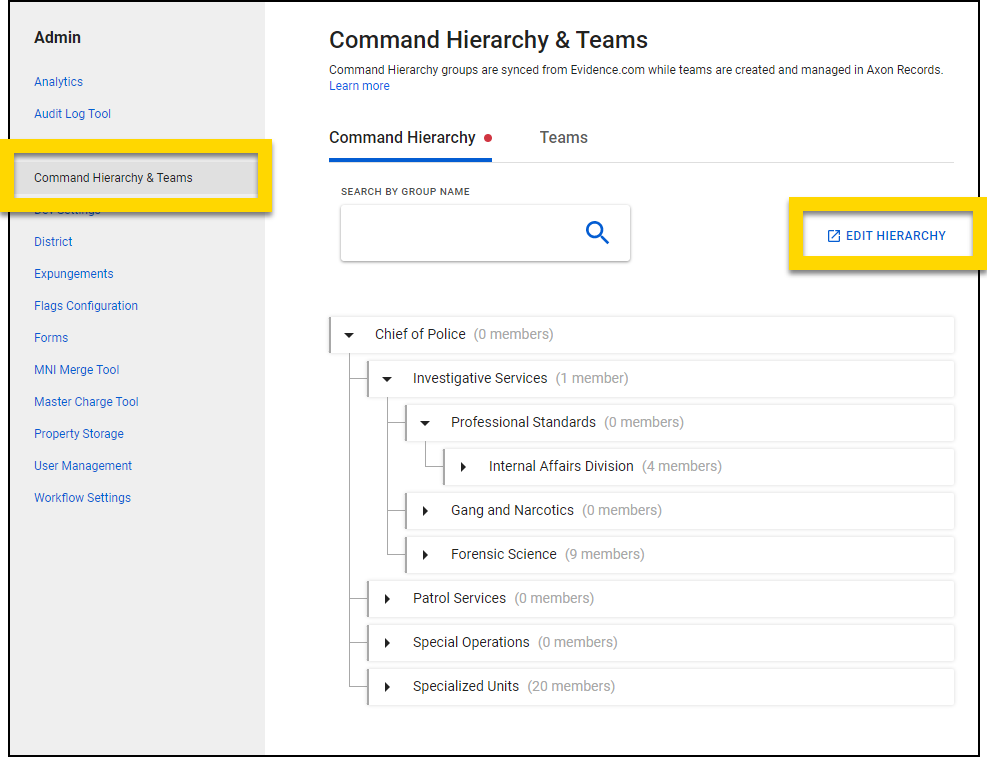
To adjust which users belong a group, select the Ecom Admin link in the gray bar to open Axon Evidence and make changes. A step-by-step guide for managing Command Hierarchy group membership can be found here.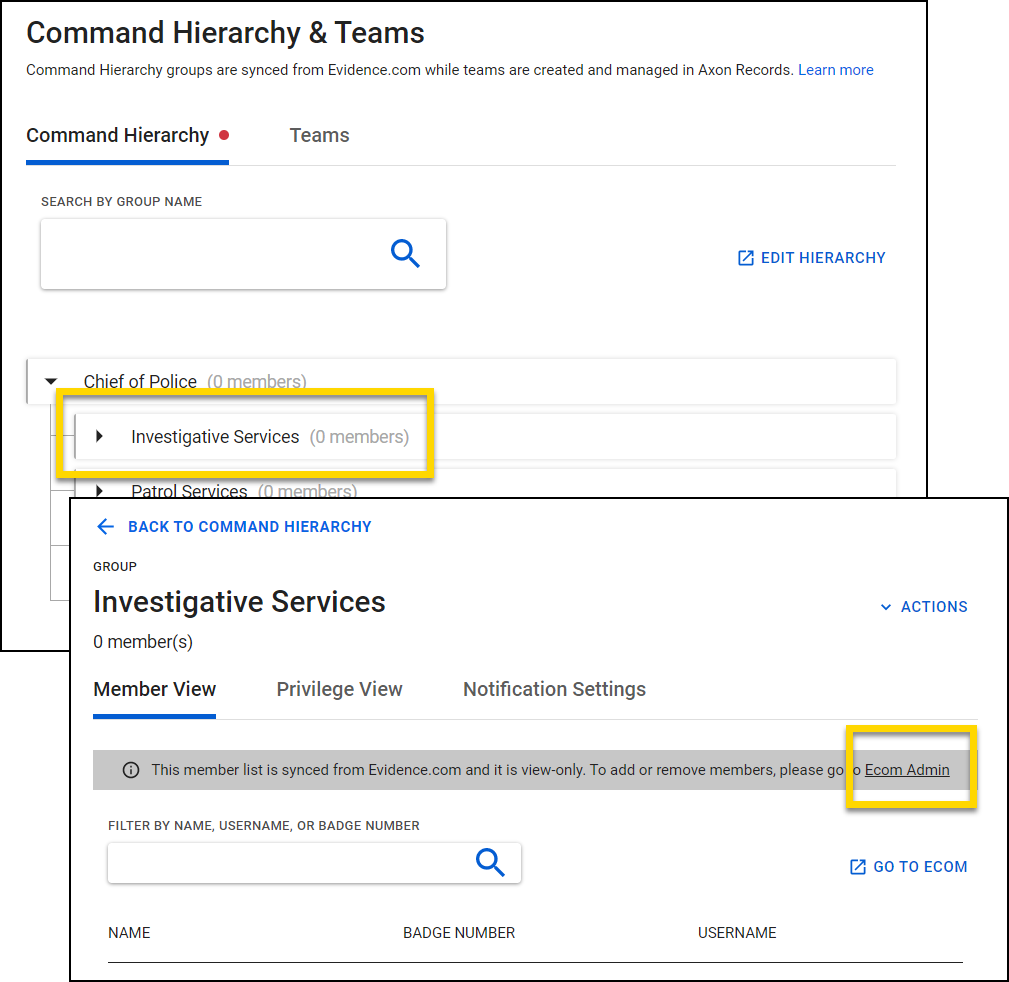
Manage teams
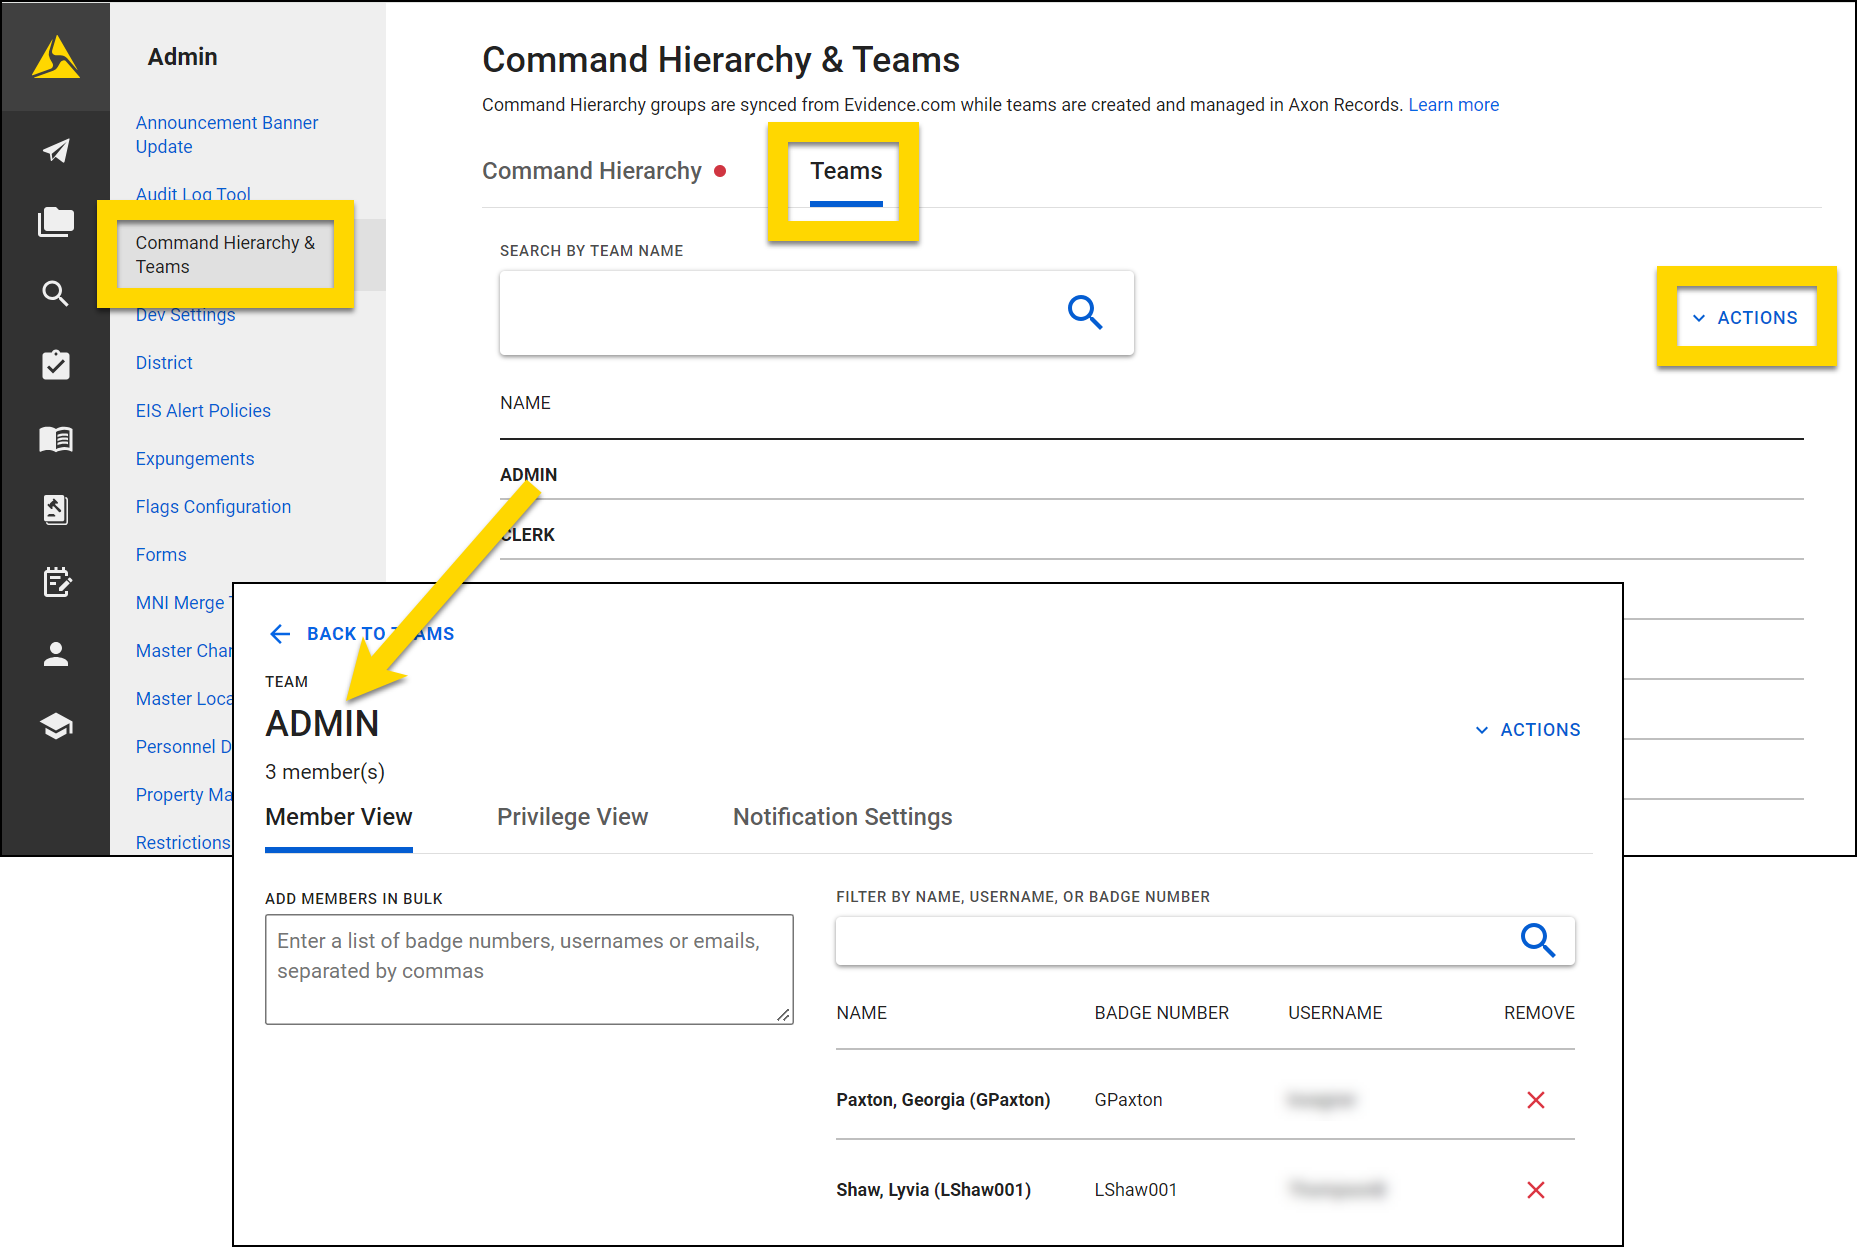
You can manage your Axon Records and Axon Standards users by using teams instead of or in addition to Command Hierarchy groups. To access Axon Records and Axon Standards teams, open the Command Hierarchy & Teams tool and switch to the Teams tab. All teams that have been created for your agency appear on this tab.
Select a team name to view all users who have been added to that team and the privileges that have been set for the team.
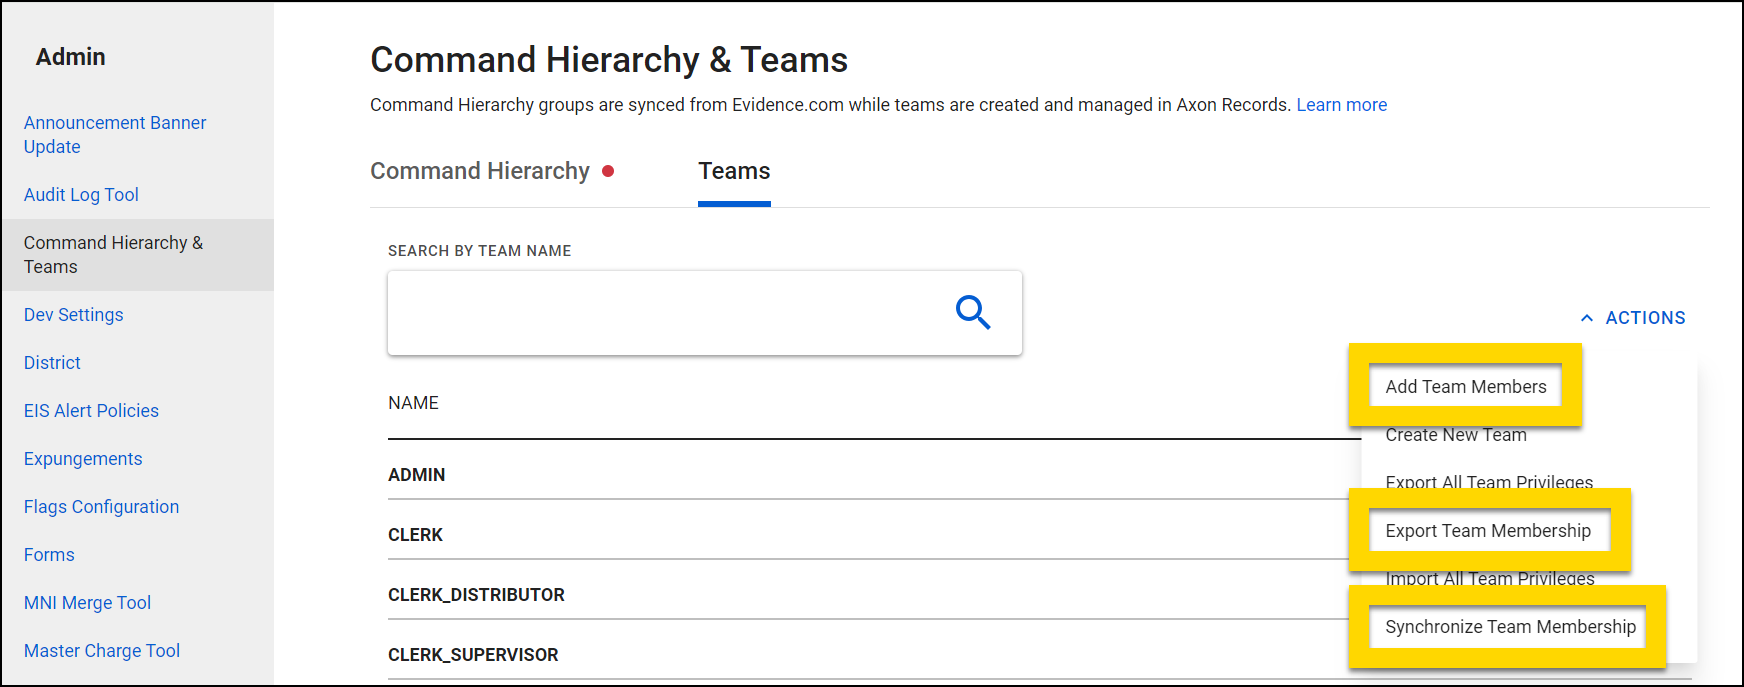
Select Actions to reveal various team-related options:
- Create new team
- Add team members
- Export/import all team privileges
- Export team membership
- Synchronize Team Membership
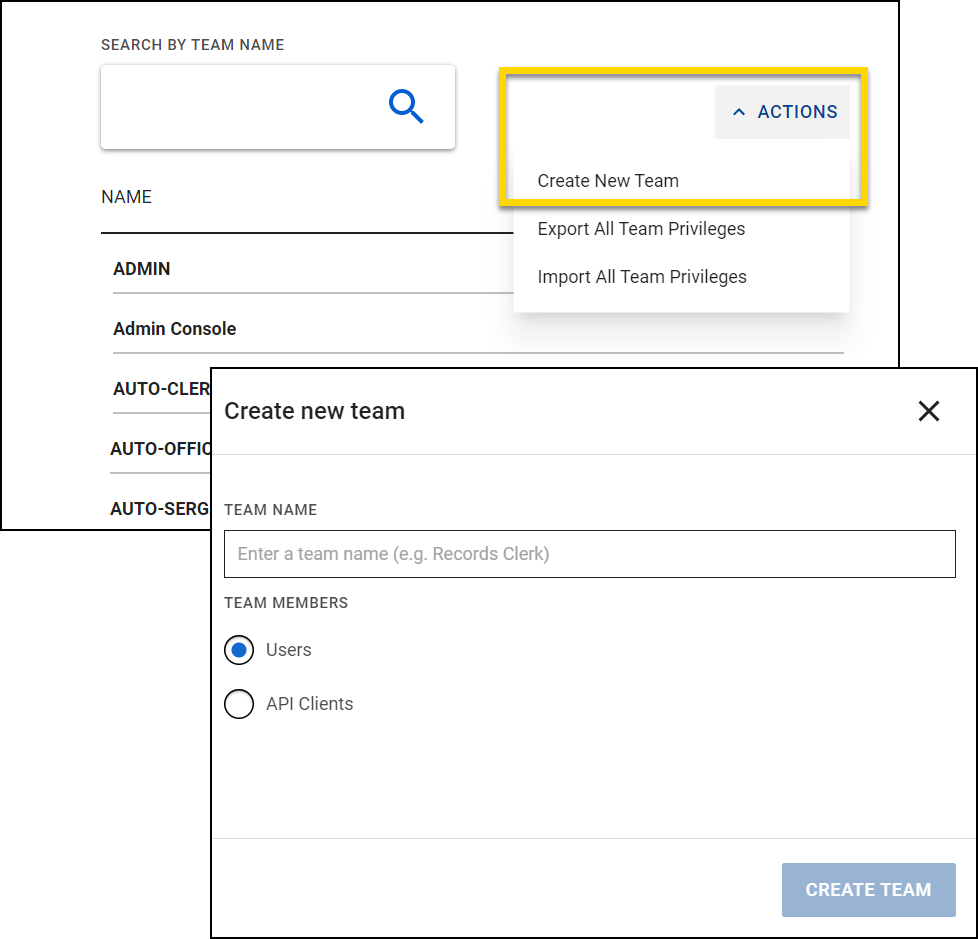
Create teams
To create a new team:
- Select Actions > Create New Team.
- Name the team and make sure the Users option is selected.
- Select Create Team.
Manage team membership
To manage which users belong to a team, go to Administrator Console > Command Hierarchy & Teams > Teams. Scroll through the list or find a team using the search box Select a team name to open the Member View tab to see a list of all team members.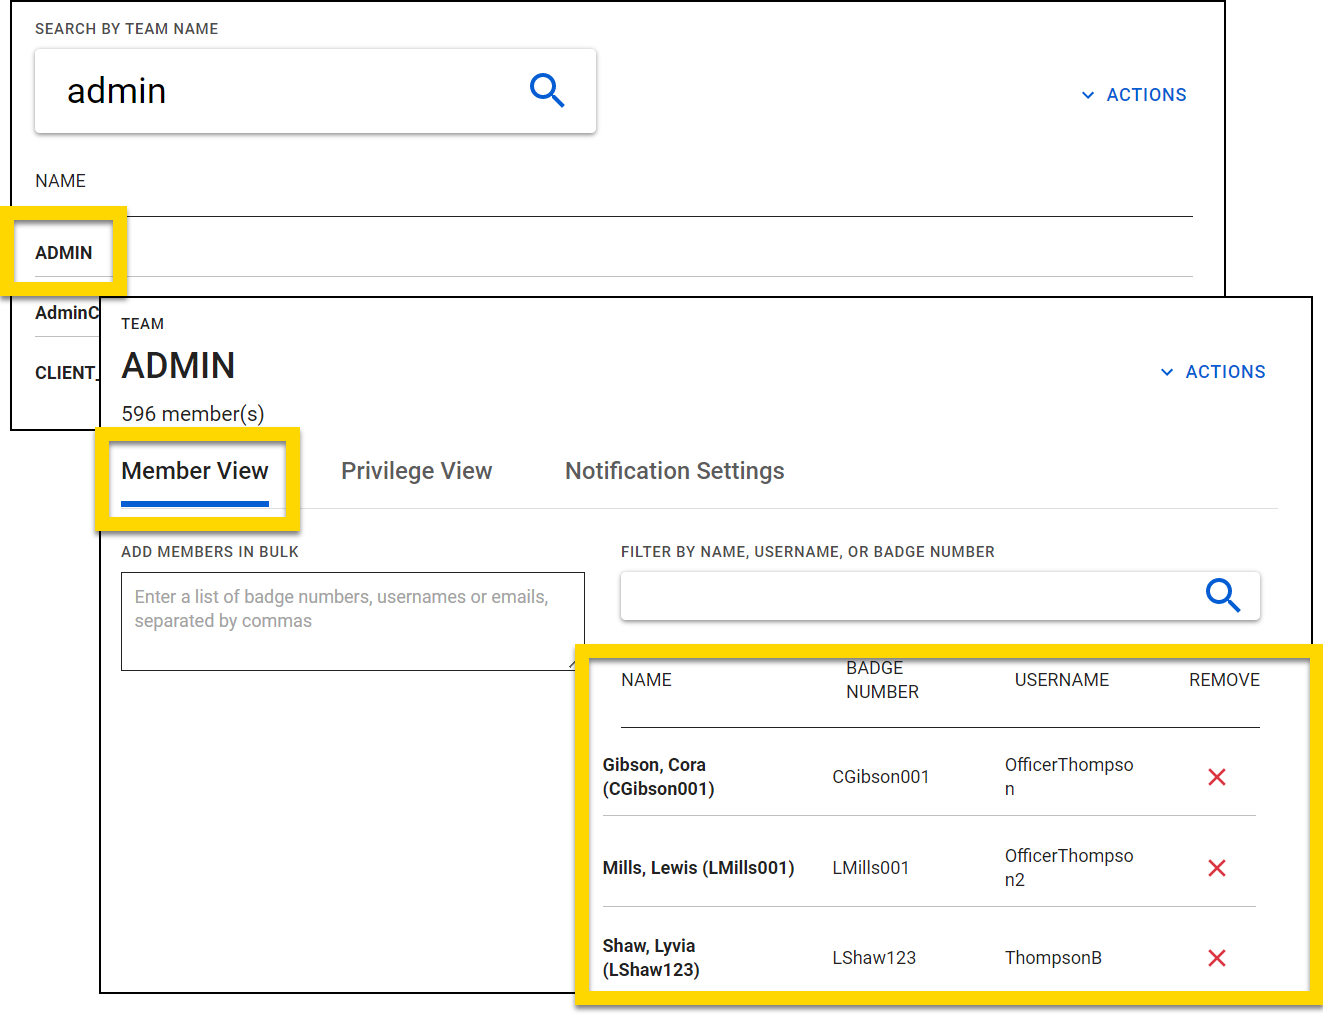
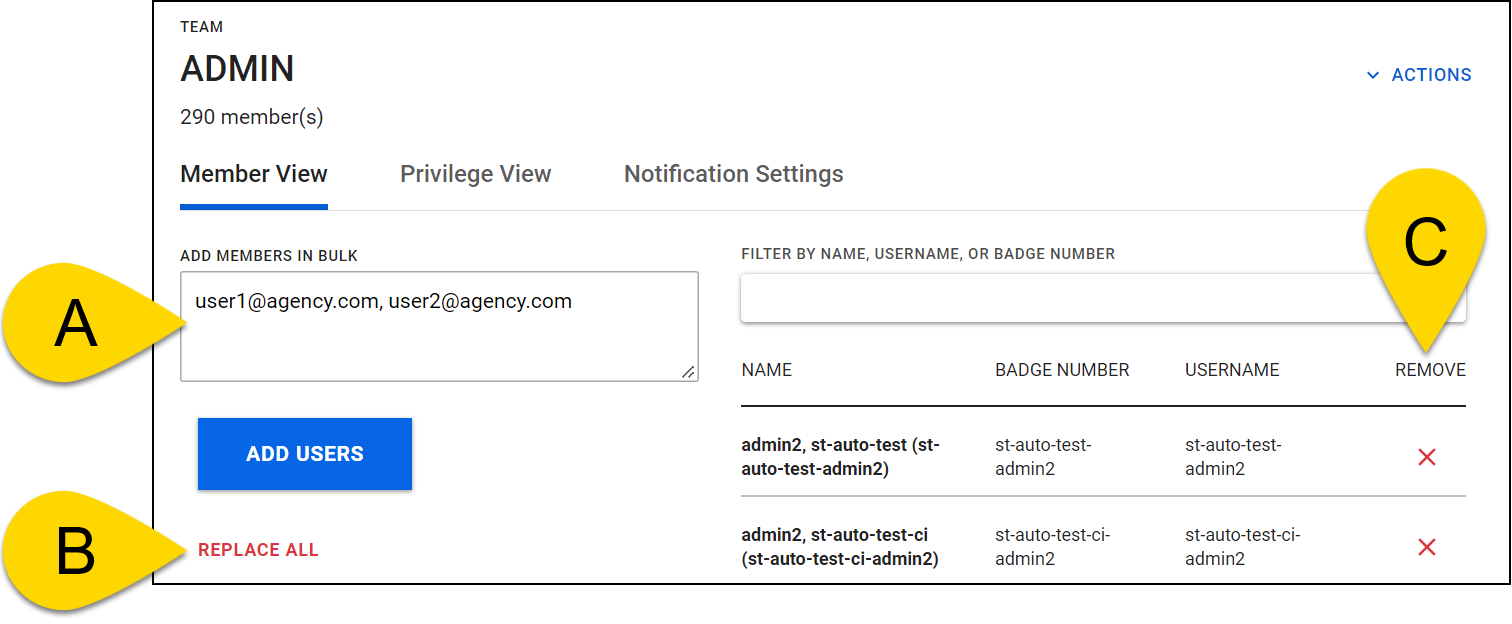
To manage users, you can:
- Add users to a team by entering a list of badge numbers, usernames, or emails separated by commas in the Add Members in Bulk field.
- Select Replace All to replace all current team members with the users entered in the Add Members in Bulk field.
The Add Members in Bulk field is case-sensitive, so be sure to use the correct capitalization when entering usernames.
- Remove a user from a team, by selecting the X beside their name.
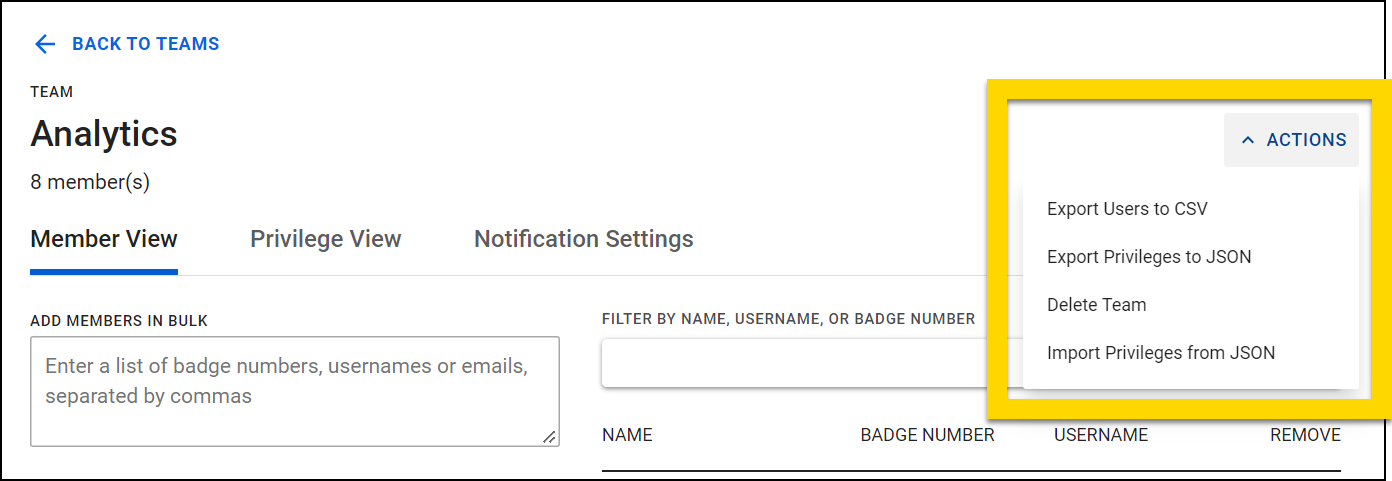
Open the Actions menu to find additional management options:
- Export Users to CSV
- The file includes each users first name, last name, username, and badge number.
- Export/Import privileges to JSON
- Delete Team
- The ADMIN team cannot be deleted
Manage membership using CSV import
Rather than managing membership team by team, you can manage membership for all teams at the same time using CSV import and export. To do this, take these steps:
- Open the Teams tool in the Administrator Console.
- Select the Teams tab.
- Select Actions > Export Team Membership.
- Open the CSV file that downloads to your computer and add, move, and remove team members. Each row in the CSV file is equal to one user's membership in a team. If a user belongs to multiple teams, the CSV file will contain multiple rows for that user. The columns for each user include:
- External_ID: The unique identifier for that team
- Name: The team name
- Membership_Type: This column can remain blank
- Entity_Type: This column should be filled out with "user" for every row.
- Entity_ID: The user's email address
- After making necessary changes, save the file and return to the Teams tool. Select one of the two options from the Actions menu:
- Add Team Members: Select this option if you are only adding users to teams.
- Synchronize Team Membership: Select this option if you are adding, removing, or moving team members.
- Select the file from your computer and upload the file you saved.
CSV Tips
- Create all teams before exporting team membership. New teams can't be created using CSV import.
- Add at least one team member to each team manually before exporting the team membership file. This ensures that the External ID is included for every team.
- Use caution when selecting the Synchronize Team Membership option, because the file you upload will change the membership of all members in all of the agency's teams.