Settings
This
The Respond Settings page provides access to:
- Axon Respond web Agency Audit Trail
- Respond Notification Configuration options
- Respond Warning Configuration
- Respond Deactivated Alerts Configuration
- Respond Device Location Filter Setting
Agency audit trail
The agency Respond web Audit Trail consolidates all Respond web information, such as which users accessed the Respond map or a livestream, into a single audit trail.
Only users with the View Respond Audit Log permission set to Allowed for their assigned role can access and download the audit trail.
Launch the audit trail from Admin > Settings. Select the time frame shown in the audit trail.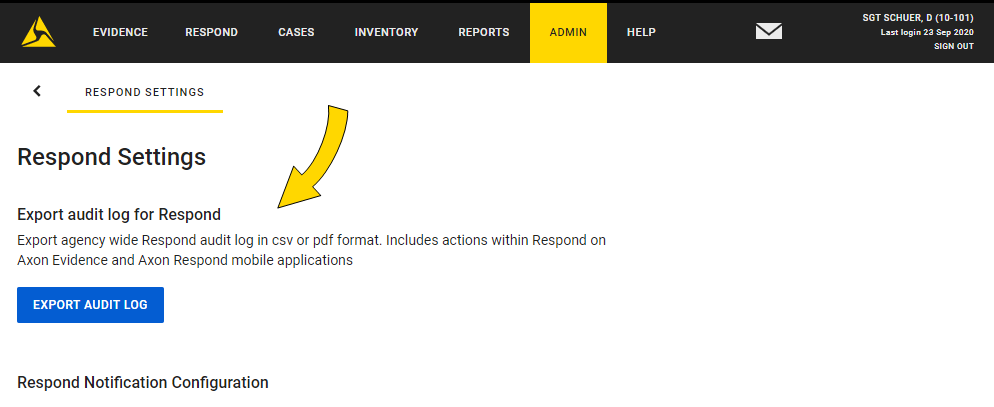
Axon Respond information is also contained in the individual device and user audit trails. Those audit trails will continue to show Axon Respond web information for the devices and users.
Notification configuration
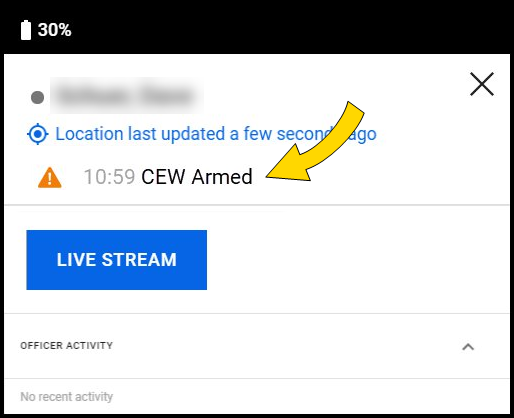
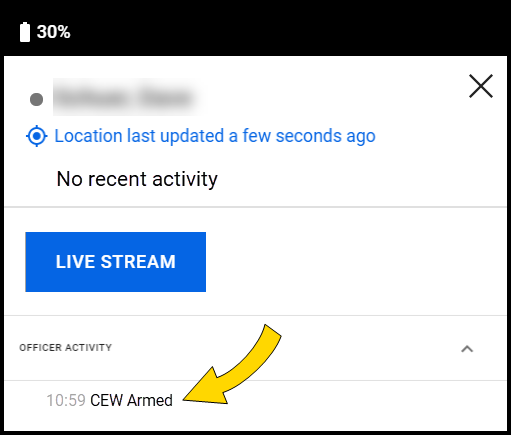
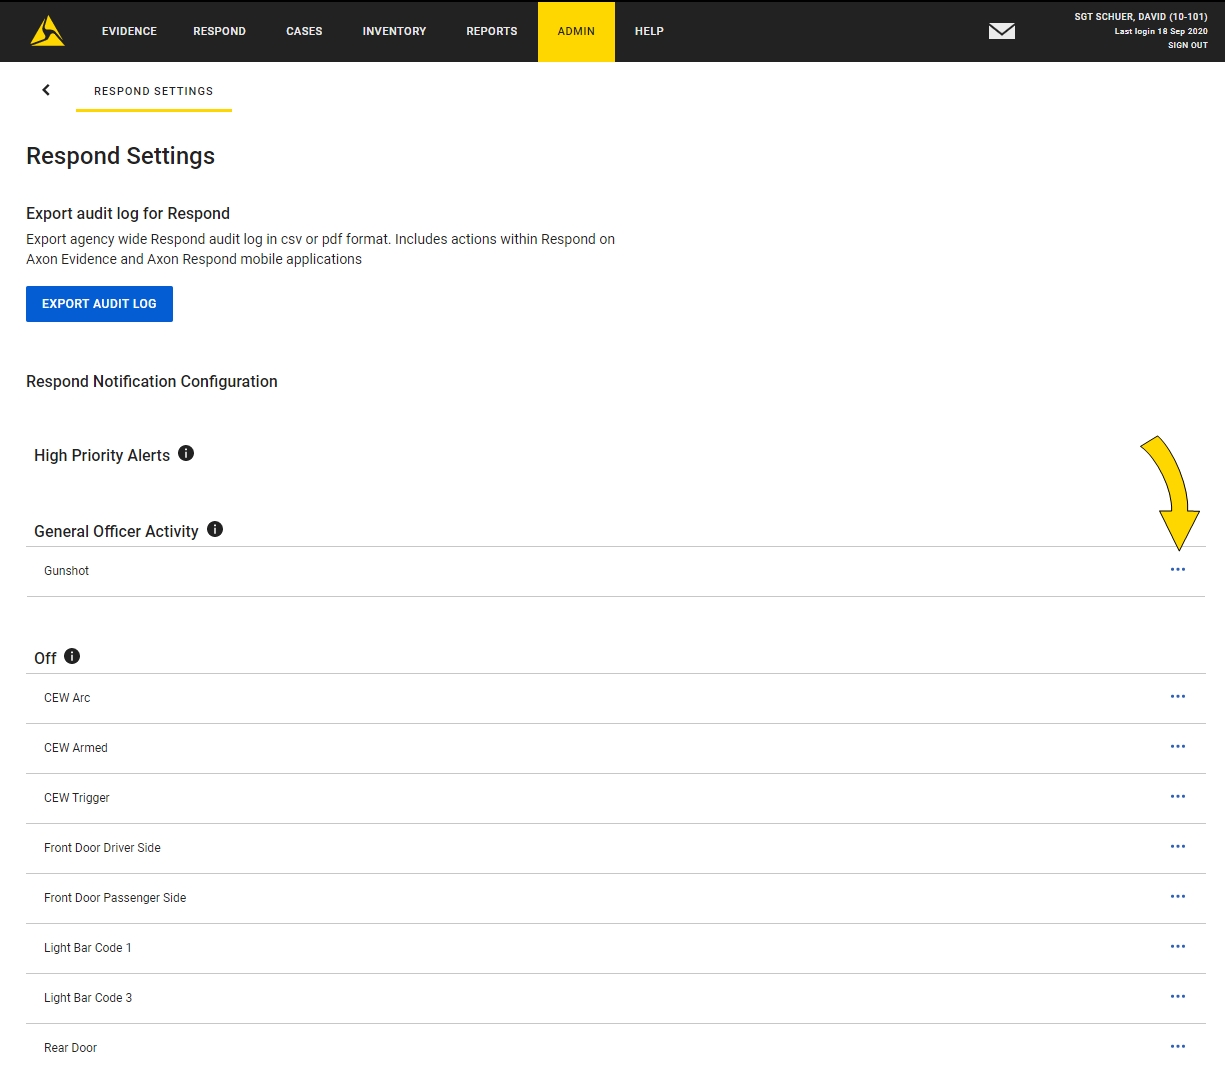
The Respond Notification Configuration section allows your agency to configure which Axon Signal-based alerts are shown by Axon Respond.
The configuration page lists the Axon Signal-based activations available to your agency, based on your Signal configuration settings, Axon Fleet 3 configurations, and Axon Body 3 gunshot detection (currently in beta testing).
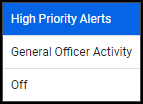
Each setting has three options:
- High priority alerts – An alert displays in the alerts banner on the Respond map, the associated camera marker is surrounded by a red circle, and the alert is added to the device marker.

- General officer activity – The information is only noted in the Officer Activity section on the device marker and will not generate an alert.
- Off – No information shown by Axon Respond.
Setting Axon Respond notification configurations
- Select Admin > Respond Settings.
- In the Respond Notification Configuration section, select More options ... for the Signal-based activation you want to change.
- Select the appropriate option from the list. The activation is moved to the appropriate section.
- Repeat until all the activations are in the appropriate sections.
Respond warning configuration
Respond Warning Configuration can be used by agencies that allow wide access to the Respond map to remind users about the potentially sensitive information available on the Respond map and livestream view. When the option is enabled, a custom warning message appears on the Respond map and requires user confirmation before allowing use of the map. Each time a user confirms the message or cancels and exits the Respond map, it is recorded in the user audit trail.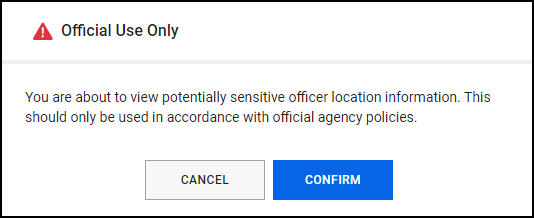
Enable the Respond warning
- Select Admin > Respond Settings.
- In the Respond Warning Configuration section, select the toggle to enable the warning.
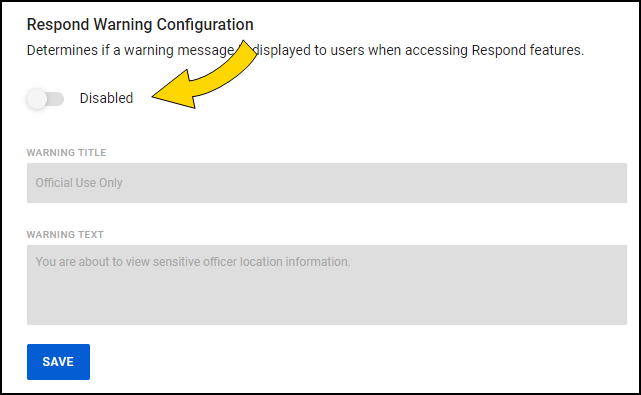
- Enter the warning title and text information:
- Warning Title – Enter the title for the warning message; maximum 25 characters.
- Warning Text – Enter the text for the warning message; maximum 255 characters.
- Select Save and confirm.
When user next access the Respond map, the message displays and the user must confirm they understand the message before they can view the map.
Disable the Respond warning
- Select Admin > Respond Settings.
- In the Respond Warning Configuration section, select the toggle switch (shown in prior section) to disable the warning.
- Select Save and confirm.
Respond deactivated alerts configuration
This feature lets authorized users deactivate alerts by marking them as false or resolved and add comments to events.
- Select Admin > Respond Settings.
- In the Respond Deactivated Alerts Configuration section, select the toggle to enable the feature.

- Select the appropriate Comments option for your agency:
- Required – Users must enter a comment before an alert can be marked as false or resolved.
- Optional – Users can enter a comment, but it is optional.
- Disabled – Users can't add comments.
- Select Save.
Once the feature is enabled, users with the Mark Alert as False or Resolved permission set to Allowed can mark alerts as false or resolved.
Respond device location filter
This feature lets agencies set how long the most recent device location displays on the Respond map.
When the filter is enabled, the default setting is within eight hours. Only devices that reported a location within the selected time appear on the Respond map. When the filter setting is disabled, only devices that have sent location information within the previous 30 seconds appear on the map. Changes to this setting are tracked in the Agency and User Audit Trails.
This setting requires up to ten minutes to take effect. It only affects the Respond browser map, not the Axon Respond mobile app.
- Select Admin > Respond Settings.
- In the Respond Device Location Filter section, select the toggle to enable the feature.
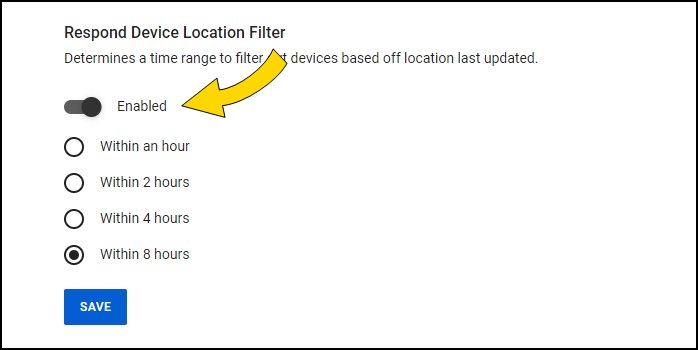
- Select the appropriate time option for your agency.
- Select Save.
Watch Me notifications
Watch Me notifications can be enabled in permissions to include additional officer identifiers such as first name, last name, or call sign. To include these additional identifiers in Respond mobile app notifications, Axon will send additional officer identifiers to our push notification providers: Apple Inc. or Google Inc. Similarly, for a Respond webpage, Axon will send additional officer identifiers to our web push notification providers: Apple Inc., Google Inc., or Mozilla Corporation.