Permit management
Once a permit has been created and either approved or denied, additional management steps may include:
- Print permit photo card
- Print permit application
- Update the permit status
- View the permit activity log
Print permit photo cards
After approving a permit, you are returned to the My Tasks inbox. To print a permit photo card:
- Open the Review Permits inbox.
- Switch to the Recently Finalized tab.
- Select a permit task to open the permit.
- Select More Actions [...] > Print Photo Card.
- Select a person and organization name then Next.
- Enter a recipient and purpose then Print.
- The permit card will open in a new tab where you can download or print it.
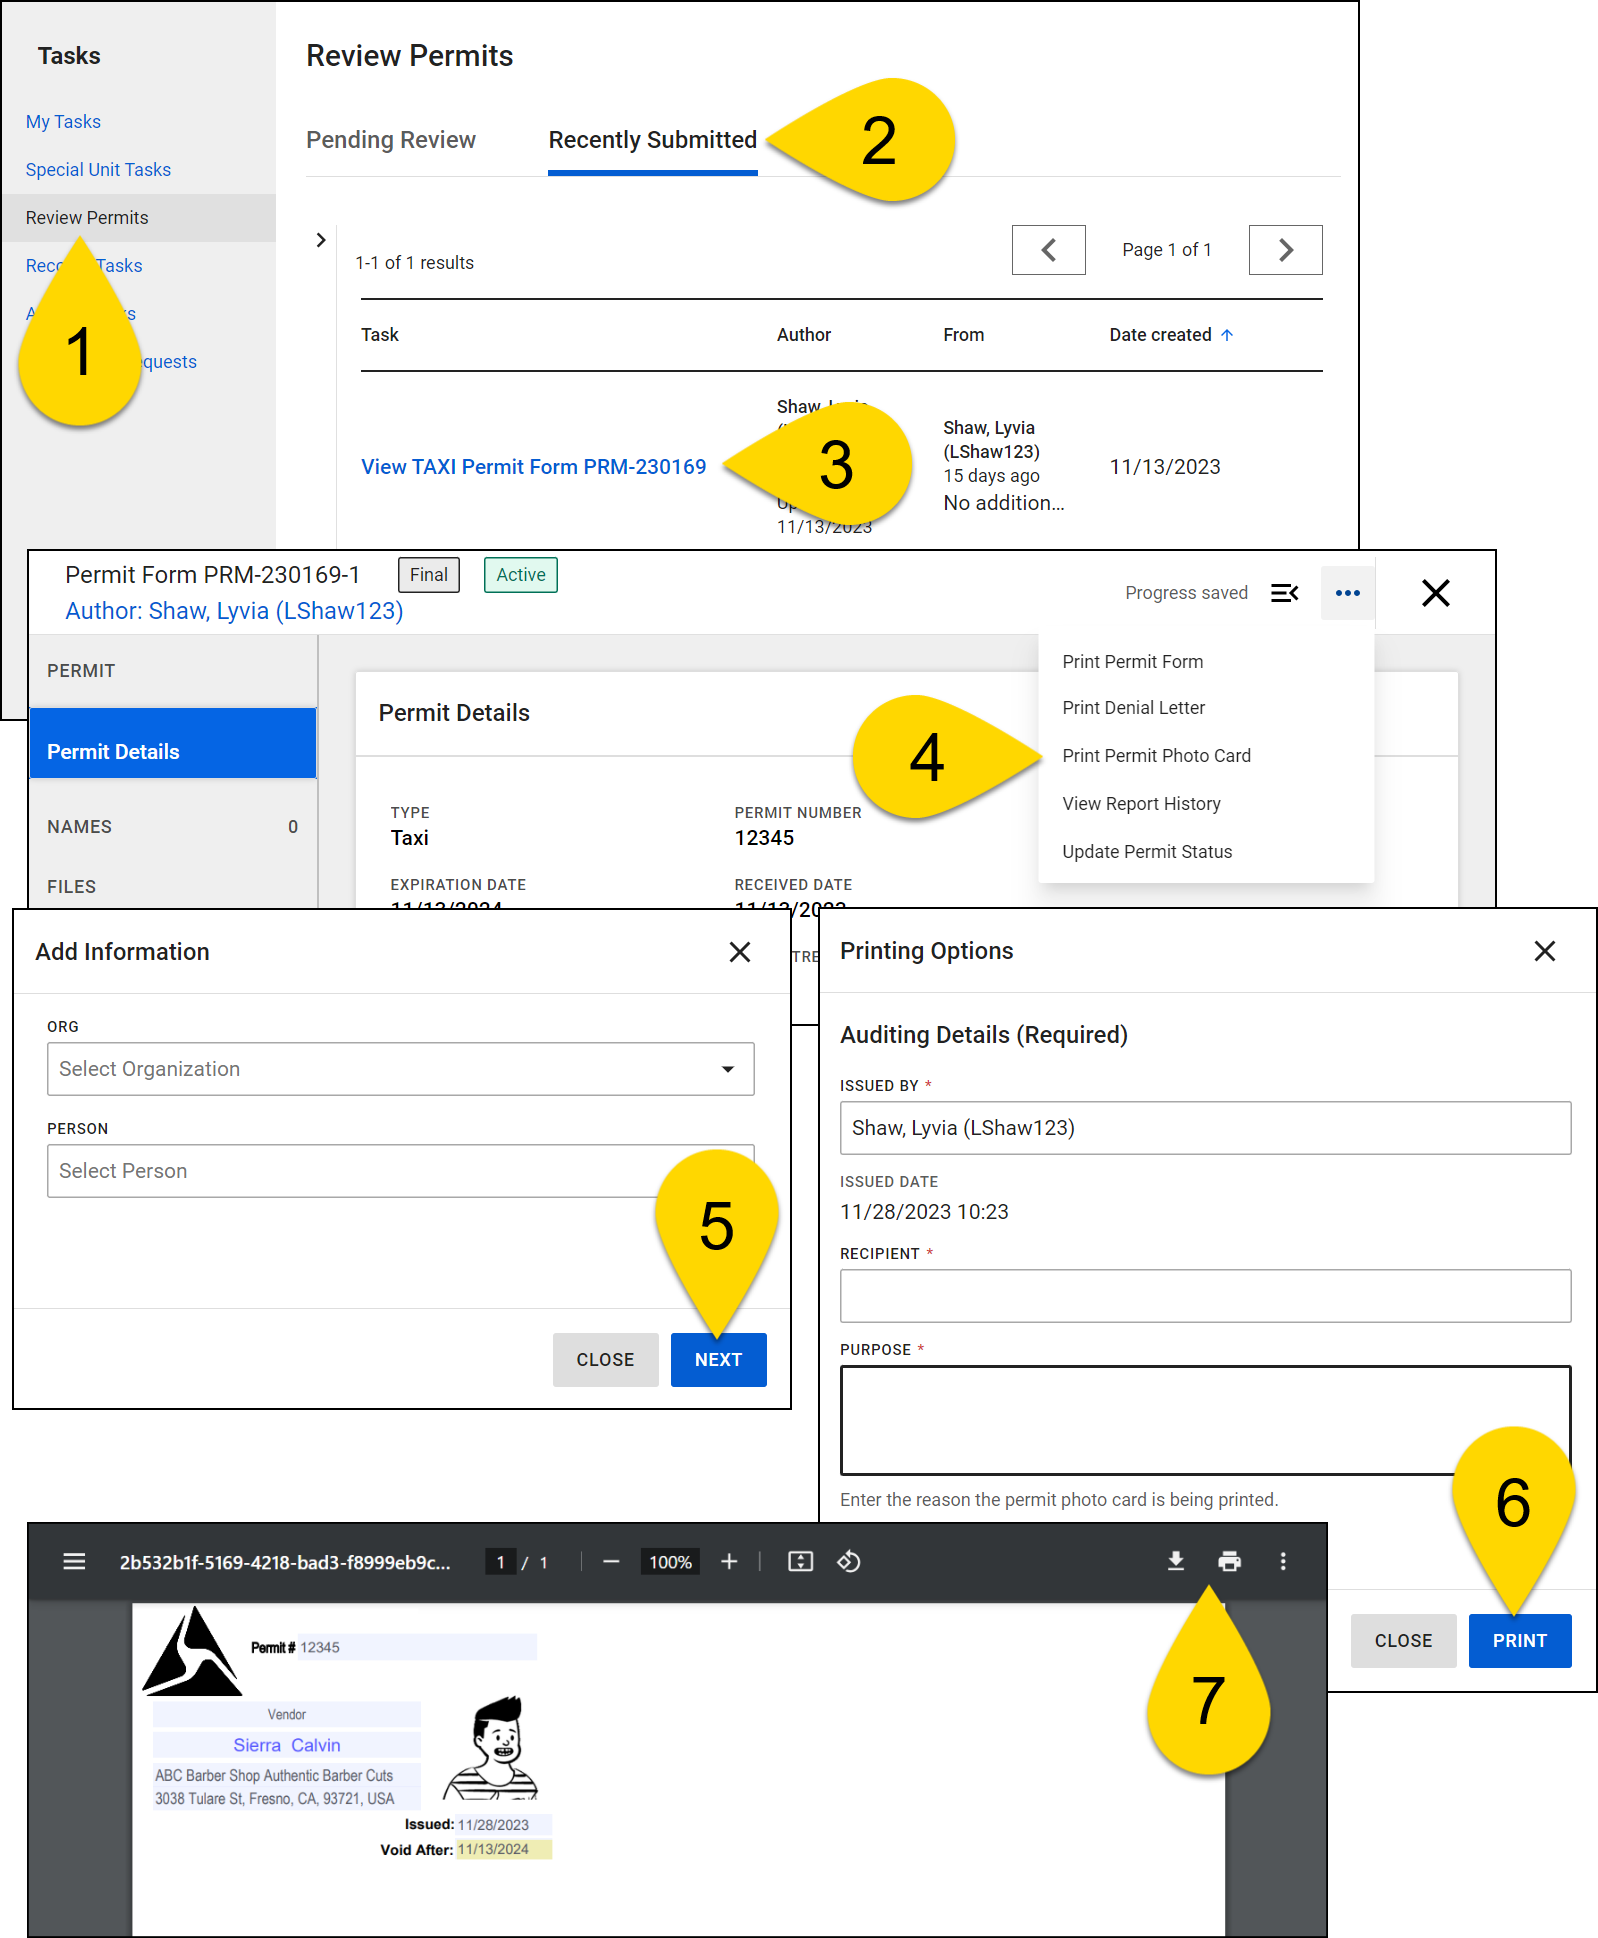
Permit photo cards can only be printed once the permit has been approved.
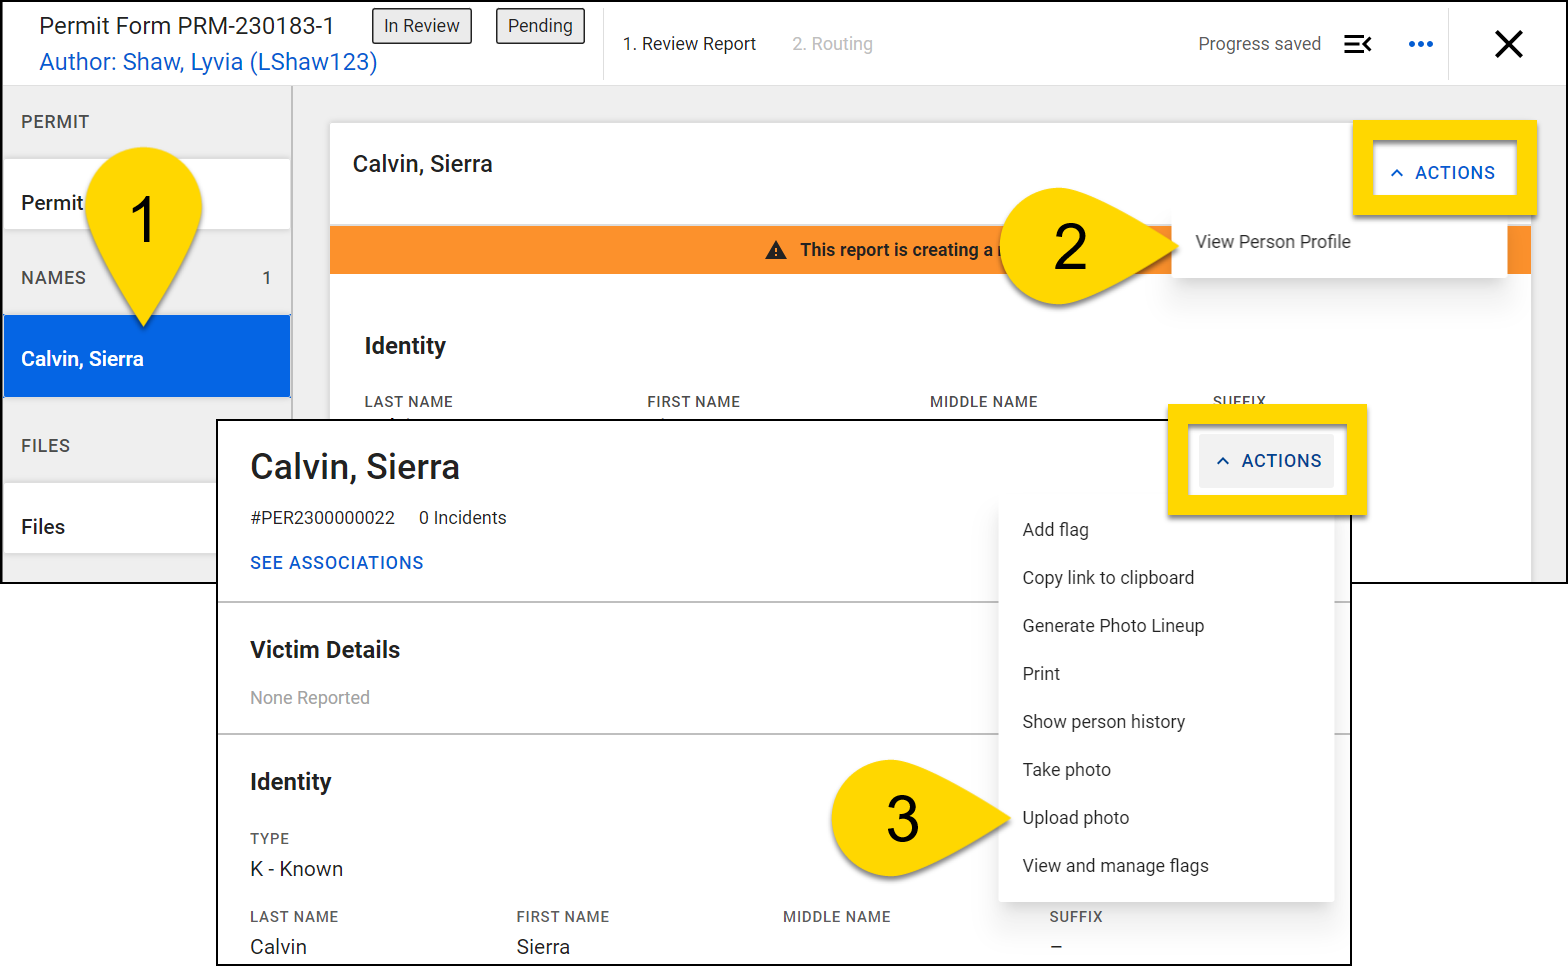
Add Photo
If you added a new person to the Axon Records database when creating the permit, and the permit card includes a photo, you must add a photo to that person's profile before printing the photo card. You may also need to add a photo to a person's profile even if they already existed in the Axon Records database before you added them to the permit.
To add a photo to a profile:
- Select the person's name in the permit.
- Select Actions > View Person Profile.
- The person's profile will open in a new browser tab. If an image does not appear at the top of the profile, below the person's name, select Actions > Upload Photo.
- When permit photo cards are printed, they maintain the aspect ratio of the person's profile photo. If the image on the permit photo card needs to be a square, be sure to upload a square image to the person's profile.
- For more information about adding photos to profiles, see Manage profile photos.
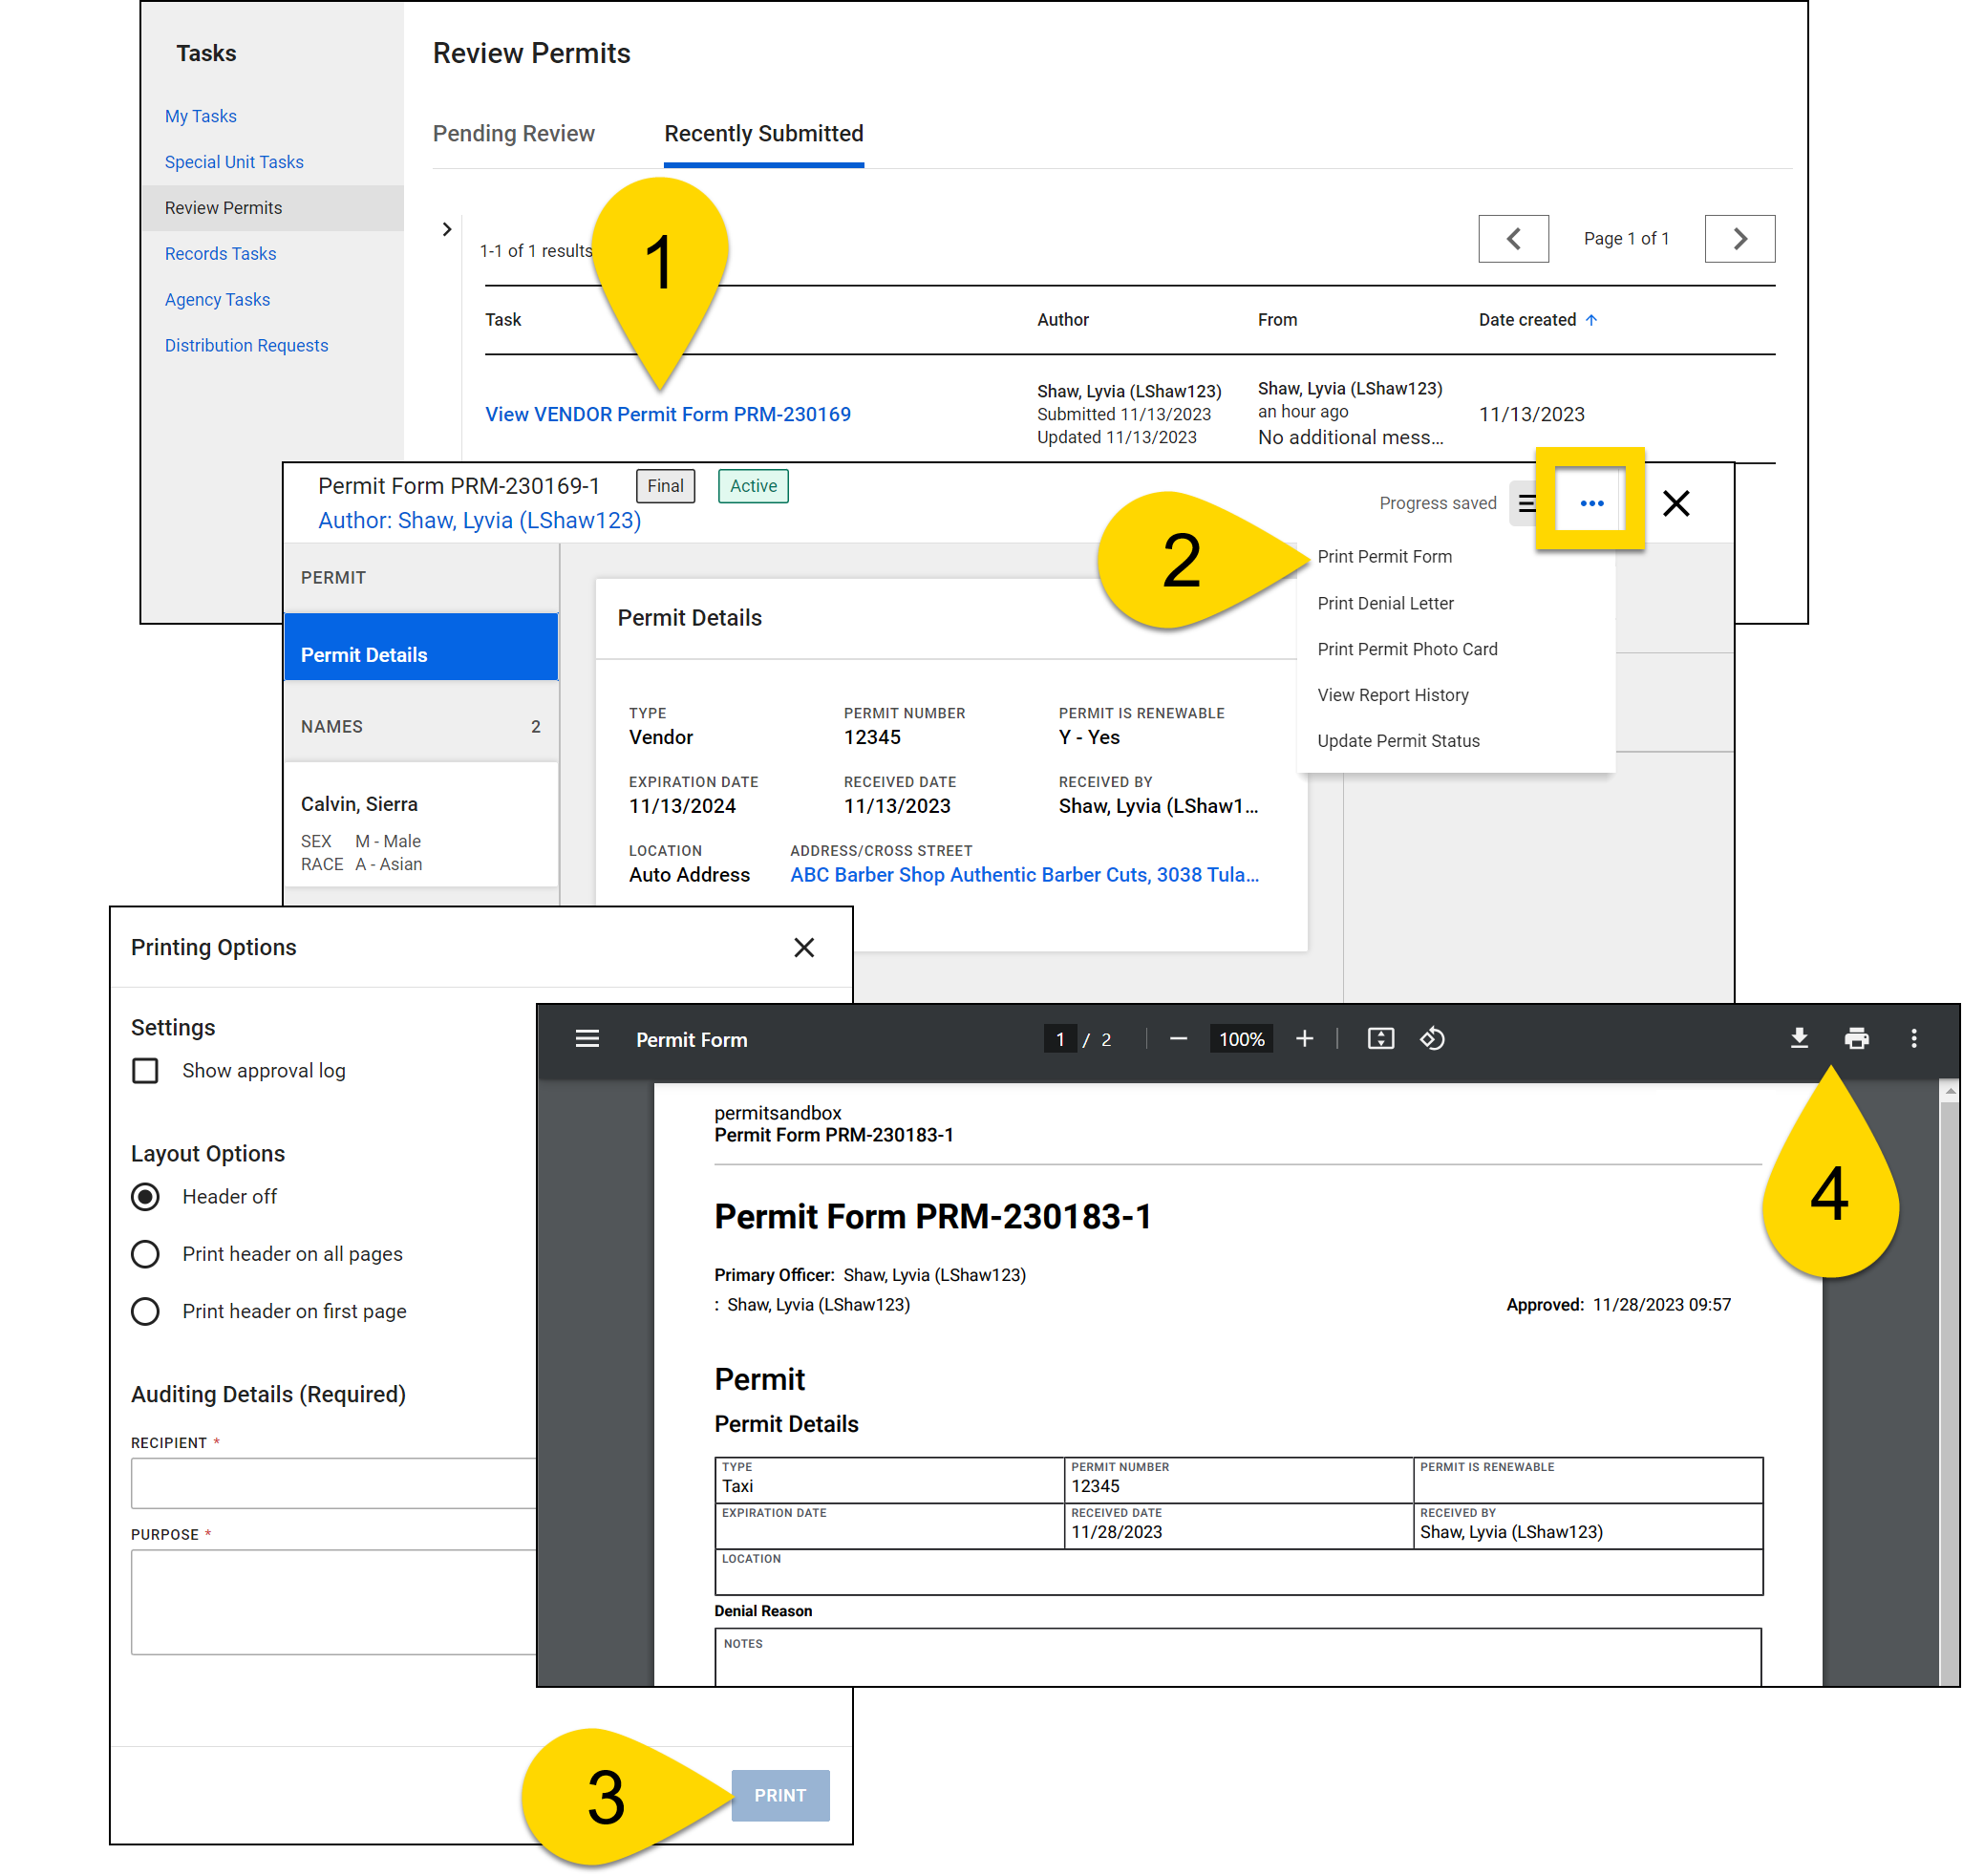
Print permit application
You can print a permit application at any time. To do this:
- From a task inbox or Permits Search, open the permit by selecting the permit name.
- Select More Actions [...] > Print Permit Form.
- Adjust the print settings and select Next.
- The permit application will open in a new tab where you can download or print it.
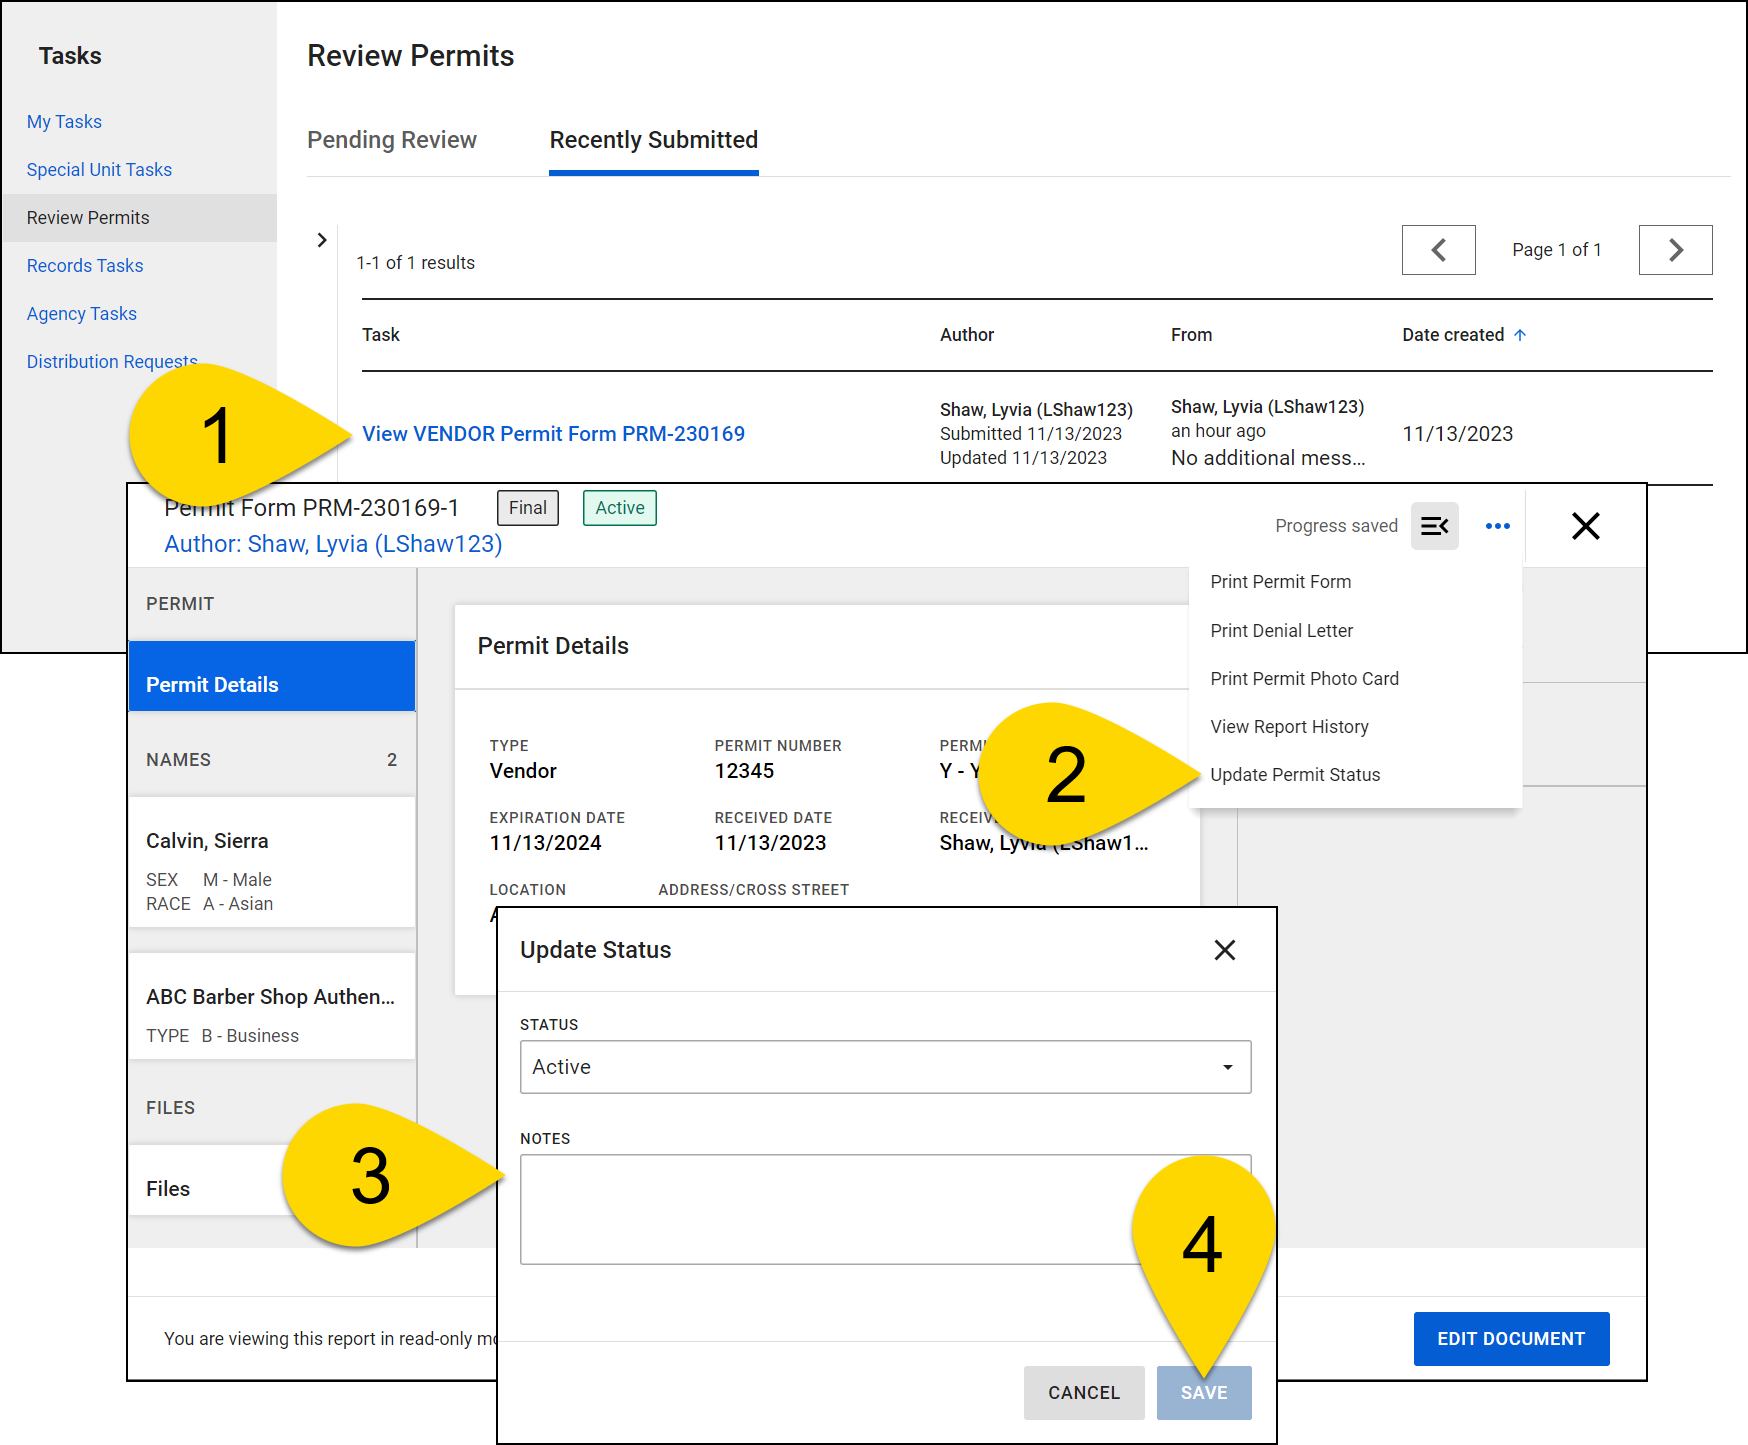
Update permit status
After a permit has been finalized, you can update its status. To do this for single permit:
- From a task inbox or Permits Search open the permit by selecting the permit name.
- Select More Actions [...] > Update Permit Status.
- Select a new status and add notes. Possible statuses include:
- Active
- Denied
- Expired
- Pending
- Reinstated
- Revoked
- Suspended
- Select Save.
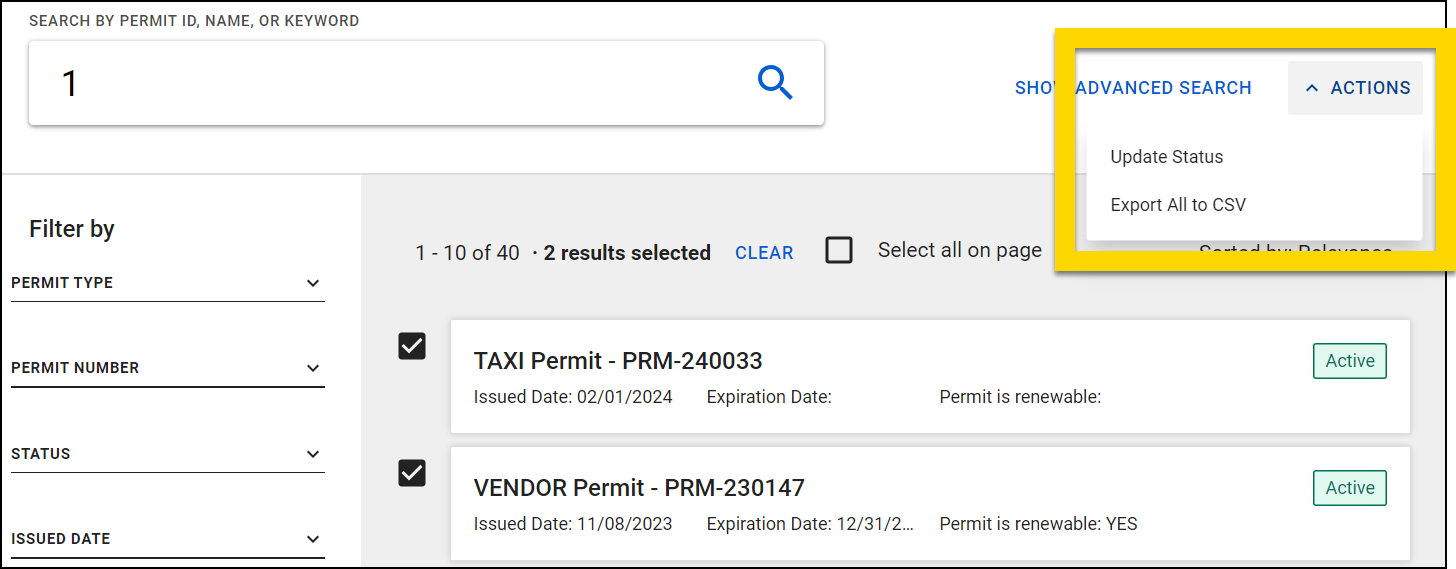
You can update the status of multiple permits at the same time from Permits search:
- Open Permits Search and search for permits.
- Select the checkboxes beside multiple permits.
- Select Actions > Update Status.
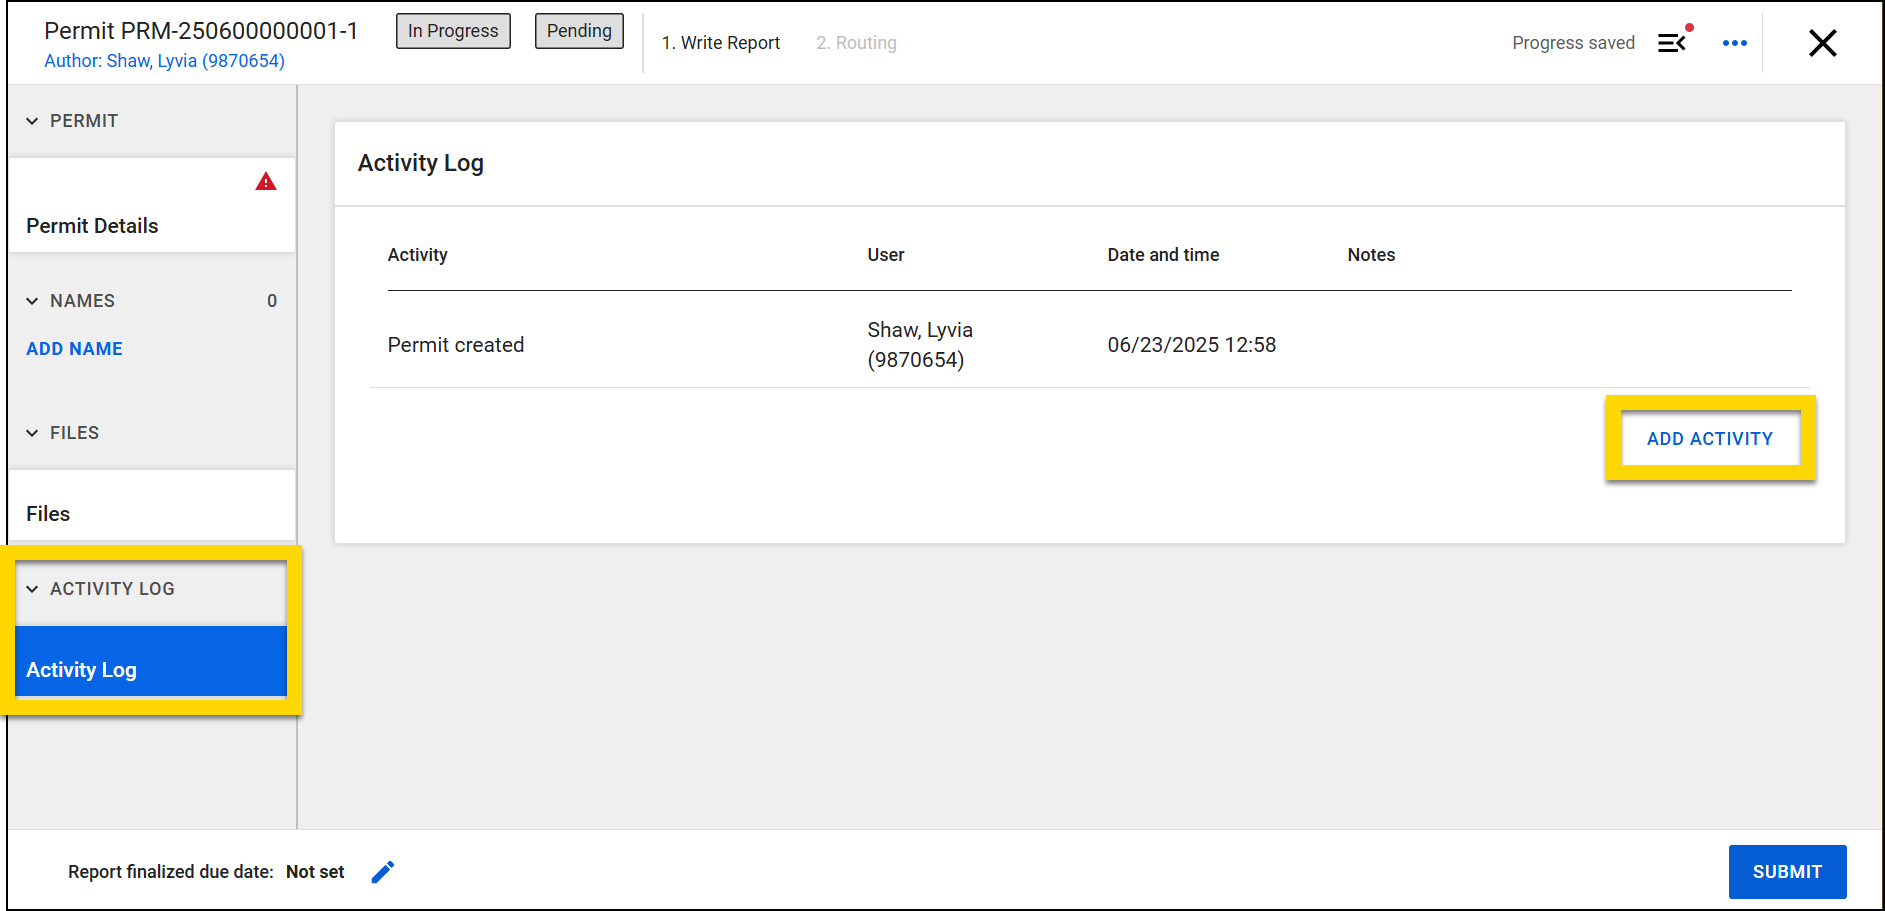
Manage the permit activity log
The Activity Log section on a permit form includes all activities performed on that permit. Aside from a "Permit created" activity, all activities shown in the log are user-generated. In addition to activities manually added to the permit form, permit status updates are displayed.
The most recently completed activities appear at the top of the list. The information recorded for each activity includes:
- Activity Type
- User (who performed the activity)
- Date Completed
- Notes
To add an activity to the log:
- Open a permit (either finalized or in progress).
- Open the Activity Log section.
- Select Add Activity.
- Select an Activity Type. Options include:
- Appeal / Dispute resolution
- Application payment
- Compliance verification / background check
- Correspondence with other department
- Follow-up with permit holder
- Notice / reminder
- Other
- Printed from external system
- Indicate which user performed the action.
- Enter the date and time the activity was completed.
- Add notes about the activity.
- Select Add.
Unlike other activity logs, activities added to permits cannot be deleted.