Quality Control
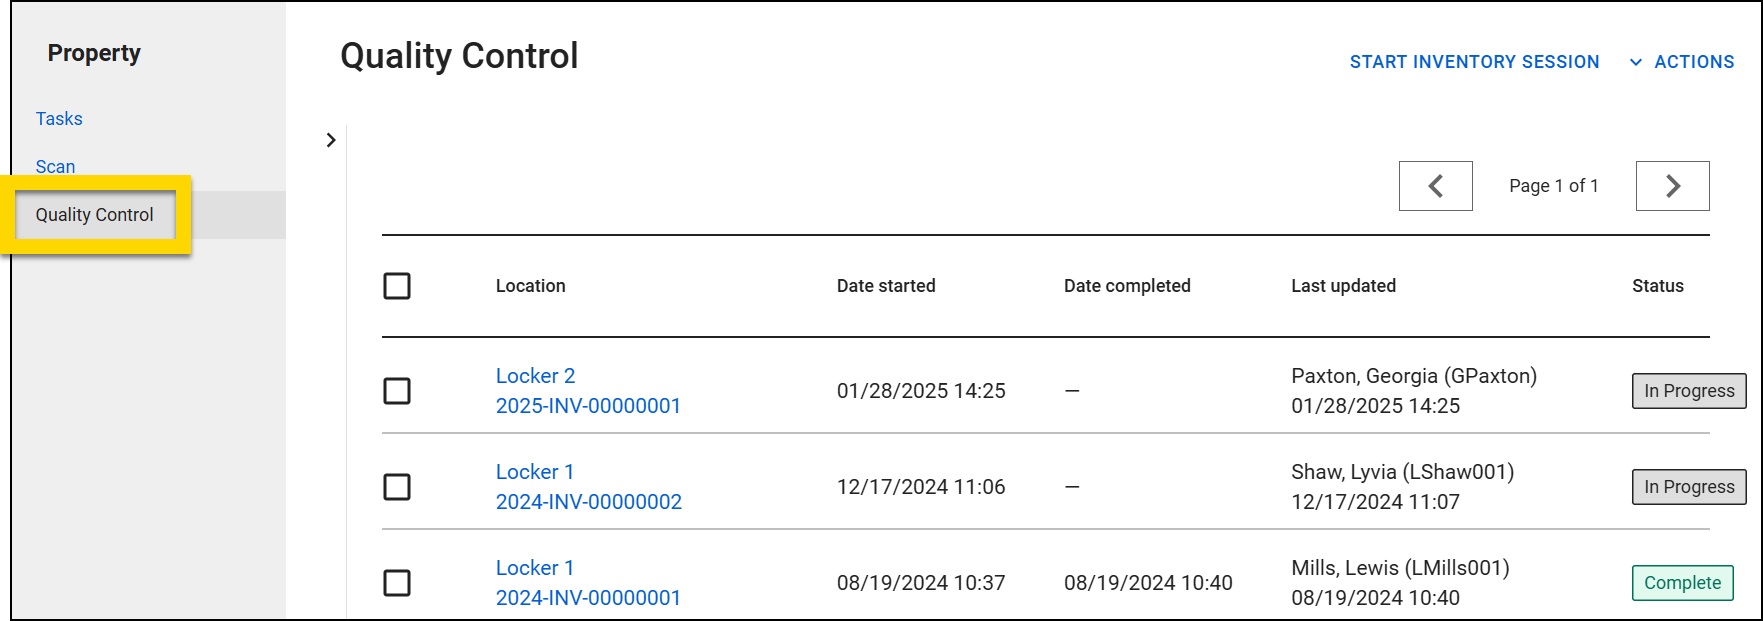
The Quality Control dashboard in the Property module lets you view a list of all inventory sessions that have been performed at your organization. You can filter the list of inventory sessions by Location, Date started, or Status.
The following information is included for each inventory session:
- Location
- Date started
- Date completed
- Last updated
- Status
Select the Session ID in the Location column to open that inventory session where you can view or continue the session.
From this dashboard, you can take the following actions:
- Perform inventory
- Manage misplaced property
- Manage UTL property
- View inventory session history
- Print inventory session reports
Perform inventory
To start a new inventory session, select Start inventory session from the Quality Control dashboard. Select a storage location then select Start.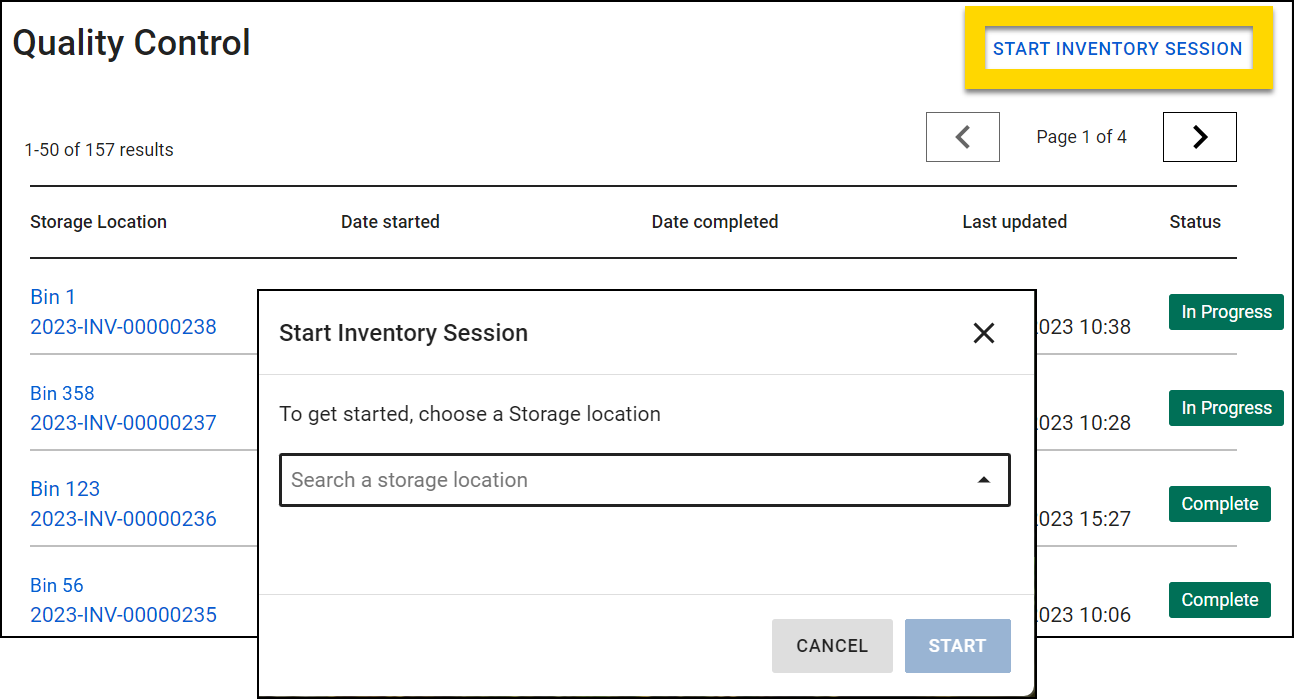
A list of all items and containers assigned to that location will appear on the left side in the Assigned to location section. Scan or enter the barcode number in the Barcode field for each property item or container in that location. As you work, items will move from the Assigned to location section on the left to the Confirmed section on the right.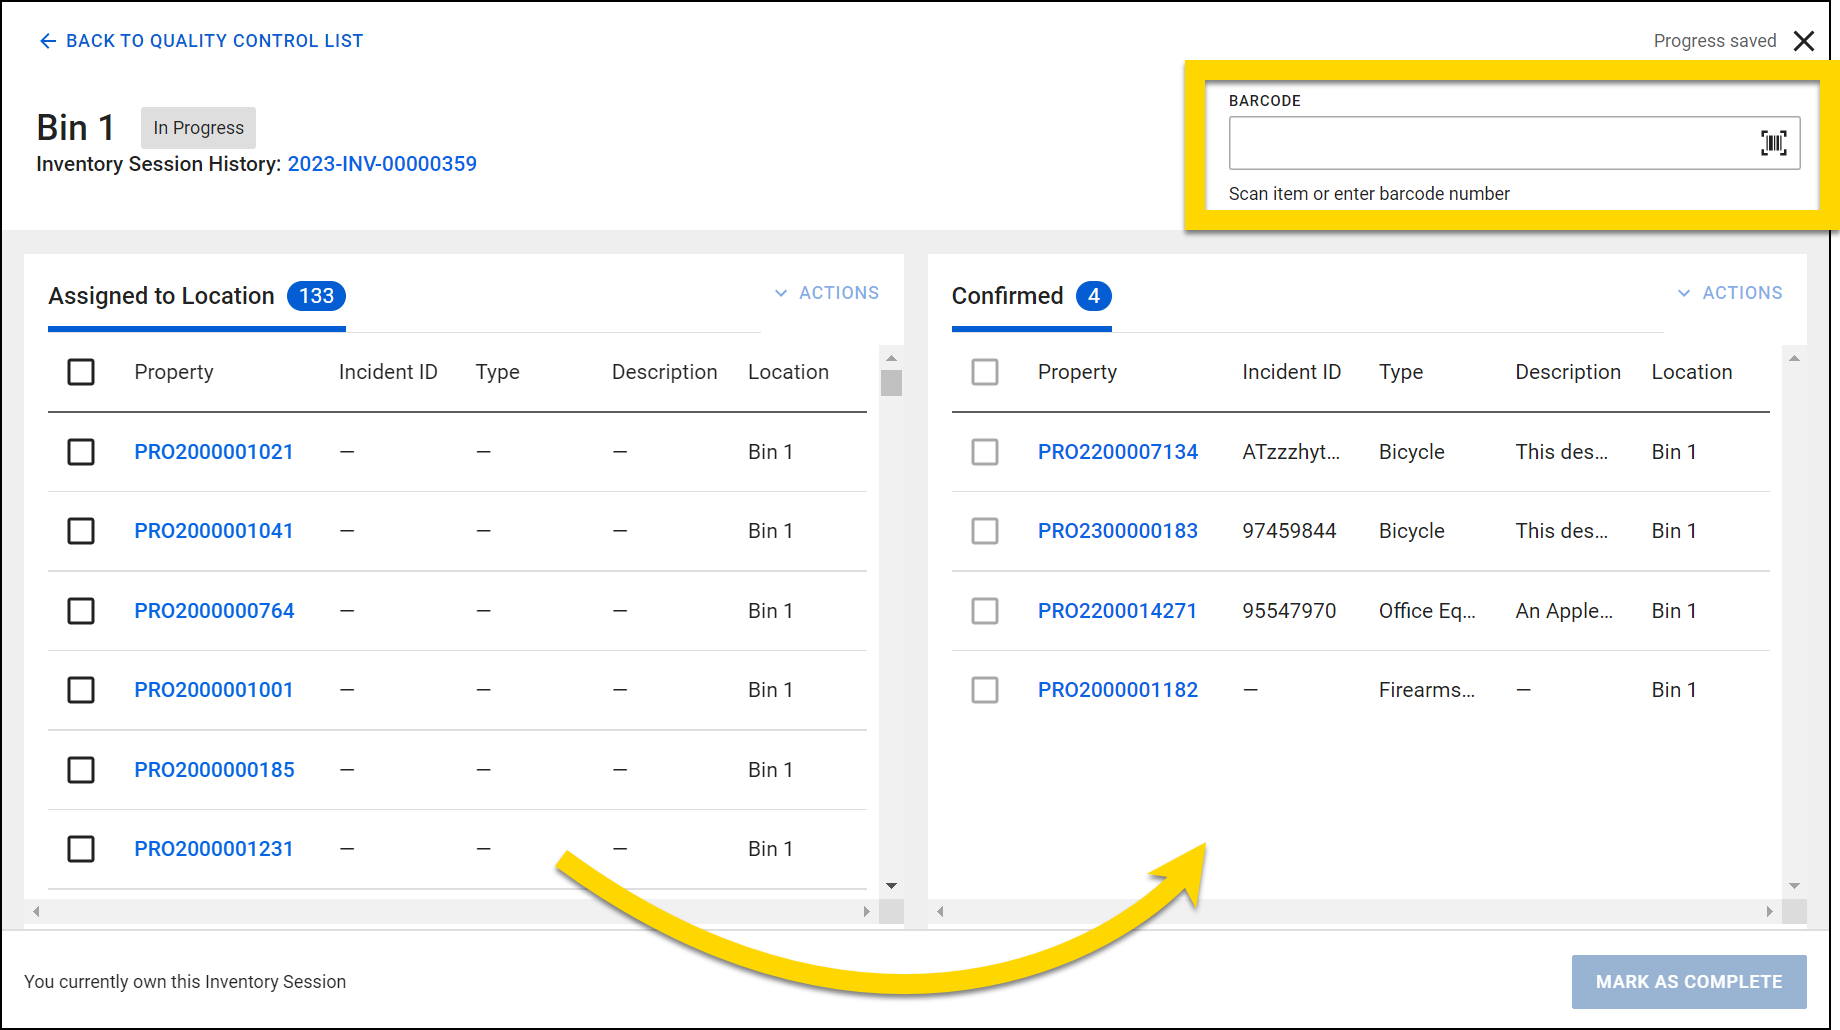
Your progress is automatically saved as you work, and you can leave the session at any time by selecting the X or Back to Quality Control list.
Take over inventory session
To work on an inventory session started by another user, select the Session ID in the Storage location column on the Quality Control dashboard then Take over session.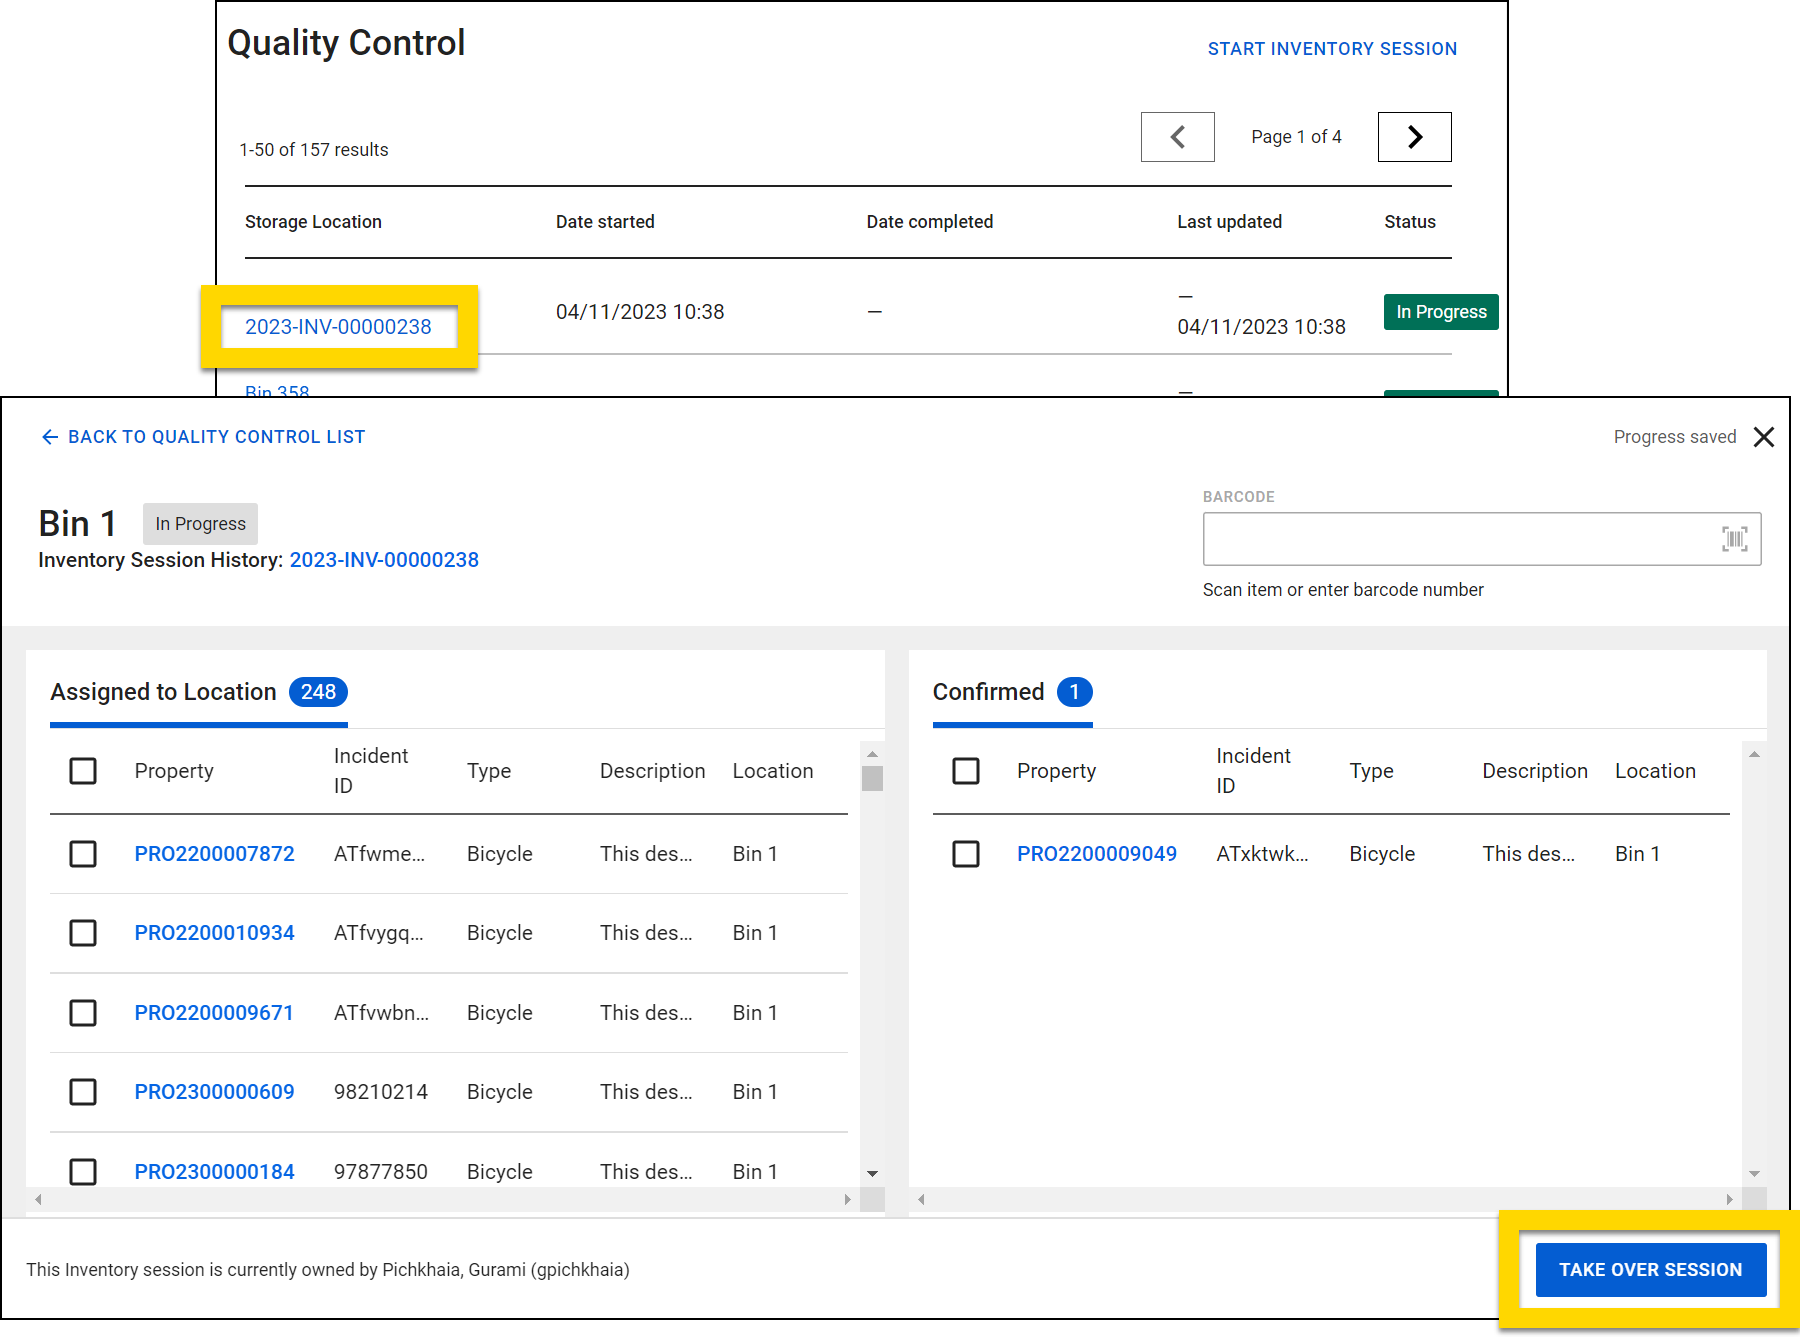
UTL and misplaced property
While performing inventory, some items or containers may be misplaced, and others may be UTL (Unable to Locate). You can manage these items during the inventory session or wait until later and manage them from the Misplaced and UTL tabs in the Tasks dashboard.
Mark session as complete
When all items and containers in your session are confirmed or marked as UTL, select Mark as complete. Once a session is marked as complete, the only action that can be taken is viewing the session history.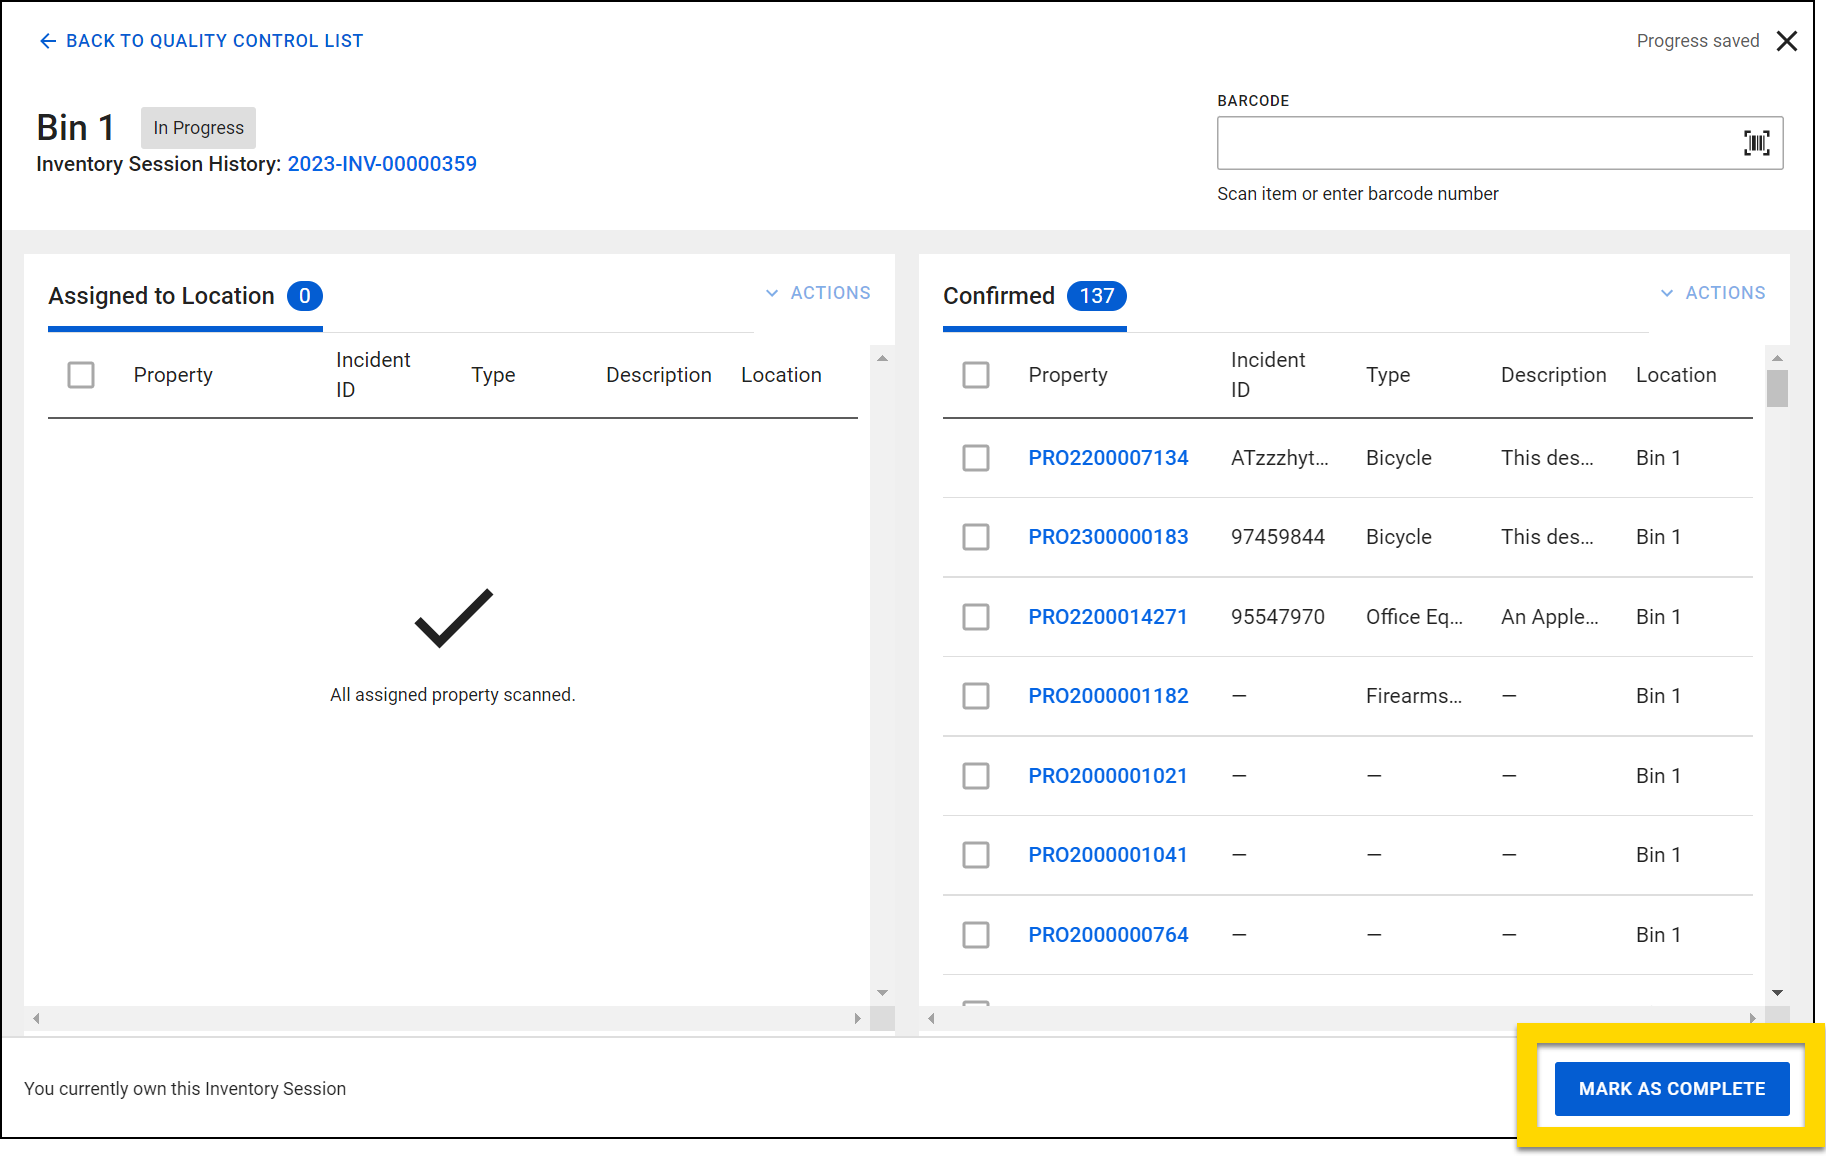
Manage misplaced property
During an inventory session, if you scan or enter the barcode for an item or container that is assigned to a different location but has been incorrectly placed in the location you are scanning, a message will appear indicating it is misplaced. You can manage the misplaced property immediately, or close the message and access the property later from the Misplaced tab in the Tasks inbox.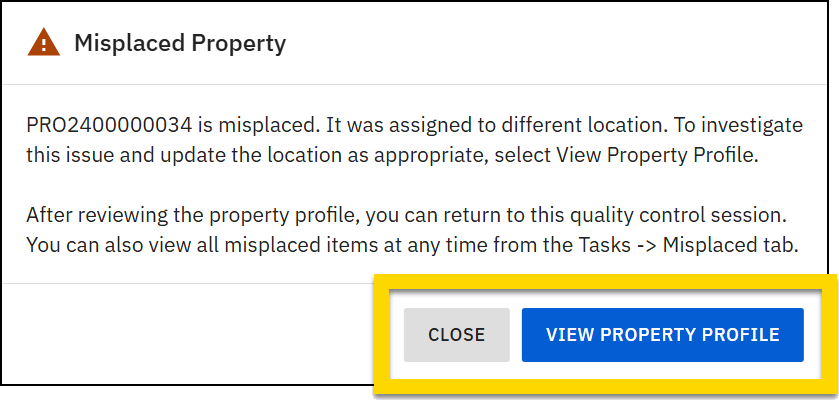
To manage the misplaced item right away, take these steps:
- Select View property profile to open the item or container profile in a new browser tab.
- In the Location section on the profile, enter the correct location.
- See Move property location for full instructions.
- Ensure the item is in the physical location that corresponds to its location in the system.
- The Misplaced label is NOT updated automatically when you update the item's location. Instead, you should update the item's status to indicate that the misplacement has been resolved.
- Axon recommends that you create a custom status of "In Storage - Misplaced Resolved" for this purpose.
- In future, the product will be updated with a streamlined workflow for resolving misplaced items.
- Close the browser tab and continue your inventory session.
Manage UTL property
During an inventory session, if you finish scanning or entering all barcodes, and there are still property items or containers in the Assigned to location section, they should be marked as UTL. To do this, select the checkboxes beside the item or container then select Actions > Mark as UTL (Unable to Locate).
A message will appear asking if you want to go to the Tasks > UTL tab to view the current list of UTL property. If you close the message, you will return to your inventory session.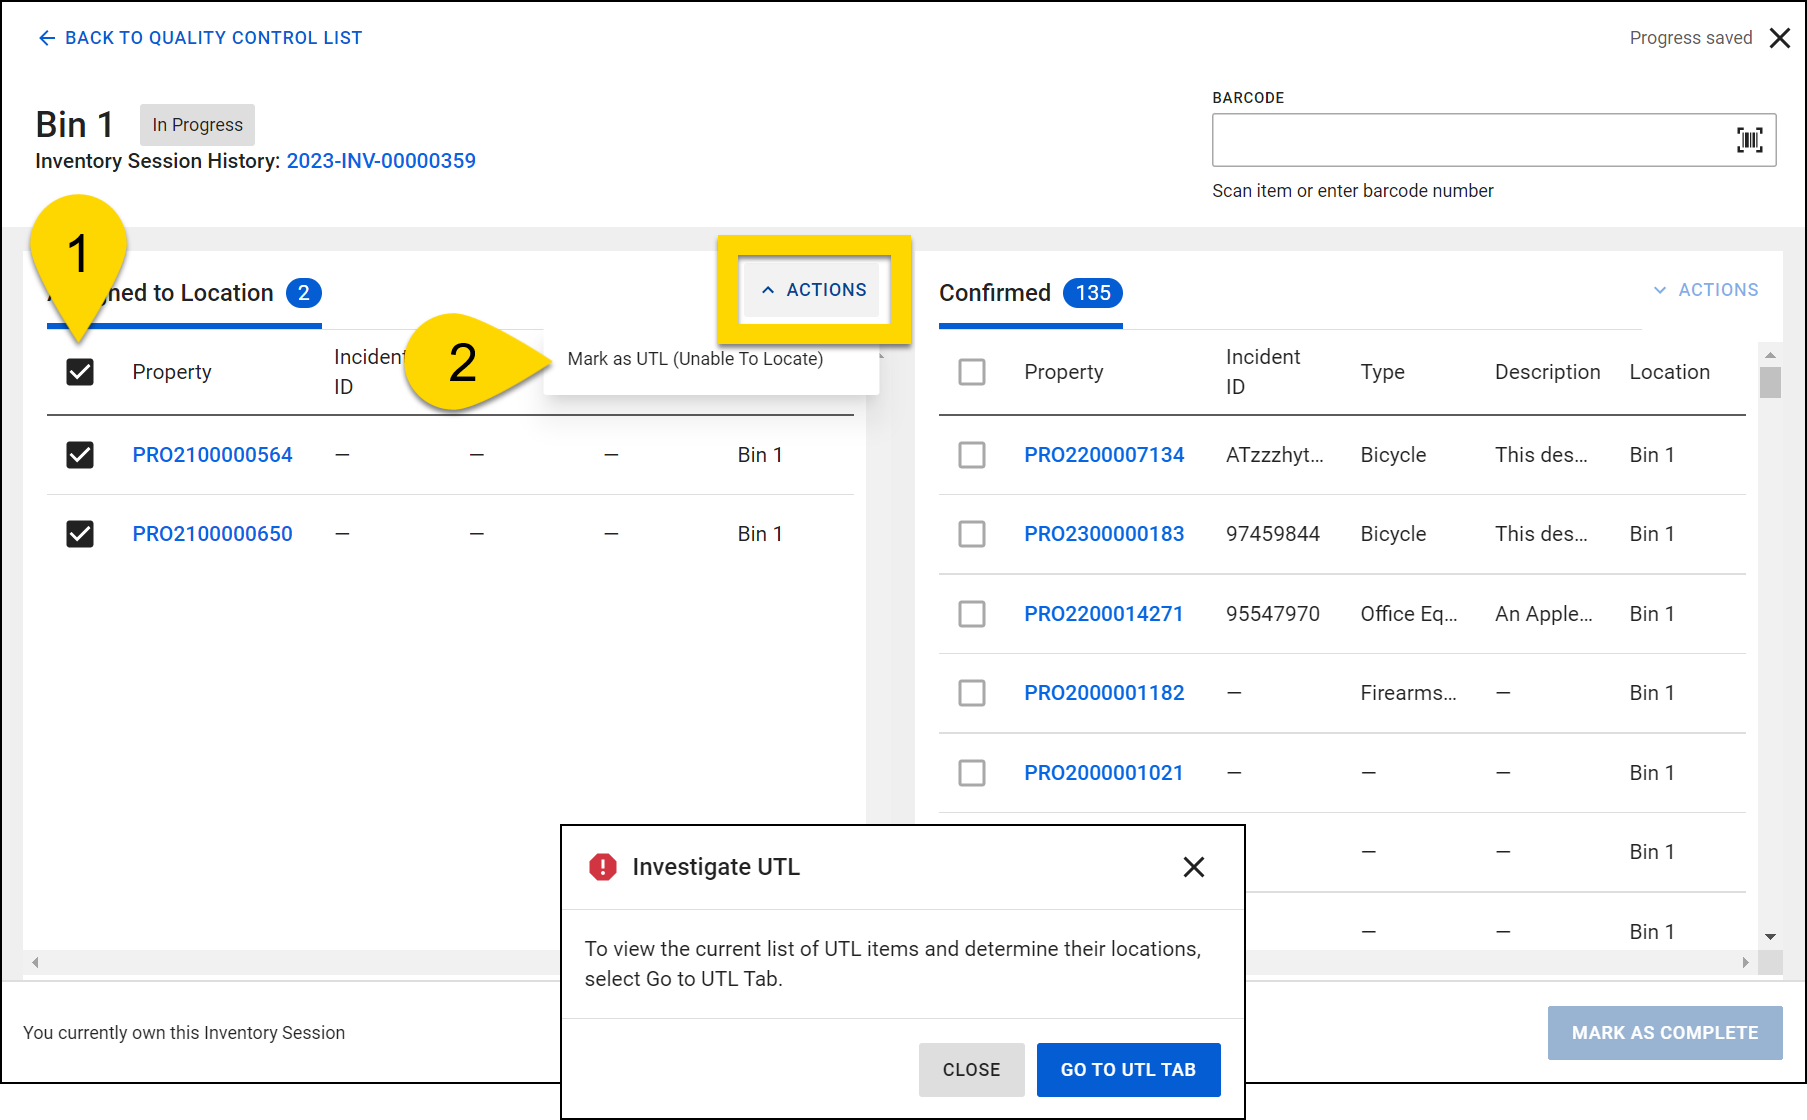
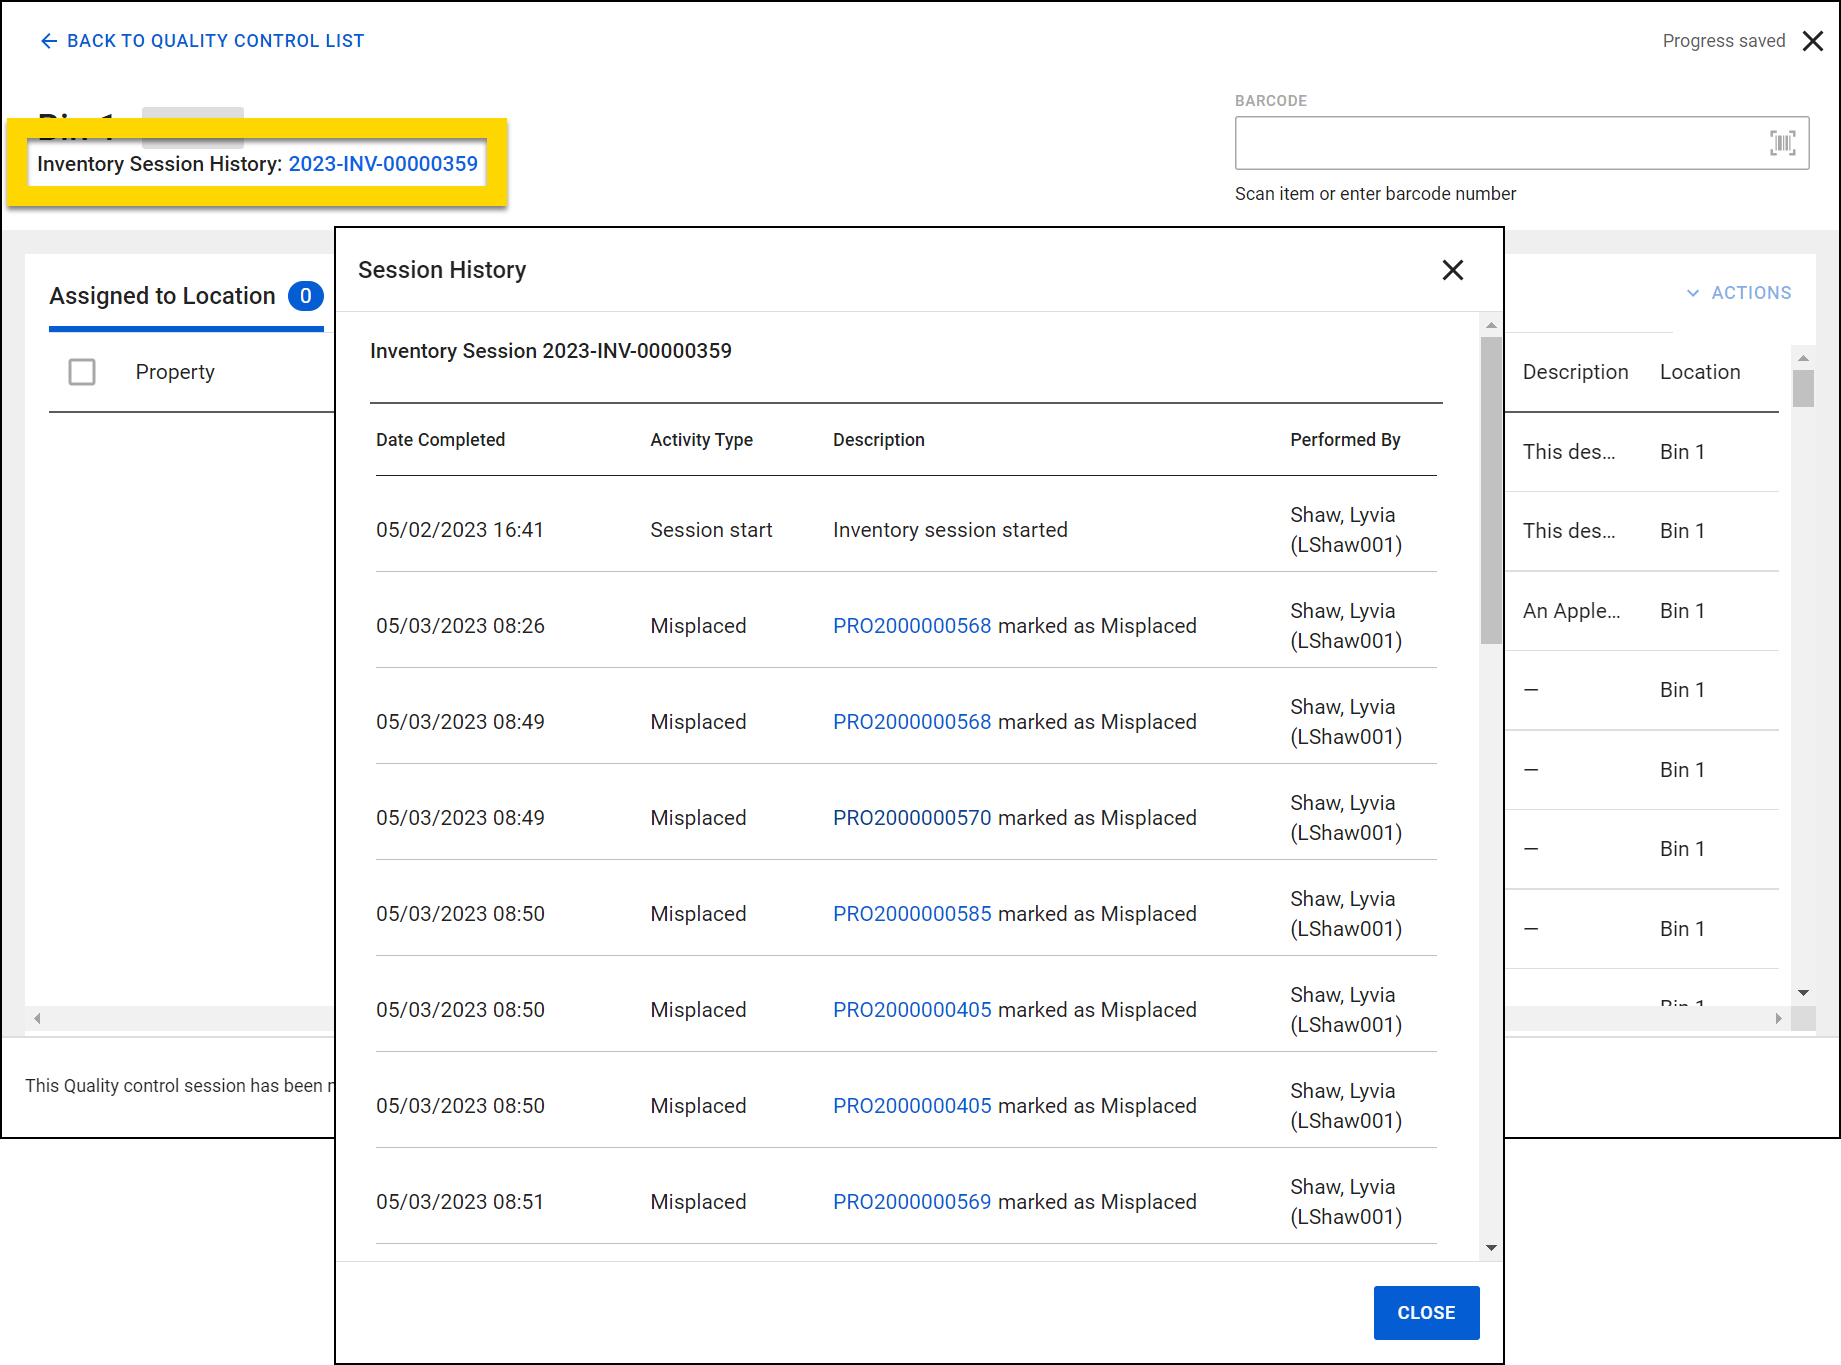
View inventory session history
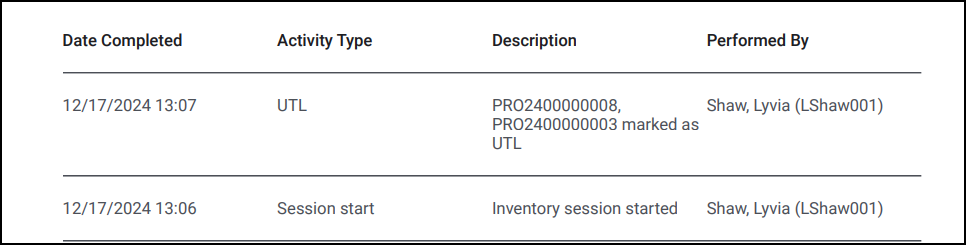
View additional information about an inventory session by selecting the Inventory Session History link on the inventory session page. Each activity in the session history notes the date and time and who performed the activity. Activity types included in this history log include:
- Session started
- Item or container marked as Misplaced
- Item or container marked as UTL
- Session marked as complete
Print inventory session reports
When you generate an inventory session report, the system creates a PDF that you can either print immediately or save to your computer for future reference. Follow these steps to create your report:
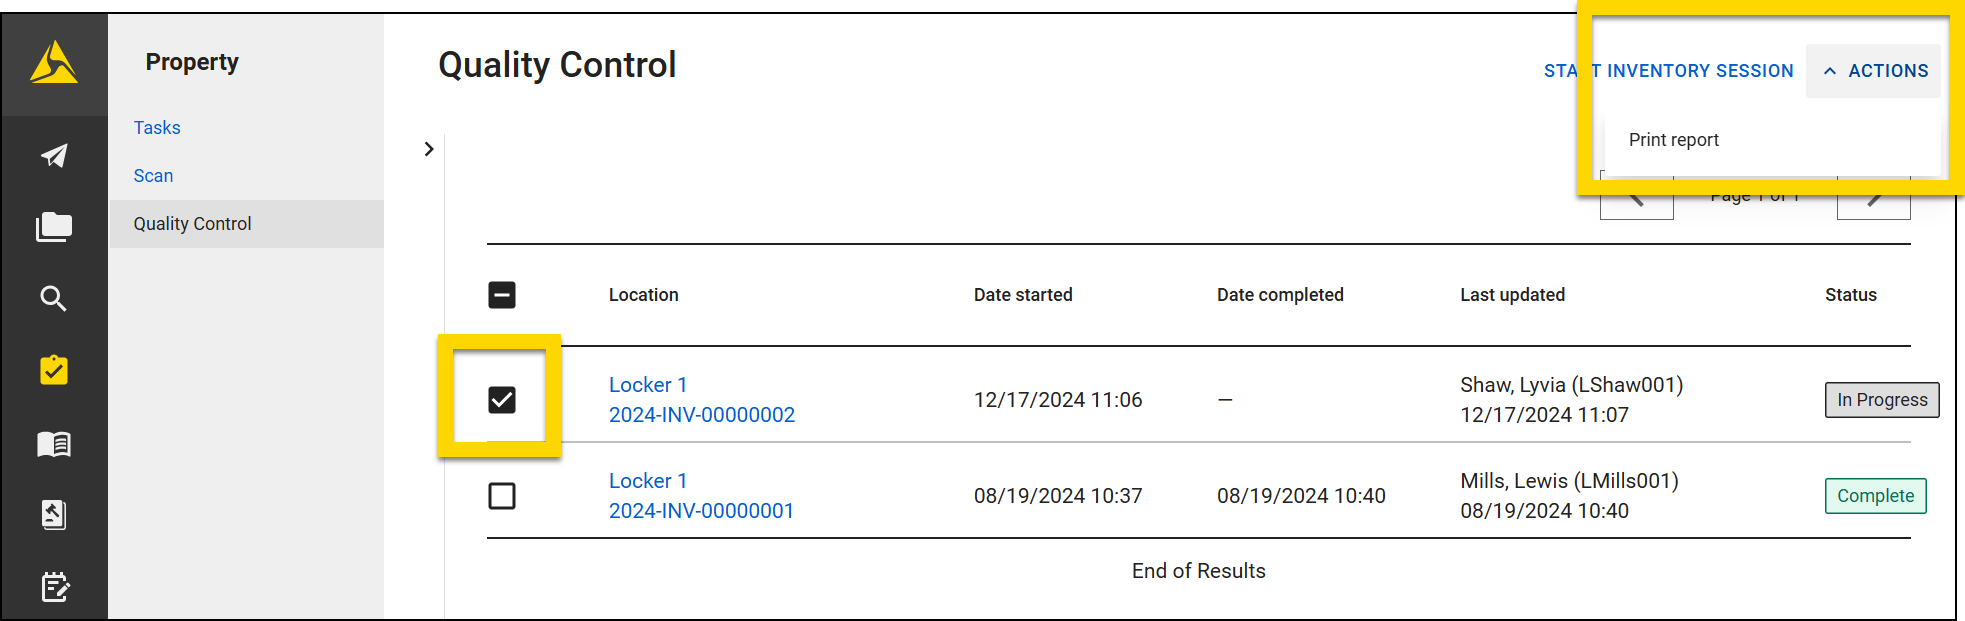
- Open the Quality Control dashboard in the Property module.
- Use the filters to only view the inventory sessions that match a location, date rage, or status.
- Select which inventory sessions you'd like to include in your report:
- Select individual checkboxes to only include specific sessions
- Select the checkbox in the header to select all sessions in the list
- Select Actions > Print report from the upper right corner.
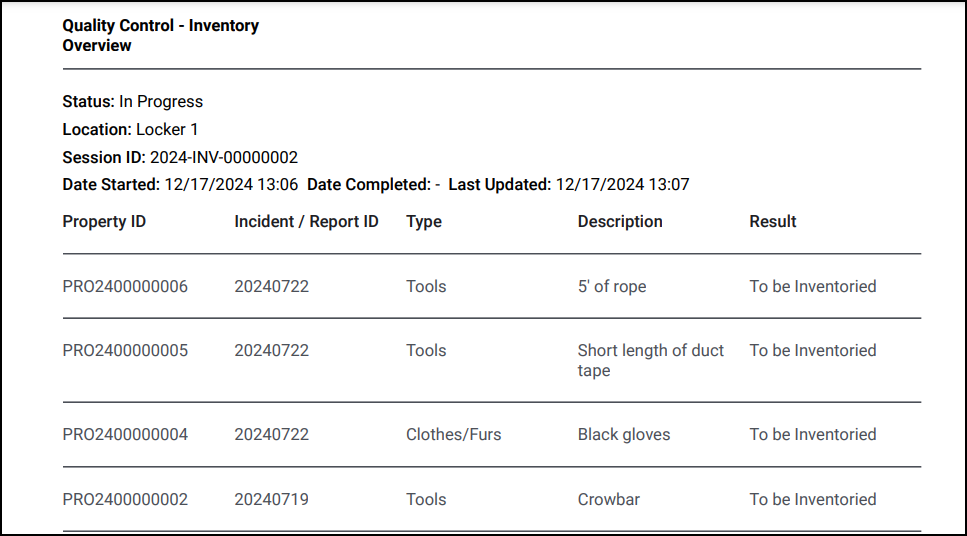
Each report begins with key information at the top:
- Session ID
- Location
- Status (In Progress or Complete)
- Date Started
- Date Completed (when applicable)
- Last Updated timestamp
The report then organizes items based on their status (In Progress or Complete) and divides the information into two sections:
- Items currently in inventory:
- Displays all items marked as Confirmed or To be Inventoried
- Shows Property ID, Incident/Report ID, type, description, and result status
- Session history:
- Shows the inventory session history
- Lists any items marked as UTL or misplaced
- Shows completion date, activity type, description, and user who performed the task