Property management
The Property module, accessed by selecting the clipboard icon in the main navigation menu, lets you access the Tasks, Scan, Pull Requests and Quality Control pages.
Property appears in the Property module when it is added to a report, marked as "in police custody", and submitted to the Property department. This can happen when the property is added to the Property section of the report or if the item is a vehicle that is submitted as a property item.
You can search for specific property items from the Property module or by using Property search, and take the following actions on property items from different locations in Axon Records:
- Check in/out
- Create release notice
- Intake
- Move location
- Print label
- Release
- Update authorized disposition
- Update disposition/status
- Update responsible officer
- Upload attachment
- View chain of custody
Administrators can manage property features from the Administrator Console, including:
- Grant Command Hierarchy groups/teams property-related privileges.
- Manage the agency's list of internal and external property locations.
- Create the agency's release notice template.
- Manage the agency's list of property statuses.
- Manage retention date defaults.
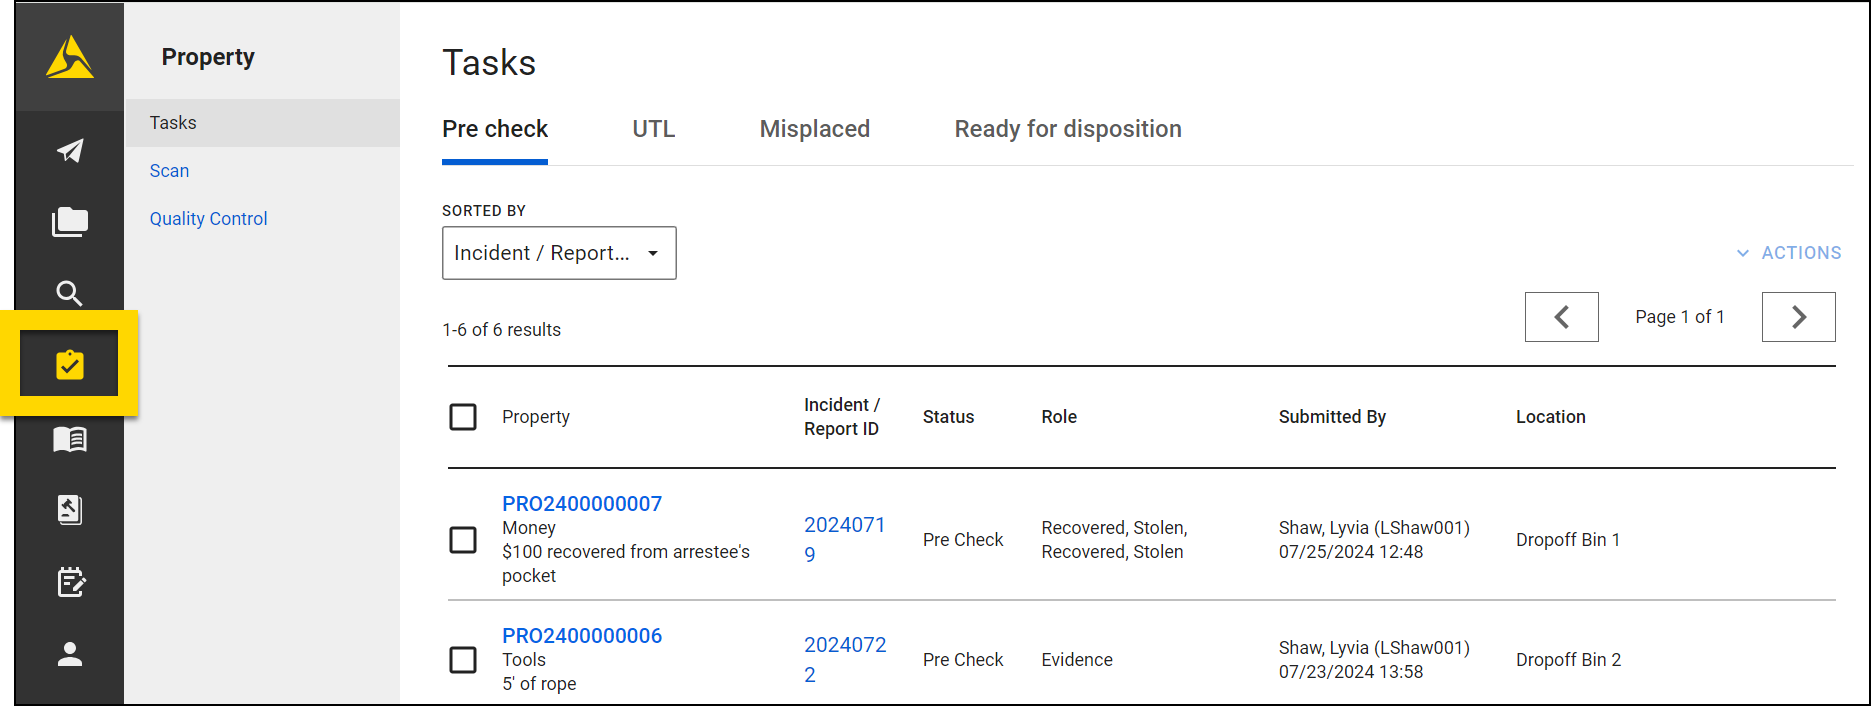
Tasks
The property Tasks dashboard contains all property-related tasks. Property items are sorted by their current status/disposition into four tabs:
On each tab, the following information is displayed for each property item:
- Property (selecting this opens the property intake window)
- Incident/Report ID (selecting this opens the incident profile)
- Status
- Role
- Submitted By
- Current Location
You can take action on one or more items by selecting the checkboxes beside the Property ID then opening the Actions menu. The options in this menu vary based on the tab.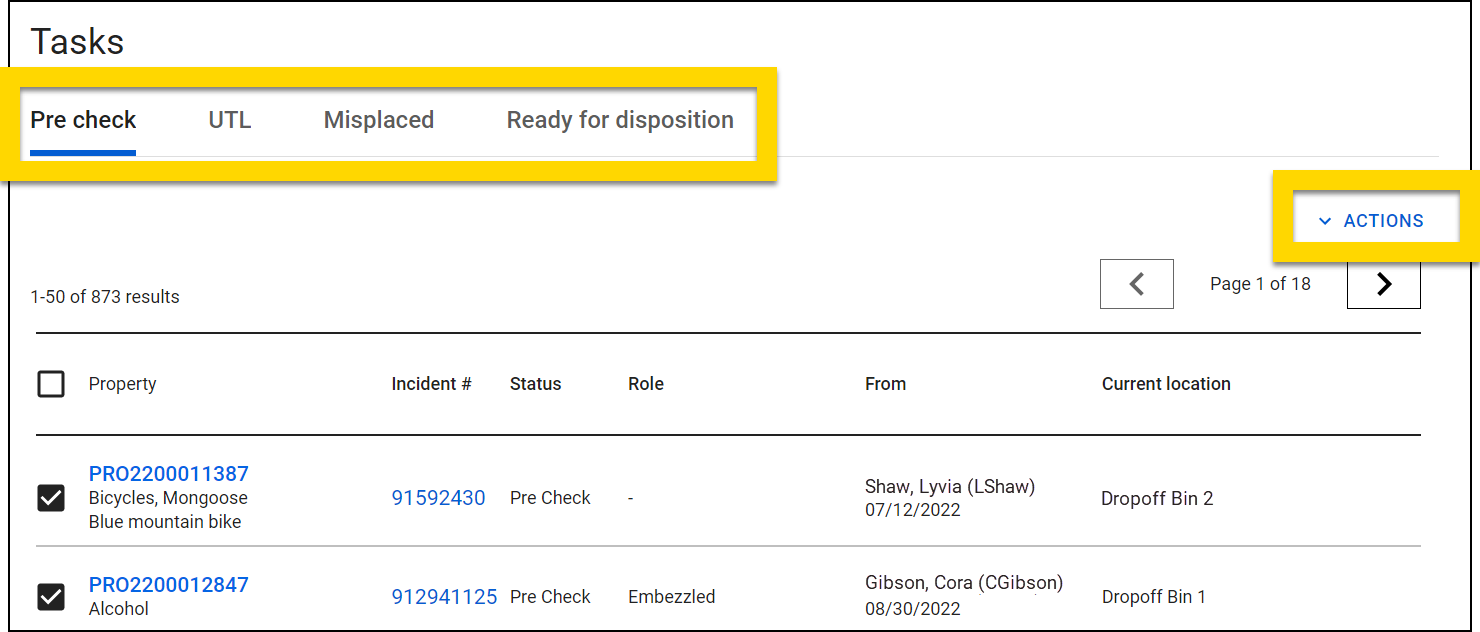
Pre check
The Pre check tab contains all property items and containers that have been submitted to property and need to go through intake. Perform intake for one or more items by taking these actions:
- Select the checkbox beside the Property ID.
- Select Actions > Intake.
- Below the Property Information section, set the Retention date range, Storage Location, and Notes.
- Selecting View profile opens the full property profile in a new tab.
- Select Check-in.

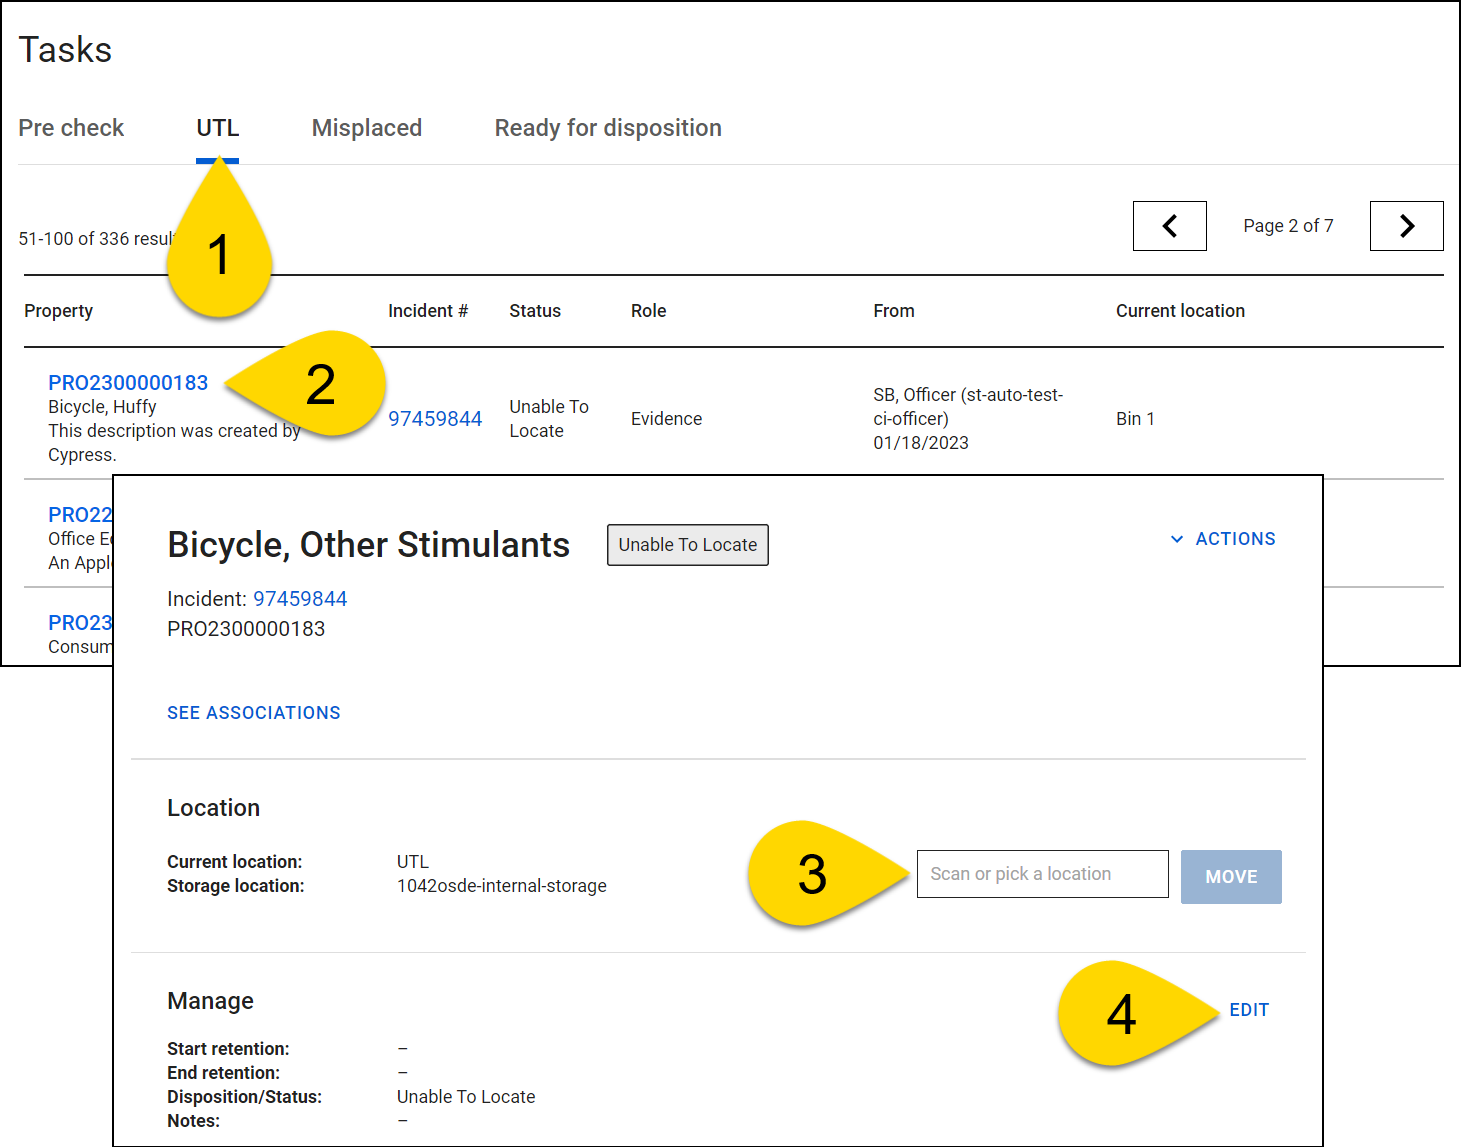
UTL
The UTL tab contains all items and containers marked as UTL (Unable to Locate) during a Quality Control session.
If an item or container is located, you can update the current location and disposition/status to remove it from the UTL tab. To do this:
- Open the UTL tab.
- Select the Property ID to open the property profile in a new tab.
- Update the item's current location by scanning or entering the location barcode and selecting Move.
- Update the item or container's disposition/status by selecting Edit.
Misplaced
The Misplaced tab contains all items and containers marked as Misplaced during a Quality Control session.
If an item or container is not misplaced, you can update the disposition/status to move it from the misplaced tab. To do this:
- Open the Misplaced tab.
- Select the Property ID to open the property profile in a new tab.
- In the Location section on the profile, enter the correct location.
- See Move property location for full instructions.
- Ensure the item is in the physical location that corresponds to its location in the system.
- The Misplaced label is NOT updated automatically when you update the item's location. Instead, you should update the item's status to indicate that the misplacement has been resolved.
- Axon recommends that you create a custom status of "In Storage - Misplaced Resolved" for this purpose.
- In future, the product will be updated with a streamlined workflow for resolving misplaced items.
Ready for Disposition
Use the Ready for disposition tab to view and work with any property that has been checked in and has one of the following statuses:
- Ready for checkout
- Ready for donation
- Ready for return to owner
- Ready for auction
- Ready for destruction
The information shown about each piece of property includes:
- Property
- Status/Disposition
- Role
- Retention end date
- Incident/Report ID
- Current location
Release or update the disposition for one or more items by selecting the checkbox next to the property.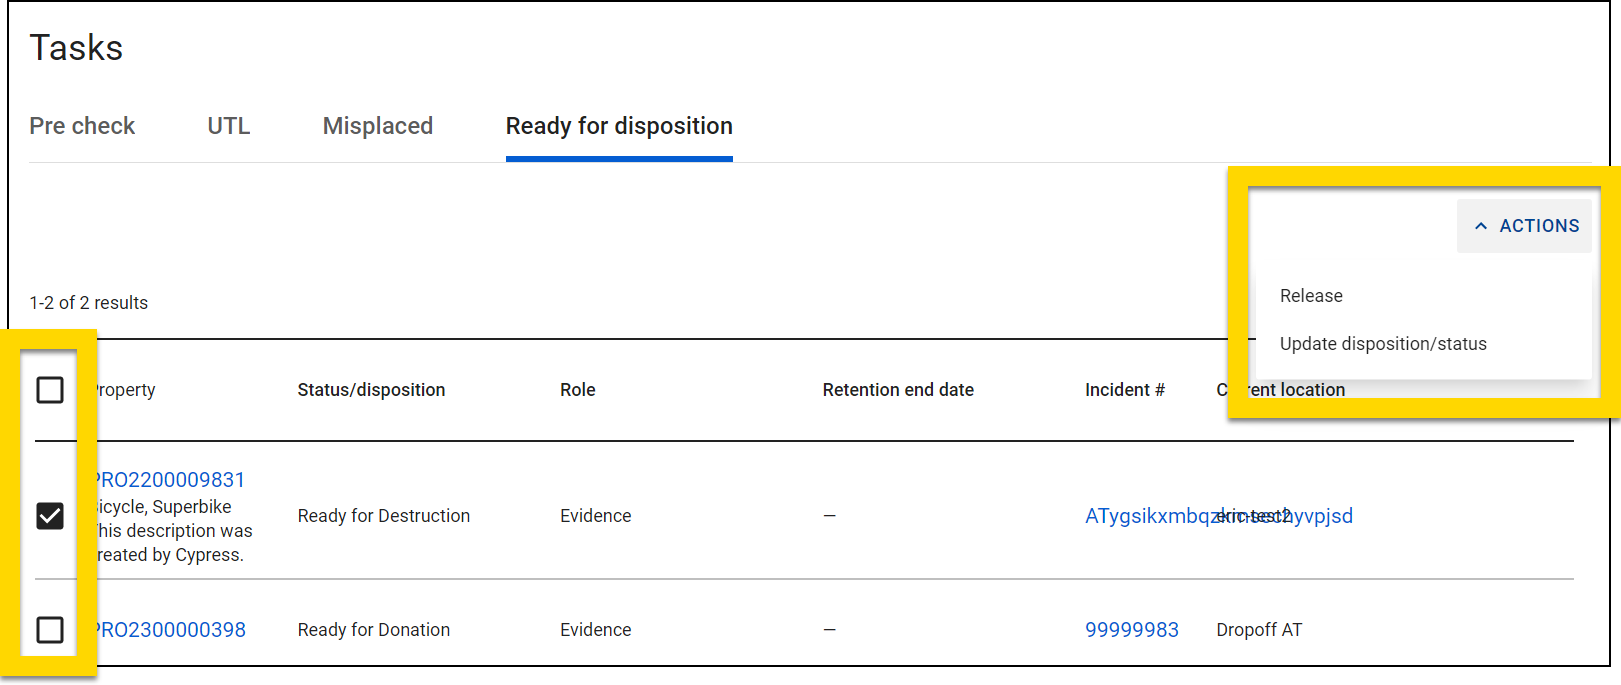
Scan
You can quickly work with one or multiple property items or containers from the Scan dashboard. Select Property item to scan property items and containers or Property location to scan a location. The items or containers you scan, along with any items or containers belonging to the location you scan, appear in a list. Select Reset to clear the list and start over.
Select the checkboxes beside one or more items then select Actions to: