Documentation sharing
Sharing allows organizations to distribute information to external partners, such as prosecutors or other organizations. During this process, specific privileges can generate a point-in-time snapshot of the incident, case, or event in PDF format, which is then uploaded to Axon Evidence where it can be shared. This process ensures that shared materials are consistent and auditable.
Prepare for sharing
To share an incident, case or investigation, take these steps:
- Open the incident, case, or investigation profile.
- Open the More actions menu and select:
- Incidents and cases: Prepare documents for sharing
- Investigations: Prepare investigation for sharing
- Update the name of the file. This is the name that appears in Axon Evidence.
-
In the Documents section, indicate which content to include:
- For incidents, you can include:
- Full incident report: Includes the latest data and narratives from all supplements (including draft supplements).
- Incident reports: Indicate which reports to include. If you select the Full incident report option, all reports are included automatically.
- This option does not appear for investigations because investigations are not associated with an incident.
- File list: If selected, a list of all file names that have been added to the case are included in the printout.
- Evidence list: If selected, all property items associated with the incident that have a role of Evidence are included in the printout.
- Activity log: Includes all actions taken on the incident.
- In addition to the items listed above, for cases or investigations, you can include:
- Case or investigation summary
- Case or investigation documents
- Tasks
- Indicate if the printout should include a list of case tasks, or details for each task.
- Optionally include incomplete tasks.
- Set the order in which the tasks should be listed in the printout. Sort options include Task, Assignee, Status, Created at, Due date, and Completed at.
- For incidents, you can include:
- In the Settings section, optionally include the following items:
- Change print format: This option only appears if the Full incident report option is selected in the Documents section.
- Select a print format option from the Incident report menu. The default format includes all report information. Other format options may not include all information and do not include some settings, a header, or a footer.
- Show table of contents: Includes a list of all sections in the printout with a header that gives basic details about the case.
- Show images in narratives: Includes images that have been inserted inline into the narratives.
- Show restricted information: If restrictions have been applied, this option includes restricted information that you have privileges to view. Optionally include this restricted information on a separate page.
- Show approval log: Details of the report approval process.
- Start each narrative on a new page: Inserts a page break at the start of each narrative.
- Change print format: This option only appears if the Full incident report option is selected in the Documents section.
- Select Next.
- Use the Sort reports and documents by and the Order fields to set the order in which items appear.
- Sort options include:
- Document Type
- Name (if custom names have been created for any of the items)
- Date and time created
- If you selected the Full incident report option in the Documents section, this screen will not appear.
- Sort options include:
- Select Next.
-
If you need to redact anything before printing, select Yes then Start redaction. If you are not redacting anything, select Export PDF and continue share.
- See Redaction for more information.
- The PDF will export (taking longer depending on the amount of information included).
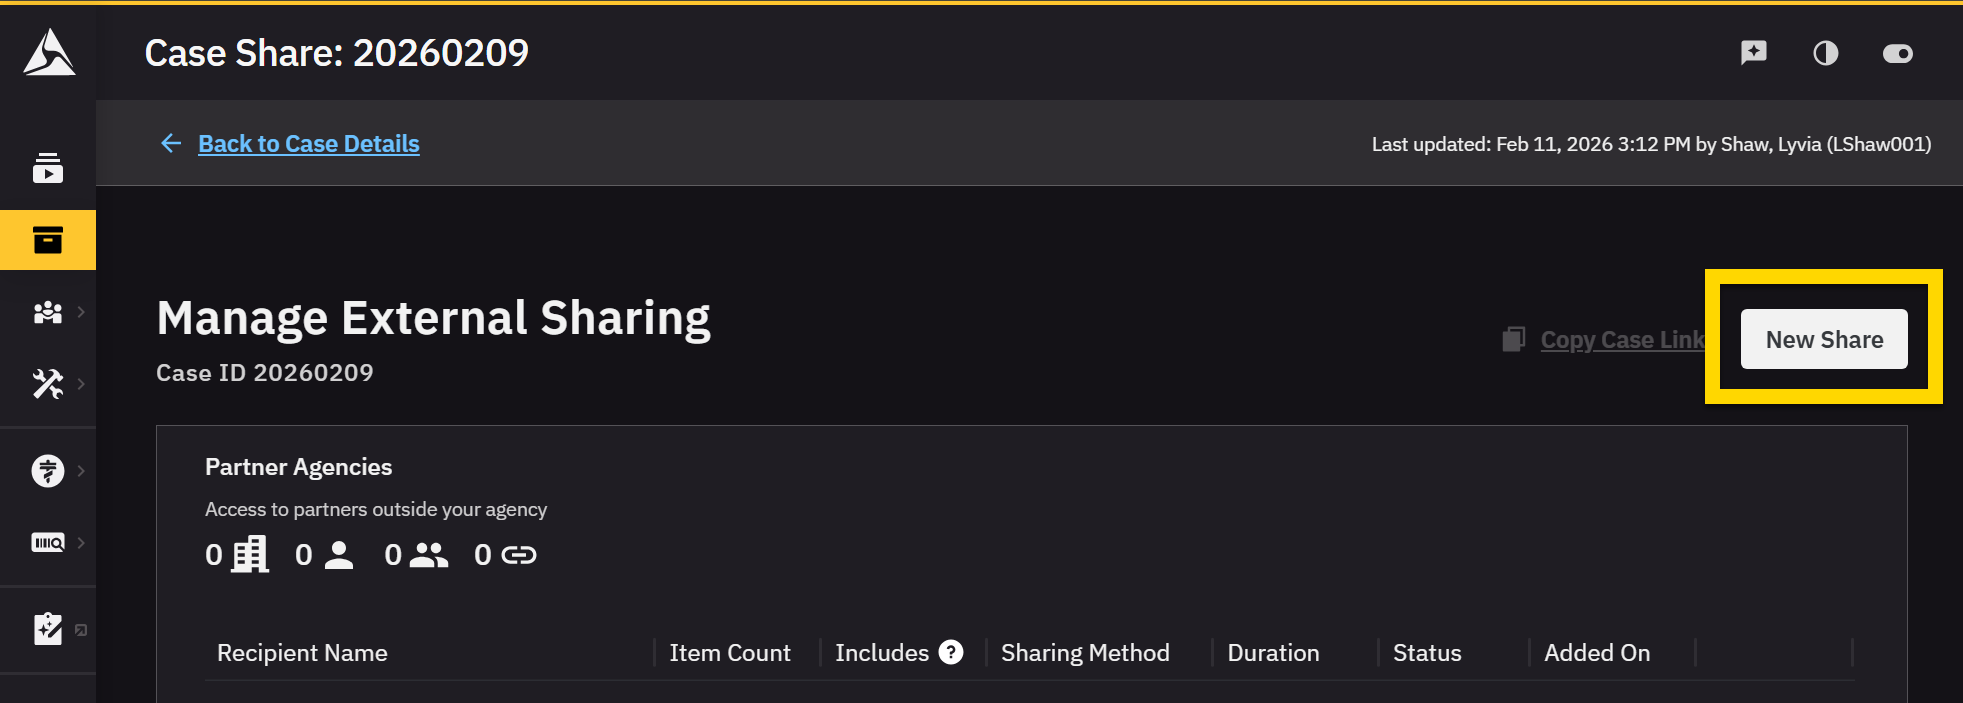
- When exporting is complete, the PDF saves to your cases in Axon Evidence, and a new tab in your browser opens to the Manage shares page. If it does not, select Continue share.
- If you are exporting an incident, the PDF is saved to your evidence in Axon Evidence. Select Go to file to open the PDF in Axon Evidence and continue the sharing process.
- To share the case, follow the steps in Cases share overview.
When you prepare documents for sharing from Axon Records or Axon Standards, the PDF containing all case information appears in the Axon Evidence case on the Evidence tab in an auto-generated Documents folder.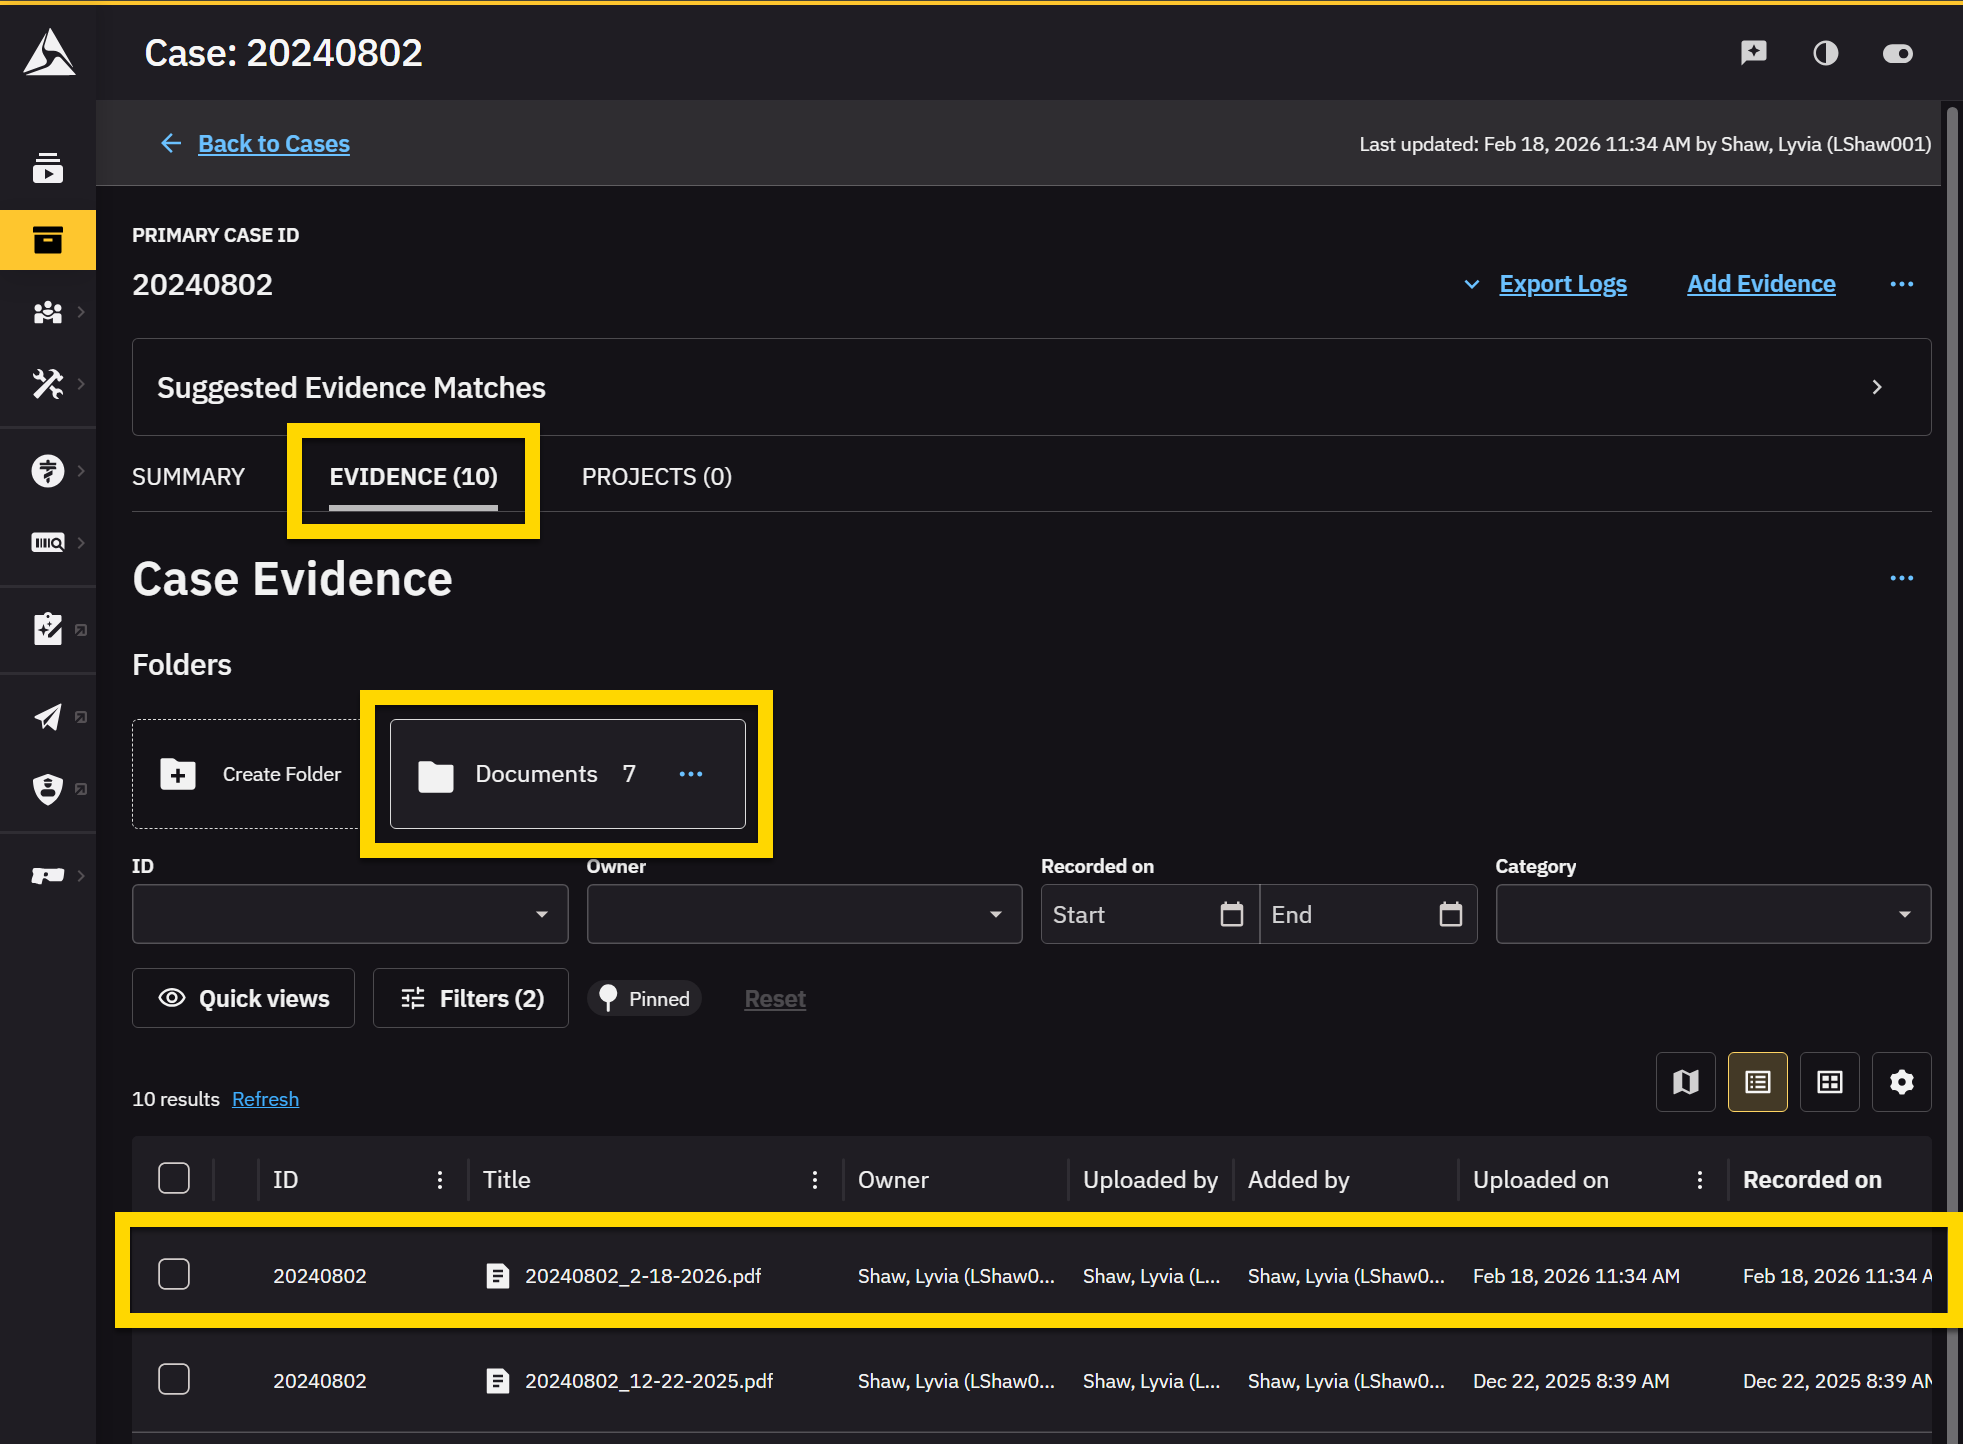
If you update the case or add additional files after sharing it, you should repeat the steps above to generate a new PDF that includes the updated information. Be sure to update the file name to distinguish it from the originally shared file.
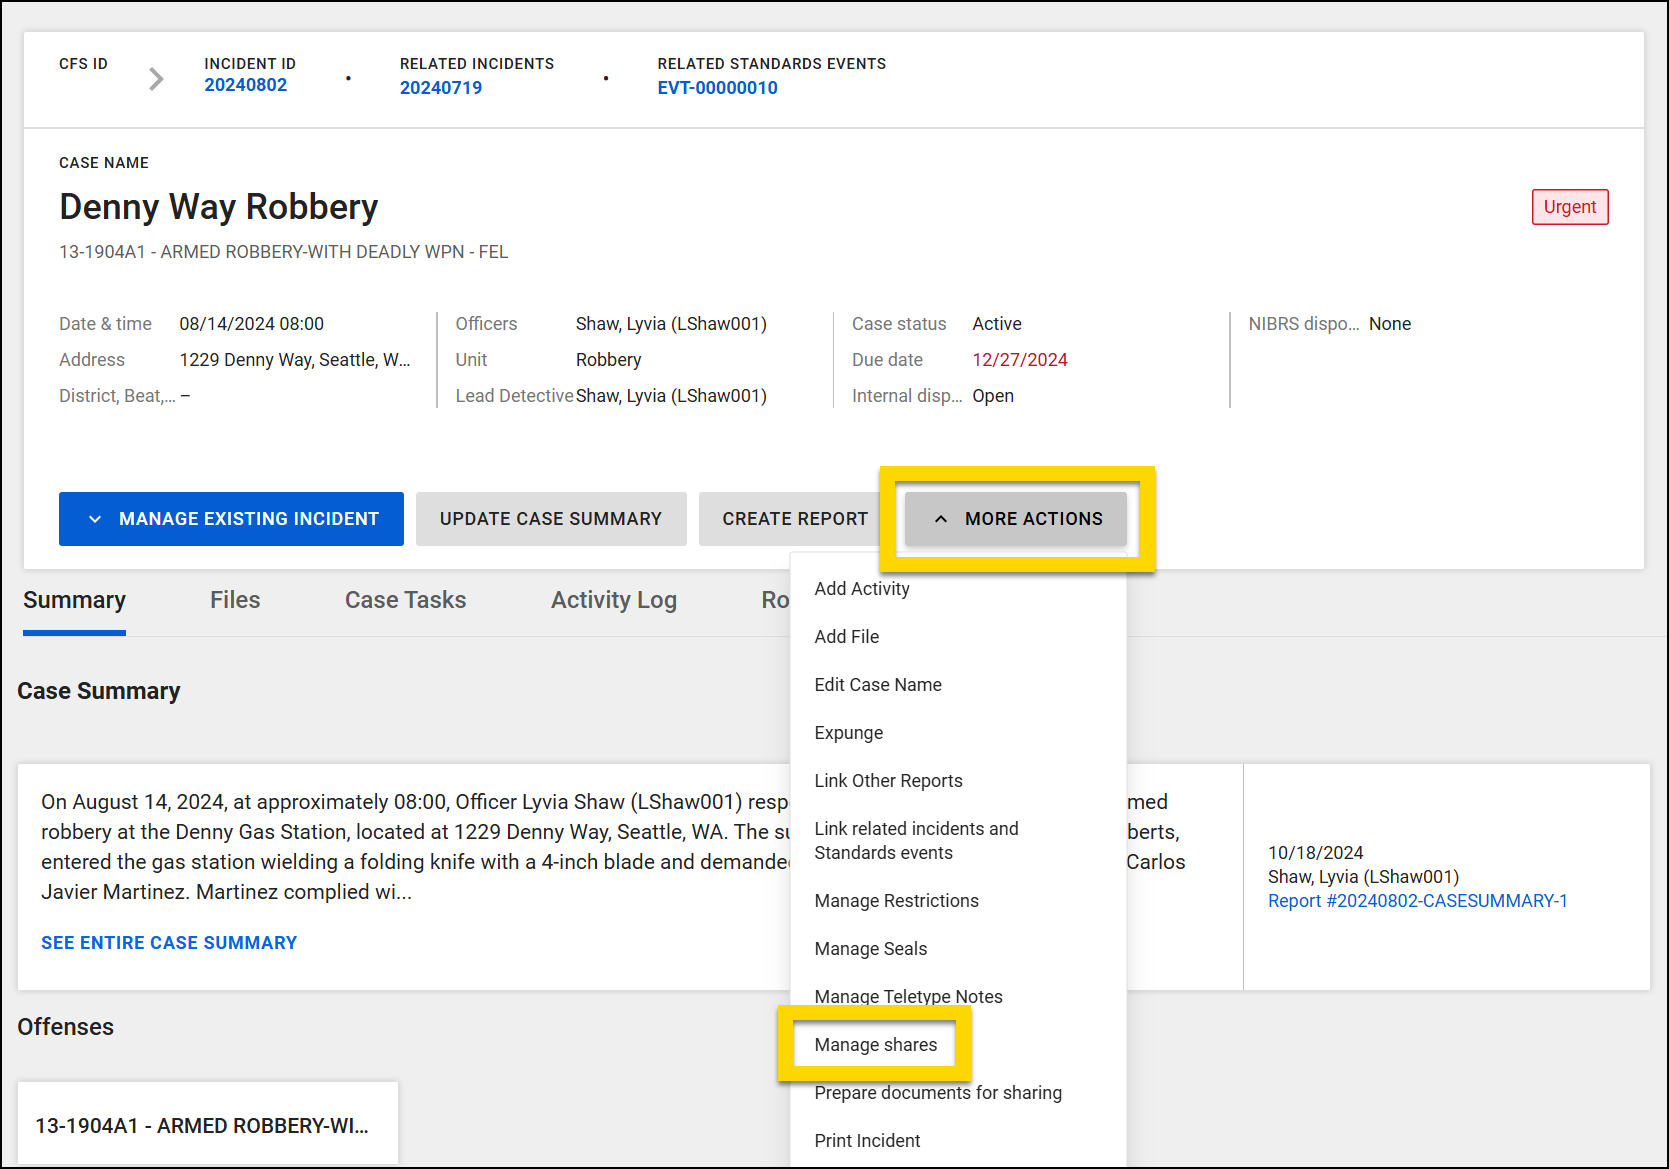
Manage shares
To manage current shares of an incident or case, open the incident or case profile and select More actions > Manage shares. Axon Evidence opens in a new tab where you can update how the incident or case is shared.