GIS and maps
A geographic information system (GIS) is a system that creates, manages, analyzes, and maps location data. A GIS connects location data (where something is) with descriptive information (what it looks like there).
In Axon Records, GIS information appears in reports, profiles, search, and Analytics.
If your organization uses Axon's Map Service, you can manage your organization's feature layers and list of common names from the Axon Evidence Admin panel. See Map settings permissions for more information about managing who can control your organization's location-related settings.
Axon Records can use the Esri data set or a custom data set as the source of location data. Contact your Axon representative for more information.
Reports
GIS information appears when you are writing reports.
Depending on the report type, various location-related fields appear, often including Location, Location category/type, and Location note. The location-related fields and entry methods of the options in the Location field are outlined in the table below.
|
Location option |
Entry method |
Appears in search when adding locations to a report |
Appears in Locations search in the Search module |
|---|---|---|---|
|
Auto address |
Users search the system for verified addresses to add to reports |
Yes |
Yes |
|
Cross streets |
Users search the system for verified addresses to add to reports |
Yes |
Yes |
|
Manual address |
Manually entered by users |
No |
Yes |
|
Mile marker |
Manually entered by users |
No |
No |
|
Unknown |
Manually entered by users |
No |
No |
It is generally a best practice to use verified Auto addresses and Cross streets when completing reports. Follow your organization's policy when adding Manual addresses, mile markers, or Unknown locations to reports.
Auto addresses and cross streets
Auto addresses and cross streets are verified addresses, which means they appear in Locations search and have location profiles associated with them.
When you select Auto address or Cross streets from the Location field, you can type in the Address/cross street field, and a list of possible location matches will appear.
To enter a location by finding it on a map, instead select the map that displays beside the Address/cross street field. A larger map window loads. Use the plus and minus buttons to zoom in and out. Click and drag to pan the map and reveal new areas.
Click anywhere on the map to drop a pin. The pin you place appears in light purple, and the nearest verified address appears in dark purple. Select Add to report to add the verified address to your report.
You can add subaddress information to auto addresses to specify a particular unit or apartment number. These unit/apartment numbers are considered unique locations, even though they share the same address. As a result, a separate location profile is created for each unit/apartment. These location profiles appear in Location Search results. Opening one of these profiles reveals all associations for that particular unit/apartment.
To add a unit, select Add unit, then provide the Unit type (Apartment, Suite, etc.) and Unit number.
Manual addresses
Manual addresses are NOT verified and cannot be searched for when users are adding an address to a report. Instead, manual addresses must be entered manually. However, like Auto addresses, manual addresses do appear in Locations search and have location profiles associated with them. Manual addresses are included in Locations search to allow users to search for reports by location. However, users cannot search for previously entered manual addresses when they are completing reports to prevent incorrect manually entered addresses from being added to multiple reports. Follow your organization's policy when adding Manual addresses to reports.
When you select Manual address from the Location field a set of new fields appears where you can enter the location information.
Mile markers, and unknown
Mile markers and Unknown addresses are NOT verified, which means they do NOT appear in Search, either in the Search module or when searching to add a location to a report. As a result, these location types do NOT have location profiles associated with them. Follow your organization's policy when using these location types.
When you select Mile marker or Unknown from the Location field a set of new fields appears where you can enter the location information.
Profiles
The location information that is entered in reports is displayed on incident/case, person, organization, and location profiles.
Incident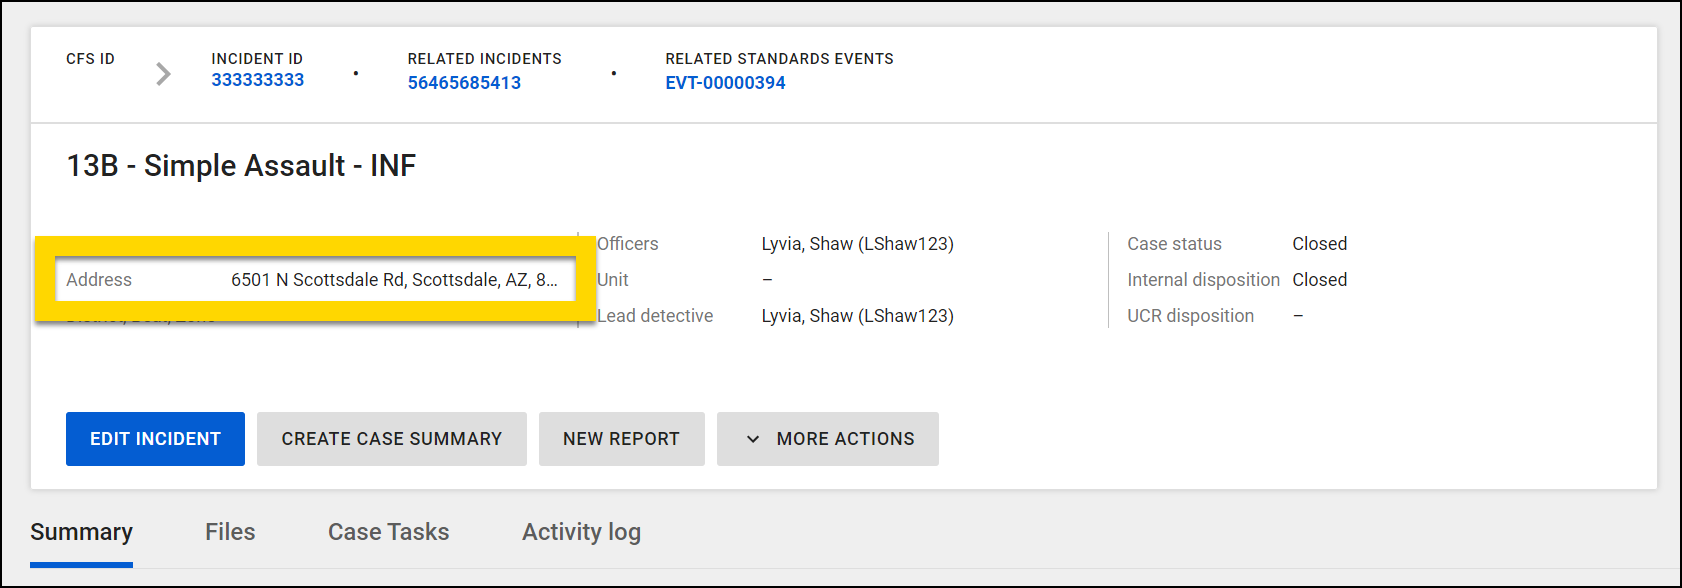
Person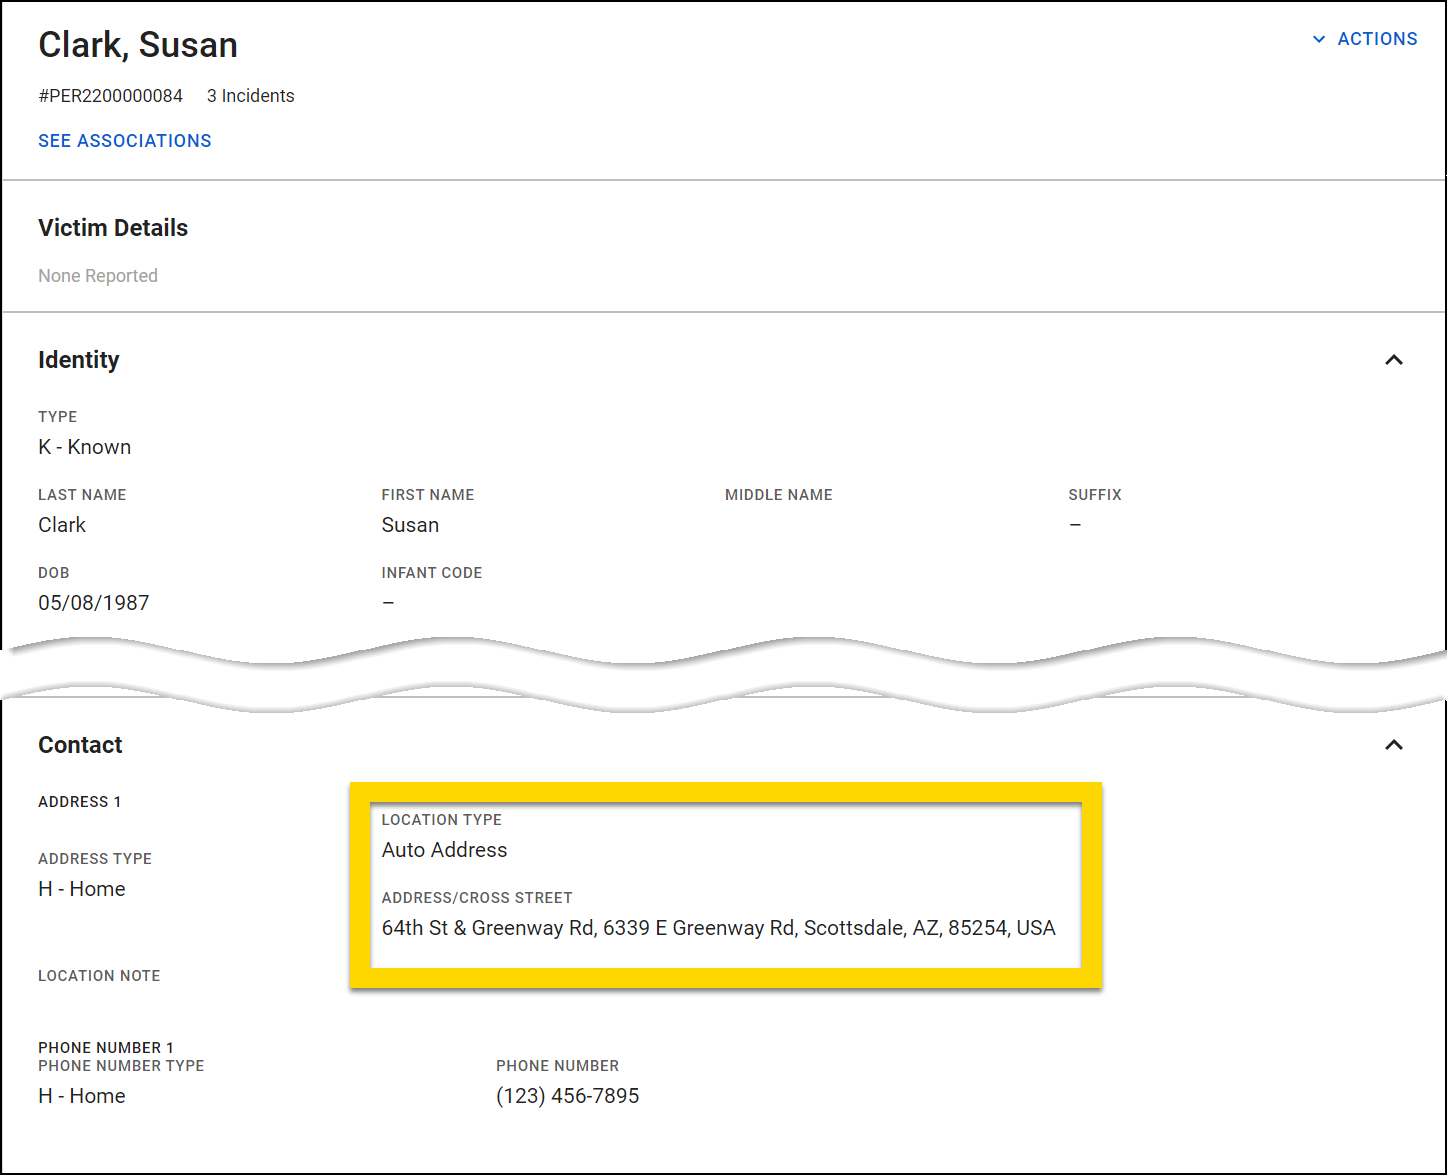
Organization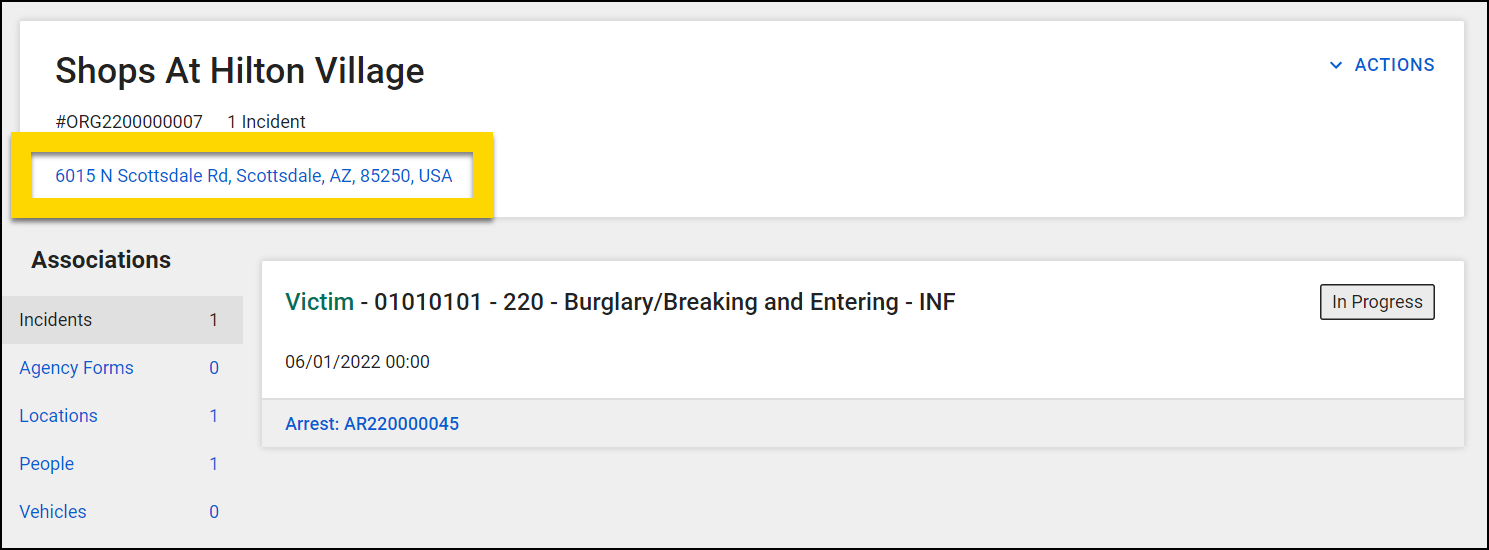
Location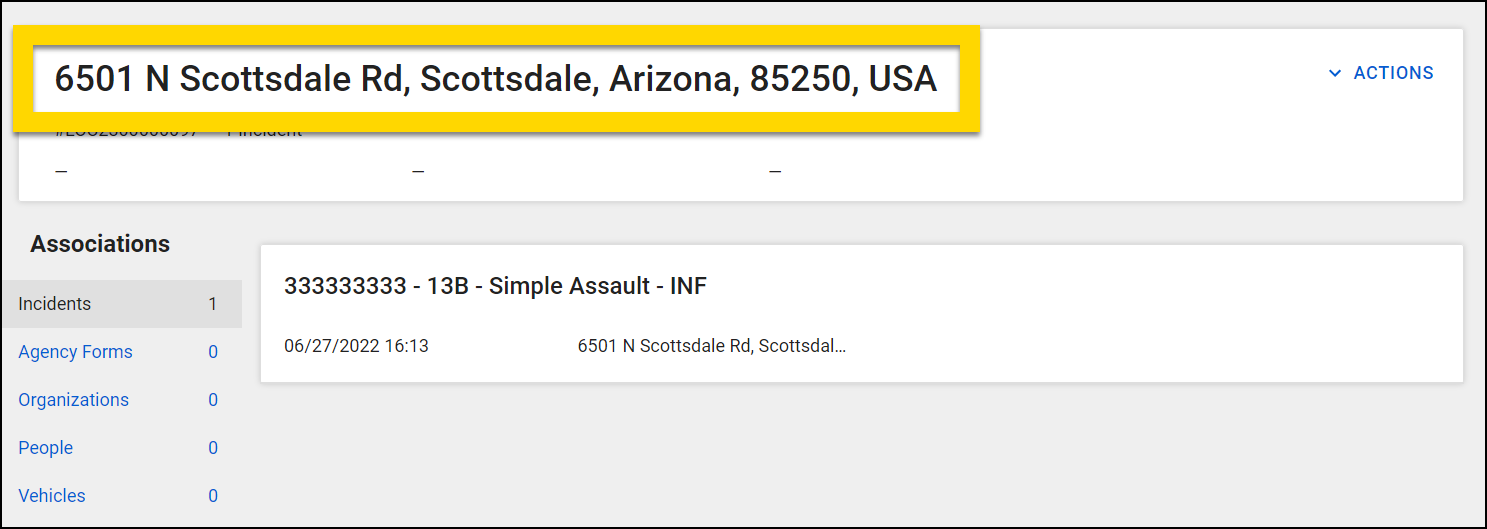
Search
GIS information, when available, is displayed in search results for Reports, Organizations, and Locations Search.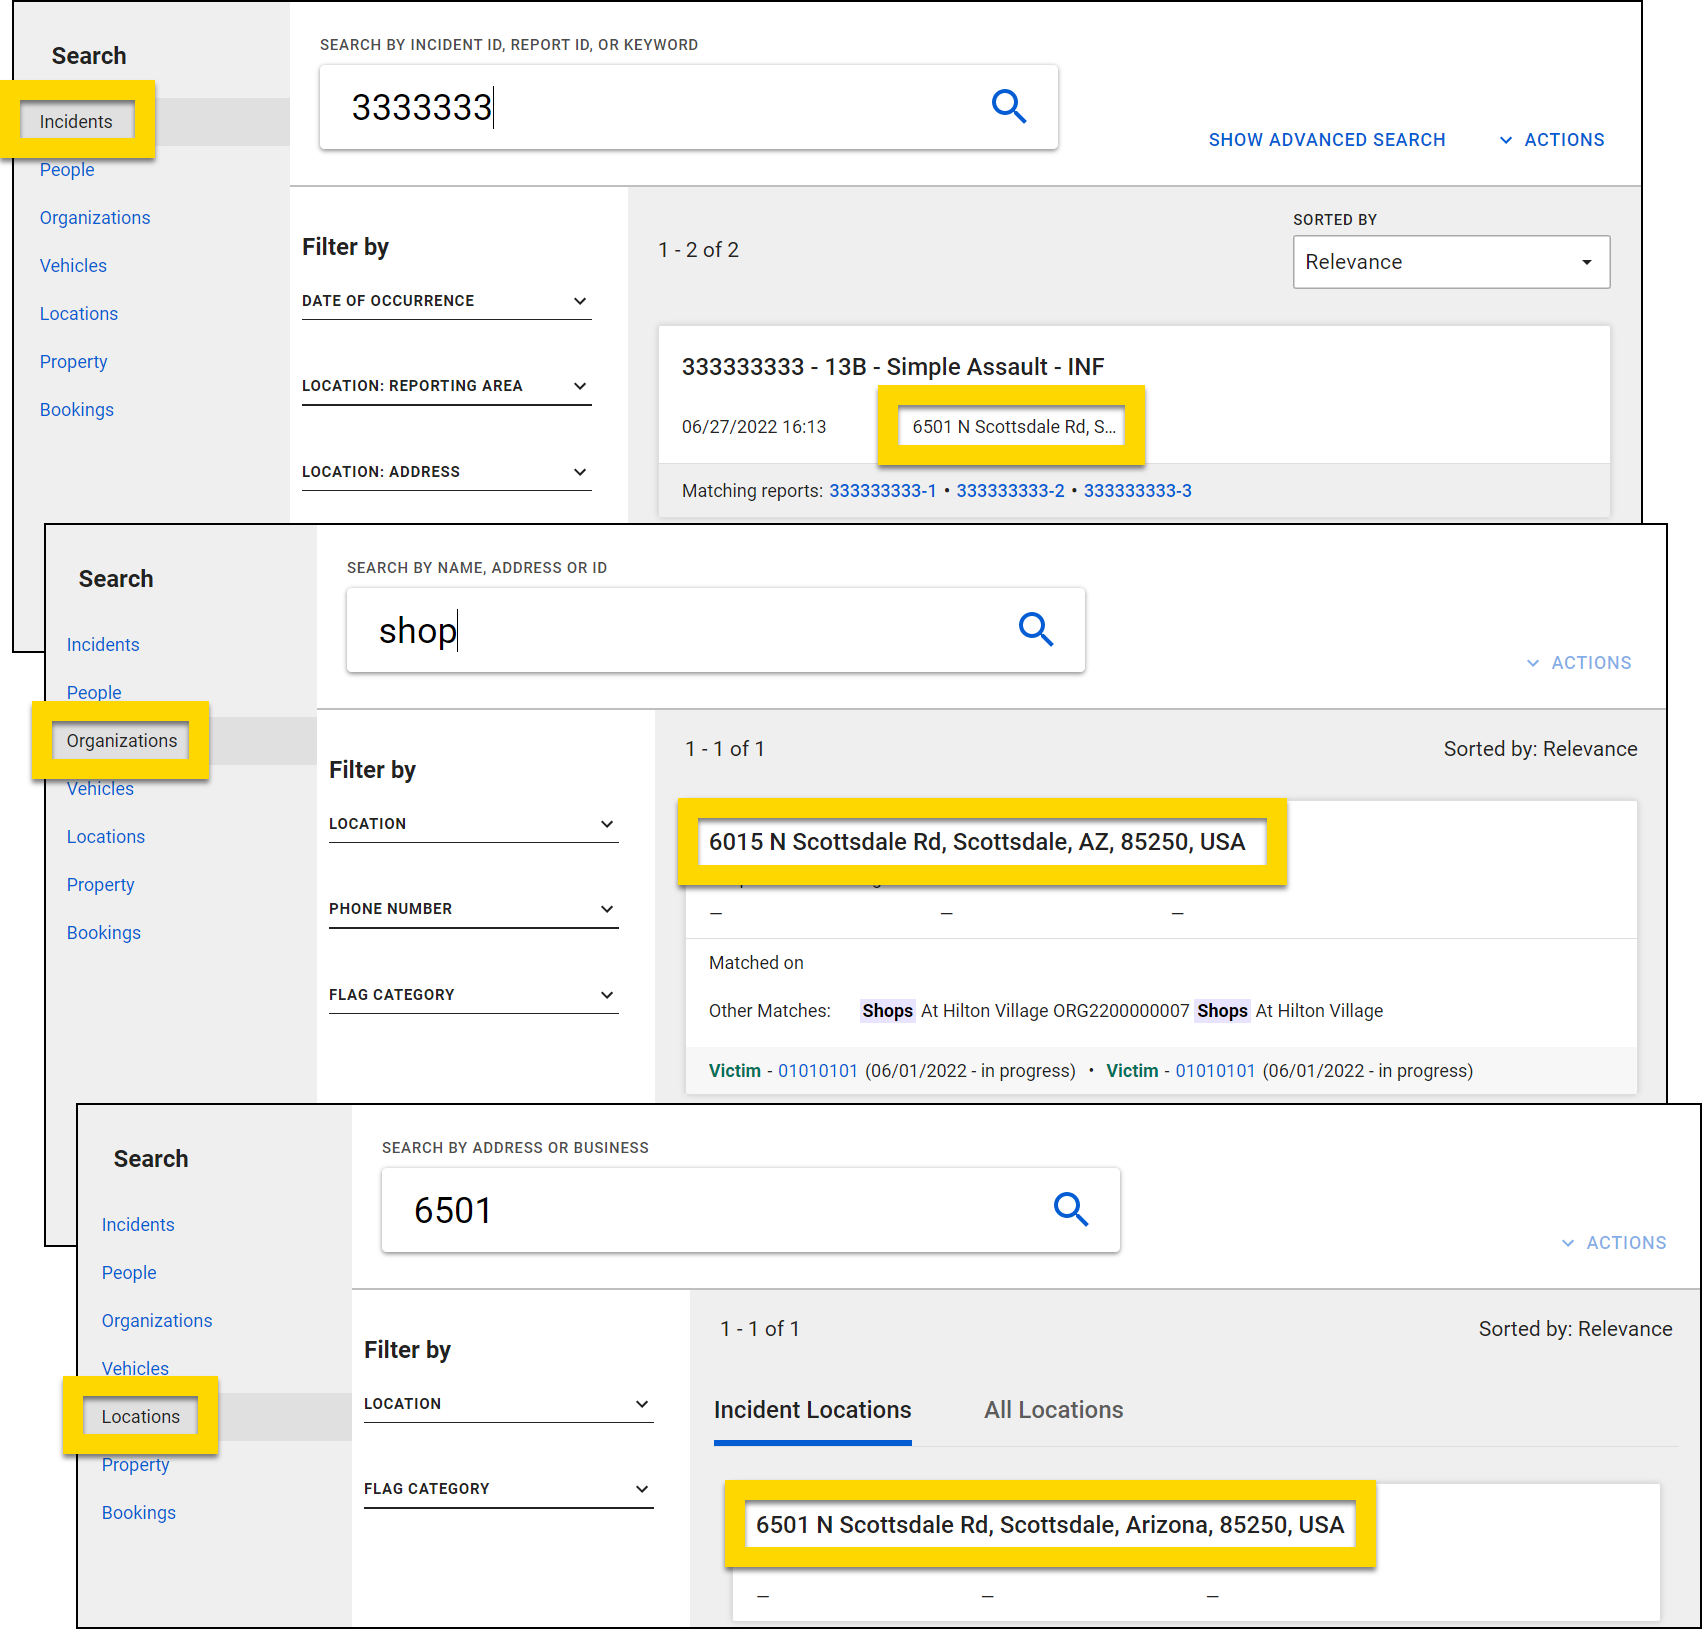
Analytics
GIS information also appears in the maps in the Analytics module.
Feature layers
Axon products use GIS (Geographic Information System) information in address validation, reports, search, and associations (e.g., incidents at a given location).
- A map feature layer is a single map layer that can be created from:
- A map service or feature service
- ArcGIS Online or ArcGIS Enterprise portal items
- An array of client-side features
The layer can be either a spatial (has geographic features) or non-spatial (table). Layers can show school buildings, banks, hazardous locations, live-traffic, camera-feeds, etc.
Users with specific permissions can upload and manage their agency’s feature layers in Axon Evidence in Admin > Feature layers. Each of your agency’s layers is displayed on this page, along with the following information:
- Layer name
- Who last updated it
- When it was last updated
- Status (Active, Sync pending, Sync failed)
If your agency has a large number of layers, use the search controls at the top of the window to quickly find a specific layer.
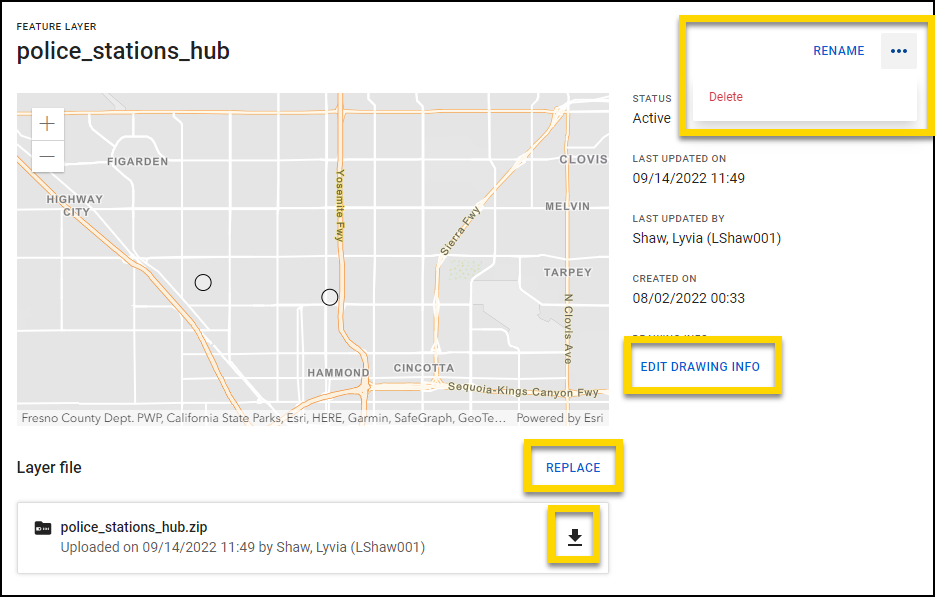
Feature layer details
Select a layer name to view the layer’s detail page. Here, you can:
- Preview the layer by clicking on the map and dragging or zooming in and out
- Rename the layer
- Replace the layer
- Download the layer
- Delete the layer
- Edit the Drawing Info (Currently, Axon Records and Axon Standards do not use this feature.)
Deleting a feature layer cannot be undone. Before deleting a layer, contact your Axon representative and ensure that the Axon product(s) in use by your agency do not rely on that feature layer.
Upload feature layers
You can have up to 100 feature layers in your Axon Evidence account. To add a map layer, take these steps:
- Open Admin > Feature layers.
- Select Upload layer.
- Select CSV file requirements or ZIP file requirements to view requirements and examples for each file type. (These requirements are also listed here.)
- Click Select file, choose a CSV or ZIP file from your computer, and select Upload.
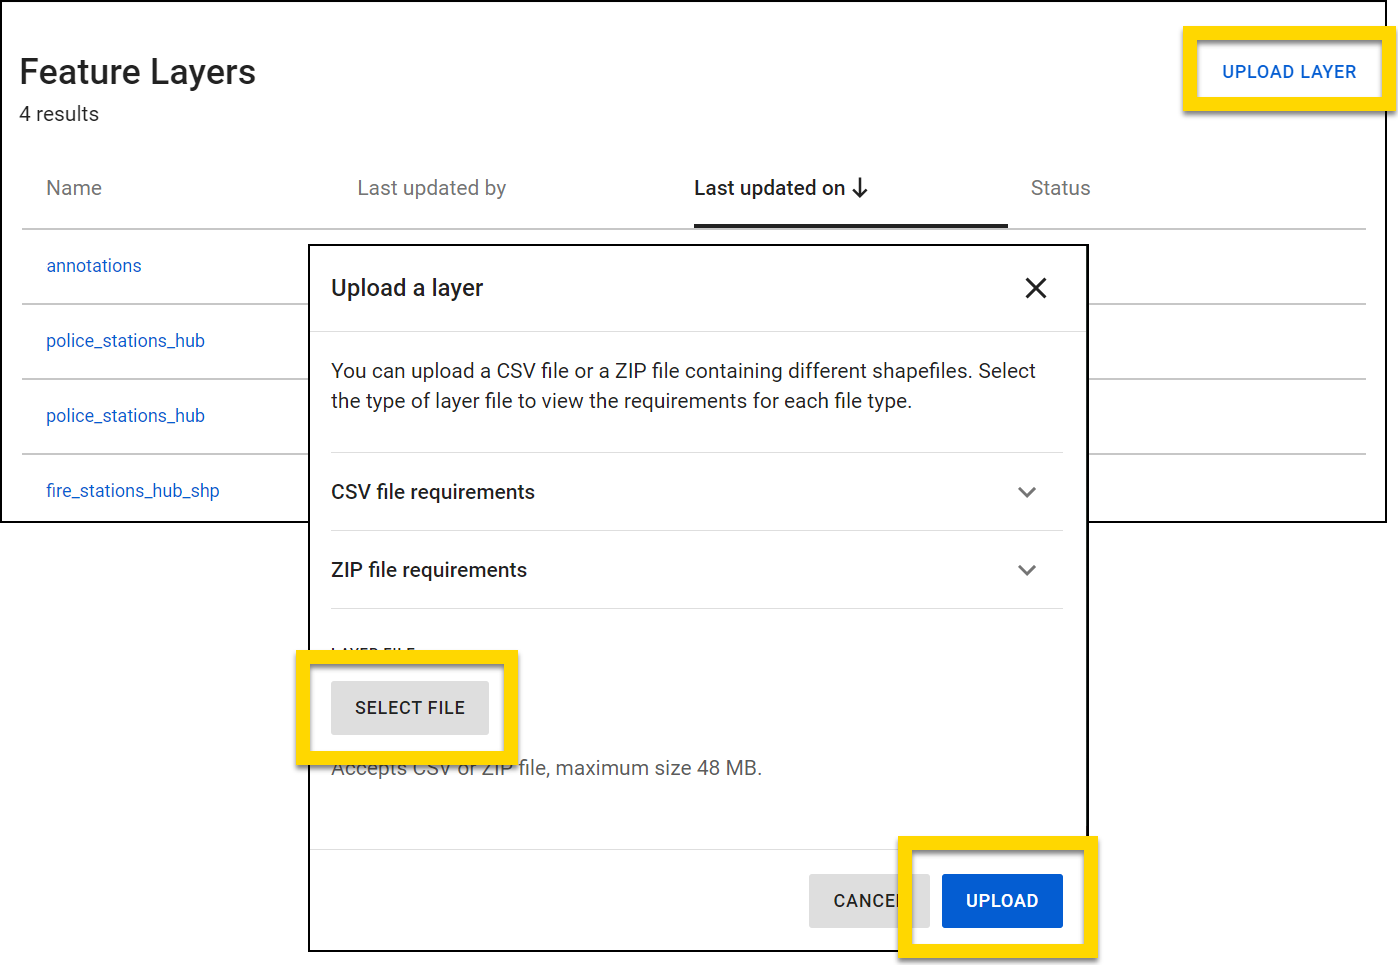
- It can take up to 30 minutes for a layer to become active. Once the layer’s status changes to Active, select the layer name to preview it and ensure it renders correctly.
- If the layer doesn’t render correctly, update the styling or contact your Axon representative.
- Uploading a feature layer does not automatically make that layer visible in your Axon products. Tell your Axon representative that you have uploaded a new feature layer so they can configure the layer for the Axon product(s) you are using.
If you upload a file and the sync fails, select the layer name to view additional information about the failure.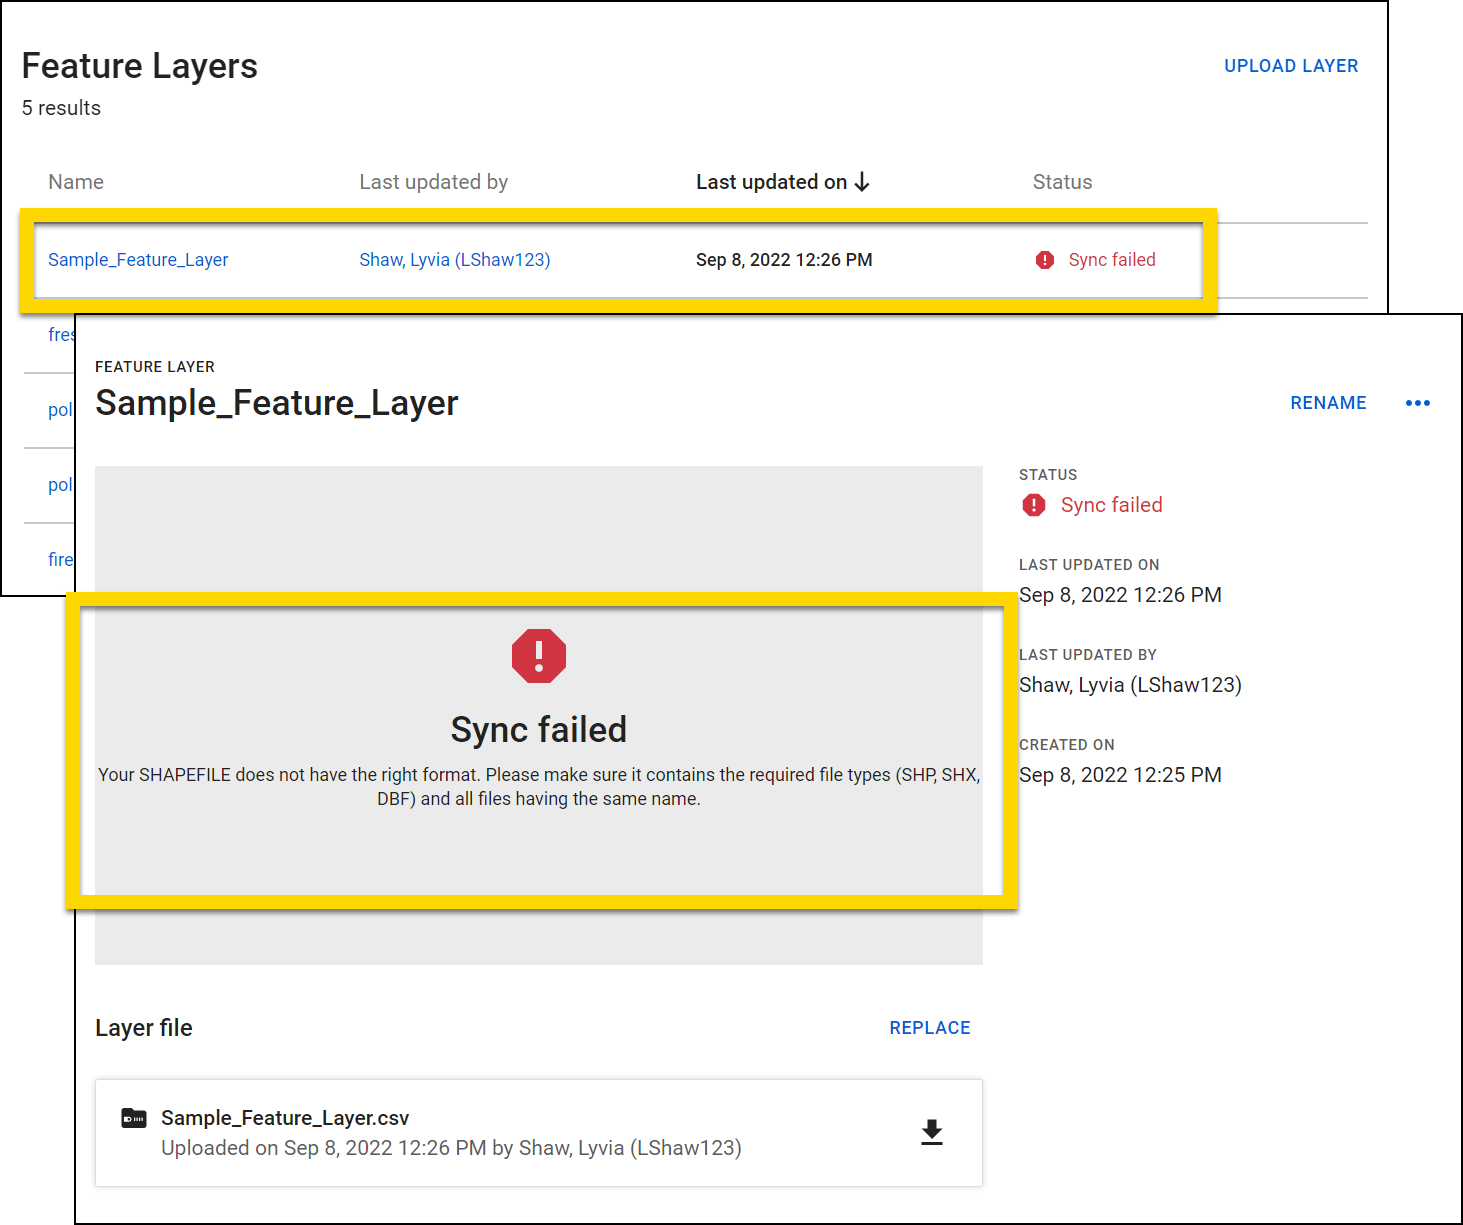
Replace existing feature layers
If a feature layer is outdated or needs to be replaced, take these steps:
- Go to Admin > Feature layers.
- Select a feature layer name to open the details page.
- Download the layer to maintain a historical record or to make updates to the existing layer files.
- Select Replace to upload an updated version of the layer.
Double-check before uploading that you are replacing the correct layer type. For example, uploading a Zones feature layer to the Police Stations Hub feature layer would disrupt styling and cause confusion.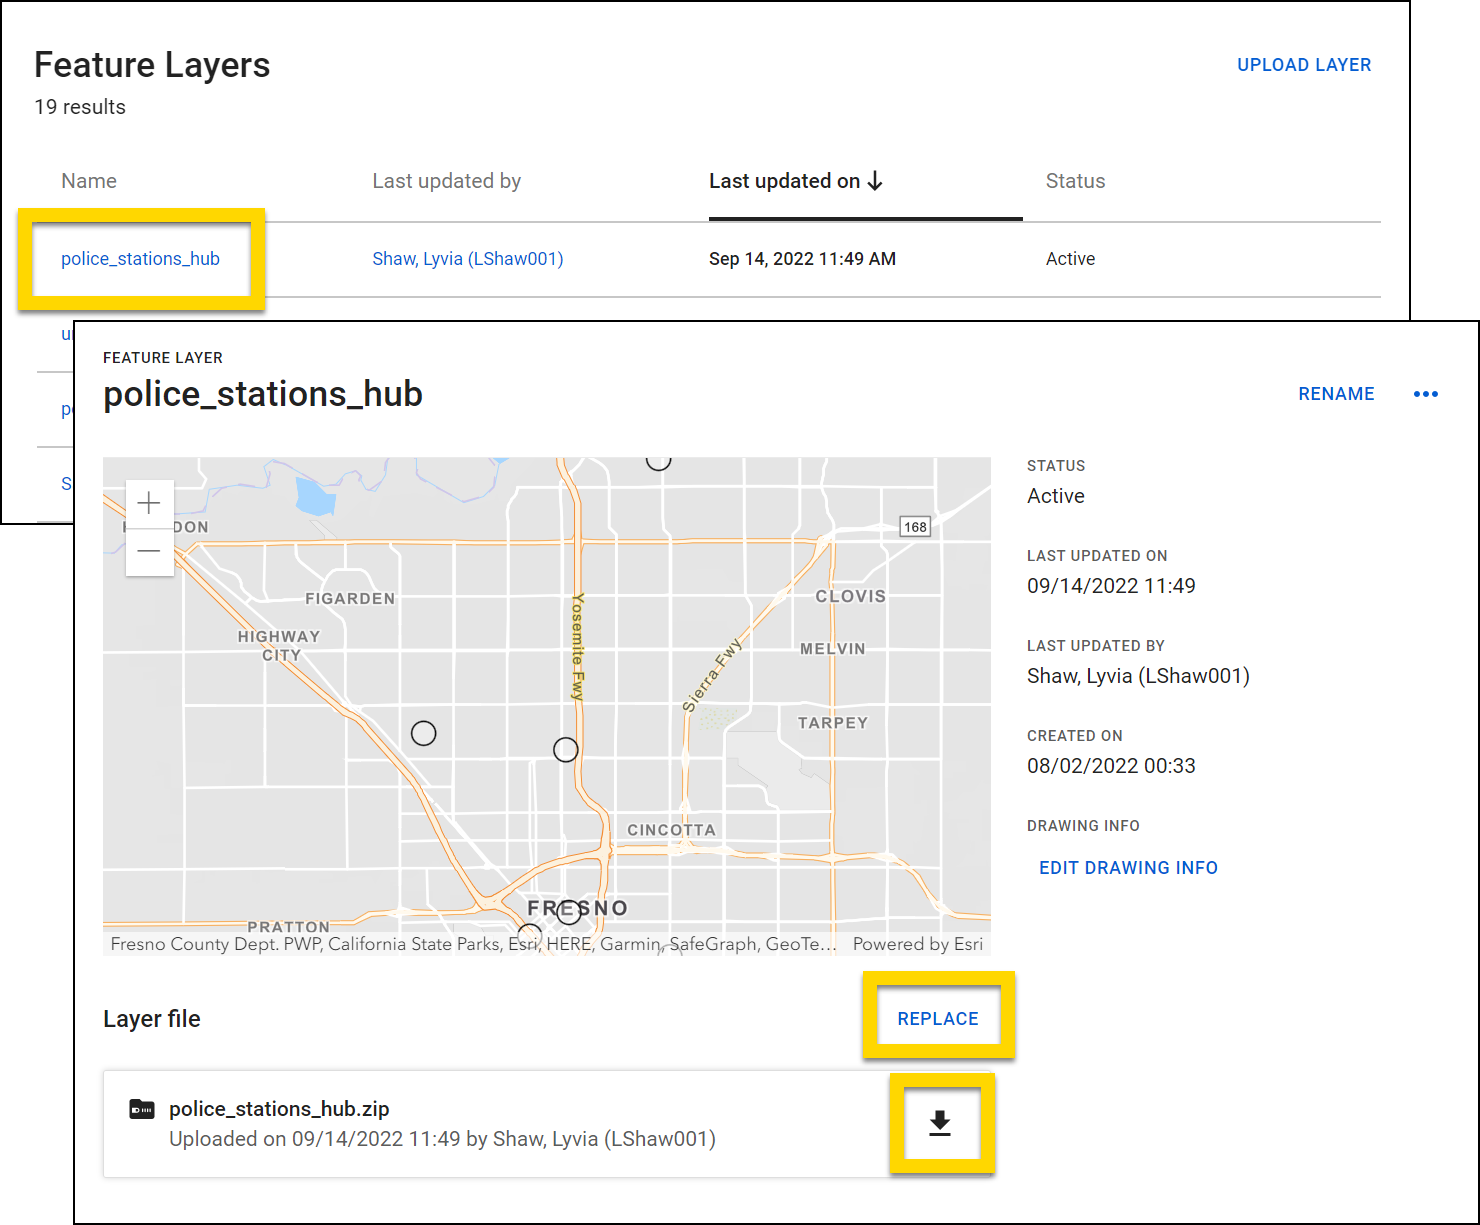
Feature layer file requirements
The maximum allowed file size is 48 MB.
CSV
- Must contain a LATITUDE and LONGITUDE column
ZIP
Must contain the following files:
- Shapefile (.shp extension) to represent spatial vector data, including points, lines, and polygons in a map
- Index File (.shx extension) to represent shape index position
- dBASE File (.dbf extension) to store attribute data and object IDs
Can optionally contain the following files:
- Projection File (.prj extension) to specify the metadata associated with the shapefiles coordinate and projection system
- XML Metadata File (.xml extension) to represent the metadata associated with the shapefile
- Spatial Index File (.sbn extension) to optimize and speed up spatial queries, used with .sbx files
- Spatial Index File (.sbx extension) to optimize and speed up spatial queries, used with .sbn files
- Code Page File (.cpg extension) to describe the encoding applied to create the shapefile
All files in the ZIP folder must have the same name (except for the file extension). For example:
- County_Boundaries.cpg
- County_Boundaries.dbf
- County_Boundaries.shp
- County_Boundaries.shx
Feature layer styling
In most cases, Axon will style new feature layers for you during configuration. However there are several styling capabilities open to you if you want to update the styling:
Update existing styling (medium complexity):
If your layer has already been styled by Axon, and you want to adjust colors or contrast follow these steps:
- Open the feature layer detail page: Admin > Feature layers > Layer name.
- Select Edit drawing Info to view the current feature layer JSON.
- Copy and paste the existing Drawing Info JSON into a text editor so you can roll back your changes if needed.
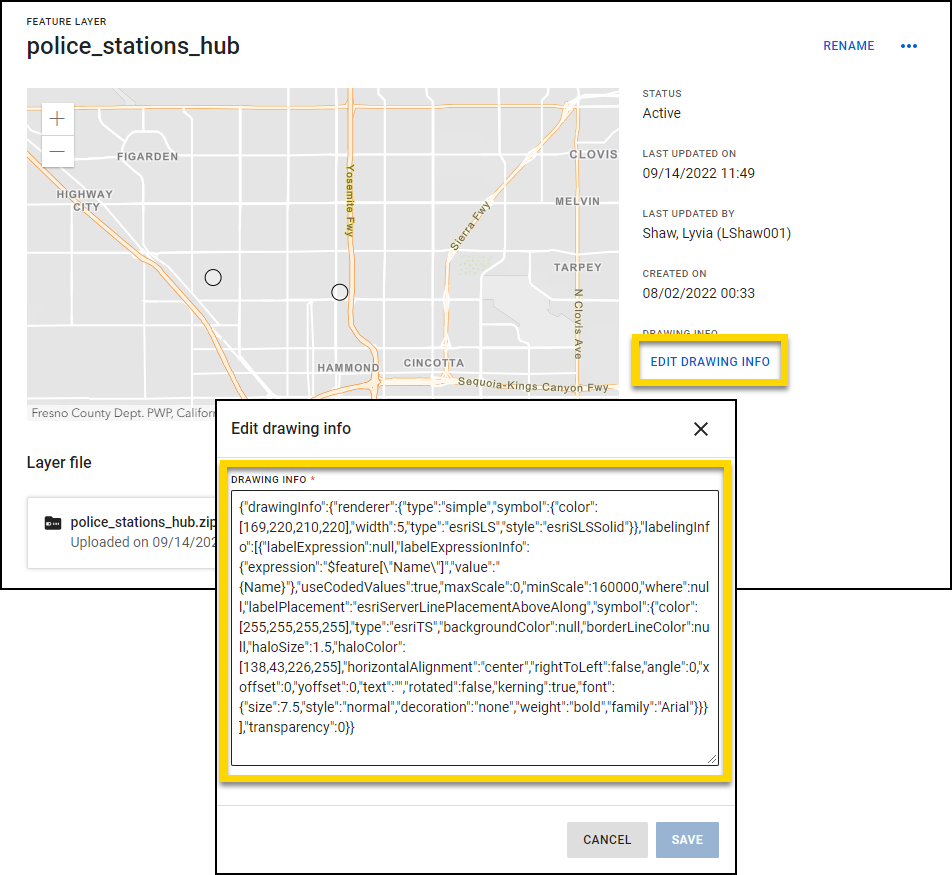
- Adjust the JSON as desired to update the layer’s colors, line widths, etc.
- Select Save. Your changes will immediately reflect both in the layer’s preview window and any Axon product currently using the layer.
Add new styling
Contact your Axon representative to create new styling for a feature layer.
Common names
You can add custom names for locations that are commonly known by names other than their addresses. For example, most people may know a store name, but not necessarily its full address. Common names allow users to quickly search and find verified addresses for locations.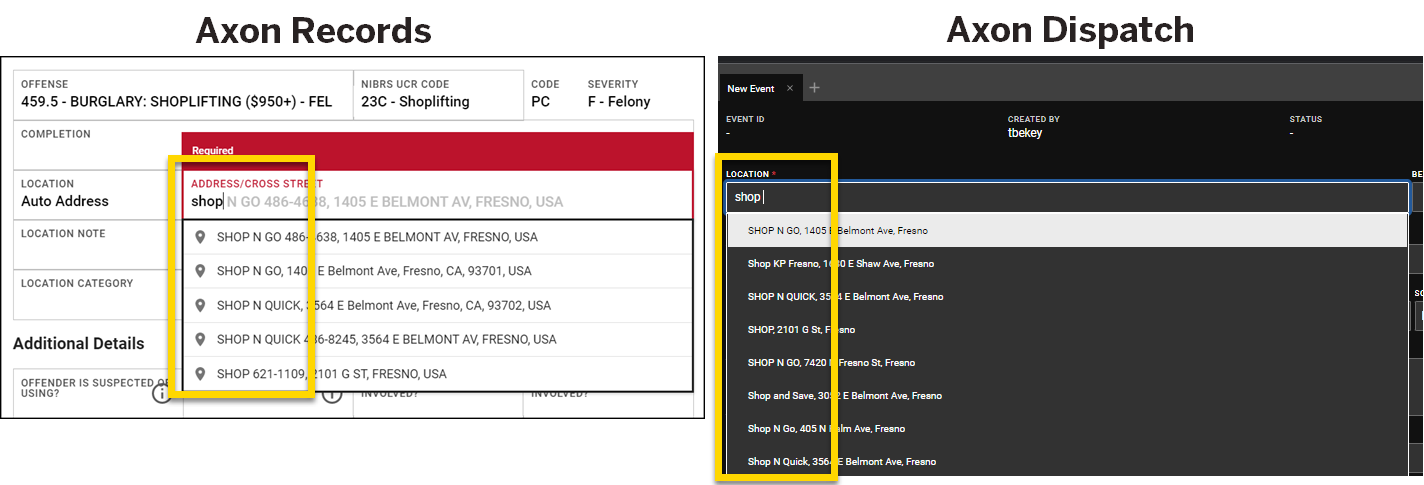
Users with specific permissions can manage your organization's common names by logging in to Axon Evidence and selecting Admin > Common names. Each name that has been created for your organization is displayed, including:
- Location
- Type (Place or Street)
- Last updated on
- Last updated by
- Status (Active, Sync pending, Sync failed, Archived)
If your agency has a large number of common names, use the search controls at the top of the window to quickly find a specific name.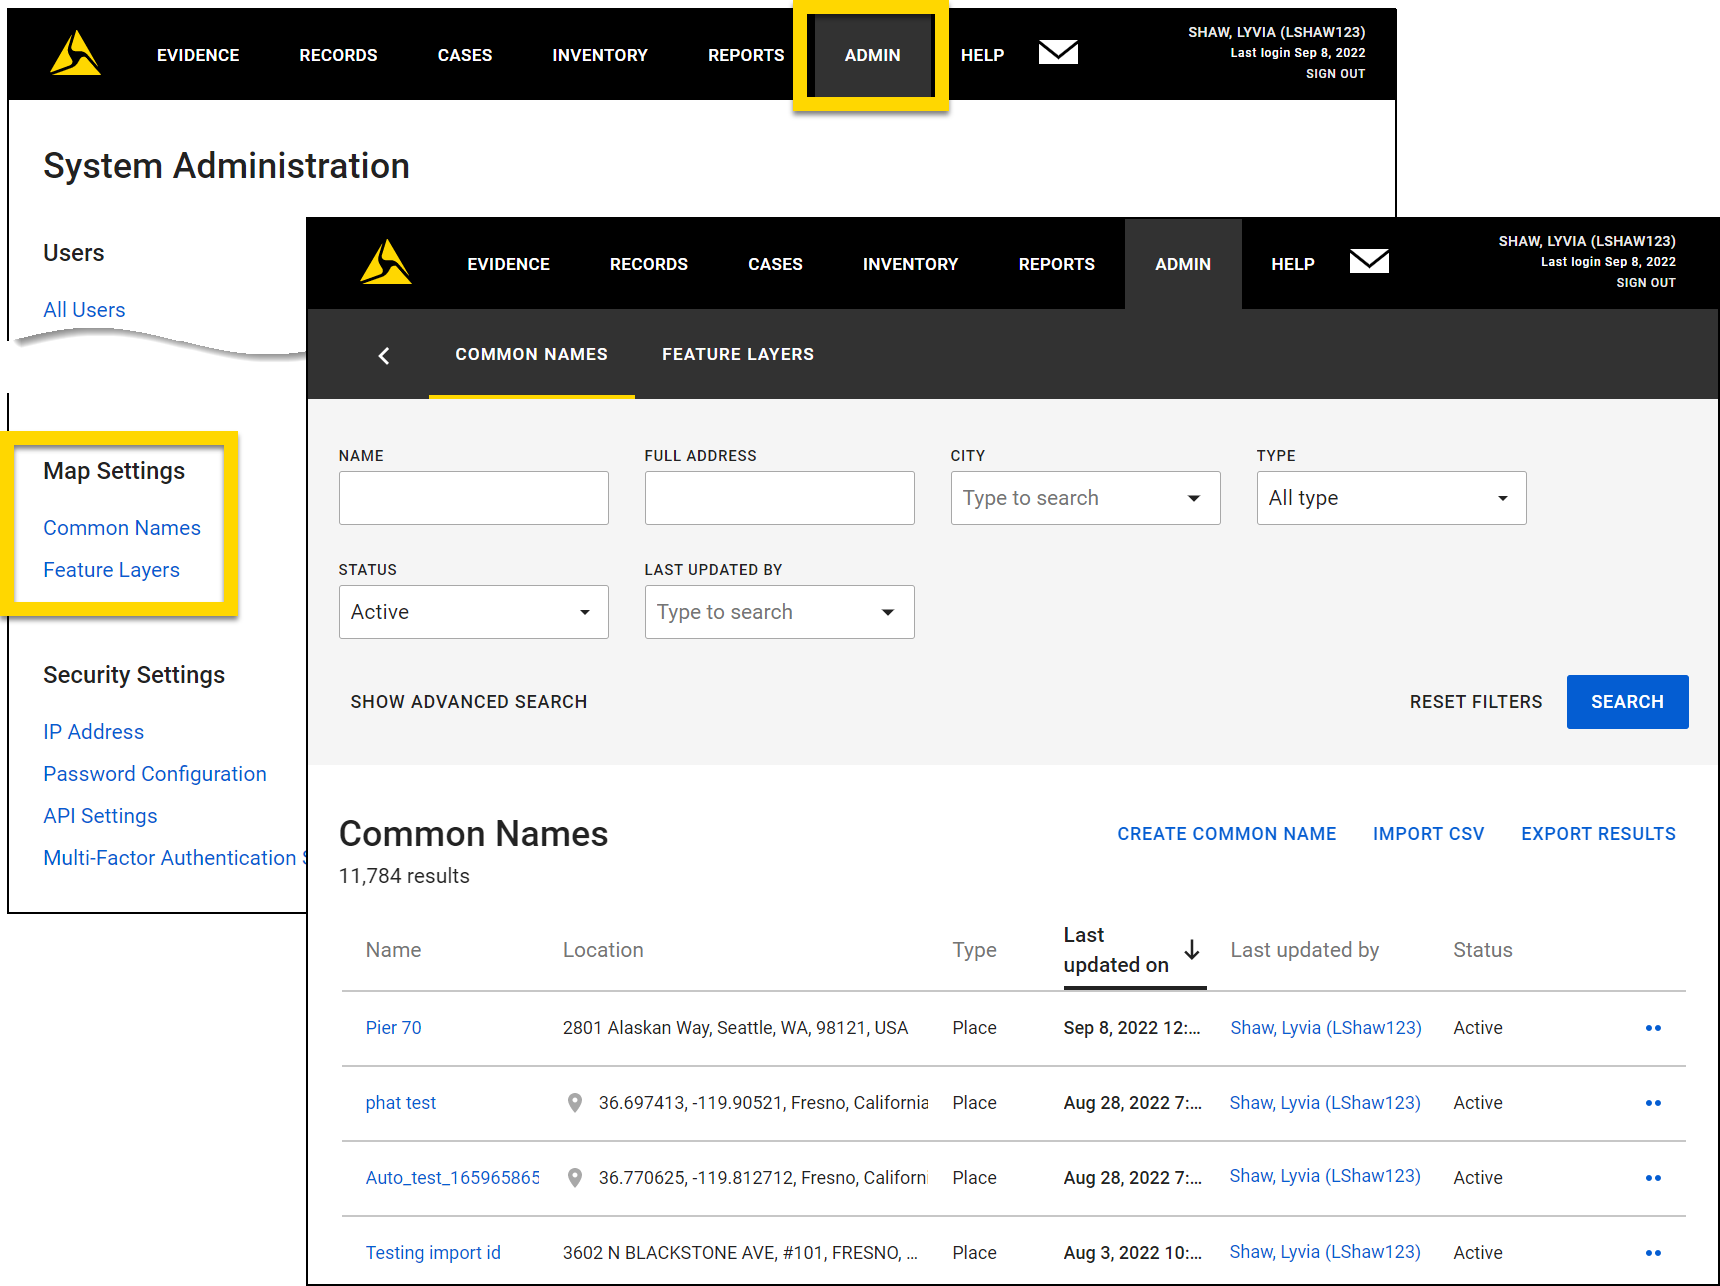
Select Export results to export your current search results. You can export to a PDF, Text, CSV, or Excel file. Five hundred names can be exported in a single file. If you need to export more than 500 names, you can export multiple files.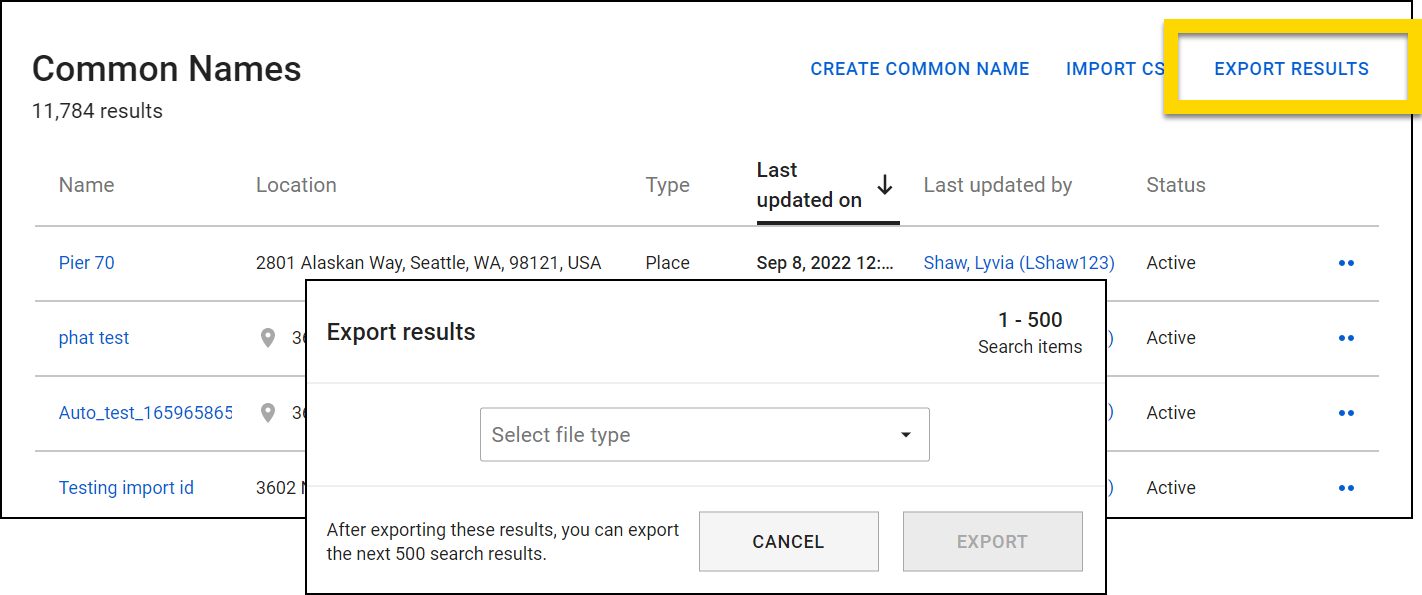
Add multiple common names
Select Import CSV to add common names in bulk. Download the example file to ensure that you format your common name file correctly with the following columns:
- ALIAS_TYPE: Place or Street
- ALIAS: The common name for that location
- FULL-ADDRESS: The location's street address, not required if a latitude and longitude are entered instead
- LATTITUDE: If the location's full-address cannot be validated, a latitude and longitude is required
- LONGITUDE: If the location's full-address cannot be validated, a latitude and longitude is required
- STATUS: Active or Archived
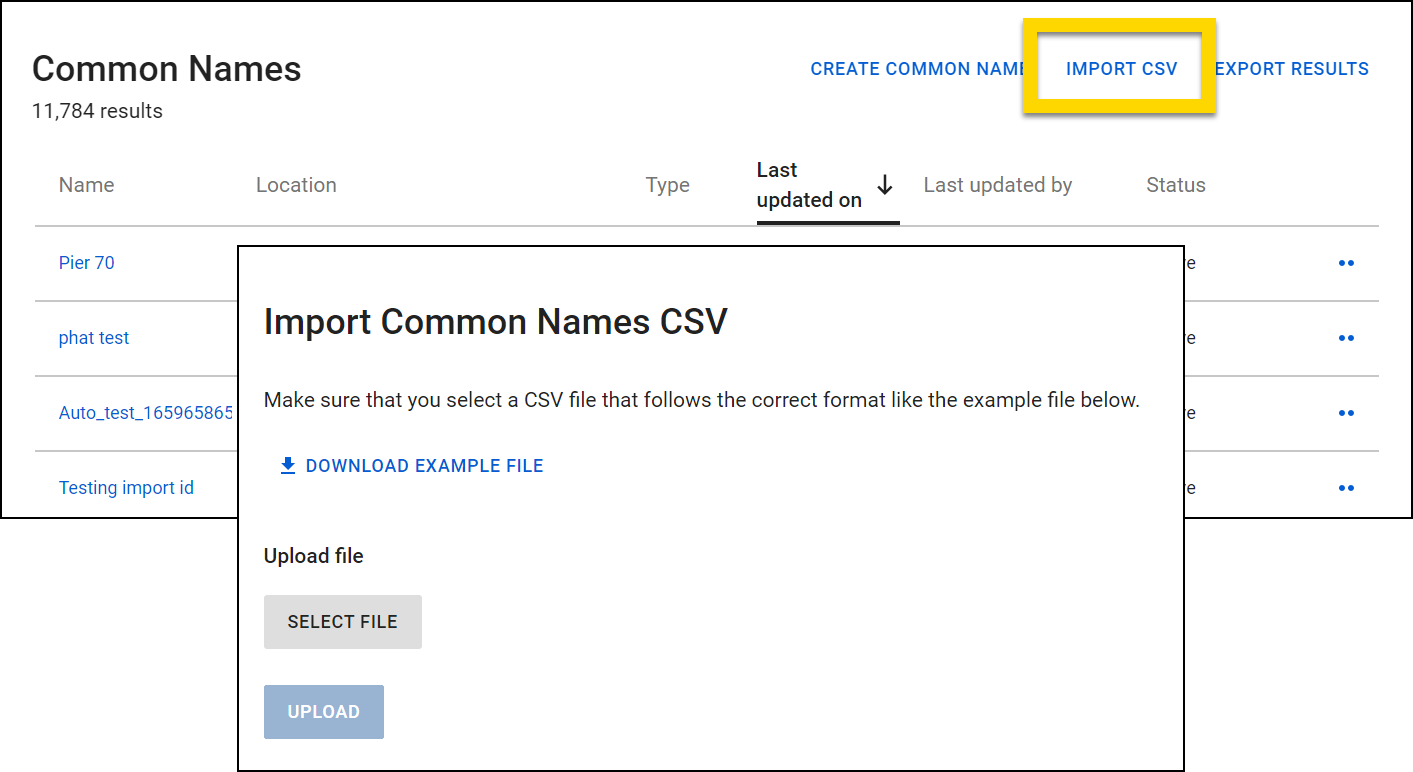
If common names that are bulk uploaded are invalid, they will not appear in the Axon products used by the agency.
Add a single common name
To add a single name, select Create common name, provide the following information, and select Create:
- Name
- Type: Place or Street
- Location: Street address or GPS coordinates
You can enter a street address or GPS coordinates manually or select a point on the map to autofill the exact GPS coordinates in the Location field.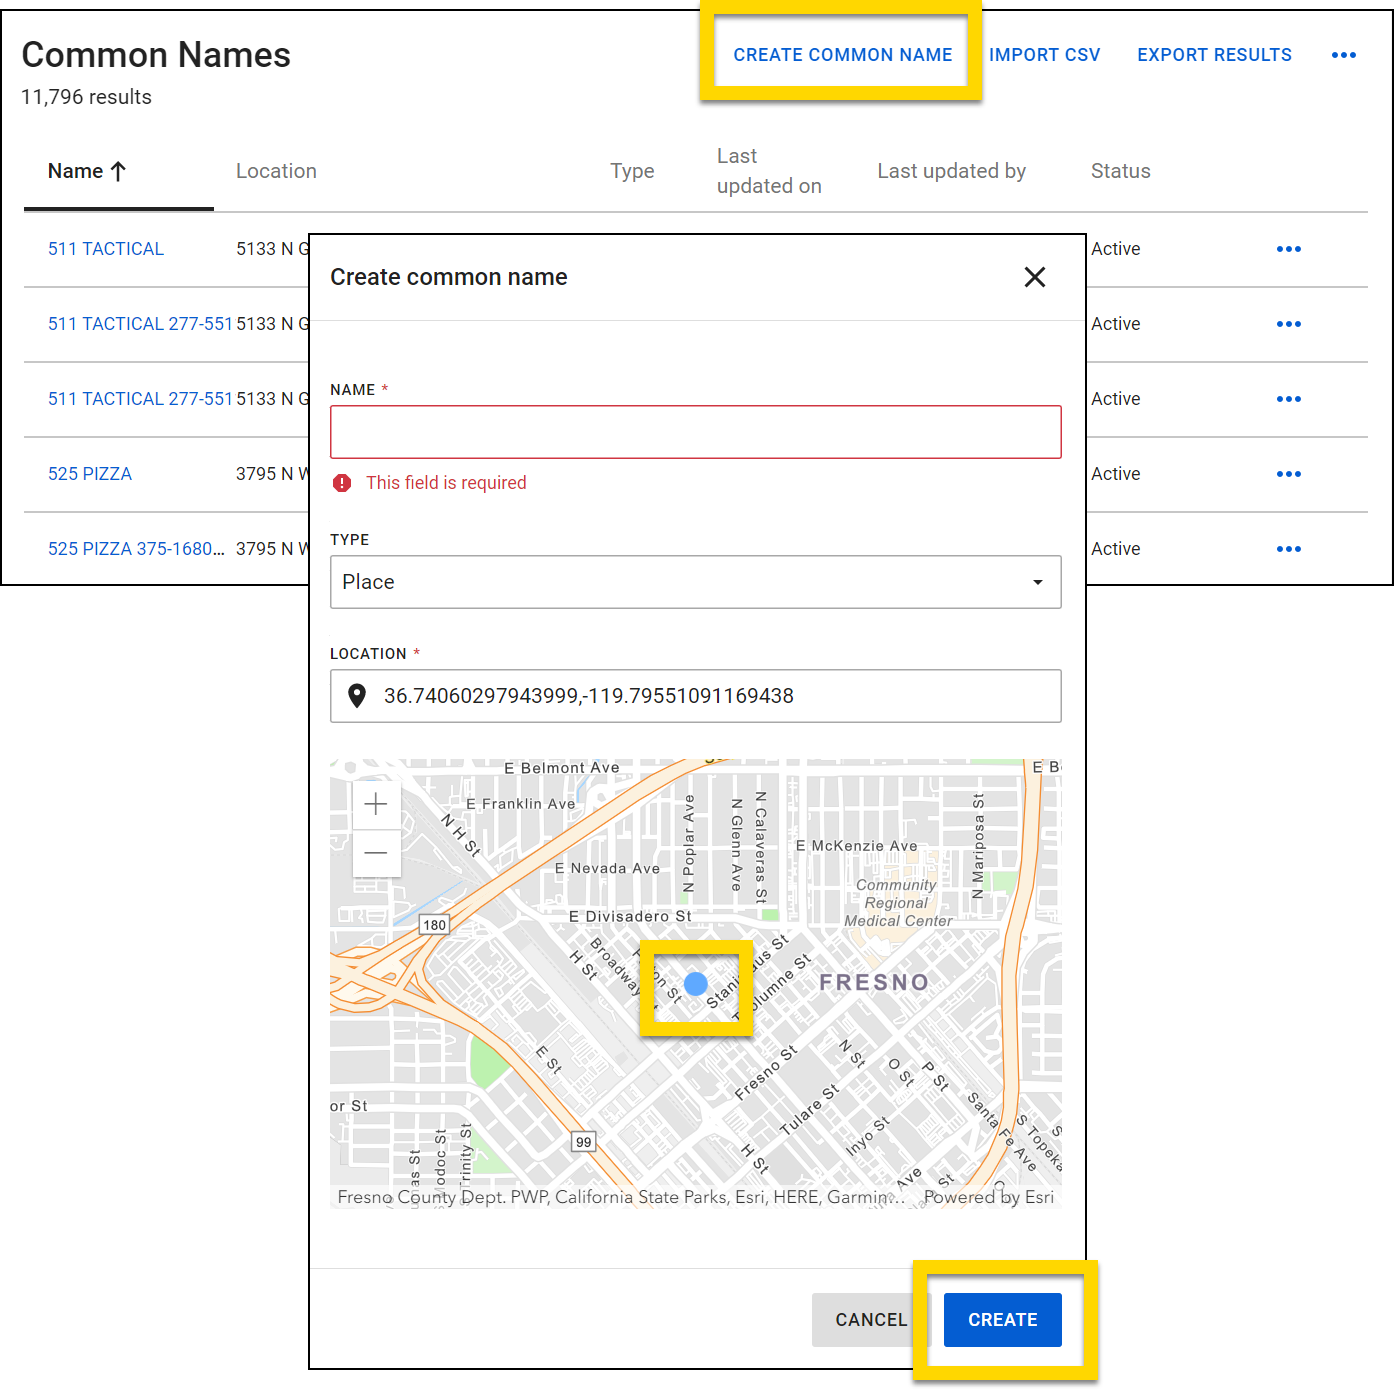
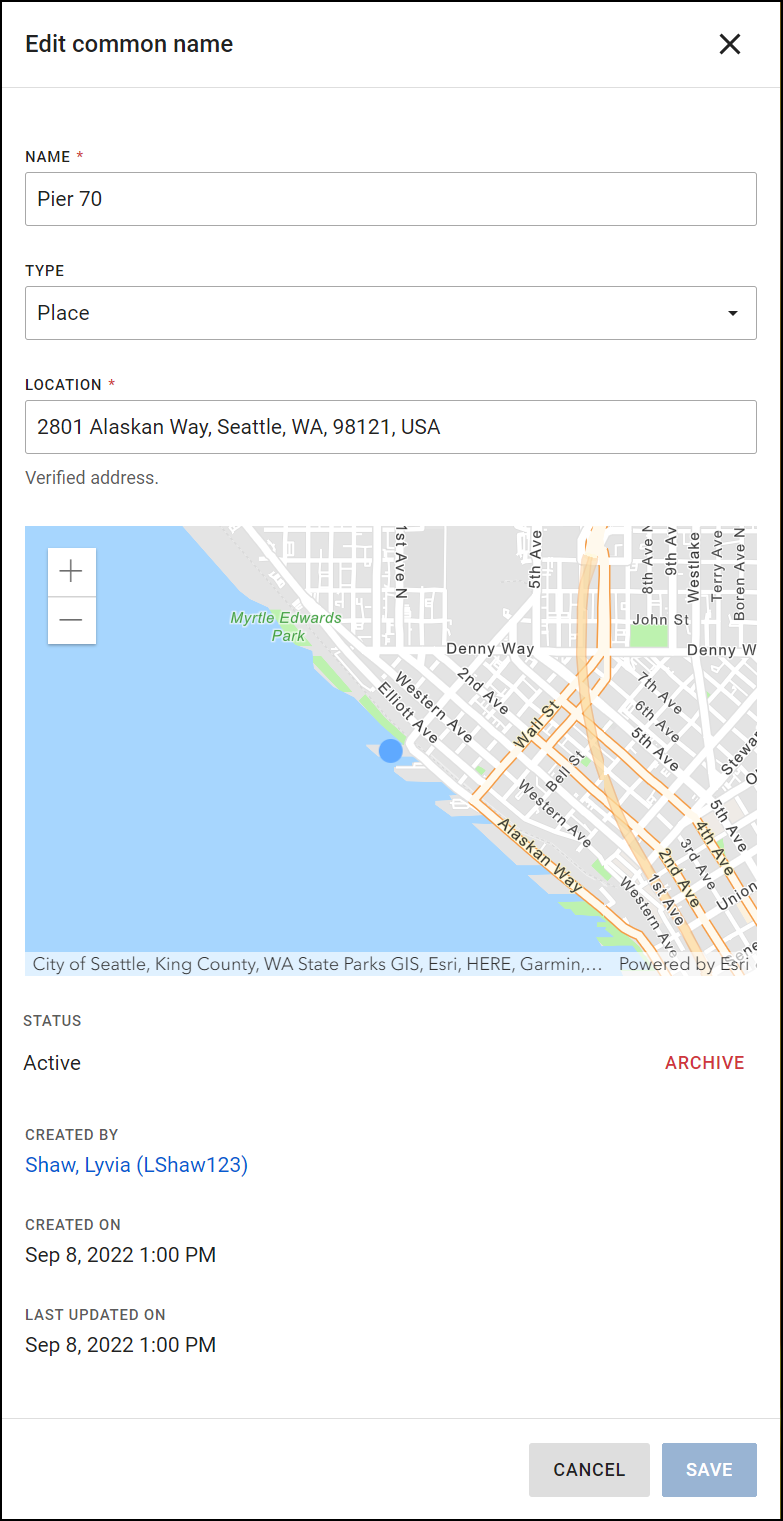
Edit a common name
Select a common name to update the name, type, location. You can interact with the map by clicking and dragging or zooming in and out. Select Archive to archive the name.
Common names can only be archived; they cannot be deleted.