Create and finalize permits
Once a permit has been created, it can be reviewed and either approved or denied.
Create permits
To create a new permit:
- Select Create Report from the top right corner of any task inbox.
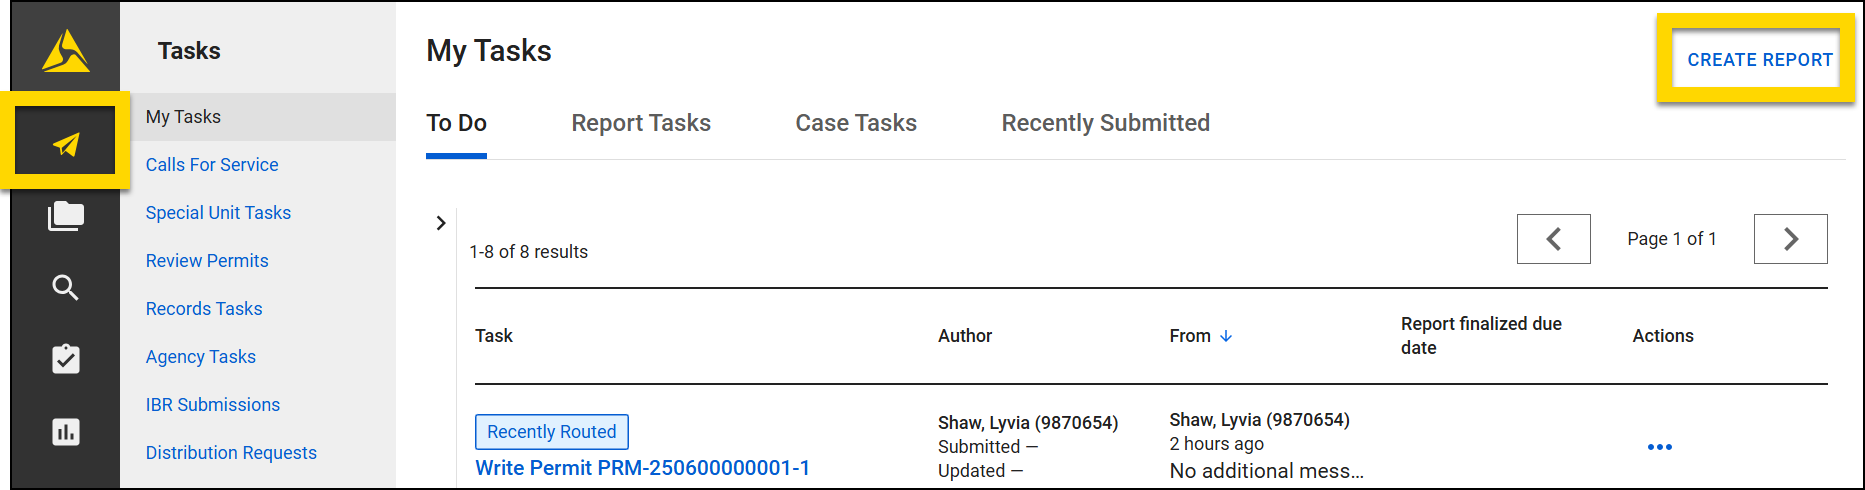
- Select Permit Form.
- Select Create Report to open the Report Writer tool and begin creating the permit.
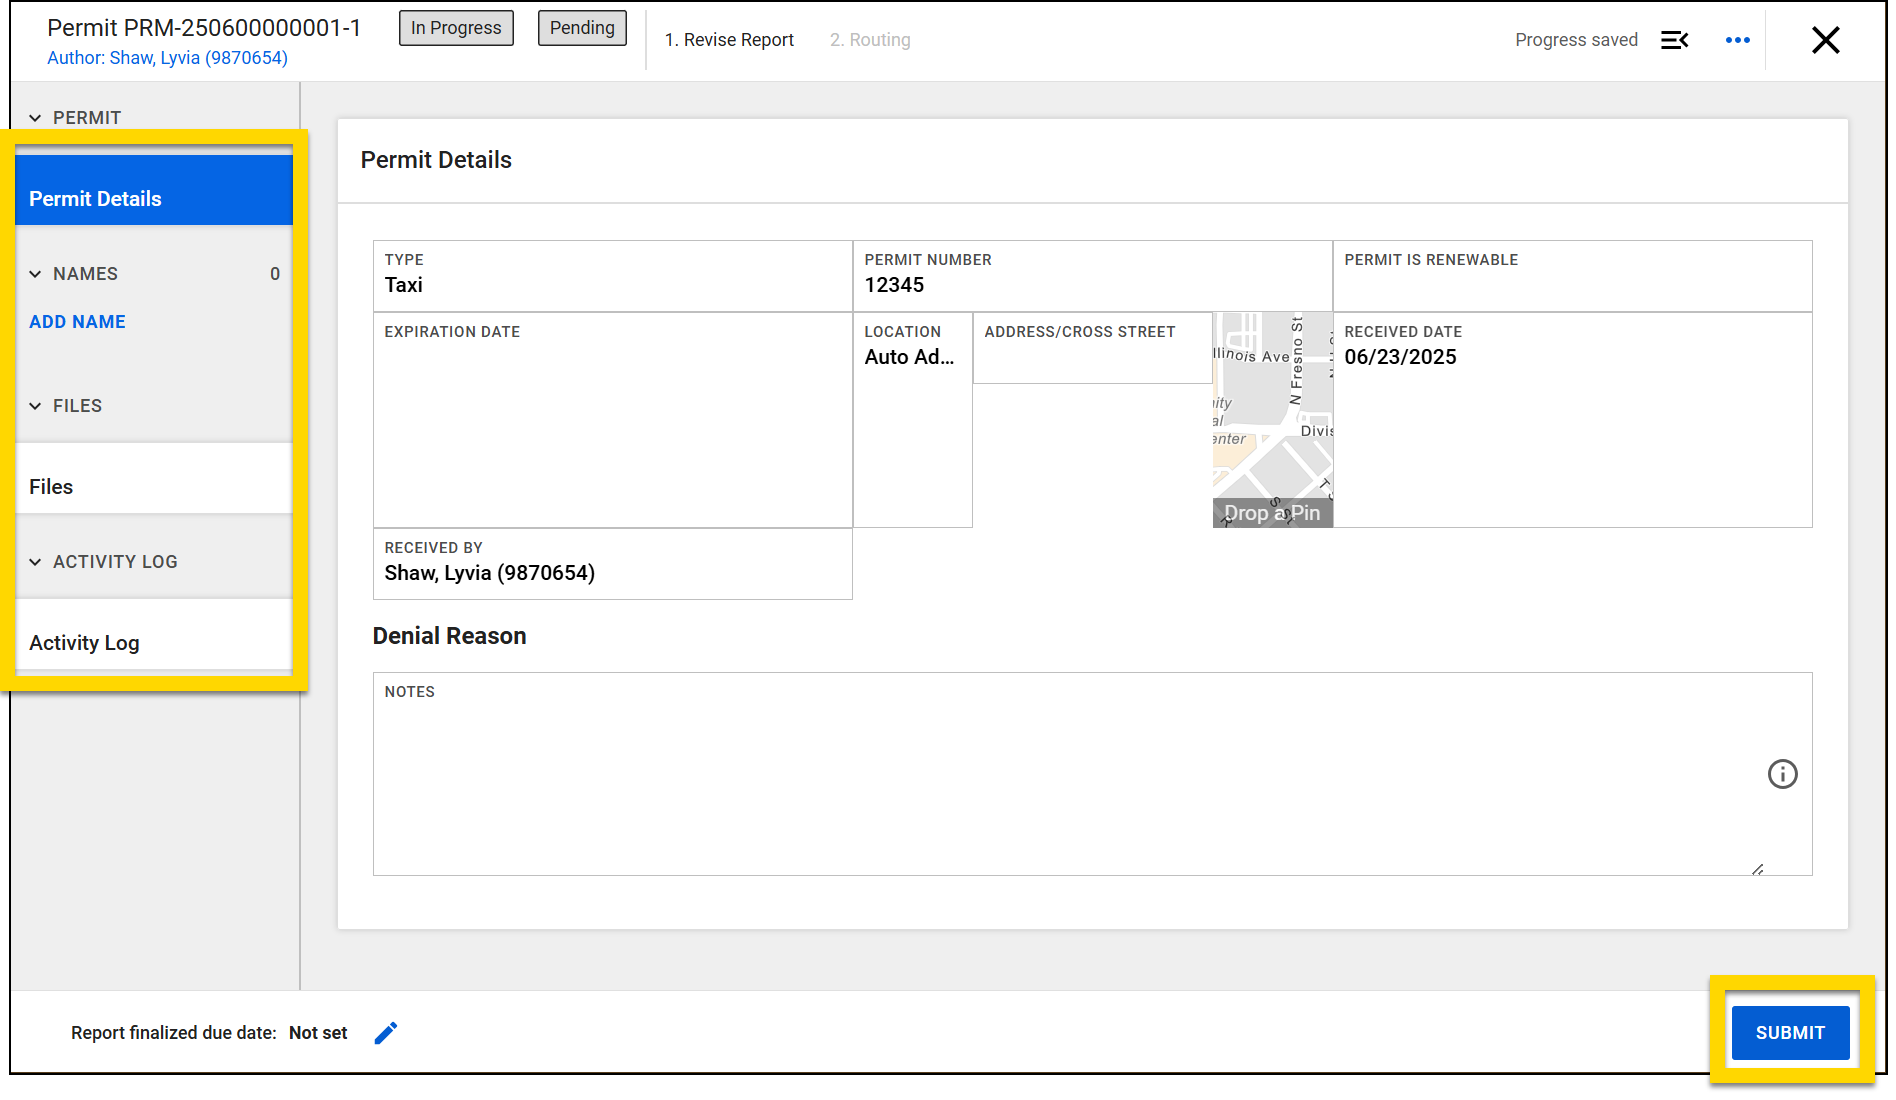
- When the permit form opens, use the links in the navigation menu to update the different permit sections including:
- Add Name: Add associated people and organizations
- Files: Add files associated with the permit.
- Activity Log: Record activities taken on the permit.
- Once all necessary information has been added, select Submit.
- On the routing screen, you can choose between three options: Request Review, Approve Permit, Deny Permit.
- Optionally assign the permit to a reviewer (if you selected Request Review), add a note, then select Submit.
- If you approved the permit, print the permit photo card.
At the top of the screen, you will see two status boxes. The first status indicates the status of the permit application. The second indicates the status of the permit.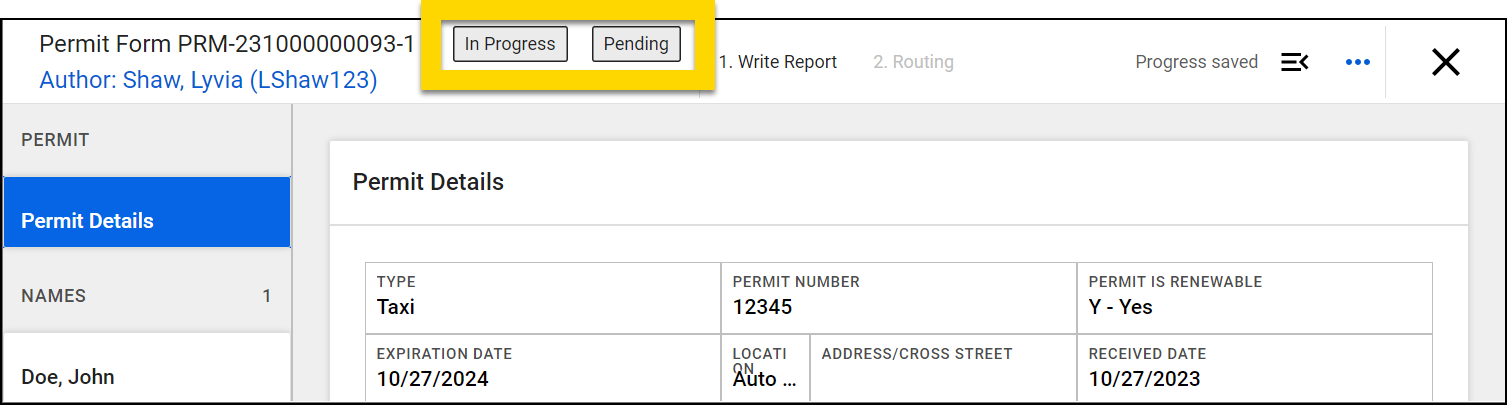
Expand the right sidebar to view the comments and errors panel. Required fields that have not yet been completed appear in the error panel.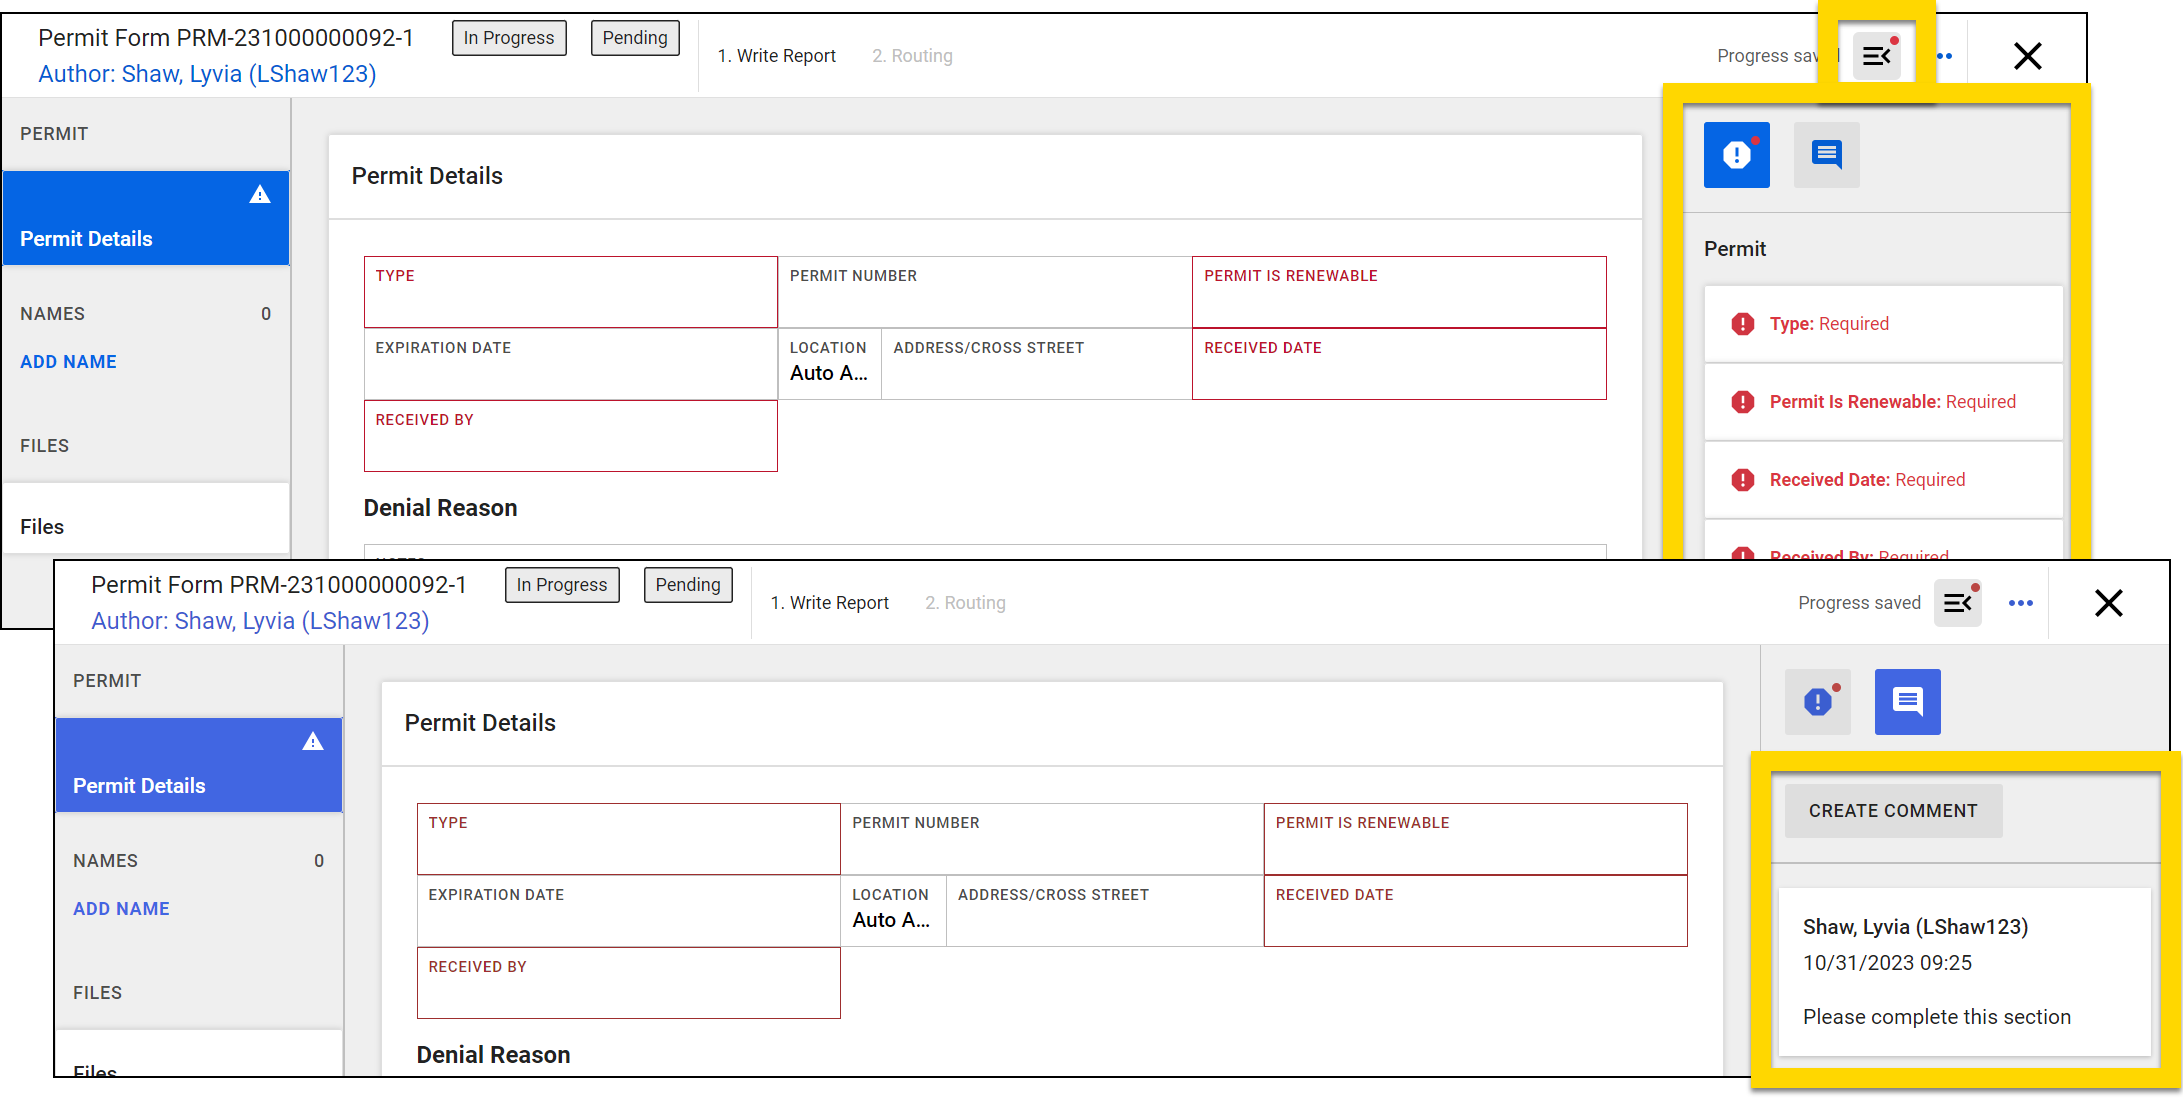
Select More Actions [...] > View Report History to view the history of the permit form. The history of the permit, including status updates, can be found in the Activity Log section.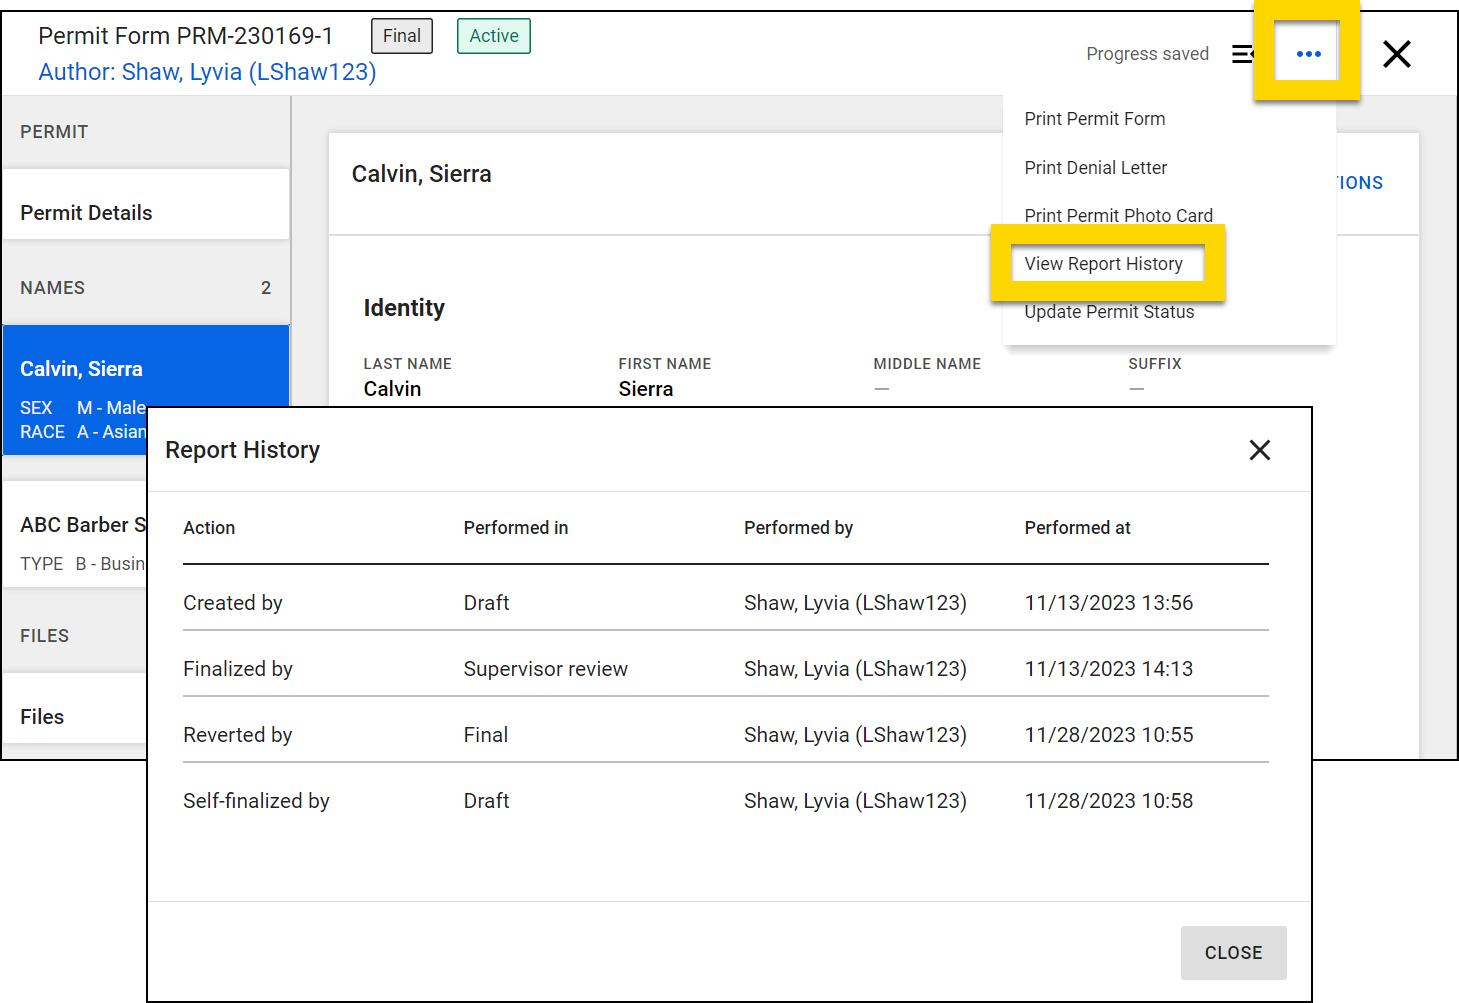
Review and approve or deny a permit
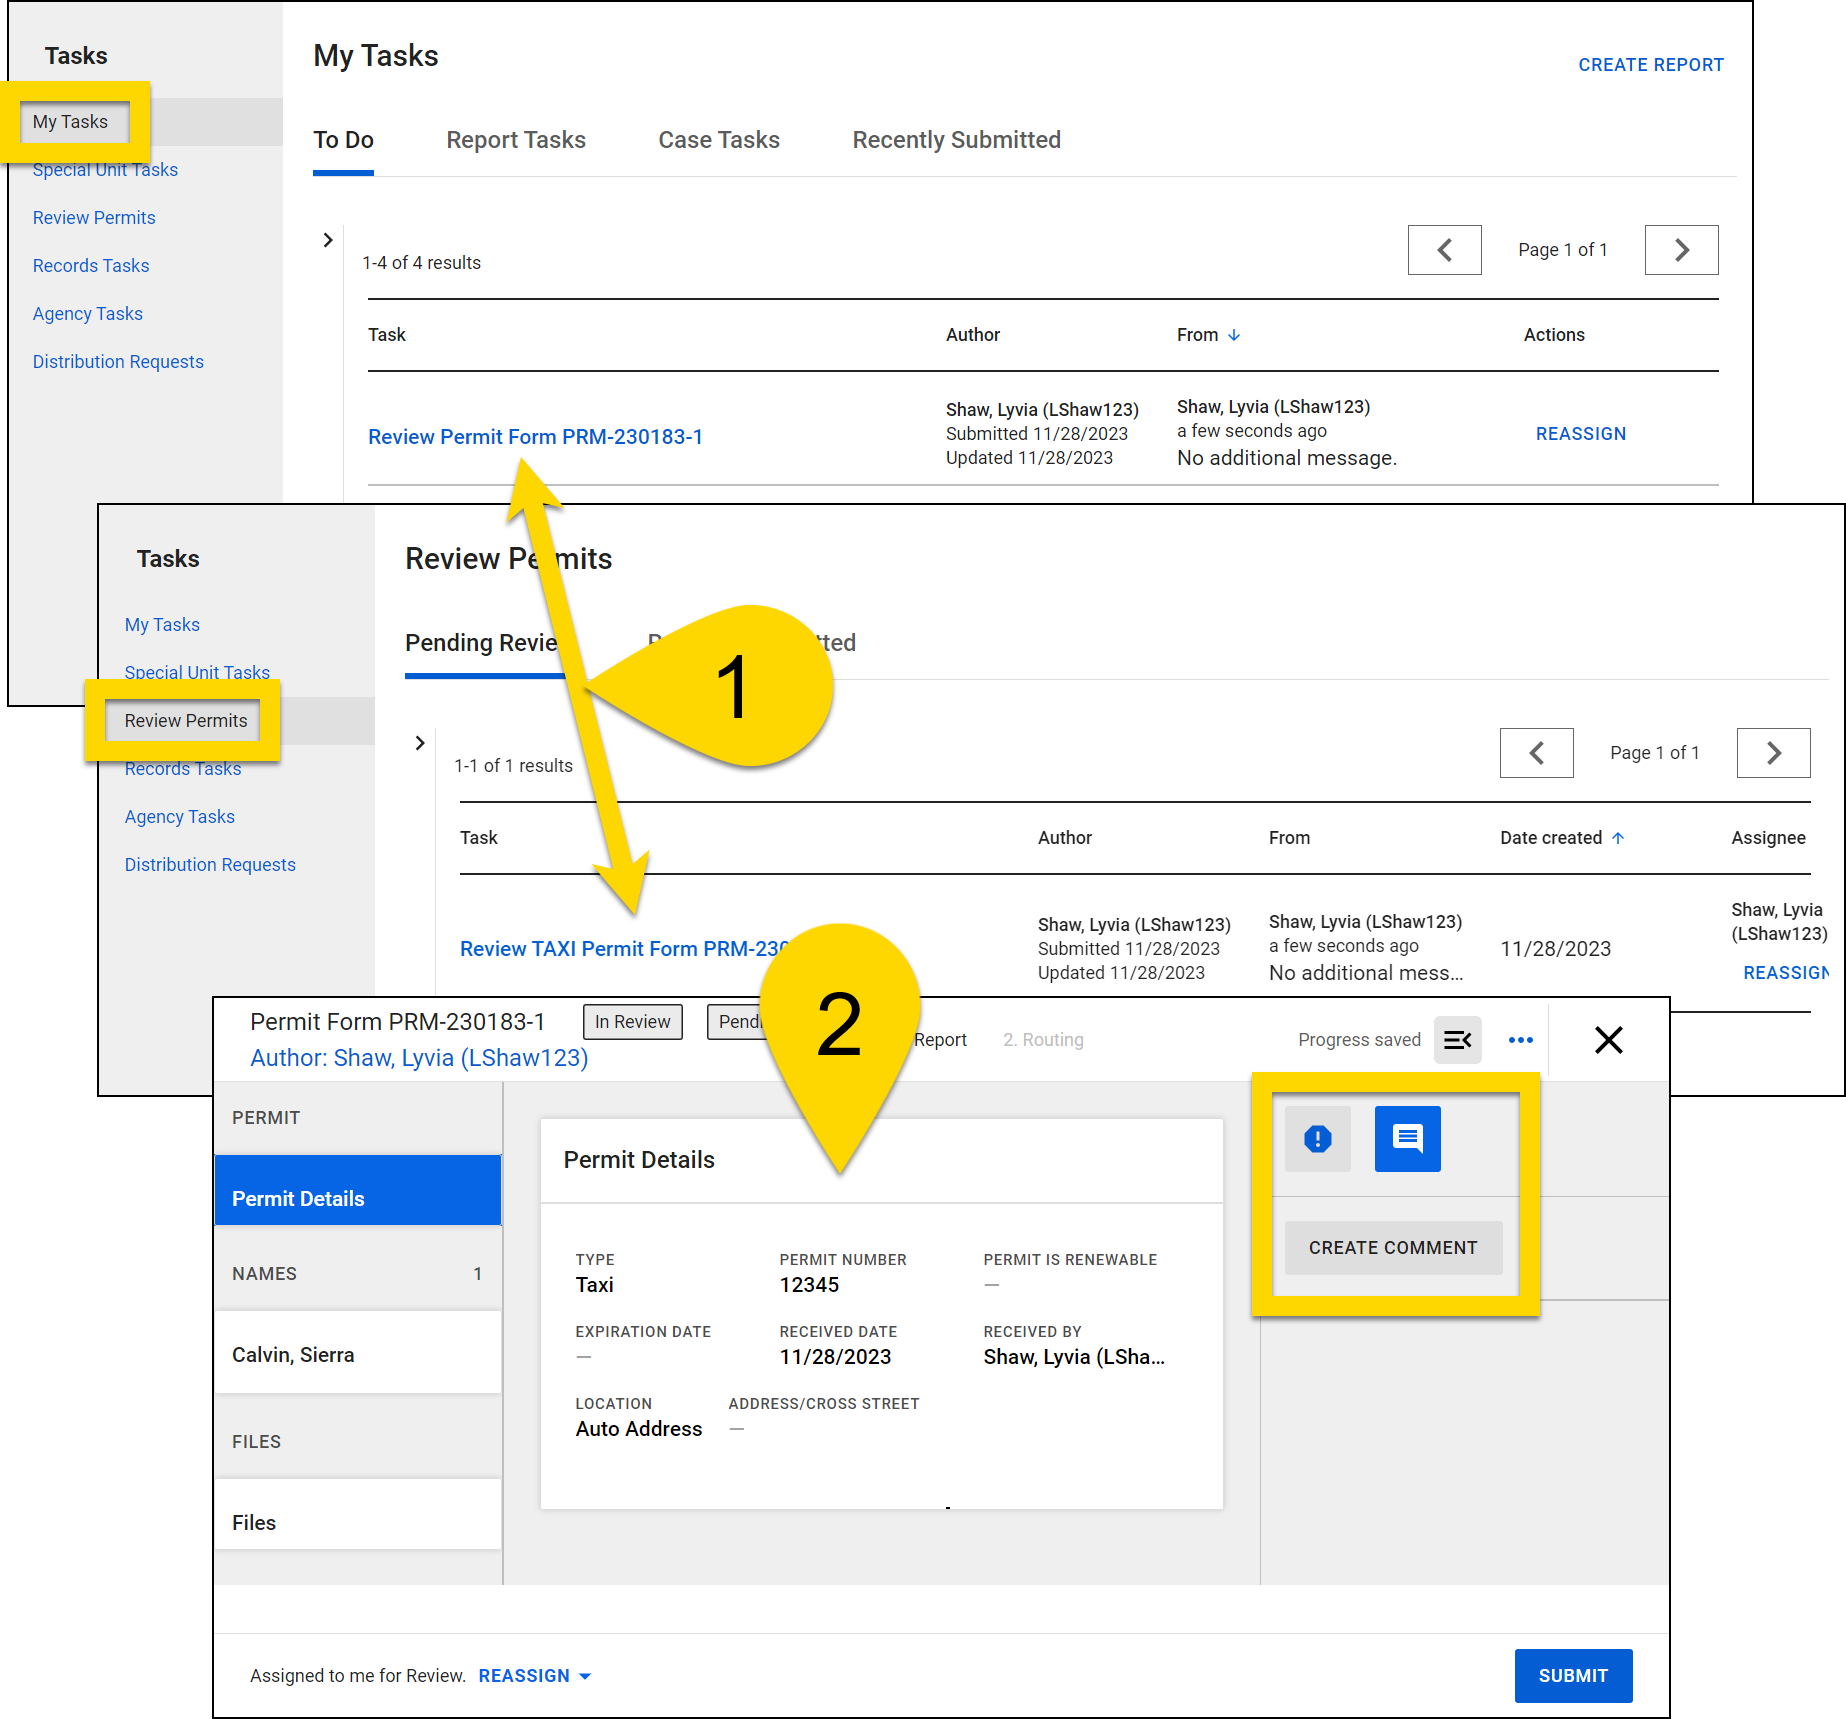
To review a permit:
- Select a Review Permit task from either the My Tasks or Review Permits inbox to open the permit.
- Review the permit application information, using the comments sidebar to leave comments as needed.
- To edit the permit fields, including to add a denial reason, select More Actions [...] > Review and Edit.
- Once your review is complete, select Submit.
- On the routing screen, you can choose between several options: Approve Permit, Deny Permit, Request Review, Request Revision.
- Optionally assign the permit to a reviewer (if you selected Request Review), add a note, then select Submit.
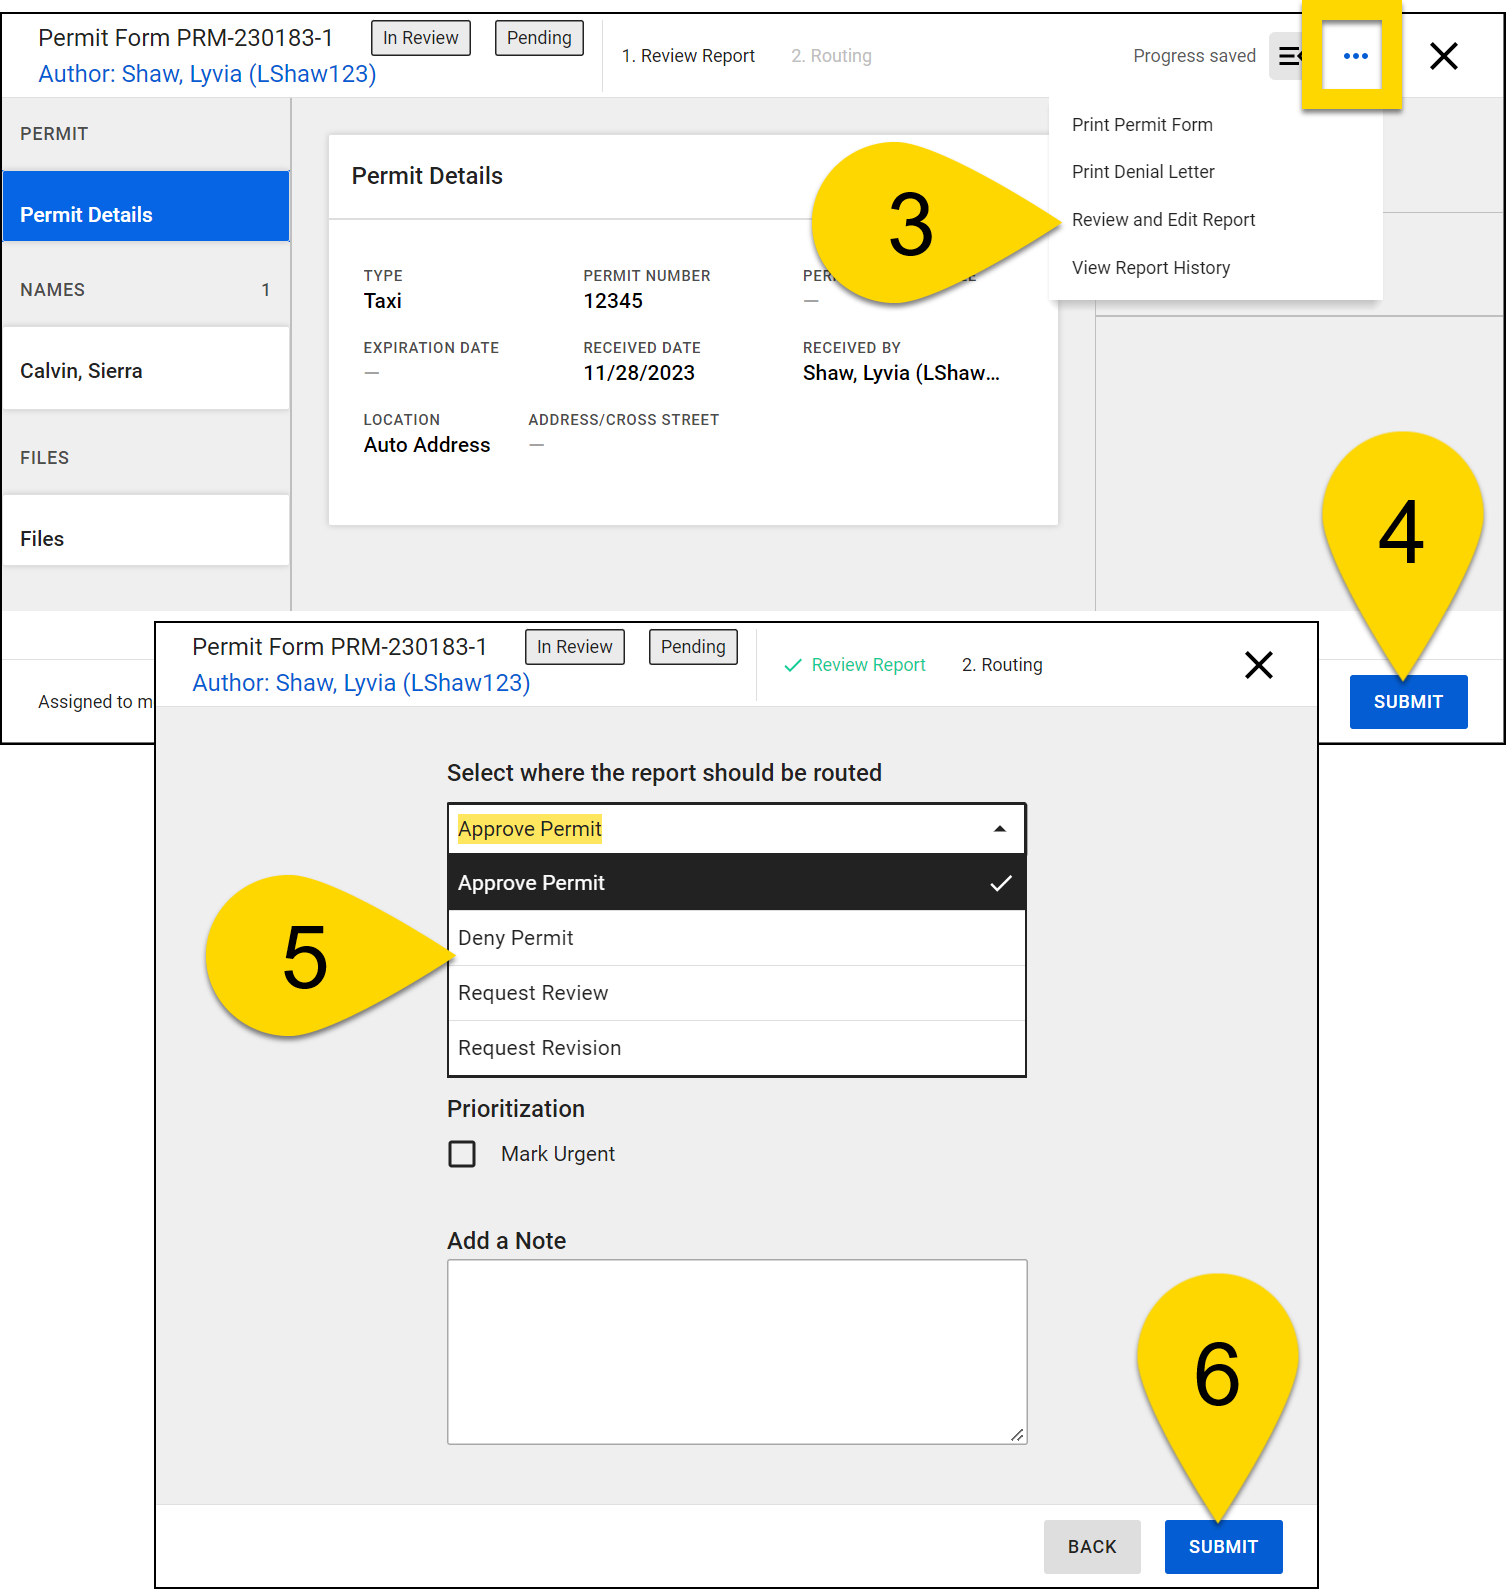
- If you approved the permit, print the permit photo card.