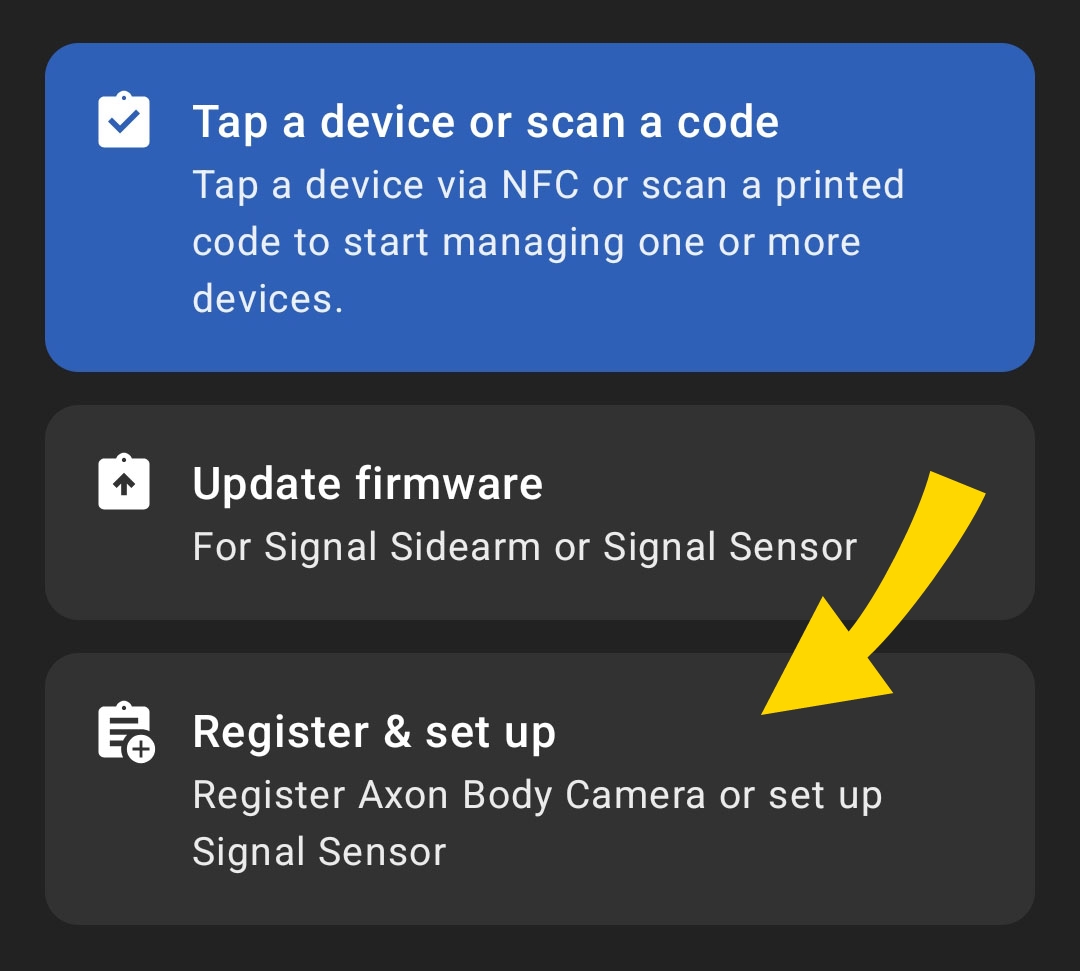
Setup and calibration
Setup
This topic is normally for the armorer or admin who sets up Signal Sensors. For user guidance, see Operation.
Signal Sensor from Axon is best administered and maintained using Axon Device Manager (ADM), available from your app store (Apple or Android). The following sections discuss how to use ADM with Signal Sensor. Learn more about ADM at my.Axon.
This topic describes how to add a sensor to ADM, assign the type of holster, and assign a user. The next two sections discuss installation and calibration. After your sensors are completely set up, you may want to jump directly into one of these sections or topics:
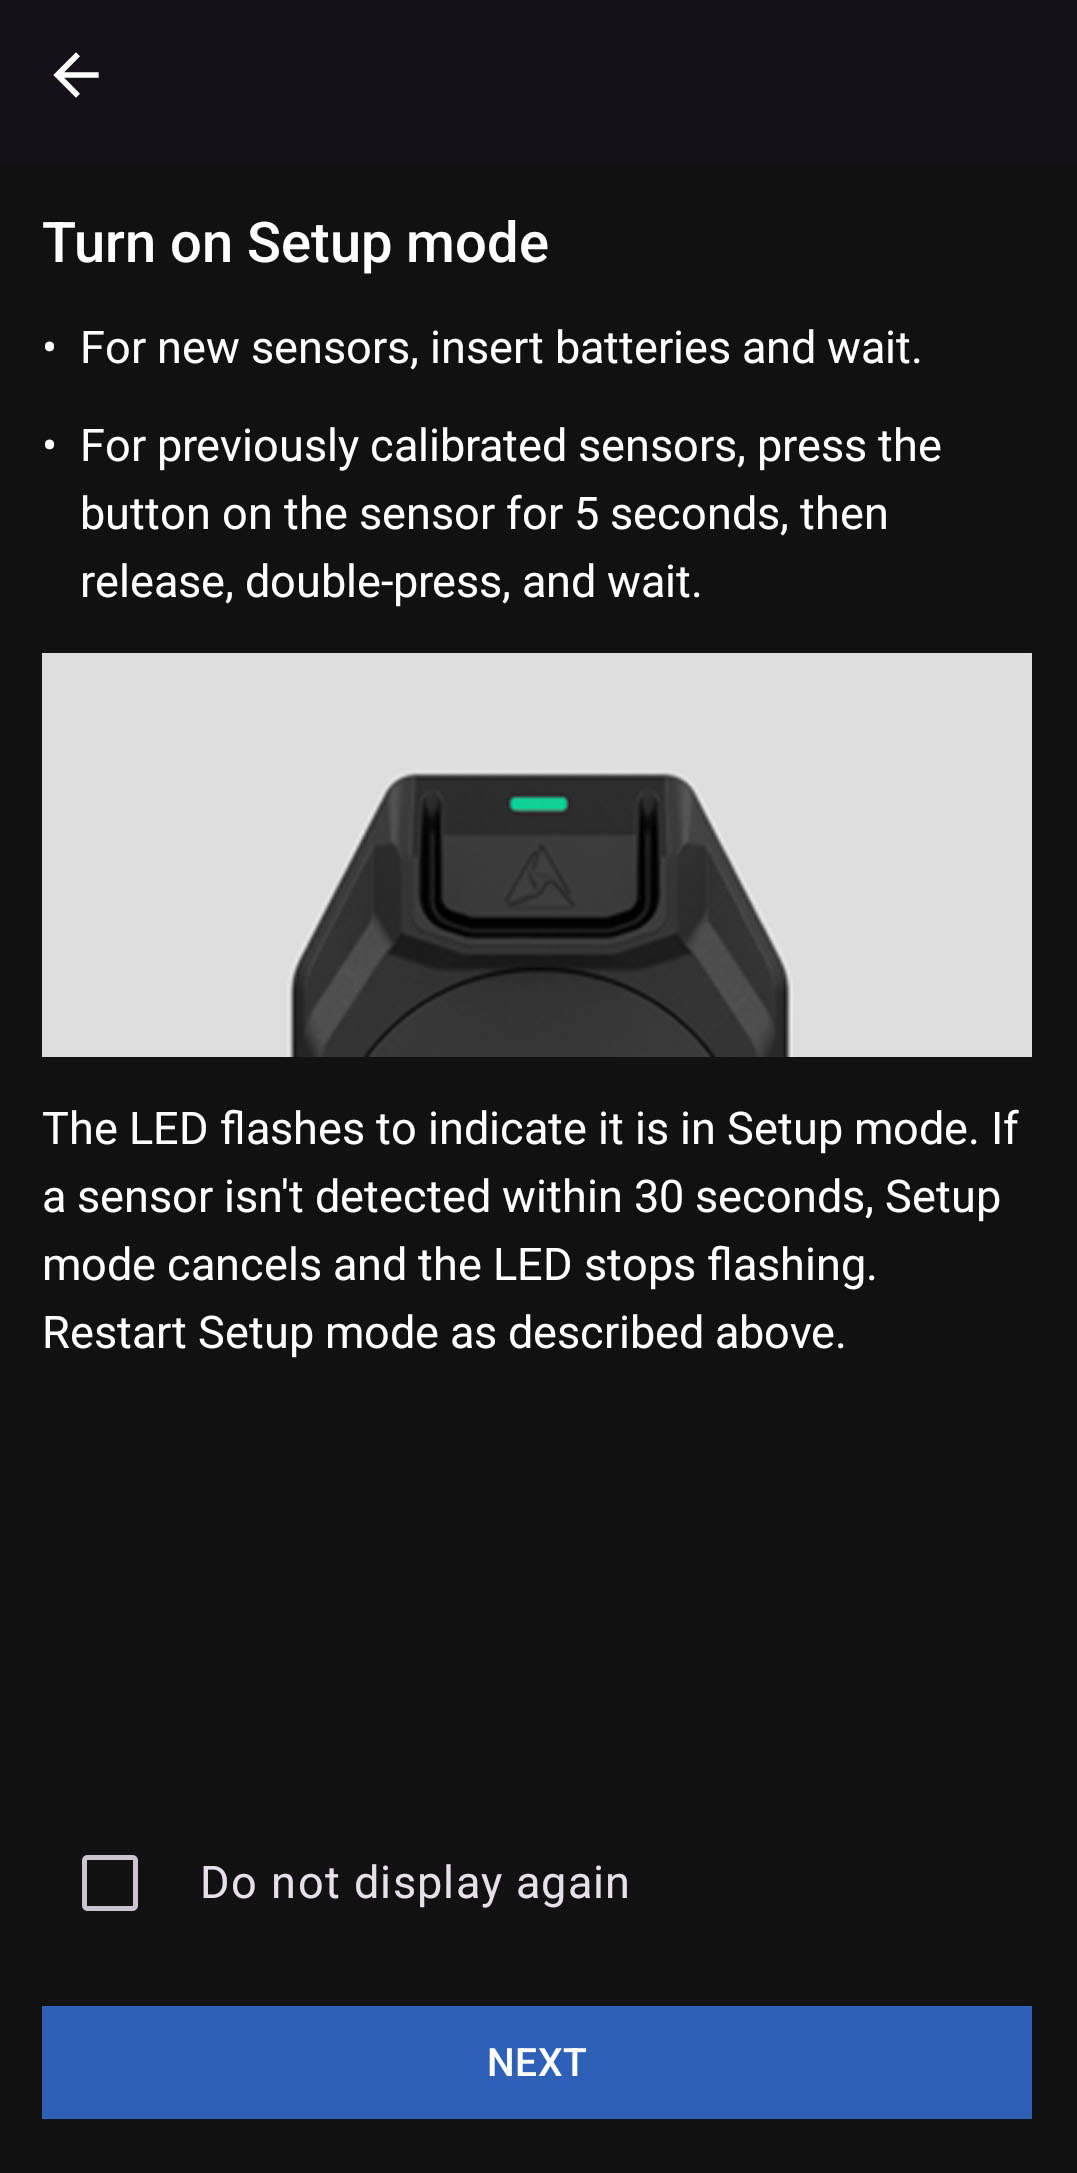
- For previously calibrated devices: To enter setup mode, press and hold the Mute button for about 5 seconds, then quickly double-tap the button . From setup mode, you can run ADM.
- For new devices: To enter setup mode, insert a battery into the sensor. If it goes to sleep after 30 seconds of no connection, press the Mute button to wake it up.
Start setup
Sensors typically arrive pre-registered to your organization. If not registered yet, setup includes registration, assigning the sensor to a user, assigning a holster, and calibration.
If the ADM screens shown in the following steps differ from yours, update your app.
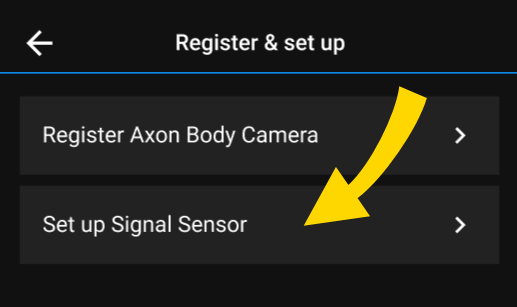
- In ADM, select Register & set up.
- Select Set up Signal Sensor.
- Insert a battery into each sensor (see Battery replacement) and wait for them to enter Setup mode, indicated by the LED rapidly flashing green
 . Select Start, then Next. You can work with up to seven sensors at once.
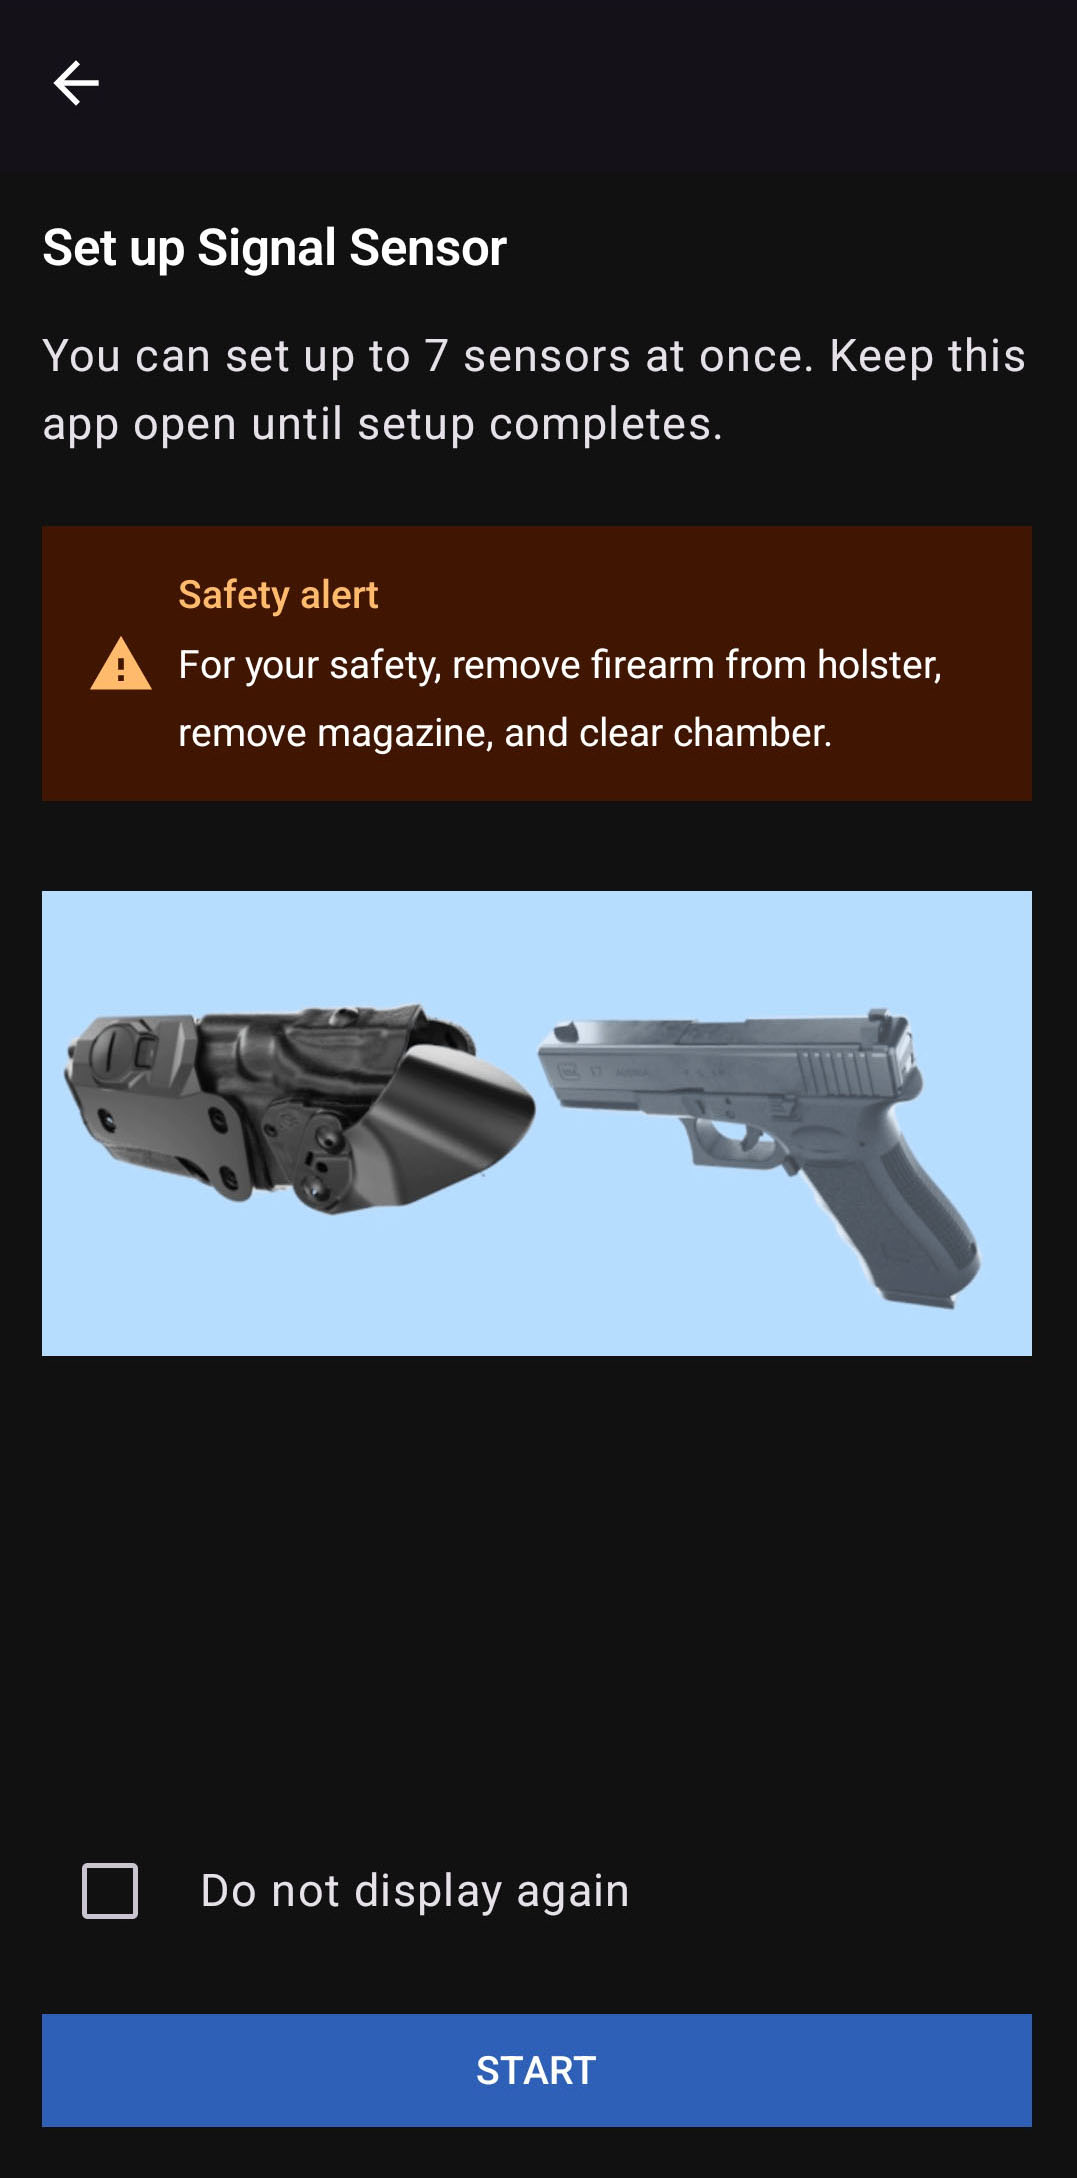
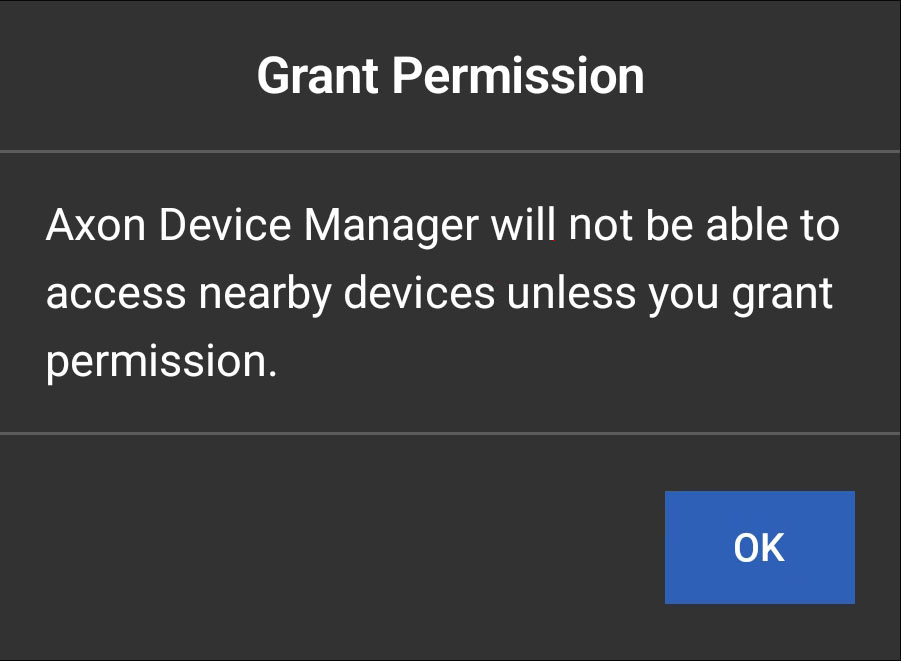
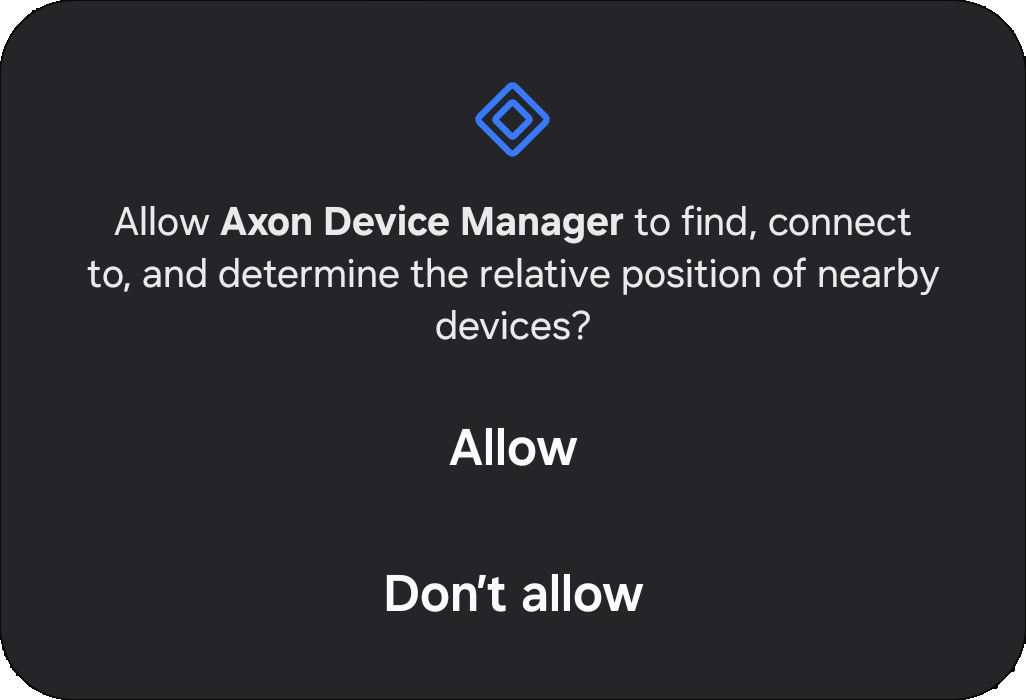
- If a message requests additional permissions to access nearby devices, tap OK and then Allow, then return here and continue.
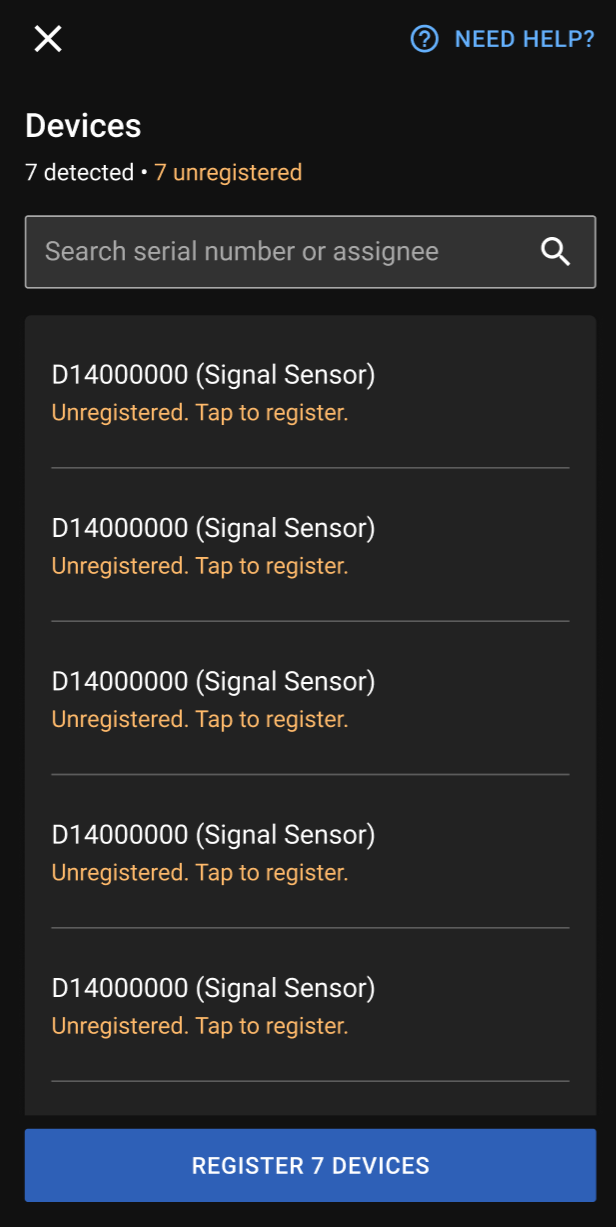
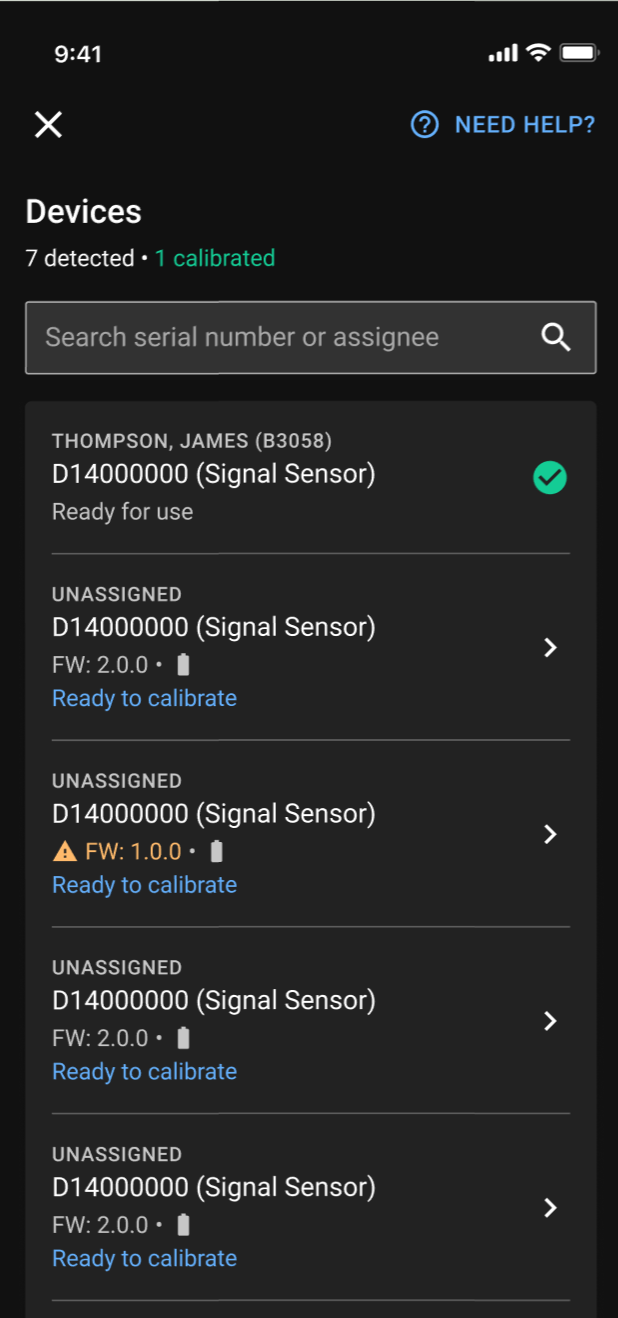
- Keep sensors within one meter of your phone. ADM lists detected devices and notes which ones need registration. Tap Register x Devices at the bottom, then Yes to confirm the agency you're signed into. Each device's status will change from Unregistered to Registering..., then Connecting..., then Synchronizing..., and finally Ready to calibrate.
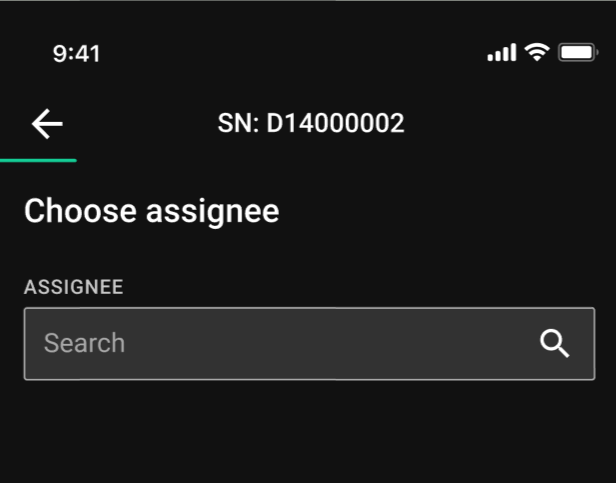
Assign user and equipment
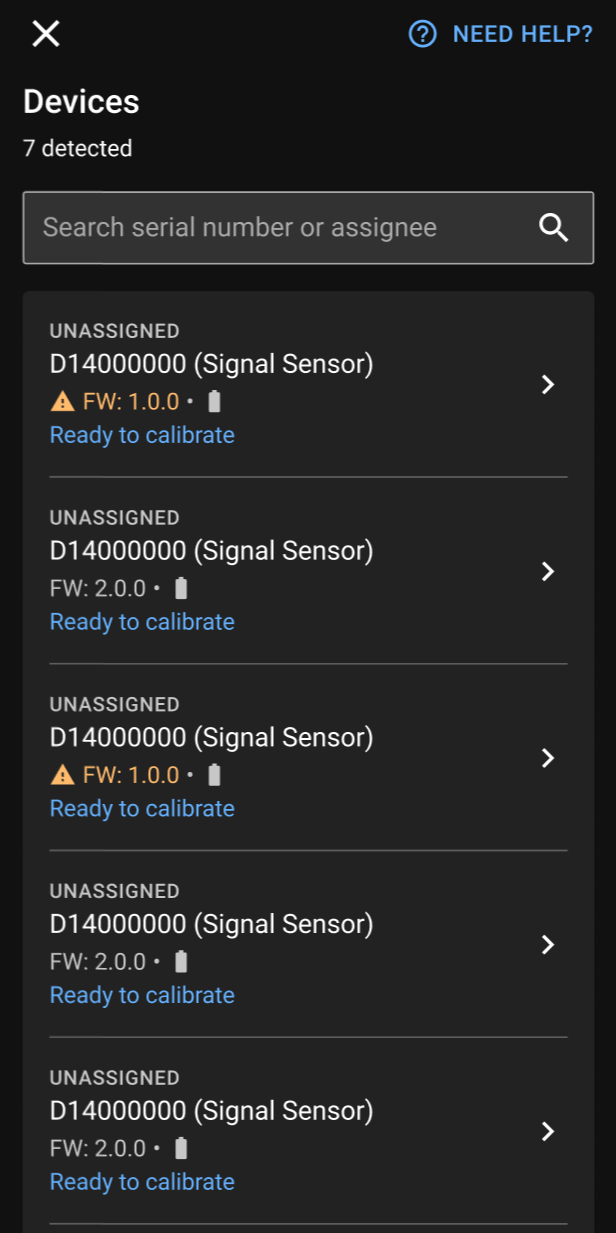
After a sensor finishes updating and ADM shows Ready to calibrate, tap it to continue.
- If the sensor is not already assigned to a user, do that now, otherwise skip to the next step. Tap one of the sensor tiles, tap in the Search field, enter the first few letters of a user name, then select it from the list and tap Return (not shown).
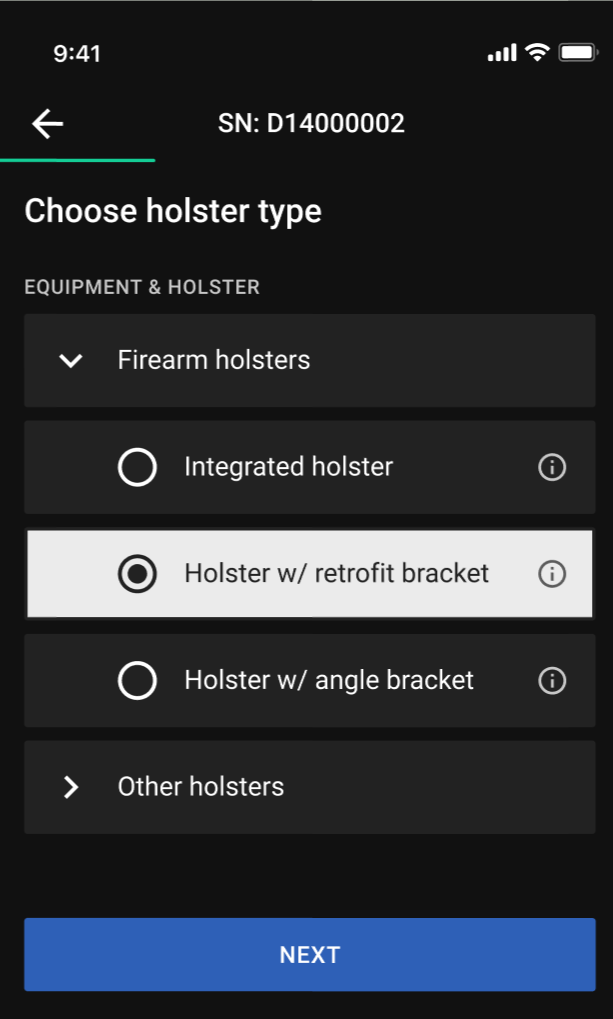
- Select the type of holster, then Next.
Calibration
This topic is normally for the armorer or admin who sets up Signal Sensors. For user guidance, see Operation.
The topic describes how to calibrate the sensor, which is best accomplished using Axon Device Manager (ADM), available from your app store (Apple or Android).
Also at the end of this topic:
For quick access to recalibrate: in Mute mode (press button for about five seconds), press the button twice to enter Setup mode and connect to ADM.
Calibrate
If the sensor is not yet registered and ready to calibrate, or if you haven't assigned a holster and user yet, see Setup. If a required sensor retrofit bracket isn't installed on the holster yet, see Installation. After these items are complete, continue below.
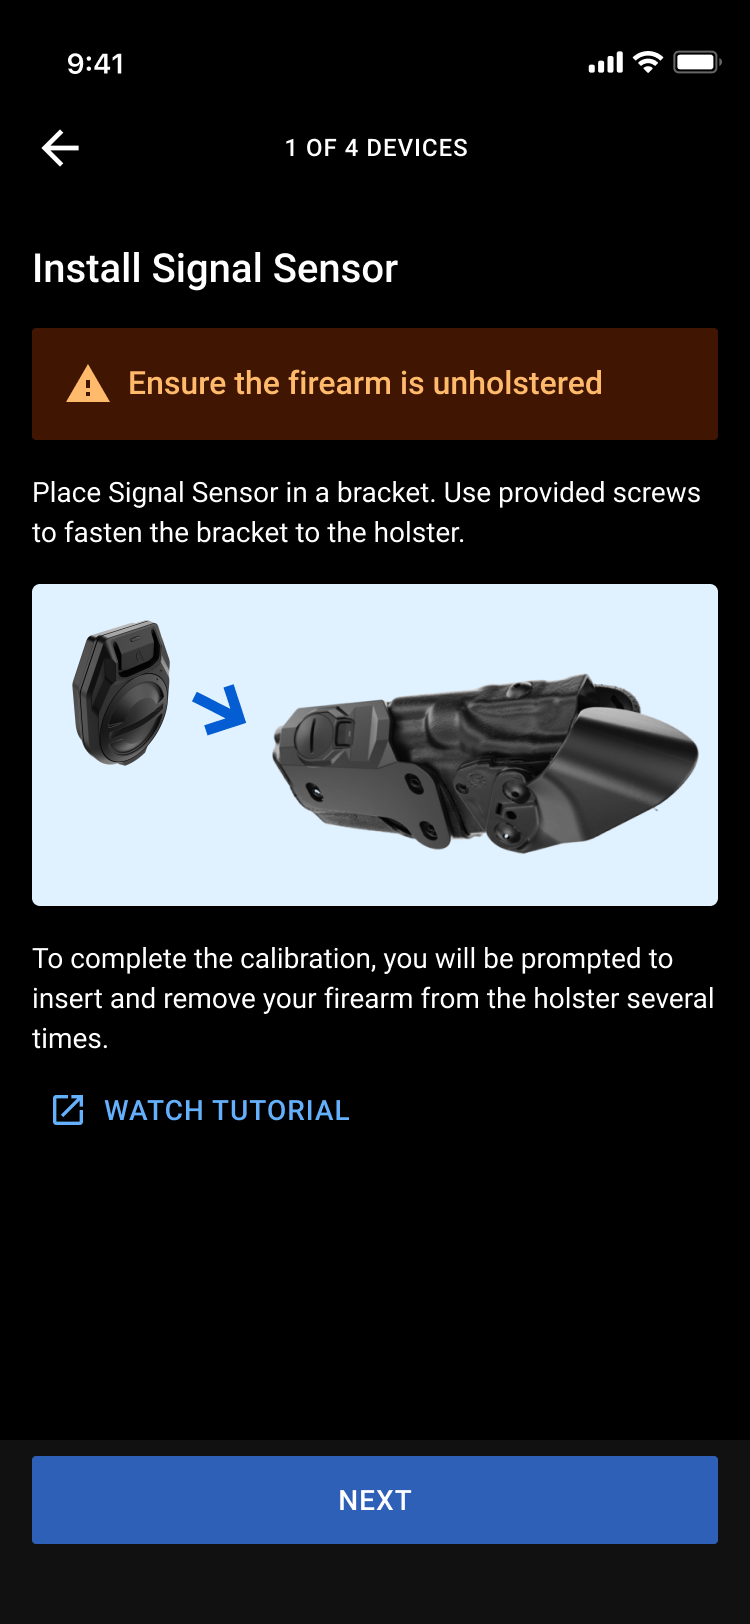
Ensure the firearm is unloaded during this process.
With a user and holster type assigned and the sensor retrofit bracket (if needed) installed on a holster, it's now time to calibrate.
- Install the sensor on a holster, then tap Next.
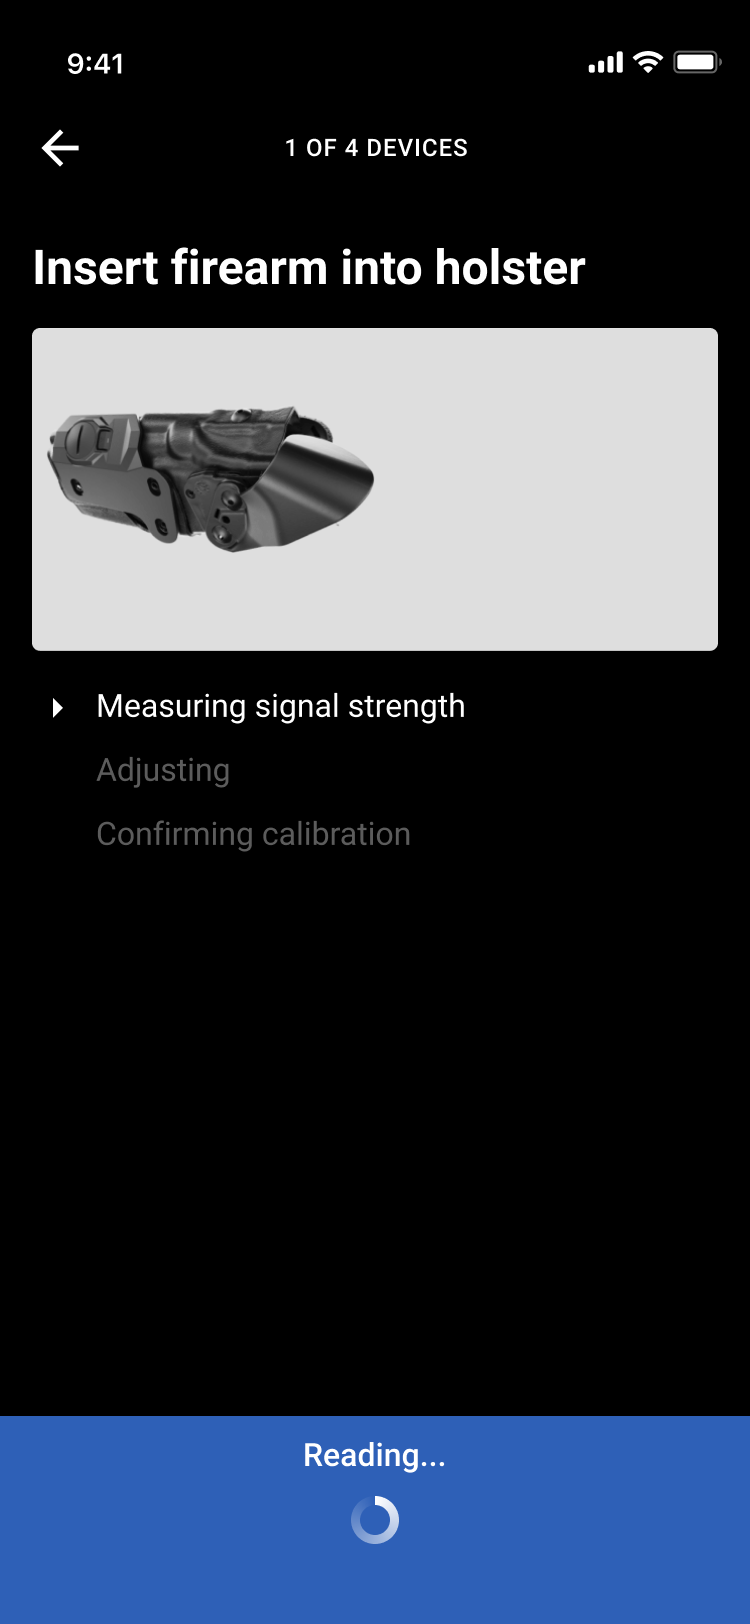
- ADM will instruct you to insert and remove the firearm from the holster several times so the sensor can calibrate itself to the two different states. When you remove the firearm, remove it entirely from the holster and keep it separate until instructed to re-holster it. When calibration is complete (second screen below), reholster the firearm and tap Back to Device List.
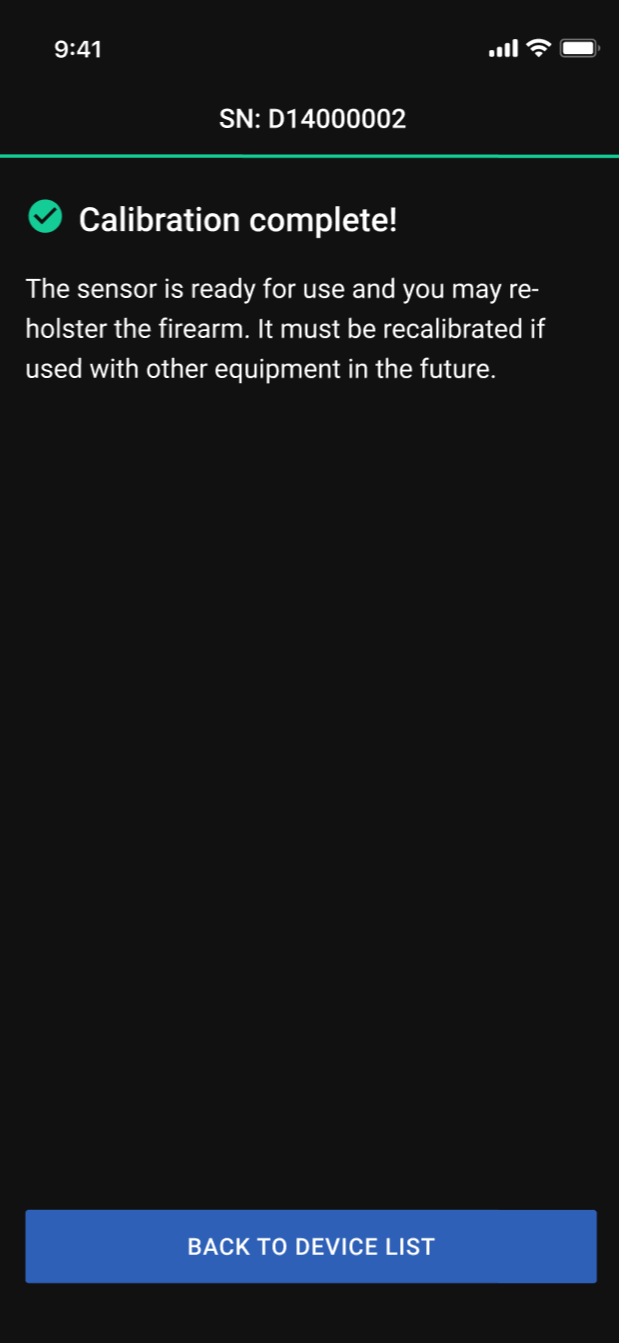
- Calibrated devices feature a green check mark. To calibrate another sensor, tap a tile showing Ready to calibrate and resume at step 1.
- Once all sensors are assigned and calibrated, setup is complete. Tap Exit.
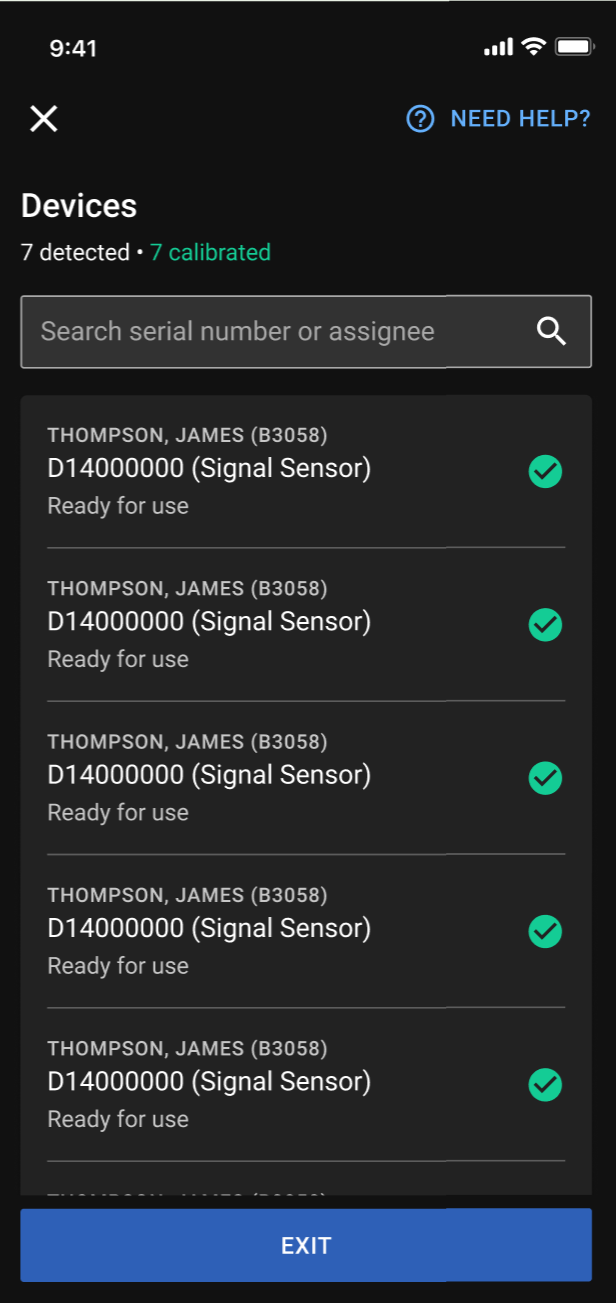
The sensors are now ready for use: registered, assigned, and calibrated.
Restart setup
To restart setup on a calibrated sensor:
- Press the button for about five seconds, then quickly double-tap the button until the LED blinks green to confirm entry into Setup mode.
- Continue with Start setup.
A sensor must be recalibrated if moved to a different device. For an uncalibrated sensor, simply Start setup.
Adjust these organization-wide settings of your sensors in Axon Evidence at Admin > Signal Sidearm and Signal Sensor. Select Edit ![]() to change an event, toggle a property on or off as required, and register sensors to users.
to change an event, toggle a property on or off as required, and register sensors to users.
If your agency uses Axon Body 2 or Axon Fleet 2 cameras, contact your Axon representative about Compatibility mode. If your agency does not use these cameras, this setting does not appear.