Profile actions
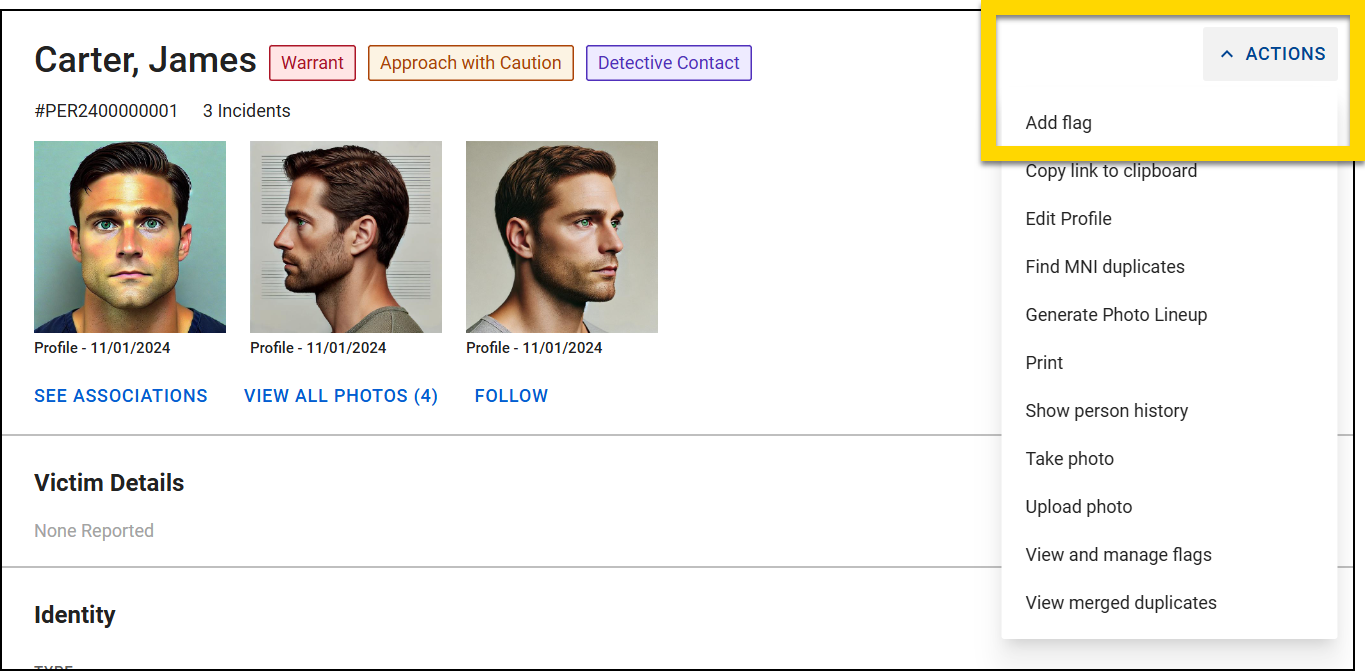
Profiles can be opened from Search or from within Report Writer. Once opened, the Actions menu in the profile header lets you take various actions on the profile. Some profiles contain additional actions, but every profile contains the following options:
- Add flag
- Copy link to clipboard (copy the profile URL to paste into another document/application)
- Print profile
- View and manage flags
Manage flags
Users with certain privileges can add one or more flags to a profile to visually alert other users to important information. 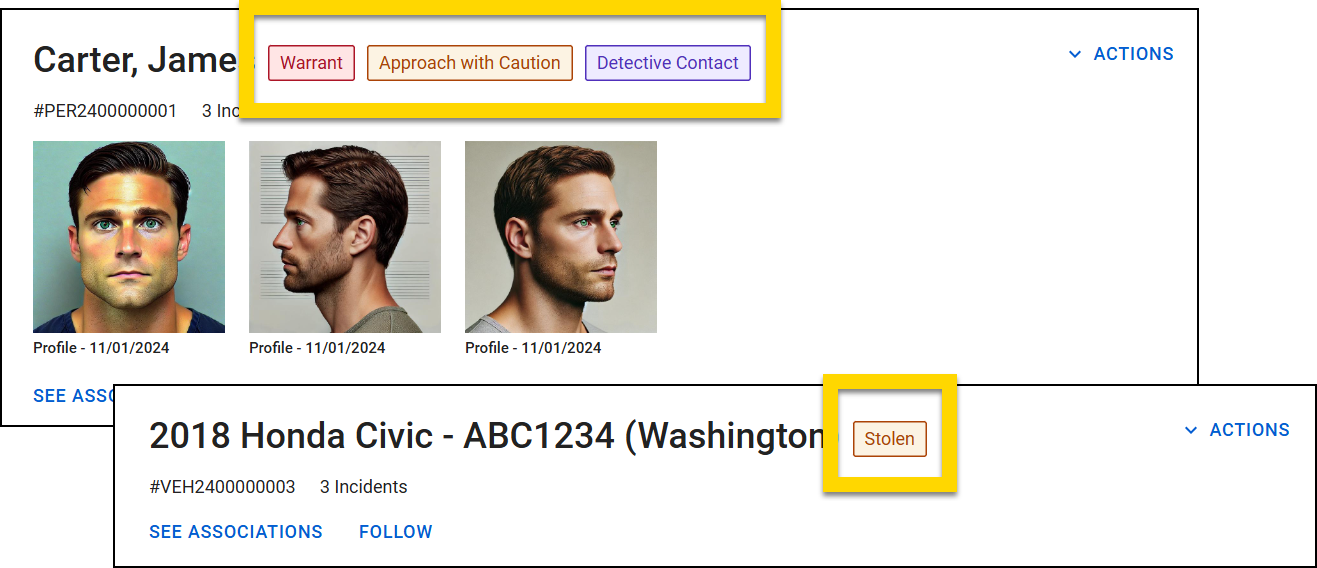
Flags also appear in Report Writer when you're searching to add an existing person, vehicle, etc. to a report. Hover over the flag name to view additional information.
You can add multiple flags to a profile. Flags are sorted from highest to lowest severity (high → medium → low) on a person's profile. Within each severity group, flags are sorted chronologically, with the most recently added flag appearing first.
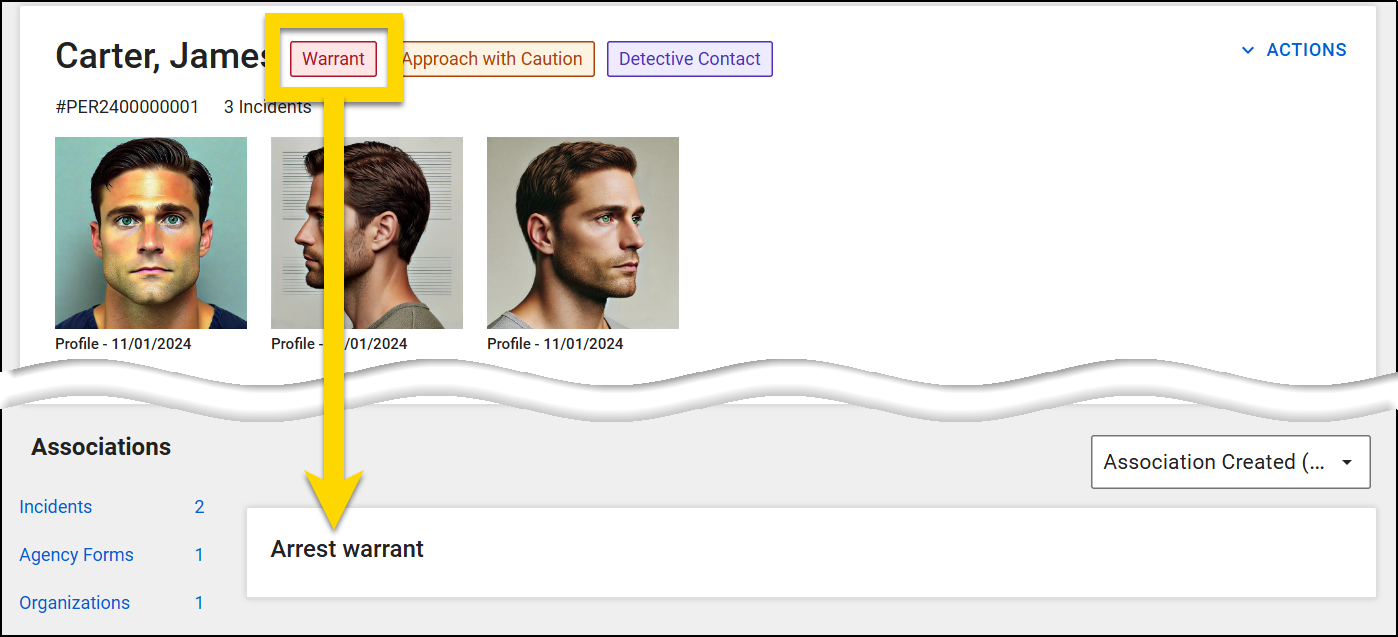
Flags can also be automatically added to a profile if that profile is added to a certain type of report. For example, a Warrant flag can be automatically applied to a person if they are added to a Warrant report. These flags are displayed in the associations section on profiles to indicate which report added the flag to that profile.
Administrators can create and manage flag categories (e.g., Approach with Caution, Deceased, etc.) from the Administrator Console.
Add a flag
Follow these steps to add a flag to a profile:
- Open the profile, either by using Search or opening a report to the section that contains the person, vehicle, etc. and selecting Actions > View Profile.
- From the profile, select Actions > Add Flag.
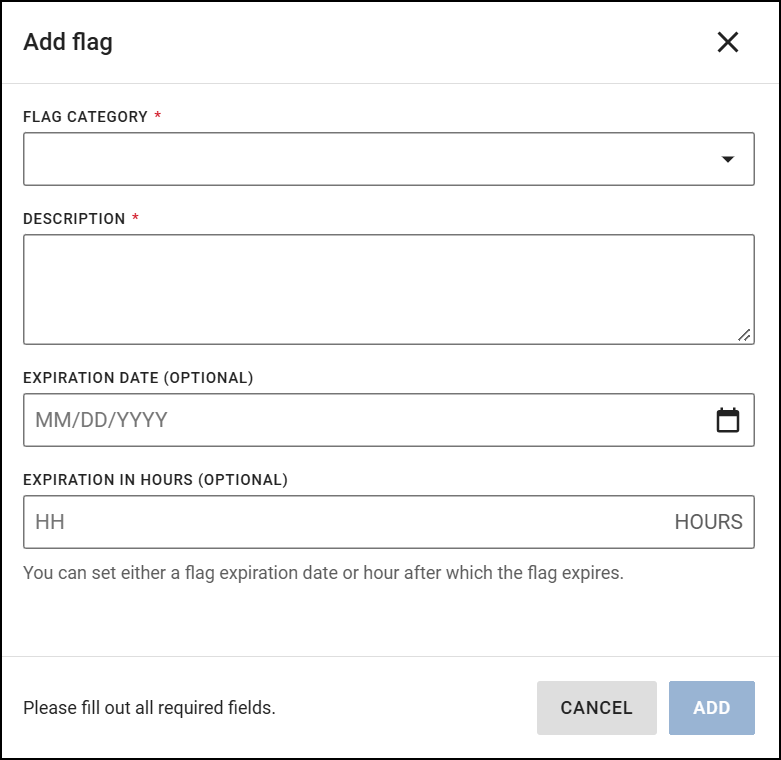
- In the Add Flag window that opens, choose an option from the Flag Category dropdown.
- In the Description box, enter information related to the flag. When other users open the profile and select the flag, they will see this information.
- Complete the Expiration Date and Expiration in Hours fields if the flag is temporary and should be removed automatically after a set time period.
- Select Add to apply the flag to the profile.
If your organization uses the Warrants module, Warrant flags are automatically added to people associated with a warrant. Additionally, some reports automatically add a flag to the people, vehicles, etc. that are added to the report. Contact your Axon representative to configure these types of reports for your organization.
Edit an Existing Flag
To edit the information for an existing profile flag:
- Open the profile.
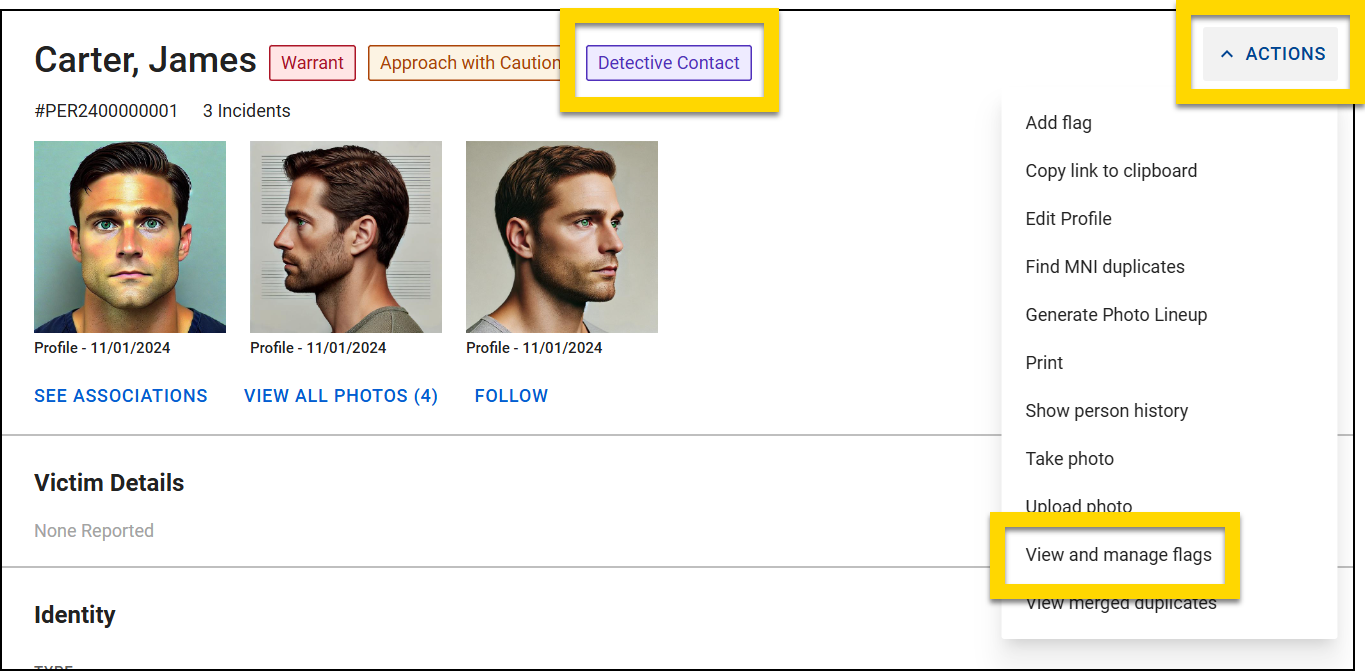
- From the profile, select a flag or Actions > View and Manage Flags.
- If the flag was added by a warrant or another report, the page scrolls down to the Associations section where you can open and adjust the warrant/report.
- If the flag was added directly to the profile, the Manage Flags window opens where you can select Edit on the flag you want to edit.
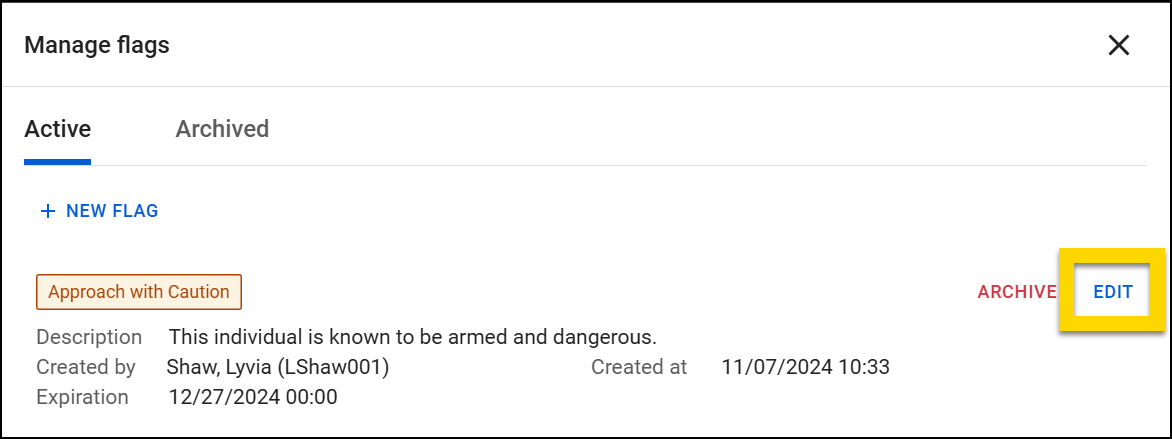
- Edit the flag information.
- You can change the flag category, description, or expiration dates/times.
- Select Save.
Remove a flag
To remove a flag from a profile:
- Open the profile.
- From the profile, select a flag or Actions > View and Manage Flags.
- If the flag was added by a warrant or another report, the page scrolls down to the Associations section where you can open and adjust the warrant/report.
- If the flag was added directly to the profile, the Manage Flags window opens where you can select Archive for the flag you wish to remove.
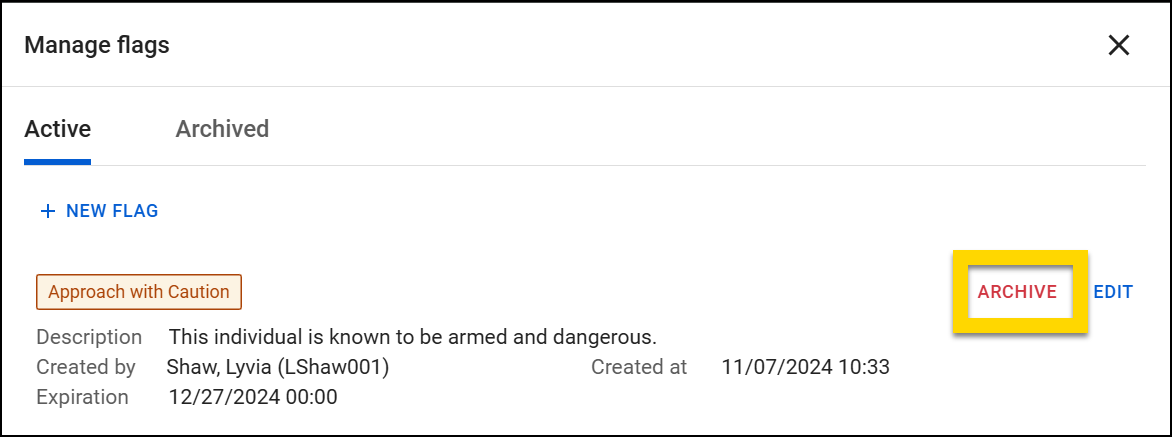
- In the confirmation message that appears, choose to either archive or delete the flag:
- Archive: Removes the flag from the profile but keeps a record that it had once been applied to the profile. Archived flags can later be deleted after they are archived.
- Delete: Removes the flag from the profile and permanently deletes any record that it had ever been applied to the profile.
View archived flags
To view previous profile flags that have expired or been archived:
- From the profile, select Actions > View and Manage Flags.
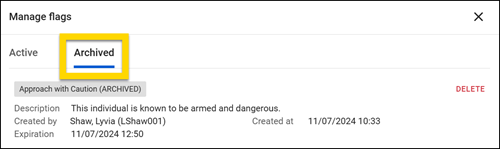
- Select the Archived tab.
- All details about the flag, including description, created by, create date/time, and expiration date/time are displayed.
Print profiles
You can print the profile for any citizen or vehicle by opening the profile and selecting Actions > Print Profile. For information about printing reports, see Print Reports, Incidents, and Events.
The following information is included on each printable PDF for each profile type.
Citizen profiles
When printing a profile, use the checkboxes to indicate which information should be included in the printout. Options include:
- Profile page
- Include historical changes
- All involvements
- Includes involvements in in-progress reports
Although person profiles in Axon Records and citizen profiles in Axon Standards look similar, the databases are separate. The same person may have a profile in Axon Records, and a different profile in Axon Standards. The Axon Records person profile only includes information that has been added to Axon Records reports, and the Axon Standards citizen profile only includes information that has been added to Axon Standards reports.
Vehicle profiles
The following information is included in vehicle profile printouts:
- Vehicle details (make, model, year, color, etc.)
- Involvements (which, if any, incidents the vehicle is associated with)
Although vehicle profiles in Axon Records and Axon Standards look similar, the databases are separate. The same vehicle may have a profile in Axon Records, and a different profile in Axon Standards. The information in the Axon Records vehicle profile only includes information that has been added to Axon Records reports, and the Axon Standards vehicle profile only includes information that has been added to Axon Standards reports.
Officer profiles
Officer profiles can't be printed.