Additional actions
Once a report, event, or case has been created, you can take various management actions from the More actions [...] menu in the top right corner of the report, including:
- Link related items
- View report history
- Copy information between reports
Print reports
Users with the appropriate privileges can print reports, incidents, events, and cases.
To print a single report:
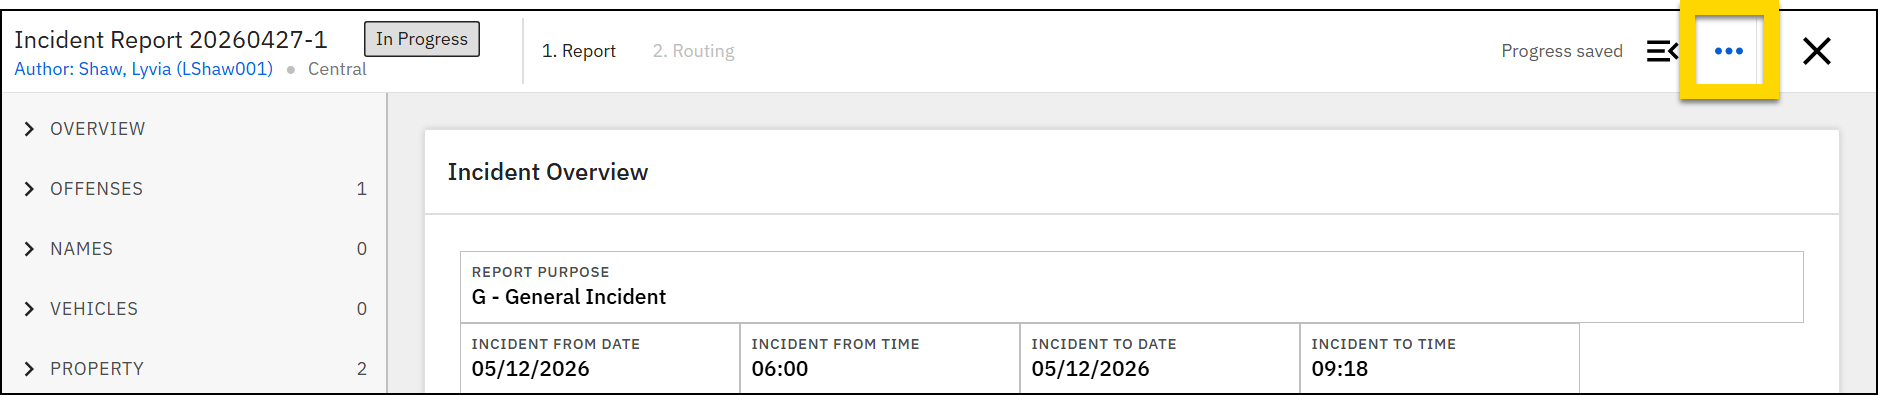
- Open the report in Report Writer.
- In the top right corner of the report header, select More actions [ ... ] > Print report.
- Based on your organization's configuration, reports may have multiple print options, which each include different information from the report.
- Adjust the following settings. Note that some of these options may not appear for certain report types, and users must have certain privileges to adjust these settings.
- Print as a DOCX file: Select this checkbox to print the report as a DOCX file rather than a PDF. Contact your Axon representative for more information about this feature.
- Settings: Choose whether to include narrative images, restricted information, or the approval log in the printout.
- Header: Can be omitted, appear on all pages, or appear on just the first page.
- When you include a header in your printout, your organization's logo appears in the top right corner. This logo can be managed from your Organization Profile in the Axon Evidence Admin Console.
- Footer: Can be omitted, appear on all pages, and optionally include page numbers.
- Provide Auditing details, which include recipient details and the purpose of the print.
- Select Next.
-
If you need to redact anything before printing, select Yes then Start redaction. If you are not redacting anything, select Print.
- See Redaction for more information.
- The file loads in a new browser tab where you can download and print it.
When you include a header in your printout, your agency's logo appears in the top right corner. This logo can be managed from your Agency Profile in the Axon Evidence Admin Console.
Print events, cases, and investigations
To print an event, case, or investigation, follow these steps:
- Open the case or investigation profile.
- Open the More actions menu and select:
- Events and cases: Print event
- Investigations: Print investigation
-
In the Documents section, indicate which content to include:
- For events, you can include:
- Event reports: Indicate which reports to include.
- File list: If selected, a list of all file names that have been added to the case are included in the printout.
- Activity log: Includes all actions taken on the event.
- In addition to the items listed above, for cases or investigations, you can include:
- Case or investigation summary
- Case or investigation documents
- Tasks
- Indicate if the printout should include a list of case tasks, or details for each task.
- Optionally include incomplete tasks.
- Set the order in which the tasks should be listed in the printout. Sort options include Task, Assignee, Status, Created at, Due date, and Completed at.
- For events, you can include:
- In the Settings section, optionally adjust the following items. Note that users must have certain privileges to adjust these settings.
- Show table of contents: Includes a list of all sections in the printout with a header that gives basic details about the case.
- Show images in narratives: Includes images that have been inserted inline into the narratives.
- Show restricted information: If restrictions have been applied, this option includes restricted information that you have privileges to view. Optionally include this restricted information on a separate page.
- Show approval log: Details of the report approval process.
- Start each narrative on a new page: Inserts a page break at the start of each narrative.
- Adjust the Header and Footer:
- Header: Can be omitted, appear on all pages, or appear on just the first page.
- When you include a header in your printout, your organization's logo appears in the top right corner. This logo can be managed from your Organization Profile in the Axon Evidence Admin Console.
- Footer: Can be omitted, appear on all pages, and optionally include page numbers.
- Header: Can be omitted, appear on all pages, or appear on just the first page.
- Provide Auditing details, which include recipient details and the purpose of the print.
- Select Next.
- Use the Sort reports and documents by and the Order fields at the top to set the order in which items appear. Sort options include:
- Document type
- Name (if custom names have been created for any of the items)
- Date and time created
- Select Next.
- If you need to redact anything before printing, select Yes then Start redaction. If you are not redacting anything, select Print.
- See Redaction for more information.
- The file loads in a new browser tab where you can download and print it.
Link reports to an incident or event
To link a standalone (non-incident report) Axon Records report, like a Field Interview, to an incident or event (if your organization uses Axon Standards):
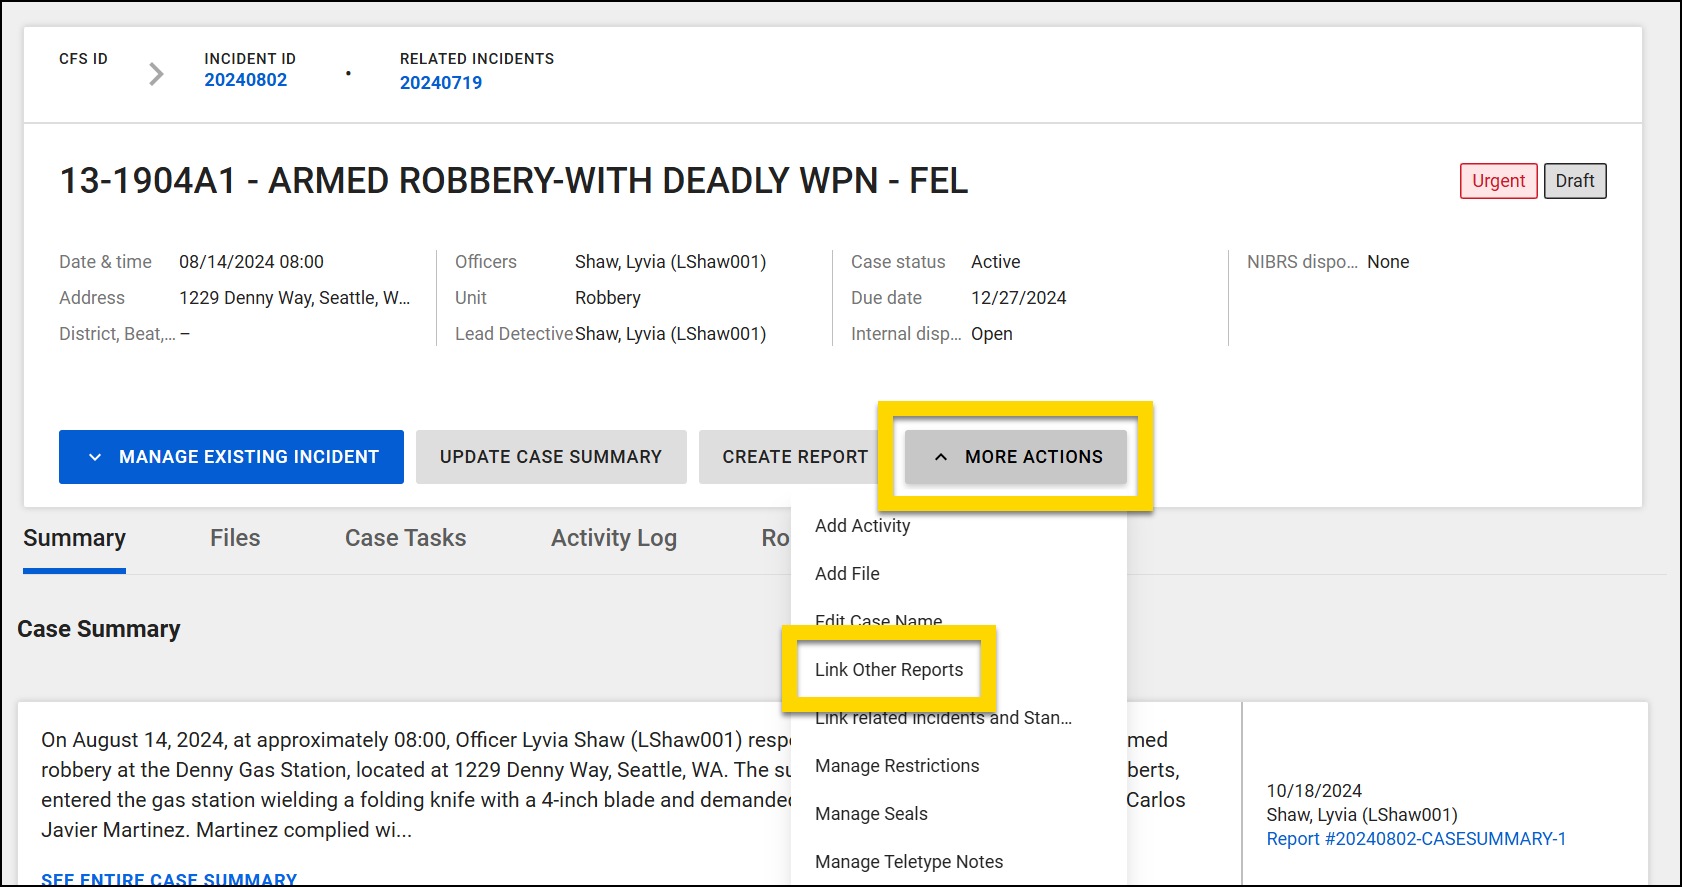
- Open the incident you want to link the report to and select More actions > Link other reports.
- This option does not appear on Axon Standards event profiles. Instead, link a report to the event by opening the report in Report Writer (explained below).
- This option does not appear on Axon Standards event profiles. Instead, link a report to the event by opening the report in Report Writer (explained below).
- Use the search box to search for the Report ID of the document you want to link.
- Select Link.
You can also perform this action while viewing the report:
- Open the report in Report Writer.
- In the top right corner of the report header, select More actions [...] > Manage related incidents.
- Search for the incident or event (if your organization uses Axon Standards).
- Select the incident or event you wish to link and press Enter on your keyboard to create the link.
- Linked incidents and events appear below the search bar.
- Select Save to finalize your changes.
Linked reports appear at the bottom of the incident profile in the Related documents section. Unlink a report by selecting More actions [...] > Unlink from incident.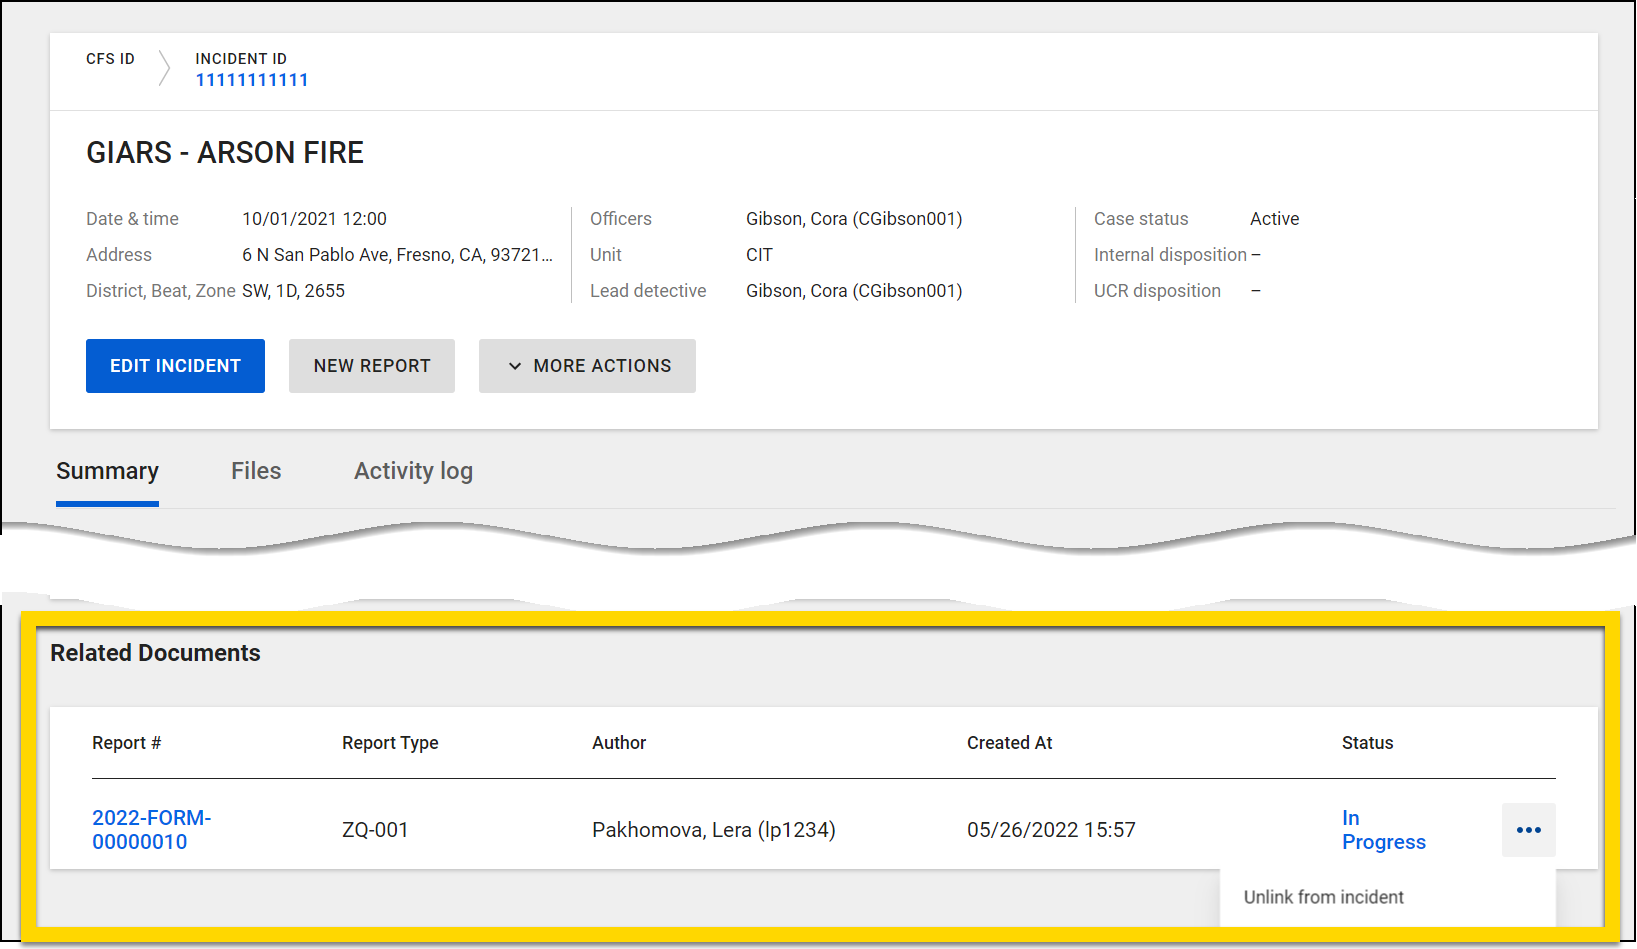
You can also remove a link by opening the report in Report Writer, selecting More actions [...] > Manage related incidents. Select Unlink > Save.
Link incidents and events
To link related events, or to link an incident to an event (if your organization uses both Axon Records and Axon Standards):
- Open an event and select More actions > Link related events.
- If your organization uses both Axon Records and Axon Standards, this option appears as Link related incident reports and Standards events.
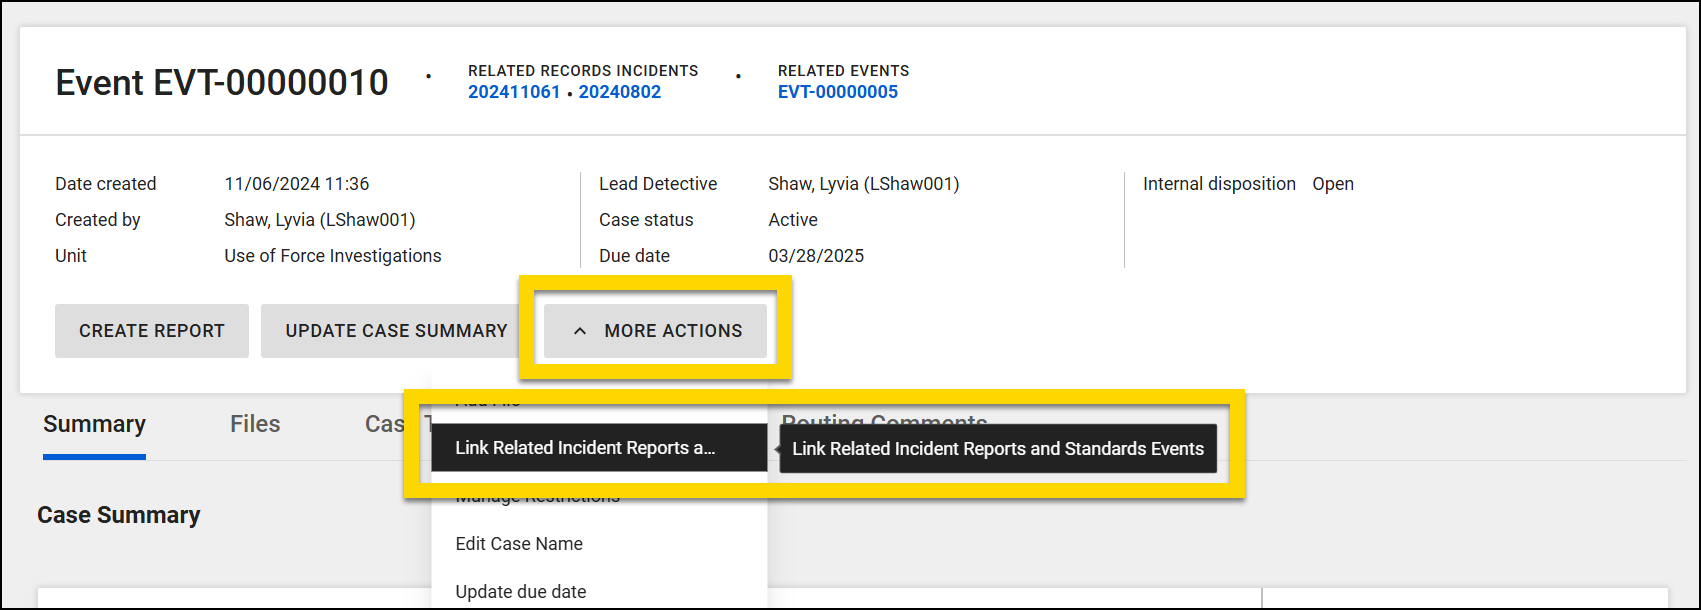
- If your organization uses both Axon Records and Axon Standards, this option appears as Link related incident reports and Standards events.
- Enter the Incident or Event ID you want to link to in the search box.
- Select the incident or event you wish to link and press Enter on your keyboard to create the link.
- Linked incidents and events appear below the search bar.
- Select Save to finalize your changes.
Related incidents and events appear at the top of the profile. Select the blue ID to open that profile in a new browser tab.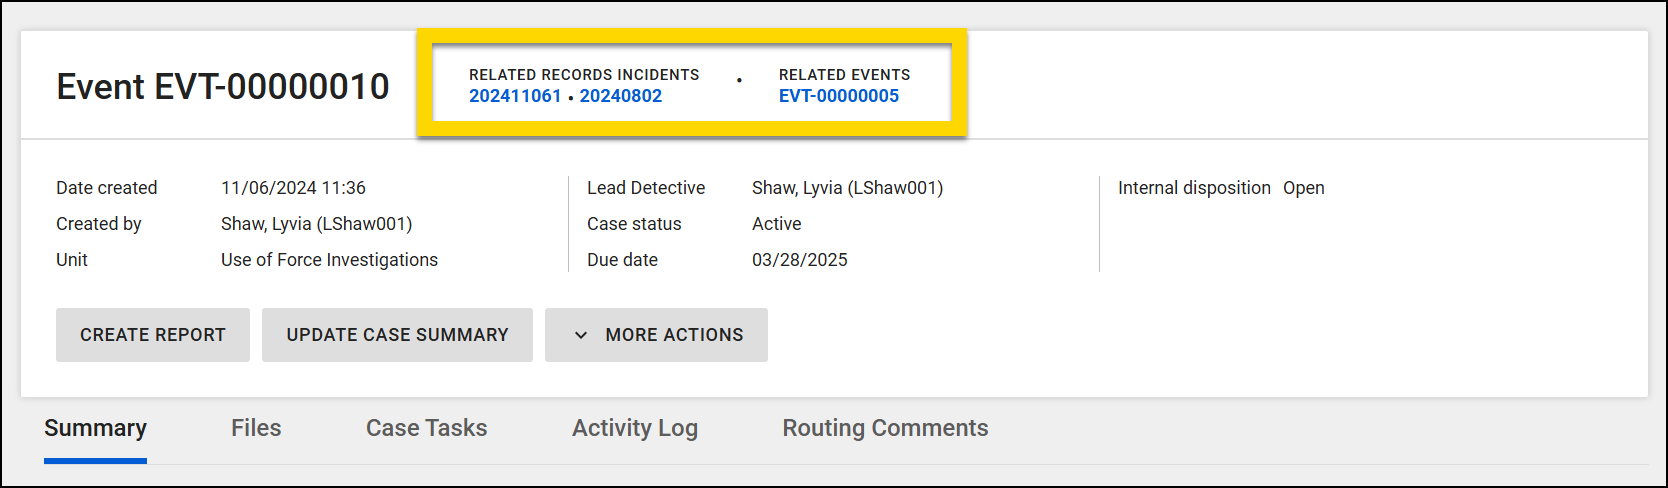
To remove links, select More actions > Link related events. Select Unlink to remove a link, then Save to finalize your changes.
View report history
To view a log of all actions taken on a report, select either the author name in the top left corner or More actions […] > View report history in the top right corner.
Copy information to a new report
You can copy report information from an existing report into a new one. Information can be copied between different report types (e.g., from a Vehicle Pursuit report to a Vehicle Collision report).
This feature can only copy information from an existing report to a new report if the fields in both reports are named and configured the same way. For example, if the Location type field in the existing report is a dropdown field, the Location type field in the new report must also be a dropdown field (with the same name).
If your organization uses both Axon Records and Axon Standards, you can only copy information within the same database. For example, you can copy information from an Axon Standards reports to a new Axon Standards reports, but you cannot copy information from an Axon Standards report to an Axon Records report.
To copy information into a new report:
- Open the existing report.
- In the top right corner of the report header, select More actions [...] > Copy info to new report.
- Choose the type of report you want to create.
- The new report will be added to the same event as the report you are copying from and appear in the Reports section on the event profile.
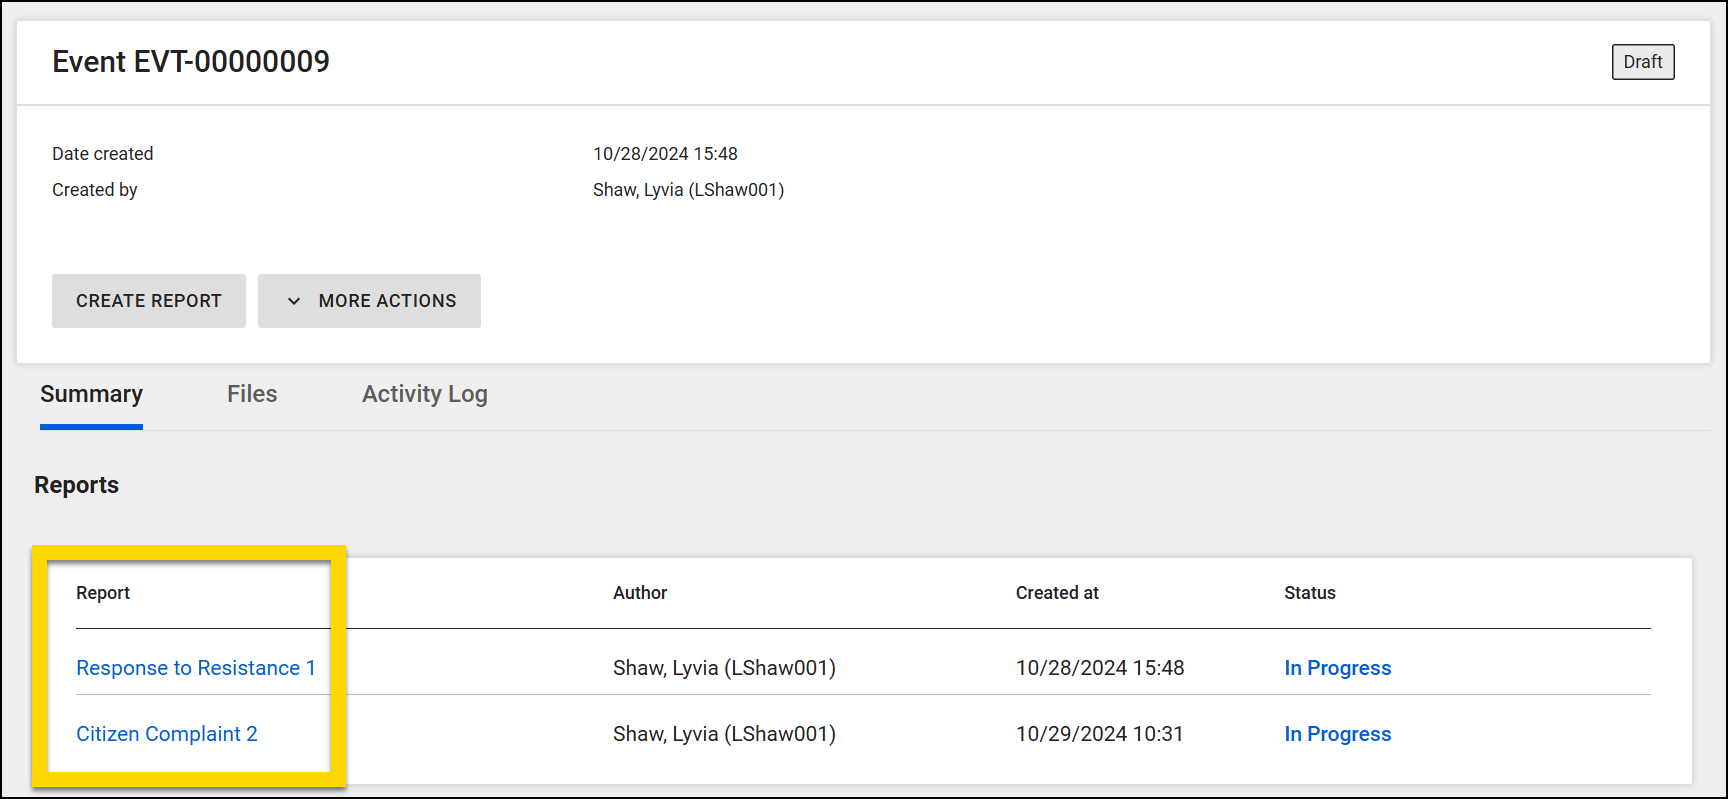
- The new report will be added to the same event as the report you are copying from and appear in the Reports section on the event profile.
- Select Preview info.
- Use the checkboxes to select which information will be copied into the new report.
- Some sections will be grayed-out and unselectable if a corresponding section does not appear in the new report (e.g., The existing report has a Vehicles section, but the new report you selected does not.).
- Select Create report.
- The new report opens in a new tab where you can review the copied information and complete all remaining fields.