Seals
Axon Records has two mechanisms for clearing information from a person's record:
- Sealing: Hiding information
- Expunging: Permanently deleting information
When sealing or expunging, you can hide/delete entire incidents or parts of the incident, such as PII, arrests, or charges. You can also seal or expunge standalone reports other than incident reports, such as Field Interviews, Citations, etc.
Both sealing and expunging can only be performed as mandated by a court order. Seals can be lifted (temporarily made visible) or removed entirely, but expunged information is permanently deleted and cannot be recovered.
If information instead needs to be hidden from general Axon Records users, rather than being cleared from a person's record, the restriction functionality should be used.
When a seal is applied to an incident, a non-incident report, or sections of a report, the sealed information is hidden from general users. Seals do not delete the data and can be lifted or removed at any time by a highly authorized individual under a court order.
Users must have specific privileges to apply, lift, and remove seals. All actions related to seals are tracked in the audit log.
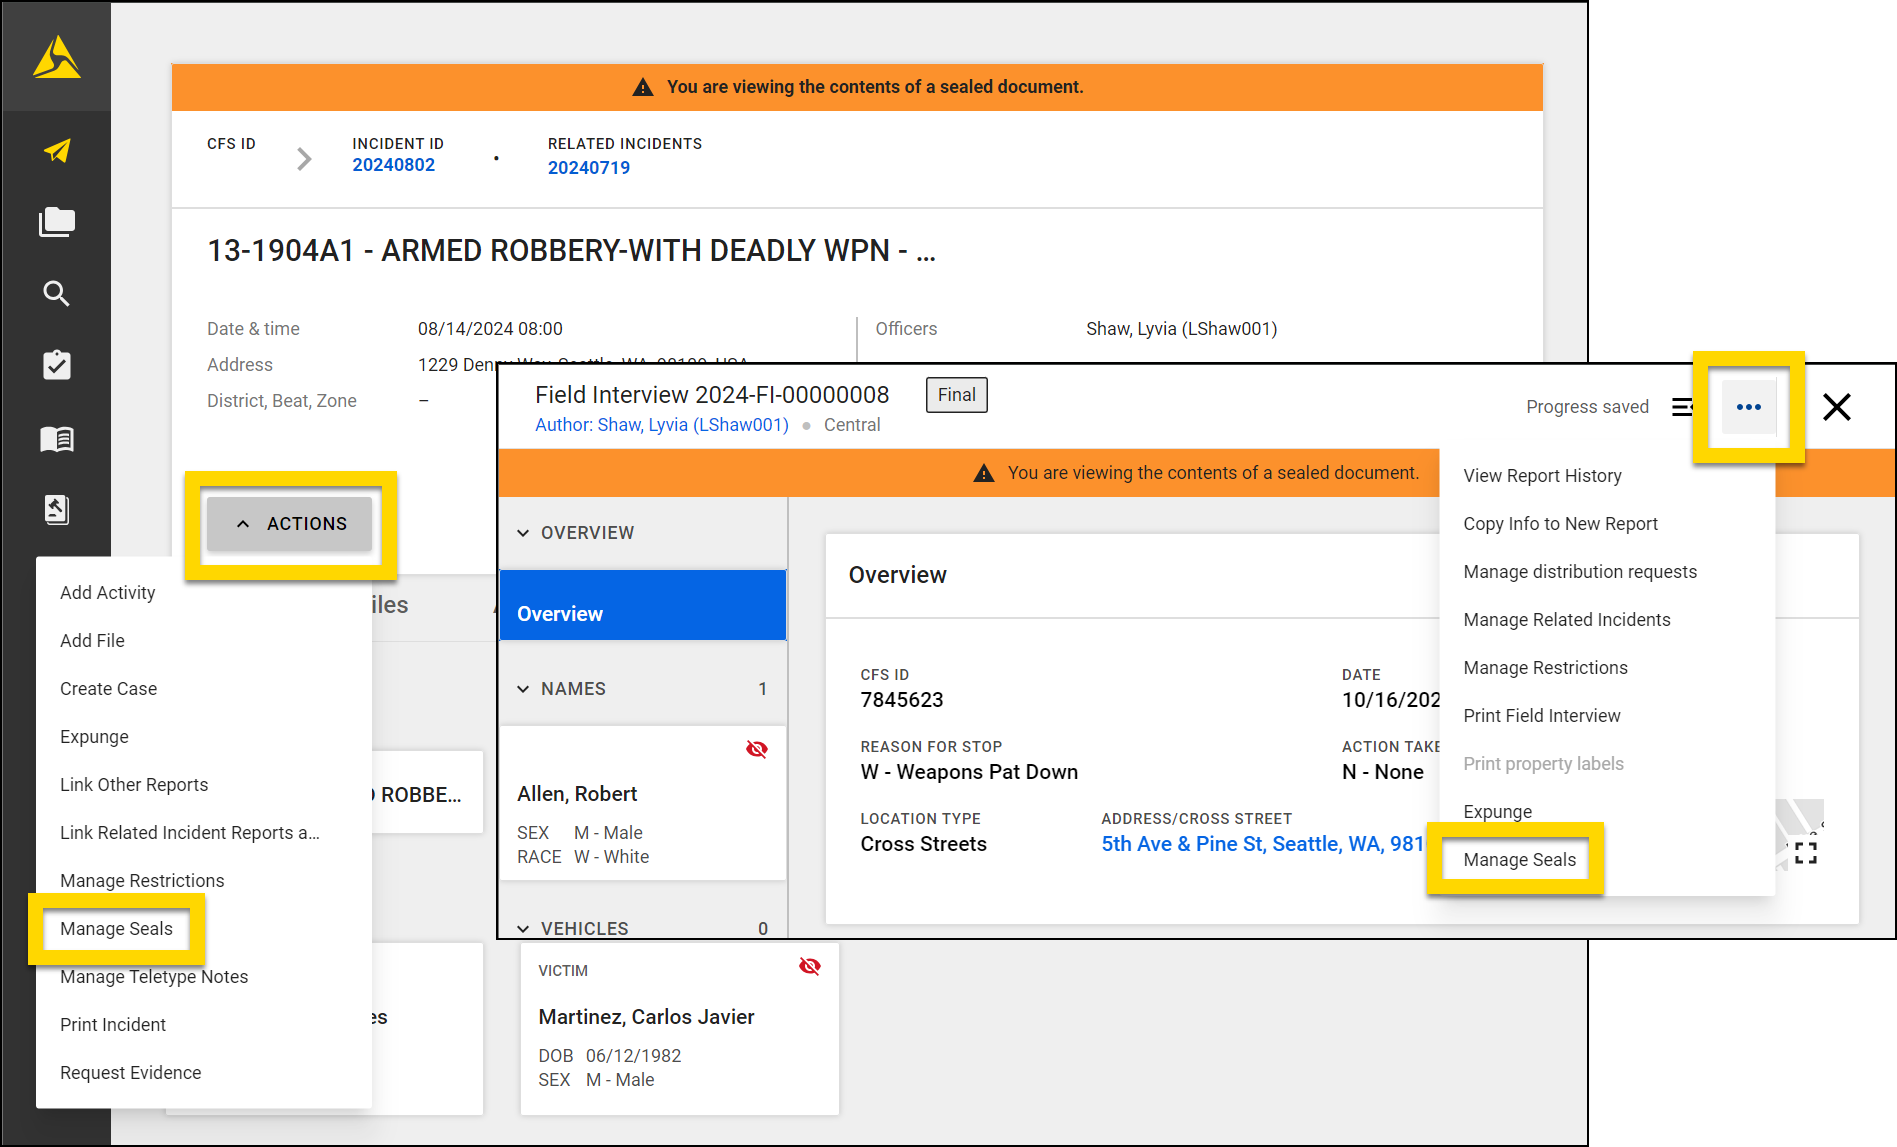
Sealed incidents and reports still appear in Search results, but banners appear indicating that they have been sealed. When portions of an incident or report are sealed, an orange banner appears at the top of the incident profile or report, notifying users that portions of the incident are sealed.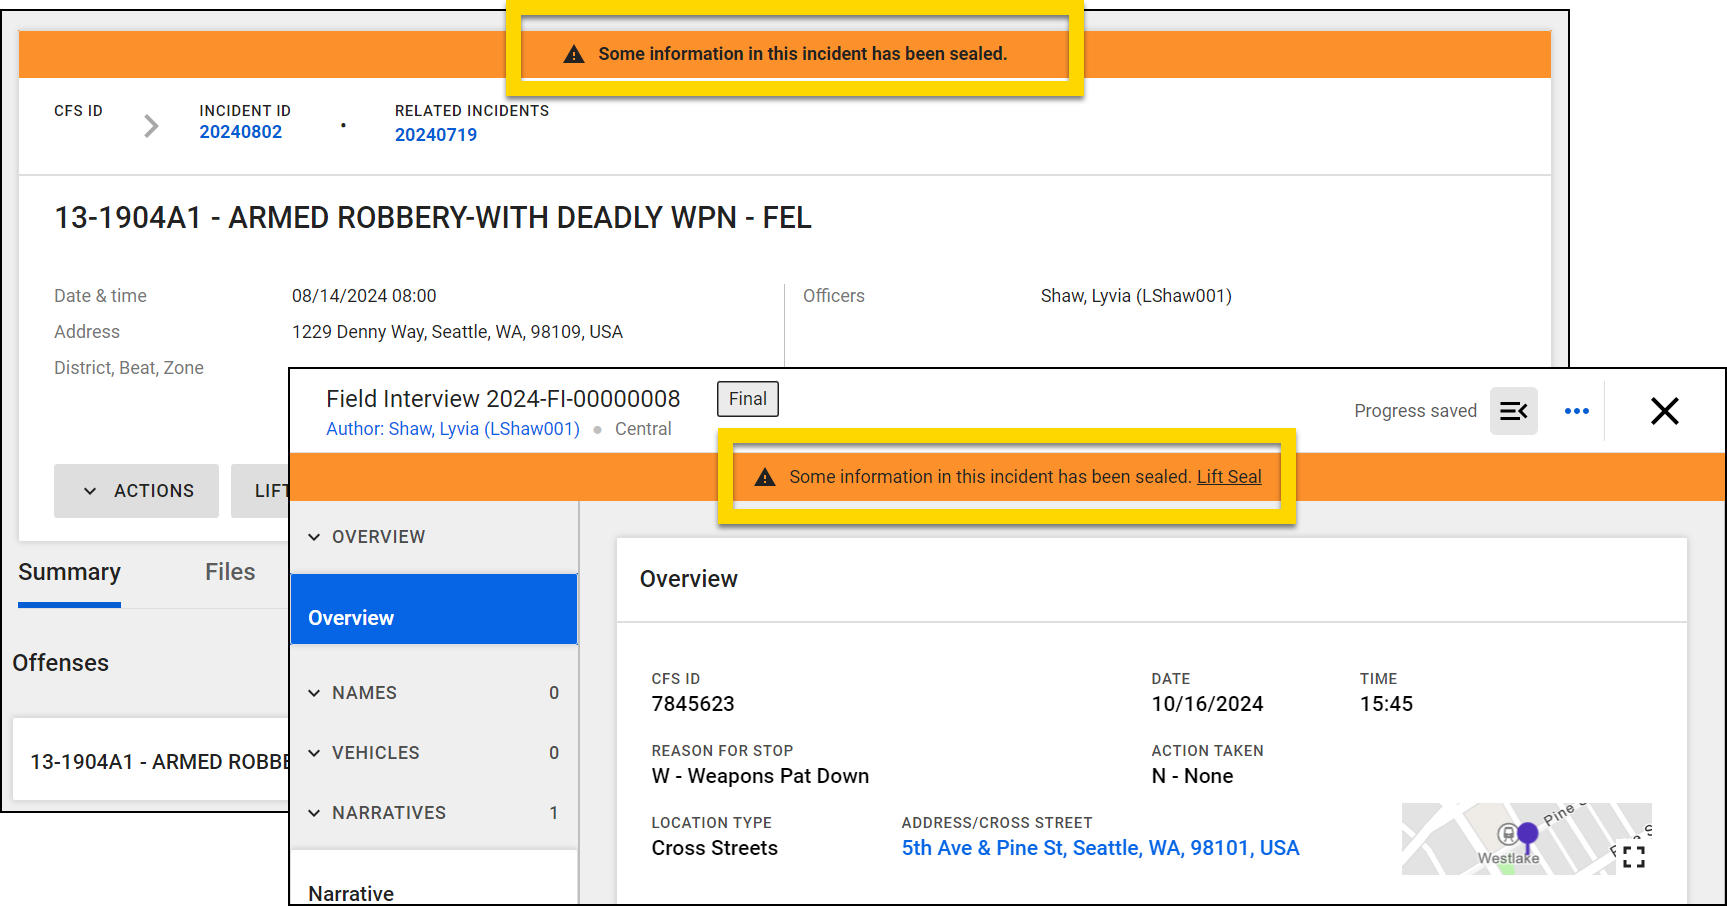
When an entire incident or report is sealed, users can only see the Incident or Report ID. Users with the appropriate privileges see the option to lift the seal.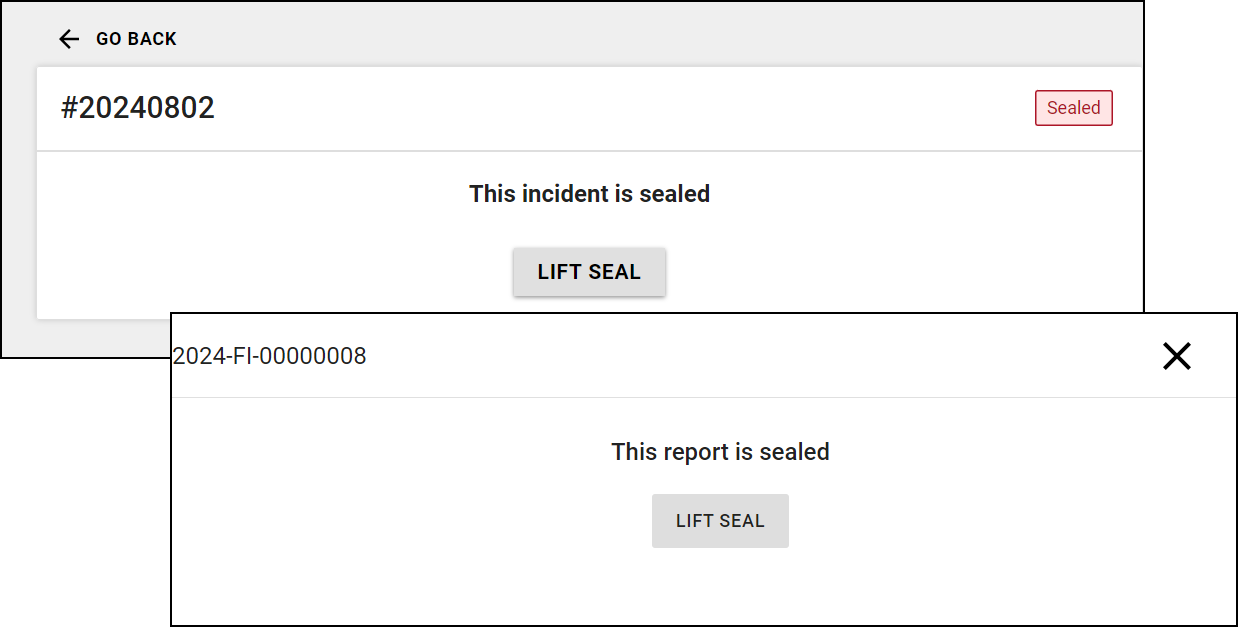
Apply seal
Seals can be applied to incidents or standalone reports, such as Field Interviews. An incident can only be sealed once all reports in the incident are finalized. Similarly, a standalone report must also be finalized before it can be sealed.
To apply a new seal:
- Open the incident profile or report and select More Actions > Manage Seals.
- If a standalone report is linked to an incident, the Manage Seals option does NOT appear in the report's More Actions menu. The report can instead be sealed from the incident profile.
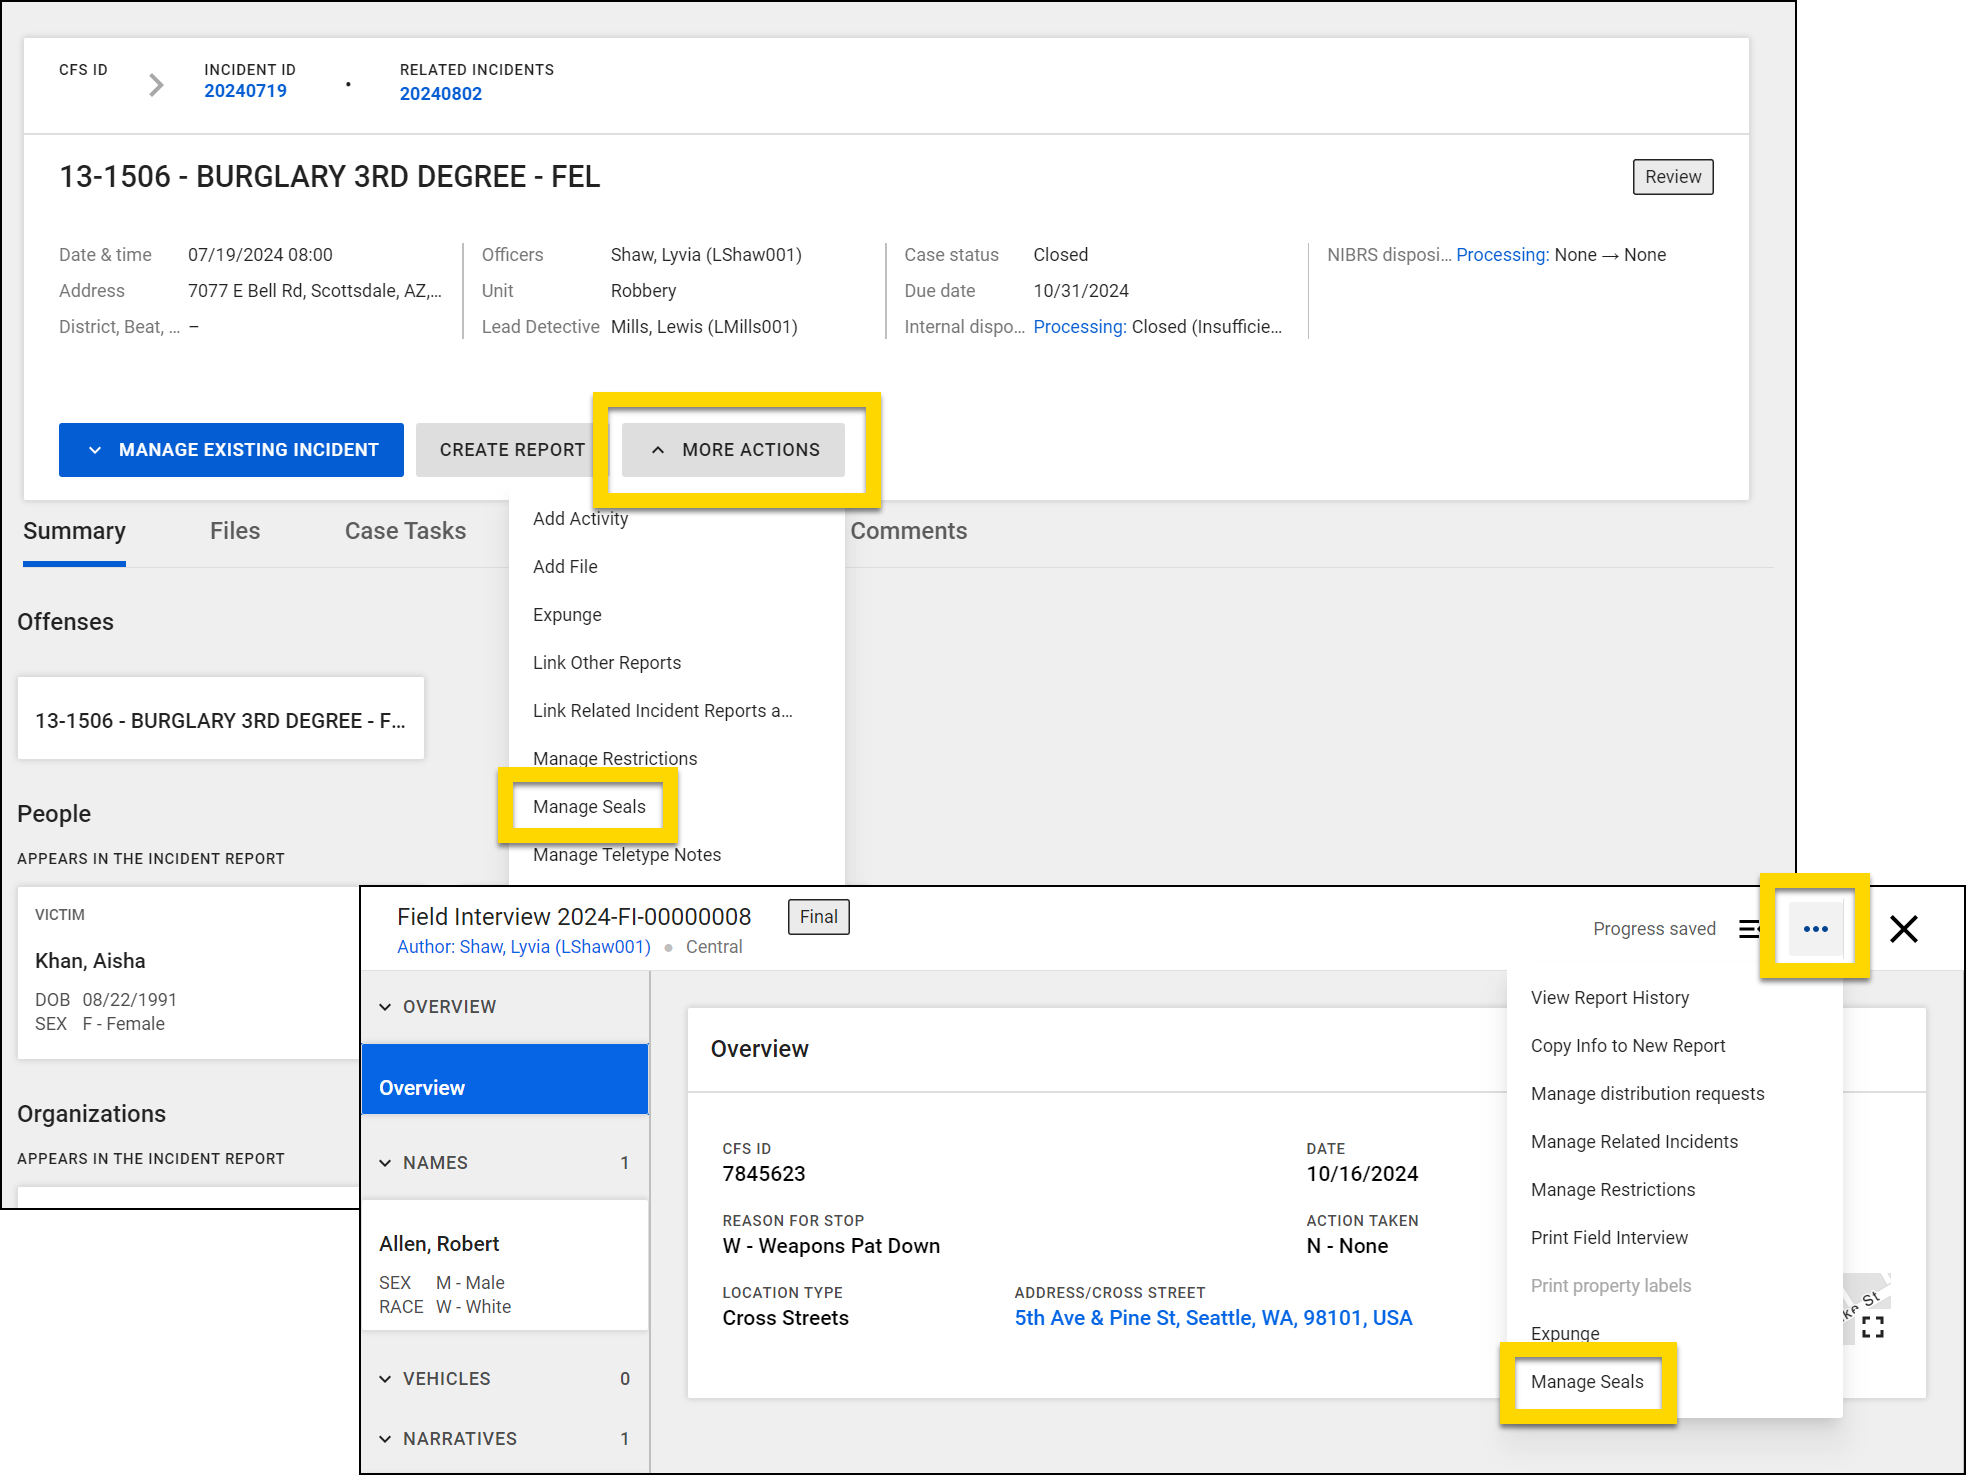
- If a standalone report is linked to an incident, the Manage Seals option does NOT appear in the report's More Actions menu. The report can instead be sealed from the incident profile.
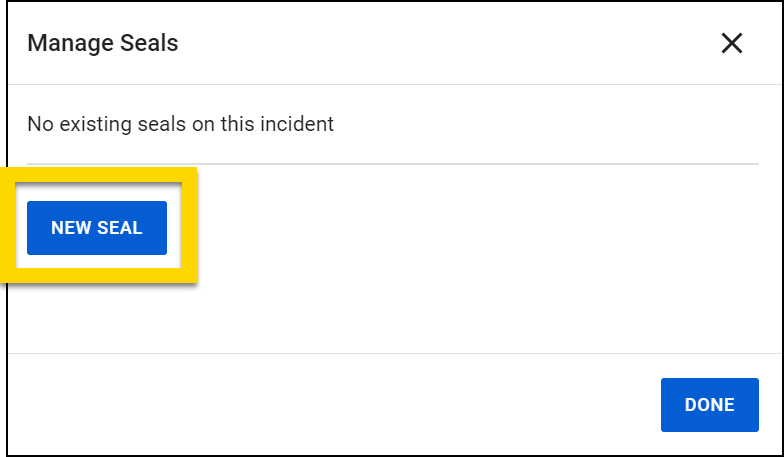
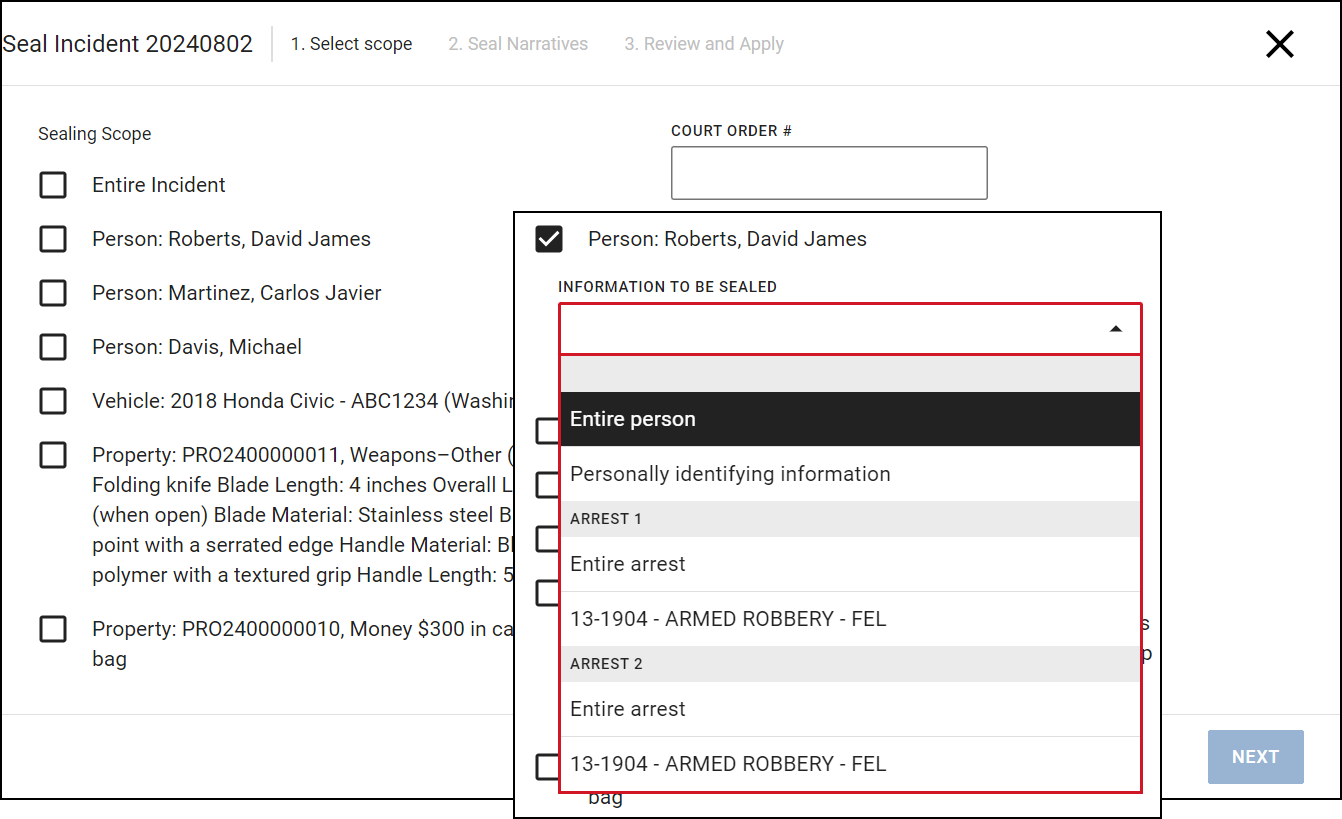
- Select New Seal.
- Use the checkboxes to select information to include in the seal (entire incident/document, people, vehicles, property ,etc.).
- The options include all people, vehicles, evidence files, property items, etc. that have been added to all the reports associated with the incident.
- If you select a person, you can specify whether you want to seal all information about the person, personally identifying information (PII), arrest information, or specific charges. PII includes a person's identity, aliases, identifying documents, and contact information.
- Enter a Court Order number.
- Select Next.
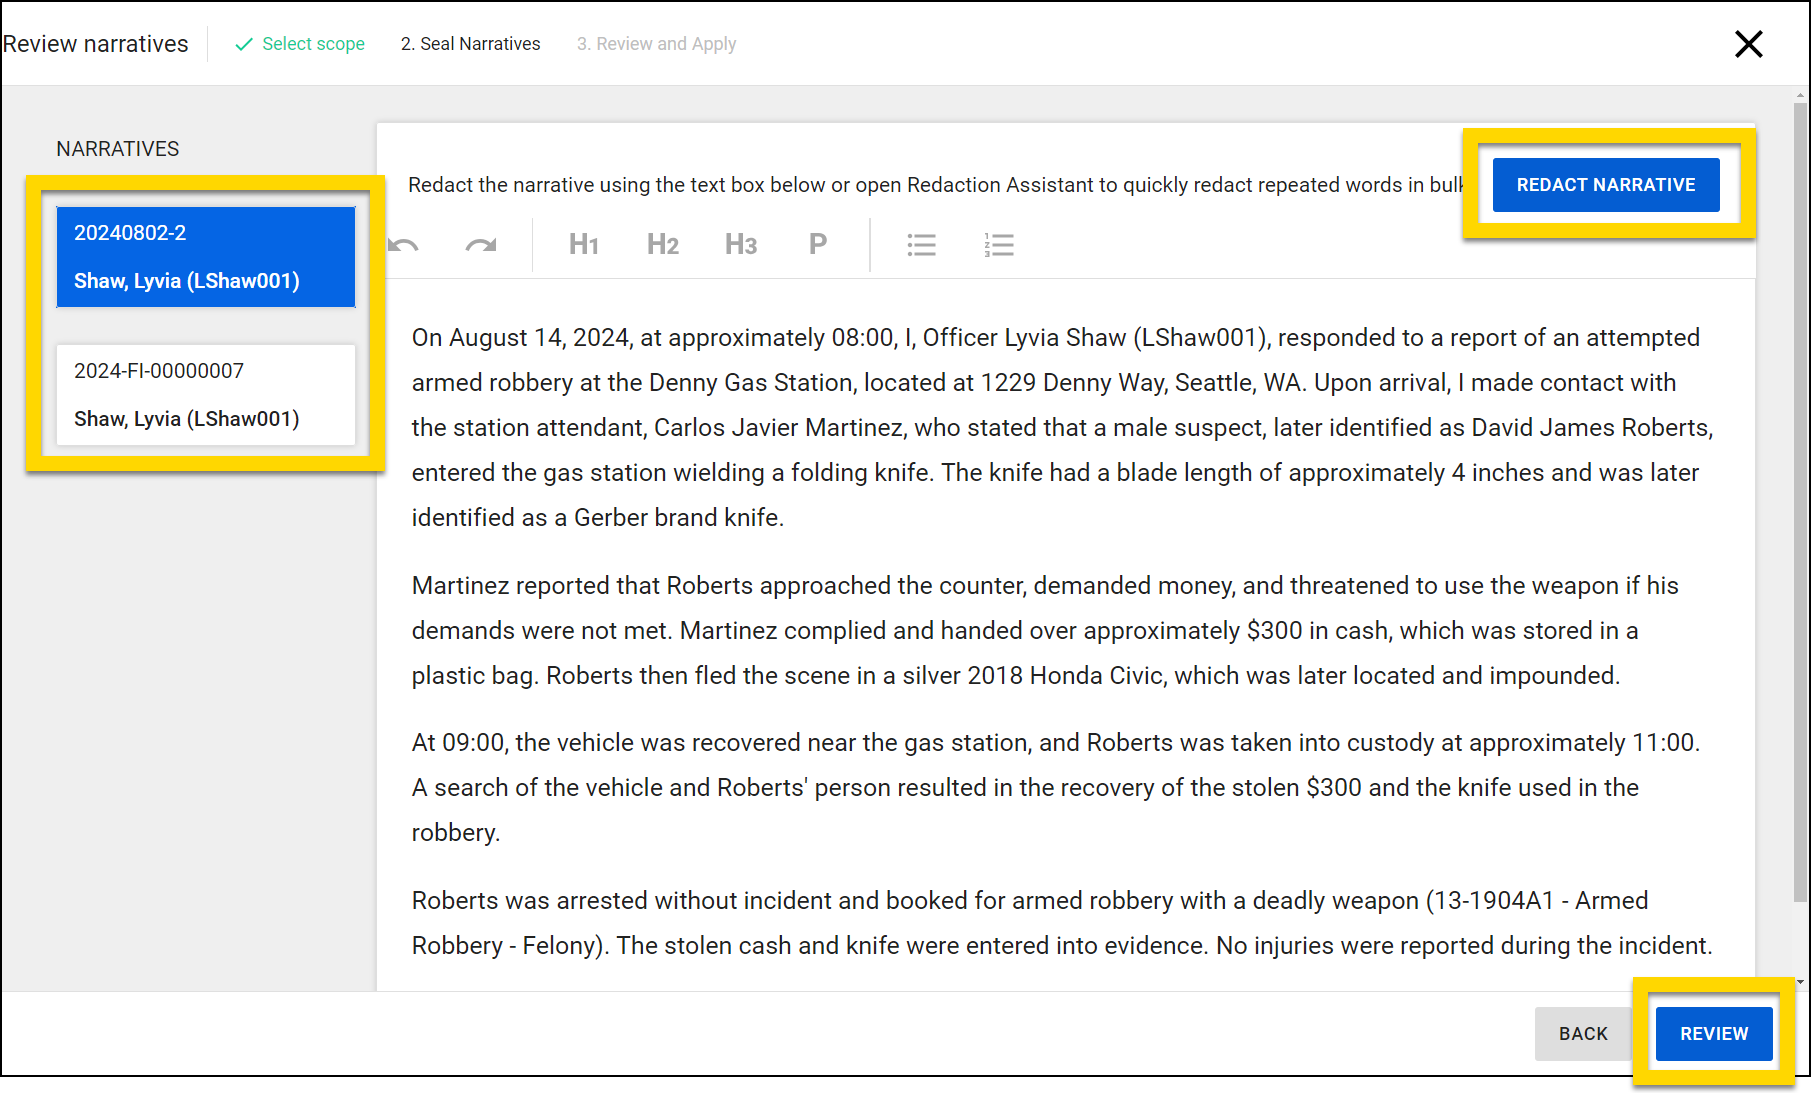
- Redact the narratives associated with the incident to remove all content related to the information you are sealing. The original narrative will be preserved and can be viewed if the seal is lifted or removed.
- If the incident contains multiple narratives, switch between them using the large blue and white buttons.
- Select Redact Narrative to use the Redact Text tool to quickly redact text in bulk.
- When sealing an entire incident, this step does not appear because the entire incident, including all narrative text, will be sealed in its entirety.
- Select Review when you are finished redacting the narratives.
- Review the information that will be sealed, as indicated by the Seal Status column. Select Apply Seal to place the seal. If you need to make changes, select Back.

Redact Text tool
When sealing portions of an incident or report, you can quickly redact text that appears multiple times throughout a narrative (e.g., the name of a person). To open the tool, select Redact Narrative.
When the tool opens, the text of the original narrative displays on the left, and the text of the redacted narrative displays on the right. The tool automatically suggests words that may need to be redacted. These words are highlighted in purple on the left, and the suggested text to replace these words is highlighted in green on the right.
Suggestions are based on the seal scope selected at the beginning of the Apply seal workflow. For example, if you select a person from the list, suggestions in the Redact Text tool automatically include all person names that appear in the narrative.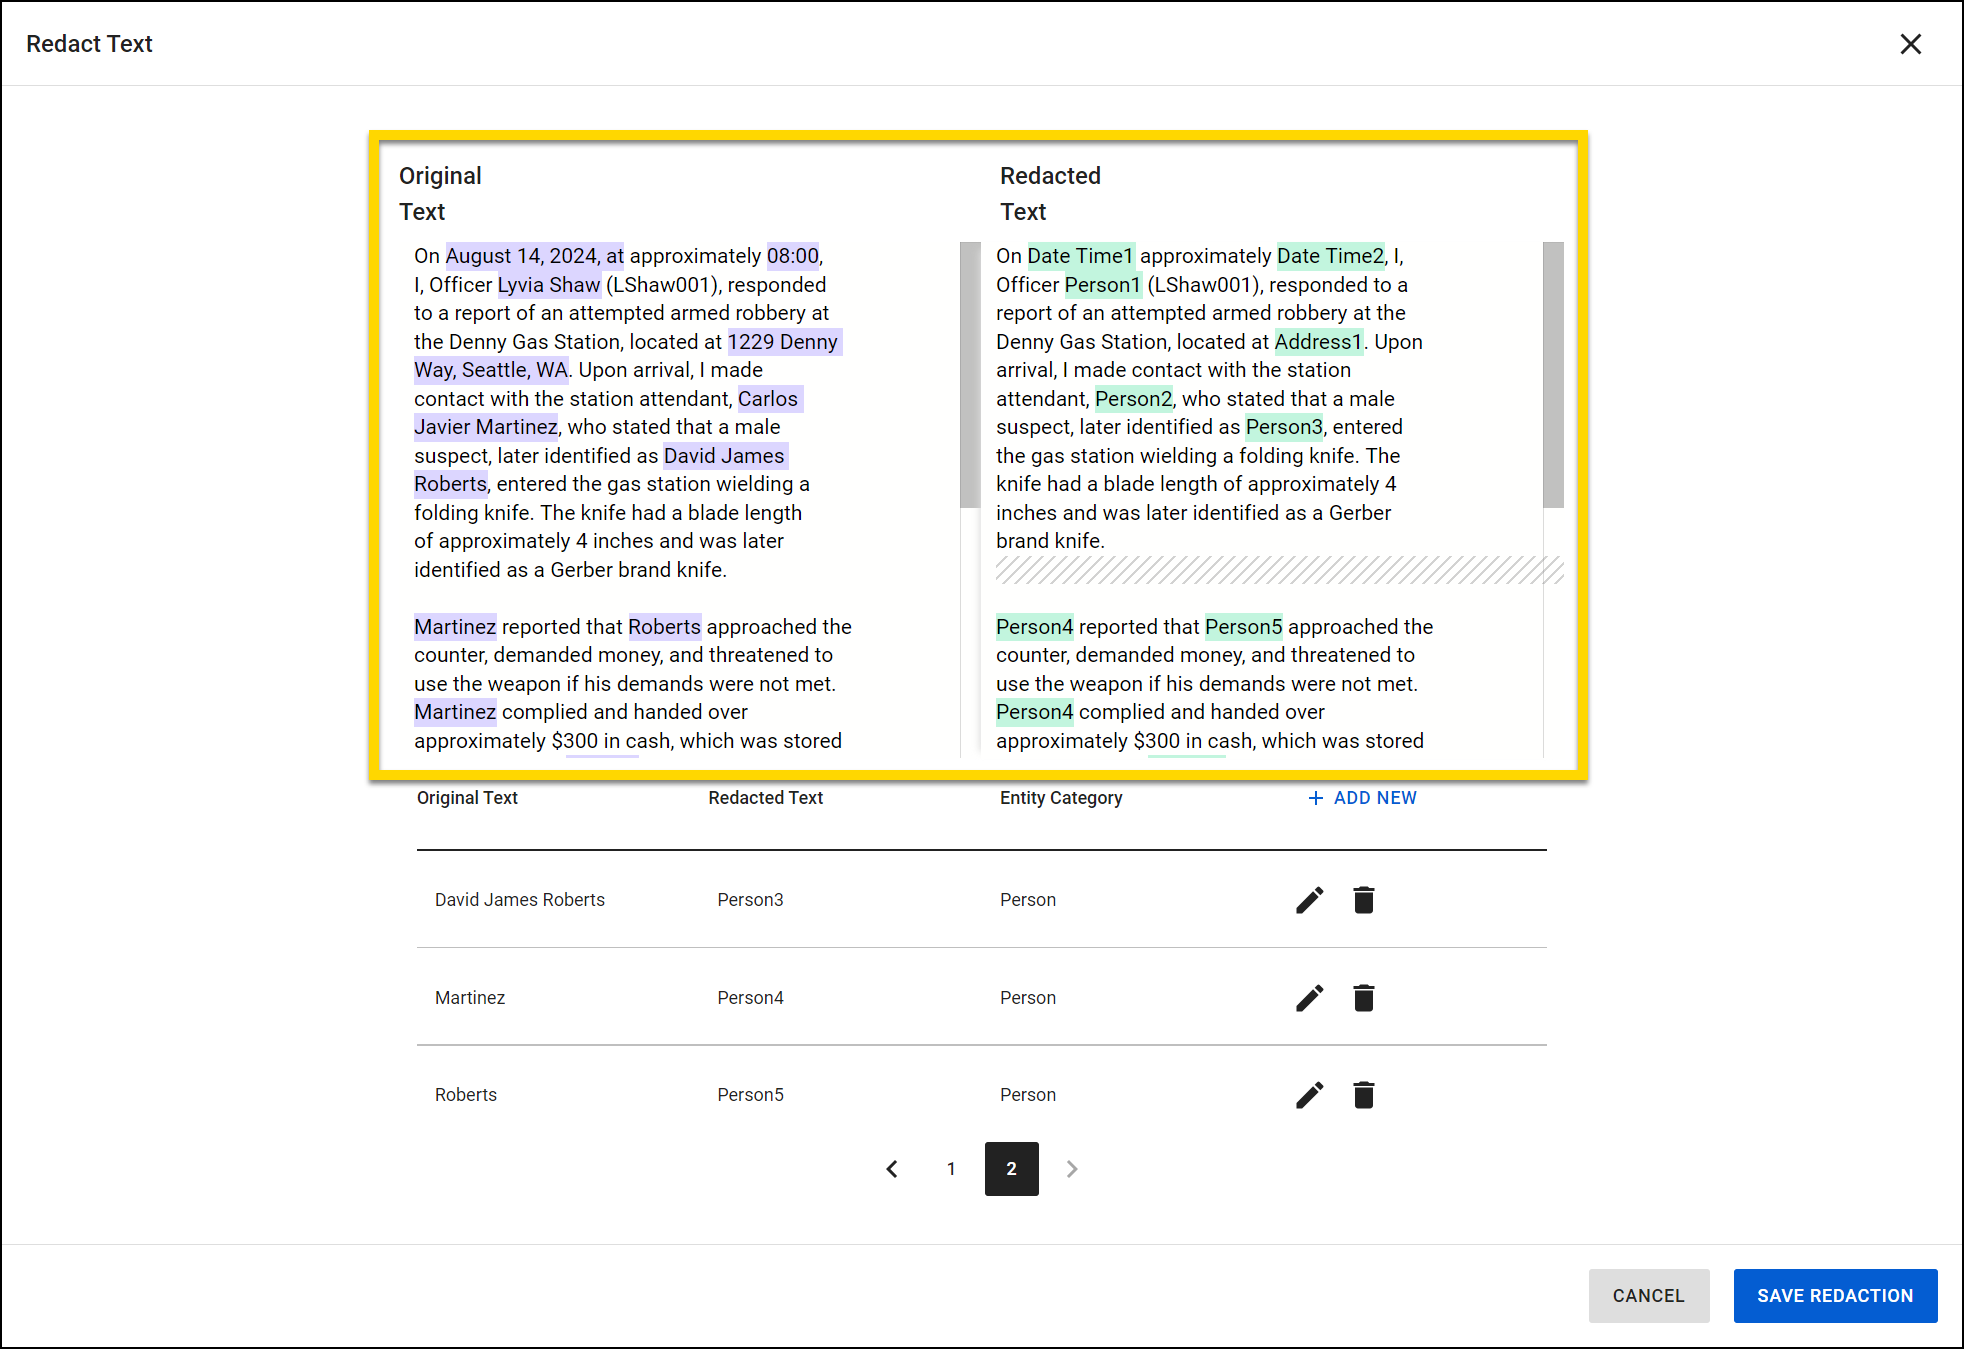
The table below the text summarizes each suggestion:
- Original text: The text that appears in the original narrative
- Redacted text: The text that will appear to users who view the sealed narrative
- Entity category: The type of text. Options include:
- Address
- Age
- Bank Account Number
- Date Time
- Drivers License Number
- Individual Taxpayer Identification
- Officer
- Organization
- Person
- Phone Number
- Social Security Number
- Subject
- Witness
Select the pencil icon to edit the suggestion or the trash can icon to remove it.
To create a new redaction item, select Add New.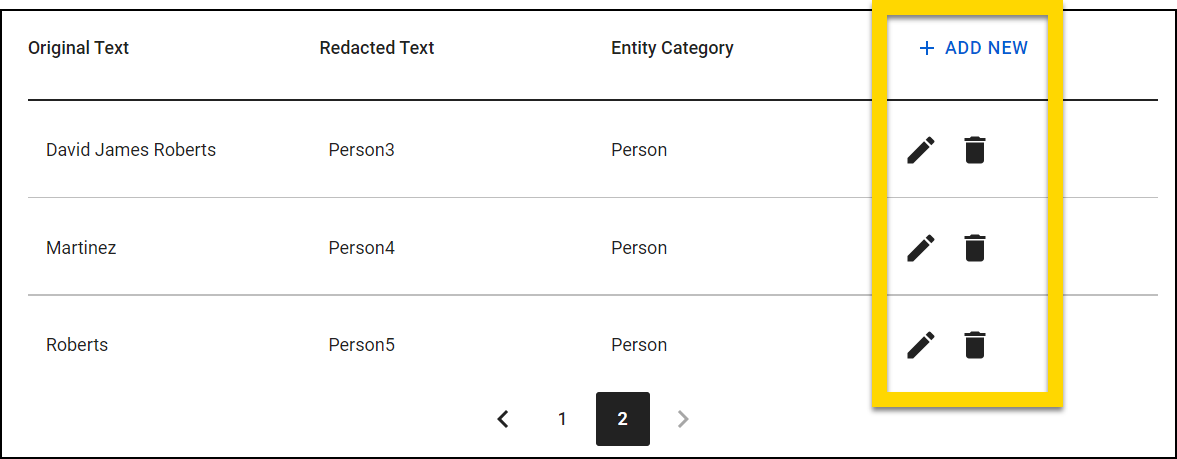
After completing all redactions, select Save Redaction at the bottom of the screen to return to the Apply seal workflow.
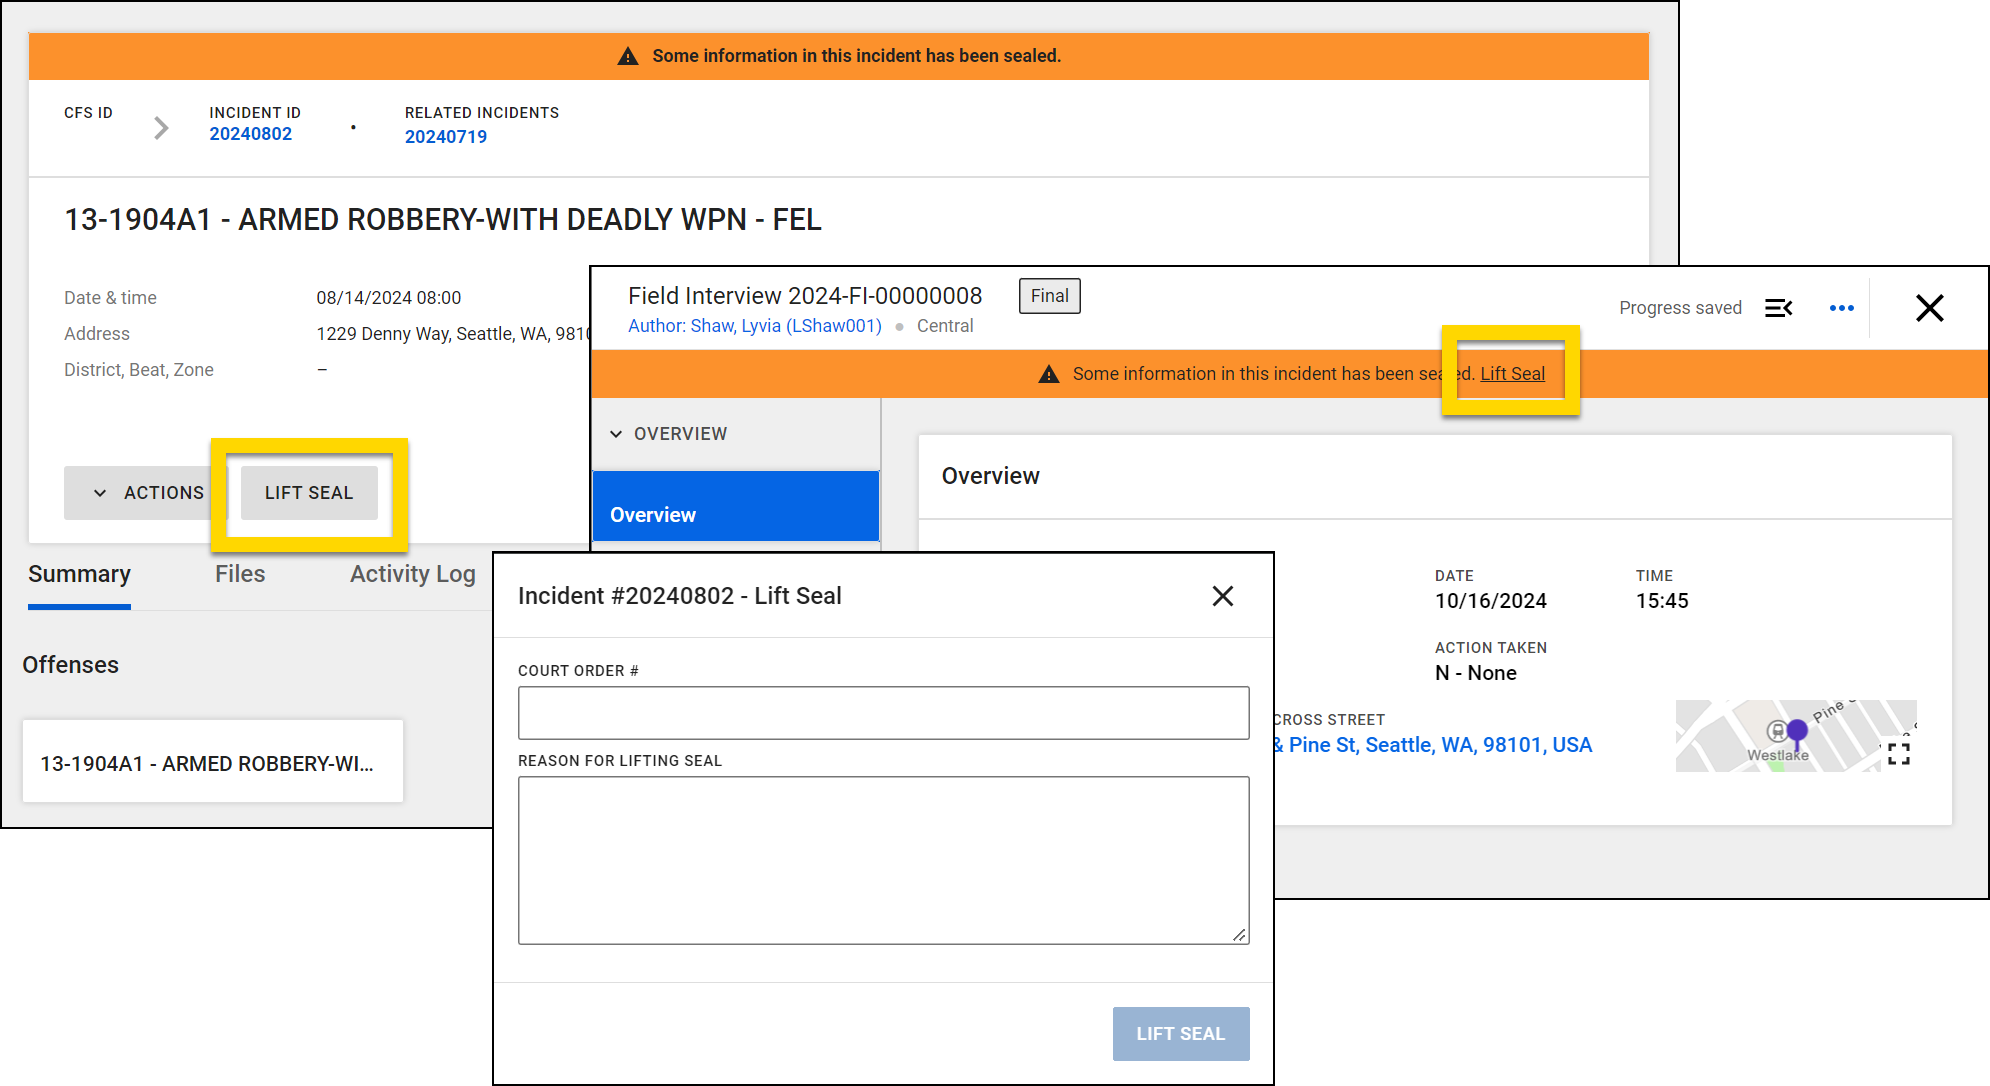
Lift seal
To temporarily view sealed information, you can lift a seal, which requires a court order number. When you lift a seal, you can only view the sealed information while you remain on the screen that contains the information. If you refresh the page or navigate away then return to the page, you will again need to lift the seal to view the information.
Lifting a seal only reveals information to the user who lifts the seal; it is not visible to other users, even if they are currently viewing that same incident or report. To lift a seal:
- Open the incident or report and select Lift Seal.
- Enter a Court Order number and reason for lifting the seal then select Lift Seal.
The orange banner at the top of the screen indicates that you are viewing the contents of a sealed document. If the seal covered a property item, vehicle, or an entire person, a red eye icon displays beside sealed information. (Partially sealed people do not display this icon.)
If you navigate away or refresh the page, the seal is re-applied and you will again need to lift it in order to view the sealed information.
Remove seal
Removing a seal permanently makes previously sealed information visible to all users (unless the seal is later re-applied).
To remove a seal:
- Follow the steps outlined in the previous section to first lift the seal.
- Select Actions > Manage Seals.
- Select Remove Seal on the seal you wish to remove.
- Enter a Court Order number and reason for removing the seal.
- Select Remove Seal.
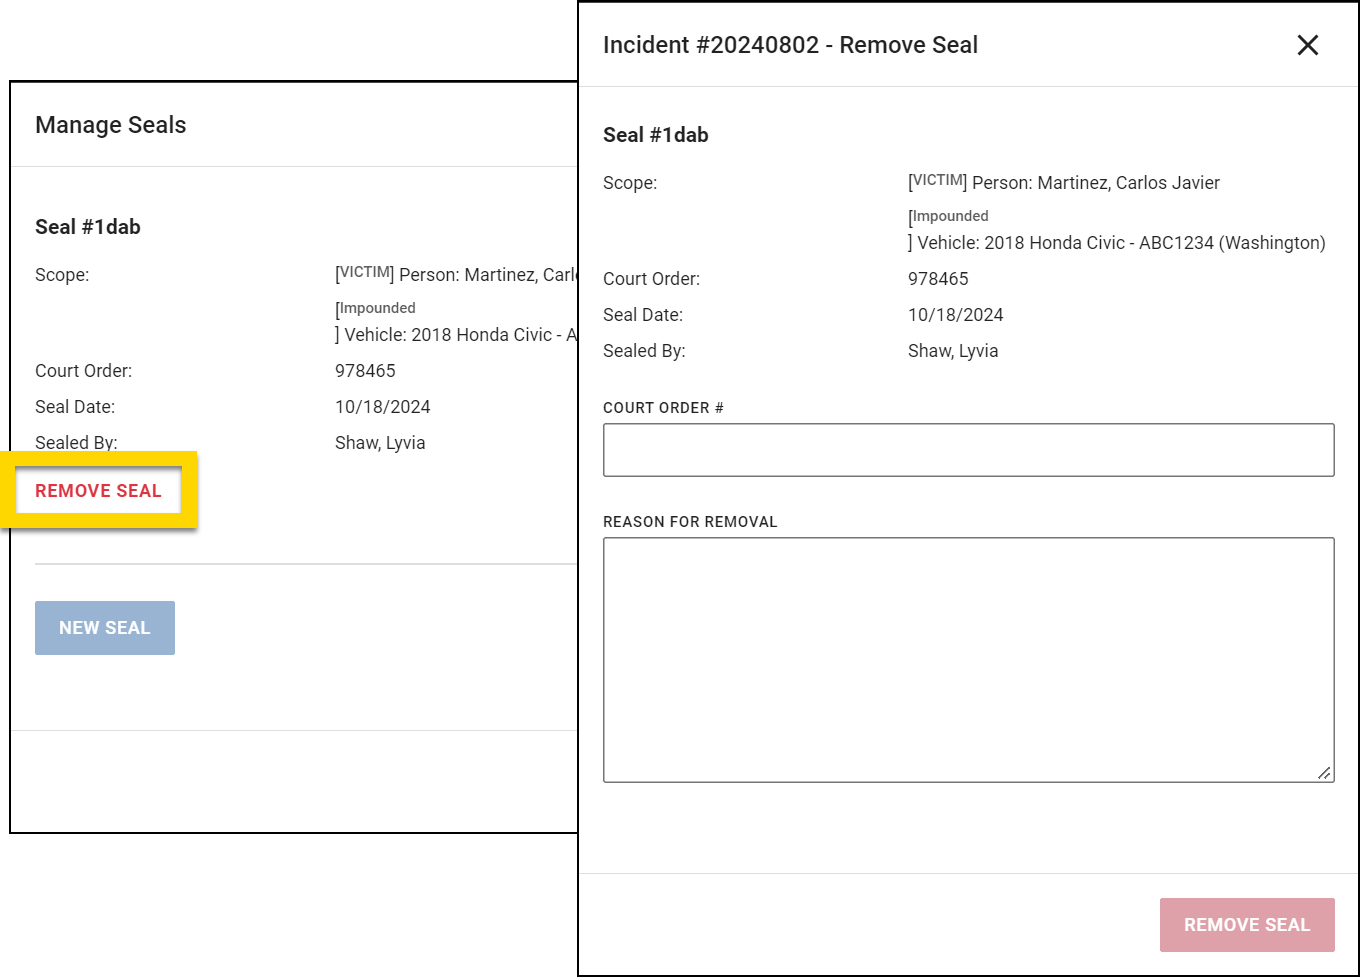
- The orange banner disappears from the top of the screen, and all information associated with the incident will again be visible to all users.
Audit log
Seal-related events appear in the audit log for users, reports, and incidents. (If a case has been created for the incident, seal events appear in the incident audit log, as opposed to the case audit log.)
The following events appear in the log:
- Seal Document
- Seal Partial Incident
- Seal Incident
- Lift Seal
- View Seal Summary
- Remove Seal
Each event includes the following information:
- User who took the action
- Date and time the action was taken
- Report or Incident ID
- Court Order Number
- For Lift and Remove activities: Reason for lifting or removing the seal
For more information about accessing audit logs, see Audit Log Tool.