Booking profiles and holding
To view the booking profile for an inmate who is in holding, select their name from the inmates list. Basic information about the inmate, including mugshots appears at the top of the screen.
Select the Incident ID to open the incident profile associated with that inmate and the Person ID to open their full person profile, which includes all known information about that person, including identity, identifying documents, description, contact information, and known associations (incidents, organizations, people, etc.).
Use the blue and gray buttons to send booking details, update the booking report, update booking photos, print the booking report, expunge a booking, and release the inmate.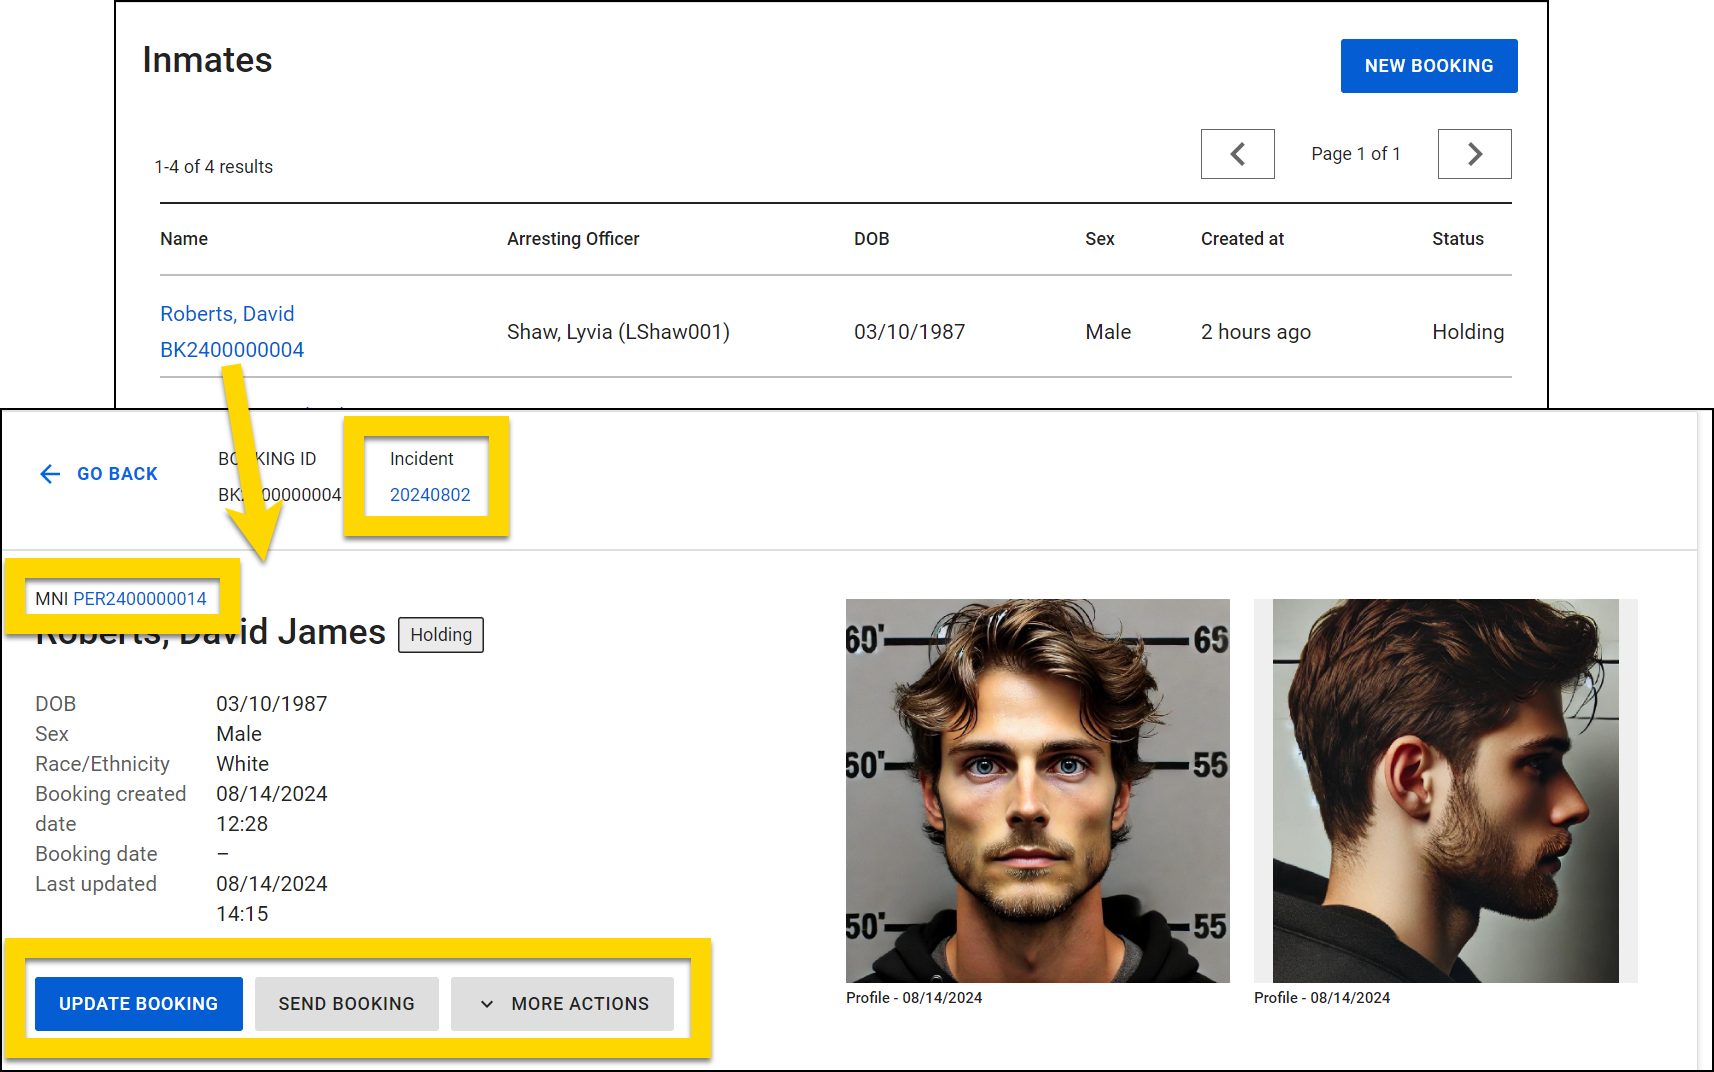
The Summary tab contains all the information from the booking intake report, and the Files tab contains all files that have been added for the inmate.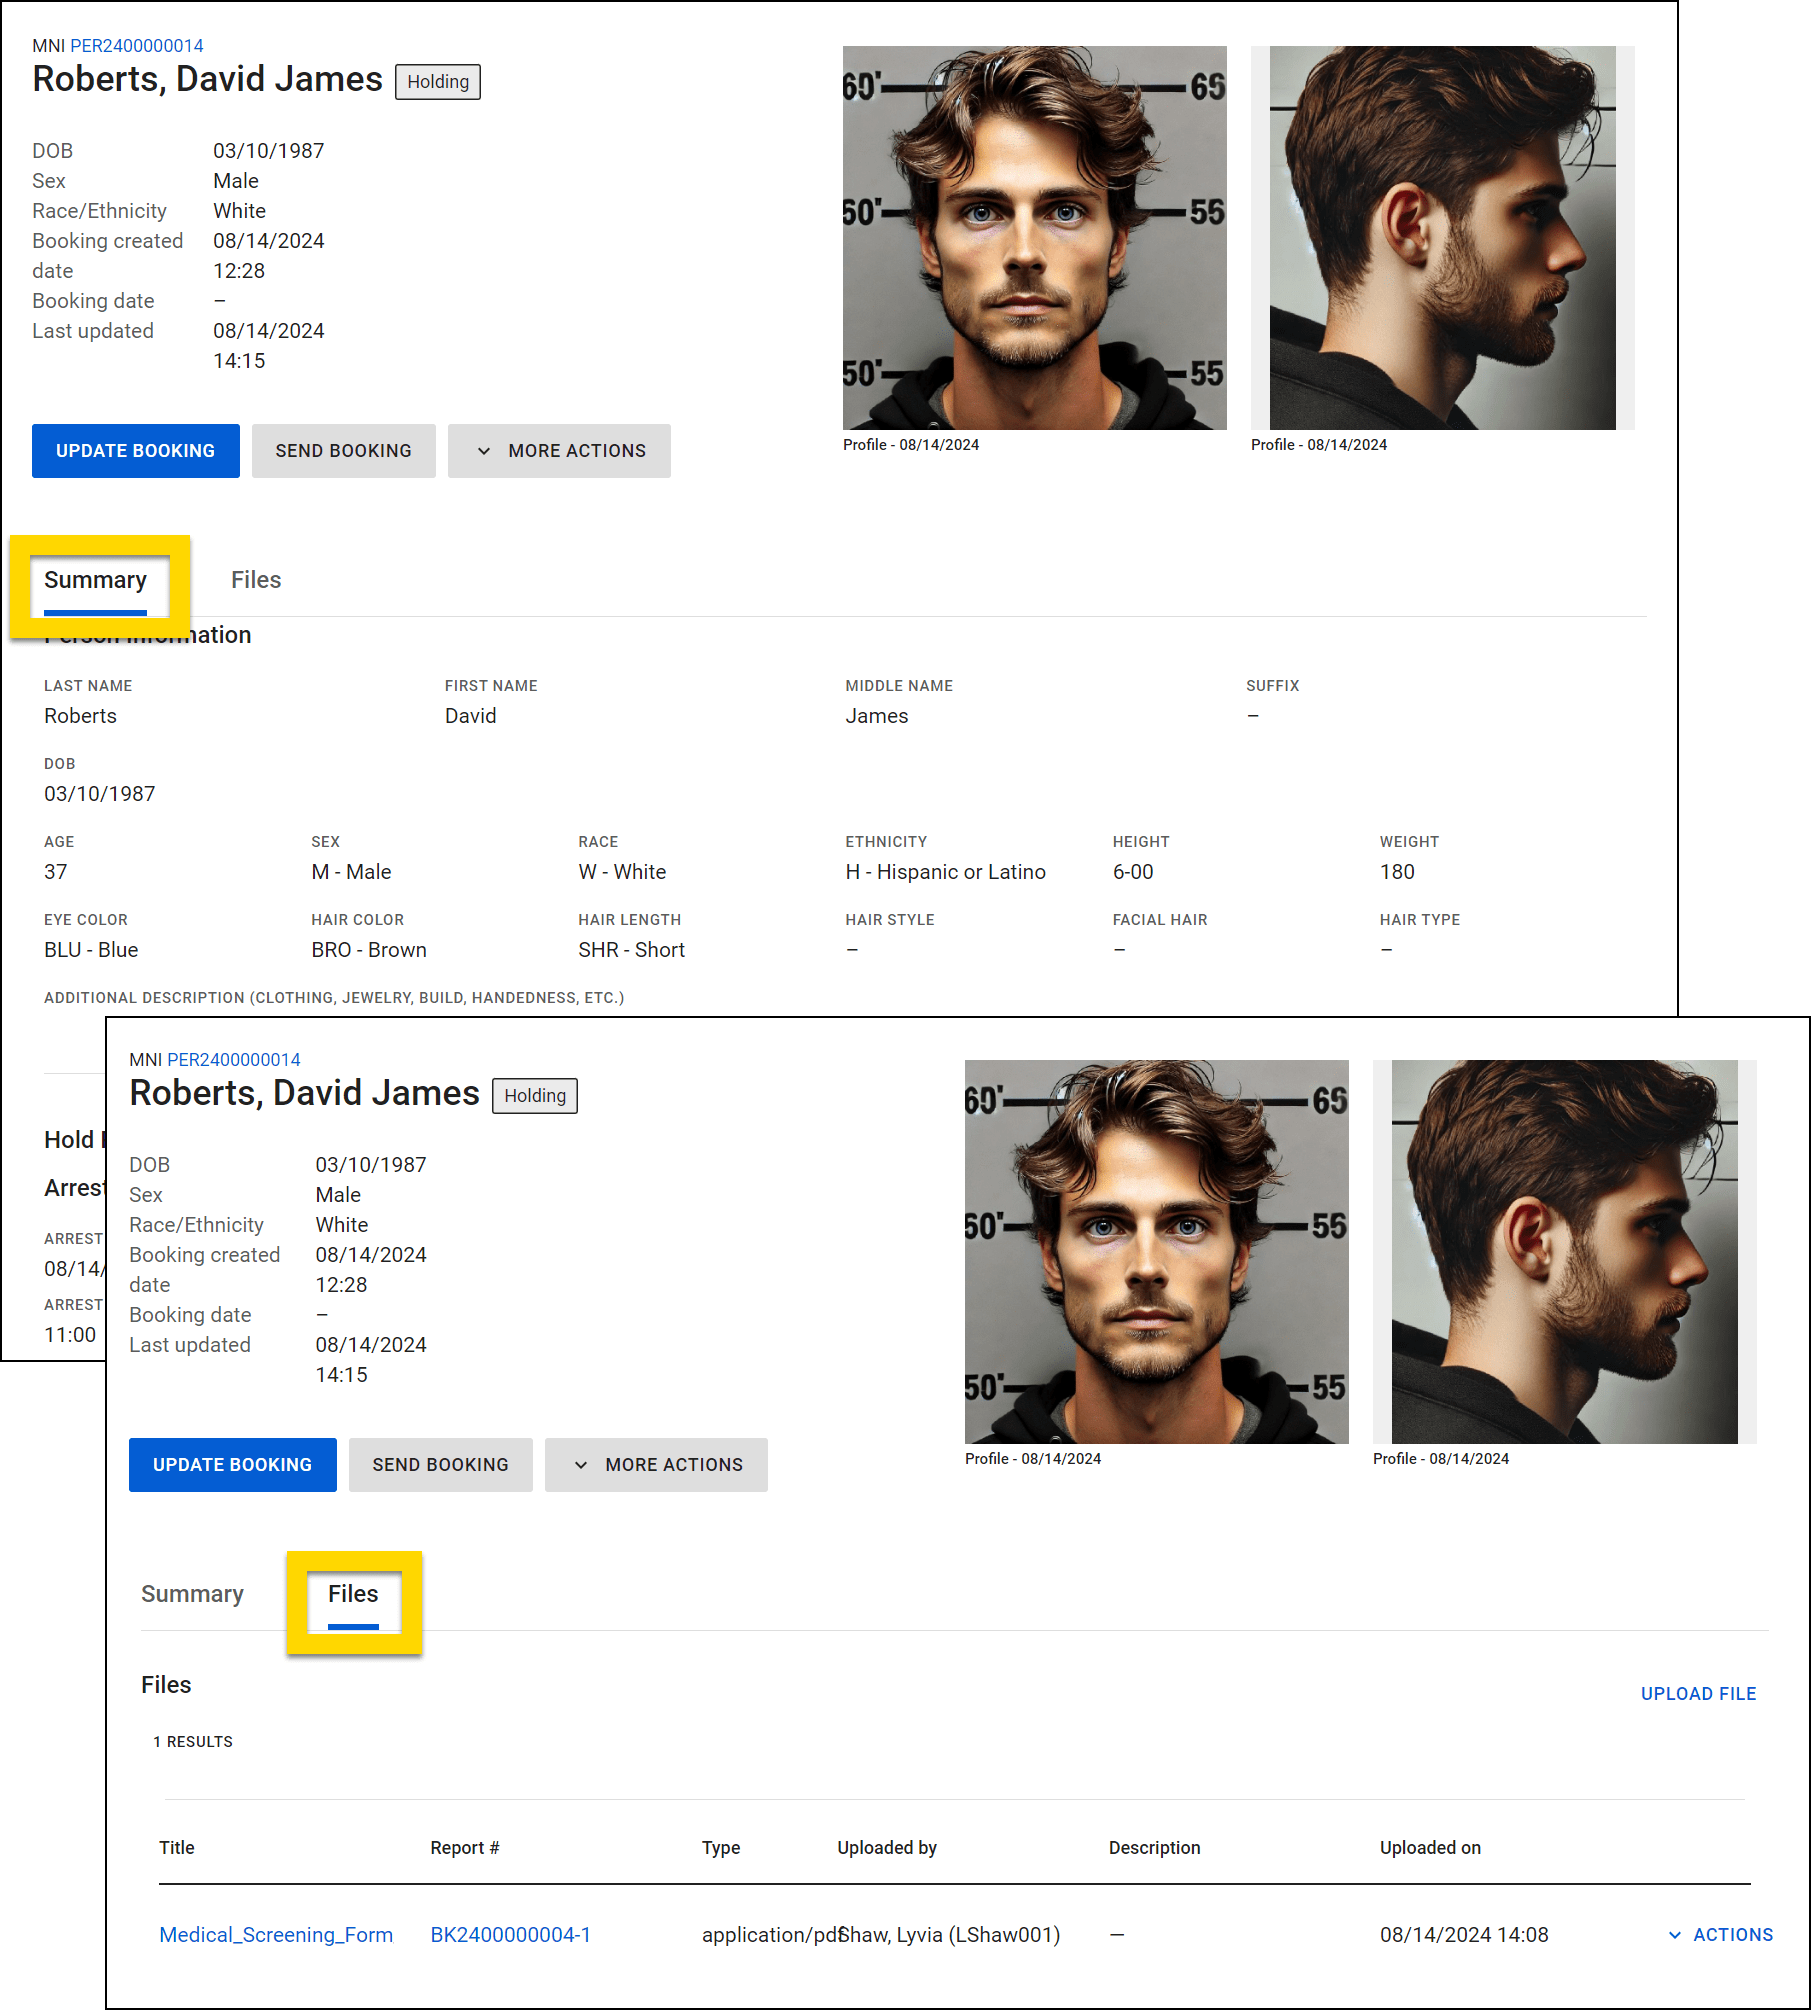
Update booking report
To update any information, select Update Booking > Edit Document.
After making changes, select Submit to finalize the booking.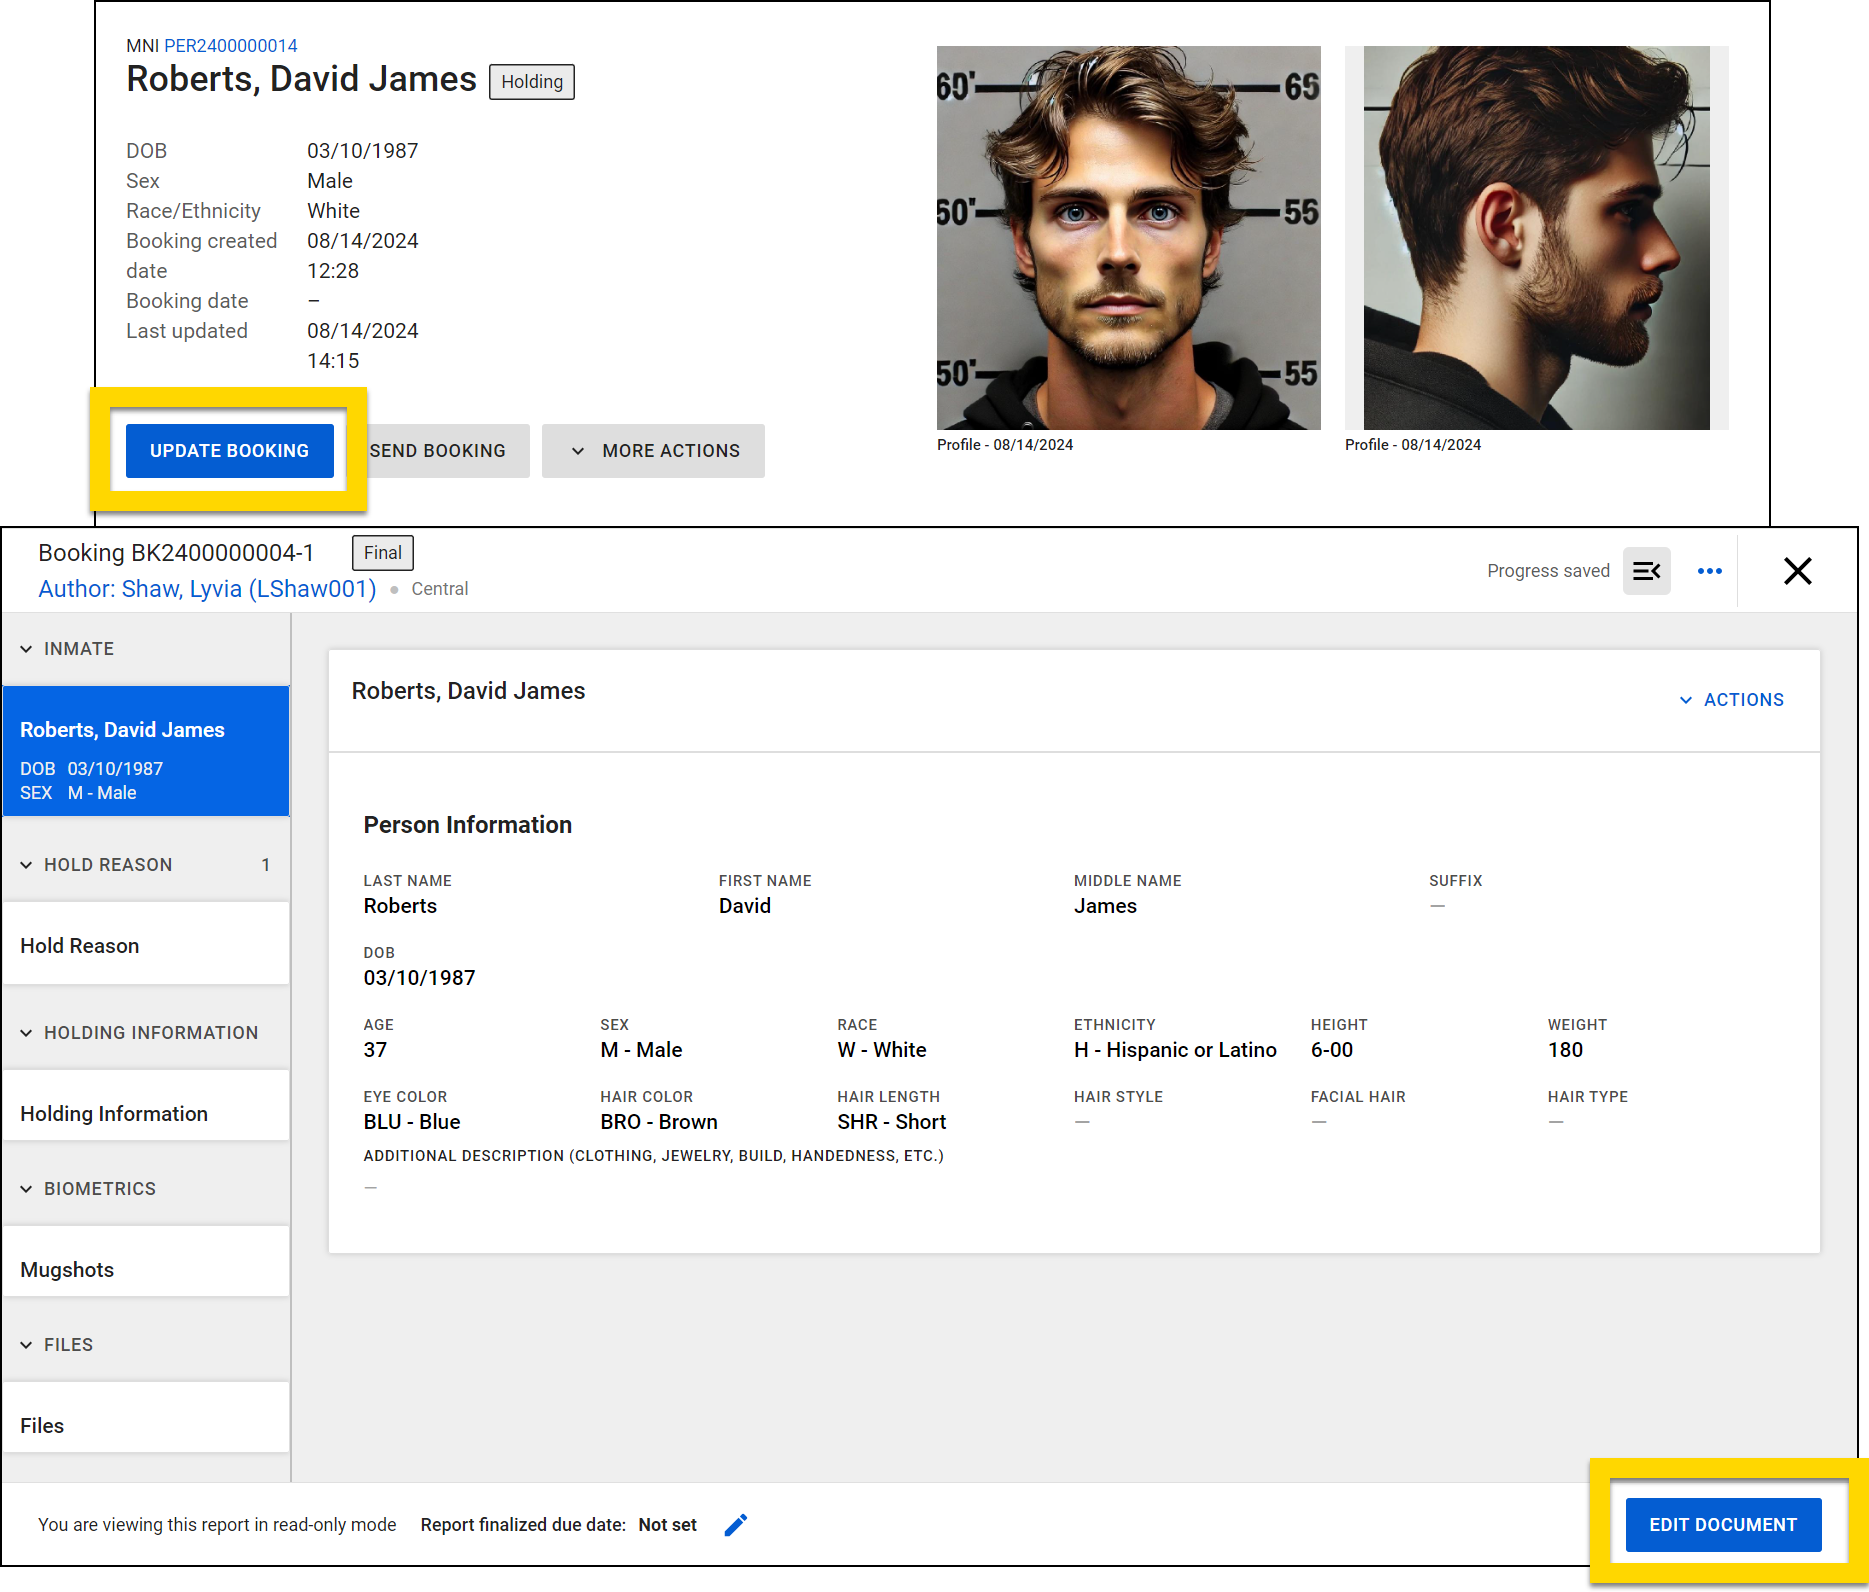
Send booking details
To send booking details to Livescan or a Jail Management System (JMS), select Send Booking. You can choose to send to Livescan, Jail, or both. Select Send Booking again at any time to view which systems have received the booking details.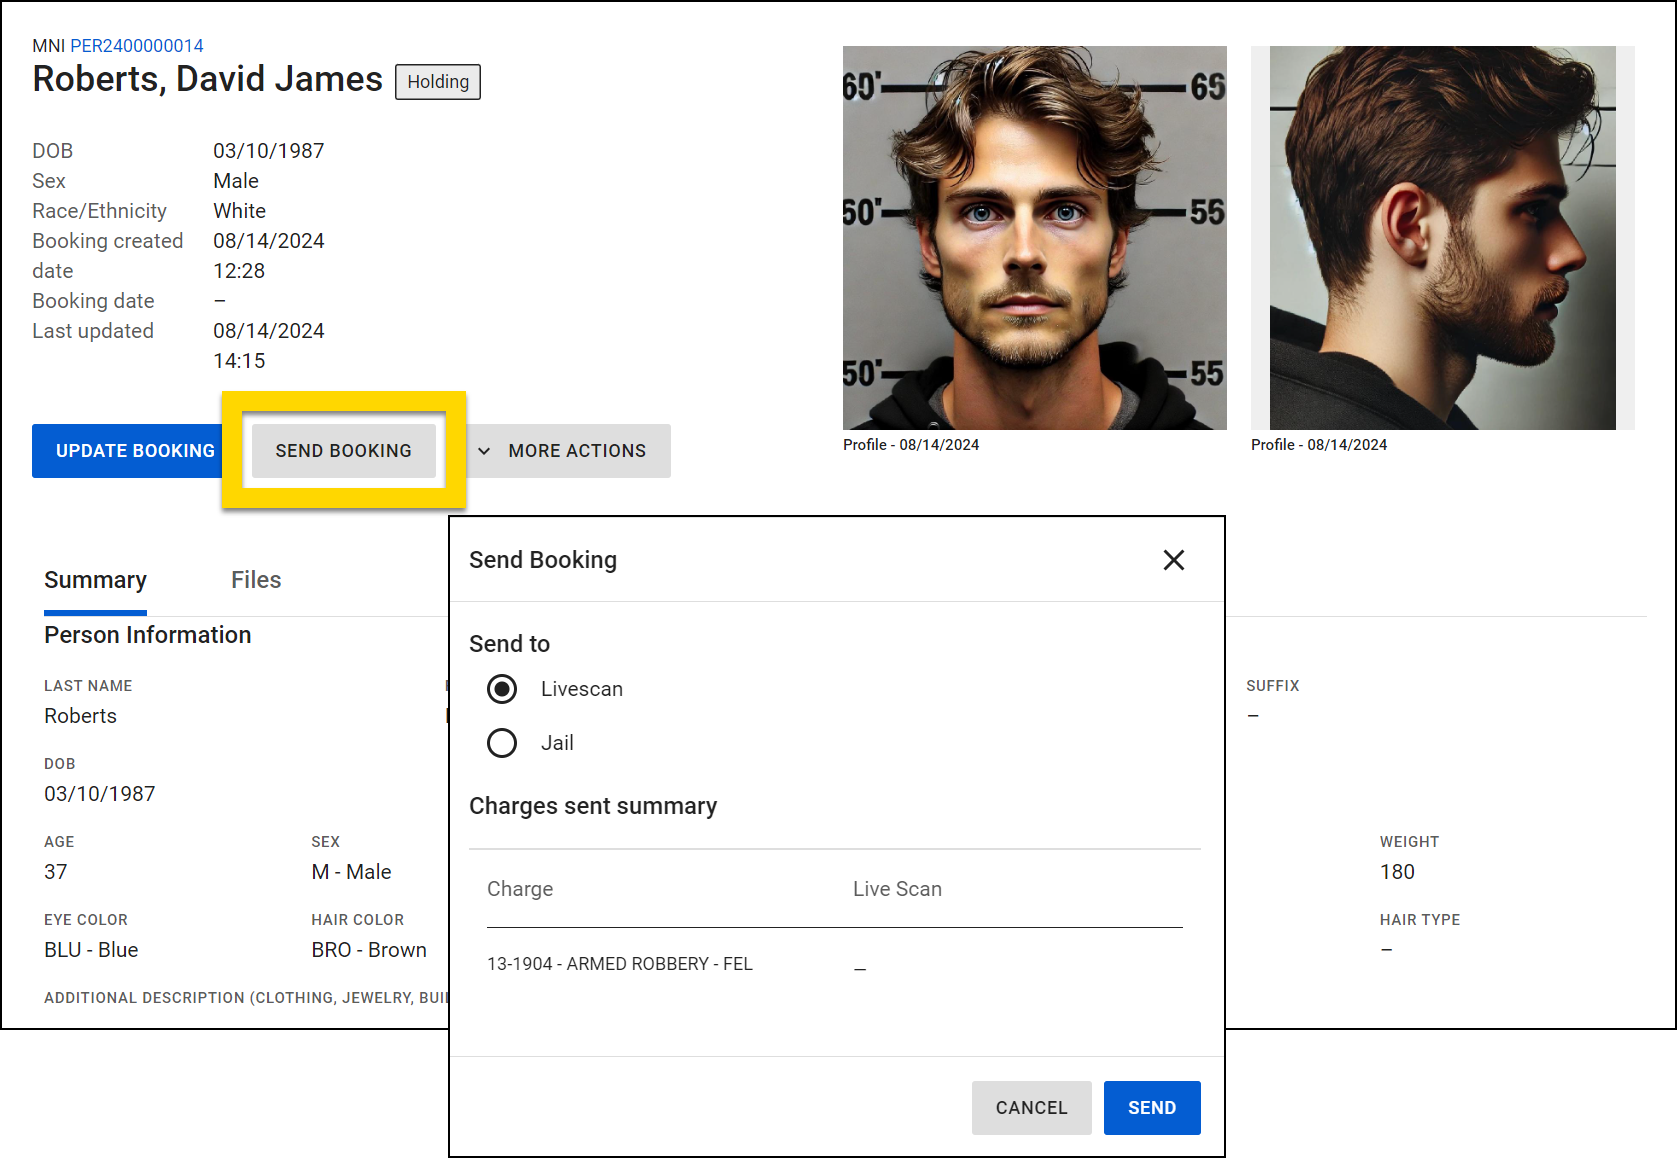
If additional charges are added to the booking after the details are initially sent, you can again select Send Booking to send the new details.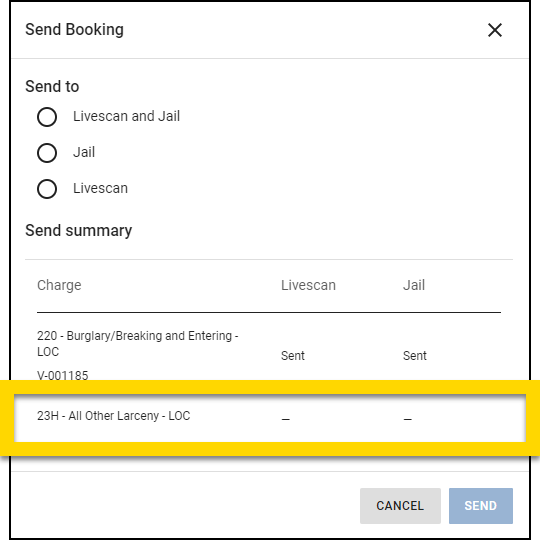
Update photos
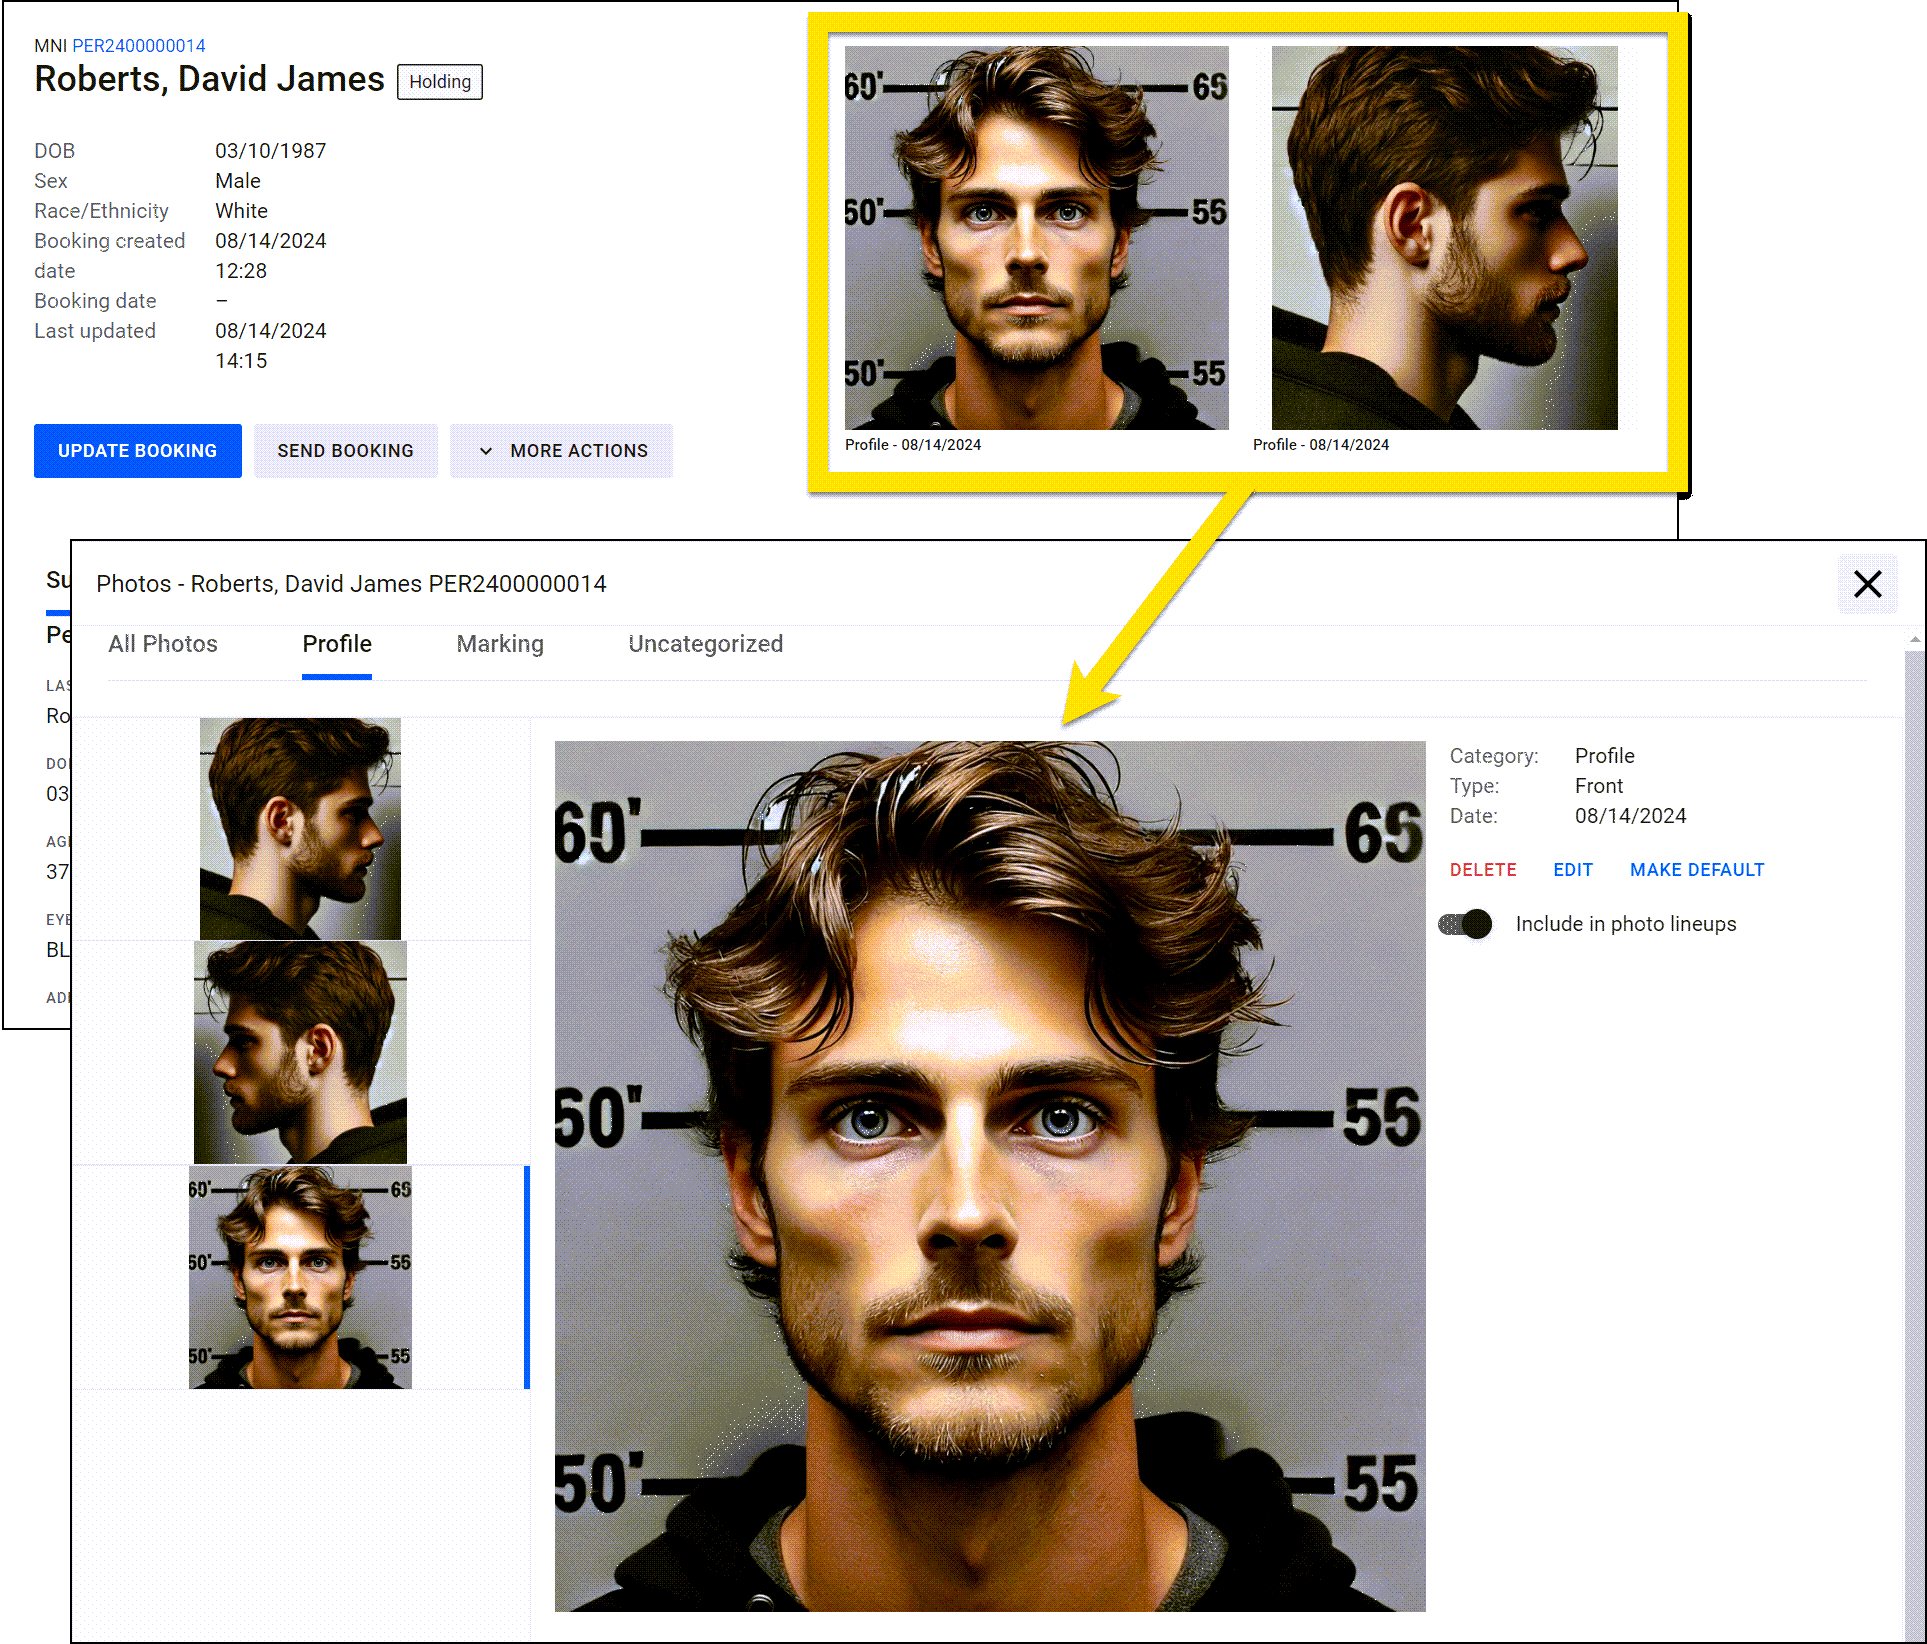
Select a profile photo to open the photo gallery where you can:
- Use the tabs to switch between All photos, Profile, Marking, and Uncategorized photos.
- Switch between photos in the current tab by selecting the thumbnails.
- Edit the selected photo (change the category, type, and date taken).
- Delete the selected photo.
- Make the selected photo the default photo. Default photos display:
- As the first image on that person's profile
- In search results
- In the search results that appear when searching to add an existing person to a report.
- As only image on the person's booking profile
- Turn on the toggle to include the selected photo in photo lineups.
To add additional photos, select Update Booking and open the Mugshots section of the report.
Manage the inmate activity log
The Inmate Activity Log tracks key events and activities throughout a person's stay. Each entry includes the activity type, description (if provided), timestamp, and the person who performed or recorded the activity.
To access the activity log:
- Open the Bookings module.
- Select an inmate from the list to open their profile summary.
- Open the Activity Log tab on their profile.
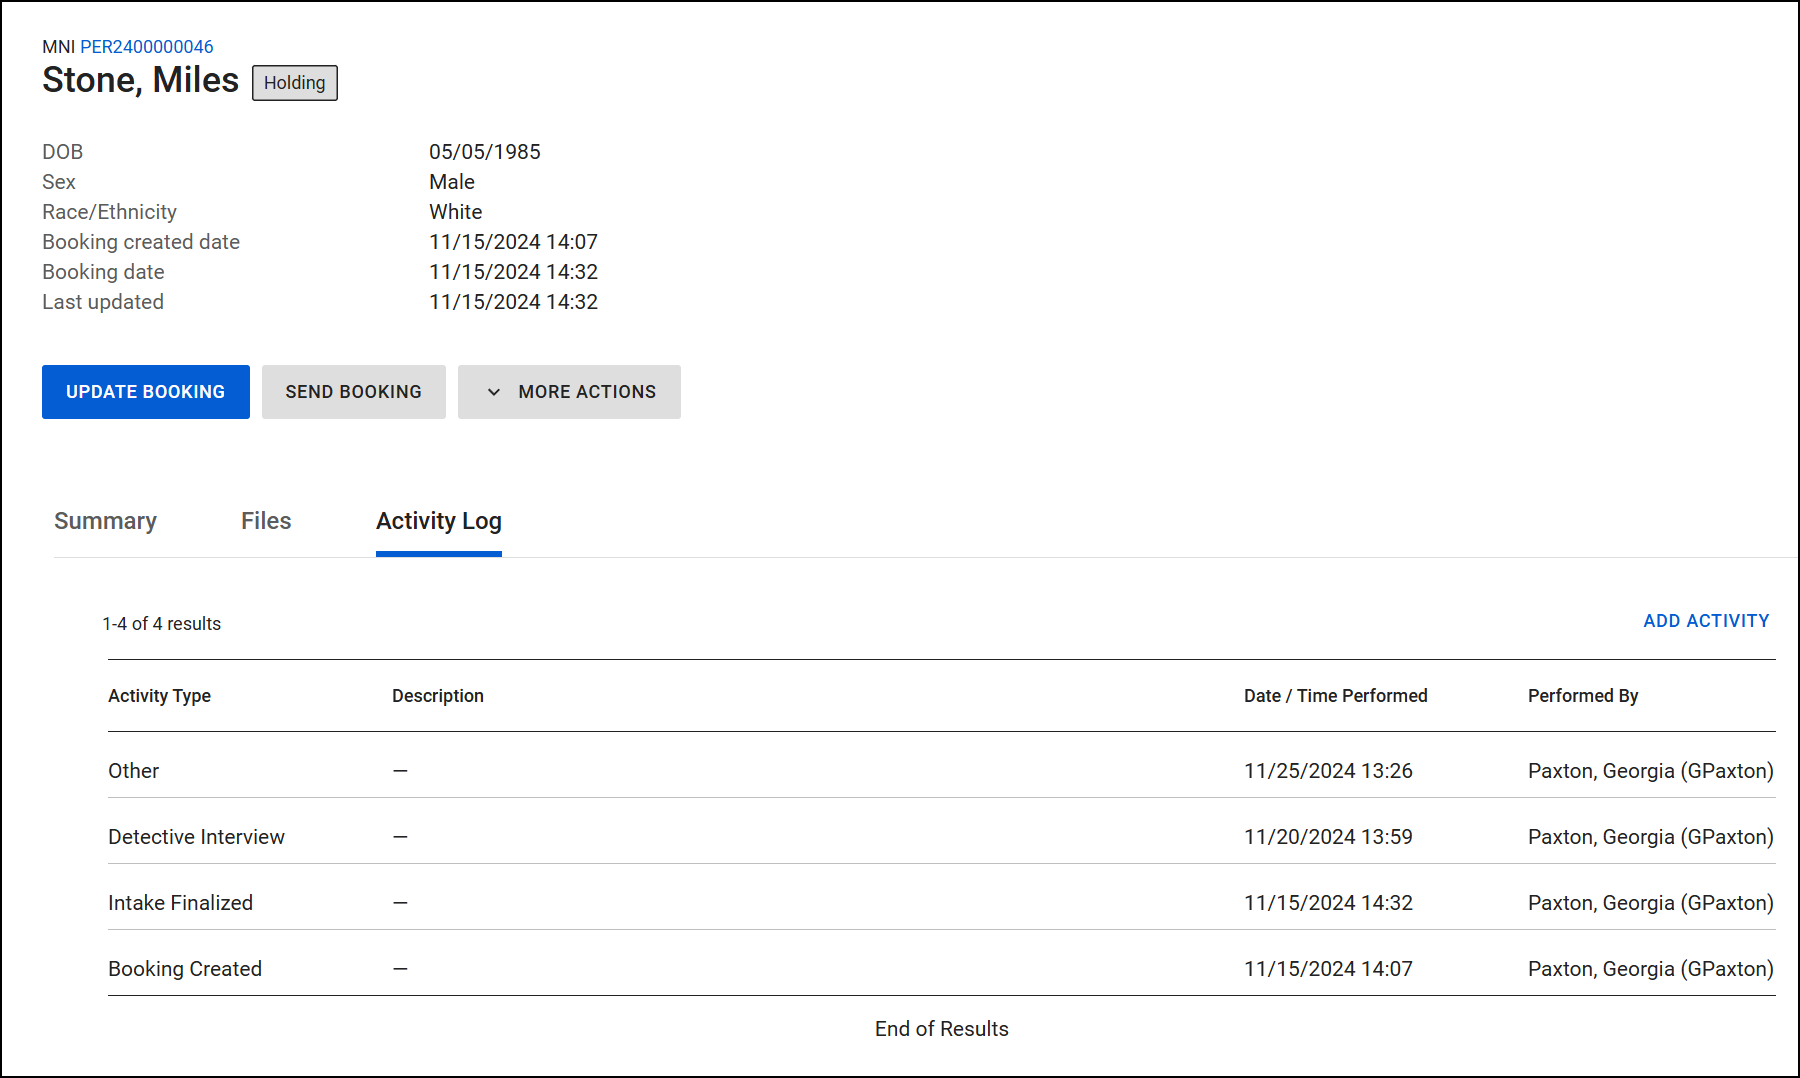
The Activity Log displays entries in reverse chronological order (most recent first). Each entry shows:
- Activity type
- Description (if provided)
- Date and time of the activity
- Name of the person who performed the activity
Activity log entries are generated in one of three ways:
- Manual entries by users for individual inmates
- Manual entries by users for the entire agency
- Automatic system-generated entries for specific events
System-generated activities
The system automatically records the following events:
- Booking created
- Intake finalized
- Release started
- Release finalized
- Attachment added
- Send Booking
User-added activities
Users can manually record the following types of activities:
- Attorney visits
- Showers
- Detective interviews
- Meals served
- Phone calls
- Other
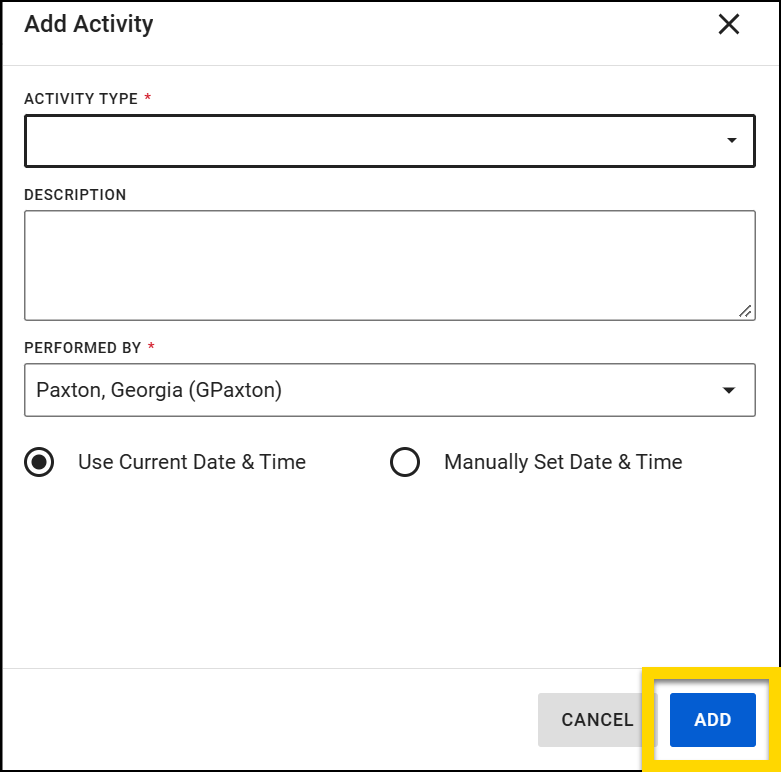
Add activities
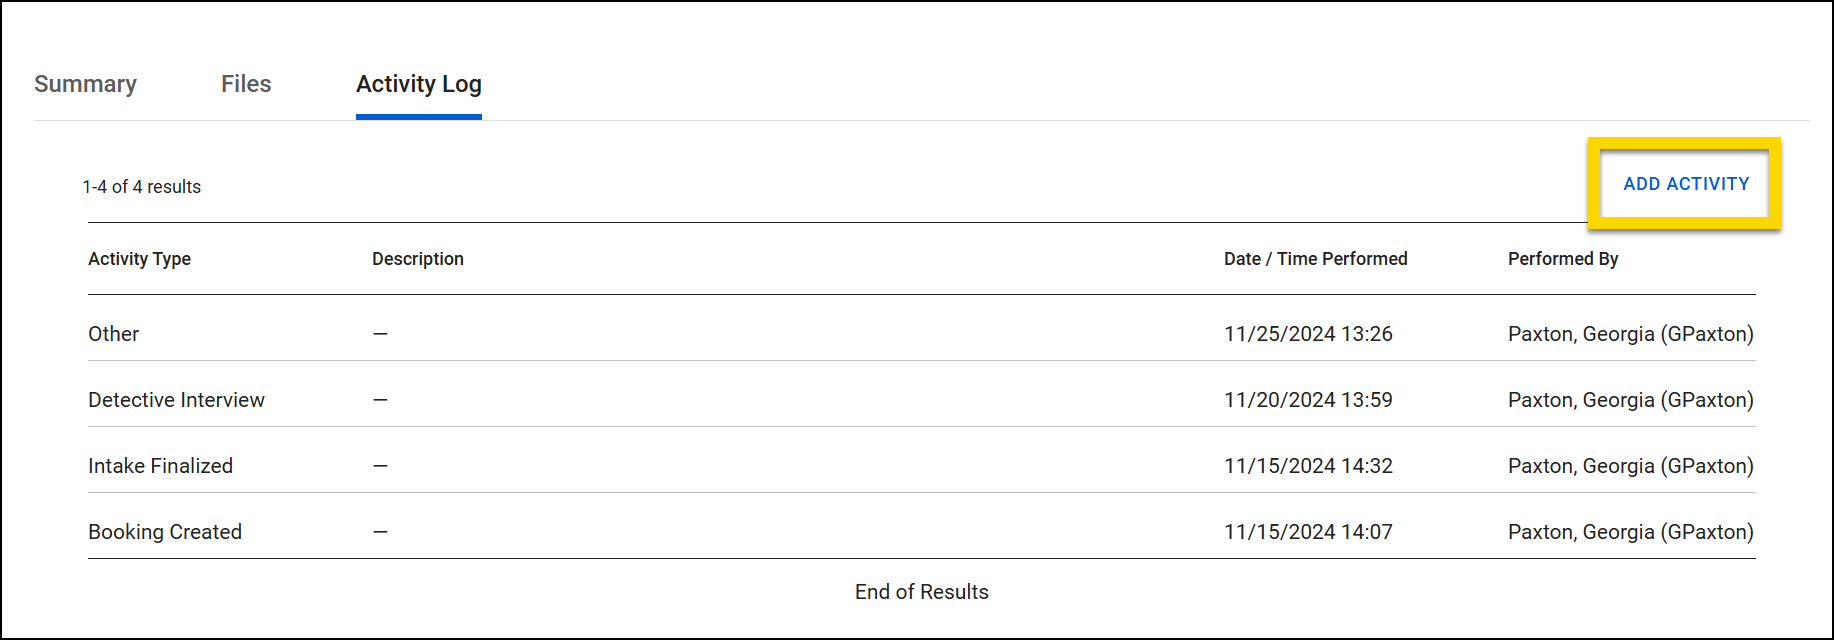
To add an activity to an inmate's activity log:
- Open the inmate's Activity Log tab.
- Select Add Activity.
- Select an Activity Type from the dropdown menu.
- Add relevant details in the Description field.
- Verify the Performed By field.
- By default, this shows the current user's name
- To change the name, click the x to remove the default name and type in another user's name
- Adjust the date and time if needed.
- By default, Use Current Date & Time is selected.
- Choose Manually Set Date & Time if you need to enter a different timestamp.
- Select Add to save the entry.
-
After saving, your new entry will appear at the top of the activity log.