Intake
The Bookings intake process helps users document and manage the details of a person being booked into custody. Whether initiated from the Bookings module or an incident report, users can complete sections for inmate information, arrest details, holding data, mugshots, related files, and associated warrants. Intake reports can be saved, edited, and submitted to update the inmate’s status from intake to holding.
Create booking reports
A booking report can be created from two locations:
- Bookings module
- Incident report
Intake from the Bookings module
To create a new booking from the Bookings module, follow these steps:
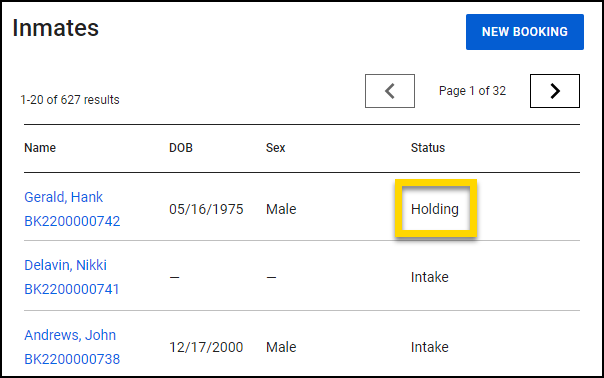
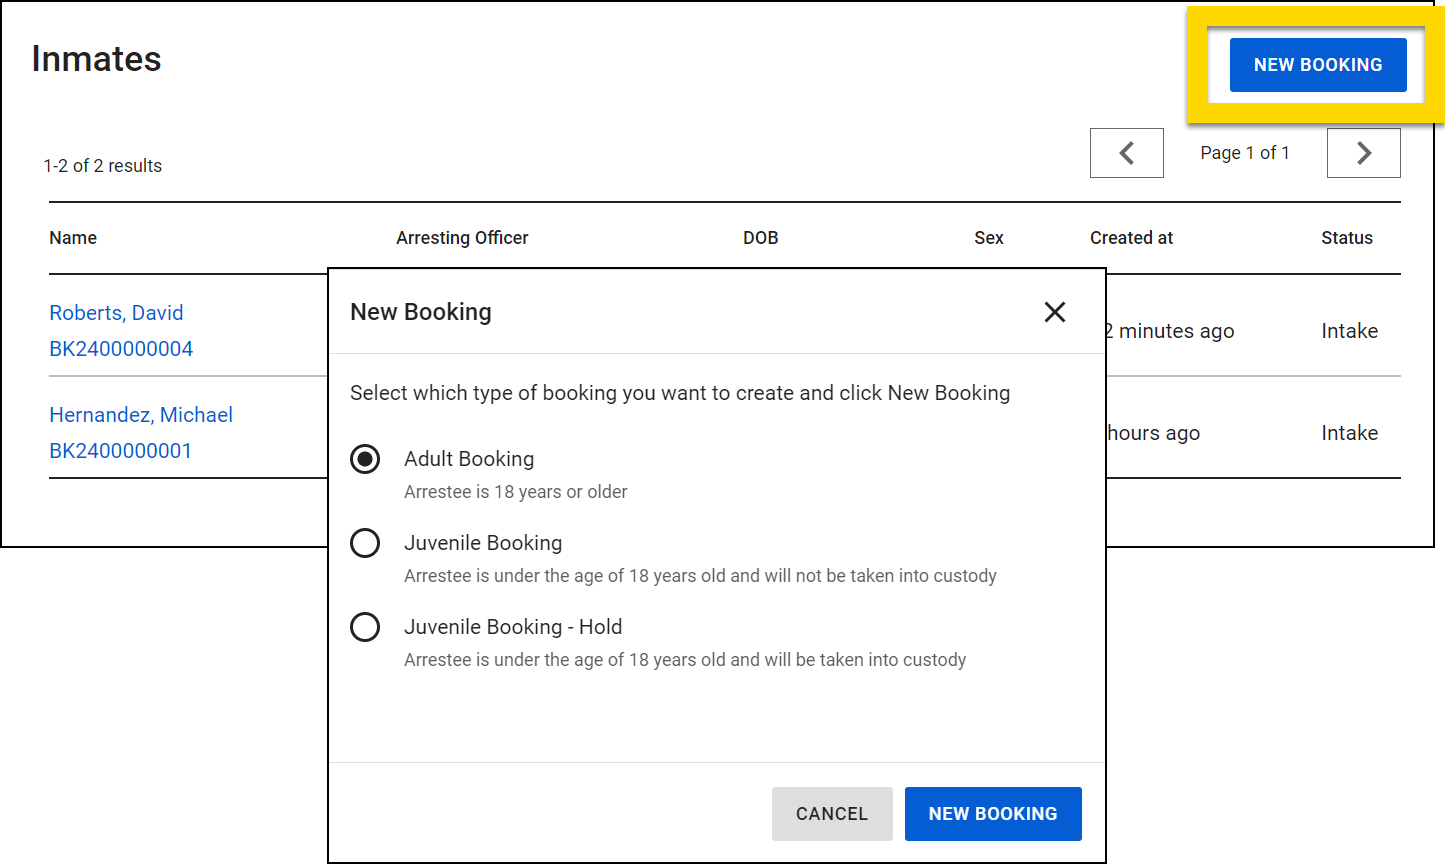
- Select New booking on the Inmates page.
- Before starting a booking, first review the Inmates list and/or search for the arrestee to confirm that a booking hasn't already been started for that arrestee.
- Select a booking type:
- Adult Booking: Arrestee is age 18 and older
- Juvenile Booking: Arrestee is under 18 and will NOT be taken into custody
- Juvenile Booking - Hold: Arrestee is under 18 and WILL be taken into custody
- Select New booking.
- The booking report will open in where you can enter information about the inmate, hold reason, holding information, mugshots, and files.
Intake from incident reports
To create a new booking from an incident report, follow these steps:
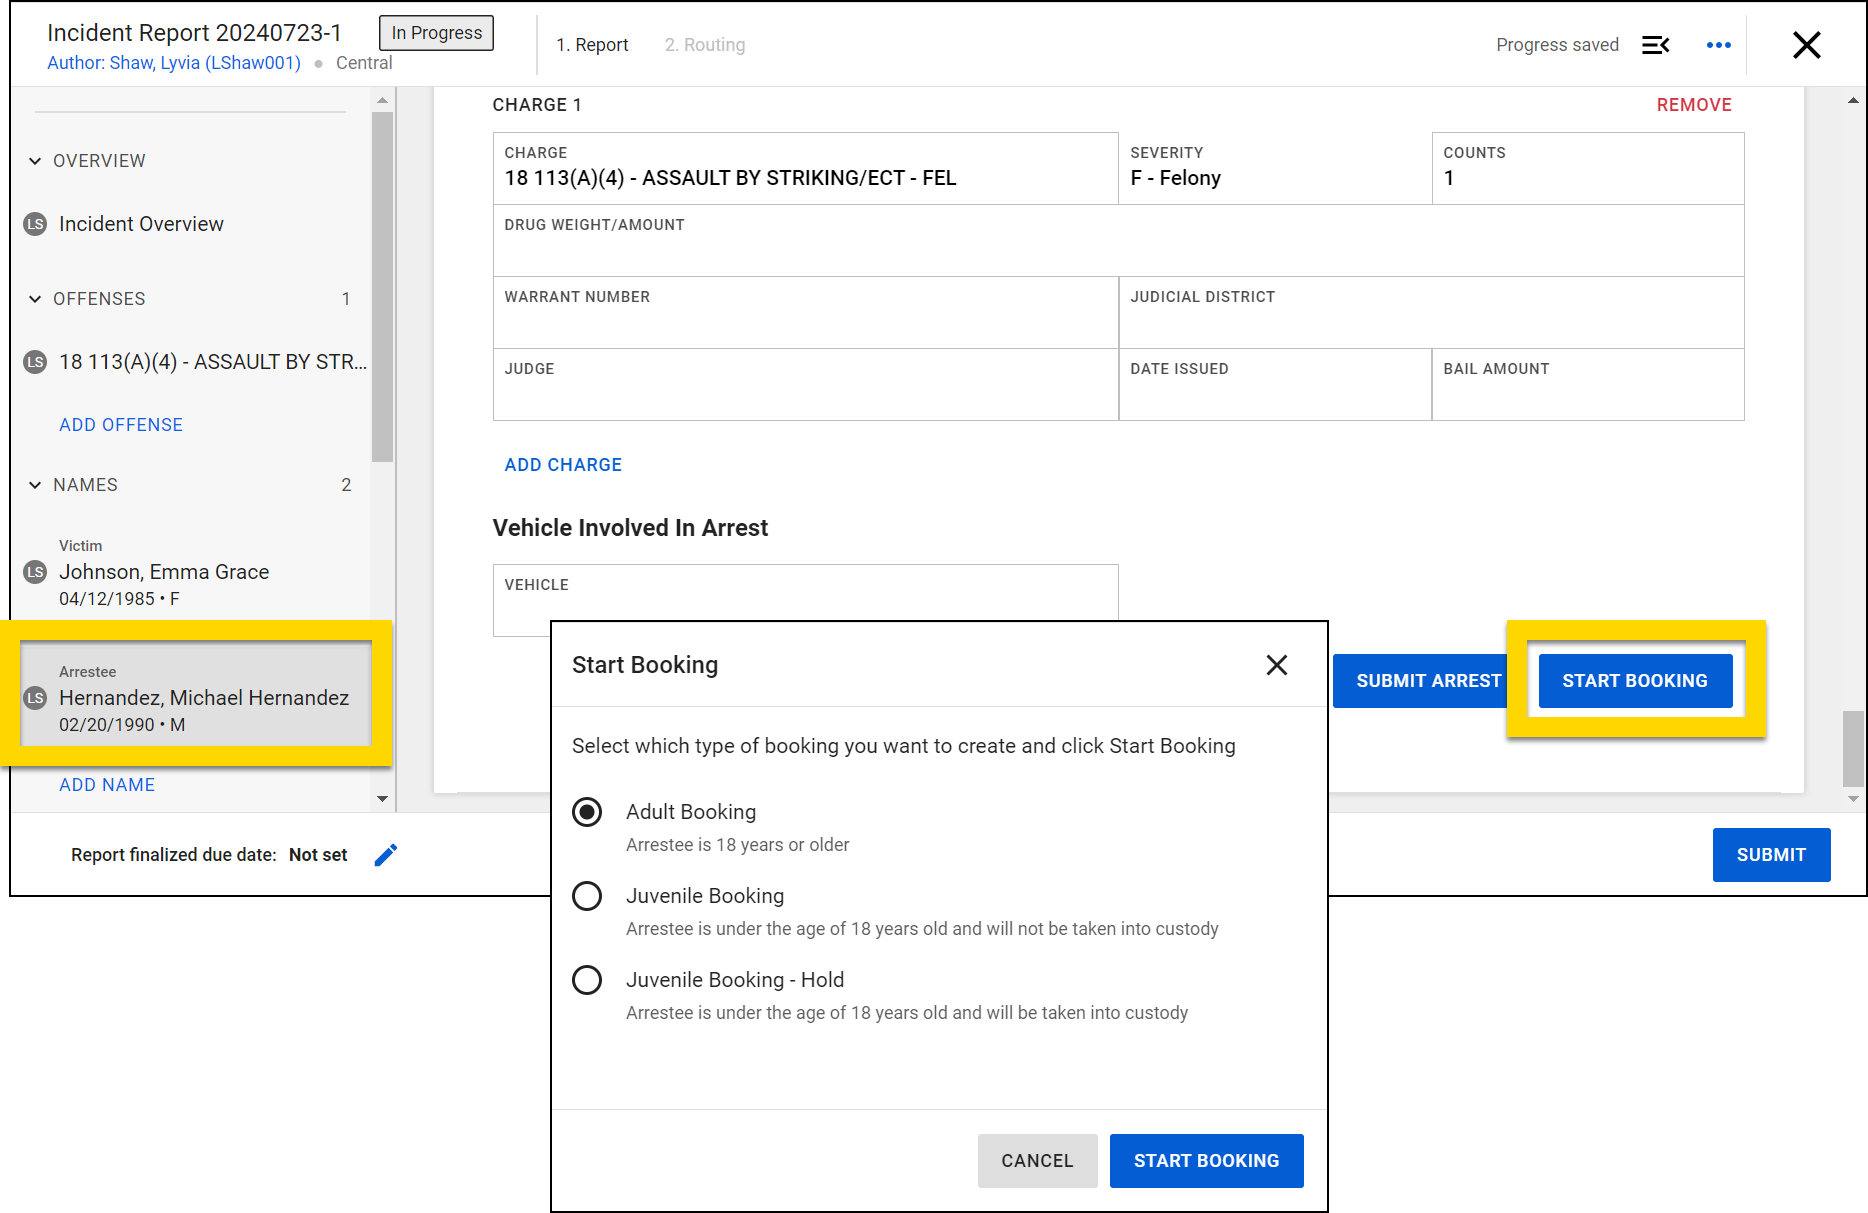
- Add a person to the report.
- Add an arrest to that person. Complete all arrest information.
- Select Start booking.
- Select a booking type:
- Adult Booking: Arrestee is age 18 and older
- Juvenile Booking: Arrestee is under 18 and will NOT be taken into custody
- Juvenile Booking - Hold: Arrestee is under 18 and WILL be taken into custody
- Select Start booking.
- The booking report will open in where you can enter information about the inmate, hold reason, holding information, mugshots, and files.
Report sections and actions
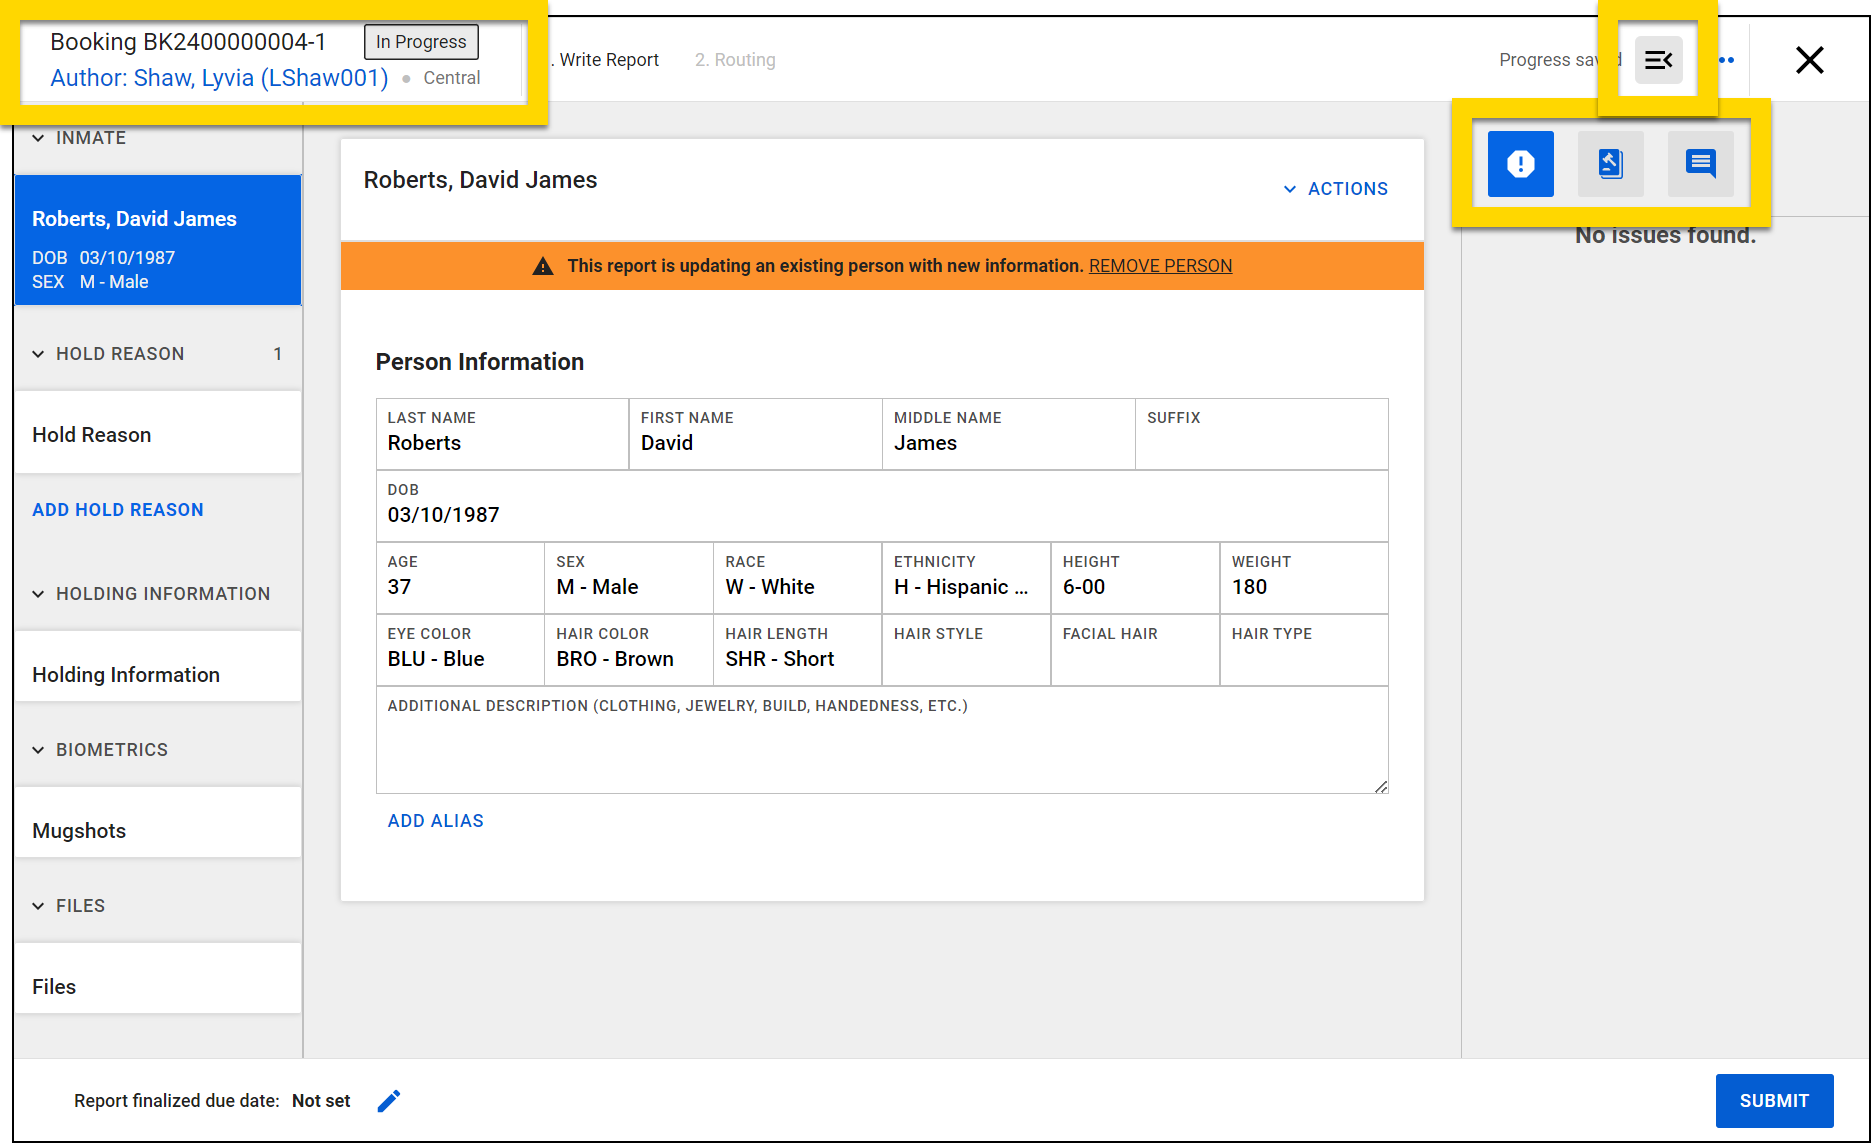
Selecting a Booking ID or creating a new booking opens the booking report in Report Writer, which displays the following information:
- Report ID
- Status (In Progress, Final)
- Author
You can take the following actions after opening the booking:
- Select the name of the author to view the booking report history.
- Expand the sidebar on the right to view errors, associate warrants, or leave comments.
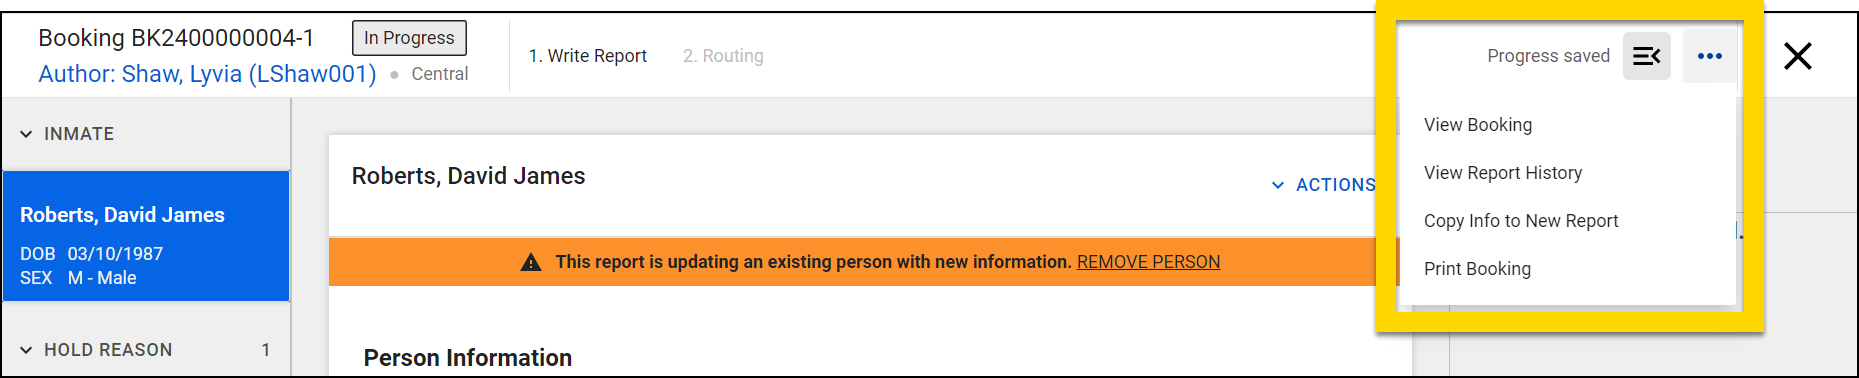
Take the following actions from the More actions [...] menu:
- View booking: Opens the inmate's booking profile in a separate tab
- View report history: Opens a log of all actions taken on the booking, including by whom and when
- Print booking: Lets you print the booking
Select the buttons and links on the left side of the screen to jump to different sections:
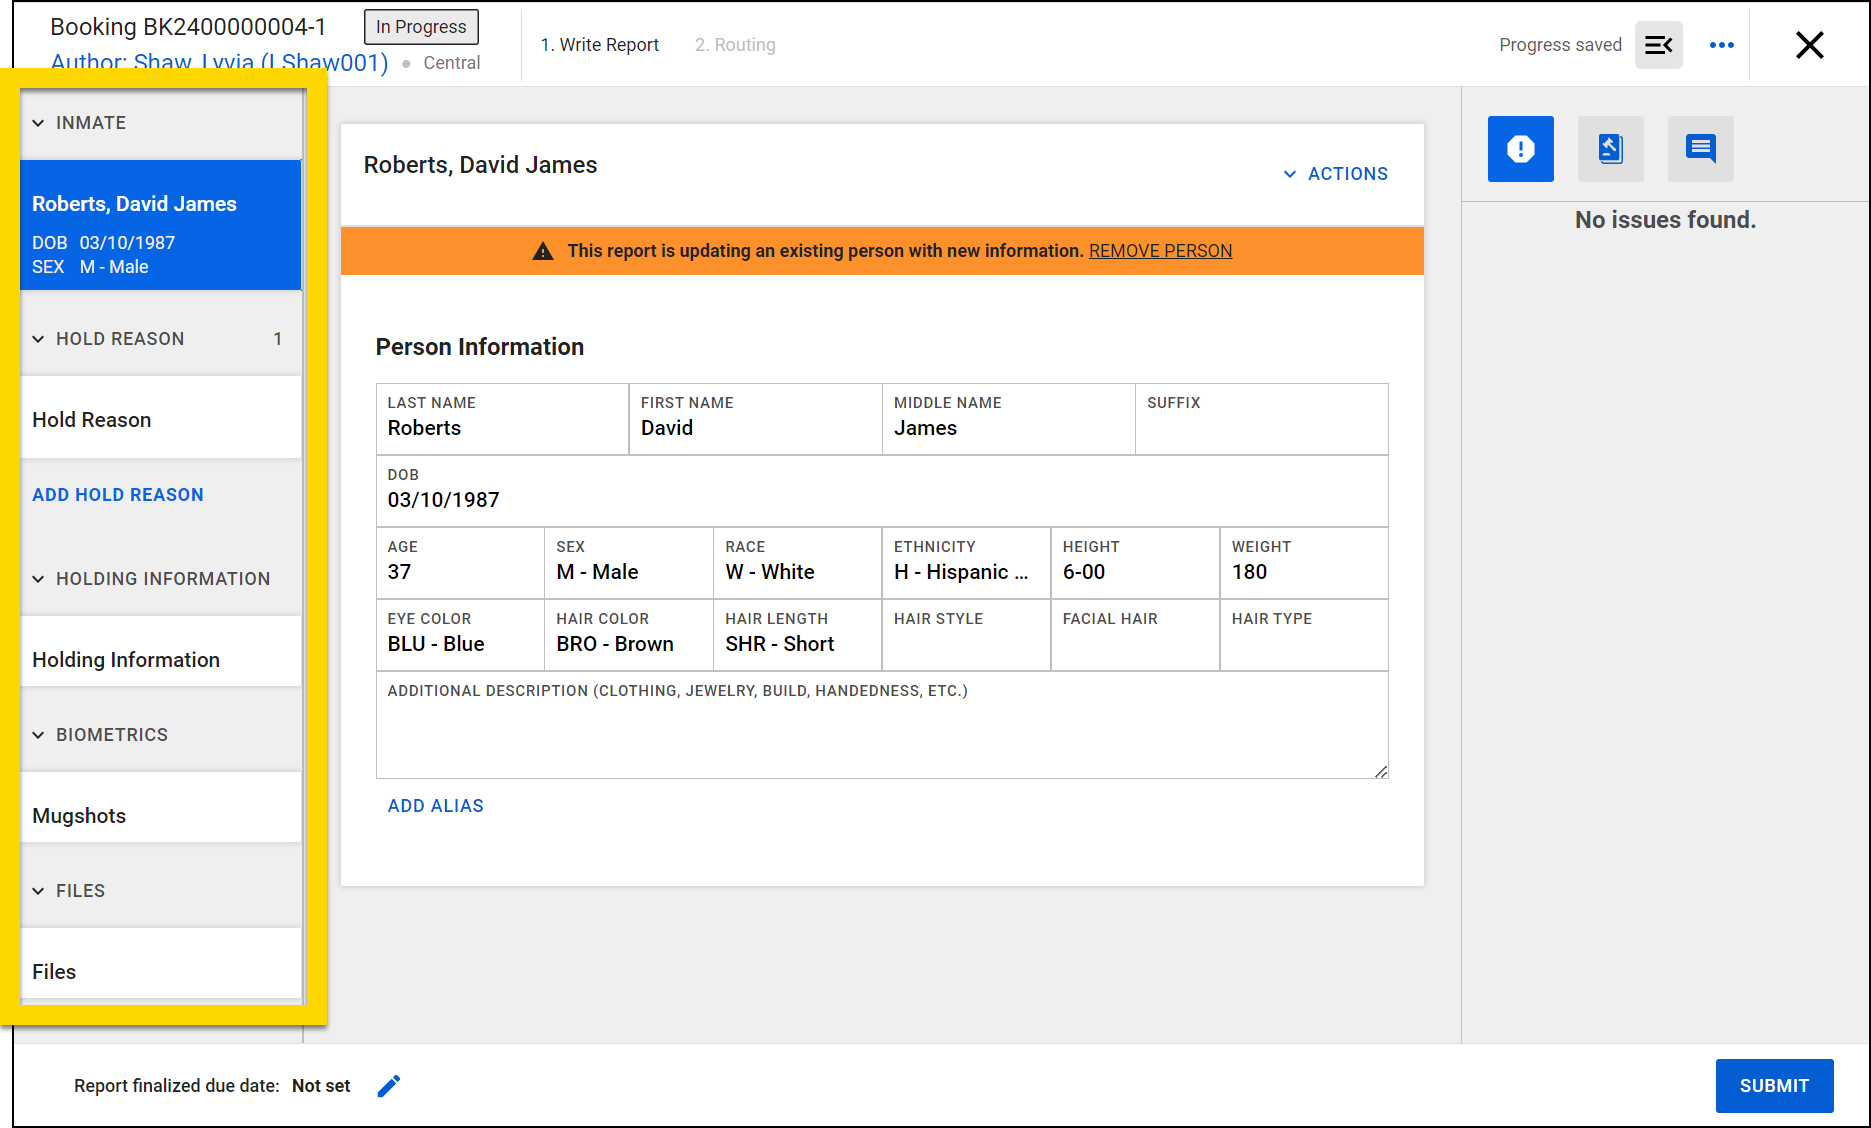
Inmate
To add an inmate to a booking report, open the Inmate section. To avoid creating a duplicate profile, use the search fields to see if that person already exists in the Axon Records database. Selecting a name will open a preview of their profile and let you import them into the booking.
If the booking was started from an incident report, this section is automatically filled with the information of the arrestee who was added to the incident report.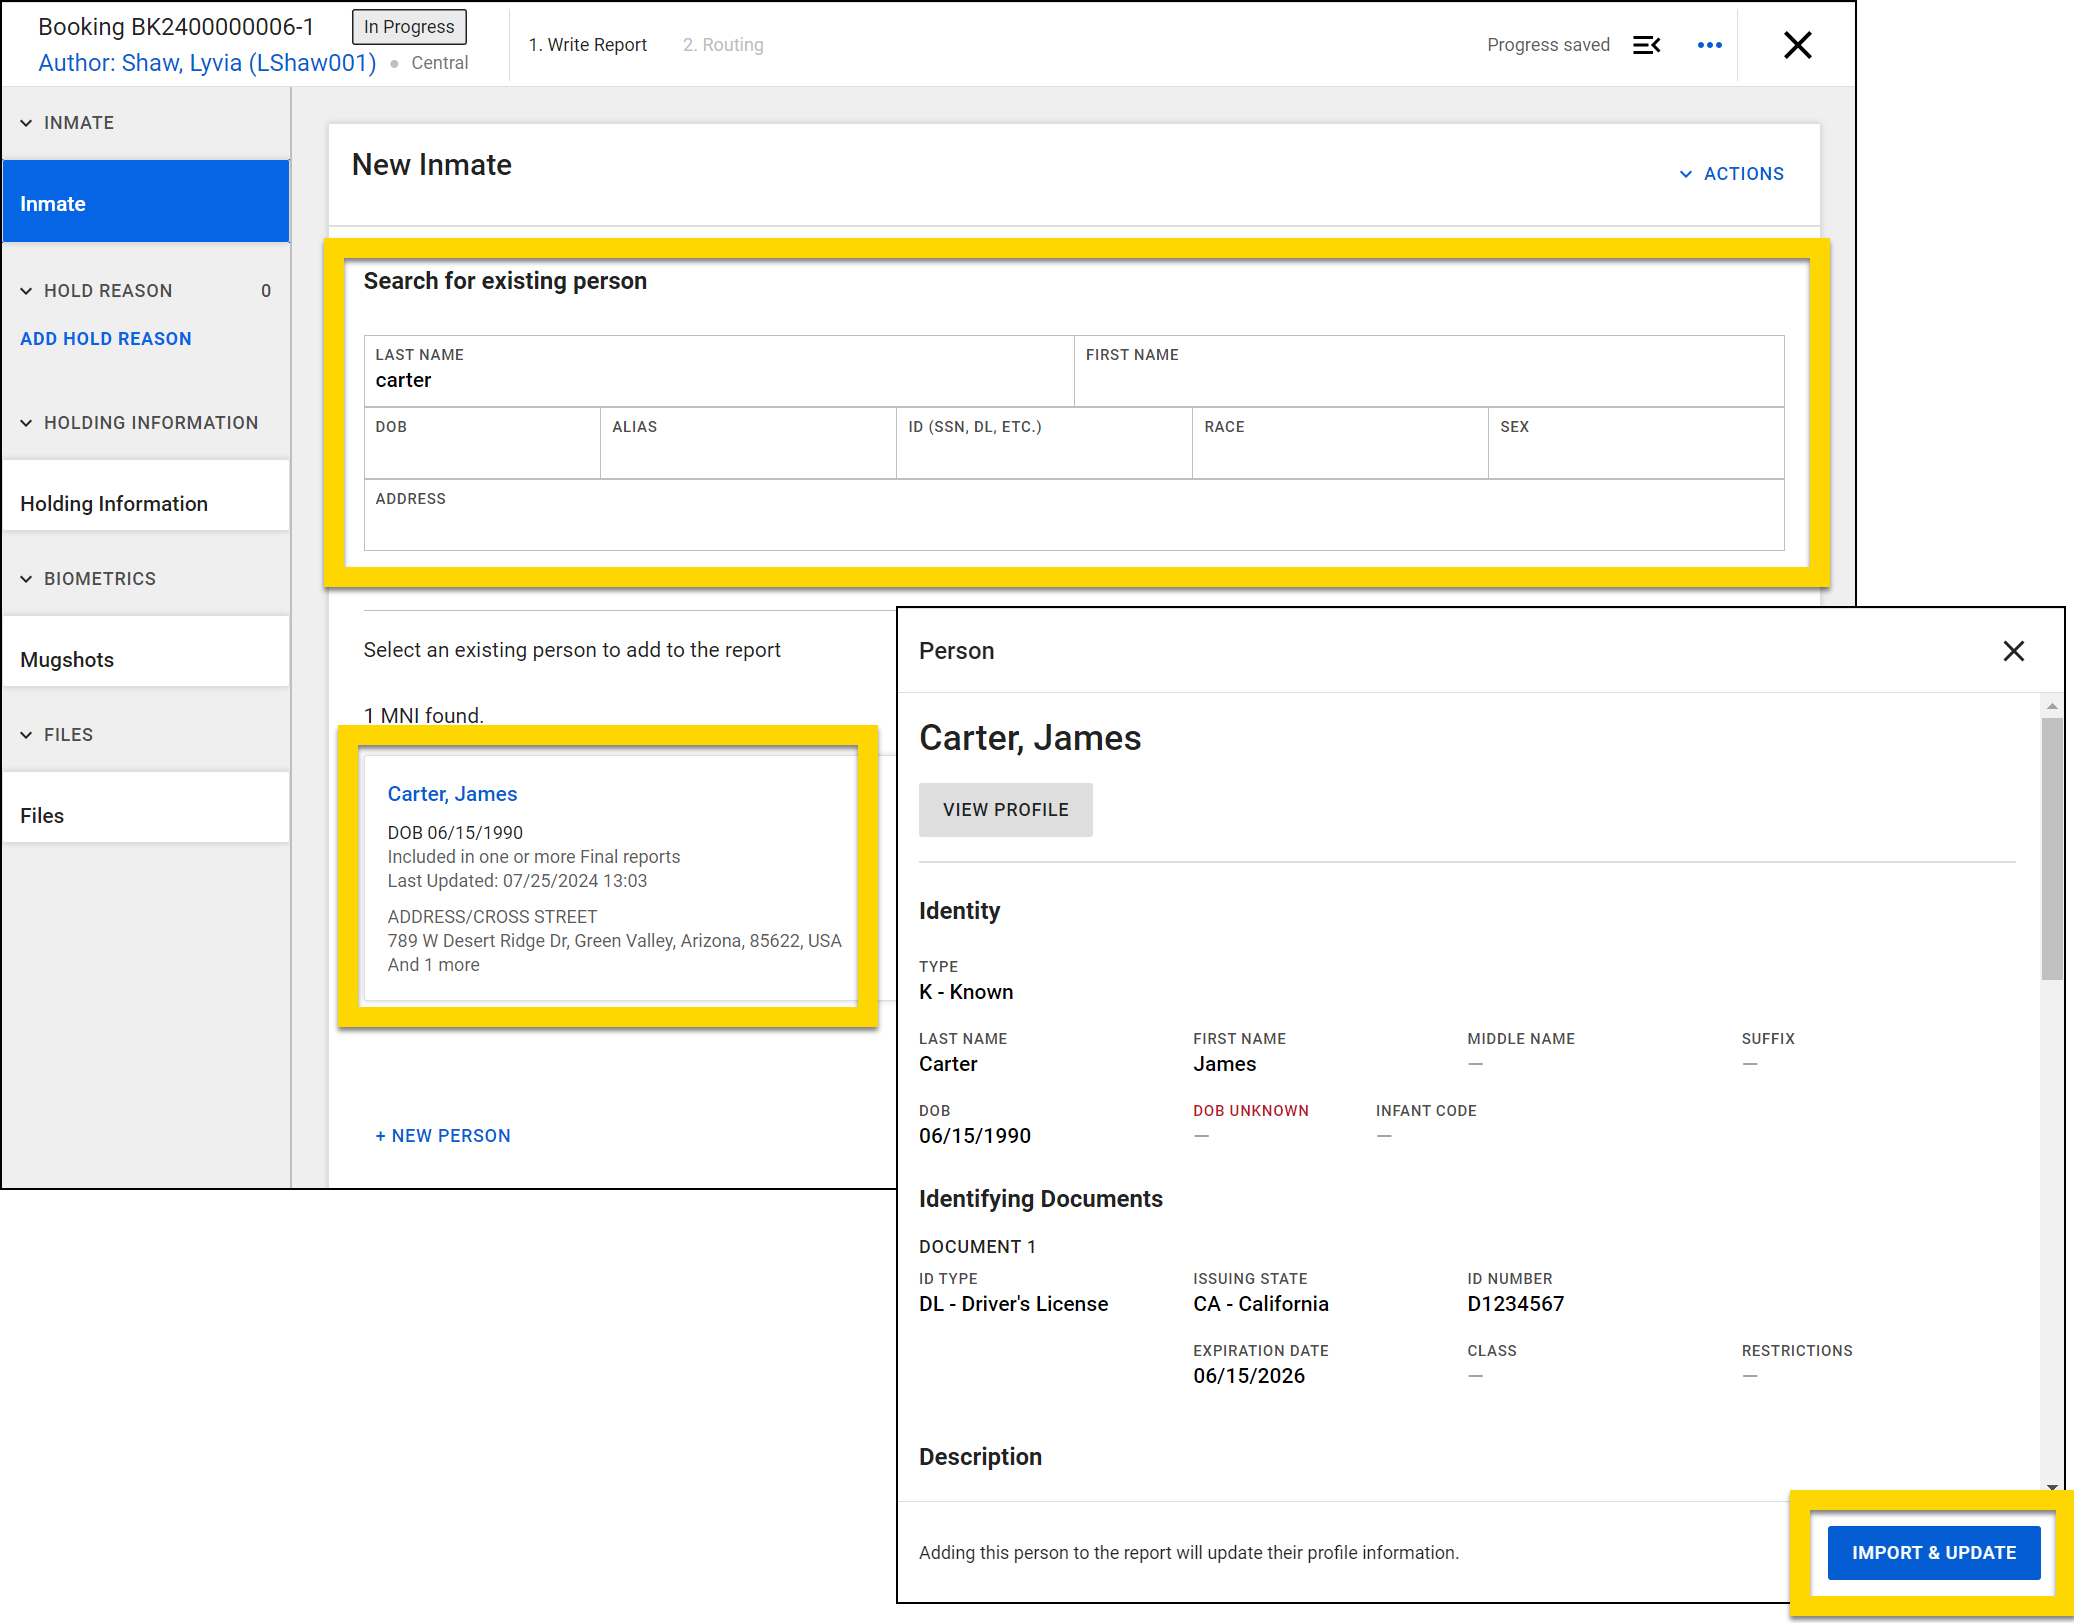
When you add an existing person to a booking, an orange banner displays at the top of the window. If the person was added by mistake, select Remove Person to remove them.
If you don't see the person in the search results list, select New person. Enter all Person Information in the new fields that appear in the booking.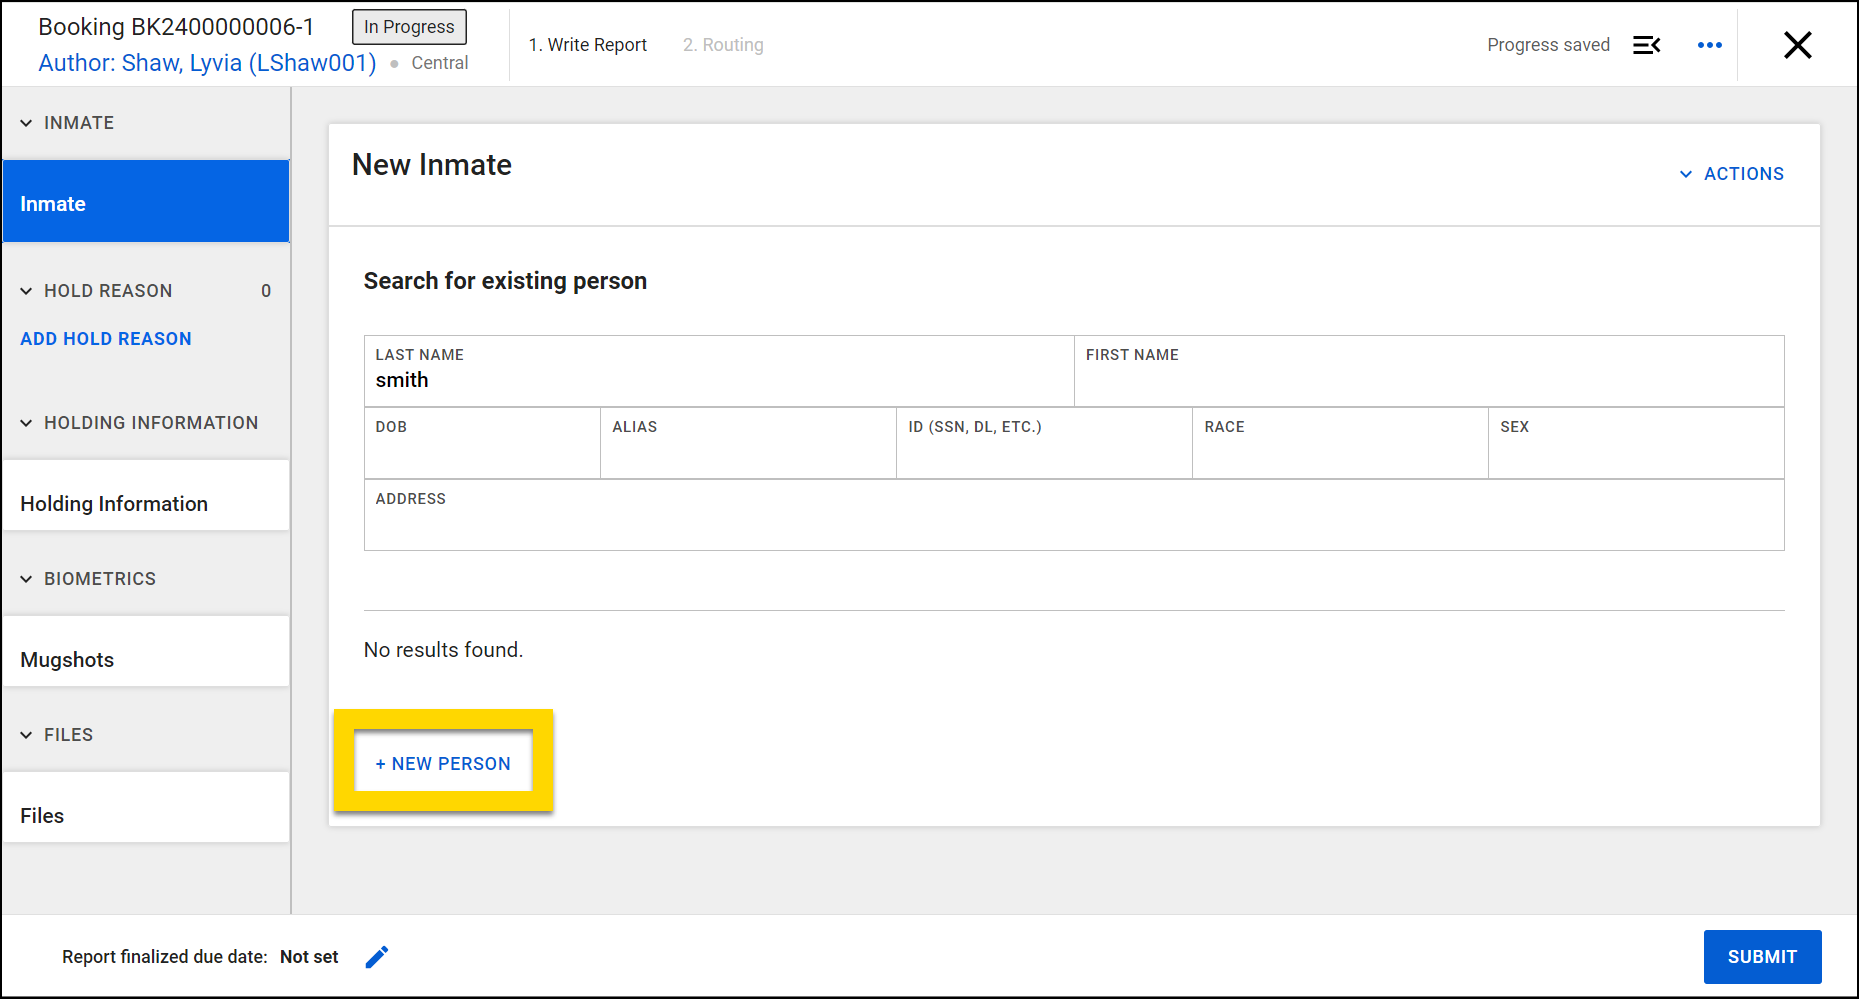
To remove a new person you have created, select Actions > Remove person.
Booking profile vs. person profile
Once you've added an inmate to the booking, a booking profile is created for them, and the inmate's name is added to the Inmates list. This booking profile contains information specific to the booking.
Each inmate also has a person profile that includes all known information about that person, including identity, identifying documents, description, contact information, and known associations (incidents, organizations, people, etc.). To view the person profile from the booking report, select Actions > View Profile.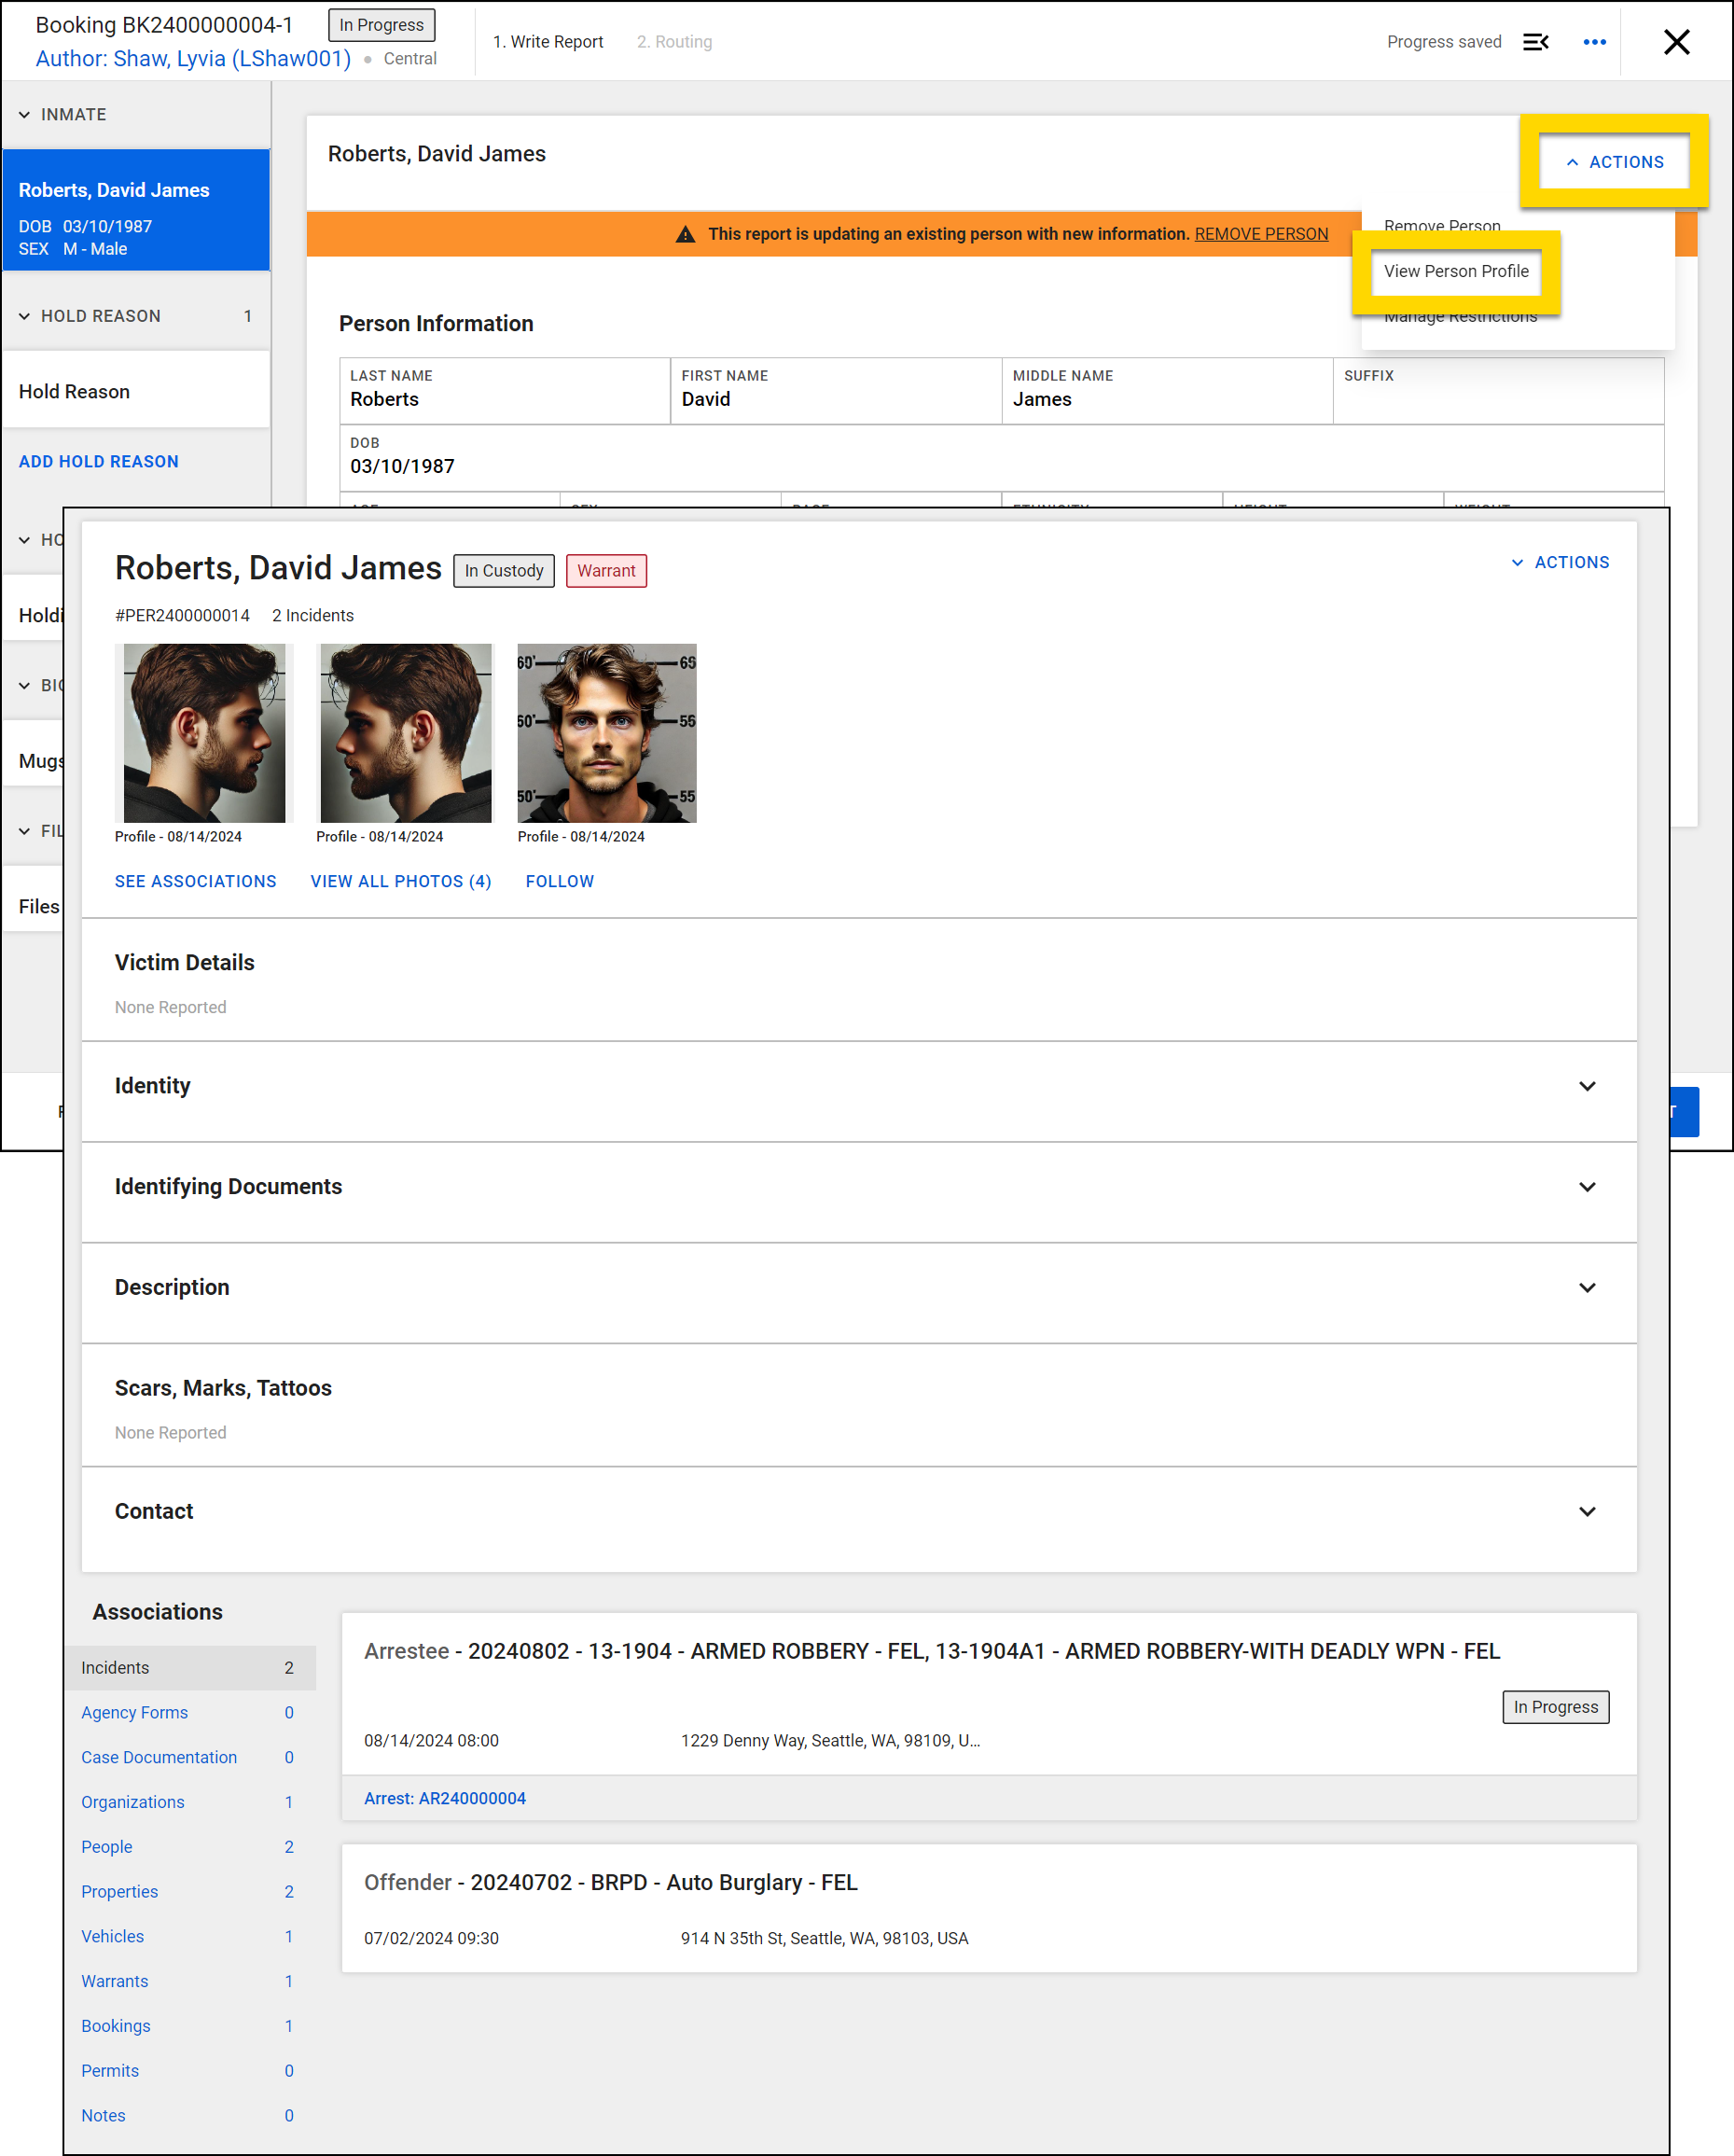
Hold reason
In a booking report, select Add hold reason to add the arrest details, warrant(s), and arrest charges. If the booking was started from the incident report, this information is automatically filled based on what was entered in the incident report.
If the hold is related to multiple arrests, select Add hold reason for each additional arrest.
Holding information
In the booking report, open the Holding information section to provide all details about the holding, such as reason, date, officer, etc.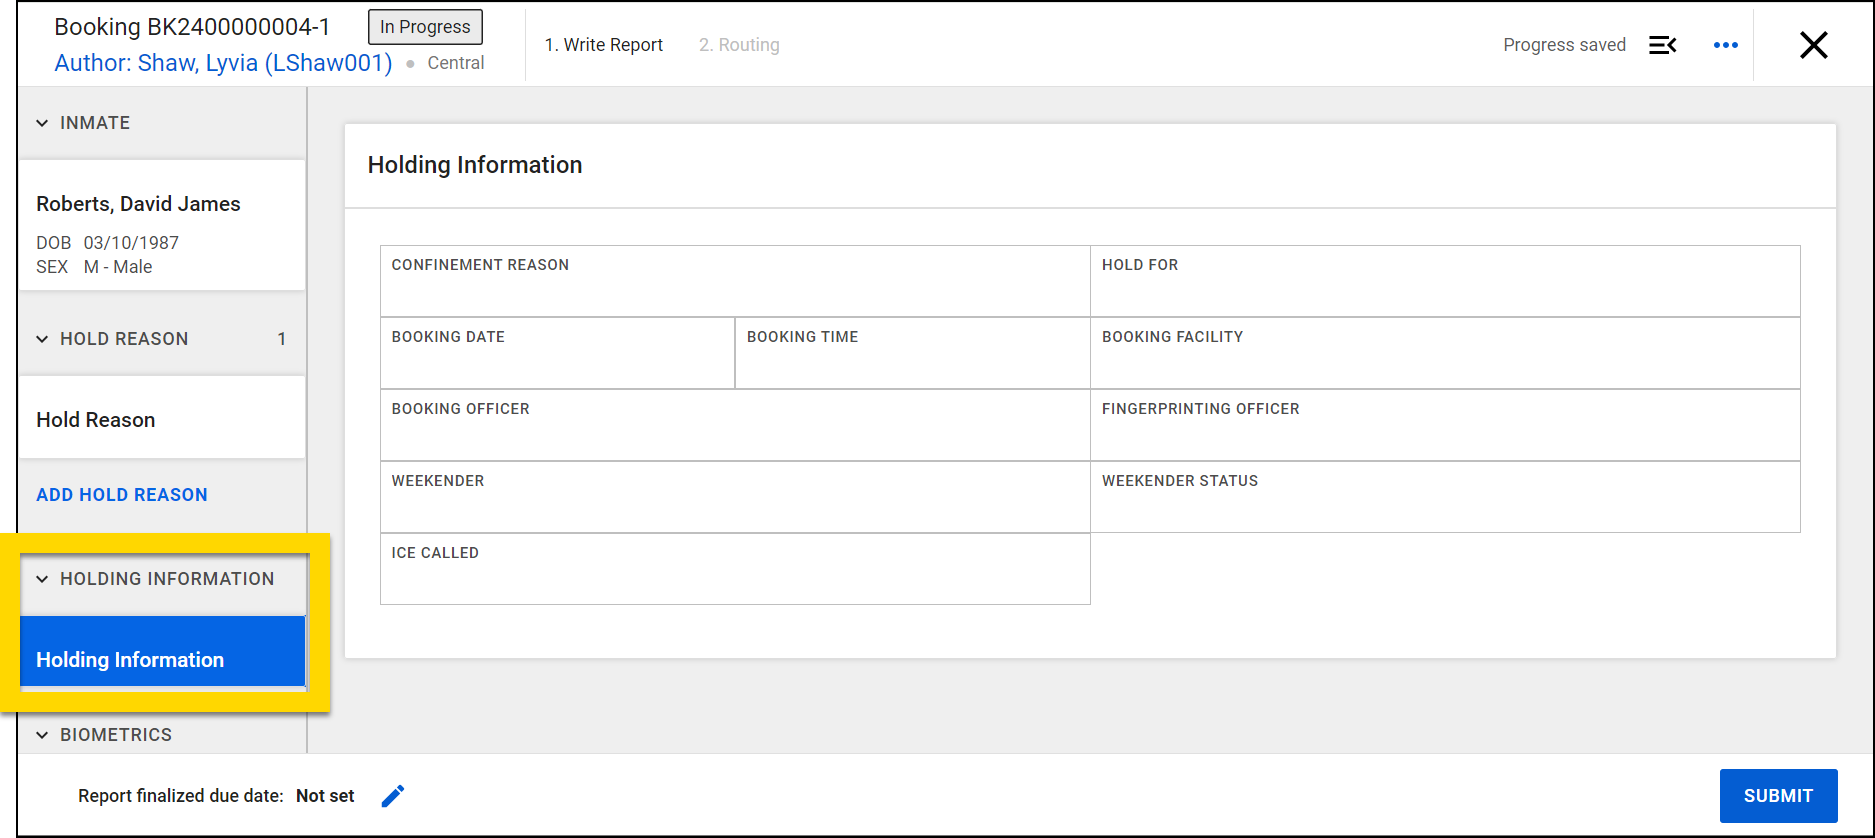
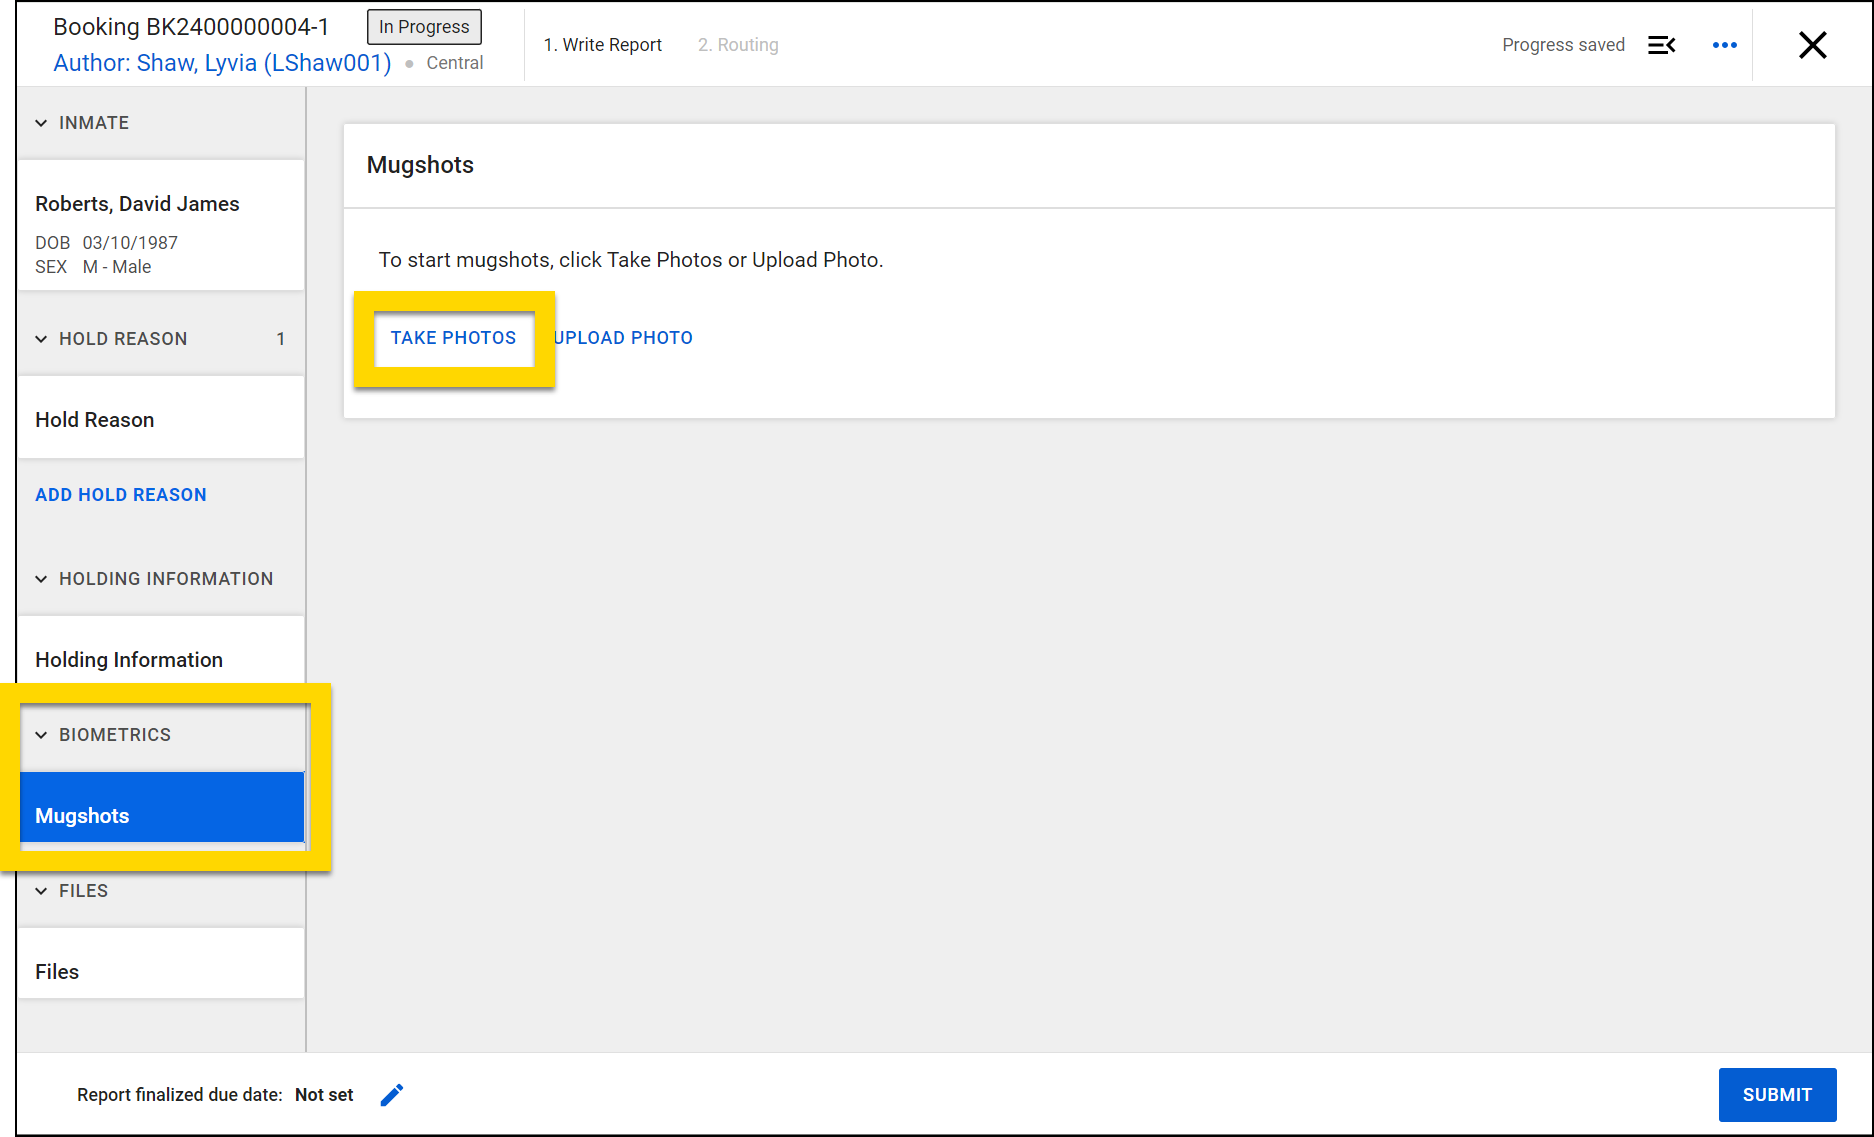
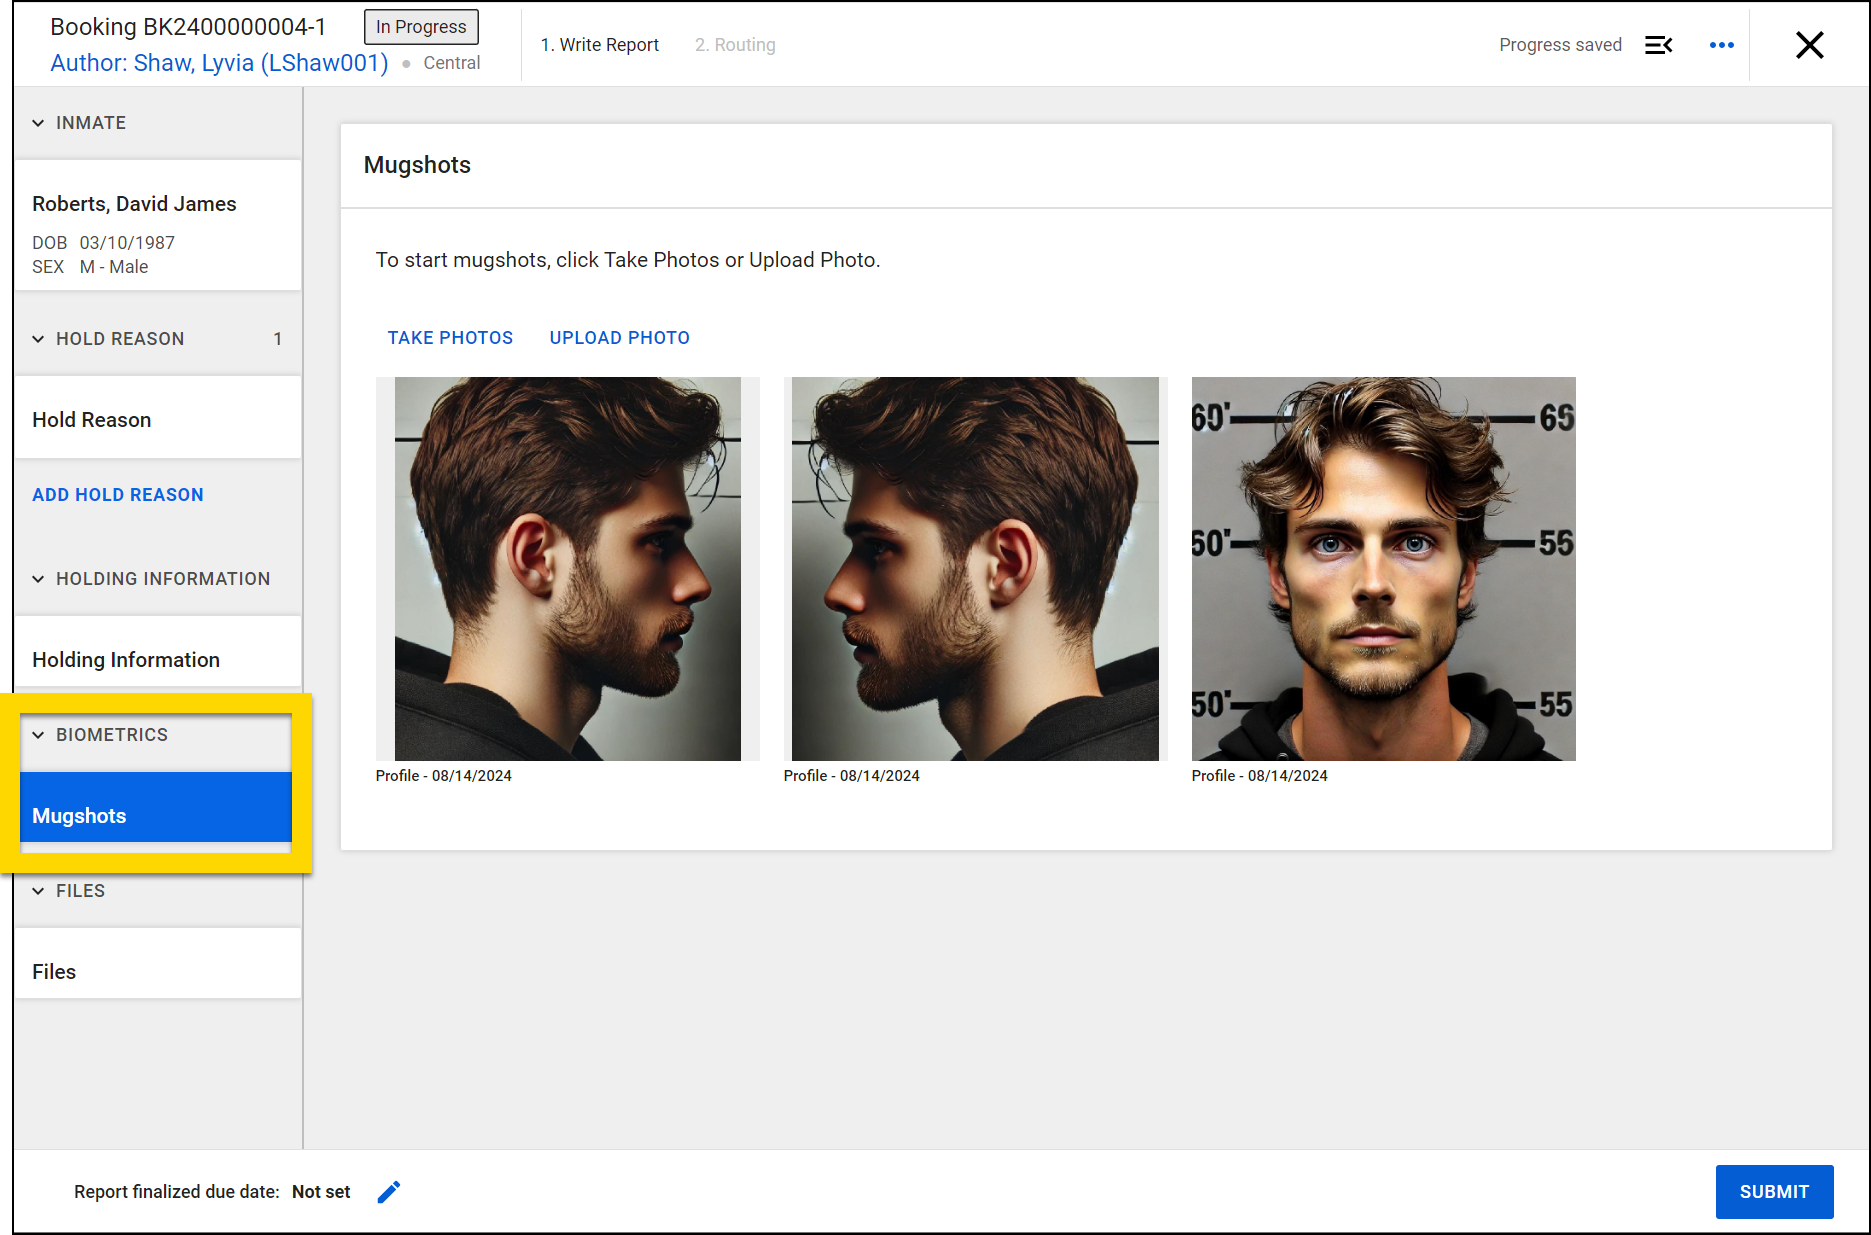
Mugshots
Open the Mugshots section to add the inmate's mugshots to the booking. You can either take photos or upload photos.
The Inmate and Hold Reason sections must be complete before adding mugshots.
Take photos
If your agency integrates a camera with Axon Records, take these steps:
- Select Take photos.
- The live camera feed loads on the left side of the screen. Once the inmate is positioned as desired, select Take photo.
- To take a new photo, select Take photo again.

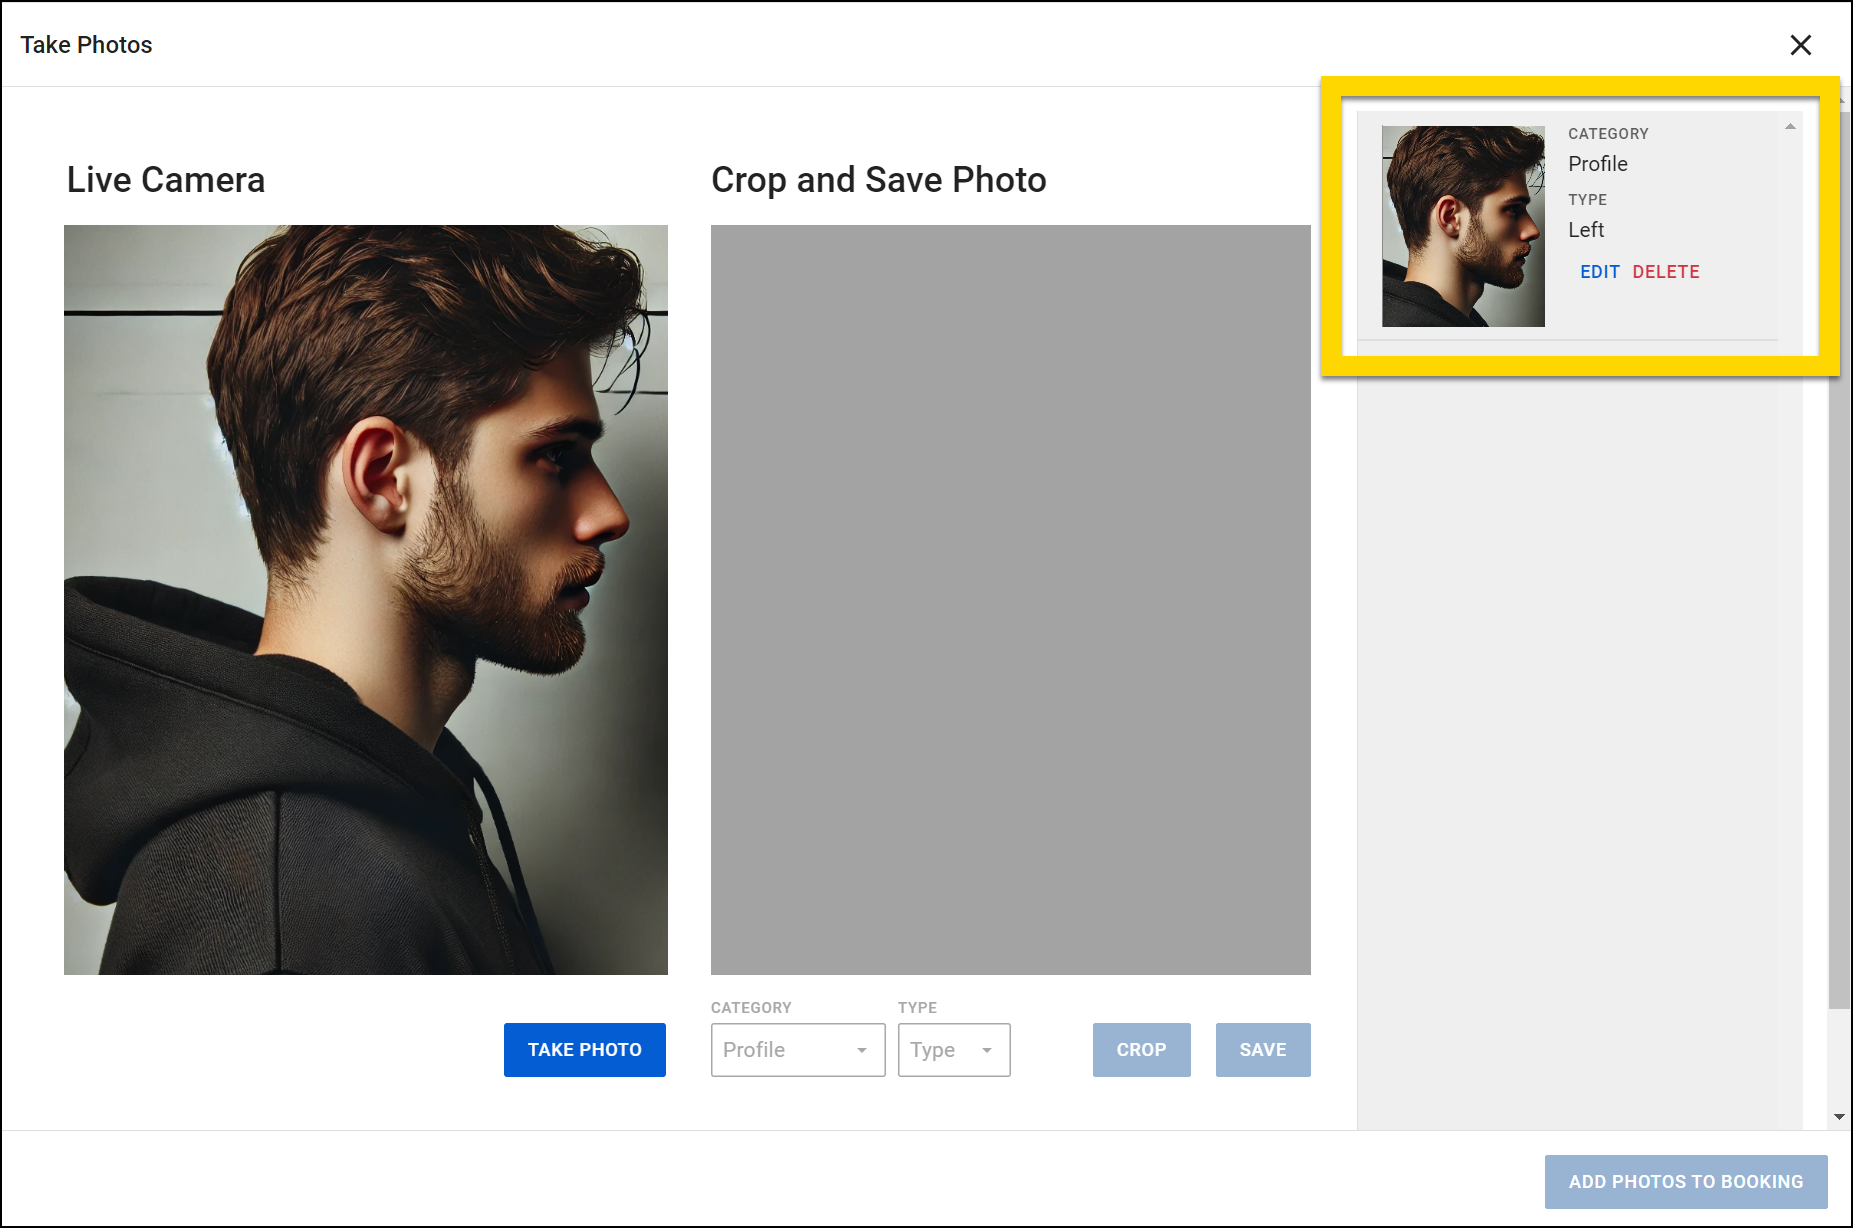
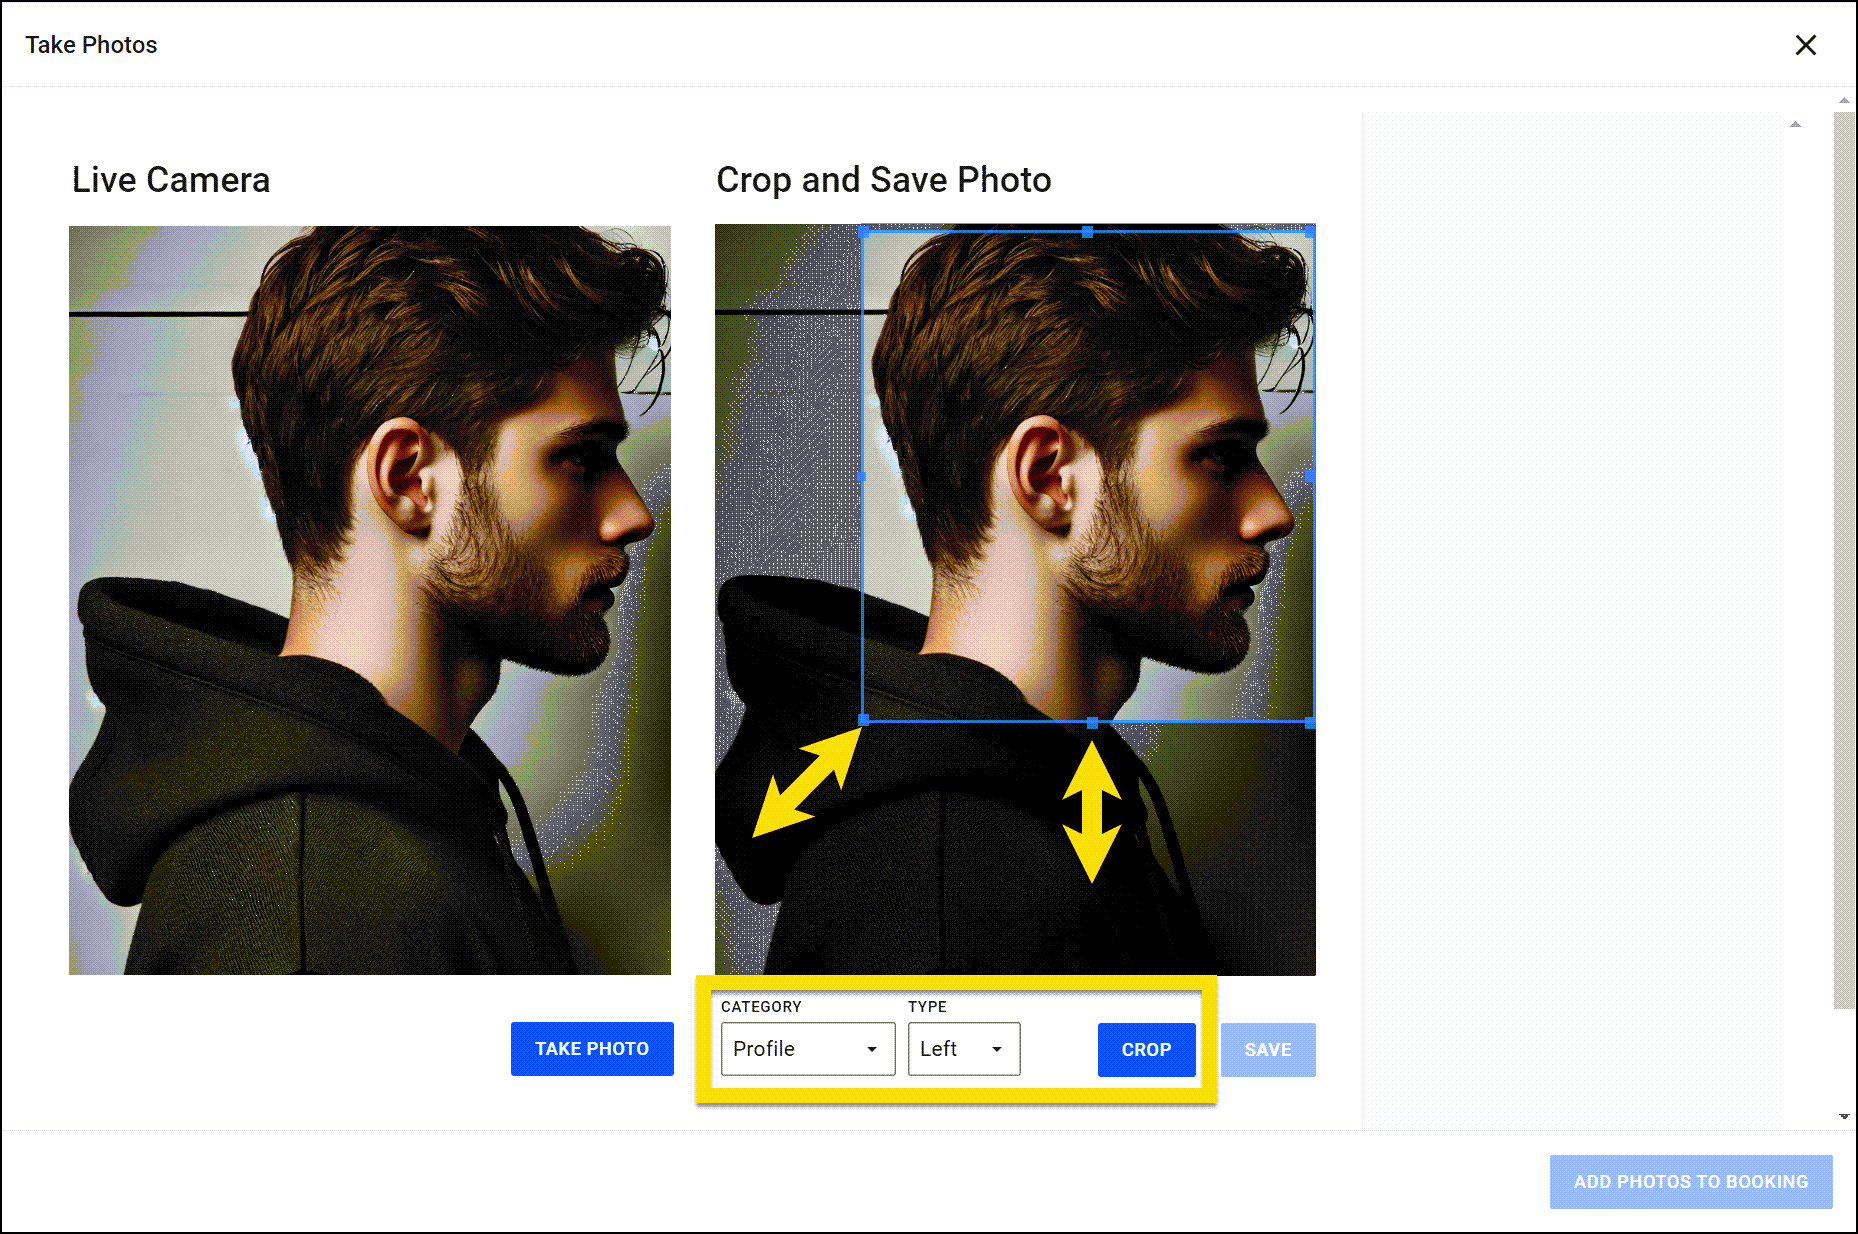
- The photo appears in the center of the screen where you can add photo details and crop the photo:
- Set the category to Profile and the photo type (Front, Left, Right).
- Click and drag the corners and edges of the blue box to resize the crop selection.
- Select Crop photo to apply the crop to your photo.
- Select Save.
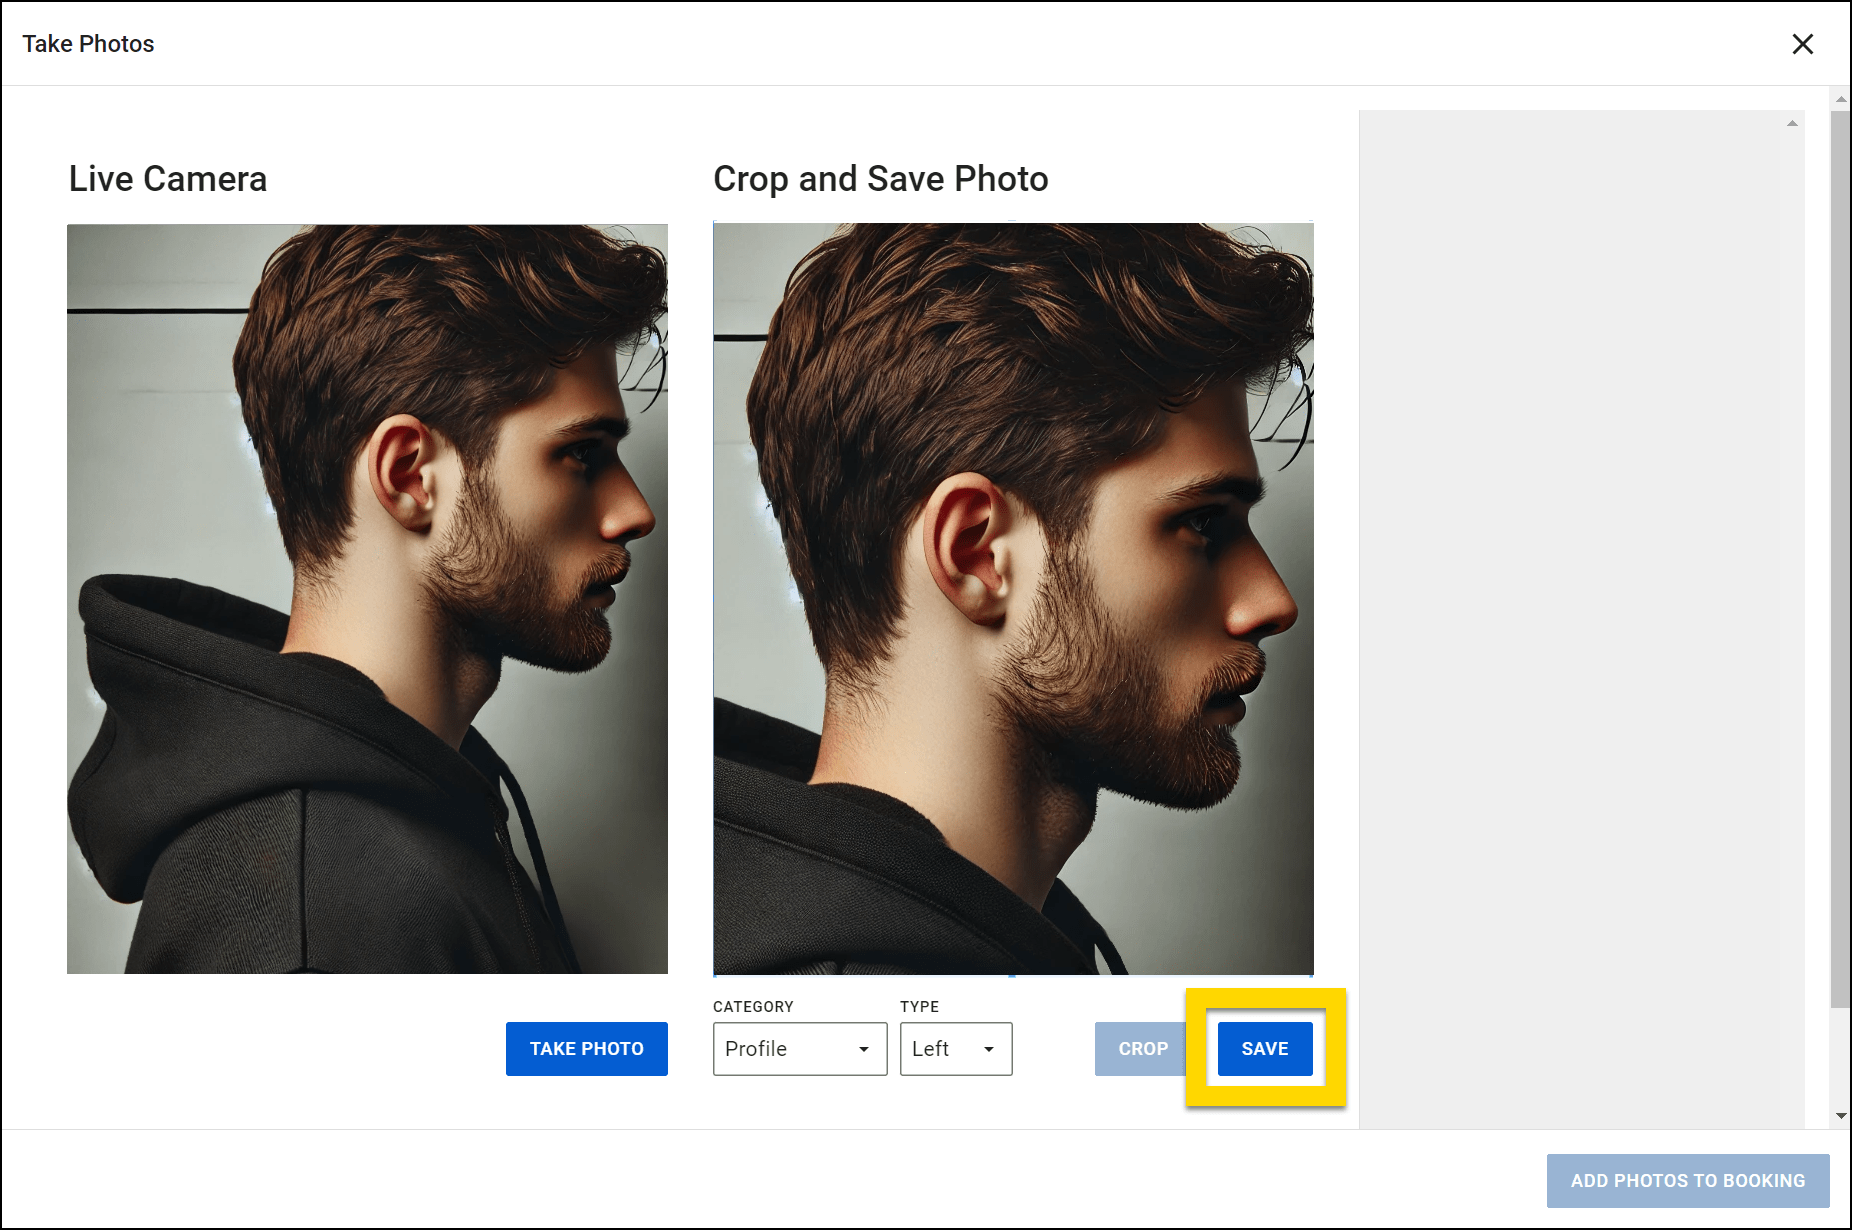
- The cropped photo, its category, and its type will appear on the right side of the screen.
- Select Edit to adjust the category and type.
- Select Delete to remove the photo.
- Select Take photo again to take the remaining profile photos (Front, left, and right are required). Add a photo category and type to each photo and crop. Once you've taken all photos, select Add photos to booking.
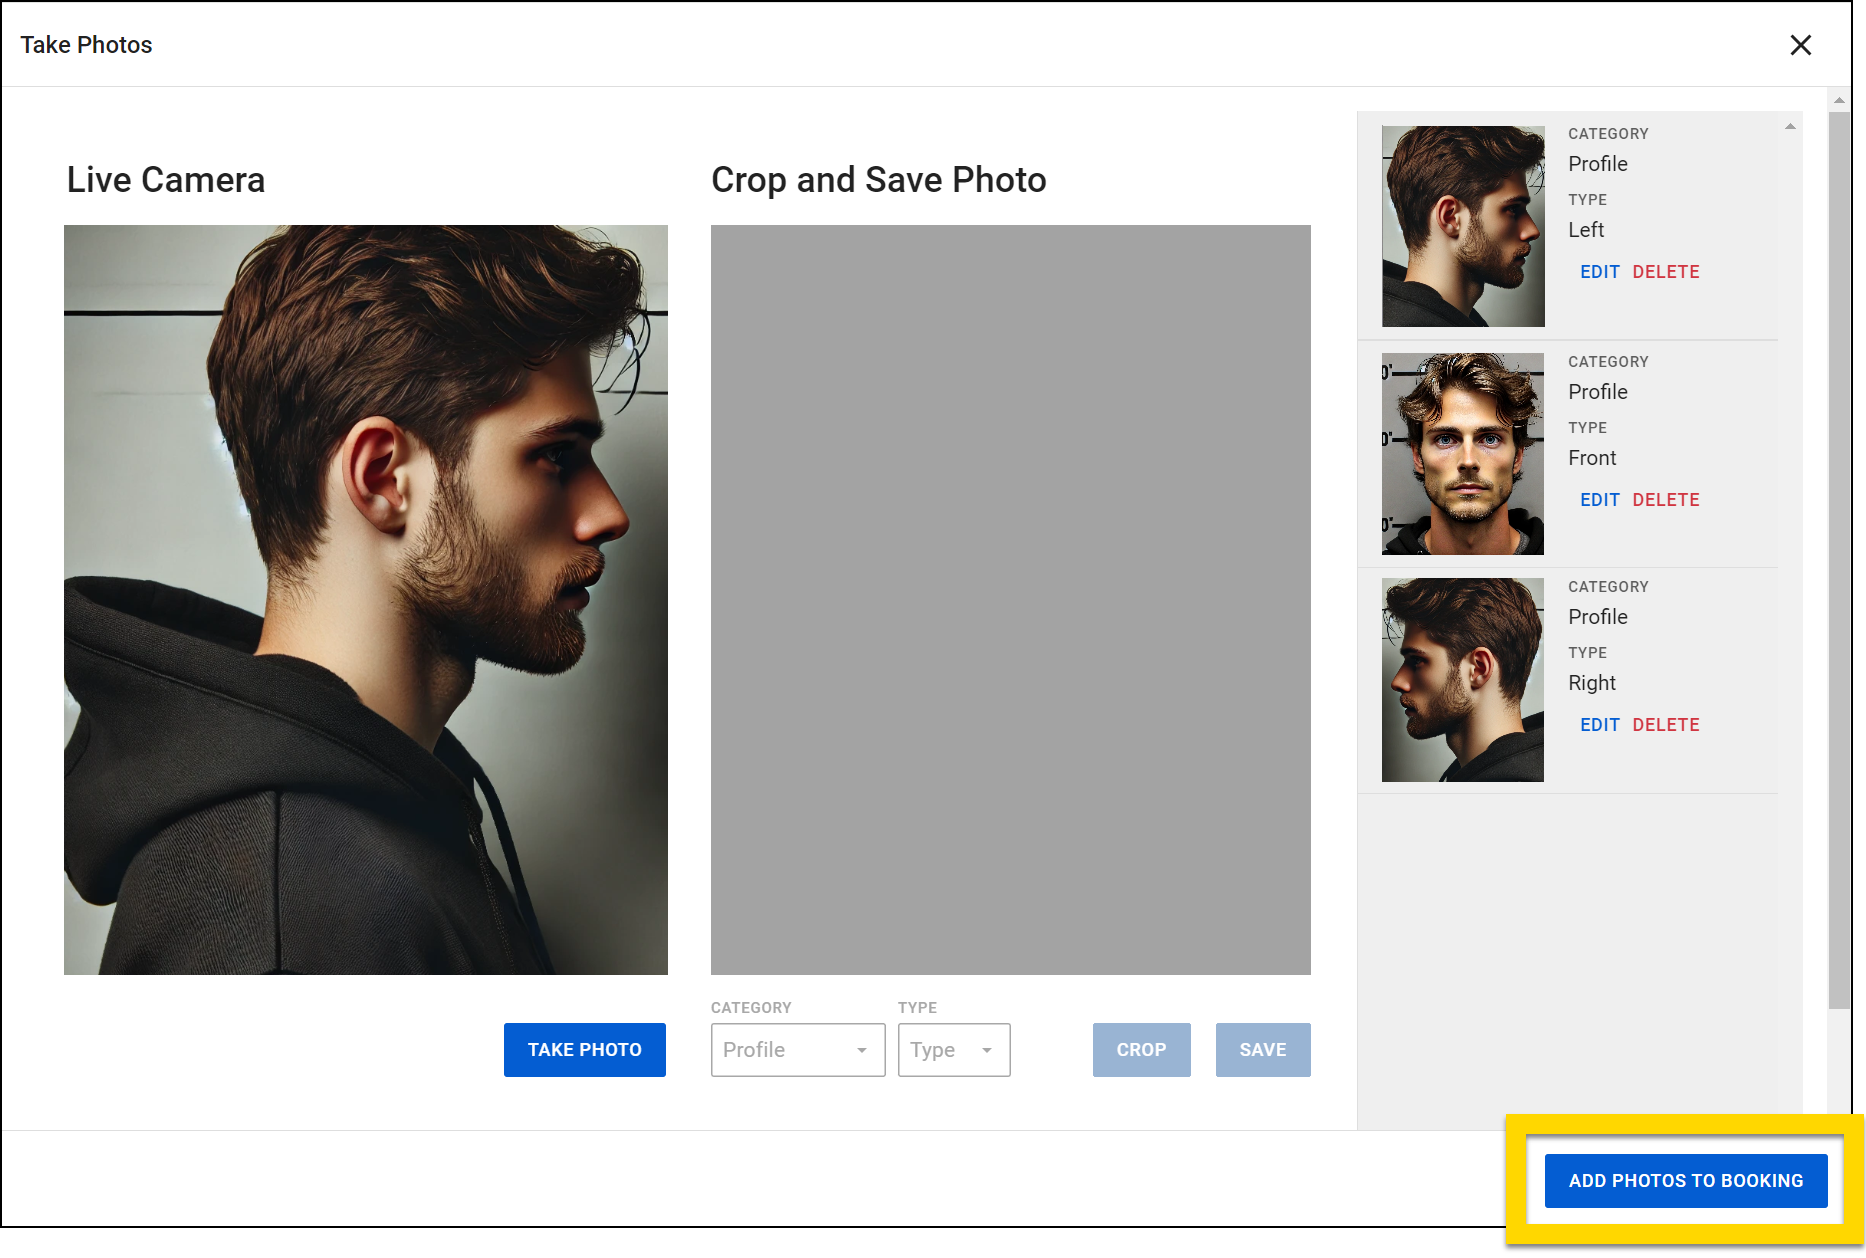
- The mugshot photos appear in the Mugshots section.
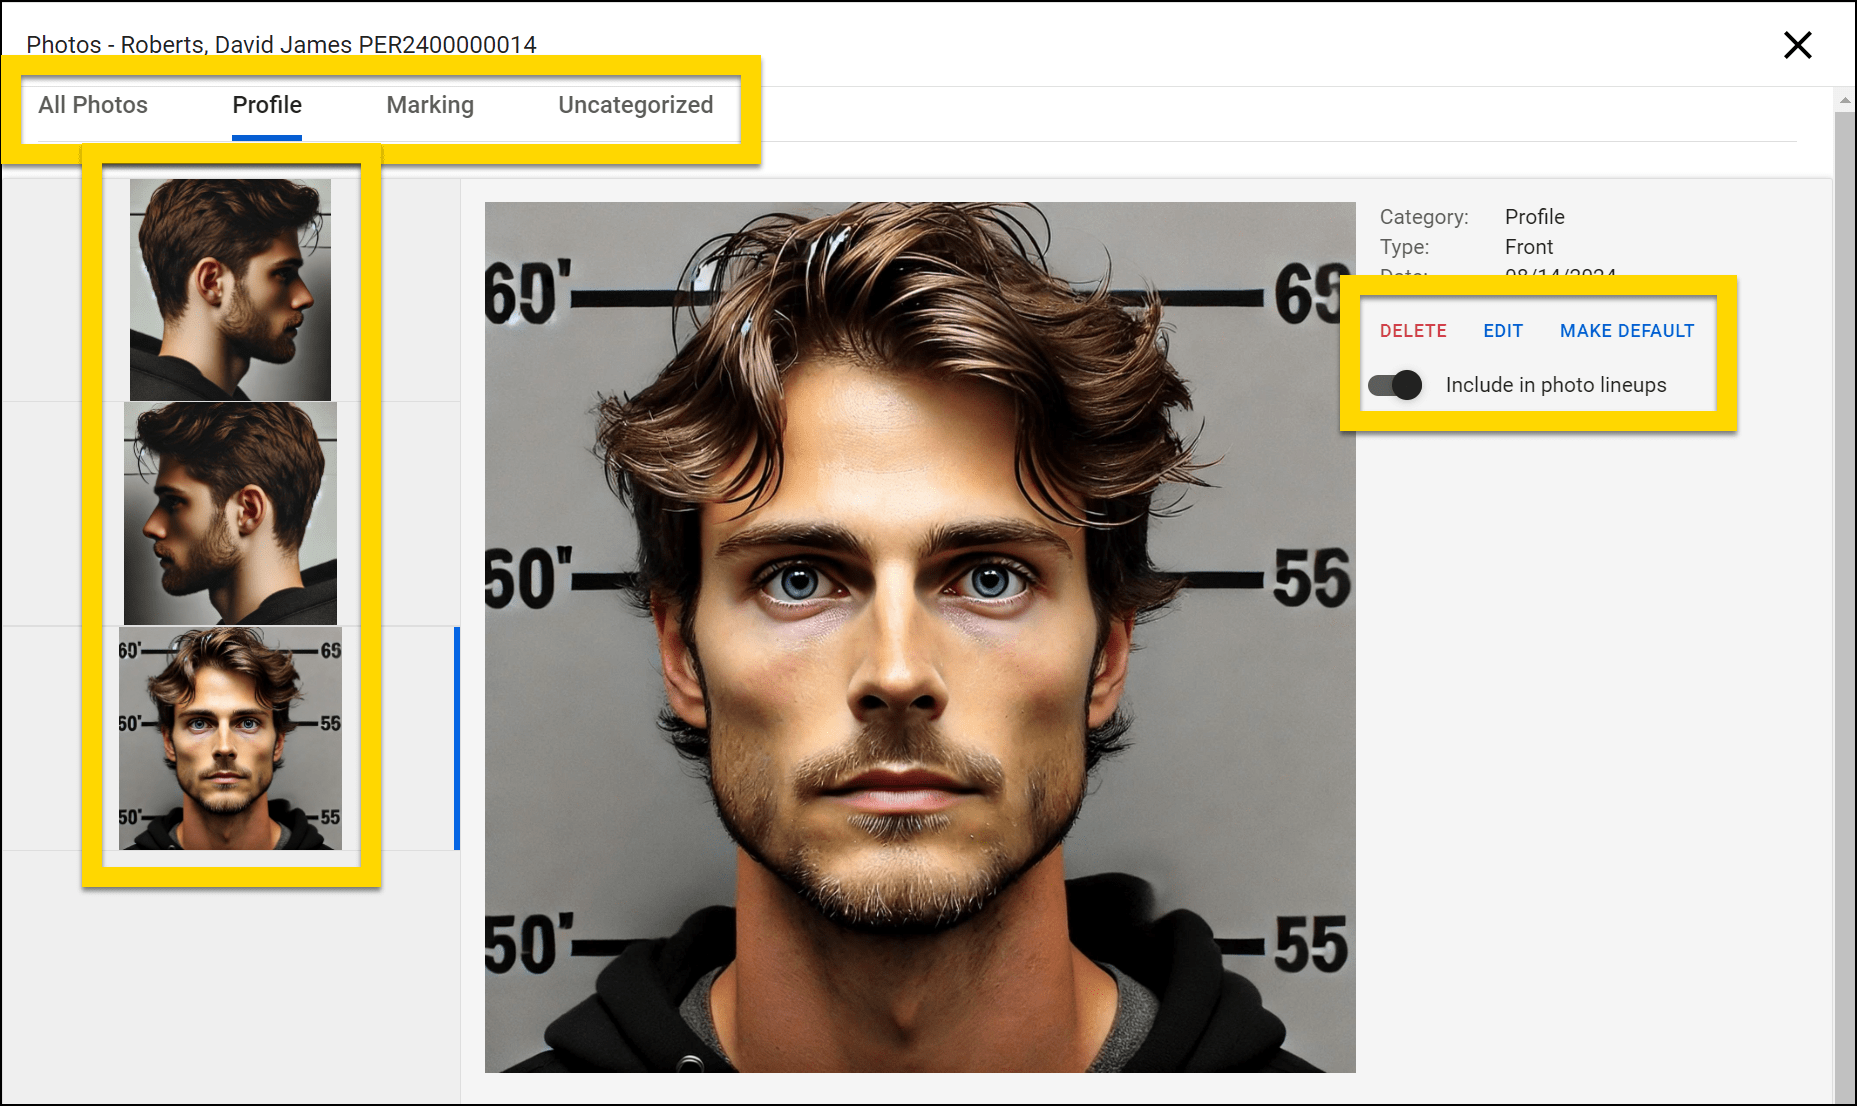
Take or upload additional photos if needed. Select a photo to open the photo gallery where you can:
- Use the tabs to switch between All photos, Profile, Marking, and Uncategorized photos.
- Switch between photos in the current tab by selecting the thumbnails.
- Edit the selected photo (change the category, type, and date taken).
- Delete the selected photo.
- Make the selected photo the default photo. Default photos display:
- As the first image on that person's profile
- In search results
- In the search results that appear when searching to add an existing person to a report.
- As only image on the person's booking profile
- Turn on the toggle to include the selected photo in photo lineups.
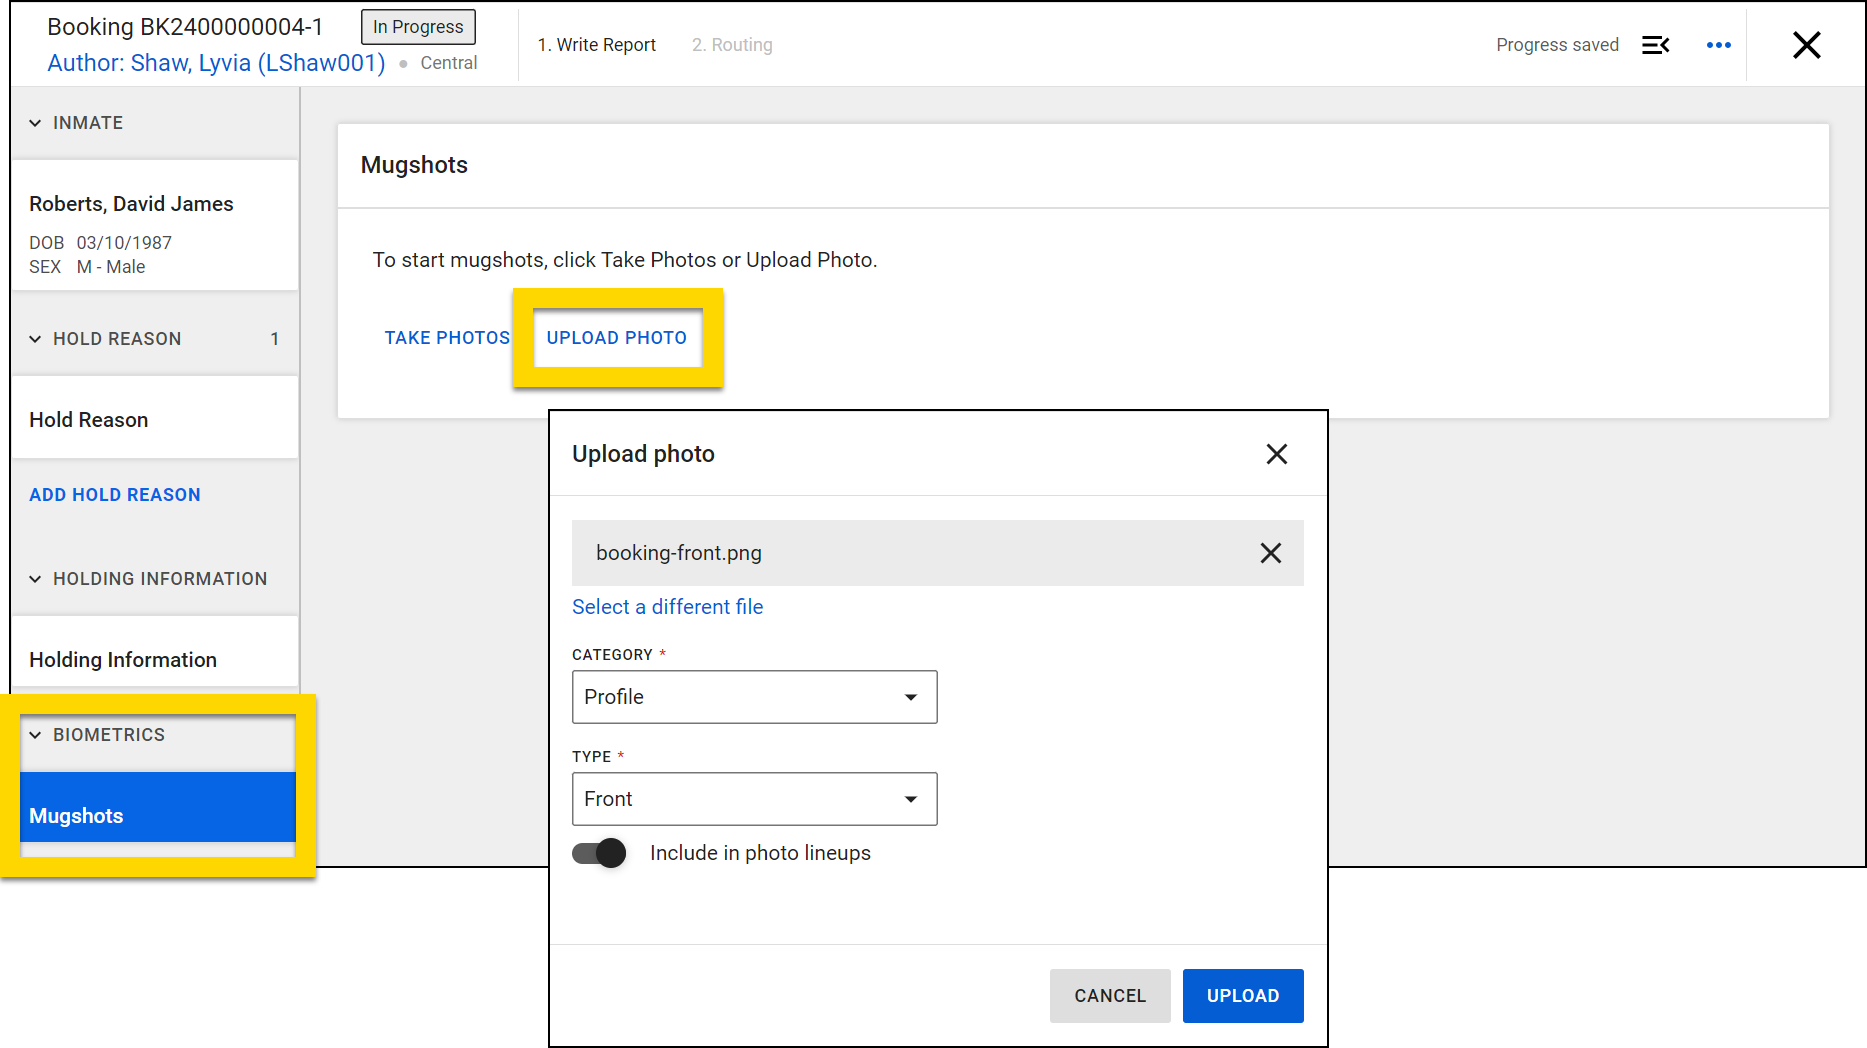
Upload photos
If your agency takes mugshots and then uploads them into Bookings, take these steps:
- Select Upload photo in the Mugshots section of the booking.
- Select Upload photo and find the first photo file on your computer.
- Set the photo category and type, and if the photo should be included in photo lineups, then select Upload.
- Repeat this process for all required photos.
Files
Open the Files section and select Upload file to upload additional files to the booking report. See Add report information for full instructions on managing files in reports.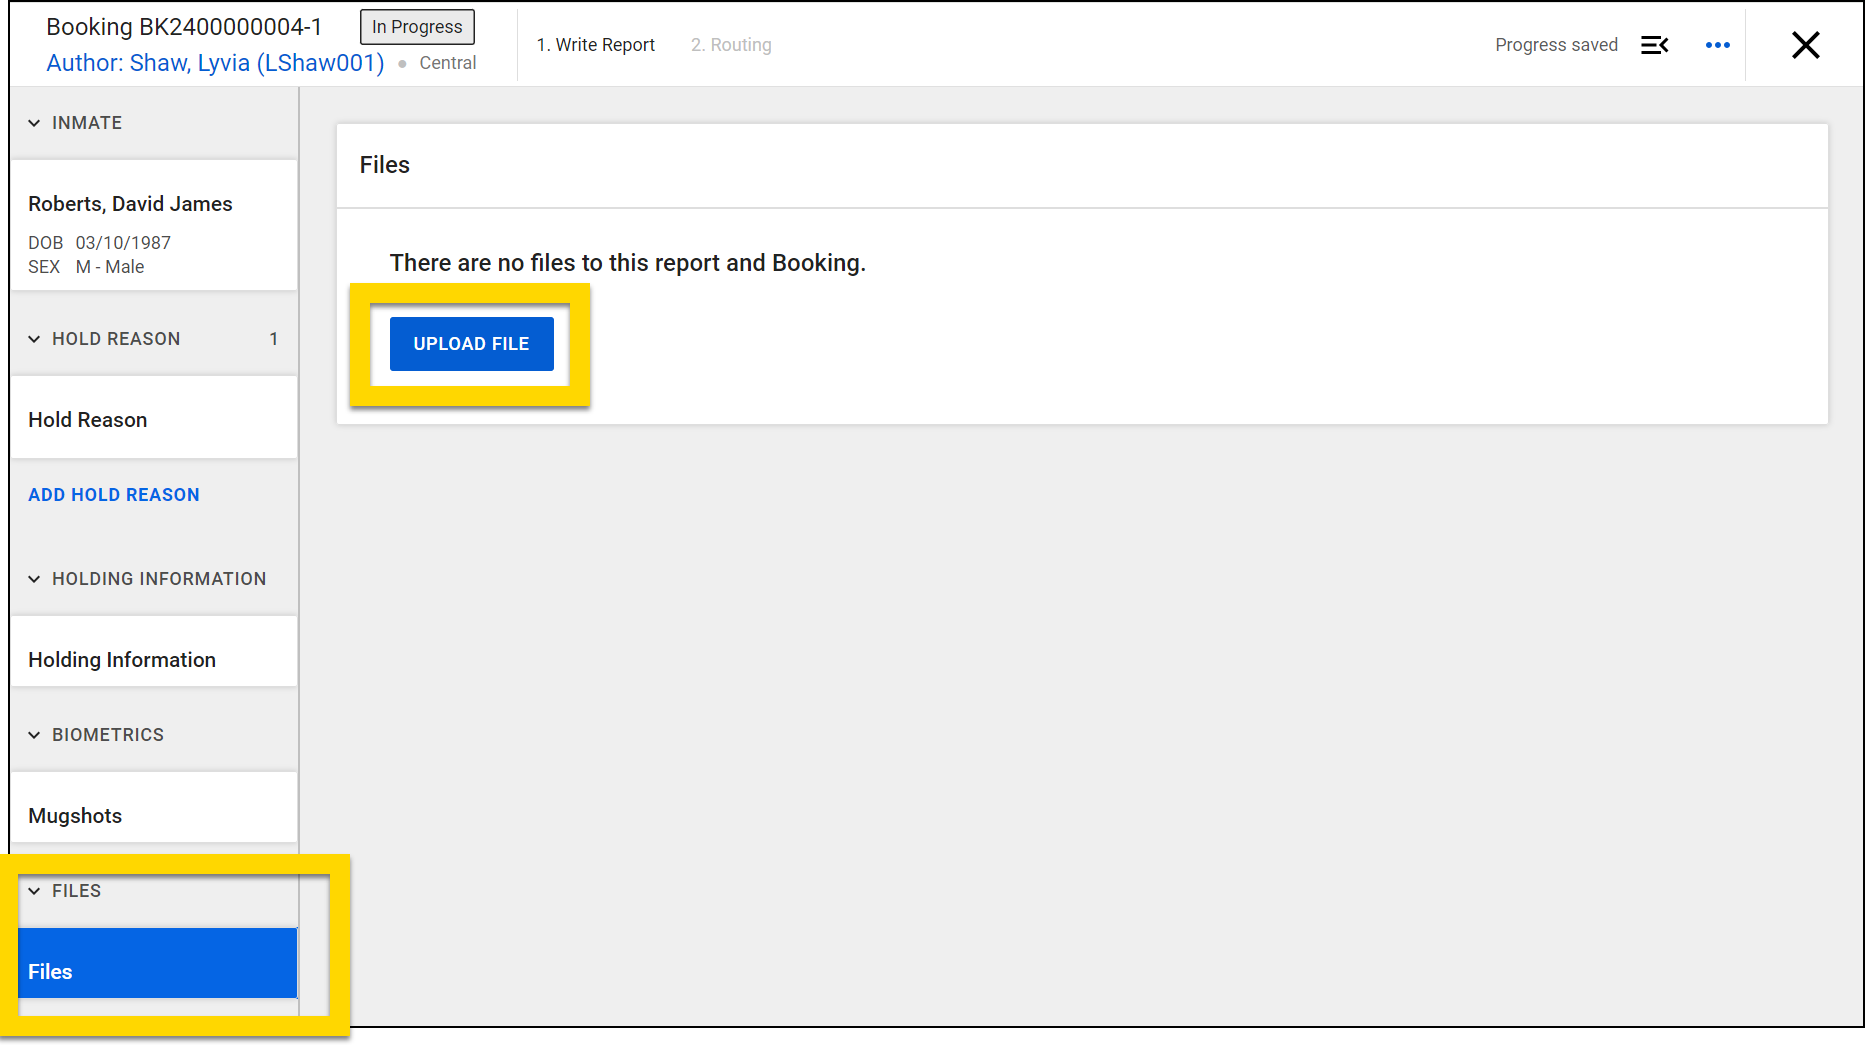
Warrants
When completing a booking, you can import warrants, as well as update their statuses from Active to Served.
Import warrants
To import a warrant, open the sidebar and select the Warrants tab. All warrants associated with that person will be listed. Find the correct warrant and select Import warrant. The warrant information will import into the Hold reason > Warrants section in the booking.
You can remove the warrant from the booking by selecting Remove.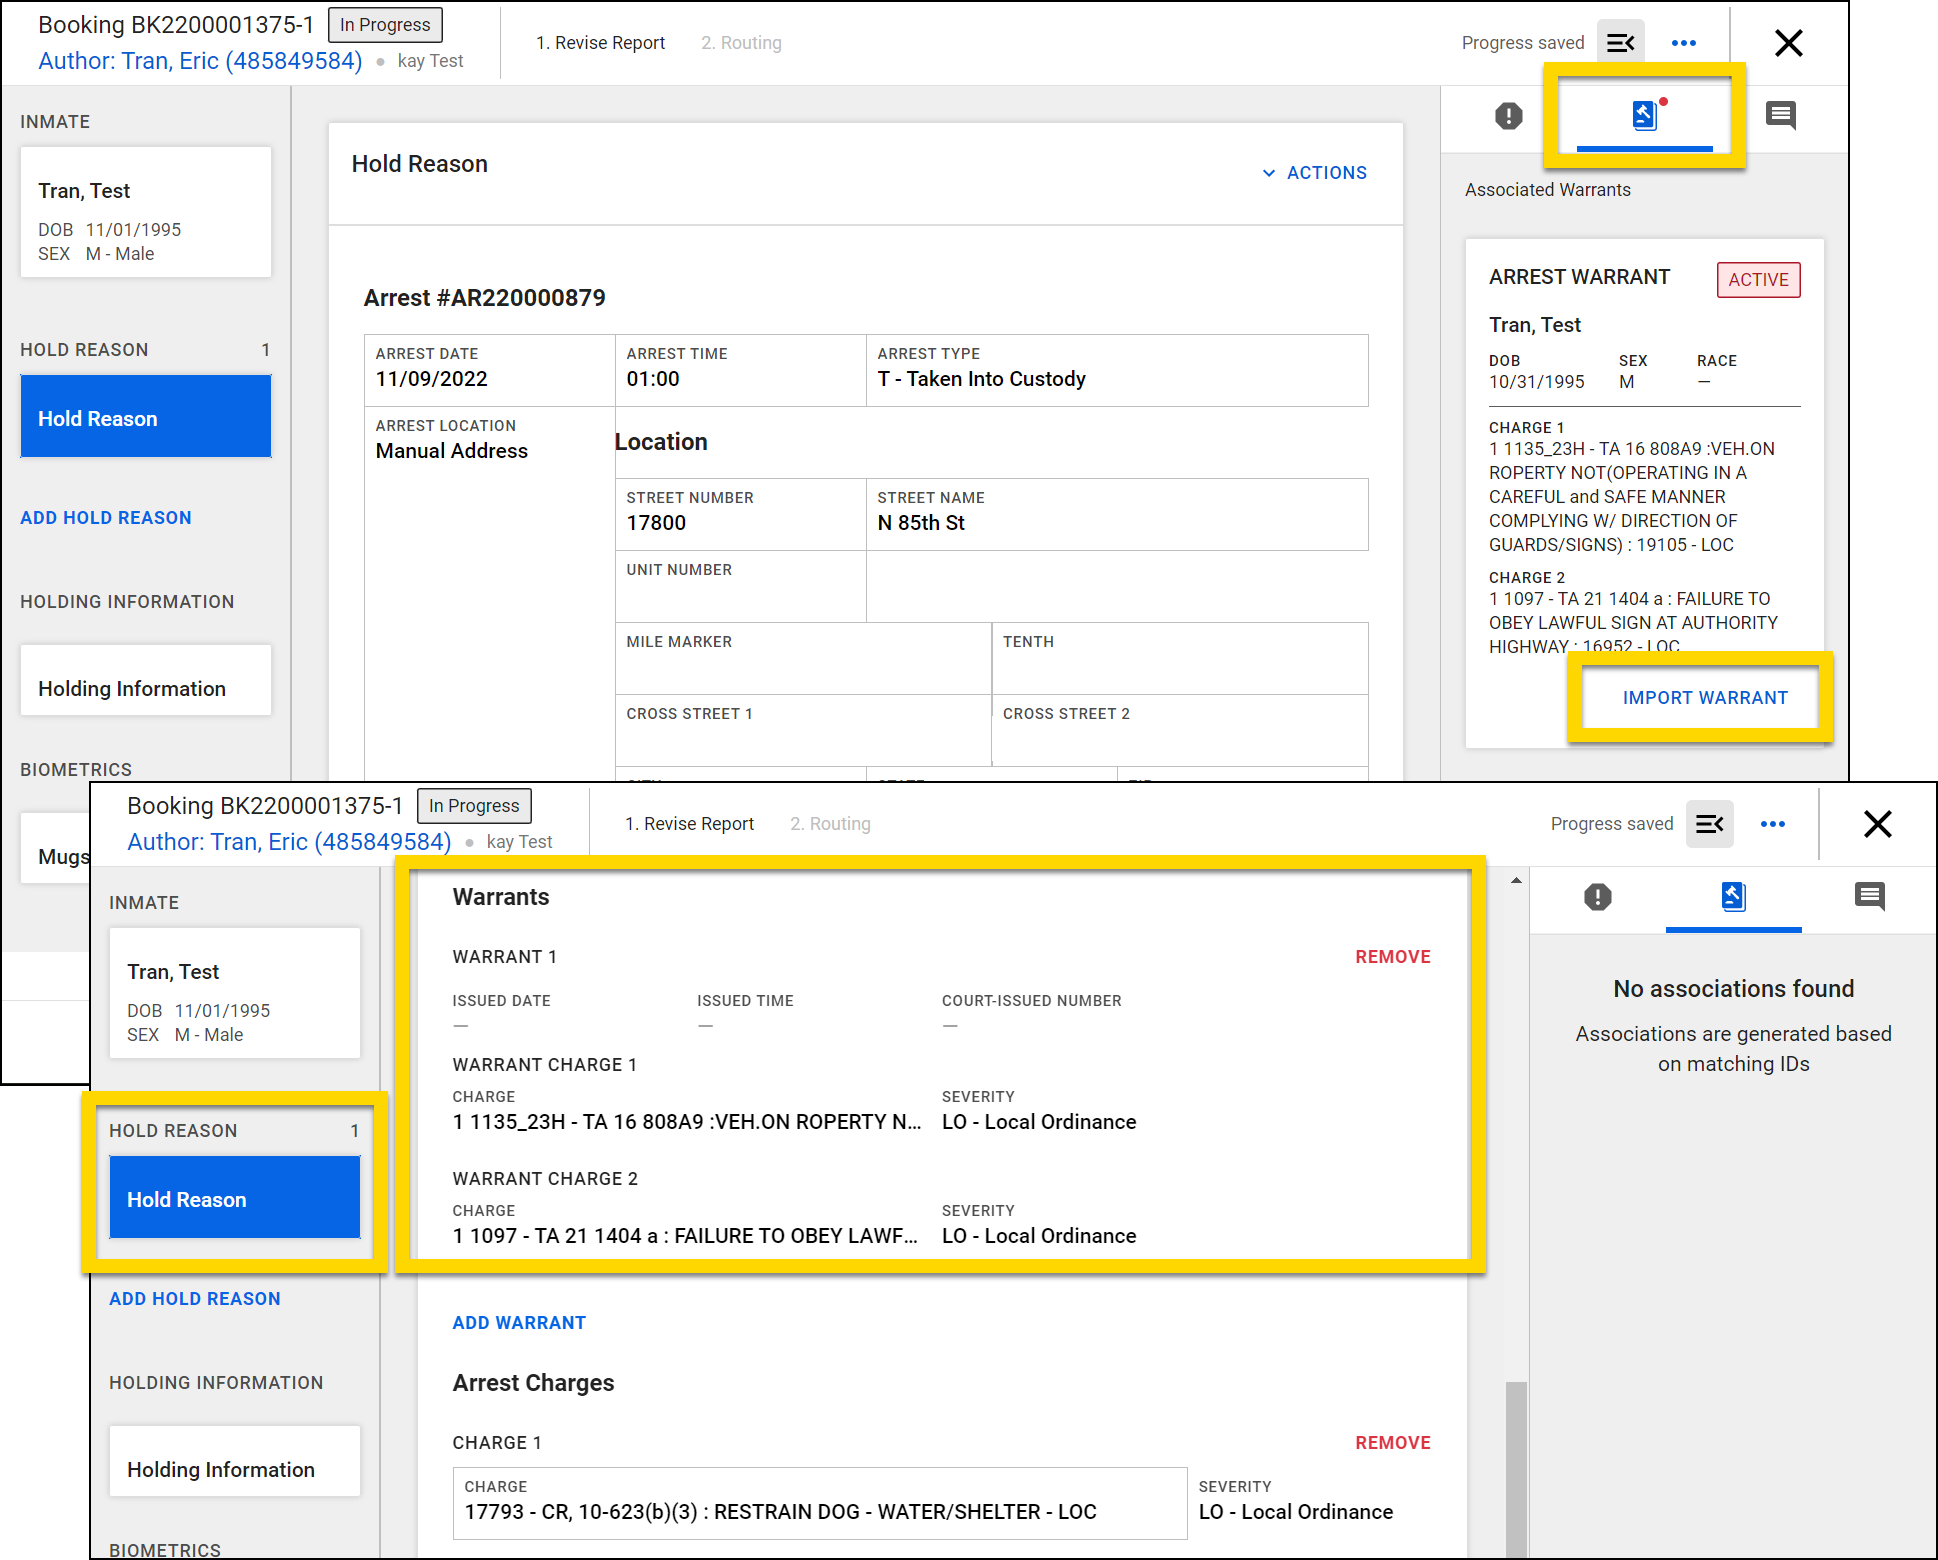
Update warrant statuses
To update a status of a warrant that has been imported into a booking, open the Hold reason section and select Actions > Update warrant status.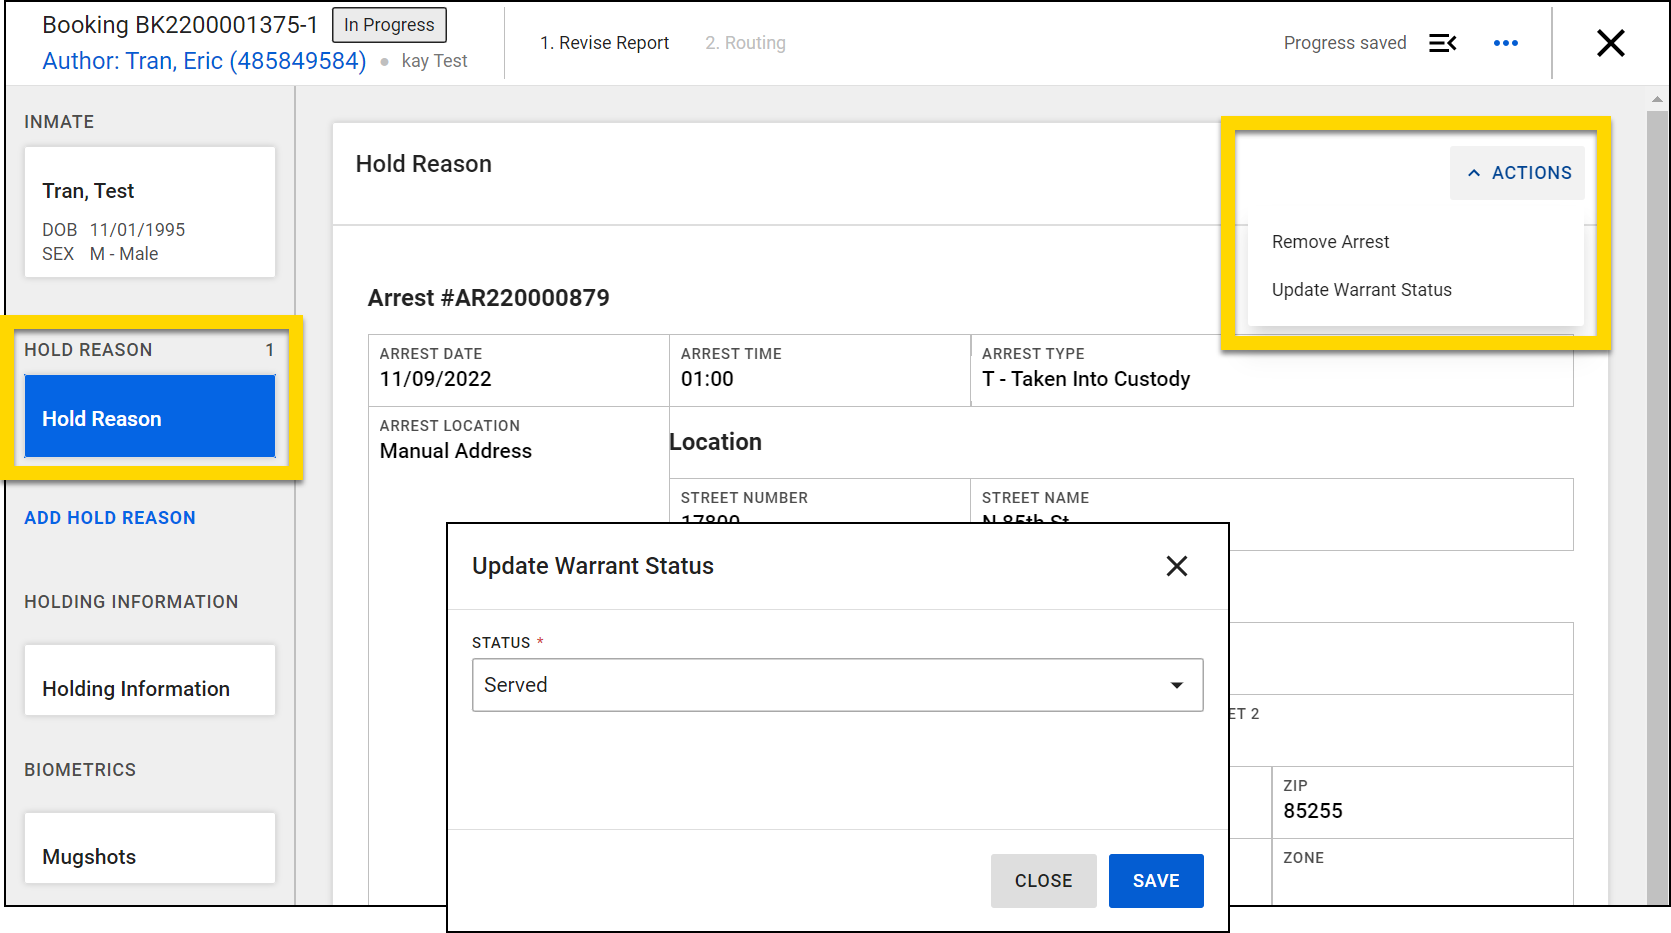
Submit booking reports
Close a booking at any time by selecting the X in the top right corner. (All information entered in the booking is auto-saved.)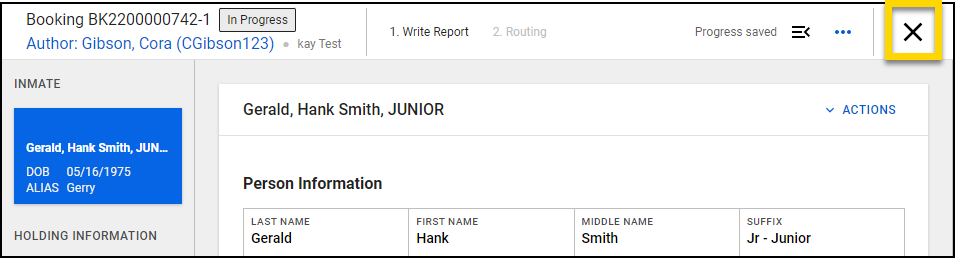
You can return to the booking to continue working in two ways:
- Open the Bookings module and select an inmate from the Inmates list, then select Complete booking.

- Search for the inmate in People Search and select the Booking ID.
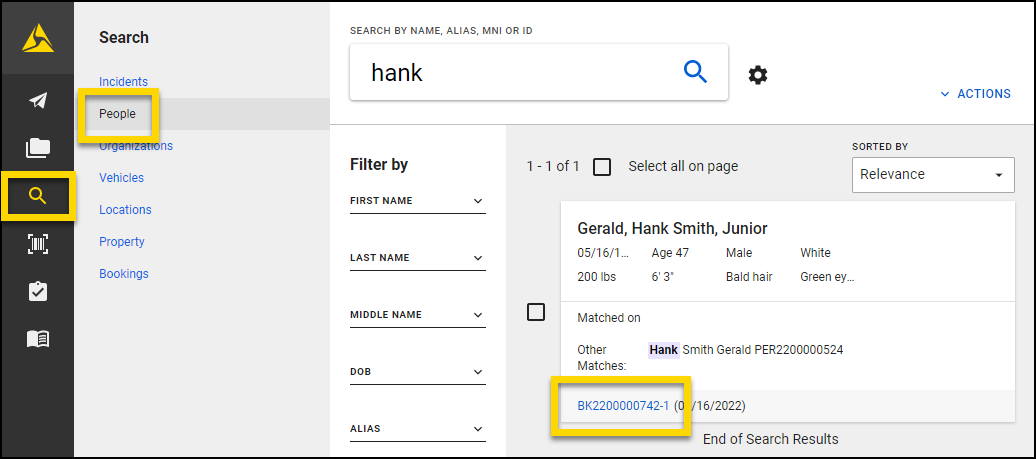
Only final bookings appear in Bookings Search.
You can finish another officer's booking by selecting Complete booking on the inmate's profile, then Take over booking at the bottom of the booking.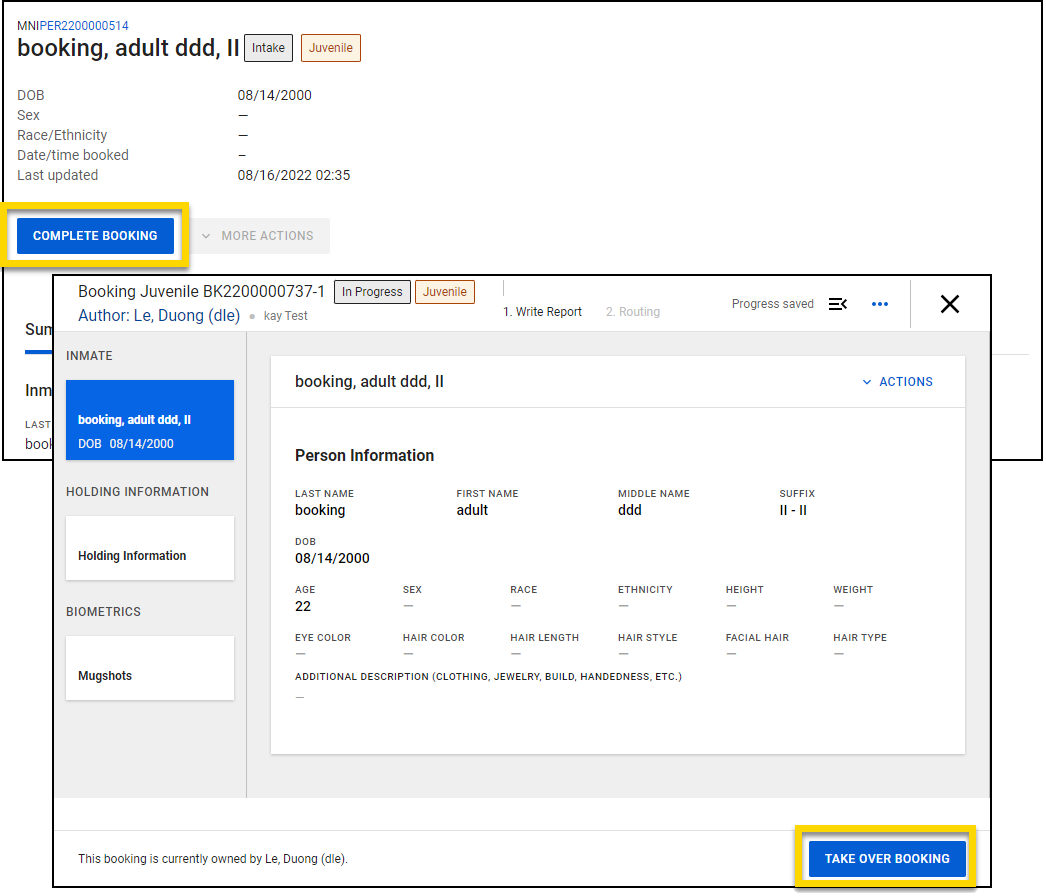
When the booking is complete, select Submit.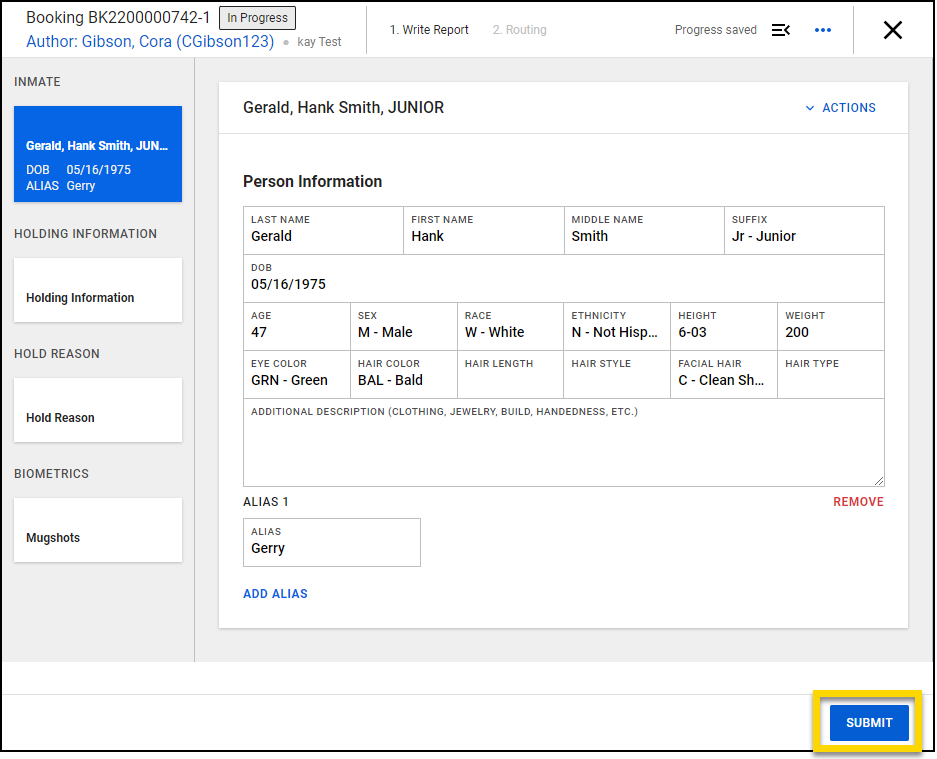
The inmate's status in the Inmates list will update from Intake to Holding.