Evidence and file management
Evidence provides the supporting materials for a case or investigation.Evidence added to a case or investigation in Axon Standards is also uploaded to Axon Evidence. As a result of this integration, users can:
- Attach digital evidence to cases and investigations
- Organize evidence into folders
- Review evidence media and metadata directly within Axon Standards
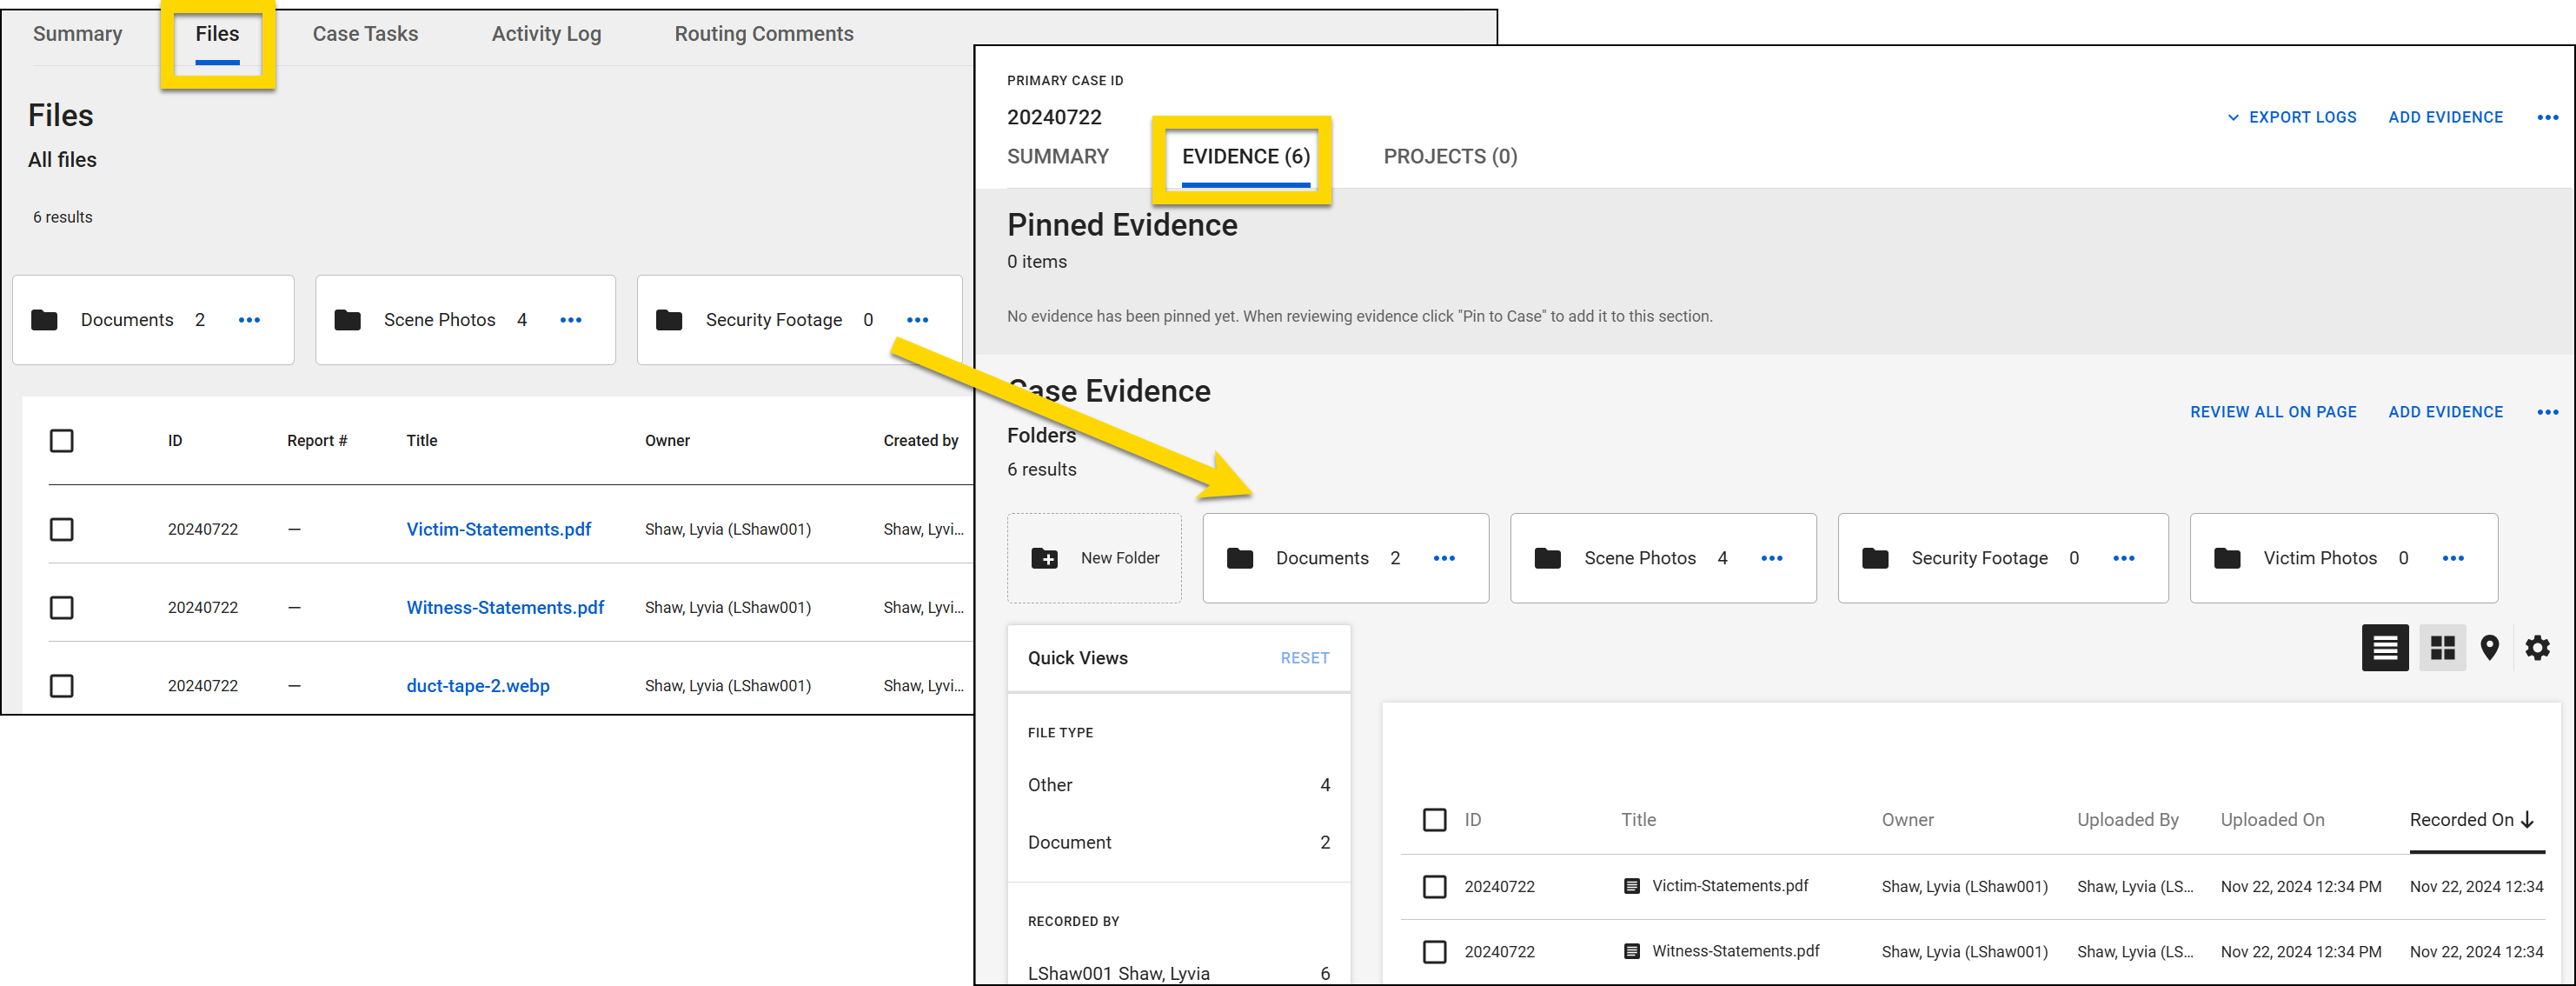
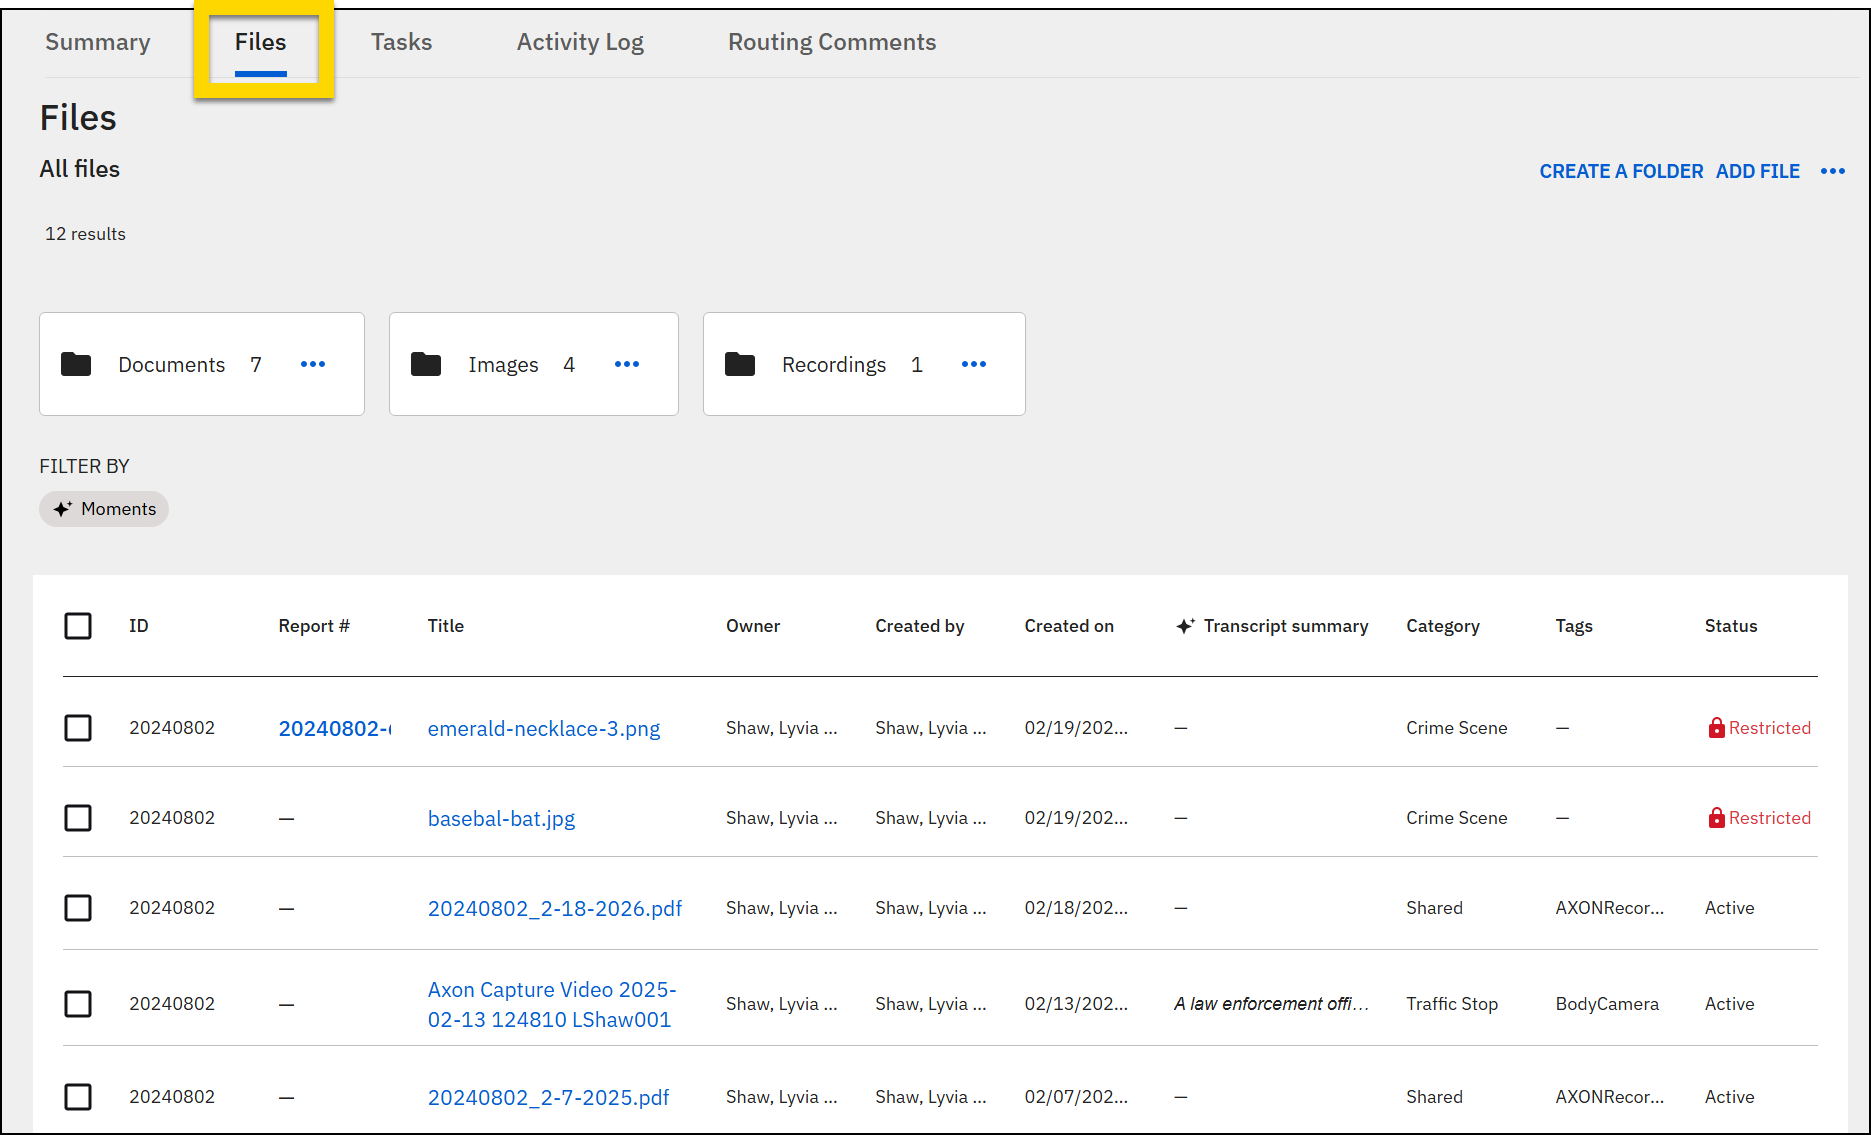
All files added directly to events, cases, and investigations or to reports associated with these items appear on the Files tab of their profiles. This tab displays all main folders that have been created, as well as a complete list of all files that appear in all folders. The most recently created files appear at the top of the list. The following information is included for each file:
- ID
- Report # (if the file was added to a report)
- Title
- Owner
- Created by
- Created on
- Transcript summary
- Category
- Tags
- Status
When viewing the Files tab, you can take the following actions:
- View file media, transcripts, and moments
- Edit metadata
- Create folders and subfolders
- Add and remove files
View files
When you select a file's title, an evidence preview pane opens and displays additional information about the file. Depending on the file type, this pane may include multiple tabs:
- Overview: This tab shows the same metadata that appears on the Overview tab of the Axon Evidence details page, as well as a transcript summary (if available).
- See Evidence details page for more information.
- Transcript: This tab only appears for audio and video files and behaves the same as the Transcript tab on the Axon Evidence details page.
- See Transcripts on the evidence details page for more information.
- Moments: This tab shows AI-detected key moments (e.g., Miranda Rights) within a piece of evidence with timestamps.
- See Brief One Transcripts for more information.
NoteThis tab only appears for customers who have purchased Brief One. Contact Axon Support or your Axon representative if you are interested in purchasing this product.
To view the full evidence details page in Axon Evidence, select Details page at the bottom of the pane.
Create folders
You can create folders and subfolders to better organize your evidence within a case or investigation.
Some organizations have configured a folder structure to be automatically created whenever an incident or case is created. This folder structure is based on the default case template that can be managed from the Case Settings page in Axon Evidence. For more information about managing the default case template, see Case settings.
When creating folders, you can create main folders, which appear when you first open the Files tab, and subfolders, which are contained either within the main folders or other subfolders.
To create a main folder, take these steps:
- Open the case profile and switch to the Files tab.
- Select the Create a folder button in the top right corner of the tab.
- Enter a meaningful name for the folder and select Create.
To create a subfolder within a main folder:
- Open the case profile and switch to the Files tab.
- Select a folder within the main folder.
- Select Create a folder.
- Enter a meaningful name for the folder and select Create.
When viewing a folder, you can see where it appears within the folder structure by looking at the folder breadcrumb list that appears above the files contained within the folder. You can quickly navigate back to higher level folders by selecting the folder name.
Two subfolders contained within the same folder cannot have the same name.
Once a folder has been created, select More actions [...] to either rename or delete the folder. When deleting a folder, you can choose to delete the folders and keep the files in the case or delete the folders and remove the files from the case. To delete the files entirely, open Axon Evidence.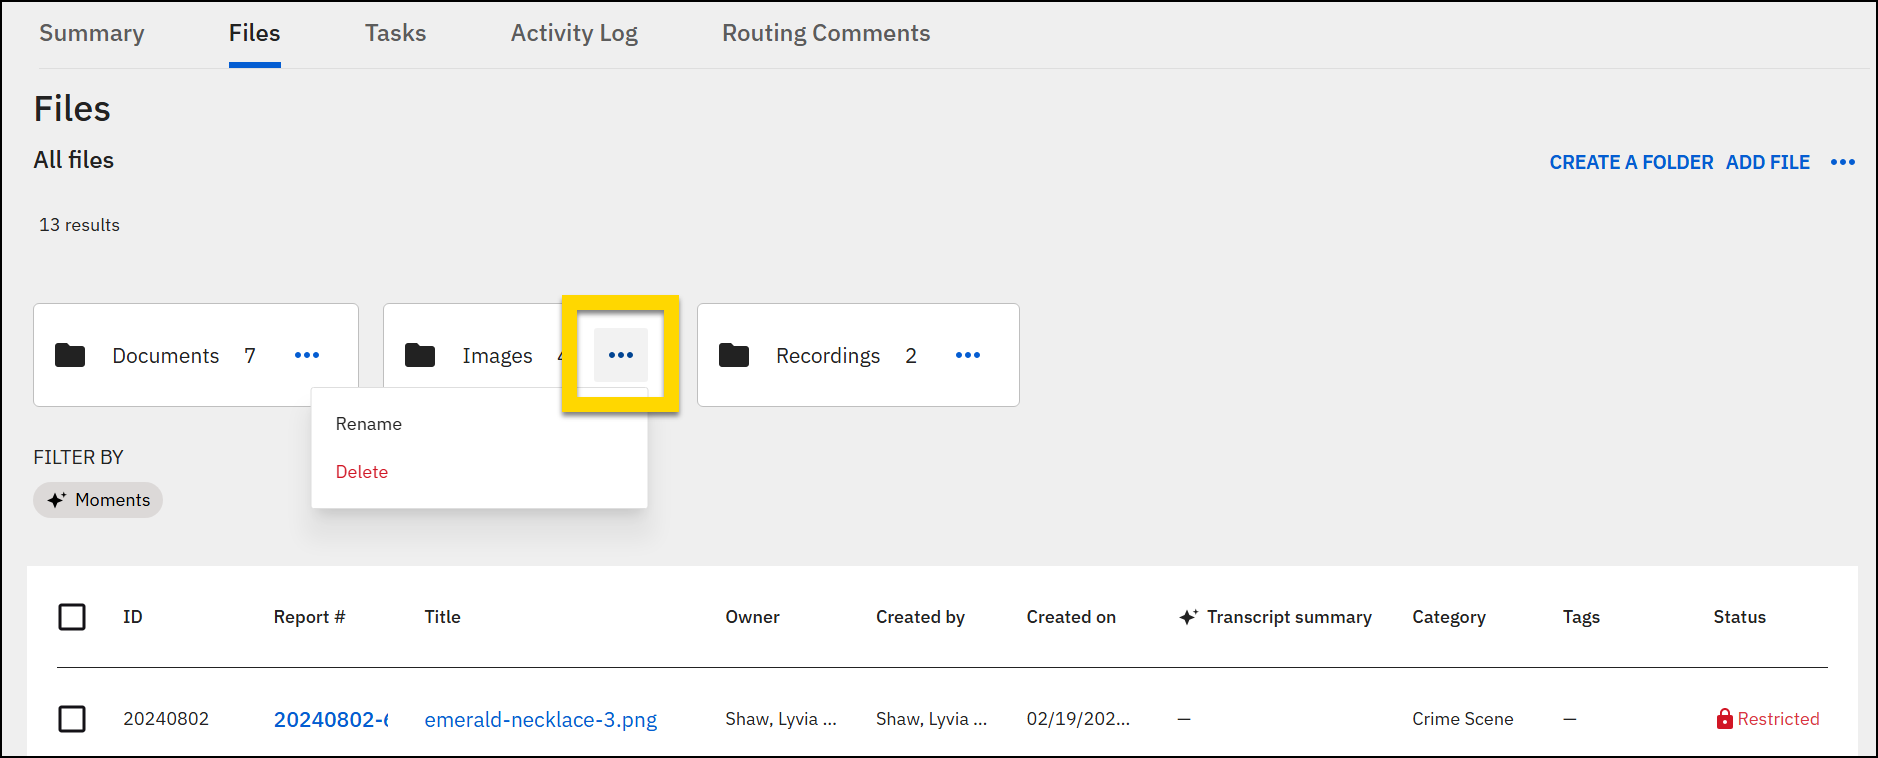
Moving subfolders between folders currently is not supported. Instead, select More actions [...] > Manage files on Axon Evidence to move the folders from within Axon Evidence.
Add files
Files can be added to the main All files section, or to a specific folder. Additionally, files can be added to a single folder or multiple folders. If a file appears in multiple folders, it still only appears once in the All files list.
To add files:
- Open the folder where you want the file to appear.
- Select the Add file button in the top right corner of the tab.
- Use the Suggested, Upload, and Search tabs (explained below) to find files that have already been added to Axon Evidence or to upload new files.
- When reviewing the evidence on any of these tabs, select the evidence title to open the evidence preview window that displays additional information.
- After choosing or uploading files, select Add.
The Suggested tab contains recommendations for evidence you may want to add to the incident. Evidence is suggested based on the following criteria:
- Any Evidence ID that matches the ID of a case, incident, report, or the CFS ID
- Evidence you uploaded in the past 72 hours that hasn't been added to the report
Use the search fields to find specific evidence within the suggestion list and the checkboxes to add multiple files at the same time.
To add new files, switch to the Upload tab and either drag and drop files from your computer or select Chose files. Use the Upload to folder menu to set which folder the files should be added to, optionally add a description or update the file names, and select Add.
If you do not select a folder from the Upload to Folder field, the files are added to the All Files list. You can also easily create a new folder when uploading files by typing the new folder name in the Upload to Folder field that appears below the Drag and drop files area and selecting the Create new option that appears.
You can upload one or more files, or full folders. If the folder you upload contains subfolders, the subfolders will be uploaded along with the files they contain. After selecting the files and folders from your local file system, the Upload tab displays the files that will be uploaded, as well as the folder the files will appear in.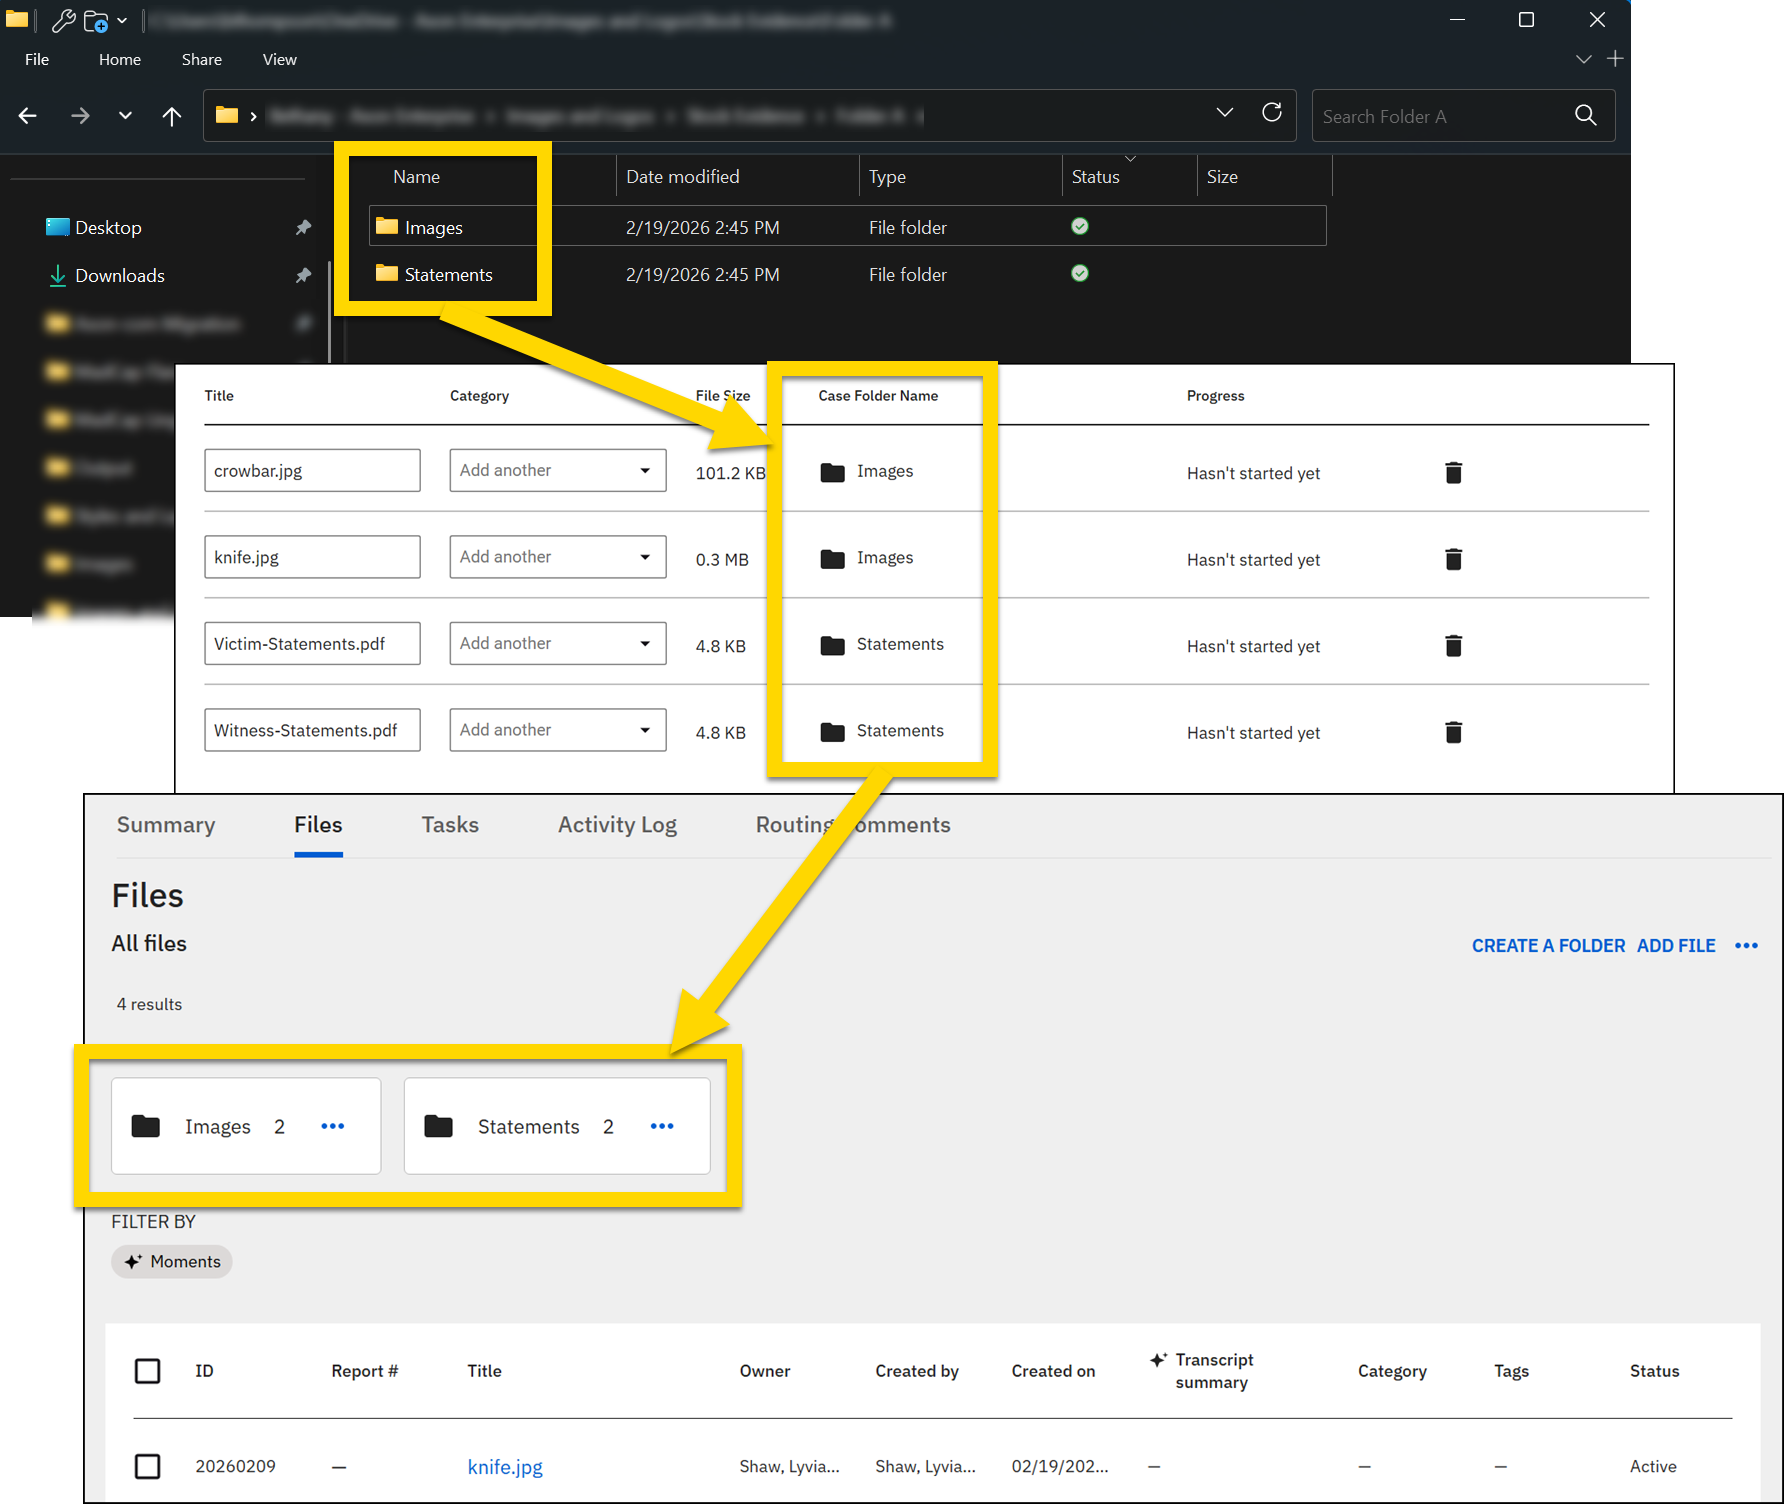
The Search tab lets you search for evidence that has already been uploaded to Axon Evidence. Use the search fields to find specific evidence and the checkboxes to add multiple files at the same time.
Edit metadata
Use the checkboxes to select one or more files then select the Edit Metadata button in the top right corner of the tab to update (add or remove) the tag or category for the files. The categories and tags that appear in the dropdown menus are the same as those that appear in Axon Evidence.
Remove files
To remove a file, take these steps:
- Open the folder that contains the files you want to remove.
- Select the checkboxes beside the files you want to move.
- Open the More Actions [...] menu in the top right corner of the tab and choose one of the following options:
- Remove from Folder: Removes the file from the folder but not from the case. Once removed, the file appears in the All Files section that is displayed when you first open the Files tab.
- Remove from Case: Removes the file from both the folder and the case.
If a file was added to the case because it was originally part of a report associated with the case, the file is also removed from the report when it is removed from the case.
To delete a file, open Axon Evidence, find the file, and schedule it for deletion.
Sync with Axon Evidence
The files and folders that appear on the Files tab in Axon Records and Axon Standards also appear on the Evidence tab of the corresponding case in Axon Evidence. Any changes made to the files or folders in Axon Records or Axon Standards immediately display in Axon Evidence, and changes made in Axon Evidence immediately display in Axon Records or Axon Standards.
When viewing a case in Axon Records or Axon Standards, you can open the corresponding case in Axon Evidence, by selecting More Actions [...] > Manage files on Axon Evidence.