Create and submit reports
This topic describes how to create and submit reports. Specific workflows include creating reports and events, creating events from Axon Records, and submitting reports.
Create reports
When you create an event, you must choose an initial report type to start the event. Once an event is created, you can add additional reports, upload files from your computer, and manage restrictions.
To create a new report:
- Select Create event from the top right corner of any task inbox.
- To add a report to an existing event or case, open the event or case profile and select Create report.
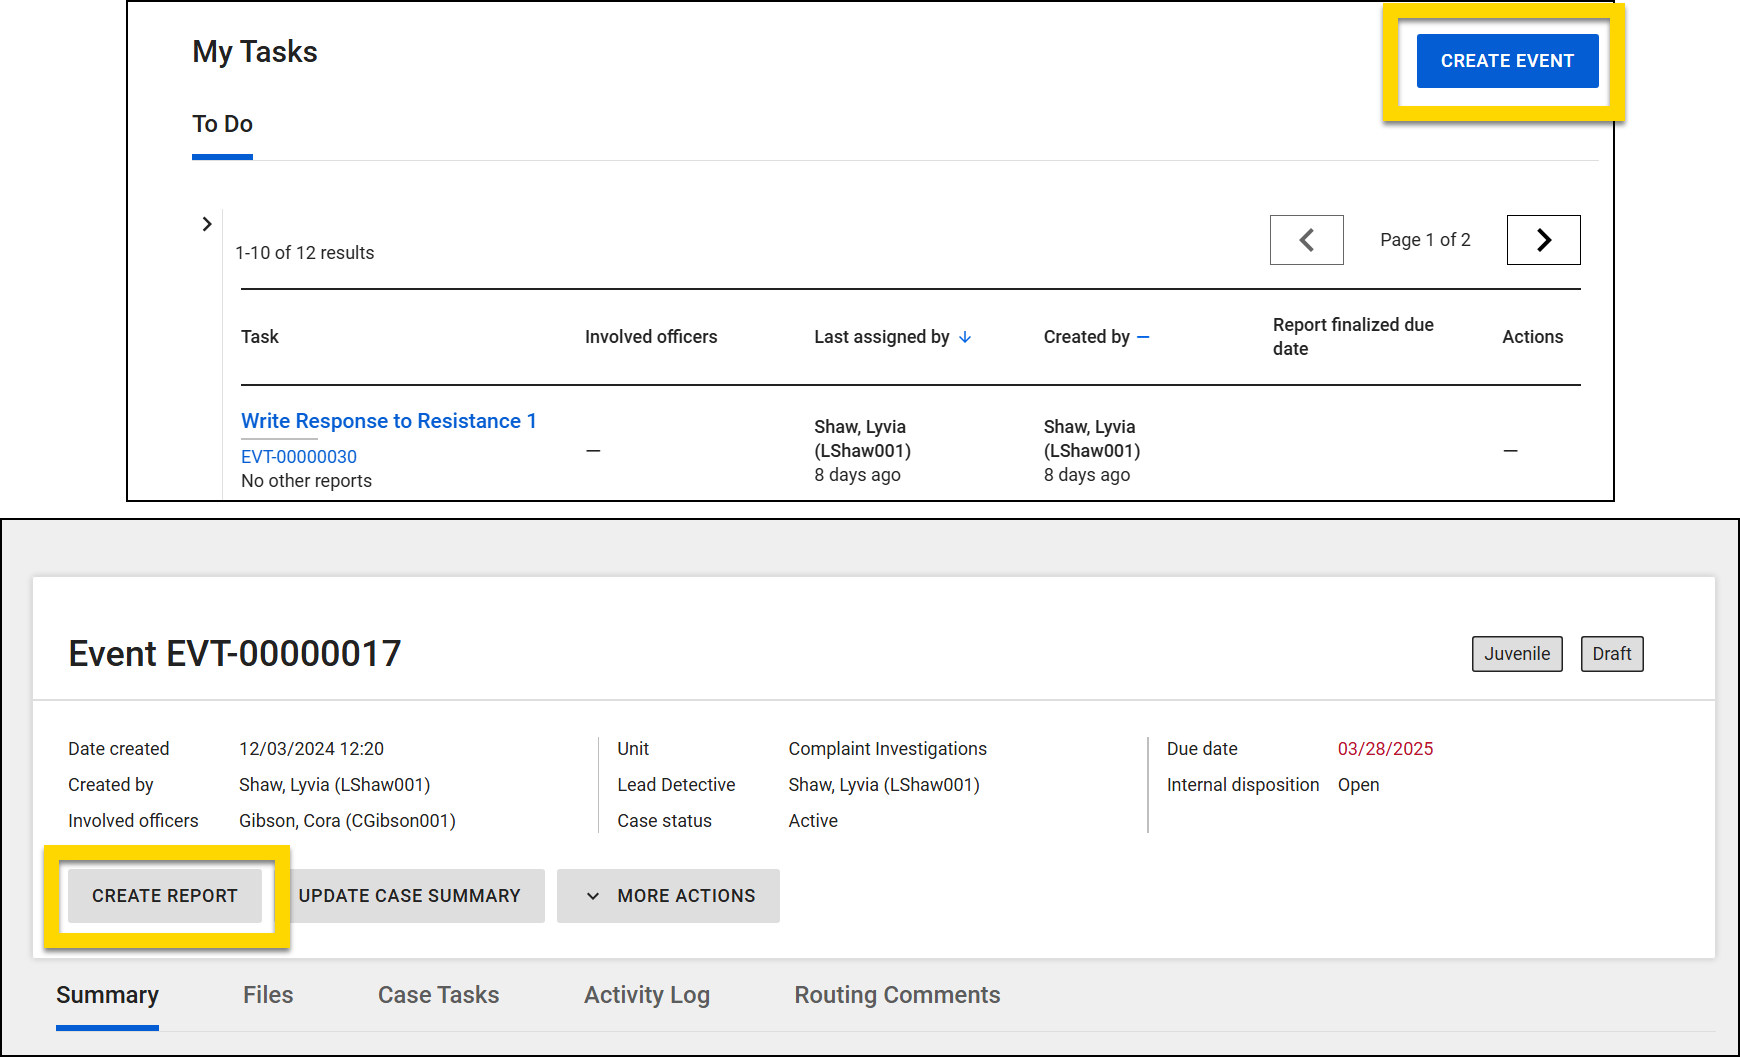
- To add a report to an existing event or case, open the event or case profile and select Create report.
- Select a report type.
- The following report types are available by default. Additional report types are created on an organization-by-organization basis, so you will see additional options in this menu:
- Citizen Complaint
- Internal Complaint
- Use of Force / Response to Resistance
- Vehicle Collision
- Vehicle Pursuit
- The following report types are available by default. Additional report types are created on an organization-by-organization basis, so you will see additional options in this menu:
- If your organization is configured to use custom names, you can optionally add a custom name for the report.
- After choosing a report type, select Create event to open Report Writer and add information to the report.
- When you have finished working on the report, select Submit to submit it for review.
- To close a report without submitting it, select the X in the upper right corner. You can come back to it later by selecting the Write report task from your My Tasks inbox.
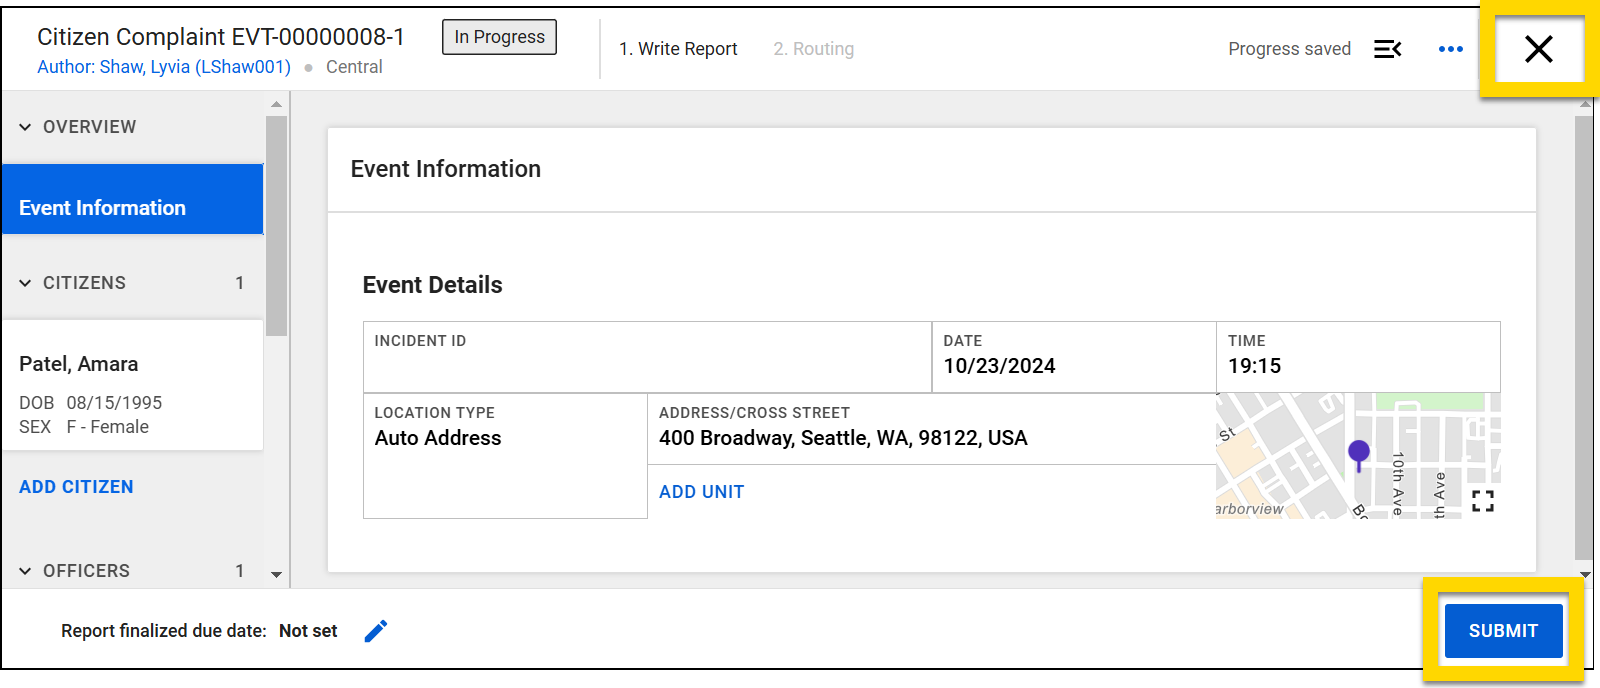
- To close a report without submitting it, select the X in the upper right corner. You can come back to it later by selecting the Write report task from your My Tasks inbox.
If you create a new report by selecting Create report on an existing event/case profile, you may see additional options:
- If your organization uses the Case Management module AND a case has been created for that incident, you'll see a section for the creation of case documents.
Submit reports
To submit a report for review or finalization:
- Open the report in Report Writer.
- Select Submit at the bottom of the Report Writer screen.
- In some workflows, the report can be finalized immediately and does not need to be submitted for review. In these cases, select Finalize at the bottom of the screen.
- If the report contains validation errors, the Routing page shows a warning. Return to the report to fix the errors by selecting Back or submit the report with errors by selecting Submit.
- Some organizations don't allow reports containing validation errors to be submitted. If this is the case for your organization, you will not be able to select Submit until you have resolved all errors.
- Select where the report should be routed for review.
- This option may not appear in some workflows.
- Add a routing note as necessary.
- Select Submit.
Submitted reports are removed from your My Tasks inbox and routed to the appropriate Review inbox. If the report is reviewed and rejected, it re-appears in the My Tasks inbox as a Revise task. After updating the report, you can resubmit the report for re-review. The supervisor will again approve or reject the report.
If the report belongs to a multi-step review workflow, a supervisor may submit the report for additional review. During the later review steps, a reviewer can still reject the report. If they do, the report is again returned to the original author for revision and re-submission.
Once a report is approved by the final reviewer, it becomes an official, final report.
Create events from Axon Records
If your organization uses both Axon Records and Axon Standards, you can create an Axon Standards event from within Axon Records. When you do this you can easily import person information from the Axon Records incident into the Axon Standards event without needing to manually copy-paste.
To do this, take the following steps:
- Open the incident profile in Axon Records by selecting the Incident ID from a task inbox or by searching for it and select New report.
- Switch to the Standards tab, select the type of Axon Standards report you would like to create, and select Create report.
- The Incident ID is automatically added to the Incident ID field in the Axon Standards report.
- If you need to import person information from the incident into the event, select Add person.
- All people who have been added to the incident appear below the search fields. Select a person's name to open their profile.
- Select Import and update to add that person to the event.
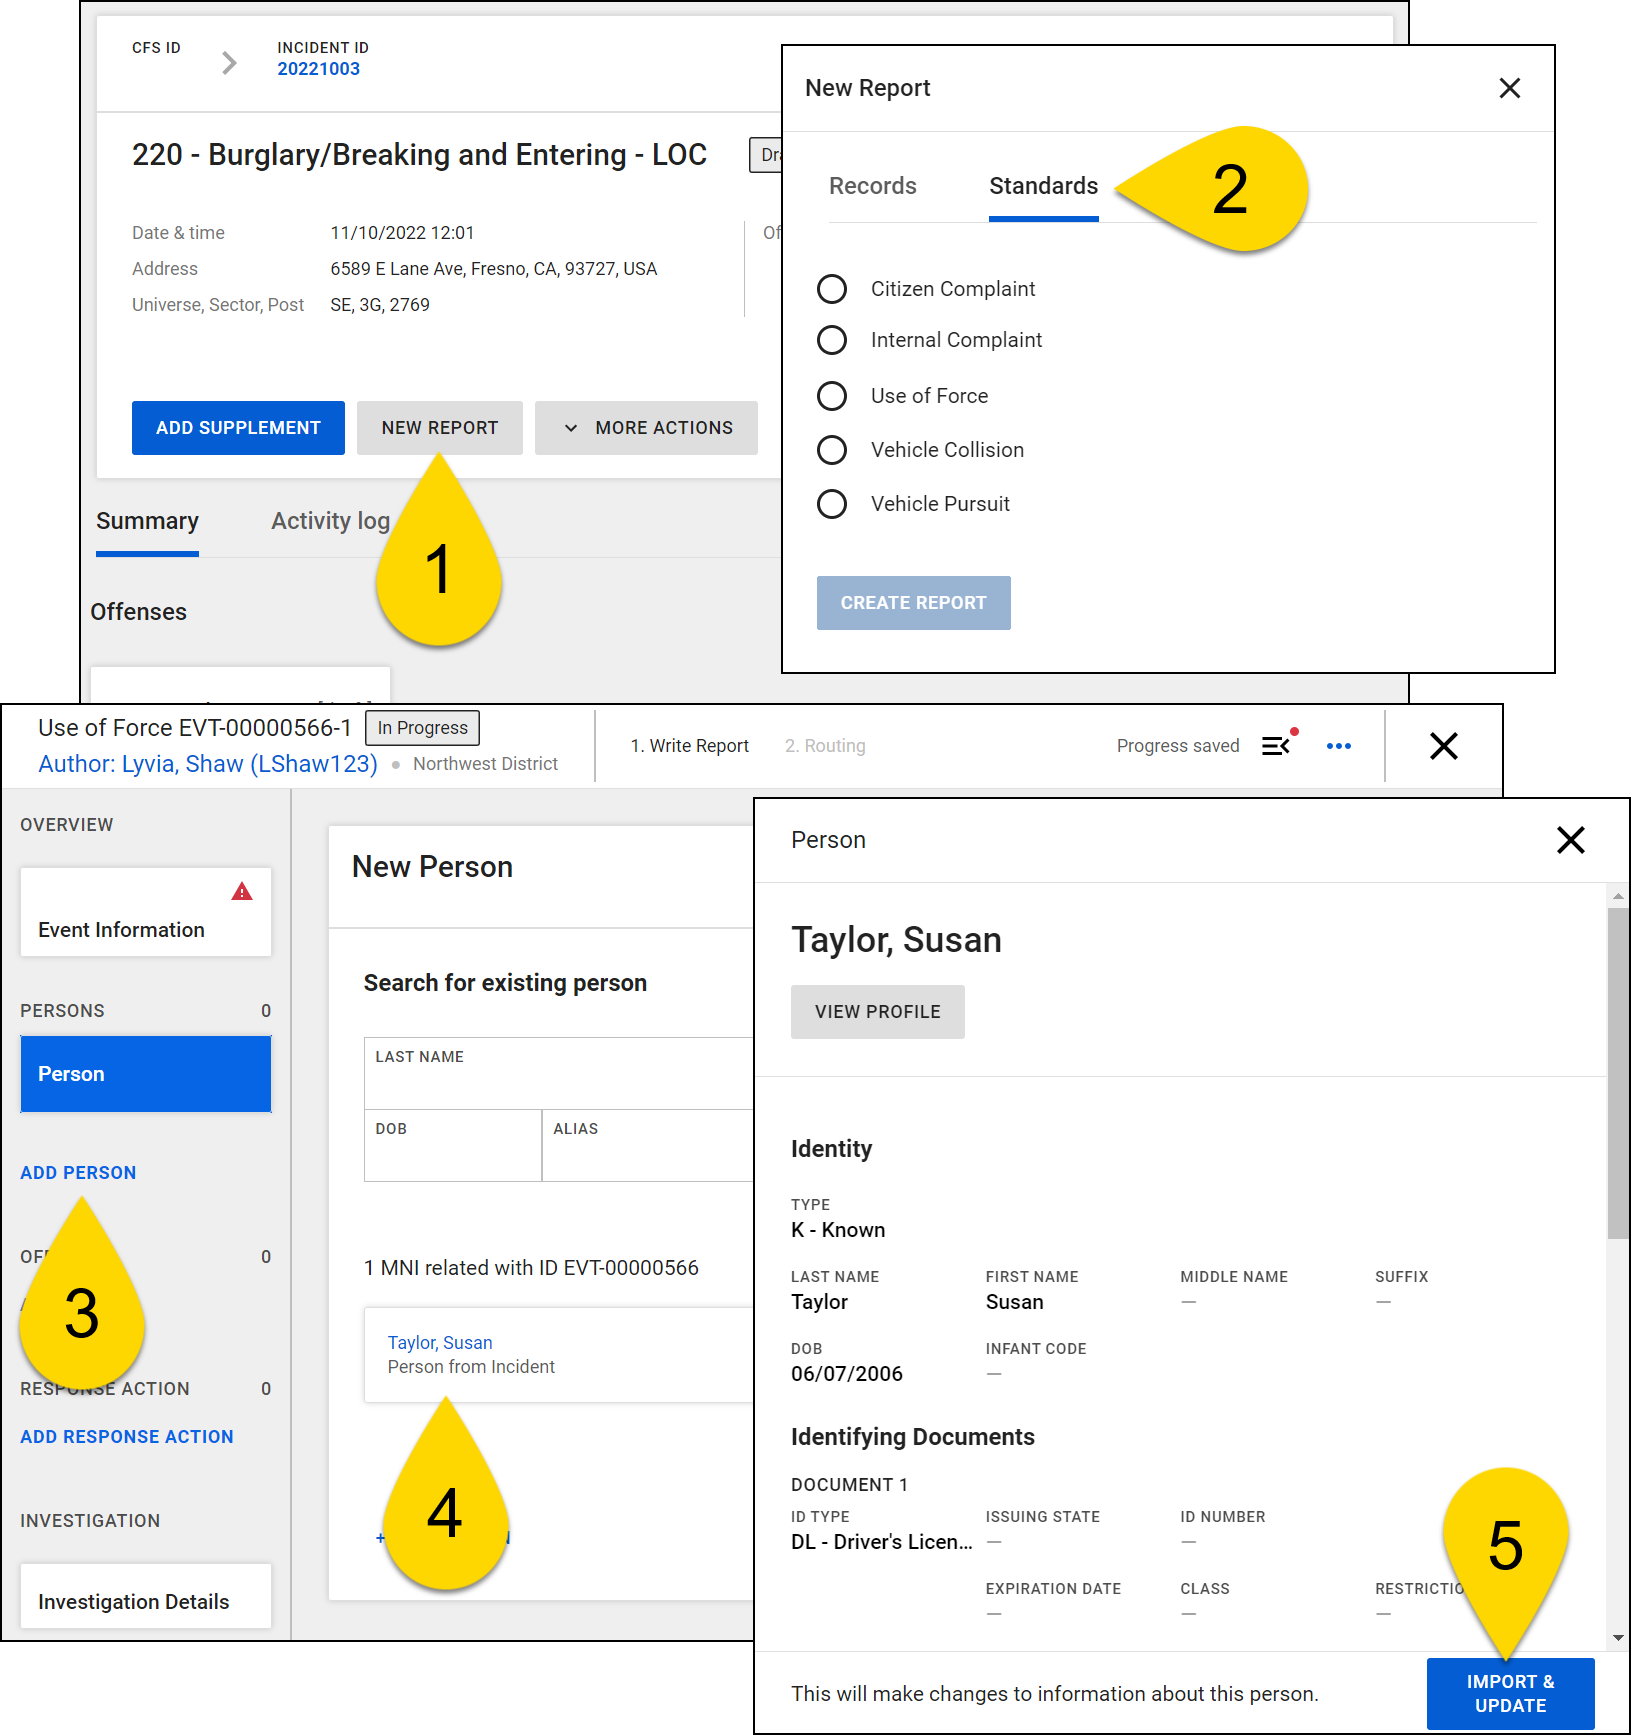
All information about the person that was added to the Axon Records report will import into the Axon Standards event.
When you submit or close the Axon Standards event, you are returned to the incident profile in Axon Records.